Home>Articles>How Long Does It Take To Ferment With Kegerator
Articles
How Long Does It Take To Ferment With Kegerator
Modified: February 27, 2024
Discover how long it takes to ferment with a kegerator in this informative article. Learn the fermentation process and optimize your brewing time for the best results.
(Many of the links in this article redirect to a specific reviewed product. Your purchase of these products through affiliate links helps to generate commission for Storables.com, at no extra cost. Learn more)
Introduction
Fermentation is a crucial process in the world of brewing, winemaking, and even bread-making. It is the magical transformation of sugars into alcohol, carbon dioxide, and flavorful compounds by the action of yeast or bacteria. The duration of fermentation can vary depending on several factors, such as the type of beverage being fermented and the conditions provided for the fermentation process.
In this article, we will specifically explore the process of fermenting with a kegerator, a popular refrigeration appliance used to store and dispense beer. For beer enthusiasts who are looking to experiment with homebrewing or those who want to refine their brewing techniques, fermenting in a kegerator can offer numerous advantages.
We will discuss the various factors that can influence the fermentation time and the role of temperature in the process. Additionally, we will provide a step-by-step guide on how to ferment using a kegerator, common challenges you may encounter, and useful tips for a successful fermentation experience.
Whether you are a seasoned homebrewer or just starting on your brewing journey, understanding the fermentation process and how to effectively utilize a kegerator can greatly enhance the quality of your brews. So, let’s dive in and explore the fascinating world of fermentation with a kegerator!
Key Takeaways:
- Using a kegerator for fermentation provides precise temperature control, resulting in efficient fermentation, high-quality beverages, and the ability to experiment with different yeast strains and flavors.
- Challenges such as temperature fluctuations and limited space can be overcome by maintaining sanitation, monitoring fermentation activity, and selecting suitable yeast strains. Embrace the art of fermentation and enjoy the brewing journey!
Understanding Fermentation
Fermentation is a natural metabolic process that converts sugars into alcohol, gases, and flavor compounds. It occurs when yeast or bacteria consume the sugars present in the fermentable material, such as grains, fruits, or vegetables, and produce alcohol as a byproduct. This process is widely used in brewing, winemaking, and even the production of yogurt and bread.
During fermentation, yeast or bacteria break down the sugars through a series of chemical reactions. The two most common types of fermentation are alcohol fermentation and lactic acid fermentation.
In alcohol fermentation, yeast converts sugars into alcohol and carbon dioxide. This is the process used in brewing beer and making wine. The yeast consumes the sugars and produces alcohol, giving beer and wine their characteristic alcoholic content.
Lactic acid fermentation, on the other hand, is carried out by bacteria. This process occurs when the bacteria convert sugars into lactic acid, resulting in products such as yogurt, sauerkraut, and kimchi.
Fermentation is a delicate balance of factors that affect the final outcome of the product. The selection of yeast or bacteria, the type and quantity of fermentable sugars, and the conditions provided during fermentation all play a role in determining the flavor, aroma, and alcohol content of the finished product.
One crucial aspect of fermentation is controlling the temperature. Different strains of yeast or bacteria have specific temperature ranges at which they are most active and produce desirable flavors. Temperature can greatly influence the speed of fermentation and the development of flavors and aromas.
Now that we have a basic understanding of fermentation, let’s explore the factors that can affect the duration of the fermentation process when using a kegerator.
Factors Affecting Fermentation Time
Several factors can affect the duration of the fermentation process when using a kegerator. These factors include:
- Type and Quantity of Yeast: The type of yeast used in the fermentation process can have a significant impact on the fermentation time. Different yeast strains have their own fermentation characteristics, including the fermentation rate. Some strains ferment more quickly than others, resulting in shorter fermentation times. Additionally, the quantity of yeast used can also influence the fermentation time. Using a higher concentration of yeast can lead to a faster fermentation process.
- Fermentable Sugar Content: The amount and type of fermentable sugars present in the wort or must will also affect the fermentation time. Yeast consume these sugars during fermentation, and a higher concentration of sugars can result in a longer fermentation process. Different types of sugars, such as maltose, glucose, and fructose, may be present in the fermentable material, and yeast may have varying degrees of efficiency in fermenting these sugars.
- Temperature: Temperature plays a crucial role in fermentation and can significantly impact the fermentation time. Yeast and bacteria have specific temperature ranges at which they are most active and produce the desired flavors. Higher temperatures generally increase the fermentation rate, leading to a shorter fermentation time, but they may also produce off-flavors. Lower temperatures can result in slower fermentation and a longer fermentation time.
- Nutrient Availability: Yeast and bacteria require essential nutrients, such as nitrogen, vitamins, and minerals, to carry out the fermentation process. The availability of these nutrients can affect the yeast or bacteria’s ability to ferment efficiently. A lack of nutrients may lead to a slower fermentation process and a longer fermentation time.
- pH Levels: The pH levels of the fermentable material can also impact the fermentation time. Yeast and bacteria have optimal pH ranges for fermentation. Deviations from this range can affect their activity and slow down the fermentation process.
It’s important to note that these factors are interconnected, and changes in one factor can have a cascading effect on others. For example, a higher yeast pitching rate may result in a faster fermentation process, but it may also generate more heat, which can impact the temperature. Finding the right balance between these factors is key to achieving a successful and efficient fermentation process.
Now that we understand the factors that can influence fermentation time, let’s explore the role of temperature in the fermentation process and how a kegerator can be used to regulate it.
The Role of Temperature in Fermentation
Temperature is a critical factor in the fermentation process. It affects the activity and behavior of yeast or bacteria, ultimately influencing the fermentation time, flavors, and aromas of the final product.
Each yeast or bacteria strain has an optimal temperature range at which it thrives and produces the desired fermentation outcomes. This temperature range can vary depending on the specific strain and the type of beverage being fermented.
During the initial stages of fermentation, yeast or bacteria generate heat as they consume sugars and convert them into alcohol and other byproducts. This heat can cause the temperature of the fermentable material to rise. If the temperature exceeds the optimal range, it can lead to increased yeast metabolism and the production of off-flavors. On the other hand, if the temperature is too low, the fermentation process may slow down or even halt.
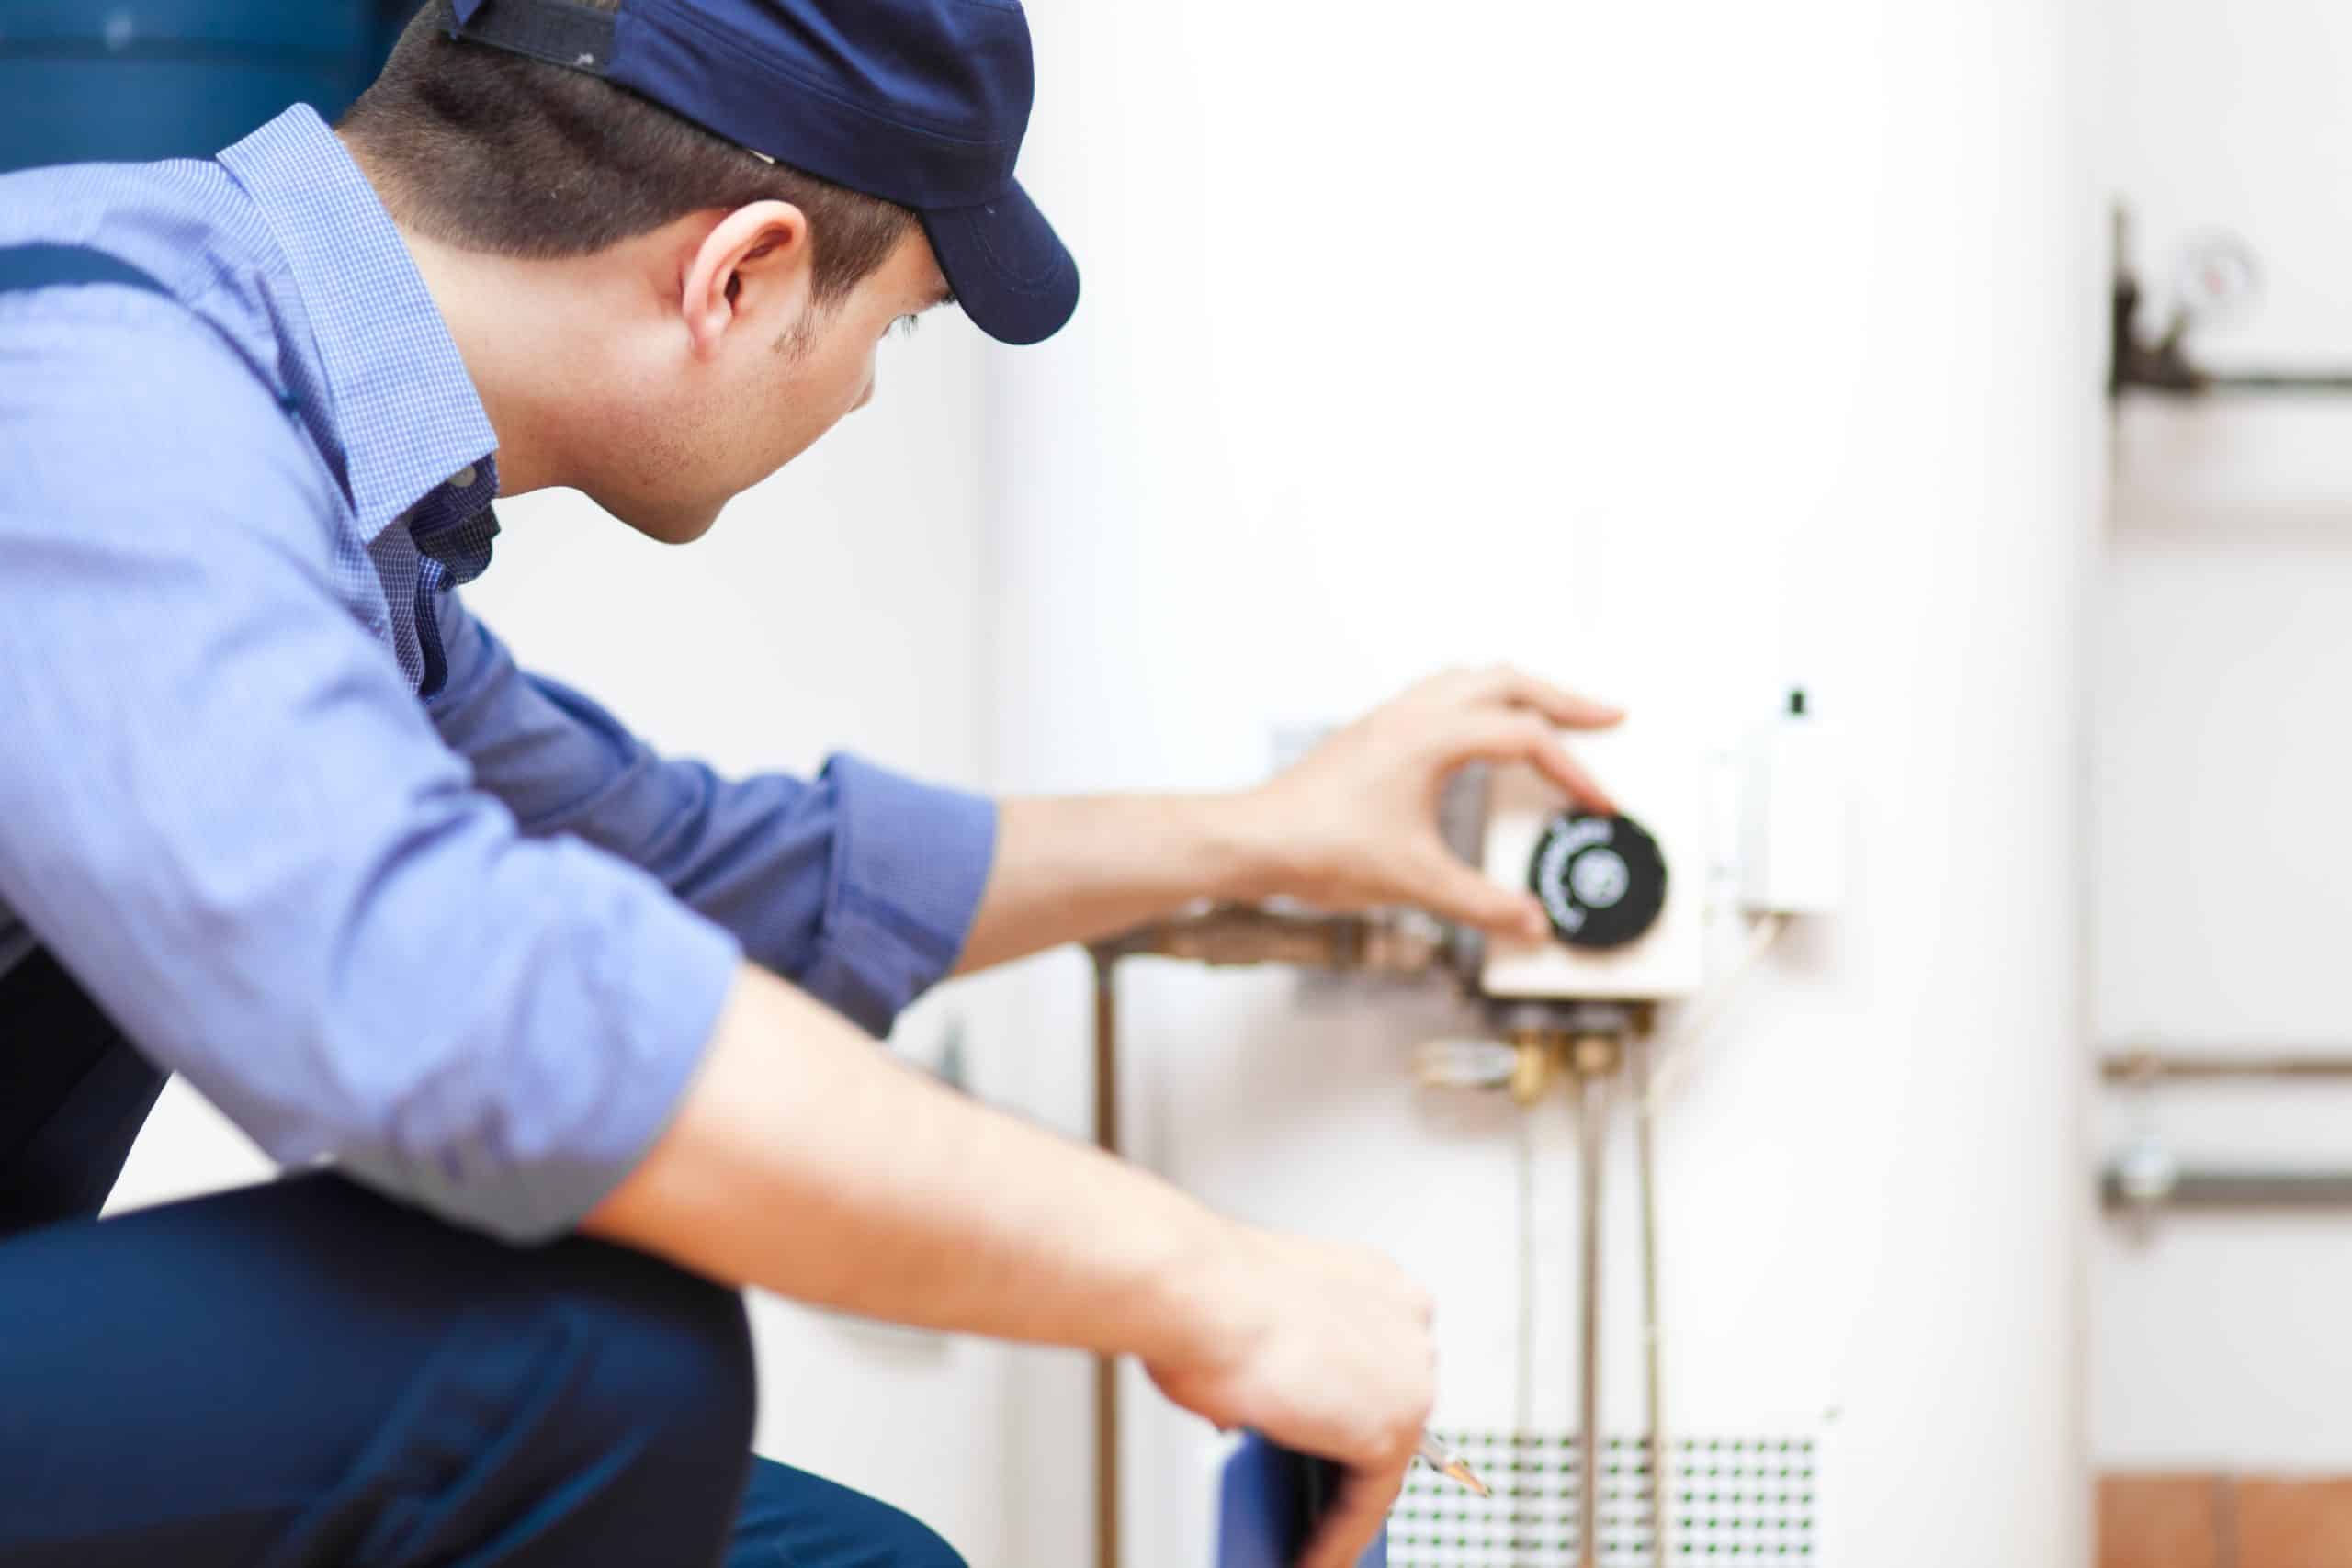
It is crucial to maintain a stable temperature throughout the fermentation process to achieve the desired flavor profile and fermentation time. This is where a kegerator can play a significant role.
A kegerator, with its temperature control capabilities, allows brewers to precisely regulate the temperature of the fermentable material. By setting the kegerator to the optimal temperature range for the specific yeast or bacteria strain being used, brewers can create an environment that promotes efficient fermentation and the development of desired flavors.
Most kegerators come equipped with digital temperature controls, allowing brewers to easily adjust and monitor the temperature. This ensures that the fermentation process stays within the ideal temperature range, minimizing the risk of off-flavors and producing a consistent and high-quality final product.
Furthermore, kegerators provide insulation, which helps maintain a stable temperature even in fluctuating ambient conditions. This is particularly important for brewers who live in regions with varying seasonal temperatures.
By using a kegerator for fermentation, brewers can have greater control over the temperature, resulting in improved fermentation efficiency, shortened fermentation times, and the production of well-balanced and flavorful beverages.
Now that we understand the role of temperature in fermentation and how a kegerator can help regulate it, let’s delve into the step-by-step process of fermenting with a kegerator.
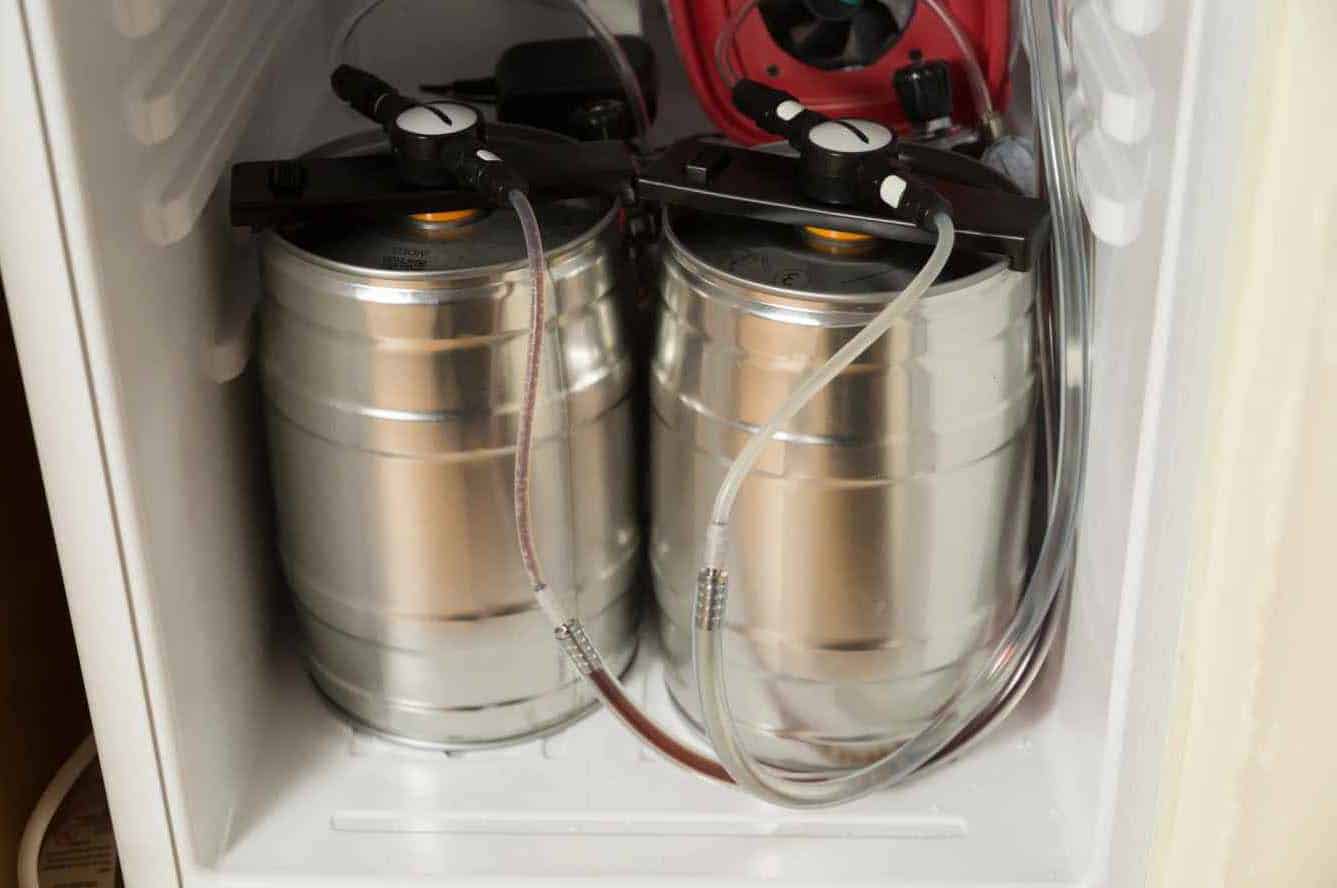
Using a Kegerator for Fermentation
A kegerator, typically known for dispensing chilled beer, can also be repurposed for fermentation. The temperature control capabilities and insulation of a kegerator make it an ideal environment for achieving optimal fermentation conditions.
Here is a step-by-step process for using a kegerator for fermentation:
- Clean and Sanitize: Before starting the fermentation process, it is essential to clean and sanitize all equipment thoroughly. This includes the kegerator itself, fermentation vessel, airlock, and any other tools or accessories that will come into contact with the fermentable material.
- Prepare the Fermentable Material: Prepare the wort, must, or other fermentable material according to your recipe. This can involve mashing grains, diluting fruit juice, or any other necessary steps to create the fermentable liquid.
- Transfer the Fermentable Material: Once the fermentable material is ready, transfer it to a sanitized fermentation vessel. It can be a glass carboy, plastic bucket, or any other suitable container that can hold the liquid and allow for the release of carbon dioxide during fermentation.
- Add Yeast: Depending on your recipe, add the appropriate yeast to the fermentation vessel. Ensure that you follow the instructions provided by the yeast manufacturer, including rehydrating the yeast if necessary.
- Place the Fermentation Vessel in the Kegerator: Carefully place the fermentation vessel inside the kegerator, ensuring that it fits properly and can be securely sealed. This will maintain a controlled environment for fermentation.
- Set the Temperature: Set the temperature on the kegerator to the optimal range for the yeast or bacteria strain being used. This information can typically be found in the yeast manufacturer’s guidelines or brewing recipe.
- Attach an Airlock: Attach an airlock to the fermentation vessel to allow the release of carbon dioxide produced during fermentation while preventing outside contaminants from entering. Fill the airlock with sanitizer or water to create a seal.
- Monitor the Fermentation: Regularly check the fermentation progress by observing the activity in the airlock, such as bubbles or the movement of liquid. Keep an eye on the temperature and make necessary adjustments to ensure it stays within the optimal range.
- Allow for Conditioning: Once primary fermentation is complete, you might choose to transfer the fermented beverage to another vessel for secondary fermentation or aging. This step is optional and depends on the type of beverage being fermented.
- Bottle or Keg the Final Product: After the fermentation process is complete, the beer, wine, or other fermented beverage can be bottled or kegged for further conditioning or immediate consumption.
Using a kegerator for fermentation provides brewers with precise temperature control and a controlled environment. It minimizes the risk of off-flavors and allows for a more efficient fermentation process, ultimately resulting in high-quality and consistent beverages.
However, like any endeavor, fermenting with a kegerator can come with its own challenges. We will explore some common challenges and how to overcome them in the next section.
The time it takes to ferment with a kegerator can vary depending on factors such as the type of beer, yeast used, and fermentation temperature. Generally, it can take anywhere from 1-2 weeks for primary fermentation, followed by additional time for conditioning. Keep an eye on the specific gravity and taste the beer to determine when it’s ready.
Fermenting with a Kegerator: Step-by-Step Process
Fermenting with a kegerator offers brewers precise temperature control and a controlled environment, resulting in more efficient fermentation and better-quality beverages. Here is a step-by-step process for fermenting with a kegerator:
- Clean and Sanitize: Thoroughly clean and sanitize all equipment, including the kegerator, fermentation vessel, airlock, and any other tools or accessories that will come into contact with the fermentable material. This step is crucial to prevent contamination and off-flavors.
- Prepare the Fermentable Material: Prepare the wort, must, or other fermentable material according to your recipe. This may involve mashing grains, extracting juice from fruits, or any other necessary steps to create the fermentable liquid.
- Transfer the Fermentable Material: Transfer the prepared fermentable material to a sanitized fermentation vessel. This vessel can be a glass carboy, plastic bucket, or any other suitable container that can safely hold the liquid and allow for the release of carbon dioxide during fermentation.
- Add Yeast: Depending on your recipe and desired beverage, add the appropriate type and quantity of yeast to the fermentation vessel. Follow the instructions provided by the yeast manufacturer, including rehydrating the yeast if necessary.
- Place the Fermentation Vessel in the Kegerator: Carefully place the fermentation vessel inside the kegerator, ensuring a snug fit and a secure seal. This will create a controlled environment for fermentation.
- Set the Temperature: On the kegerator, set the temperature to the optimal range for the yeast or bacteria strain being used. This information can typically be found in the yeast manufacturer’s guidelines or brewing recipe.
- Attach an Airlock: Attach an airlock to the fermentation vessel to allow the release of carbon dioxide generated during fermentation while preventing outside contaminants from entering. Fill the airlock with sanitizer or water to create a seal.
- Monitor the Fermentation: Regularly monitor the fermentation progress by observing the activity in the airlock, such as bubbles or movement of the liquid. Keep an eye on the temperature and make adjustments as needed to maintain the desired fermentation environment.
- Allow for Conditioning: After primary fermentation is complete, you may choose to transfer the fermented beverage to another vessel for secondary fermentation or aging. This step is optional and depends on the specific beverage being fermented.
- Bottle or Keg the Final Product: Once fermentation is finished, the beer, wine, or other fermented beverage can be bottled or kegged for further conditioning or immediate consumption.
Fermenting with a kegerator allows for greater precision and control, resulting in consistent fermentation and improved beverage quality. By following these steps, you can use your kegerator as a reliable tool for fermenting delicious and enjoyable beverages.
While the process of fermenting with a kegerator offers many benefits, there can be challenges along the way. In the next section, we will explore some common challenges during fermentation with a kegerator and provide tips on how to overcome them.
Monitoring and Adjusting Fermentation Time
Monitoring the fermentation process is essential to ensure the optimal progression of the fermentation and to make any necessary adjustments along the way. Here are some key aspects to consider when monitoring and adjusting fermentation time:
1. Observing Fermentation Activity: Regularly check the fermentation vessel for signs of activity, such as bubbles in the airlock or a thick layer of foam on top of the liquid. These are indications that the yeast or bacteria are actively fermenting.
2. Measuring Specific Gravity: Use a hydrometer or a refractometer to measure the specific gravity (SG) of the fermenting liquid. Take measurements at regular intervals to track the progress of fermentation. As the yeast consumes the sugars, the SG will decrease over time. When the SG stabilizes at the desired final gravity, it indicates that fermentation is complete.
3. Temperature Control: Continuously monitor and maintain the fermentation temperature within the optimal range for the yeast or bacteria strain being used. Use the temperature controls of the kegerator to make any necessary adjustments. A stable temperature throughout the fermentation process promotes consistent and efficient fermentation.
4. Adjusting Fermentation Time: In some cases, you may need to adjust the fermentation time to achieve desired results. If fermentation seems sluggish, you can gently agitate the fermentation vessel to rouse the yeast and promote increased activity. Alternatively, you may extend the fermentation time if you want to develop certain flavors or allow for further conditioning.
5. Sampling and Tasting: Periodically take small samples of the fermenting beverage to assess its flavor and aroma profile. This allows you to gauge the progression of fermentation and make any necessary adjustments, such as adjusting the temperature, yeast nutrients, or extending the fermentation time.
6. Adjusting Fermentation Conditions: If you encounter any issues during fermentation, such as excessive off-flavors or slow fermentation, consider evaluating the fermentation conditions. Assess factors such as pH levels, nutrient availability, and yeast health, and make appropriate adjustments to rectify the problem and improve fermentation efficiency.
Routine monitoring and adjustments throughout the fermentation process will help you achieve the desired fermentation time and produce high-quality beverages. Remember that each batch of fermentation may have its own unique characteristics, and experience and experimentation will help you refine your techniques.
In the next section, we will discuss common challenges that brewers may face when fermenting with a kegerator and provide tips for overcoming them.
Common Challenges During Fermentation with a Kegerator
While fermenting with a kegerator offers numerous benefits, there are some common challenges that brewers may encounter. By being aware of these challenges, you can take proactive measures to overcome them. Here are a few challenges to watch out for:
1. Temperature Fluctuations: Despite the temperature control capabilities of a kegerator, external factors such as ambient temperature changes or opening the kegerator frequently can cause temperature fluctuations. These fluctuations can affect the fermentation process and lead to off-flavors. It’s important to monitor and adjust the temperature regularly to maintain a stable fermentation environment.
2. Carbon Dioxide Build-up: During fermentation, carbon dioxide is produced as a byproduct. If the kegerator is not equipped with proper ventilation, excessive carbon dioxide can build up inside, leading to increased pressure and potential damage to the fermentation vessel. To prevent this, consider using a blow-off tube instead of an airlock during the early stages of fermentation to release excess carbon dioxide.
3. Sanitation Challenges: Maintaining proper sanitation is crucial throughout the fermentation process. However, transferring the fermentable material and equipment in and out of the kegerator can introduce potential contaminants. Take extra care to clean and sanitize all equipment before transferring them back into the kegerator to minimize the risk of spoilage or off-flavors.
4. Limited Space: Kegerators are designed primarily for storing and dispensing kegs, which may limit the space available for fermentation vessels. If you’re fermenting larger batches or multiple batches simultaneously, you may need to find creative solutions, such as using smaller fermentation vessels or utilizing other temperature control methods outside of the kegerator.
5. Accessibility and Monitoring: The placement of the fermentation vessel inside the kegerator may make it a bit more challenging to access and monitor the progress of fermentation. Consider using a transparent fermentation vessel or installing a camera inside the kegerator to easily monitor the fermentation activity without disturbing the vessel.
6. Yeast Selection: Not all yeast strains are suitable for fermenting in a kegerator environment. Some strains may require different temperature ranges or exhibit poor performance under pressure. Ensure you select yeast strains appropriate for the specific conditions provided by the kegerator.
Overcoming these challenges requires careful attention to detail, proactive monitoring, and maintaining sanitation practices. By addressing these challenges, you can ensure a smoother fermentation process and produce exceptional quality beverages with your kegerator.
In the final section of this article, we will provide some useful tips to ensure successful fermentation with a kegerator.
Tips for Successful Fermentation with a Kegerator
When fermenting with a kegerator, implementing the right techniques and practices can greatly enhance the success of the fermentation process. Here are some useful tips to ensure successful fermentation with a kegerator:
1. Proper Cleaning and Sanitation: Maintain strict hygiene by thoroughly cleaning and sanitizing all equipment before and after each use. This helps prevent contamination and the development of off-flavors during fermentation.
2. Use Suitable Yeast Strains: Choose yeast strains that are well-suited for fermenting in a kegerator environment, considering temperature ranges and ability to perform under pressure. Selecting the right yeast strain is crucial for achieving desired fermentation outcomes.
3. Optimize Temperature Control: Utilize the temperature control capabilities of the kegerator to maintain a consistent and appropriate temperature throughout fermentation. Avoid temperature fluctuations that can negatively impact the fermentation process.
4. Regularly Monitor Fermentation Activity: Keep a close eye on the fermentation vessel and monitor the activity, such as airlock movement or specific gravity measurements. This allows you to track the progress and make any necessary adjustments in a timely manner.
5. Balance CO2 Release: Ensure proper release of carbon dioxide by using an airlock or blow-off tube. This helps prevent excess pressure build-up and potential damage to the fermentation vessel. If using a blow-off tube, ensure it is long enough to prevent any liquid or foam from entering the kegerator.
6. Consider Fermentation Vessel Placement: Pay attention to the placement of the fermentation vessel inside the kegerator to optimize accessibility for monitoring and sampling. Consider using transparent vessels or cameras for easy observation without disturbing the fermentation process.
7. Experiment with Fermentation Times: Depending on desired flavors and styles, consider experimenting with fermentation times. Longer fermentation times can result in more complex flavors and improved clarity. However, monitor the process closely to avoid over-fermentation or off-flavors.
8. Maintain Recommended Nutrient Levels: Yeast requires proper nutrition to carry out fermentation effectively. Follow yeast nutrient guidelines and consider supplementing the fermentation with appropriate nutrients if needed.
9. Plan Ahead for Space Limitations: If space is limited inside the kegerator, consider utilizing smaller fermentation vessels or utilizing other temperature control methods outside the kegerator. Plan your fermentation schedule accordingly to accommodate multiple batches if needed.
10. Document and Learn: Keep a detailed record of your fermentation process, including fermentation times, temperatures, yeast strains, and any adjustments made. This data helps you evaluate and refine your fermentation techniques for future brews.
By implementing these tips, you can maximize the potential of your kegerator for successful fermentation and produce high-quality beverages with consistent results. Enjoy the process, explore new recipes, and continue to refine your brewing skills with each fermentation cycle.
As a reminder, fermentation is a natural process that requires time and patience. Embrace the journey, learn from your experiences, and celebrate the joy of creating your own fermented delights with a kegerator.
Happy brewing!
Read more: How Long Does Plumbing Take
Conclusion
Fermenting with a kegerator opens up a world of possibilities for homebrewers, offering precise temperature control and a controlled environment for the fermentation process. Understanding the factors that affect fermentation time, the role of temperature, and the step-by-step process of fermenting with a kegerator can greatly enhance the quality of your brews.
Throughout this article, we have explored various aspects of fermentation, from the basics of the process to the challenges and tips for successful fermentation with a kegerator. By keeping a close eye on fermentation activity, optimizing temperature control, and maintaining proper sanitation practices, you can create exceptional beverages with consistency and finesse.
Remember, fermentation is an art that requires experimentation and a willingness to learn. Each batch presents an opportunity to refine your techniques, experiment with different yeast strains or fermentable materials, and discover your own unique flavor profiles.
Using a kegerator for fermentation not only offers convenience but also provides an avenue for creativity and exploration in the brewing world. Whether you’re a seasoned homebrewer or just starting out, the ability to control temperature and maintain a clean and consistent environment allows you to produce professional-quality brews in the comfort of your own home.
So, embrace the fermentation process, monitor and adjust as needed, and celebrate the joy of brewing with a kegerator. Cheers to your brewing adventures and the delicious beverages that await!
Frequently Asked Questions about How Long Does It Take To Ferment With Kegerator
Was this page helpful?
At Storables.com, we guarantee accurate and reliable information. Our content, validated by Expert Board Contributors, is crafted following stringent Editorial Policies. We're committed to providing you with well-researched, expert-backed insights for all your informational needs.


0 thoughts on “How Long Does It Take To Ferment With Kegerator”