Articles
How To Adjust HVAC Fan Speed
Modified: October 20, 2024
Learn how to adjust the fan speed on your HVAC system with these helpful articles. Enhance indoor comfort and maximize energy efficiency with expert tips and techniques.
(Many of the links in this article redirect to a specific reviewed product. Your purchase of these products through affiliate links helps to generate commission for Storables.com, at no extra cost. Learn more)
Introduction
When it comes to heating, ventilation, and air conditioning (HVAC) systems, the fan plays a crucial role in maintaining a comfortable indoor environment. The HVAC fan is responsible for circulating the conditioned air throughout your home or workplace, ensuring proper airflow and temperature distribution.
However, there may be instances when you want to adjust the fan speed to meet specific requirements. Whether you need to increase the airflow during hot summer months or reduce the noise level during the night, having the ability to adjust the HVAC fan speed can provide greater control over your indoor comfort.
In this article, we will explore the importance of adjusting HVAC fan speed and provide a step-by-step guide on how to do it. By understanding the process, you can optimize your HVAC system’s performance and create a more tailored and efficient environment for your needs.
Key Takeaways:
- Takeaway 1: Adjusting HVAC fan speed offers benefits such as improved comfort, energy efficiency, noise reduction, and better air quality. By following a step-by-step guide, you can customize your indoor environment to meet your specific needs.
- Takeaway 2: The process of adjusting HVAC fan speed involves locating the control switch, turning off the system, removing the panel, and fine-tuning the settings. It’s essential to prioritize safety and consult professionals if needed for optimal results.
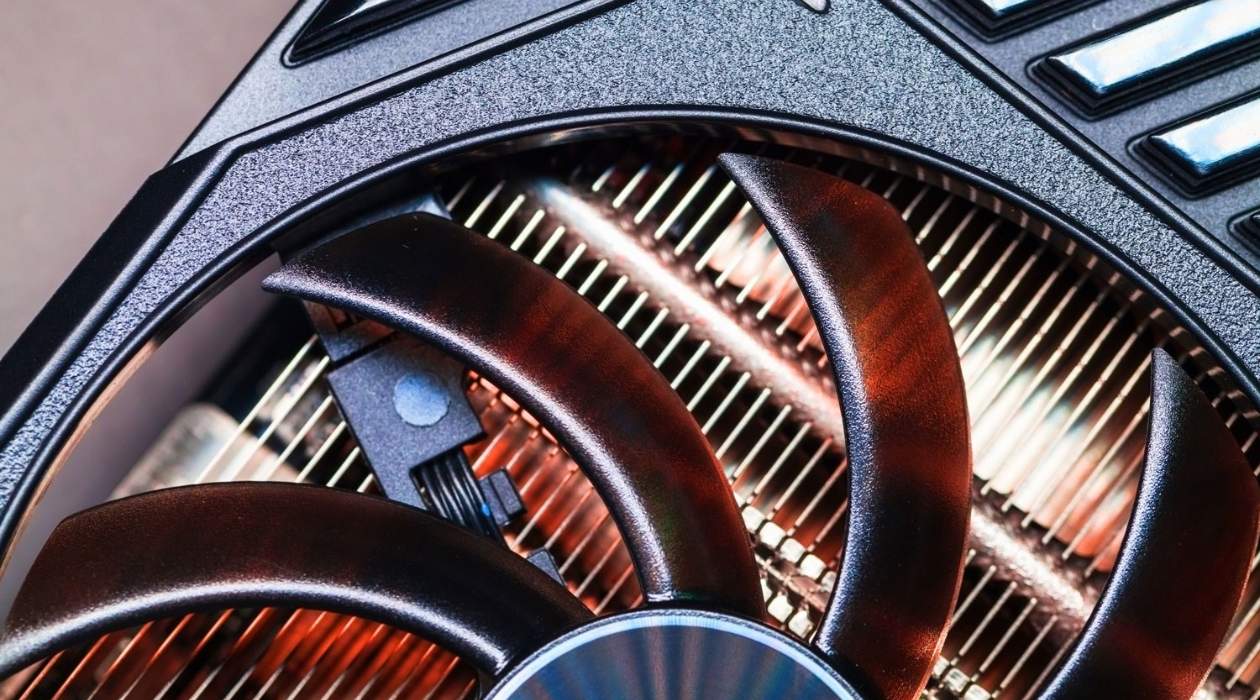
Read more: How to Adjust GPU Fan Speed
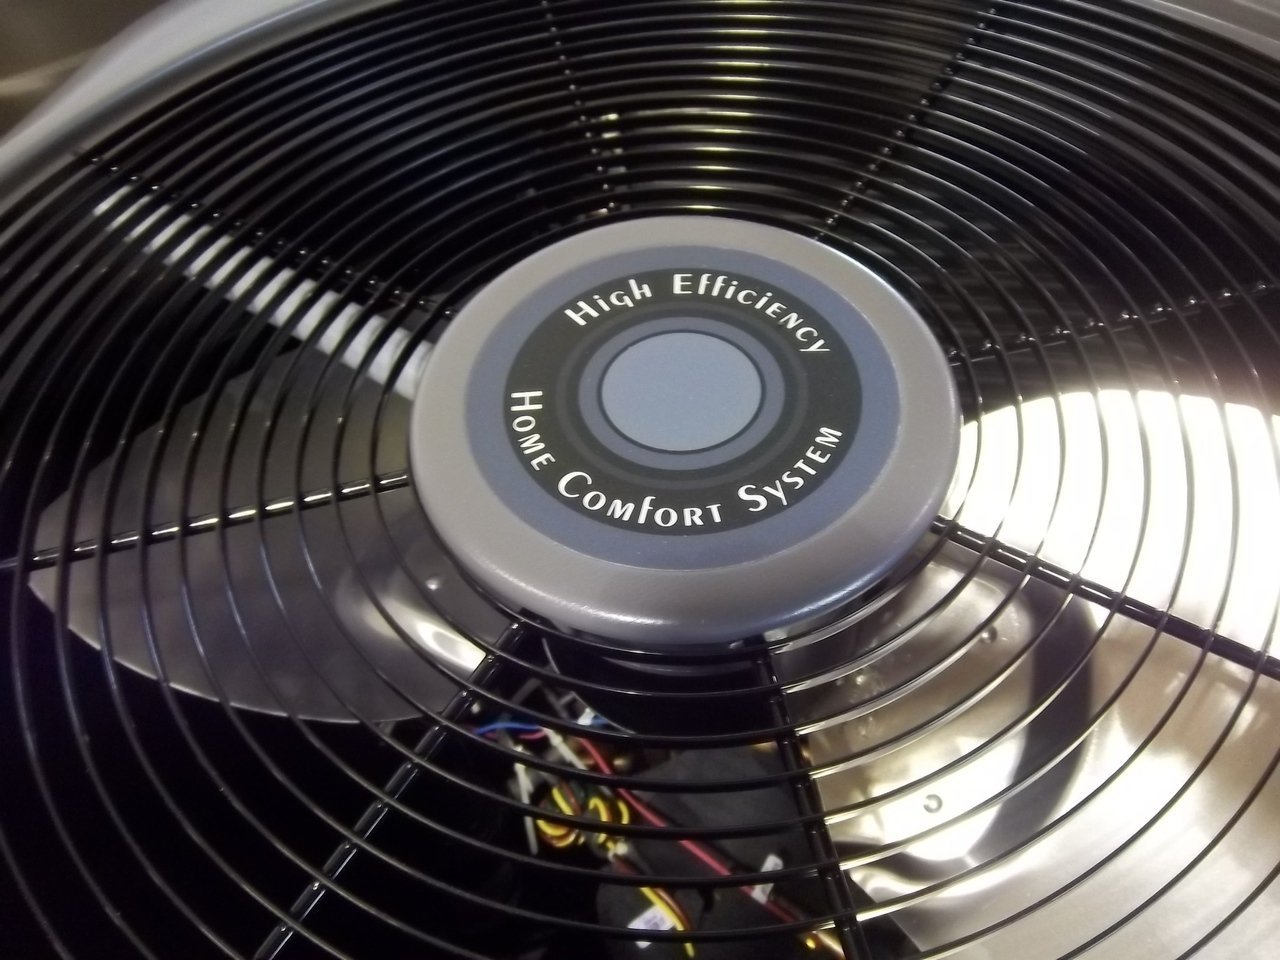
Understanding HVAC Fan Speed
HVAC fan speed refers to the rate at which the fan blades spin and circulate air through the system. It determines the volume of air moving through the ducts and into the different areas of your home or building. Most HVAC systems have multiple fan speed settings, typically ranging from low to high, allowing you to choose the desired airflow.
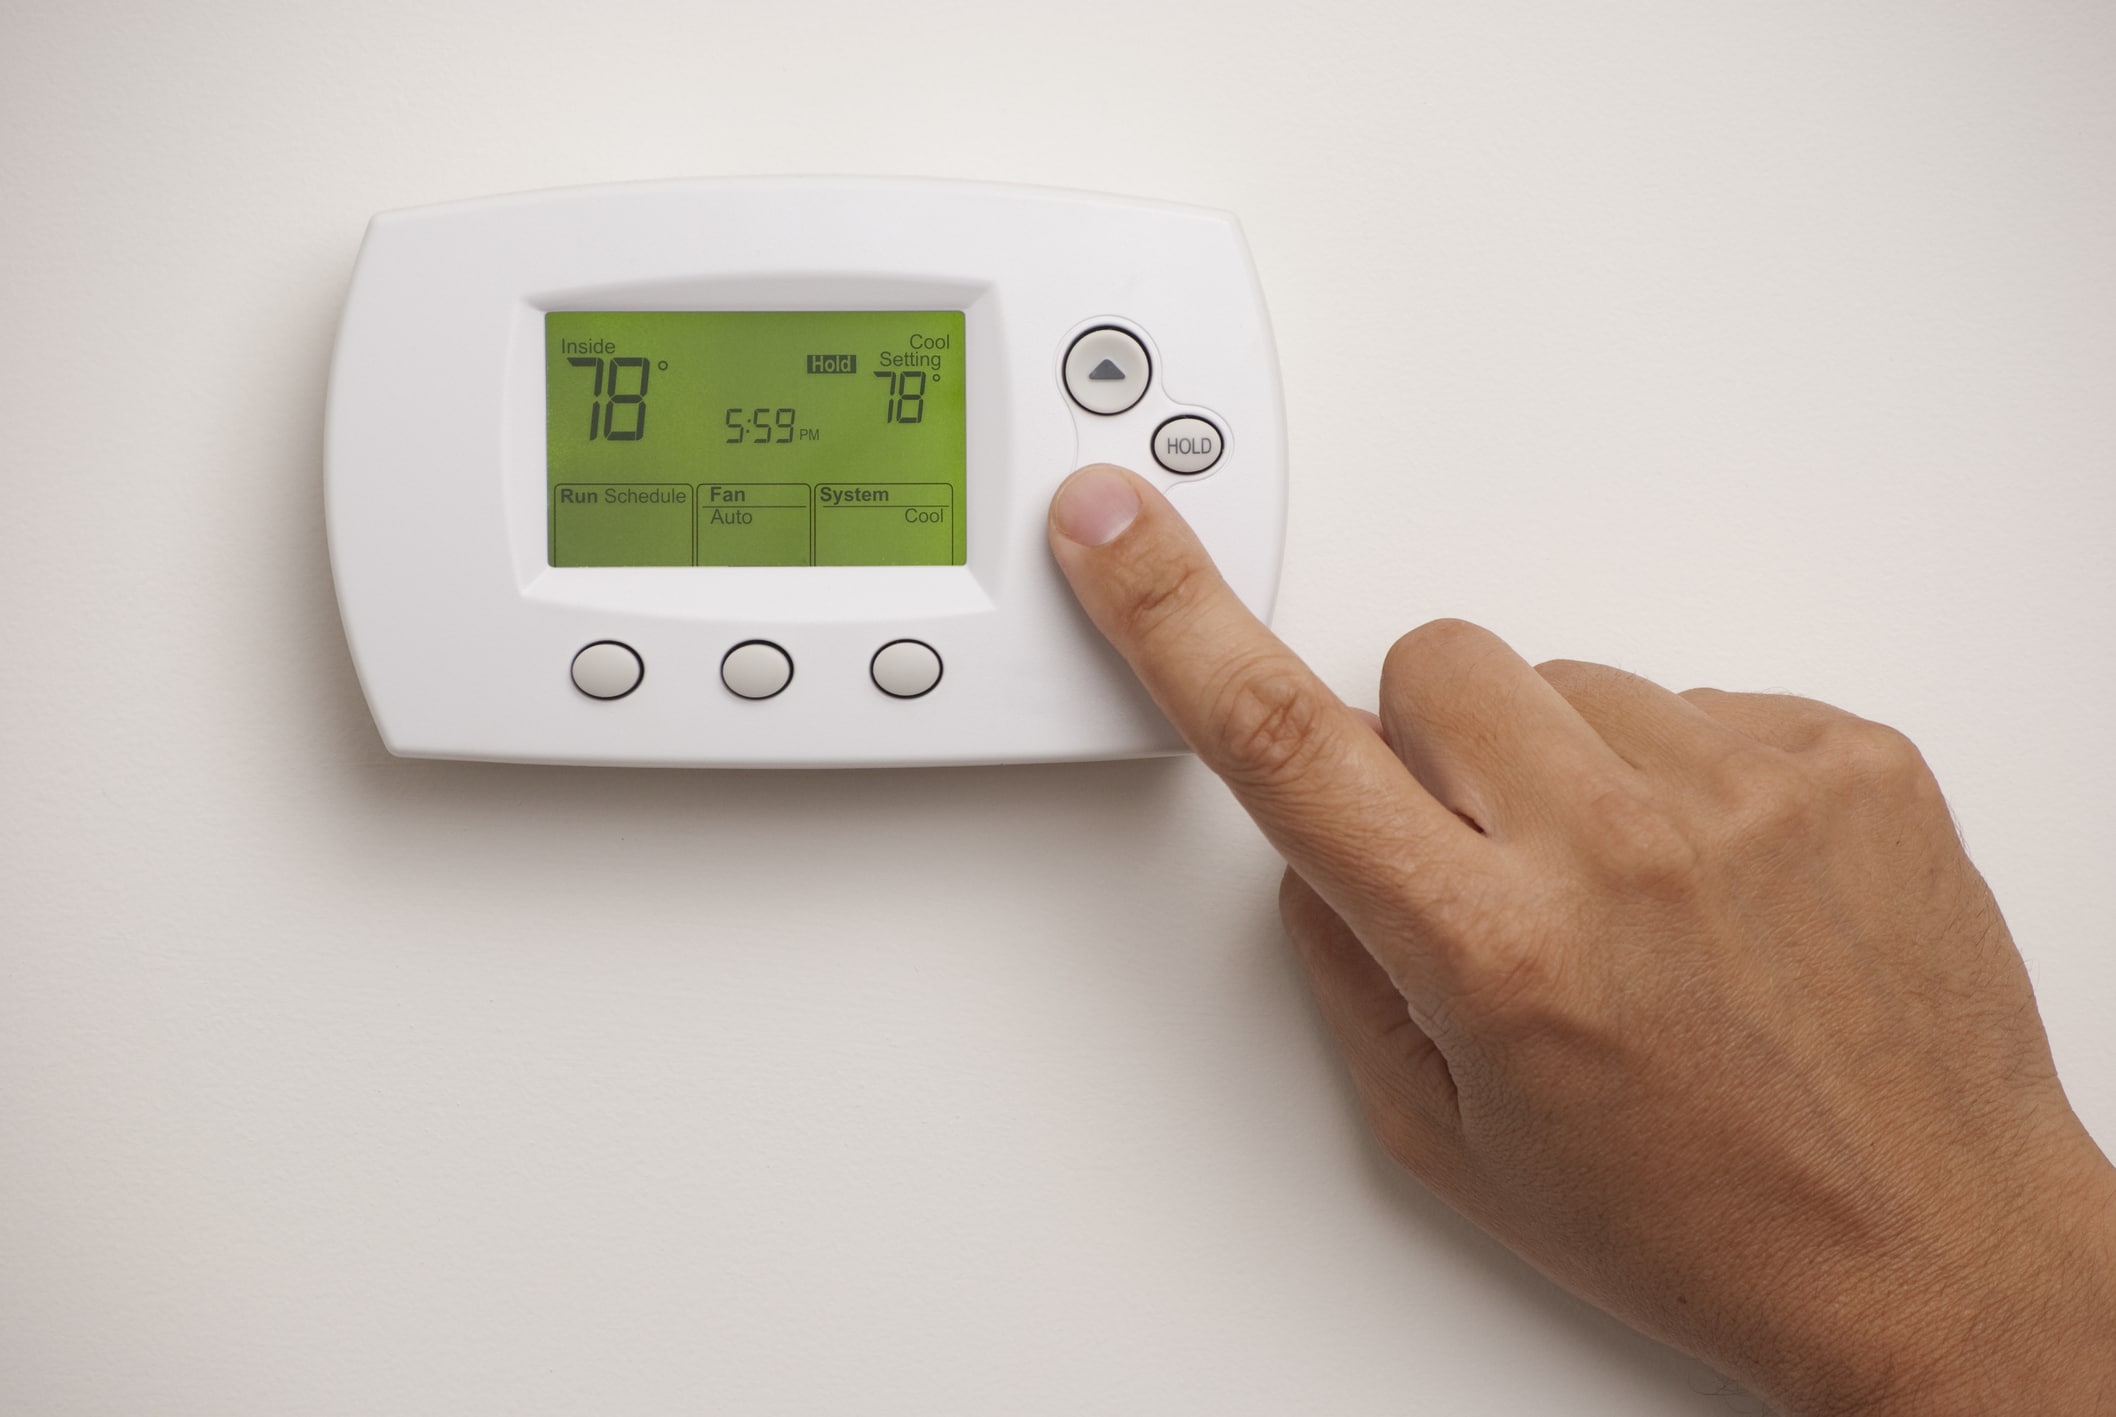
The fan speed is controlled by a fan speed control switch or dial, which is usually located on the HVAC control panel. Some systems may have a dedicated fan speed control module or a programmable thermostat that allows you to adjust the fan speed settings.
Higher fan speeds result in increased airflow, offering more powerful cooling or heating capacities. It can quickly distribute conditioned air to reach desired temperatures and provide better air circulation. On the other hand, lower fan speeds reduce the airflow, making it quieter and more energy-efficient.
It’s important to note that the default fan speed setting is often set to “Auto” mode, where the fan speed adjusts automatically based on the HVAC system’s needs. In Auto mode, the fan will run at a higher speed during the cooling or heating cycle and switch to a lower speed or turn off when the desired temperature is reached.
Understanding the nuances of HVAC fan speed can help you make informed decisions when adjusting it to suit your specific requirements. It allows you to optimize comfort, energy efficiency, and indoor air quality based on the desired airflow and noise level.
Why Adjust HVAC Fan Speed
Adjusting the HVAC fan speed can have several benefits depending on your needs and preferences. Here are some of the key reasons why you might want to consider adjusting the fan speed of your HVAC system:
- Improved Comfort: By adjusting the fan speed, you can customize the airflow to create a more comfortable indoor environment. During hot summer days, increasing the fan speed can enhance the cooling effect and help circulate cold air more effectively. Conversely, during colder months, reducing the fan speed can prevent drafts and cold spots, providing a more uniform distribution of warm air.
- Energy Efficiency: Running the HVAC fan at a lower speed can help save energy and reduce utility bills. When the fan operates at a lower speed, it consumes less power, resulting in lower energy consumption. This is particularly beneficial during milder weather conditions when the cooling or heating needs are not as high.
- Noise Reduction: HVAC systems can sometimes generate noise, especially when the fan operates at higher speeds. This noise can be disruptive, particularly during quiet moments or during nighttime when you’re trying to sleep. Adjusting the fan speed to a lower setting can significantly reduce the noise level, ensuring a peaceful and quiet indoor environment.
- Improved Air Quality: The fan plays a crucial role in air circulation, including filtering and removing airborne particles and pollutants. Adjusting the fan speed to a higher setting can increase the air exchange rate, helping to improve the overall indoor air quality. This is particularly beneficial for individuals with allergies or asthma as it can promote better breathing and reduce the presence of allergens.
- Customization: Everyone has different preferences when it comes to indoor comfort. Adjustable fan speeds allow you to customize the airflow according to your personal preferences. Whether you prefer a gentle breeze or a powerful airflow, being able to control the fan speed gives you the flexibility to create the ideal indoor environment for your specific needs.
Understanding the reasons for adjusting HVAC fan speed can help you make informed decisions about optimizing your system’s performance. By tailoring the fan speed to your preferences, you can create a more comfortable, energy-efficient, and quiet indoor environment that promotes optimal comfort and well-being.
Step-by-Step Guide to Adjust HVAC Fan Speed
Adjusting the HVAC fan speed is a relatively straightforward process that can be done by following these step-by-step instructions:
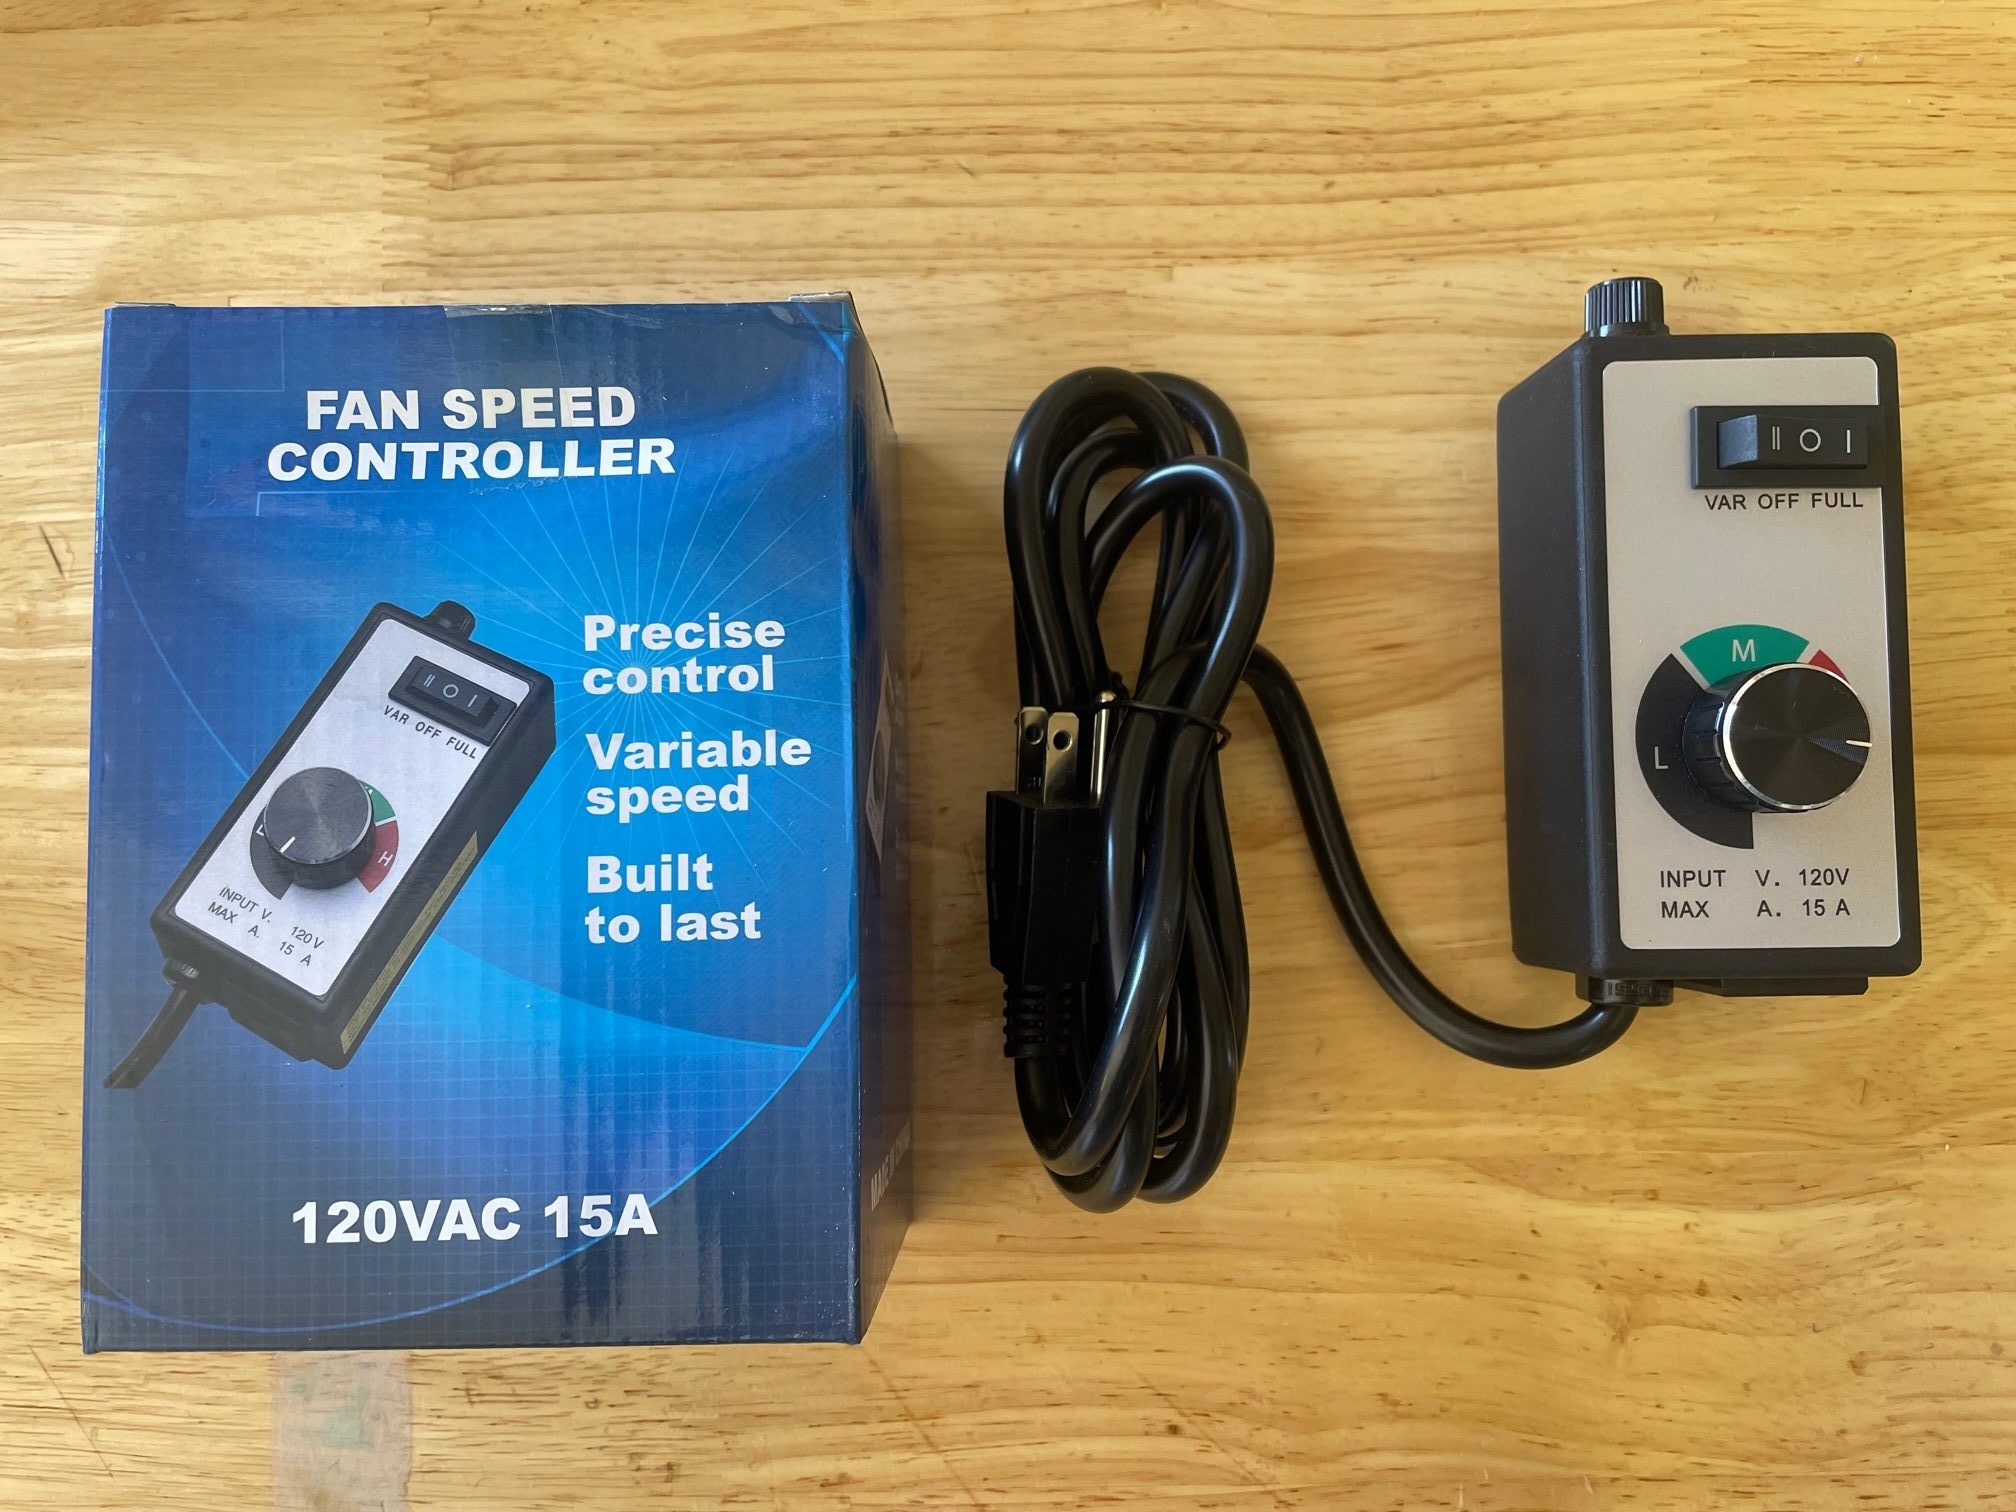
- Locate the Fan Speed Control Switch: The fan speed control switch is typically located on the HVAC control panel. It may be labeled as “Fan Speed” or have icons representing different fan speed settings. Consult your HVAC system’s manual or locate it based on the labeling on the control panel.
- Turn Off HVAC System: Before making any adjustments to the fan speed, it’s important to turn off the HVAC system to ensure safety. Locate the power switch or circuit breaker that controls the HVAC system and switch it off to cut off the power supply.
- Remove the HVAC Panel: Depending on the design of your HVAC system, you may need to remove the HVAC panel to access the internal components. Refer to the manufacturer’s instructions on how to safely remove the panel without causing any damage. Usually, this involves unscrewing or unclipping the panel.
- Locate Fan Speed Adjusting Dial: Once the HVAC panel is removed, you should be able to see the internal components. Look for the fan speed adjusting dial, which is usually a small knob or dial connected to the fan speed control switch. It allows you to adjust the fan speed settings.
- Adjust the Fan Speed Setting: Rotate the fan speed adjusting dial to the desired fan speed setting. Most systems have multiple options, ranging from low to high. Start with the desired setting, such as low for a quieter operation or high for increased airflow. Some systems may also have an “Auto” mode that automatically adjusts the fan speed based on temperature needs.
- Test and Fine-tune the Fan Speed: With the fan speed adjusted, turn on the HVAC system to test the new setting. Observe the airflow and listen for any unusual noises. If necessary, make further adjustments to fine-tune the fan speed until you find the optimal balance between comfort, energy efficiency, and noise level.
- Replace the HVAC Panel: Once you are satisfied with the fan speed setting, secure the HVAC panel back in place. Make sure all screws or clips are properly tightened to ensure the panel is secure and will not pose a safety hazard.
It’s important to note that the specific steps may vary depending on the make and model of your HVAC system. Always refer to the manufacturer’s instructions for your particular system to ensure you follow the correct procedure and avoid any potential damage.
By following these steps, you can easily adjust the fan speed of your HVAC system to meet your specific comfort and energy efficiency requirements.
Locate the Fan Speed Control Switch
The first step in adjusting the HVAC fan speed is to locate the fan speed control switch. This switch is typically located on the HVAC control panel, which is usually found on the wall or near the HVAC unit itself. The control panel is where the various controls and settings for your HVAC system are housed.
The fan speed control switch is designed to adjust the speed at which the fan blades spin, and it often features different settings that correspond to different fan speeds. These settings could be labeled as “Low,” “Medium,” “High,” or represented by different icons that indicate the speed level.
To locate the fan speed control switch, you may need to examine your HVAC system’s control panel closely. Look for any labels or markings that suggest fan speed control. In some cases, the switch may be easily identifiable, while in others, it may blend in with other controls or be located within a submenu.
If you have trouble finding the switch or are unsure about its location, consult your HVAC system’s manual or reach out to the manufacturer’s customer support for assistance. They can provide you with precise instructions based on your specific HVAC system make and model.
Once you have located the fan speed control switch, you are ready to proceed with adjusting the HVAC fan speed. This step is crucial in enabling you to customize the airflow and optimize your indoor comfort according to your preferences and specific requirements.
Remember to exercise caution and refer to the manufacturer’s instructions when operating any control switches or making adjustments to your HVAC system. Following the correct procedures ensures your safety and helps to maintain the optimal performance of your HVAC system.
Read more: How To Adjust Fan Speed On Pc
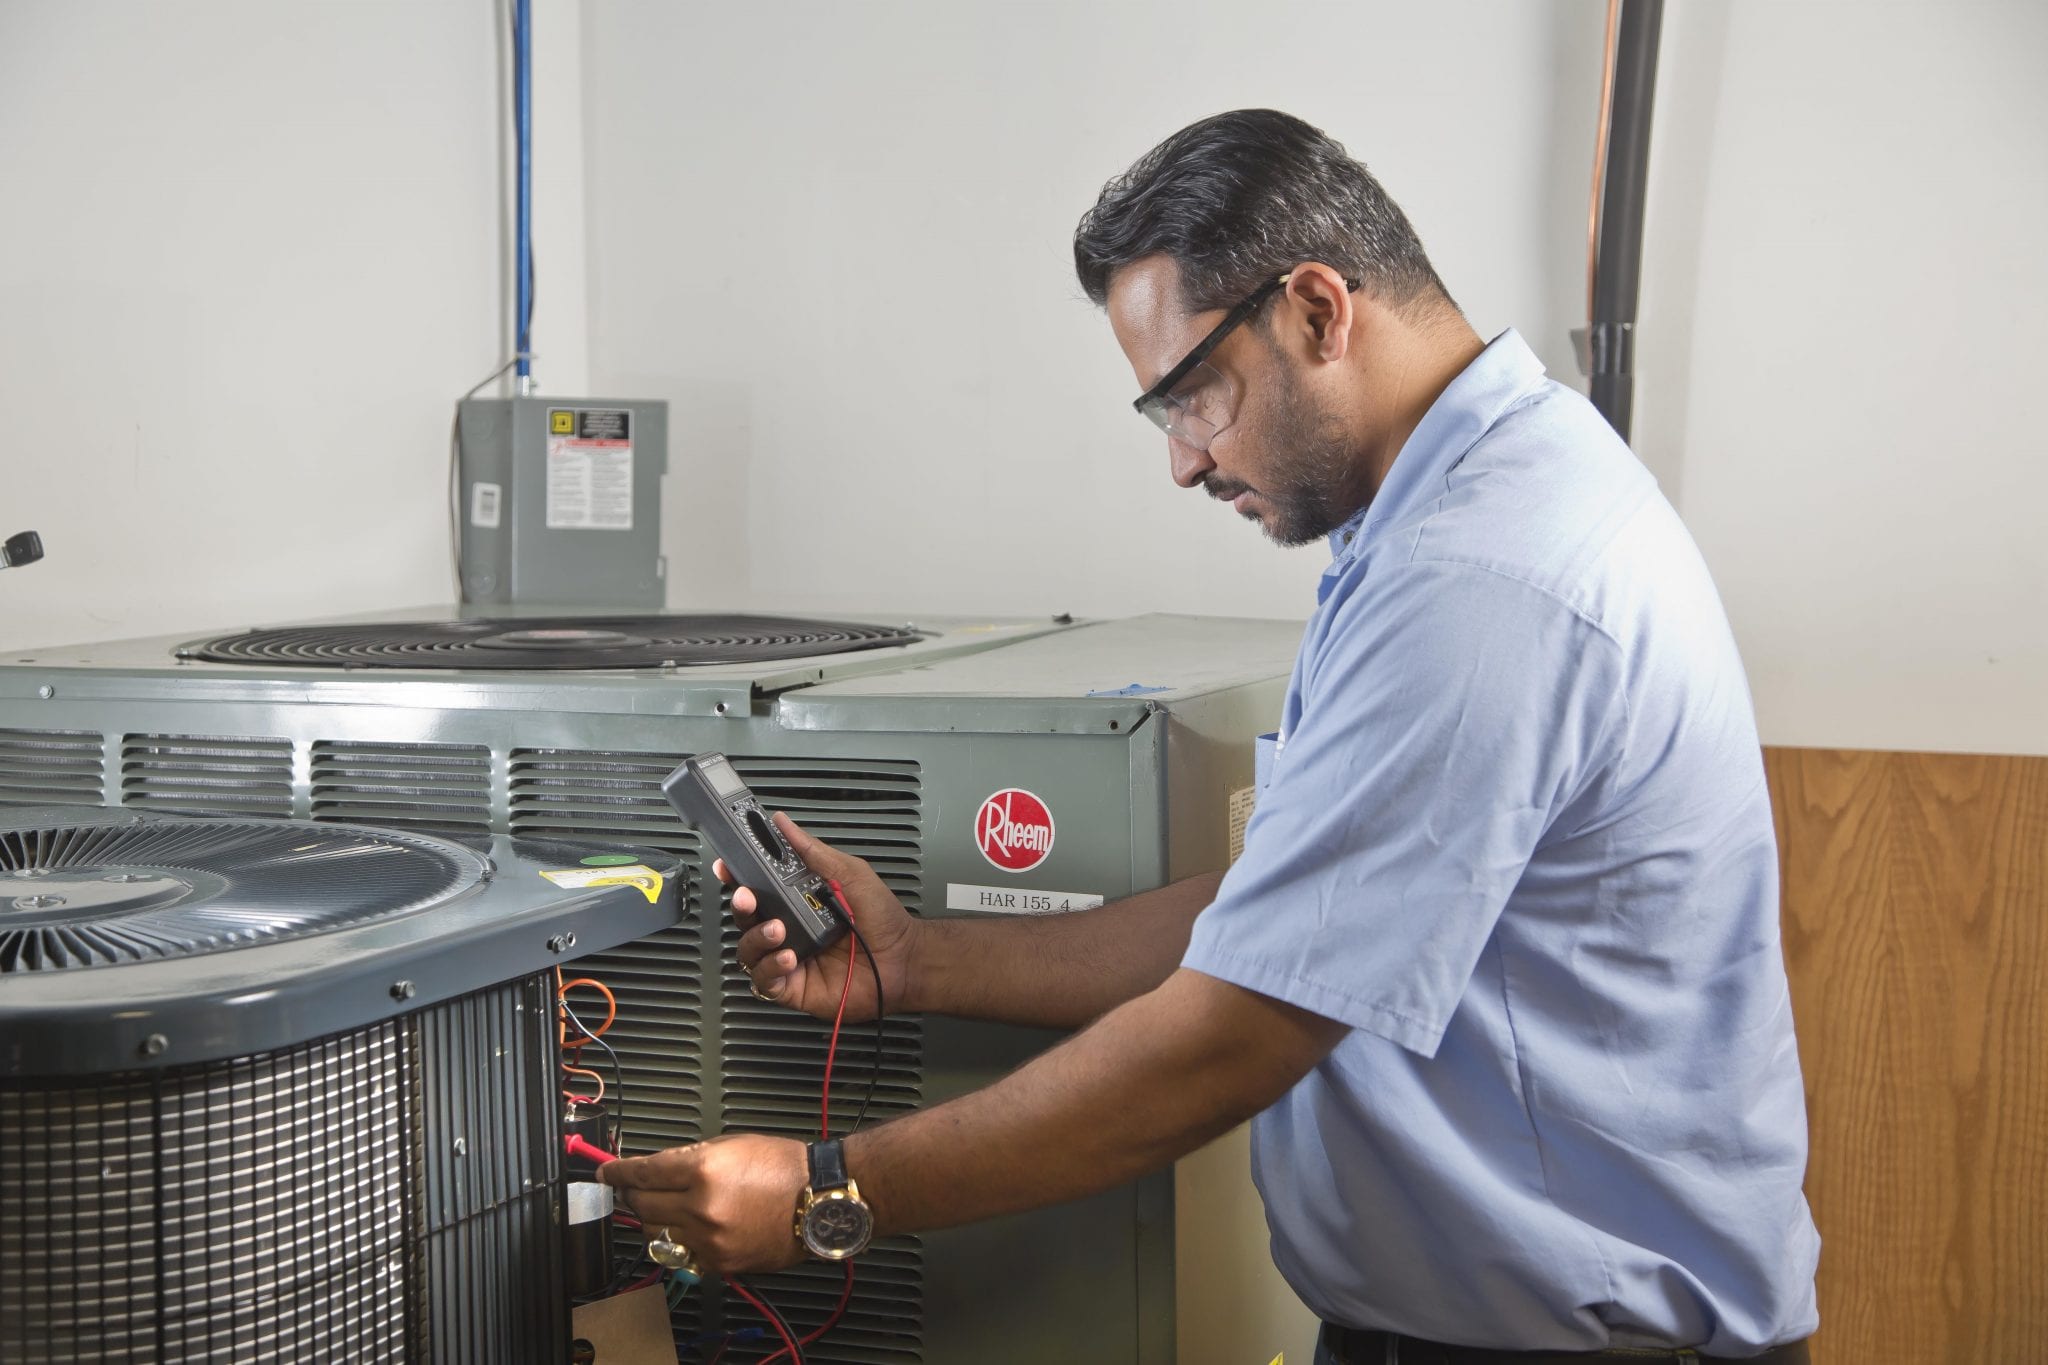
Turn Off HVAC System
Before making any adjustments to the fan speed of your HVAC system, it is important to ensure your safety by turning off the system. This step will prevent any accidents or electrical issues while you work on the fan speed control.
To turn off the HVAC system, you need to locate the power switch or circuit breaker that controls the system’s electrical supply. This switch is commonly found near the HVAC unit or on the main electrical panel in your home or building.
If you are unsure about the location of the power switch or circuit breaker, consult your HVAC system’s manual or follow these general guidelines:
- For HVAC systems with a power switch near the unit:
- Locate the HVAC unit, which is typically situated outside your home or in an equipment room indoors.
- Look for a power switch or a disconnect box near the unit. It may be a toggle switch or a metal box with a lever.
- Switch the power switch to the “Off” position or flip the lever to cut off the electrical supply to the HVAC system.
- For HVAC systems with a circuit breaker on the main electrical panel:
- Locate your home’s main electrical panel, which is usually found in the garage, basement, or utility room.
- Open the panel door to reveal the circuit breakers.
- Look for the breaker that controls the power supply to the HVAC system. It is typically labeled as “HVAC” or “Air Conditioner/Heating.”
- Switch the breaker to the “Off” position to cut off the electrical supply to the HVAC system.
Once you have successfully turned off the HVAC system, wait for a few minutes to ensure that all electrical components have safely powered down. This will reduce the risk of any residual electrical charges and allow you to work on the fan speed control switch without any hazards.
Remember, safety should always be a priority when working with electrical systems. If you’re uncertain or uncomfortable handling these tasks yourself, it is best to consult a professional HVAC technician who can assist you in adjusting the fan speed of your HVAC system.
To adjust the HVAC fan speed, locate the fan control switch on your thermostat and adjust it to the desired setting. This will change the speed of the fan and the airflow in your home.
Remove the HVAC Panel
To access the internal components of your HVAC system and locate the fan speed control switch, you will need to remove the HVAC panel. The HVAC panel is typically a cover or panel that encloses the controls and internal parts of the system.
Before proceeding, ensure that the HVAC system is turned off by following the previous step. Then, follow these general steps to remove the HVAC panel:
- Locate the panel: The HVAC panel is usually located on the front, side, or back of the HVAC unit, depending on the make and model of your system. It may be held in place with screws, clips, or latches. Examine the panel carefully to identify the fastening method.
- Remove the screws or fasteners: Use a screwdriver, wrench, or appropriate tool to remove the screws or fasteners that secure the HVAC panel. Keep the screws or fasteners in a safe place, as you will need them later to reattach the panel.
- Release the clips or latches: If your HVAC panel is held in place by clips or latches, carefully release them by gently pushing or pulling on the panel. Be cautious not to force or bend the panel, as it may be fragile and could break if mishandled.
- Set aside the panel: Once the screws or fasteners are removed, or the clips or latches are released, set the HVAC panel aside in a safe and secure location. Be mindful of any wiring or components attached to the panel, ensuring they are not damaged or disconnected during the process.
With the HVAC panel removed, you will have access to the internal components of your HVAC system. Take a moment to familiarize yourself with the layout and identify the fan speed control switch. This switch is responsible for adjusting the speed at which the fan blades spin and determines the airflow of your system.
Remember, different HVAC systems may have varying panel removal methods. Always consult your HVAC system’s manual or contact the manufacturer for specific instructions tailored to your unit. Additionally, if you are unsure or uncomfortable with removing the HVAC panel yourself, it’s best to seek the assistance of a professional HVAC technician.
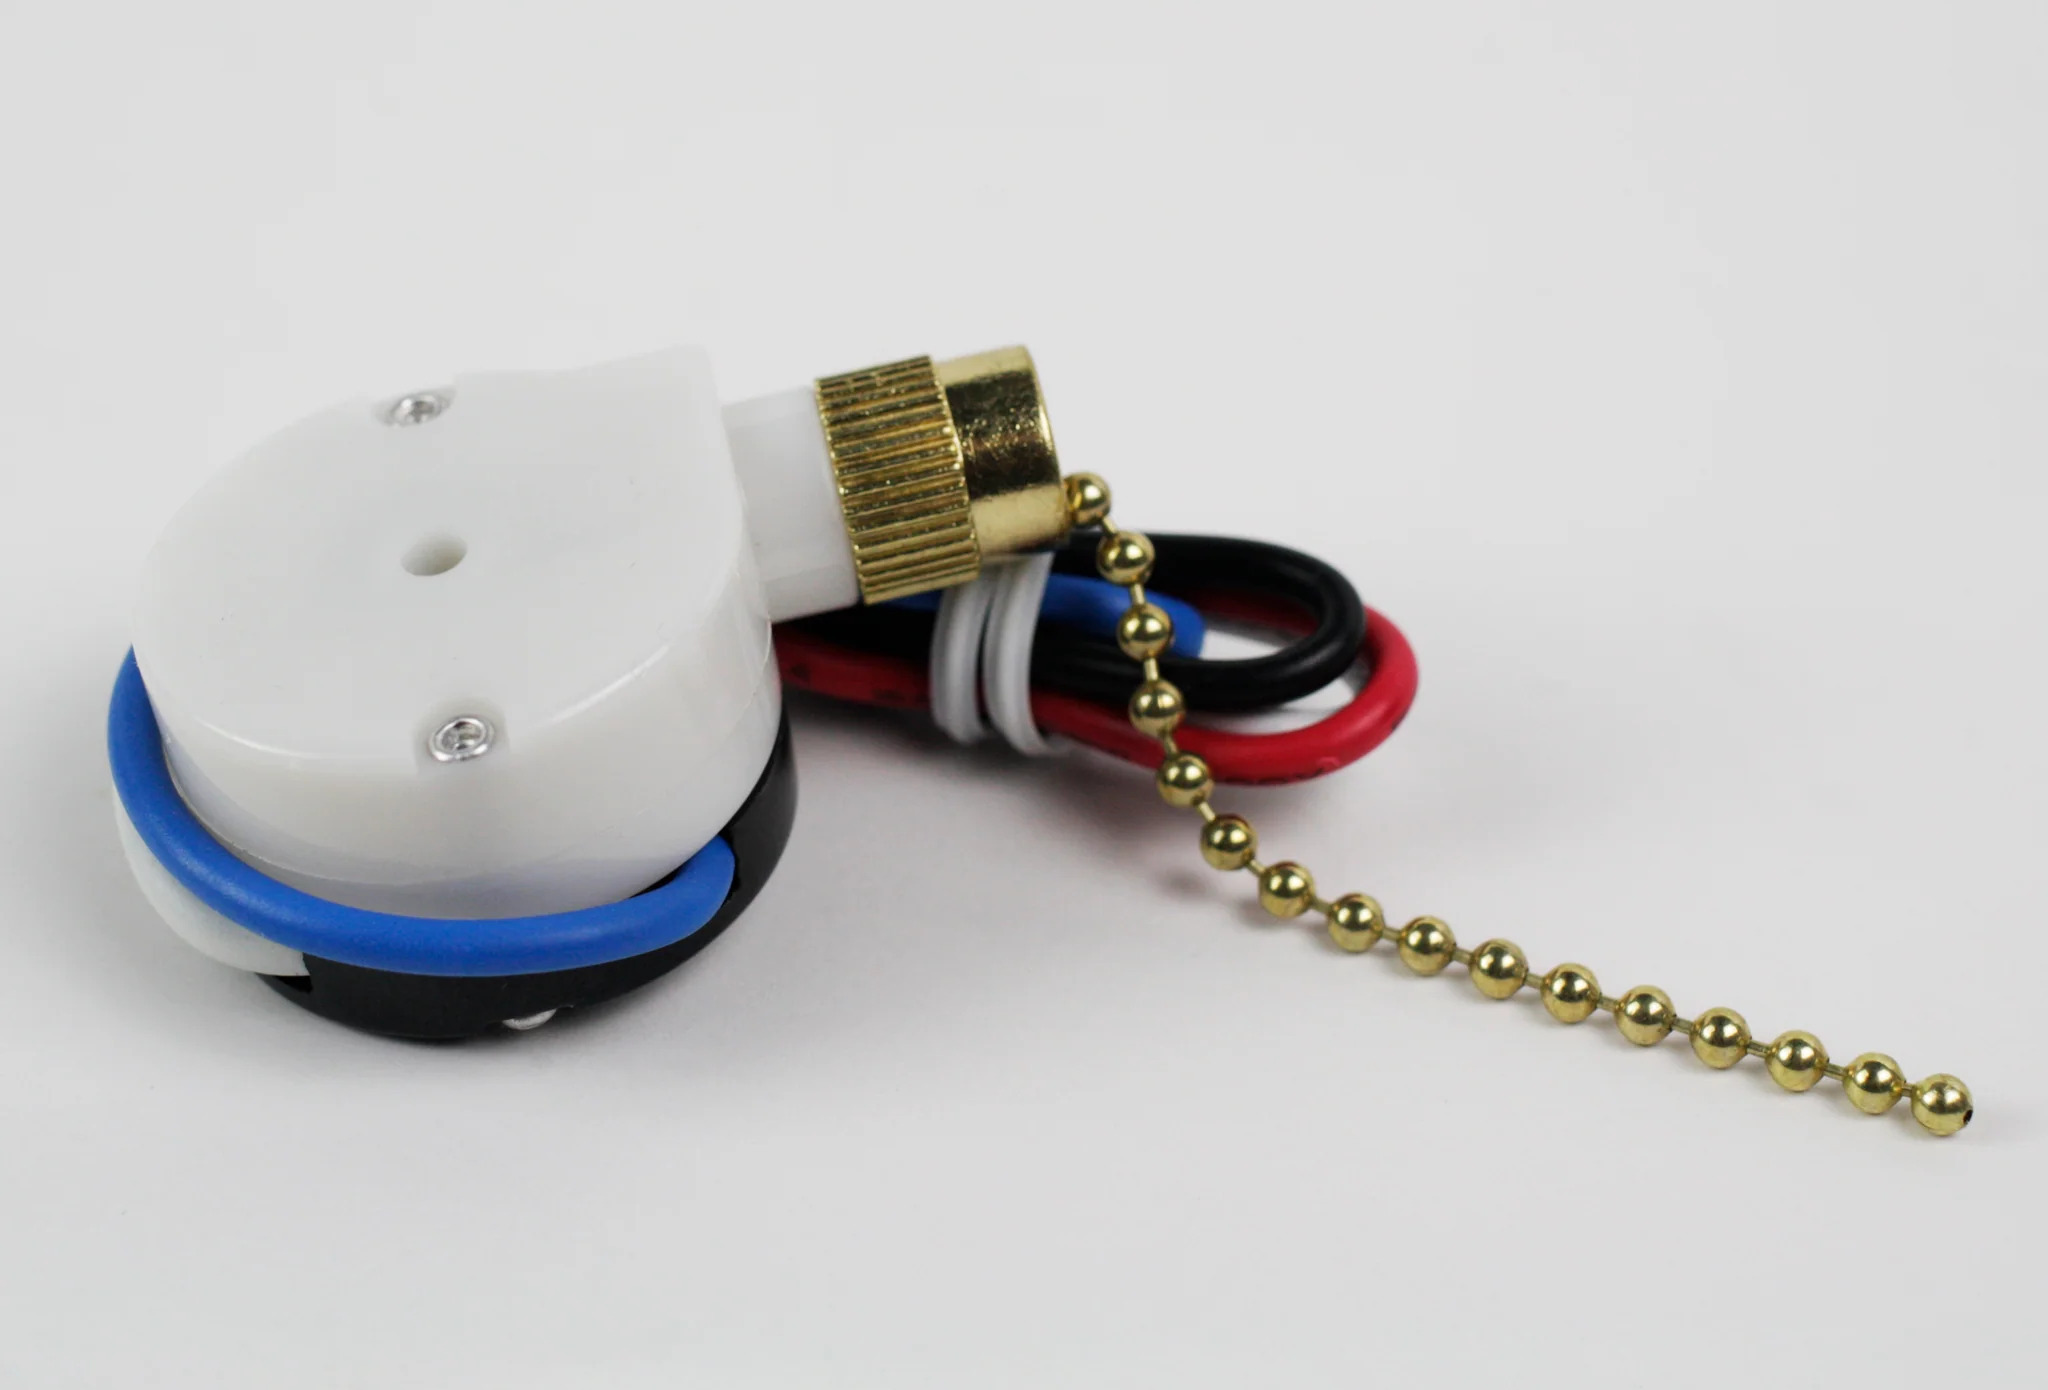
Locate Fan Speed Adjusting Dial
After removing the HVAC panel and gaining access to the internal components of your HVAC system, the next step is to locate the fan speed adjusting dial. This dial is responsible for controlling the fan speed settings of your system.
The fan speed adjusting dial can typically be found on the control board or circuit board of the HVAC system. It is a small knob or dial that is connected to the fan speed control switch. In some cases, the fan speed adjusting dial may be labeled or color-coded to indicate the different fan speed settings.
Take a moment to survey the control board or circuit board and look for the fan speed adjusting dial. Depending on the make and model of your HVAC system, the dial may be located in a prominent position or may require some close observation and inspection to identify.
If you are having trouble locating the fan speed adjusting dial, refer to the manufacturer’s manual specific to your HVAC system. The manual should have detailed information and diagrams indicating the exact location of the dial.
Additionally, if the fan speed adjusting dial is not visible or easily accessible, you can consult an HVAC technician for guidance. They have the expertise to locate and access the necessary components of your HVAC system safely and efficiently.
Once you have identified the fan speed adjusting dial, you are ready to proceed to the next step, which involves adjusting the fan speed settings according to your preferences and requirements. This step allows you to tailor the airflow of your HVAC system to create a comfortable and efficient indoor environment.
Remember to exercise caution when handling the internal components of your HVAC system. If you are unsure or uncomfortable making adjustments yourself, it is always advisable to seek professional assistance to avoid any potential damage or hazards.
Adjust the Fan Speed Setting
Once you have located the fan speed adjusting dial, you are ready to adjust the fan speed setting of your HVAC system. This step allows you to customize the airflow and optimize the performance of your system based on your specific comfort needs and preferences.
To adjust the fan speed setting, follow these general steps:
- Grasp the fan speed adjusting dial: Gently grasp the fan speed adjusting dial with your fingers. It is usually a small knob or dial that you can turn to adjust the fan speed settings.
- Rotate the dial to the desired setting: Begin rotating the dial clockwise or counterclockwise to change the fan speed setting. Most HVAC systems have multiple fan speed options, such as low, medium, high, or specific icons indicating different speed levels.
- Choose the appropriate fan speed: Select the fan speed setting that aligns with your specific requirements. Consider factors such as comfort, energy efficiency, and noise level when making your selection. Adjusting the fan speed to a higher setting will result in increased airflow, while lowering the fan speed will reduce airflow and noise.
- Make gradual adjustments: It is recommended to make gradual adjustments to the fan speed setting rather than abruptly changing it. This will allow you to observe the impact of each adjustment and find the optimal fan speed for your desired comfort level.
- Take note of the changes: As you adjust the fan speed setting, pay attention to any changes in airflow, temperature distribution, and noise level. Observe the performance of your HVAC system and assess whether the adjusted fan speed meets your expectations.
Remember that the specific steps and options for adjusting the fan speed setting may vary depending on your HVAC system’s make and model. Always consult the manufacturer’s manual for detailed instructions tailored to your system.
Additionally, if you find it challenging to adjust the fan speed setting or you are not comfortable making the adjustments yourself, it is advisable to seek the assistance of a professional HVAC technician. They have the expertise to fine-tune the fan speed and ensure optimal performance and efficiency of your HVAC system.
Read more: How To Adjust Dampers On HVAC
Test and Fine-tune the Fan Speed
After adjusting the fan speed setting of your HVAC system, it’s important to test and fine-tune the setting to ensure optimal comfort and performance. This step allows you to evaluate the impact of the adjusted fan speed and make any necessary adjustments to meet your specific needs.
Follow these general guidelines when testing and fine-tuning the fan speed:
- Turn on the HVAC system: Once you have adjusted the fan speed setting, turn on the HVAC system using the appropriate controls or switches. Allow the system to run for a few minutes to stabilize.
- Observe the airflow: Pay attention to the airflow coming from the vents or registers throughout your space. Notice if the airflow is too strong or weak for your liking. If the airflow is too strong, you may consider reducing the fan speed setting slightly. Conversely, if the airflow is too weak, you may need to increase the fan speed setting.
- Assess the temperature distribution: Check if the adjusted fan speed setting provides an even distribution of conditioned air throughout the space. Make sure there are no cold or hot spots. Adjust the fan speed setting if necessary to achieve a more balanced temperature distribution.
- Listen for noise: Take note of any noise produced by the HVAC system. If the fan speed setting is causing excessive noise or vibrations, you may consider reducing the speed to minimize the disturbance. On the other hand, if the noise level is acceptable, you can maintain or increase the fan speed setting as desired.
- Make further adjustments: Based on your observations, make further adjustments to the fan speed setting as needed. Fine-tuning the fan speed allows you to achieve the optimal balance between comfort, energy efficiency, and noise level in your space.
- Repeat the testing process: After making additional adjustments, repeat the testing process by observing the airflow, temperature distribution, and noise level. Continue to refine the fan speed setting until you achieve the desired comfort and performance.
It’s important to note that the testing and fine-tuning process may require some patience and trial-and-error. Each HVAC system and space is unique, so you may need to experiment with different fan speed settings to find the ideal balance.
If you encounter any difficulties or uncertainties during the testing and fine-tuning process, consider consulting with a professional HVAC technician. They can provide expert guidance and assistance to help you optimize the fan speed setting and ensure your system operates at its best.
Replace the HVAC Panel
After adjusting and fine-tuning the fan speed of your HVAC system, the final step is to replace the HVAC panel. The HVAC panel serves as a protective cover for the internal components and ensures the safe operation of your HVAC system.
Follow these steps to replace the HVAC panel:
- Inspect the panel: Before reattaching the panel, check for any signs of damage or defects. Ensure that the panel is clean, free from debris, and in good condition.
- Align the panel: Carefully align the panel with the appropriate slots or mounting points on the HVAC unit. Take note of any wiring or cables that need to be organized to prevent them from being pinched or damaged when the panel is replaced.
- Secure the panel: Once aligned, gently push or slide the panel into place. Depending on the design of your HVAC system, you may need to fasten it using screws, clips, or latches.
- Tighten the screws or fasteners: If your HVAC panel requires screws or fasteners, use a screwdriver or appropriate tool to secure them in place. Ensure that the screws or fasteners are tightened firmly, but be careful not to overtighten, as this can damage the panel.
- Verify proper panel placement: Double-check that the HVAC panel is secure and properly positioned. Ensure that it is flush with the rest of the HVAC unit and there are no gaps or loose areas.
- Test the HVAC system: Once the panel is securely in place, turn on the HVAC system and test its functionality. Observe the operation of the fan and airflow to confirm that everything is working as expected.
- Check for any issues: After reattaching the panel, inspect the HVAC system for any signs of irregularities. Listen for any unusual noises, check for proper airflow from all vents, and monitor the temperature distribution throughout the space.
If you notice any issues or concerns after replacing the HVAC panel, it is recommended to consult with a professional HVAC technician. They can inspect the system, identify any potential problems, and provide the necessary solutions.
Remember, if at any point during the process you feel unsure or uncomfortable, it is best to seek assistance from a trained professional. They can ensure that the panel is replaced correctly and that your HVAC system operates safely and efficiently.
Conclusion
Adjusting the fan speed of your HVAC system is a valuable tool in tailoring your indoor comfort and optimizing the performance of your system. The ability to control the fan speed allows you to customize the airflow, enhance energy efficiency, reduce noise levels, and improve overall comfort.
In this article, we have explored the importance of adjusting HVAC fan speed and provided a step-by-step guide on how to do it. We started by understanding the concept of HVAC fan speed and its role in maintaining a comfortable indoor environment. We discussed the benefits of adjusting the fan speed, including improved comfort, energy efficiency, noise reduction, and better air quality.
We then outlined the step-by-step process for adjusting the fan speed of your HVAC system. We emphasized the importance of locating the fan speed control switch, turning off the HVAC system to ensure safety, removing the HVAC panel to access the internal components, and locating the fan speed adjusting dial. We also covered the process of adjusting the fan speed setting, testing and fine-tuning the fan speed, and finally replacing the HVAC panel.
It’s important to note that every HVAC system is unique, and the specific steps and methods may vary. Always refer to the manufacturer’s instructions and follow proper safety protocols when making any adjustments to your HVAC system.
By adjusting the fan speed of your HVAC system, you can create a comfortable and efficient indoor environment that meets your specific needs. Whether you want to cool down during hot summer months, reduce energy consumption, minimize noise, or improve air circulation, taking control of your HVAC fan speed provides you with the flexibility to create a personalized and optimized living or working space.
Remember, if you encounter any difficulties or are unsure about the process, don’t hesitate to consult with a professional HVAC technician. They have the knowledge and expertise to assist you with adjusting the fan speed and ensuring the optimal performance of your HVAC system.
Frequently Asked Questions about How To Adjust HVAC Fan Speed
Was this page helpful?
At Storables.com, we guarantee accurate and reliable information. Our content, validated by Expert Board Contributors, is crafted following stringent Editorial Policies. We're committed to providing you with well-researched, expert-backed insights for all your informational needs.


0 thoughts on “How To Adjust HVAC Fan Speed”