
Articles
How To Adjust Fan Speed On Pc
Modified: January 20, 2024
Learn how to adjust the fan speed on your PC with our informative articles. Maximize performance and optimize temperature control for a seamless computing experience.
(Many of the links in this article redirect to a specific reviewed product. Your purchase of these products through affiliate links helps to generate commission for Storables.com, at no extra cost. Learn more)
Introduction
Welcome to this guide on how to adjust the fan speed on your PC. If you’ve noticed that your computer is running hotter than usual or that the fan noise is getting too loud, adjusting the fan speed can help mitigate these issues. By controlling the fan speed, you can strike a balance between keeping your system cool and maintaining a quieter operation.
There are various methods to adjust the fan speed, depending on your specific hardware and software configuration. In this article, we will explore the steps to adjust the fan speed through the computer’s BIOS settings and by using fan control software.
Before proceeding, it is important to note that adjusting the fan speed involves making changes to your system settings, and it should be done with caution. It is advisable to follow the instructions carefully and make sure you understand the potential risks involved. If you are not comfortable with making these changes or are unsure about your computer’s compatibility, it is recommended to seek professional assistance.
Now, let’s dive into the steps to adjust the fan speed on your PC!
Key Takeaways:
- Adjusting fan speed through BIOS settings or fan control software can optimize cooling and reduce noise, but requires caution and understanding of your system’s needs for effective adjustments.
- Monitoring and testing fan speed adjustments is crucial to ensure proper cooling and noise levels. Regular maintenance, experimentation, and attention to system needs are key to achieving optimal fan speed settings.
Read more: How to Adjust GPU Fan Speed
Step 1: Check Your BIOS Settings
The first step in adjusting the fan speed on your PC is to check your computer’s BIOS (Basic Input Output System) settings. The BIOS is a firmware that is built into your computer’s motherboard and is responsible for initializing and controlling various hardware components, including the CPU fan.
To access the BIOS settings, restart your computer and repeatedly press the designated key or key combination during the startup process. The key to access the BIOS may vary depending on your computer’s manufacturer, but commonly used keys are F2, Del, or Esc. Consult your computer’s user manual or manufacturer’s website for specific instructions.
Once you are in the BIOS settings, navigate to the Hardware or Cooling section, where you can find options related to fan control. The available options and their labels may differ depending on your motherboard and BIOS version.
Look for options such as “Fan Control Mode,” “Fan Speed Control,” or similar terms. Depending on your BIOS, you might have different control modes to choose from, such as “Automatic,” “Manual,” or “PWM Control.” Automatic mode allows the motherboard to control the fan speed based on system requirements, while manual mode allows you to set a specific fan speed.
After selecting the desired control mode, save the changes and exit the BIOS. Your computer will restart, and the fan speed will be adjusted according to your chosen settings. Keep in mind that changes made in the BIOS settings will be applied every time your computer starts.
Checking and adjusting the BIOS settings is a basic method to control the fan speed, but it may have limitations depending on your motherboard’s capabilities and available options. If you want more precise and flexible control over the fan speed, you can explore the next step: installing fan control software.
Step 2: Install Fan Control Software
If you are looking for more advanced control over your PC’s fan speed, installing fan control software is a great option. Fan control software allows you to monitor and adjust the fan speed based on temperature, providing more granular control over your system’s cooling.
Before installing fan control software, it is important to ensure that it is compatible with your motherboard and operating system. Check the manufacturer’s website or do some research to find a software program that suits your needs.
Once you have identified a suitable fan control software, download it from a trusted source and follow the installation instructions. During the installation process, make sure to choose the appropriate options and configurations, such as selecting the correct sensors associated with your fans.
After the installation is complete, launch the fan control software. You will be presented with a user interface that displays information about your system’s temperature and fan speeds. It may also provide options to adjust fan curves, which determine the fan speeds at different temperature thresholds.
Experiment with different fan curve settings to find the right balance between cooling performance and noise levels. You can typically adjust the fan speeds manually or choose pre-configured profiles such as “Silent,” “Balanced,” or “Performance.” Some fan control software also allows for dynamic adjustment of fan speeds based on CPU or GPU usage.
Remember to save your changes and ensure the fan control software is set to start automatically with your computer. This way, the fan speed settings will be applied every time your system boots up.
It’s worth noting that fan control software may offer additional features such as system monitoring, overclocking, and voltage control. These features can provide more control and customization options but require careful consideration and understanding of the potential risks involved. Always proceed with caution and consult the software’s documentation if you are unsure about certain settings.
With fan control software installed, you now have a more sophisticated method of adjusting and customizing your PC’s fan speed. In the next steps, we will explore how to adjust fan speeds using both the BIOS settings and fan control software.
Step 3: Adjust Fan Speed Using BIOS
Adjusting the fan speed through the BIOS settings provides a straightforward and direct method to control your PC’s cooling. If you prefer to make fan speed adjustments at the system-level rather than using third-party software, this method is for you.
To begin, reboot your computer and access the BIOS settings by pressing the designated key or key combination during startup. The key to enter the BIOS varies depending on your computer’s manufacturer, so refer to the user manual or manufacturer’s website for guidance.
Once in the BIOS settings, navigate to the Hardware or Cooling section. Look for options related to fan control, such as “Fan Control Mode” or “Fan Speed Control.” The options available may differ depending on your motherboard and BIOS version.
Enable the manual fan control mode or similar option. This allows you to set a specific fan speed that suits your cooling needs. Some BIOS configurations provide a percentage-based control, while others allow you to set specific RPM (revolutions per minute) values.
Adjust the fan speed value according to your requirements. Increasing the fan speed will result in better cooling performance but may also increase the noise level. Conversely, reducing the fan speed can make your system quieter but may result in higher temperatures.
Save the changes and exit the BIOS. Your computer will restart, and the fan speed will be adjusted according to the settings you applied. Keep in mind that the changes made in the BIOS settings will persist each time your computer starts.
It’s important to note that adjusting the fan speed through BIOS may have limitations compared to using dedicated fan control software. BIOS-based control typically offers basic fan speed options and may not provide the same level of customization and fine-tuning as software solutions.
However, adjusting the fan speed through the BIOS can still be effective in maintaining a balance between cooling performance and noise levels. Experiment with different fan speed values to find what works best for your system.
In the next step, we will cover how to adjust the fan speed using fan control software, which provides more advanced and precise control over your PC’s cooling.
You can adjust fan speed on your PC by accessing the BIOS or UEFI settings. Look for the “Hardware Monitor” or “Fan Control” section to manually adjust the fan speed or enable automatic fan control. Be cautious when making changes to avoid overheating or damaging your system.
Step 4: Adjust Fan Speed Using Fan Control Software
Adjusting the fan speed using fan control software provides a more advanced and customizable approach to cooling your PC. With fan control software installed, you can monitor temperature levels and fine-tune fan speeds accordingly.
Launch the fan control software on your computer. The software’s user interface will display information about your system’s temperatures, fan speeds, and other relevant data. It may also allow you to create custom fan profiles or adjust pre-configured profiles.
Explore the different options and preferences available in the software. You can manually adjust fan speeds by dragging sliders or inputting specific values. Some software also offers the ability to adjust fan curves, which define the relationship between temperature and fan speed.
Experiment with different fan speed settings to find the best balance between cooling performance and noise levels. Keep in mind that higher fan speeds generally result in better cooling but at the expense of increased noise. Conversely, lower fan speeds will reduce noise levels but may lead to higher temperatures.
Save your changes and set the fan control software to start automatically when your computer boots up. This ensures that the fan speed settings are applied consistently each time you start your system.
It’s important to note that the functionalities and capabilities of fan control software may vary depending on the program you choose. Some software may offer additional features like automatic temperature-based fan control or the ability to create custom fan profiles based on different scenarios.
Be cautious when adjusting fan speeds and avoid setting fan speeds too low or too high, as extreme values can result in inadequate cooling or excessive noise. It’s recommended to monitor your system’s temperatures and fan speeds under different loads and adjust accordingly for optimal performance.
Using fan control software gives you precise control over your PC’s cooling, allowing you to customize fan speeds to suit your specific needs. In the next step, we will cover how to monitor and test fan speeds to ensure that your adjustments are effective.
Read more: How To Adjust HVAC Fan Speed
Step 5: Monitor and Test Fan Speed
After adjusting the fan speed on your PC, it’s important to monitor and test the changes you made to ensure that they are effective and working as intended. This step will help you verify that your system is cooling properly and that the fan speeds are appropriate.
Start by monitoring your system’s temperatures using monitoring software or built-in monitoring tools. Keep an eye on the CPU and GPU temperatures, as these are typically the components that generate the most heat. The software you installed for adjusting fan speeds may also include temperature monitoring features.
Run different tasks or applications that put your system under load to simulate real-world usage. This could include running intensive games, video editing software, or performing tasks that require a significant amount of processing power. Monitor the temperatures during these activities and observe how the fan speeds respond.
Ensure that the fan speeds increase when the temperatures rise and reduce when the temperatures drop. This indicates that the fan control adjustments you made are functioning correctly and providing adequate cooling for your system. If you notice any temperature spikes or issues, it may be necessary to readjust the fan speed settings.
Pay attention to the noise levels produced by the fans during different activities. If the noise is too loud or becomes bothersome, you may need to fine-tune the fan speed settings to strike a better balance between cooling performance and noise reduction. Remember, finding the optimal fan speed requires finding the right compromise for your specific needs.
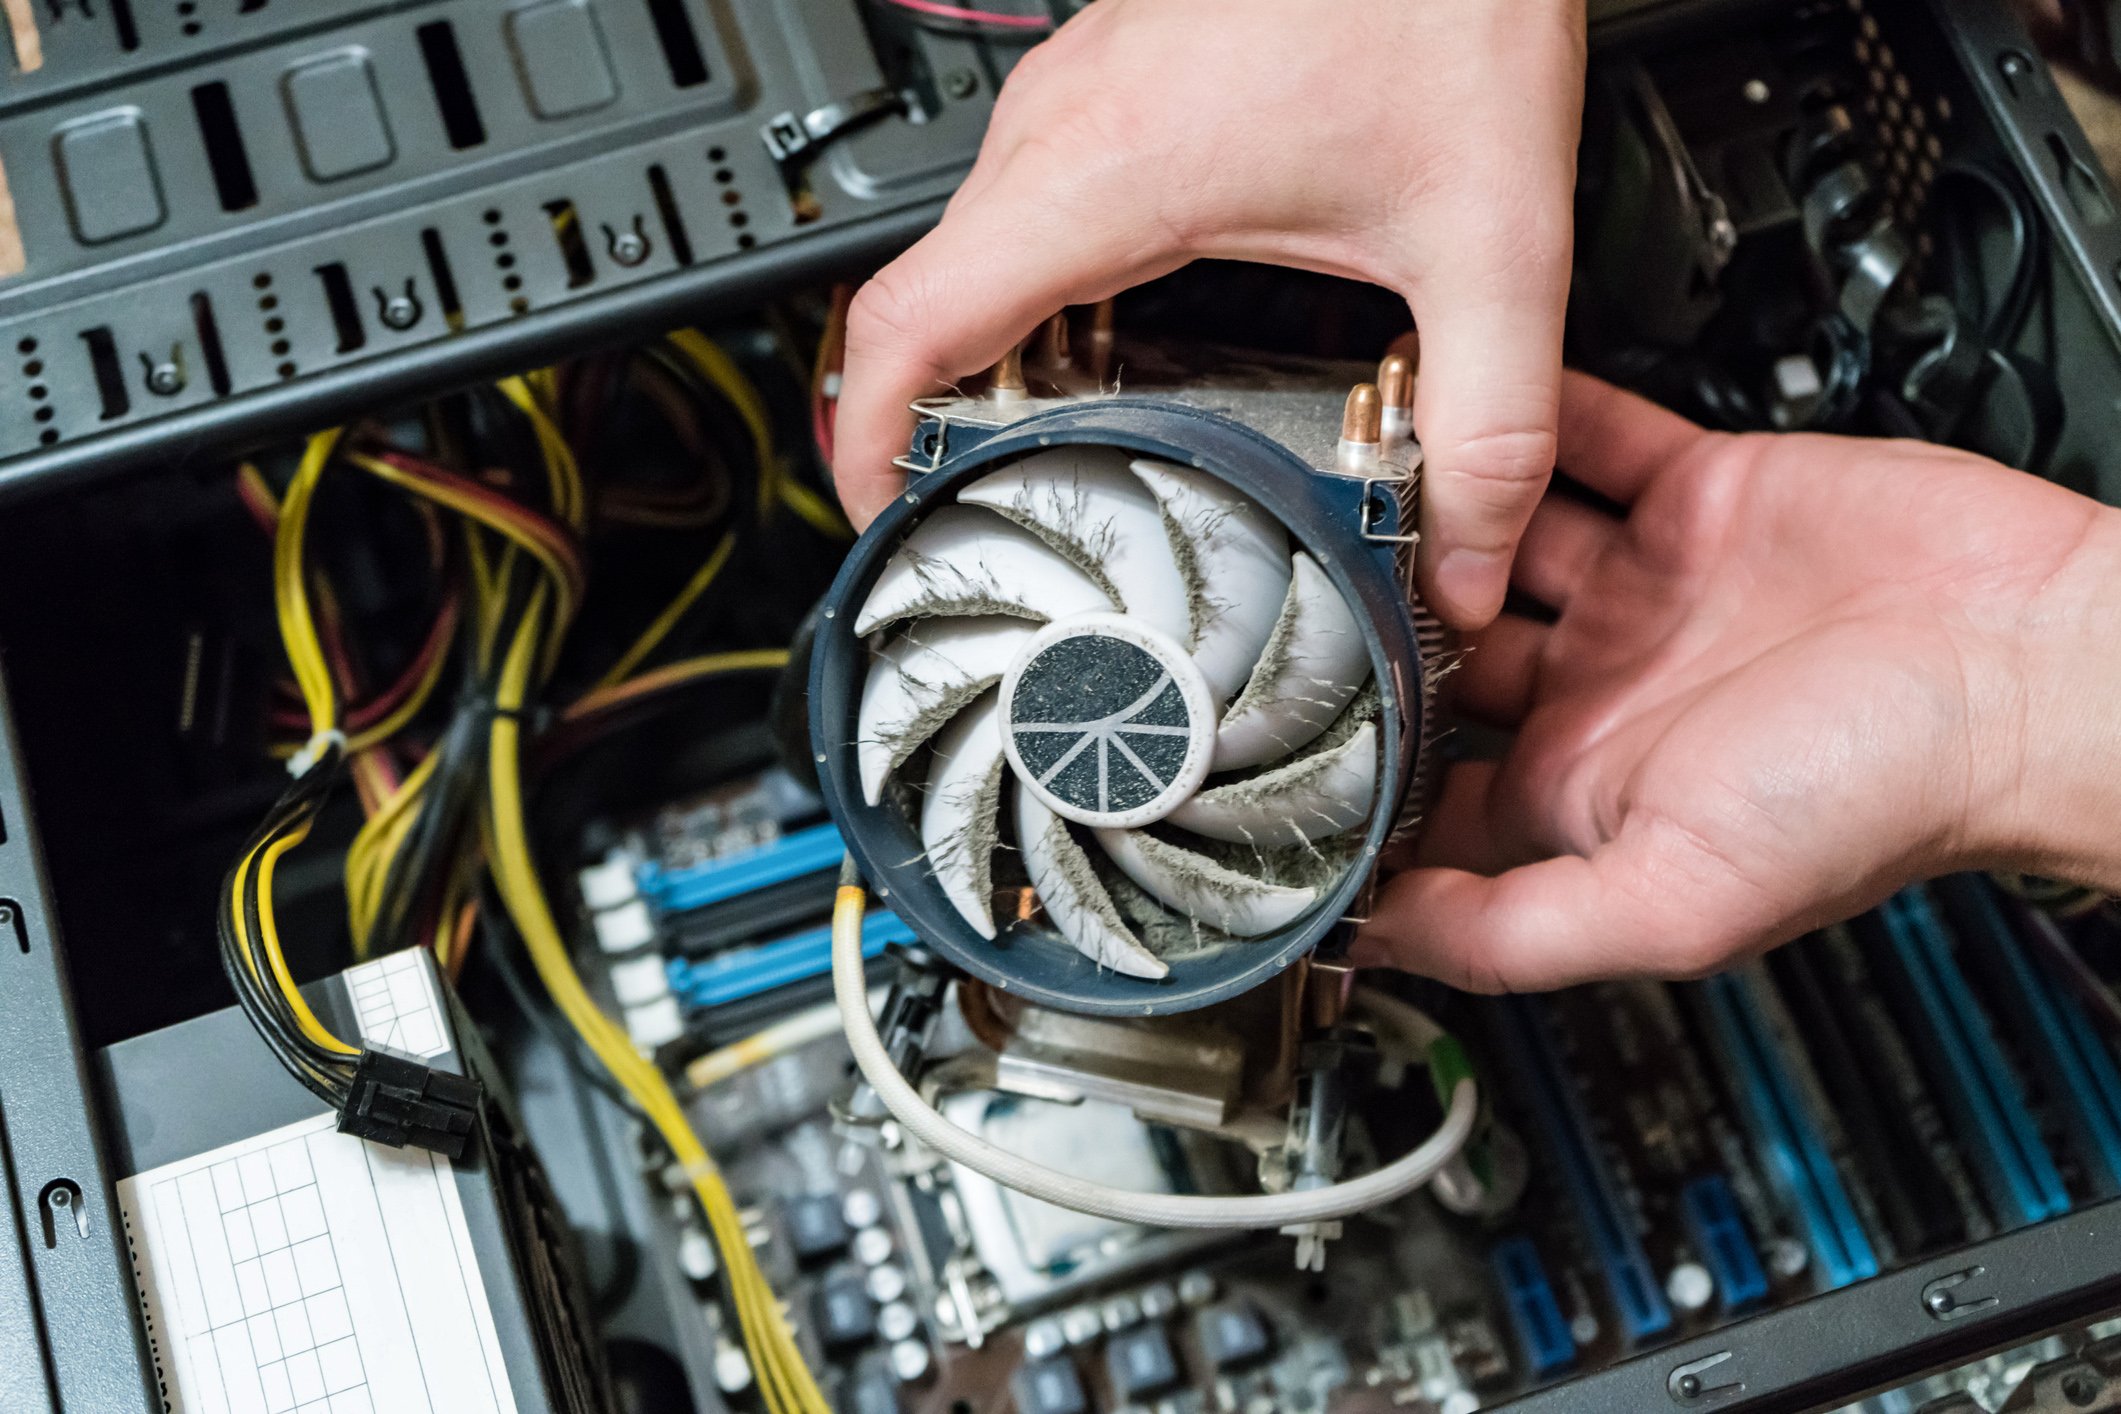
Don’t forget to occasionally clean the fans and ensure they are free from dust and debris. Accumulated dust can obstruct airflow and hinder cooling efficiency, which may require fans to run at higher speeds to compensate for the reduced airflow. Regular maintenance can help optimize cooling performance and reduce the need for excessive fan speeds.
By monitoring and testing your fan speeds, you can ensure that your adjustments are effective and that your system remains properly cooled. Keep a close eye on temperature levels and fan speeds, and make adjustments as necessary to maintain a balance between cooling performance and noise levels.
Congratulations! You have successfully learned how to adjust the fan speed on your PC. By following the steps outlined in this guide, you can optimize your system’s cooling and create a more comfortable and efficient computing experience.
Remember that every system is unique, and the optimal fan speed settings may vary depending on your specific hardware and usage patterns. Take the time to understand your system’s needs and make adjustments accordingly. With proper fan speed control, you can keep your PC running at optimal temperatures while keeping noise levels to a minimum.
Thank you for reading, and we hope this guide has been helpful for you in achieving the desired fan speed adjustments on your PC!
Conclusion
Adjusting the fan speed on your PC is an essential step in maintaining proper cooling and ensuring optimal performance. Whether you choose to adjust the fan speed through BIOS settings or use dedicated fan control software, finding the right balance between cooling efficiency and noise levels is crucial.
In this guide, we covered the steps to adjust fan speed using both BIOS settings and fan control software. Checking your BIOS settings allows for basic control over fan speed, while installing fan control software provides more advanced and customizable options.
Remember to monitor and test your fan speeds after making adjustments. Monitoring your system’s temperatures and observing how the fan speed responds to different loads will help you determine whether your adjustments are effective or if further fine-tuning is needed.
It’s important to note that each system is different, and the optimal fan speed settings may vary. Finding the perfect balance depends on factors such as your hardware configuration, system usage, and personal preferences. Experimentation and monitoring are key to achieving the ideal cooling performance for your specific needs.
Don’t forget to clean your fans regularly to maintain proper airflow and cooling efficiency. Dust and debris can clog the fans and reduce their effectiveness, which may result in the need for higher fan speeds to compensate for restricted airflow.
By following the steps outlined in this guide and paying attention to your system’s needs, you can achieve optimal cooling performance while keeping noise levels to a minimum. A well-regulated fan speed ensures a reliable and comfortable computing experience.
Thank you for reading this guide on how to adjust the fan speed on your PC. We hope the information provided has been helpful, and that you can now confidently optimize the fan speed on your computer.
Remember to always proceed with caution when making changes to your system and consult professional assistance if you are unsure or uncomfortable with the process. Here’s to a cooler, quieter, and more efficient PC!
Frequently Asked Questions about How To Adjust Fan Speed On Pc
Was this page helpful?
At Storables.com, we guarantee accurate and reliable information. Our content, validated by Expert Board Contributors, is crafted following stringent Editorial Policies. We're committed to providing you with well-researched, expert-backed insights for all your informational needs.


0 thoughts on “How To Adjust Fan Speed On Pc”