Home>Articles>How To Change A Water Filter On A Whirlpool Refrigerator
Articles
How To Change A Water Filter On A Whirlpool Refrigerator
Modified: October 28, 2024
Learn how to change a water filter on your Whirlpool refrigerator with this step-by-step guide. Find expert advice and troubleshooting tips in our comprehensive articles.
(Many of the links in this article redirect to a specific reviewed product. Your purchase of these products through affiliate links helps to generate commission for Storables.com, at no extra cost. Learn more)
Introduction
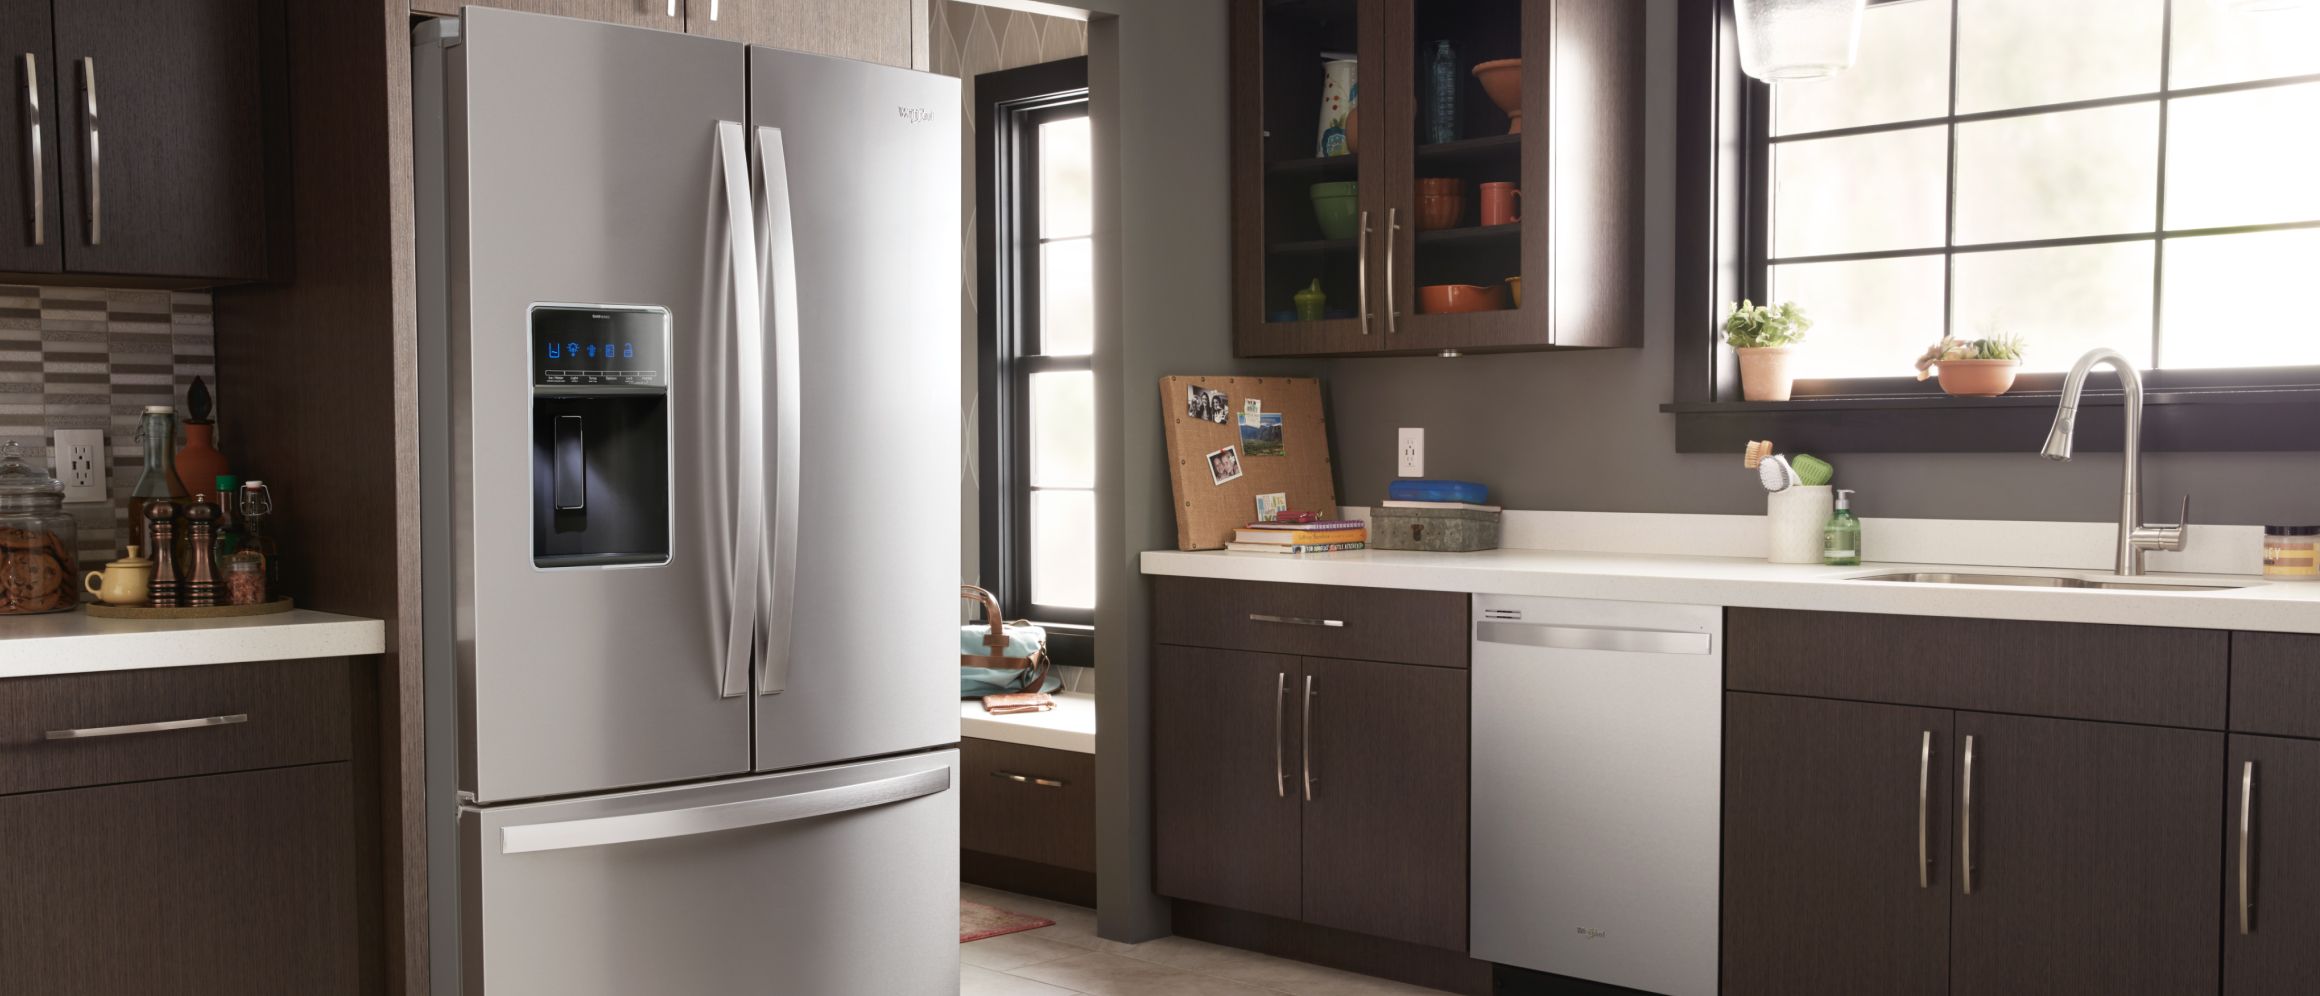
Welcome to the comprehensive guide on how to change a water filter on a Whirlpool refrigerator. If you’ve noticed a decline in the taste or quality of your water, it may be time to replace the filter. A water filter plays a crucial role in removing impurities and contaminants from your refrigerator’s water supply, ensuring clean and fresh water for you and your family.
Changing the water filter is a simple and essential maintenance task that should be performed regularly to maintain the optimal performance of your refrigerator and to safeguard your health. In this step-by-step guide, we will walk you through the process of changing the water filter on your Whirlpool refrigerator, providing you with all the necessary information and tips to complete the task successfully.
Before we delve into the steps, it’s important to note that the specific instructions and procedures may vary slightly depending on the model and type of Whirlpool refrigerator you own. Therefore, always consult the manufacturer’s instructions and refer to your refrigerator’s manual for any model-specific guidelines.
Now, let’s gather the necessary tools and materials to ensure a smooth and hassle-free filter replacement process.
Key Takeaways:
- Regularly changing the water filter in your Whirlpool refrigerator ensures clean and safe drinking water for you and your family, while also maintaining the optimal performance of your appliance.
- Following the step-by-step guide and manufacturer’s instructions for filter replacement will help you successfully change the water filter on your Whirlpool refrigerator, ensuring delicious and safe drinking water for years to come.
Read more: How To Change Water Filter Ge Refrigerator
Step 1: Gather the necessary tools and materials
Before you begin changing the water filter on your Whirlpool refrigerator, make sure you have the following tools and materials on hand:
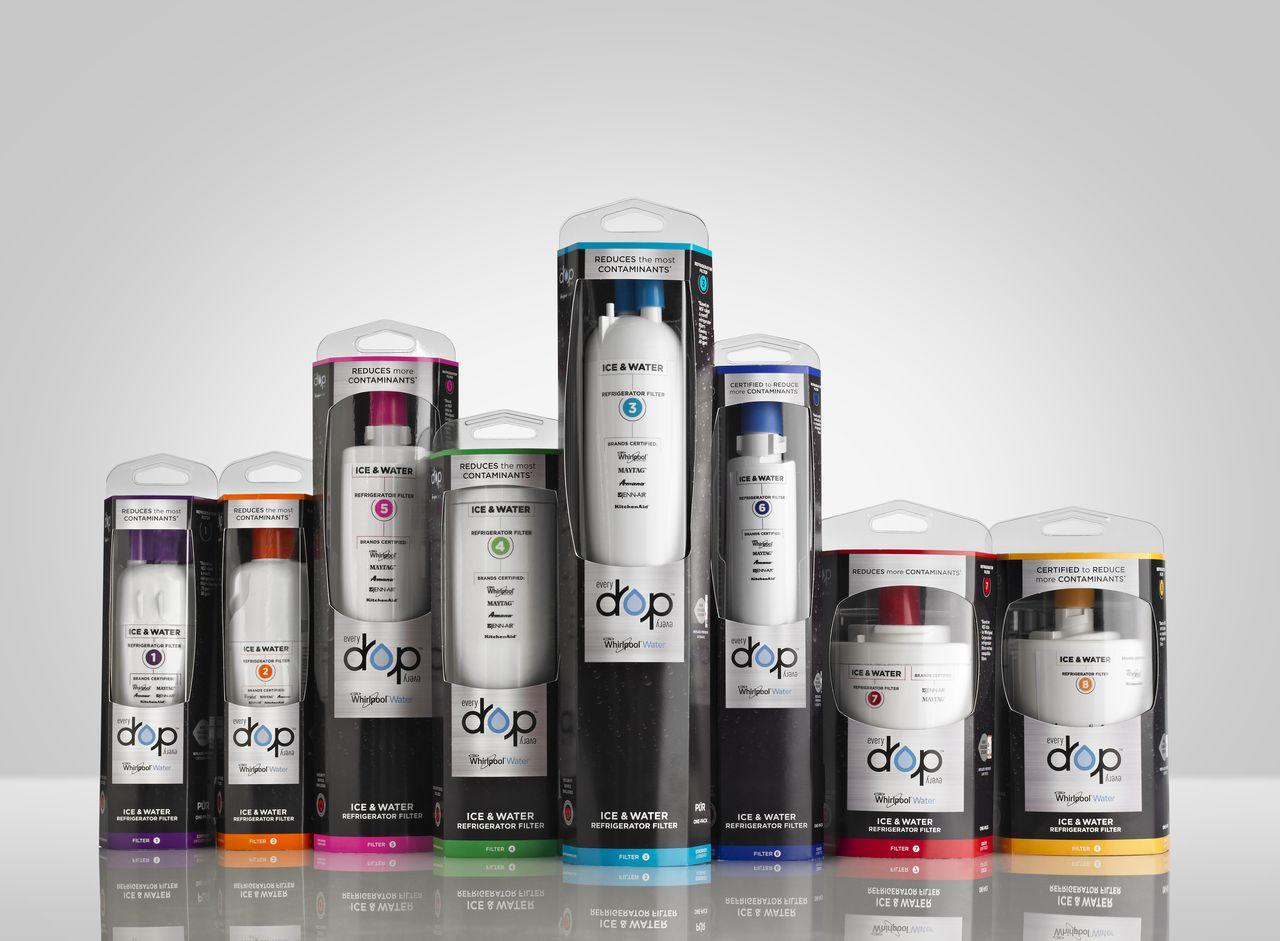
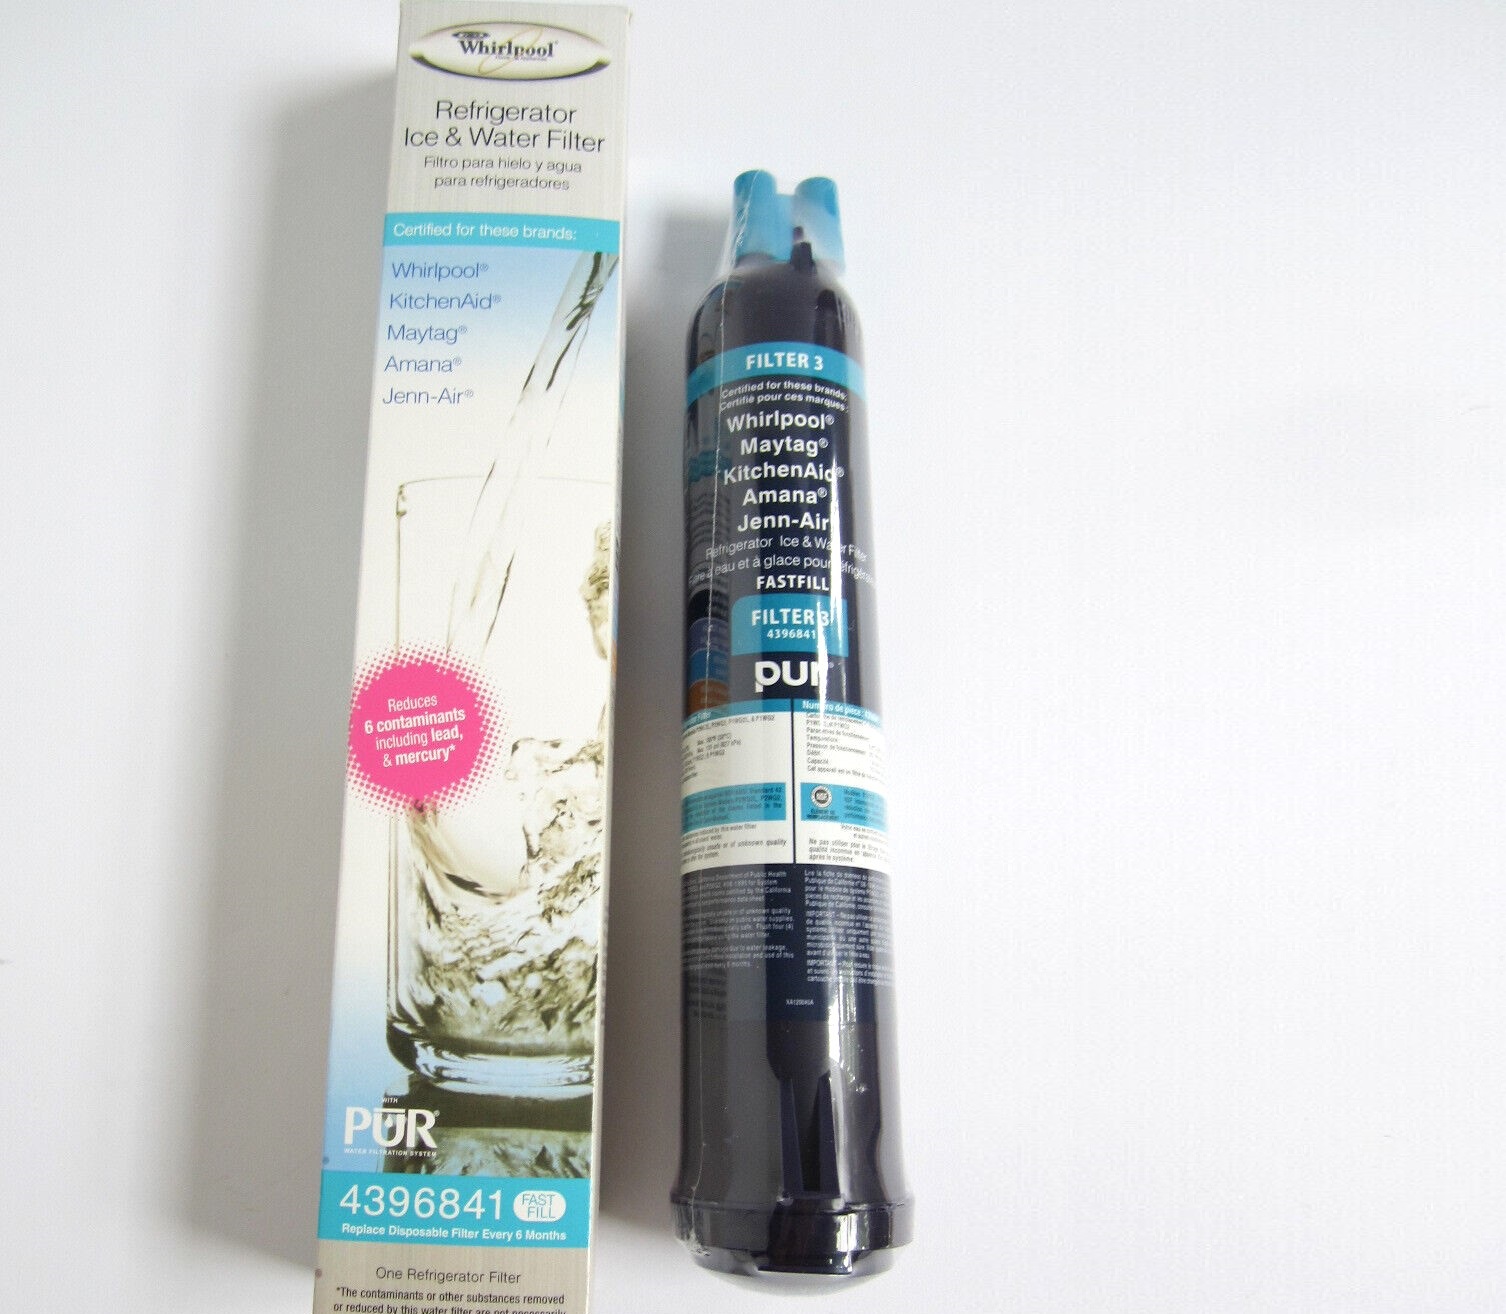
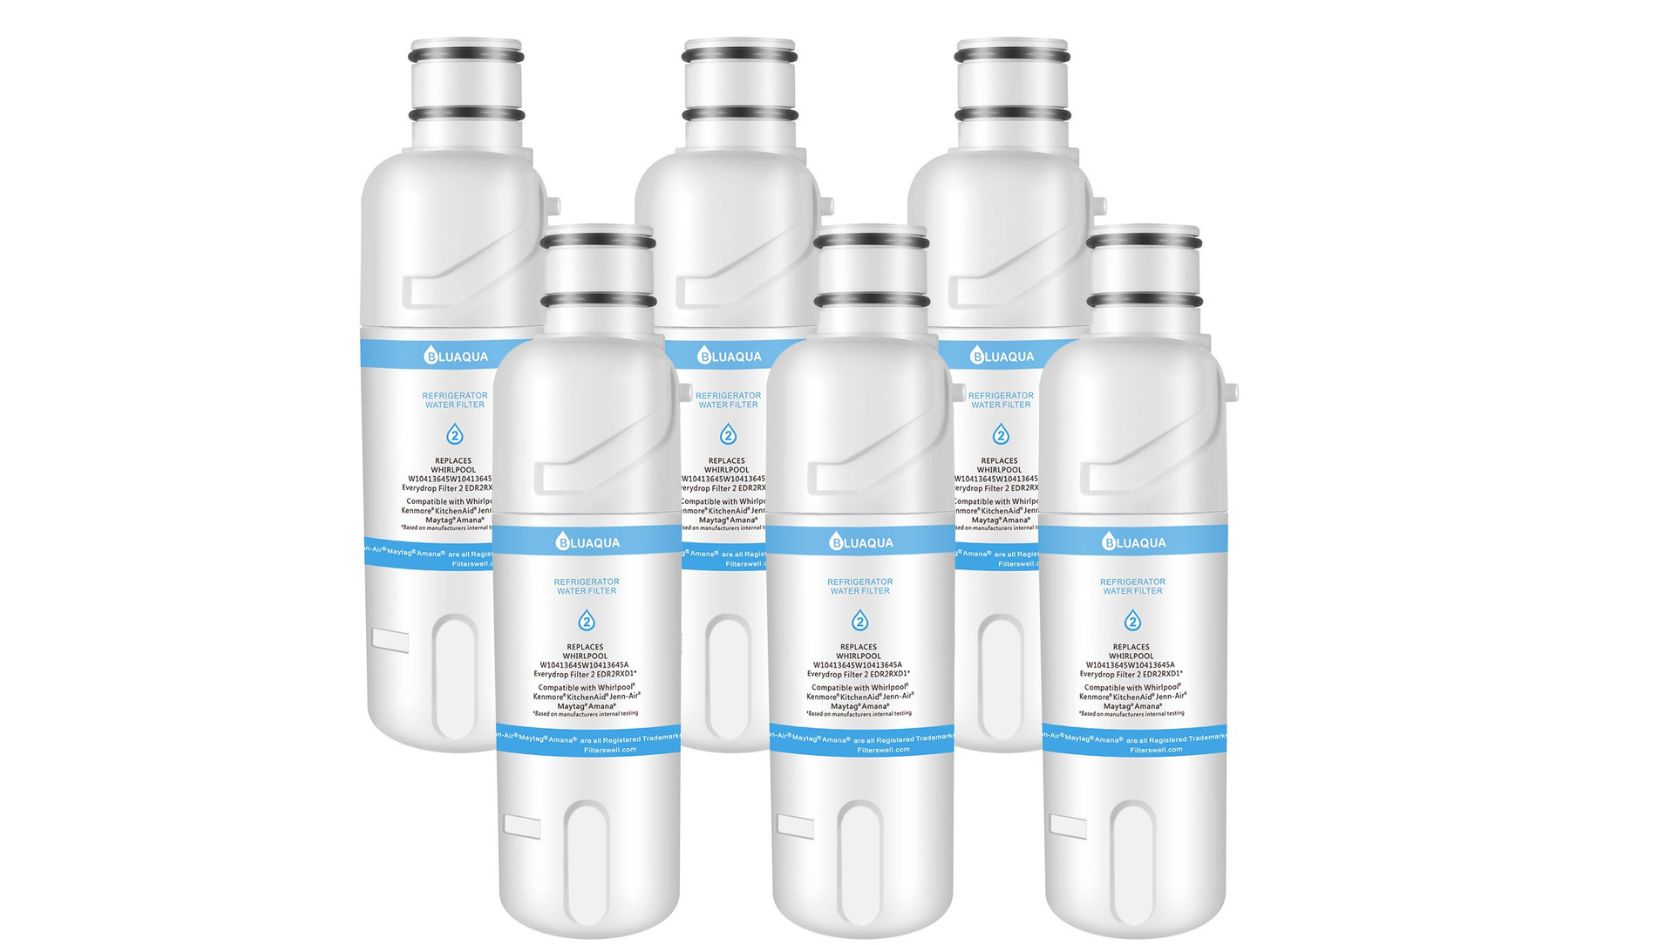
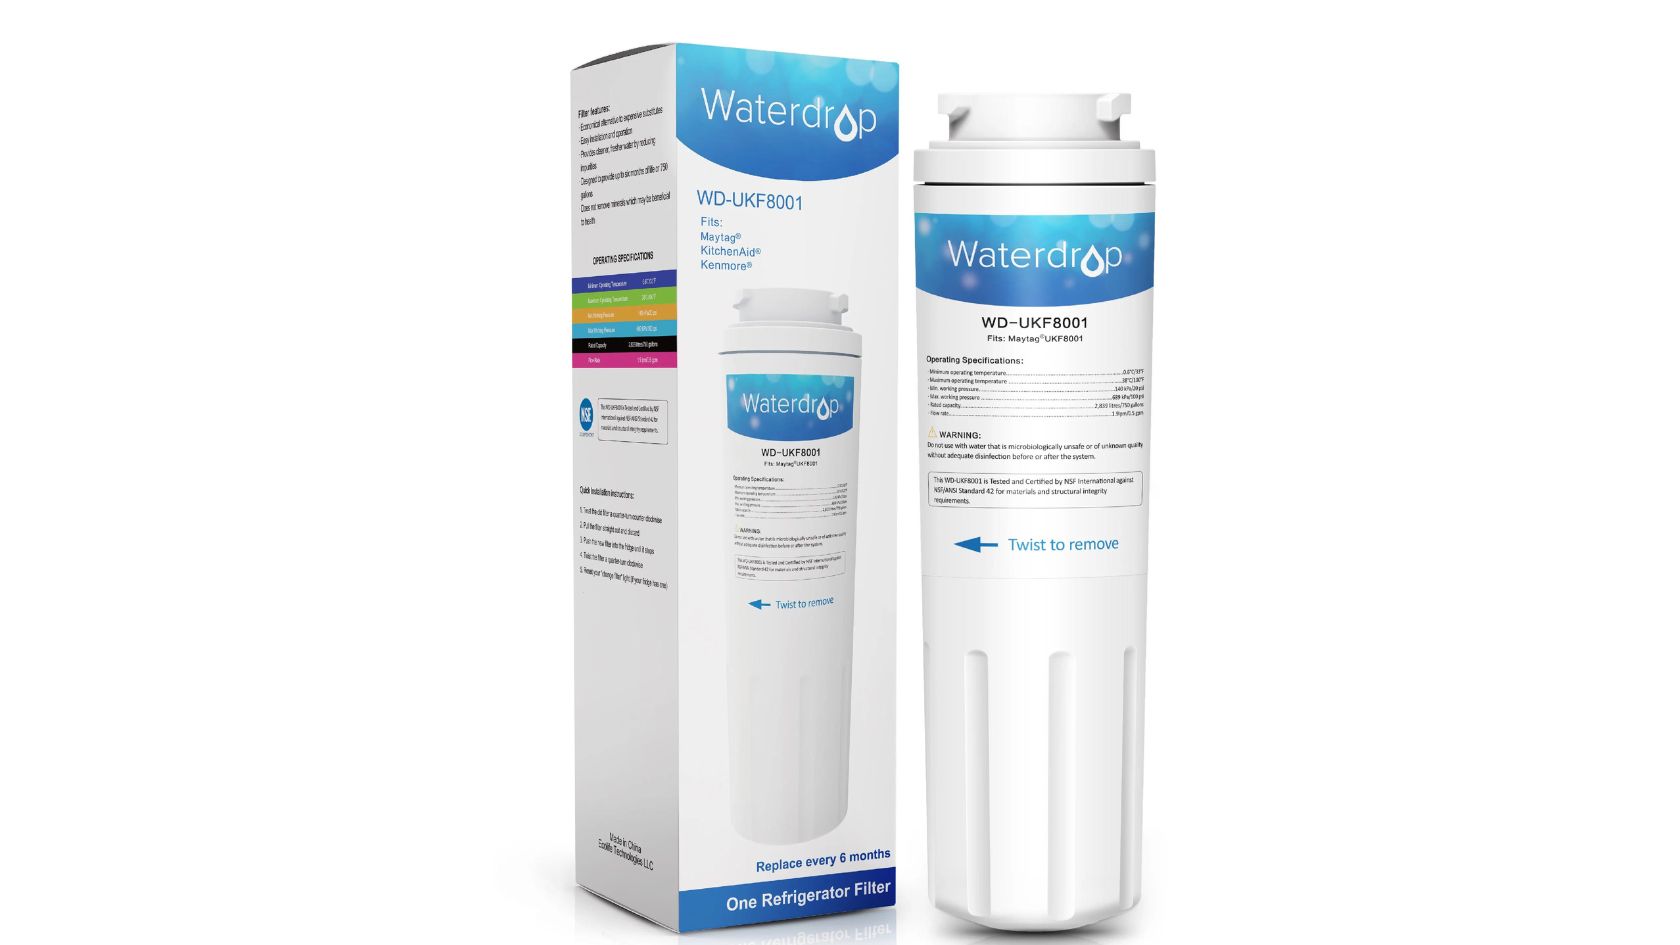
- A replacement water filter specifically designed for your Whirlpool refrigerator model. It is important to use the correct filter to ensure compatibility and optimal performance.
- Gloves to protect your hands during the process.
- A clean cloth or towel to wipe away any spills or drips.
It’s essential to have the correct replacement filter as different models may require different filters. The part number and compatibility information can typically be found in your refrigerator’s manual or on the manufacturer’s website. If you’re unsure about the right filter for your refrigerator, it’s best to consult a professional or contact Whirlpool customer support for assistance.
Once you have gathered all the necessary tools and materials, you are ready to move on to the next step: locating the water filter on your Whirlpool refrigerator.
Step 2: Locate the water filter
Locating the water filter on your Whirlpool refrigerator is the next step in the process. The placement of the water filter can vary depending on the model and type of refrigerator you own. Here are some common locations where you might find the water filter:
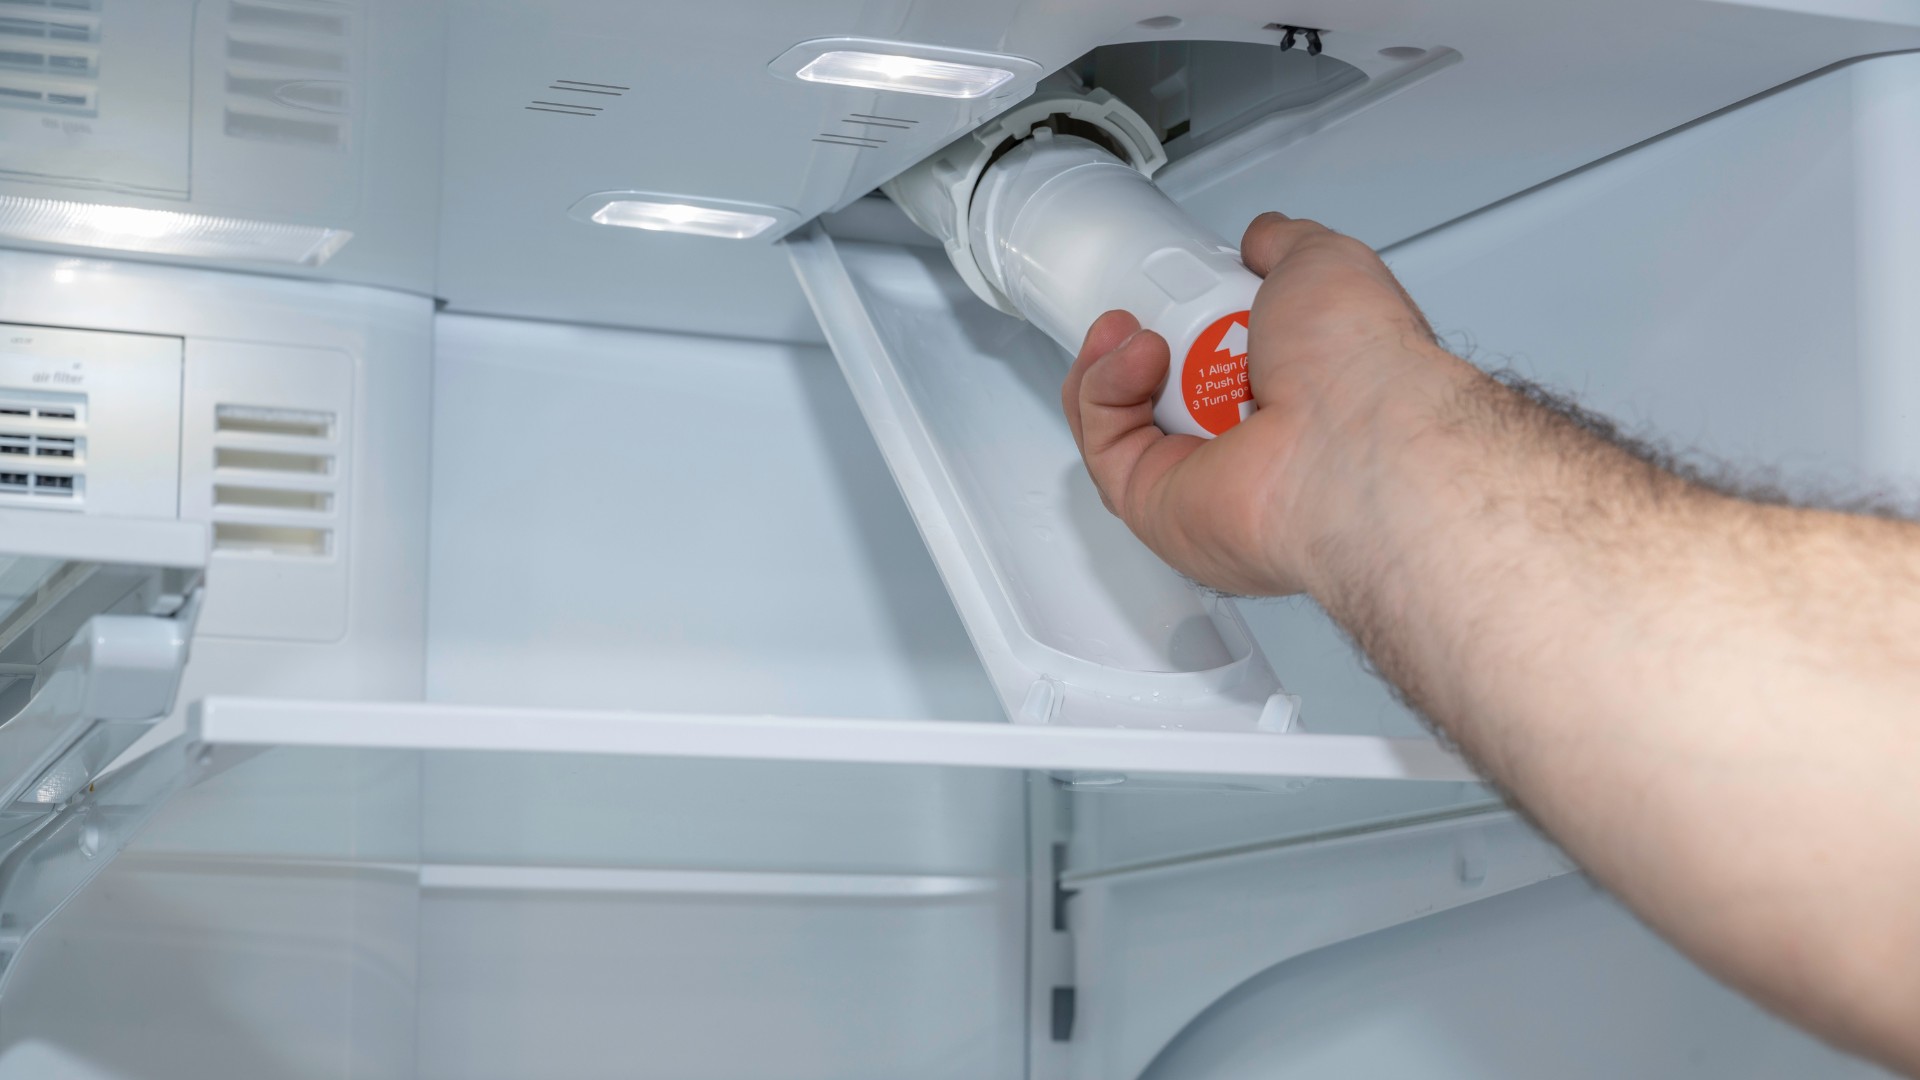
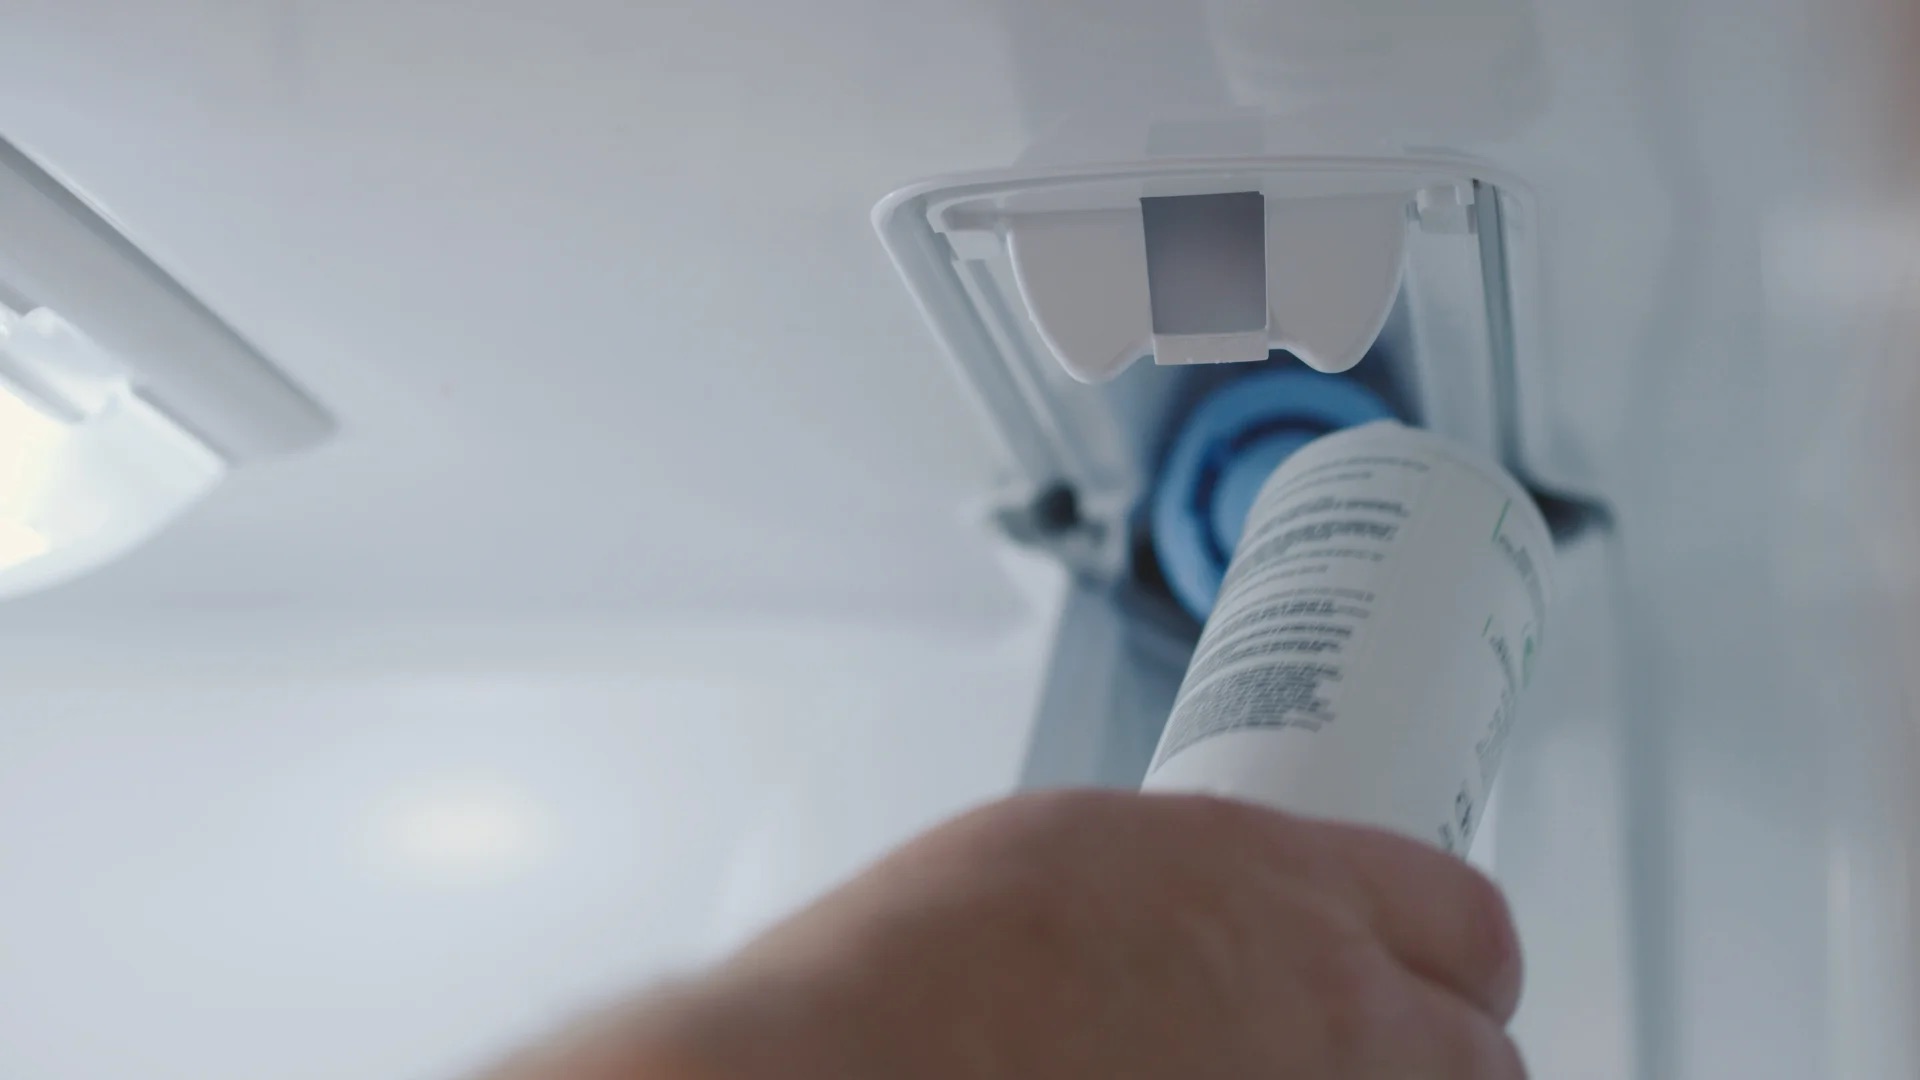
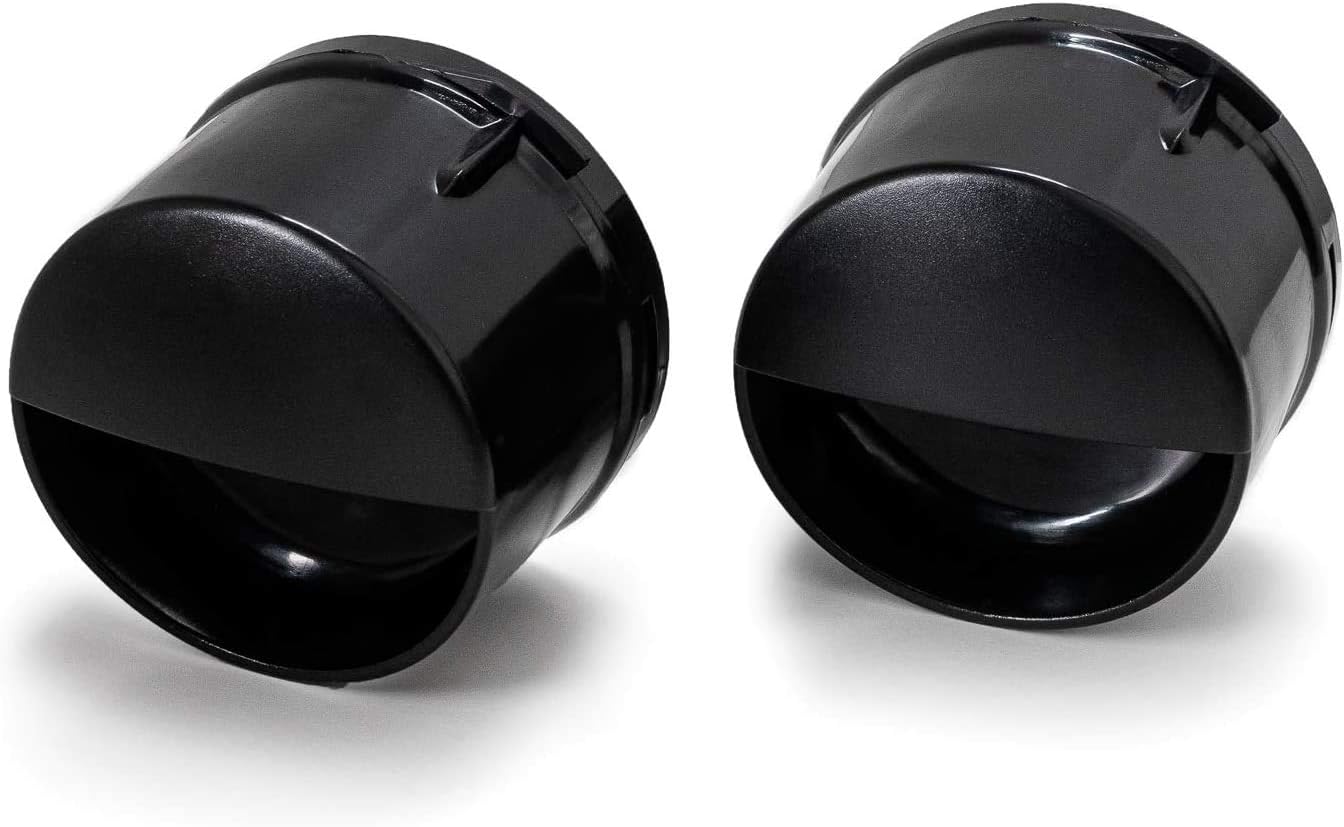
- Inside the refrigerator: Some Whirlpool refrigerators have the water filter located inside the refrigerator compartment. Look for a filter housing near the top of the refrigerator or on the back wall.
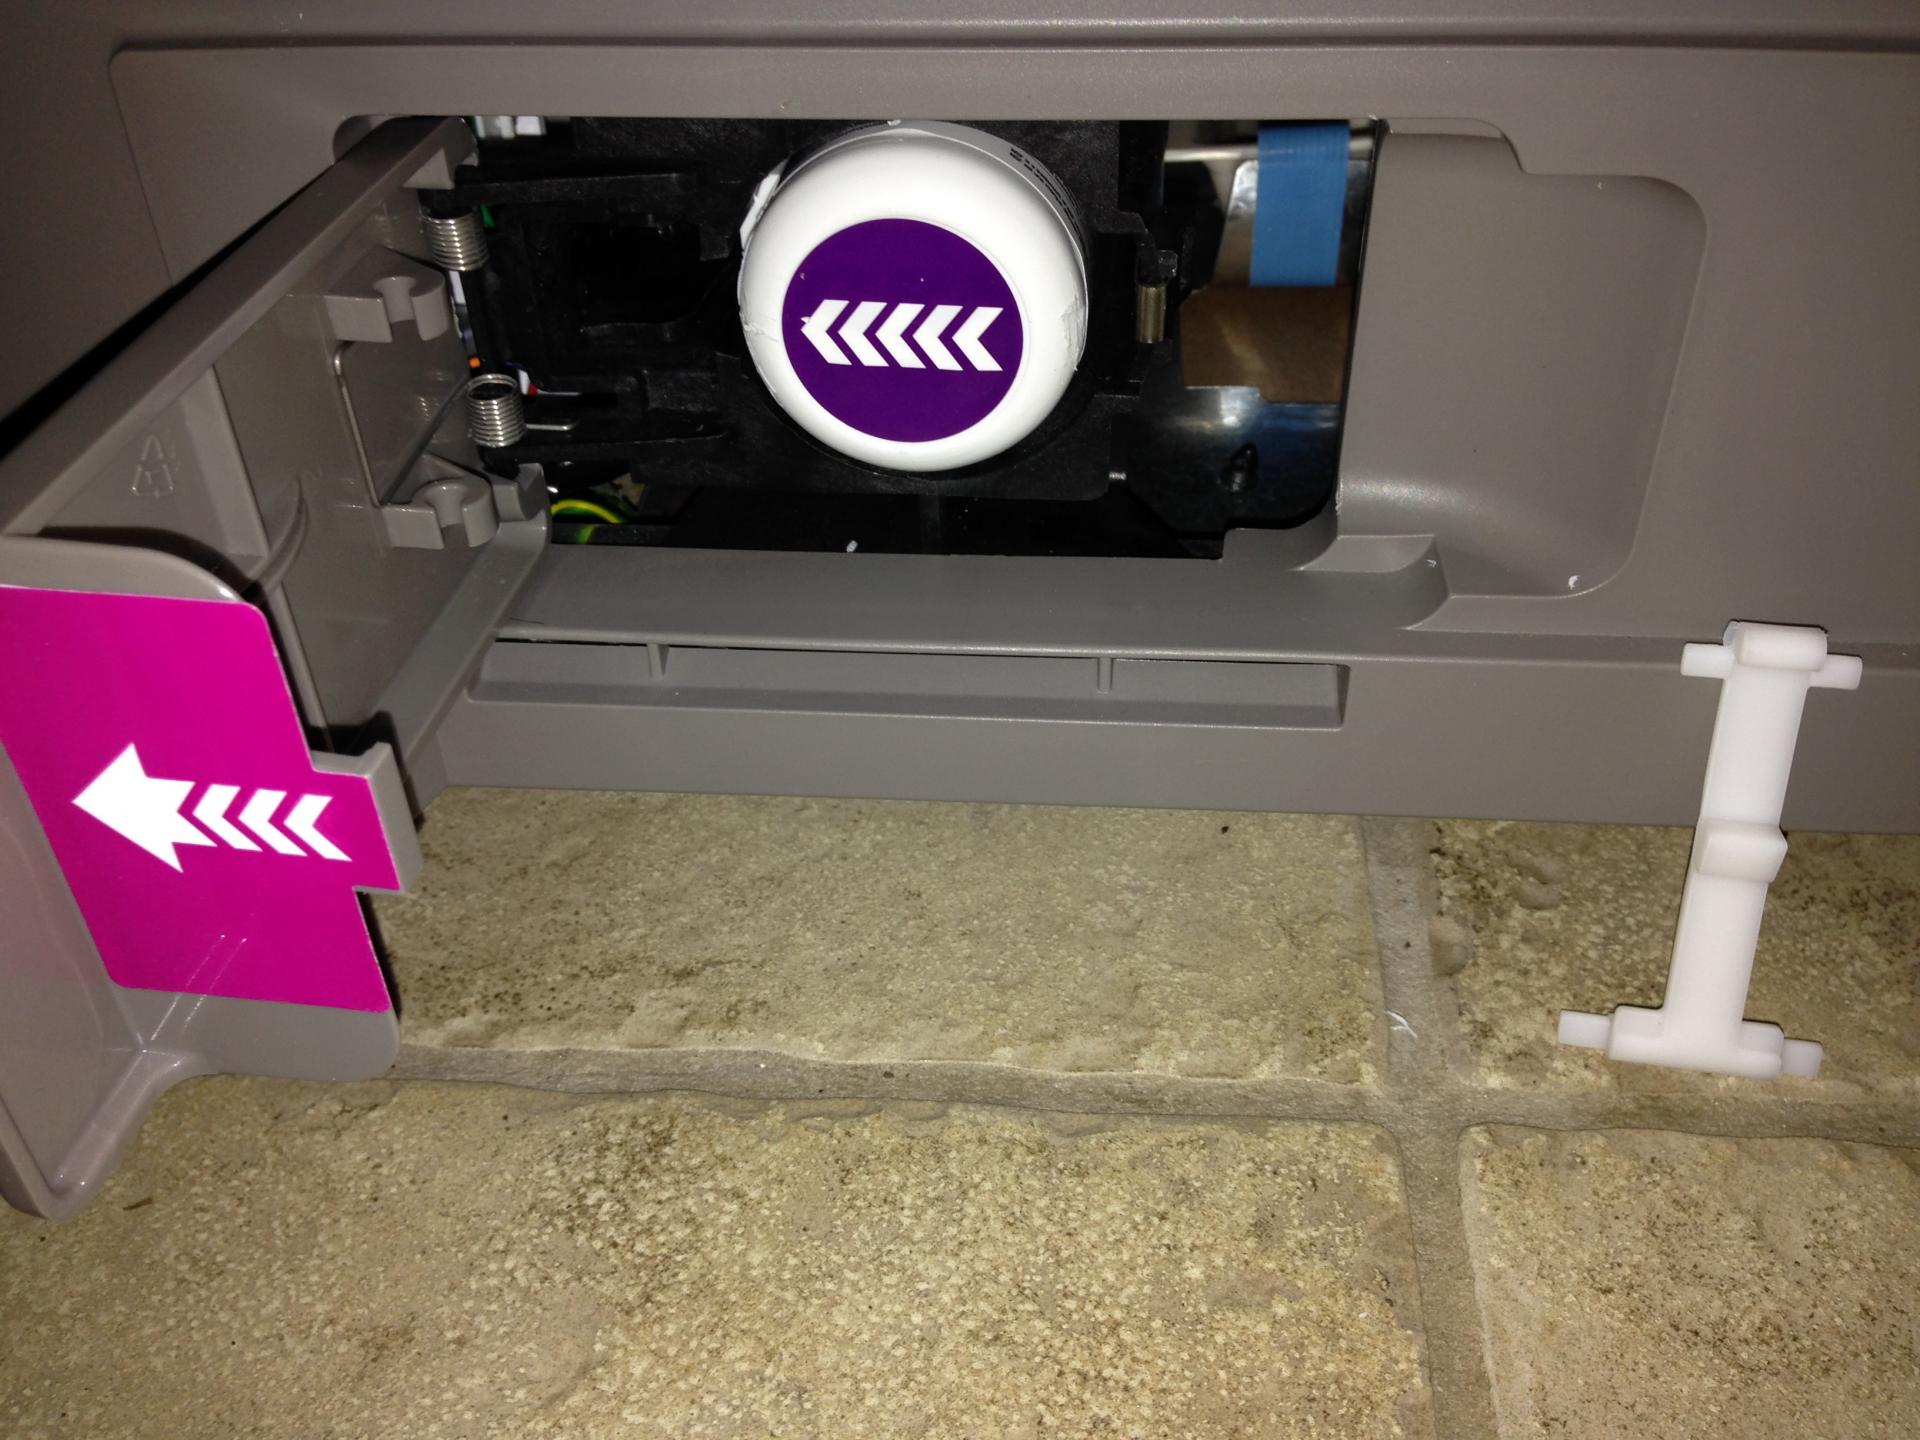
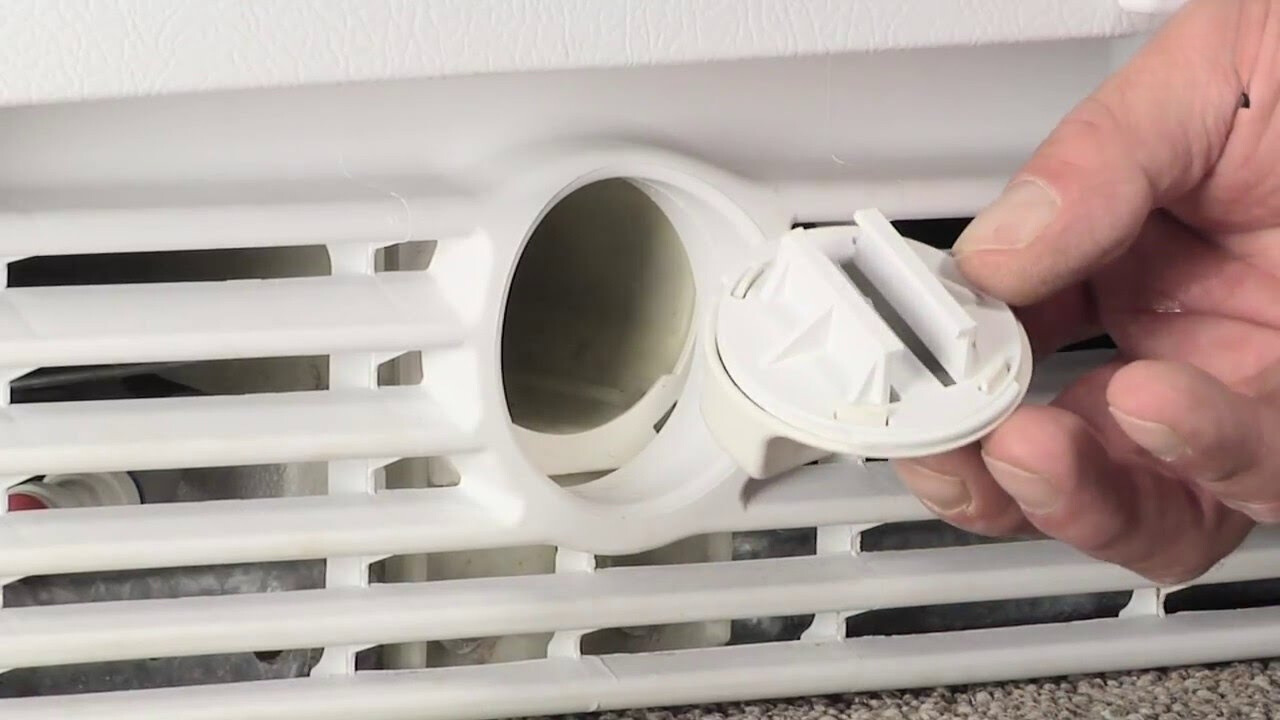
- Bottom grill: Other models may have the water filter located at the bottom of the refrigerator, behind a grill cover. The grill cover can typically be removed by pushing the release button or sliding it to the side.
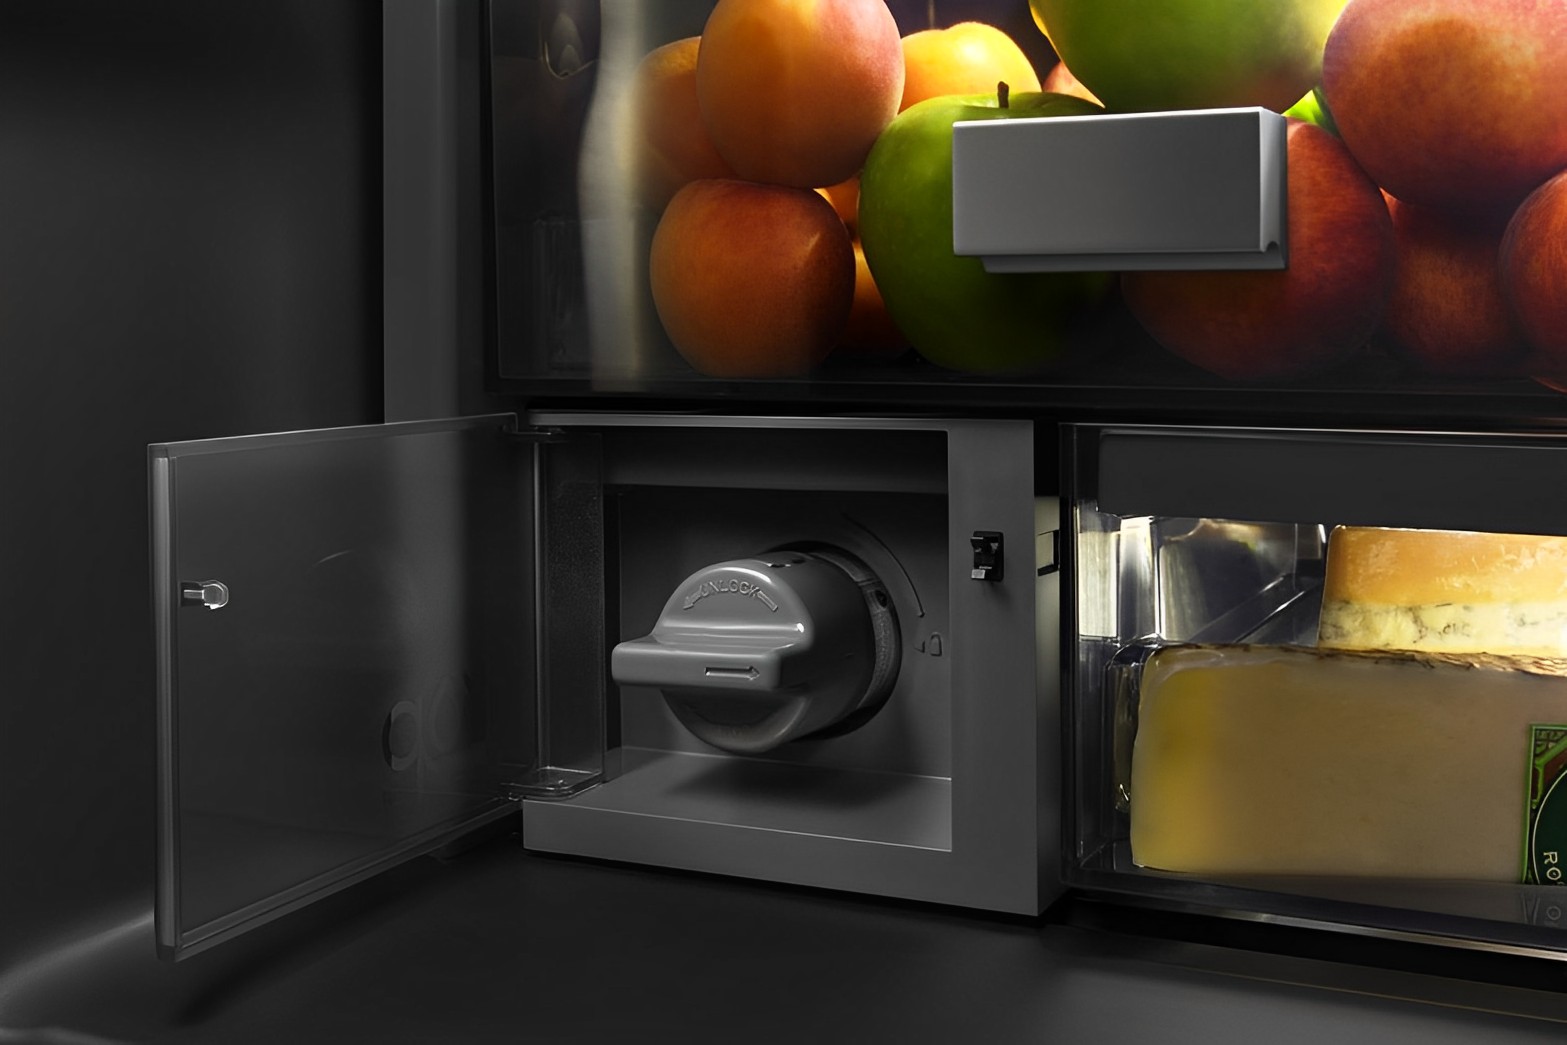
- Inside the deli drawer: In certain Whirlpool refrigerator models, the water filter can be found inside the deli drawer. You may need to remove the drawer to access the filter.
Refer to your refrigerator’s manual or check the manufacturer’s website for detailed instructions on locating the water filter for your specific model. Additionally, some refrigerators have a filter location label or sticker on the front or inside the refrigerator that provides guidance.
Once you have located the water filter, you are ready to move on to the next step: preparing for filter replacement.
Step 3: Prepare for filter replacement
Before replacing the water filter on your Whirlpool refrigerator, it is important to prepare and take a few precautions to ensure a smooth and clean process. Here are the steps to follow:
- Turn off the water supply: To avoid any leaks or water spills during the filter replacement process, locate the water shut-off valve that supplies water to the refrigerator. Turn off the valve to stop the water flow.
- Dispense any remaining water: Next, dispense any remaining water from the dispenser to relieve the pressure in the water line. This step will reduce the risk of water leakage when you remove the old filter.
- Protect the area: Place a towel or pan beneath the filter housing to catch any drips or spills that may occur during the filter change. This will help keep your refrigerator and surrounding area clean.
- Put on gloves: It is always recommended to wear gloves when handling the water filter. This will protect your hands from any contaminants and provide a better grip when removing and installing the filter.
By following these preparation steps, you are now ready to remove the old water filter from your Whirlpool refrigerator. This will be covered in the next step.
Step 4: Remove the old water filter
Now that you are prepared, it’s time to remove the old water filter from your Whirlpool refrigerator. Follow these steps:
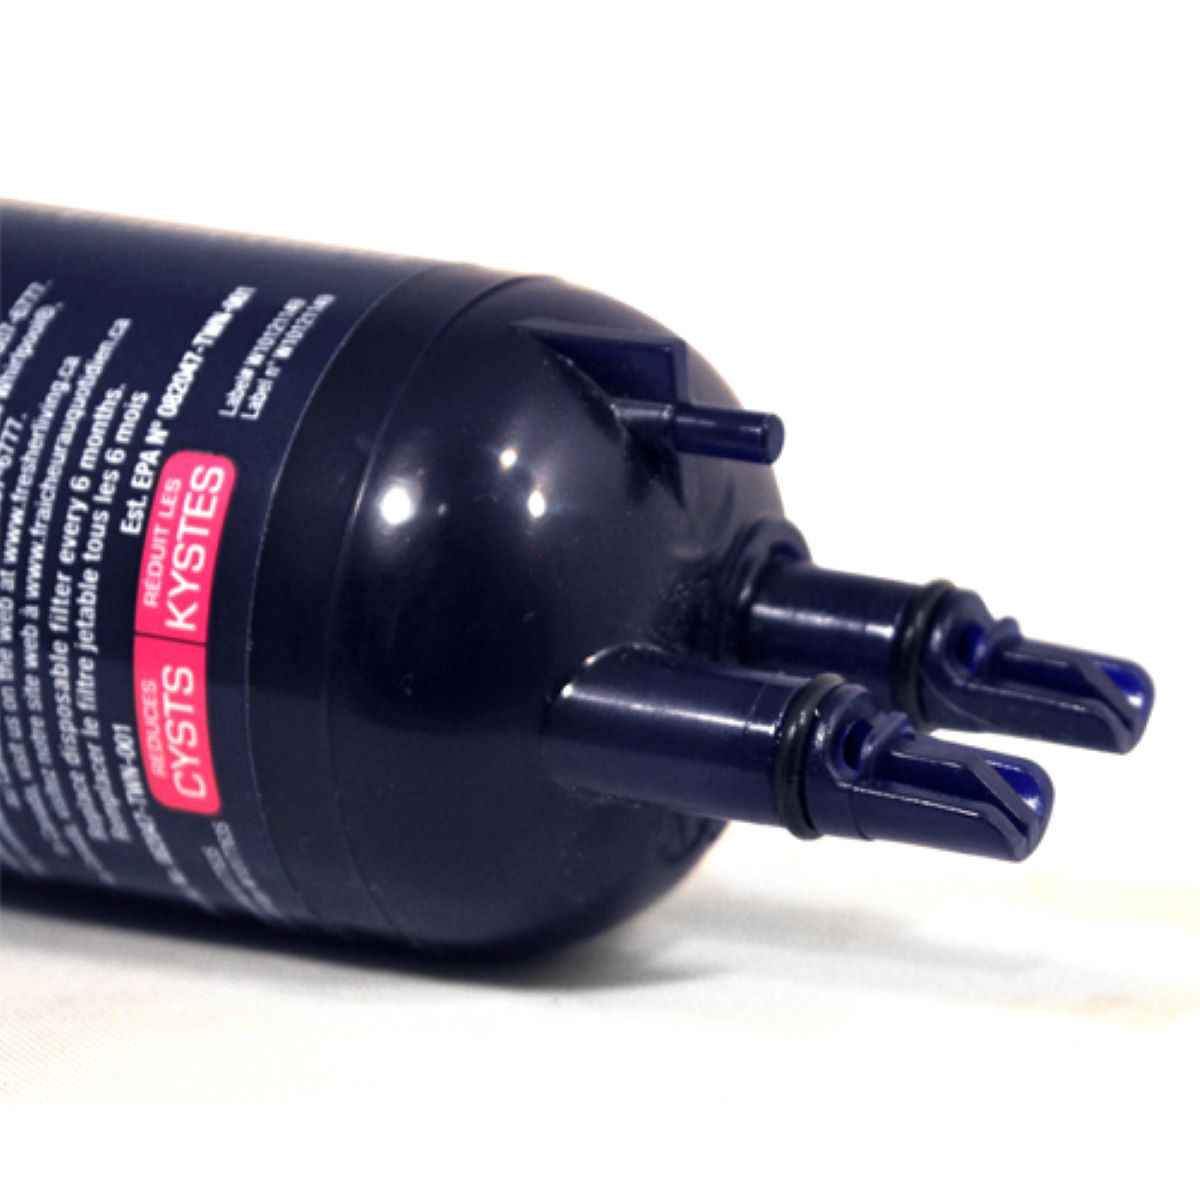
- Identify the filter housing: Locate the filter housing where the old water filter is installed. This housing is typically a cylindrical or rectangular-shaped compartment.
- Release the filter: Depending on your refrigerator model, you may need to twist the filter counterclockwise or push a release button on the housing to unlock the filter. Consult your refrigerator’s manual if unsure.
- Remove the filter: Once released, carefully pull the old filter straight out from the housing. Be cautious as it may still contain water.
- Discard the filter: Properly dispose of the old filter in accordance with local regulations. Refer to the manufacturer’s instructions or consult your local waste management guidelines.
It’s worth noting that some filters have a cap or cover that needs to be removed before installation. If your old filter has a cap, transfer it to the new filter or discard it if not reusable.
Now that you have successfully removed the old water filter, it’s time to install the new filter, which will be covered in the next step.
Step 5: Install the new water filter
With the old water filter removed, it’s time to install a new filter into your Whirlpool refrigerator. Follow these steps to ensure proper installation:
- Check the new filter: Before installing the new water filter, double-check that it is the correct replacement for your Whirlpool refrigerator model. Confirm the compatibility and compatibility information found in your refrigerator’s manual or on the manufacturer’s website.
- Prepare the new filter: If your new filter has a cap or cover, remove it before installation. Some filters come with protective seals or stickers. Make sure to remove these as well.
- Insert the new filter: Align the new filter with the filter housing and push it into place. Ensure it is fully seated and properly aligned with the housing. You may need to twist the filter clockwise or use slight force to secure it in position. Double-check for any installation instructions specific to your model.
- Lock the filter in place: Once the new filter is inserted, firmly twist it clockwise or engage the lock mechanism as instructed by your refrigerator’s manual. This will ensure a proper seal and secure the filter in place.
It is important to note that some filters require priming or flushing before use. Check the manufacturer’s instructions to see if this is necessary for your specific filter. Priming may involve running water through the filter for a certain amount of time to remove any trapped air or impurities.
With the new water filter securely in place, it’s time to move on to the next step: resetting the water filter indicator.
To change the water filter on a Whirlpool refrigerator, locate the filter housing in the upper right-hand corner of the refrigerator compartment. Turn the filter counterclockwise to remove it, then replace it with a new filter by turning it clockwise until it locks into place. Be sure to run water through the dispenser for a few minutes to flush out any air or loose carbon particles.
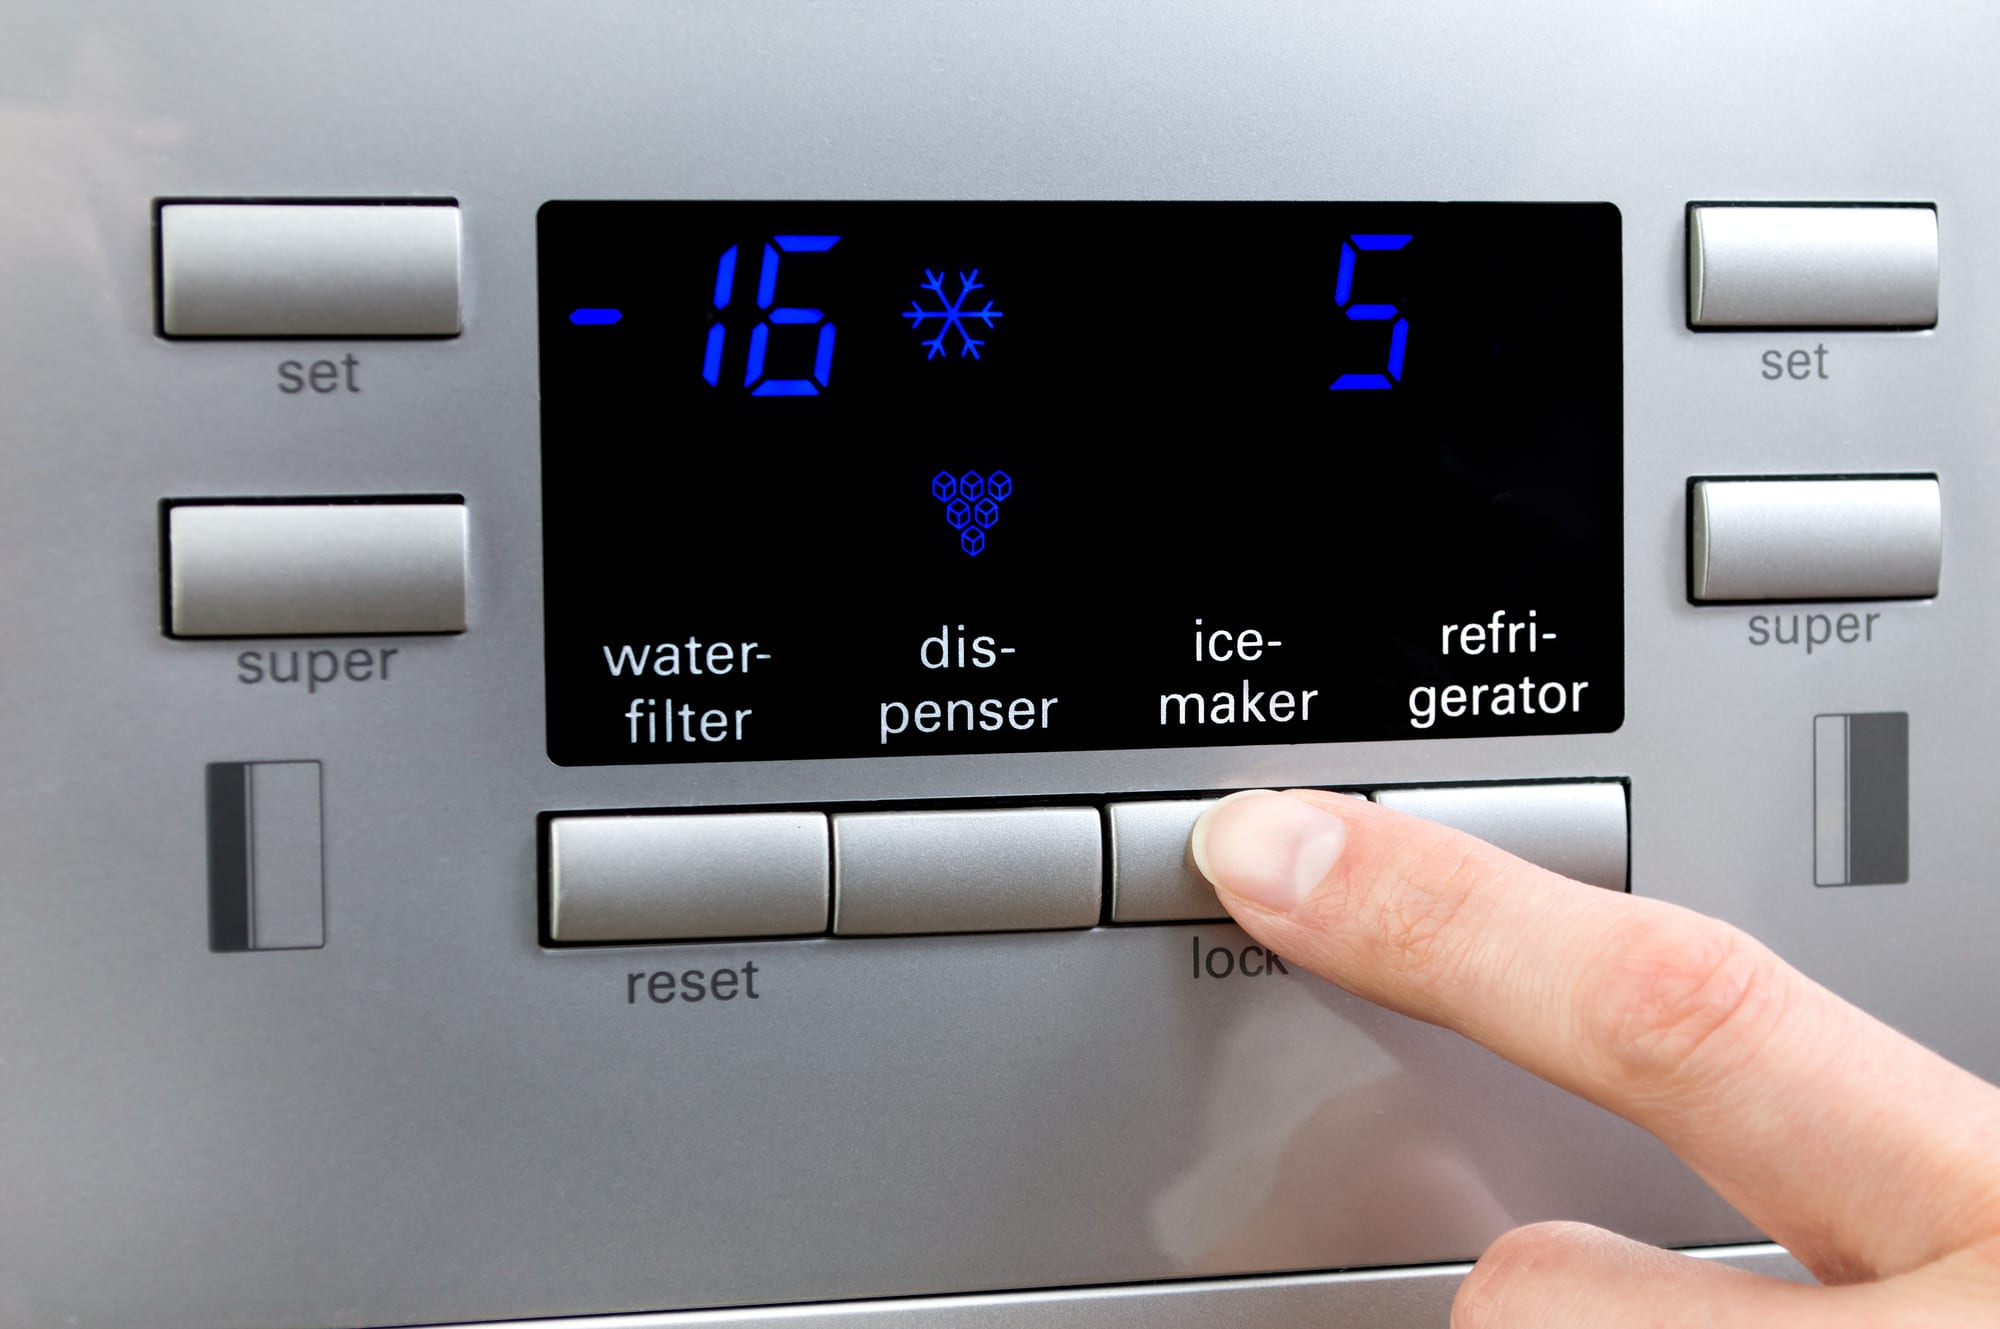
Step 6: Reset the water filter indicator
After installing the new water filter in your Whirlpool refrigerator, it’s important to reset the water filter indicator. This step ensures that your refrigerator accurately tracks the lifespan of the new filter. Here’s how to reset the water filter indicator:
- Locate the filter reset button: The filter reset button is usually located on the control panel of your refrigerator. Refer to your refrigerator’s manual if you’re unsure where to find it.
- Press and hold the reset button: Press and hold the reset button for a few seconds until the filter indicator light changes or turns off. This action will reset the timer and let the refrigerator know that a new filter has been installed.
- Confirm the reset: Check if the filter indicator light has been reset or turned off. The specific instructions may vary depending on your Whirlpool refrigerator model, so consult your manual for verification.
By resetting the water filter indicator, you ensure that your refrigerator accurately monitors the usage of the new filter. This allows you to stay aware of when it’s time to replace the filter in the future.
With the water filter indicator reset, it’s time to move on to the next step: running water through the new filter.
Step 7: Run water through the new filter
After installing a new water filter in your Whirlpool refrigerator, it’s important to properly prime and flush the filter before use. This process helps remove air and any loose particles that may be present in the new filter. Follow these steps to run water through the new filter:
- Open the water dispenser: Locate the water dispenser on the exterior of your refrigerator and open it.
- Place a container under the dispenser: Position a container, such as a pitcher or glass, beneath the water dispenser to collect the water.
- Flush the filter: Press and hold the dispenser lever or button for a few minutes to flush water through the new filter. This will help remove any air or loose particles that may have accumulated during installation.
- Monitor the water flow: Check the water flow for any trapped air or unusual discolouration. Initially, the water may appear cloudy or contain air bubbles, but it should clear up after a few minutes of flushing.
- Dispose of the flushed water: Once the water runs clear and there are no signs of air or debris, discard the flushed water from the container.
By running water through the new filter, you ensure that any impurities or air trapped in the filter are removed, allowing for clean and fresh water to be dispensed from your refrigerator.
With water successfully run through the new filter, it’s time to move on to the next step: checking for leaks.
Step 8: Check for leaks
Once you have installed the new water filter and flushed it properly, it’s important to check for any potential leaks. This will ensure that your Whirlpool refrigerator is functioning correctly and that there are no issues with the filter installation. Follow these steps to check for leaks:
- Inspect the filter housing: Carefully examine the filter housing and surrounding area for any signs of water leakage. Look for dripping water, moisture, or wet spots.
- Check the connections: Inspect the connections between the filter and the filter housing, as well as the water supply line. Ensure that they are securely attached and without any leaking or dripping.
- Run your fingers along the connections: Gently run your fingers along the connections to feel for any moisture or signs of a leak. Pay close attention to where the filter meets the housing and where the water supply line connects.
- Observe for an extended period: Leave some time for observation to see if any leaks develop over time. Check periodically for at least a few hours to ensure there are no hidden leaks.
If you notice any leaks during the inspection, double-check the connections and make sure they are tight and properly sealed. If the leaks persist, consult the manufacturer’s instructions, your refrigerator’s manual, or contact Whirlpool customer support for further assistance or guidance.
With the water filter successfully installed and checked for leaks, we can proceed to the next step: final steps and maintenance tips.
Step 9: Final steps and maintenance tips
Congratulations! You have successfully changed the water filter on your Whirlpool refrigerator. Now, it’s time for the final steps and some maintenance tips to ensure the continued performance of your refrigerator and water filter:
- Close the water dispenser: After checking for leaks and confirming everything is in order, close the water dispenser on your refrigerator. This will prevent any accidental spills or drips.
- Dispose of the packaging and old filter: Properly dispose of the packaging from the new filter and the old filter according to local regulations and waste management guidelines. Ensure that you dispose of them safely and responsibly.
- Set a reminder: Note down the date of filter replacement or set a reminder on your calendar for future reference. The recommended interval for replacing water filters is usually every six months, but this may vary depending on usage and water quality.
- Regularly clean the refrigerator: Keep your refrigerator clean by wiping down the exterior and interior regularly. This helps maintain a sanitary environment and prevents any buildup of dirt or debris that could impact the filter’s performance.
- Follow manufacturer’s maintenance guidelines: Refer to your Whirlpool refrigerator’s manual for specific maintenance guidelines and recommendations from the manufacturer. This may include routine maintenance tasks or additional tips to optimize the performance of your water filter and refrigerator.
By following these final steps and maintenance tips, you can ensure that your Whirlpool refrigerator and water filter continue to provide clean and fresh water for you and your family.
Congratulations once again on successfully changing the water filter on your Whirlpool refrigerator! With proper maintenance and regular filter replacements, you can enjoy delicious and safe drinking water for years to come.
Remember, always consult your refrigerator’s manual and refer to the manufacturer’s instructions for any model-specific guidelines during the filter replacement process.
Conclusion
Changing the water filter on your Whirlpool refrigerator is a simple yet important maintenance task that ensures you and your family have access to clean and fresh drinking water. By following the step-by-step guide outlined in this article, you can successfully replace the water filter and maintain the optimal performance of your refrigerator.
Throughout the process, we discussed the necessary tools and materials needed, how to locate the water filter, preparing for the filter replacement, removing the old filter, installing the new filter, resetting the water filter indicator, running water through the new filter, checking for leaks, and the final steps and maintenance tips to keep your refrigerator and water filter operating effectively.
Remember to always consult your refrigerator’s manual and refer to the manufacturer’s instructions for any model-specific guidelines during the filter replacement process. Additionally, it’s important to follow the recommended filter replacement schedule, typically every six months, or as indicated by the manufacturer, to maintain the best filtration performance.
By regularly changing the water filter and taking proper care of your Whirlpool refrigerator, you can enjoy clean and refreshing drinking water without worrying about impurities or contaminants. So, don’t wait any longer—grab your tools, follow the steps, and experience the difference of a properly functioning water filter in your Whirlpool refrigerator.
Thank you for reading this comprehensive guide on how to change a water filter on a Whirlpool refrigerator. Cheers to clean and delicious water!
Ready to step up your game in maintaining fresh, clean water from your fridge? Dive into our latest article on "Water Filter Replacement," where we delve into top picks for 2024. Whether you're looking to upgrade or simply curious about the new options on the market, this guide offers all the insights you need. Don't miss out on ensuring your drinking water is as pure and refreshing as possible!
Frequently Asked Questions about How To Change A Water Filter On A Whirlpool Refrigerator
Was this page helpful?
At Storables.com, we guarantee accurate and reliable information. Our content, validated by Expert Board Contributors, is crafted following stringent Editorial Policies. We're committed to providing you with well-researched, expert-backed insights for all your informational needs.

0 thoughts on “How To Change A Water Filter On A Whirlpool Refrigerator”