Articles
How To Clean An Air Purifier Filter
Modified: February 27, 2024
Learn how to clean an air purifier filter with these helpful articles. Keep your air purifier running efficiently and improve air quality in your home.
(Many of the links in this article redirect to a specific reviewed product. Your purchase of these products through affiliate links helps to generate commission for Storables.com, at no extra cost. Learn more)
Introduction
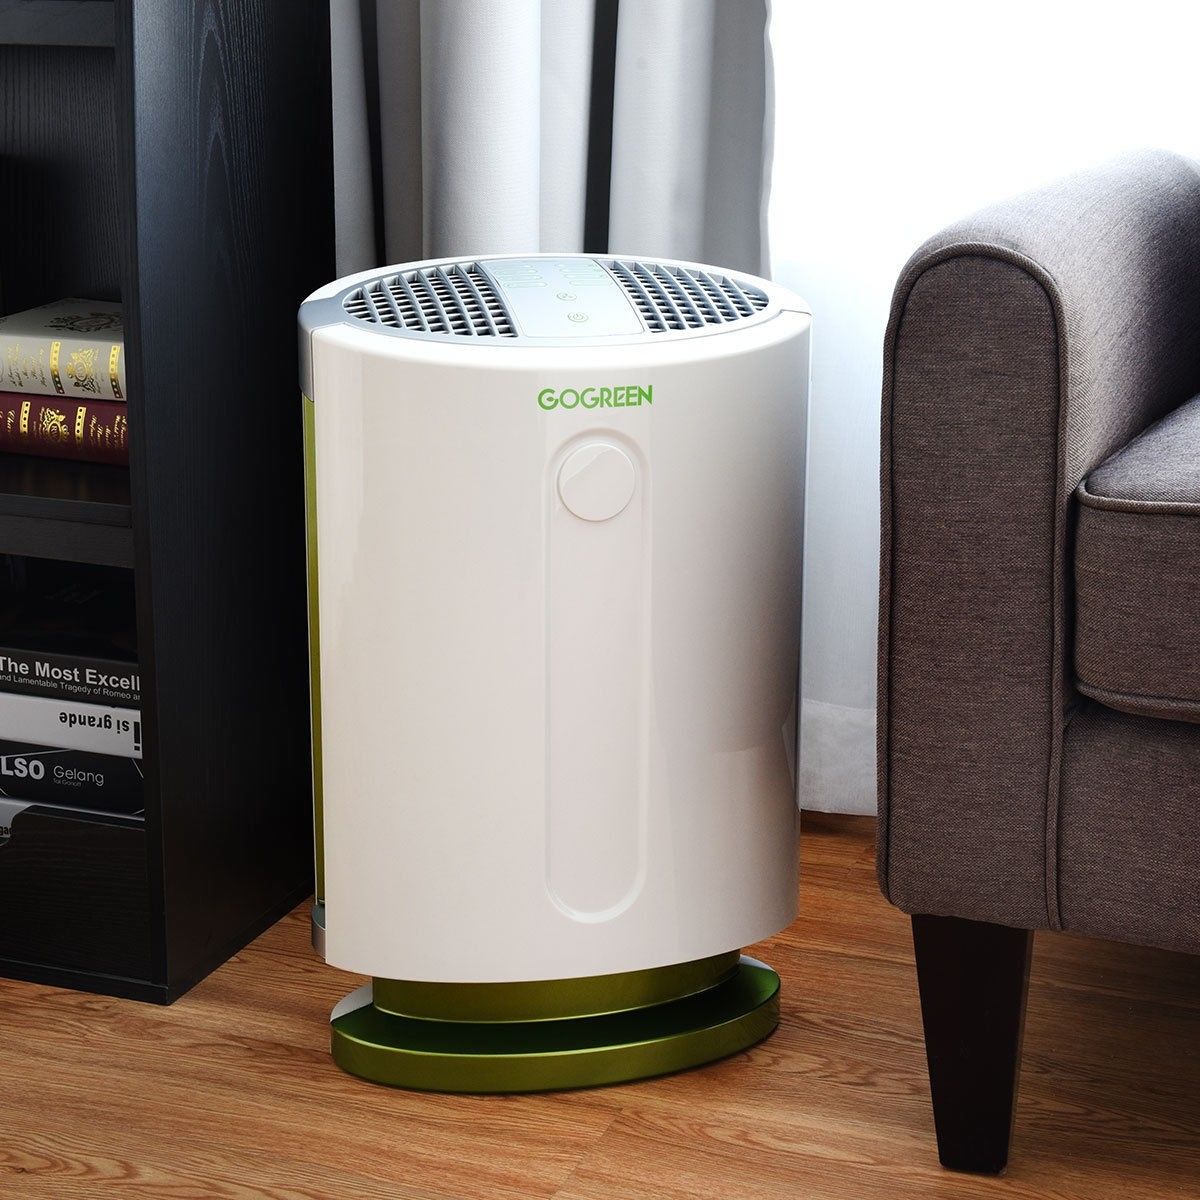
Welcome to our comprehensive guide on how to clean an air purifier filter. As we all know, air purifiers play a crucial role in improving indoor air quality by removing contaminants such as dust, pollen, pet dander, and pollutants. However, to ensure that your air purifier continues to function effectively, it’s essential to regularly clean and maintain its filters.
An air purifier filter is responsible for trapping airborne particles and pollutants, preventing them from recirculating into the air. Over time, these filters can become clogged with debris, decreasing their efficiency and potentially causing the air purifier to work less effectively.
In this guide, we will discuss the different types of air purifier filters and provide step-by-step instructions on how to clean them. Whether you have a pre-filter, HEPA filter, carbon filter, or electrostatic filter, we’ve got you covered.
By following our cleaning techniques and tips, you can ensure that your air purifier continues to provide you with clean and healthy air. So let’s dive into the world of air purifier filters and learn how to keep them in optimal condition.
Key Takeaways:
- Regularly cleaning air purifier filters ensures optimal performance, extends lifespan, and promotes healthier indoor air quality, saving money in the long run. Follow manufacturer’s instructions for specific cleaning methods and frequency.
- Signs of a dirty air purifier filter include reduced airflow, visible debris, unpleasant odors, increased allergy symptoms, dust buildup, and increased noise levels. Regular monitoring and prompt cleaning or replacement are essential for maintaining efficiency.
Read more: Honeywell Air Purifier How To Clean Filter
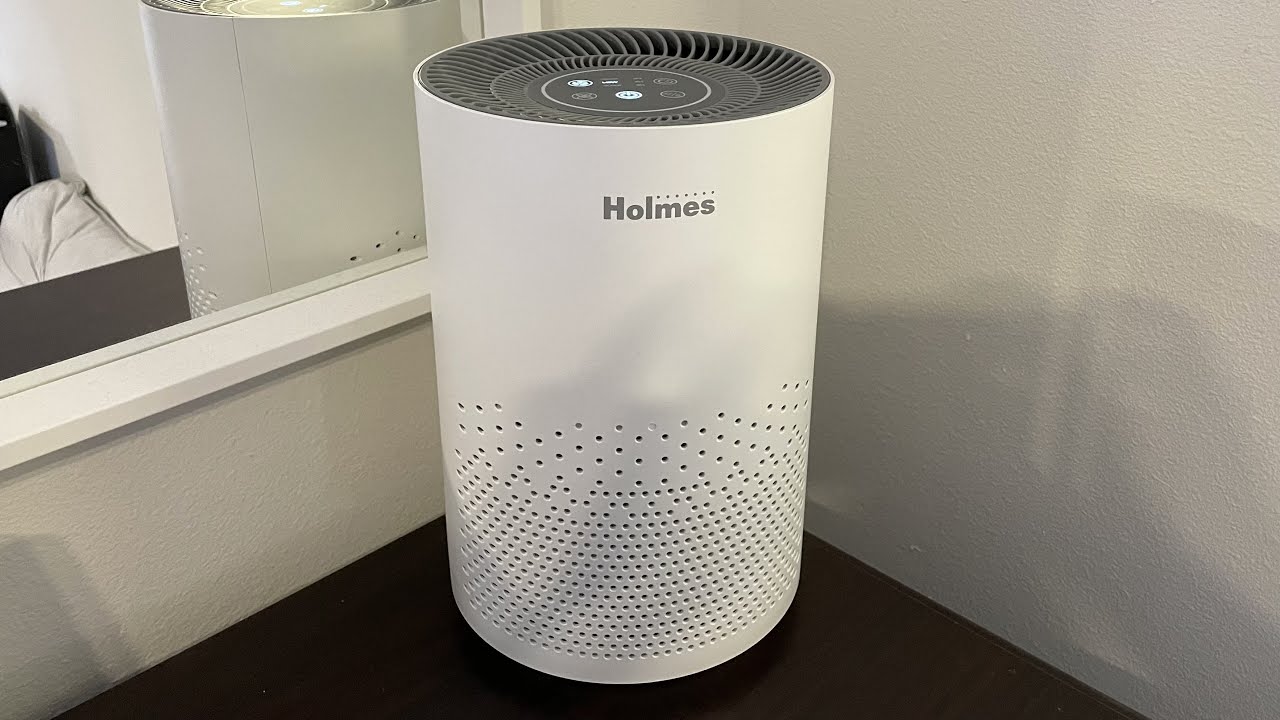
Understanding Air Purifier Filters
Before we delve into the cleaning process, it’s important to understand the different types of air purifier filters. Each filter has a specific function and targets different types of contaminants. Here are the most common types of air purifier filters:
- Pre-filter: The pre-filter is the first line of defense in an air purifier. It captures larger particles such as dust, pet hair, and lint, preventing them from reaching the main filter. Pre-filters are usually washable or vacuum-friendly and should be cleaned regularly.
- HEPA filter: High-Efficiency Particulate Air (HEPA) filters are designed to capture smaller particles as small as 0.3 microns, including pollen, mold spores, and bacteria. HEPA filters are highly effective and must be replaced or cleaned according to the manufacturer’s instructions.
- Carbon filter: Carbon filters are excellent for removing odors, chemicals, and volatile organic compounds (VOCs). They contain activated carbon that absorbs these pollutants. Carbon filters generally need replacement when they become saturated.
- Electrostatic filter: Electrostatic filters use an electrostatic charge to attract and capture particles. These filters are washable and reusable, making them cost-effective. However, proper cleaning is crucial to maintain their efficiency.
Knowing the type of filter in your air purifier is essential for determining the cleaning method and frequency. Now, let’s move on to why regular cleaning is so important for these filters.
Why Regular Cleaning is Important
Regularly cleaning your air purifier filters is crucial for maintaining their efficiency and ensuring that your air purifier continues to effectively remove pollutants from the air. Here are the key reasons why regular cleaning is important:
- Optimal Performance: Over time, air purifier filters can become clogged with dirt, dust, and debris. This can restrict airflow and reduce the effectiveness of your air purifier. By regularly cleaning the filters, you can ensure that they are free from buildup, allowing for optimal performance.
- Extended Lifespan: Cleaning the filters not only improves their performance but can also extend their lifespan. When filters are clogged, the air purifier has to work harder to pull in air, resulting in additional strain on the motor and other components. By cleaning the filters regularly, you can prevent unnecessary wear and tear on your air purifier.
- Cost Savings: Some air purifier filters, such as pre-filters and electrostatic filters, are reusable and can be cleaned instead of replaced. By cleaning and maintaining these filters, you can save money in the long run by avoiding frequent filter replacements.
- Health Benefits: A dirty air purifier filter can fail to effectively capture and remove airborne pollutants from your home. This can lead to poor indoor air quality, which can have adverse effects on your health, especially for individuals with allergies or respiratory conditions. Regularly cleaning the filters can help ensure that your air purifier is effectively capturing harmful particles and maintaining clean air in your living space.
In summary, regular cleaning of your air purifier filters is essential for optimal performance, extended lifespan, cost savings, and promoting healthier indoor air quality. Now that you understand the importance of cleaning, let’s move on to the preparatory steps before cleaning your air purifier filter.
Preparing to Clean the Air Purifier Filter
Before you begin cleaning your air purifier filter, there are a few preparatory steps you should take to ensure a smooth and effective cleaning process:
- Read the Manufacturer’s Instructions: Start by carefully reading the user manual or instructions provided by the manufacturer. Each air purifier model may have specific guidelines for cleaning and maintenance.
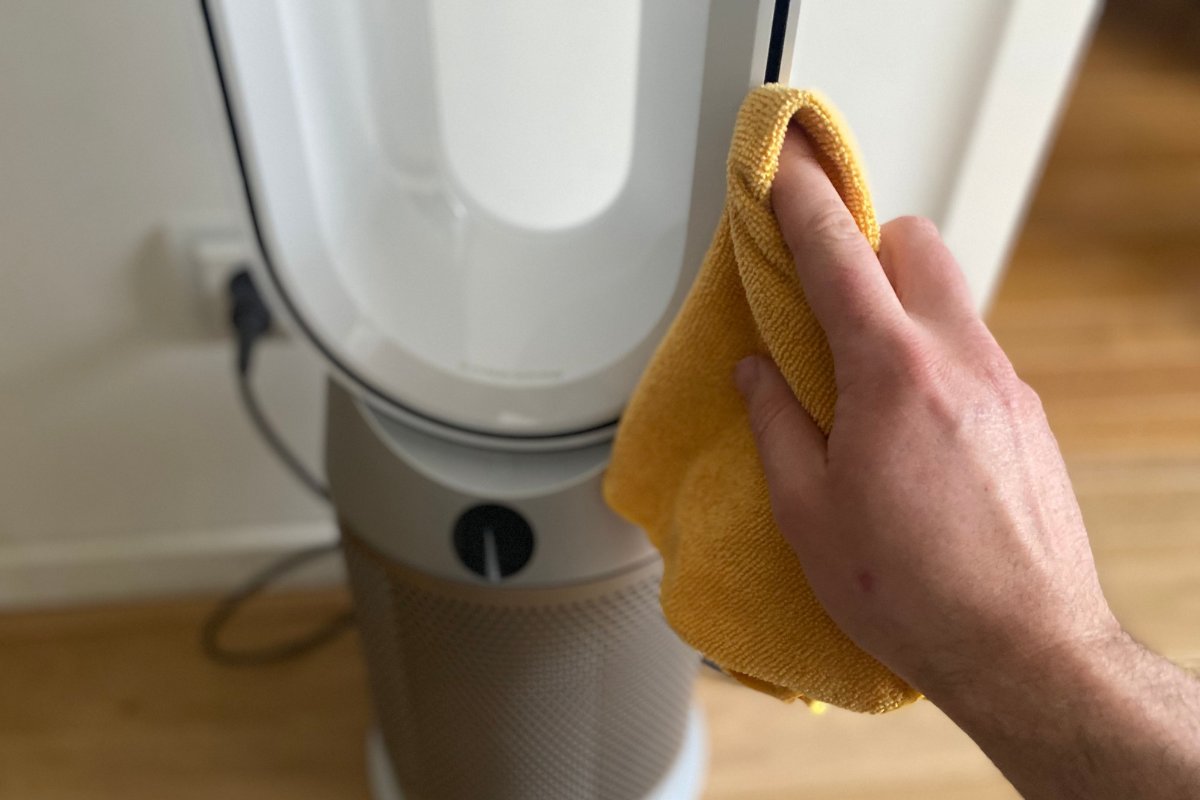
- Gather the Necessary Supplies: Depending on the type of filter and cleaning method, you may need various cleaning tools and materials. Common supplies include a vacuum cleaner with a brush attachment, microfiber cloth, mild detergent, water, and a soft brush.
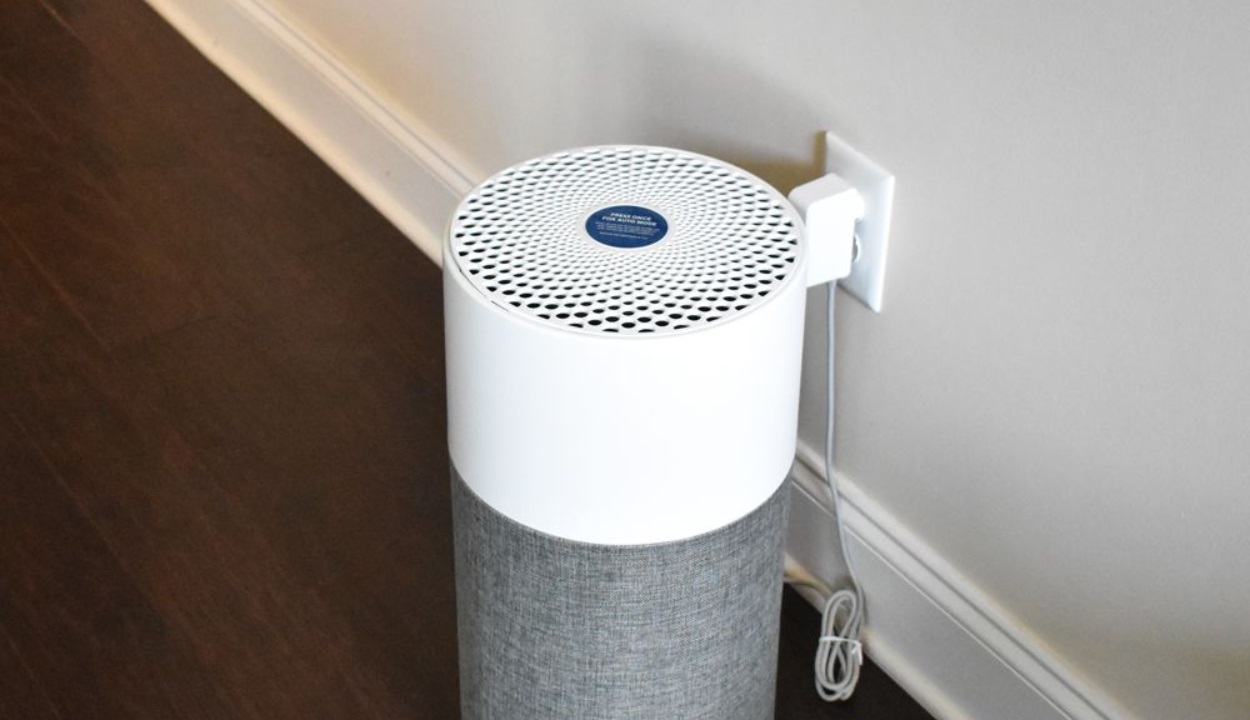
- Power Off and Unplug the Air Purifier: For safety purposes, always power off and unplug the air purifier before removing or cleaning the filters. This helps prevent any accidents or electrical hazards.
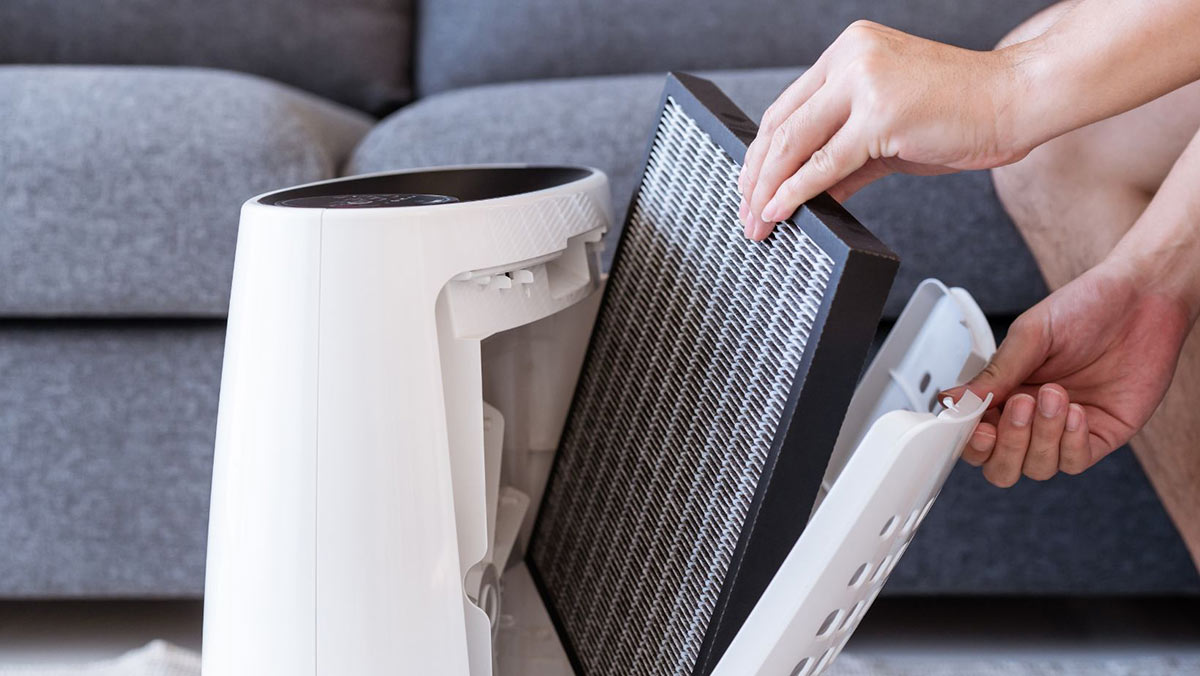
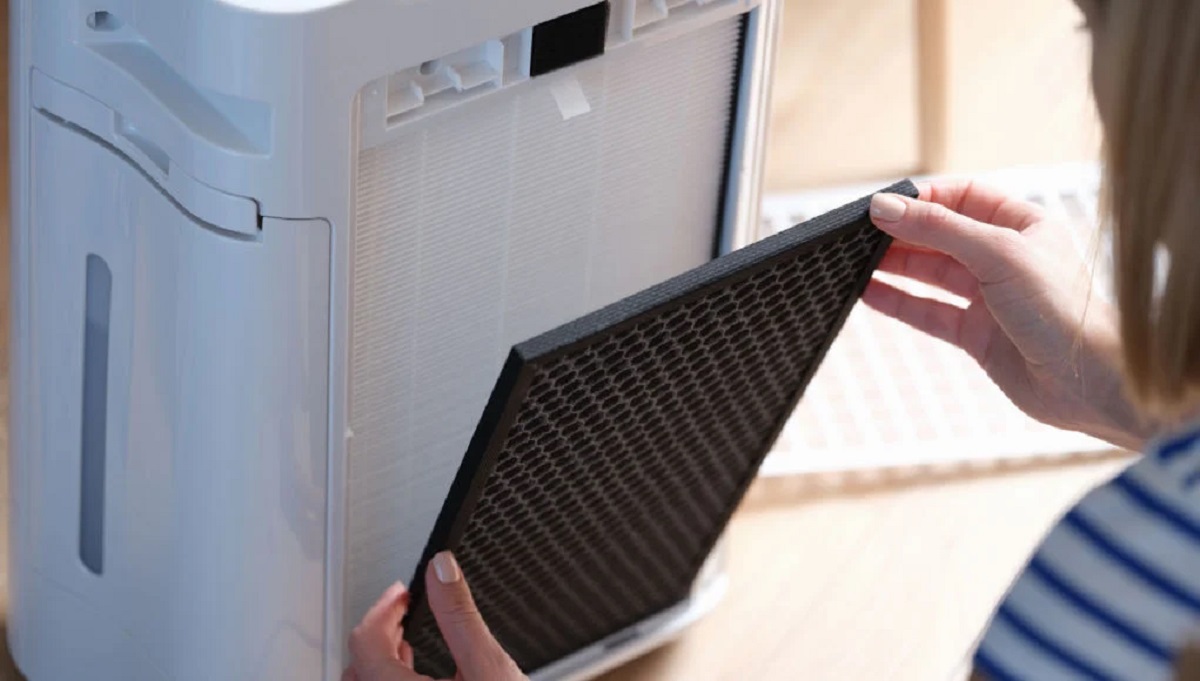
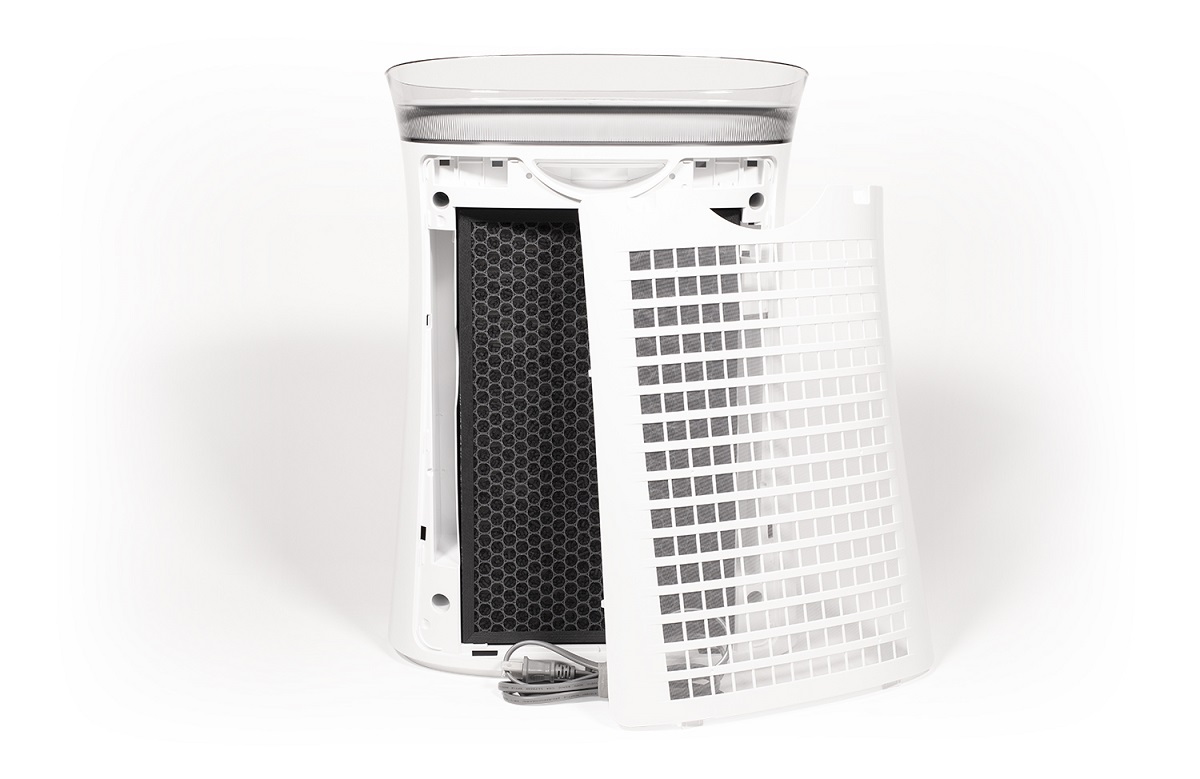
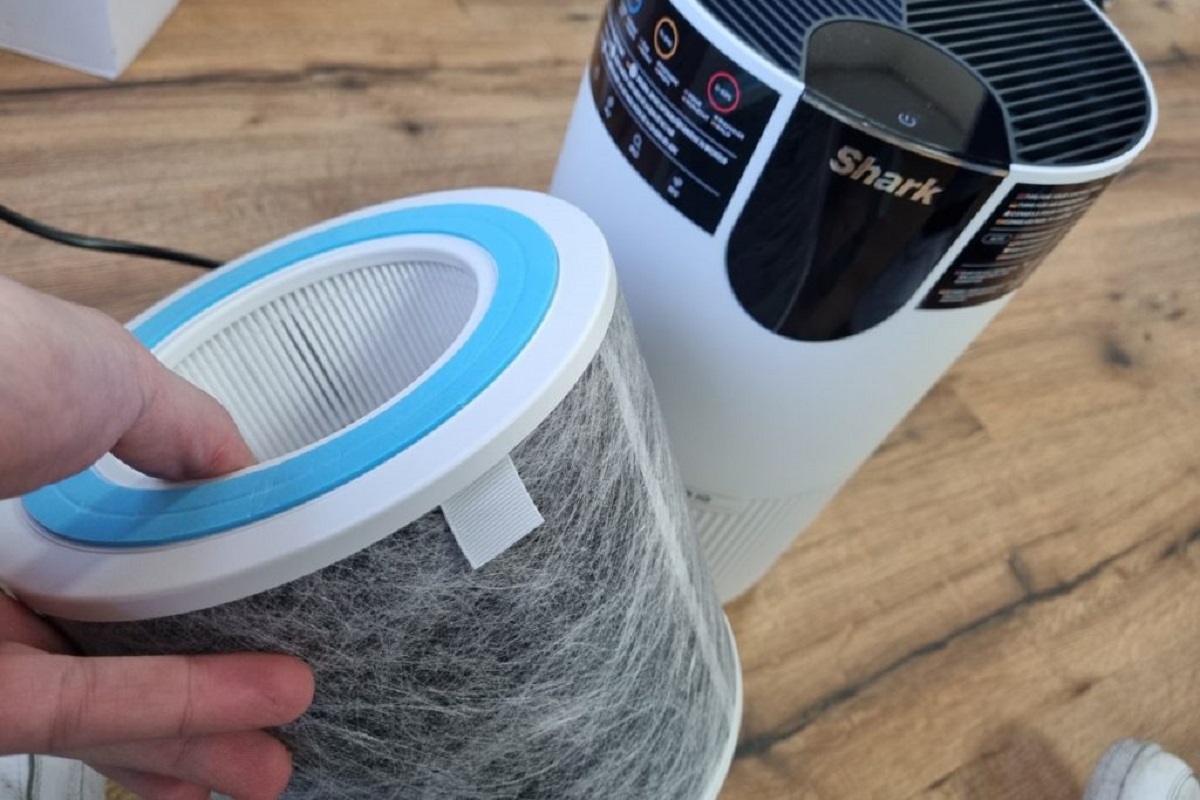
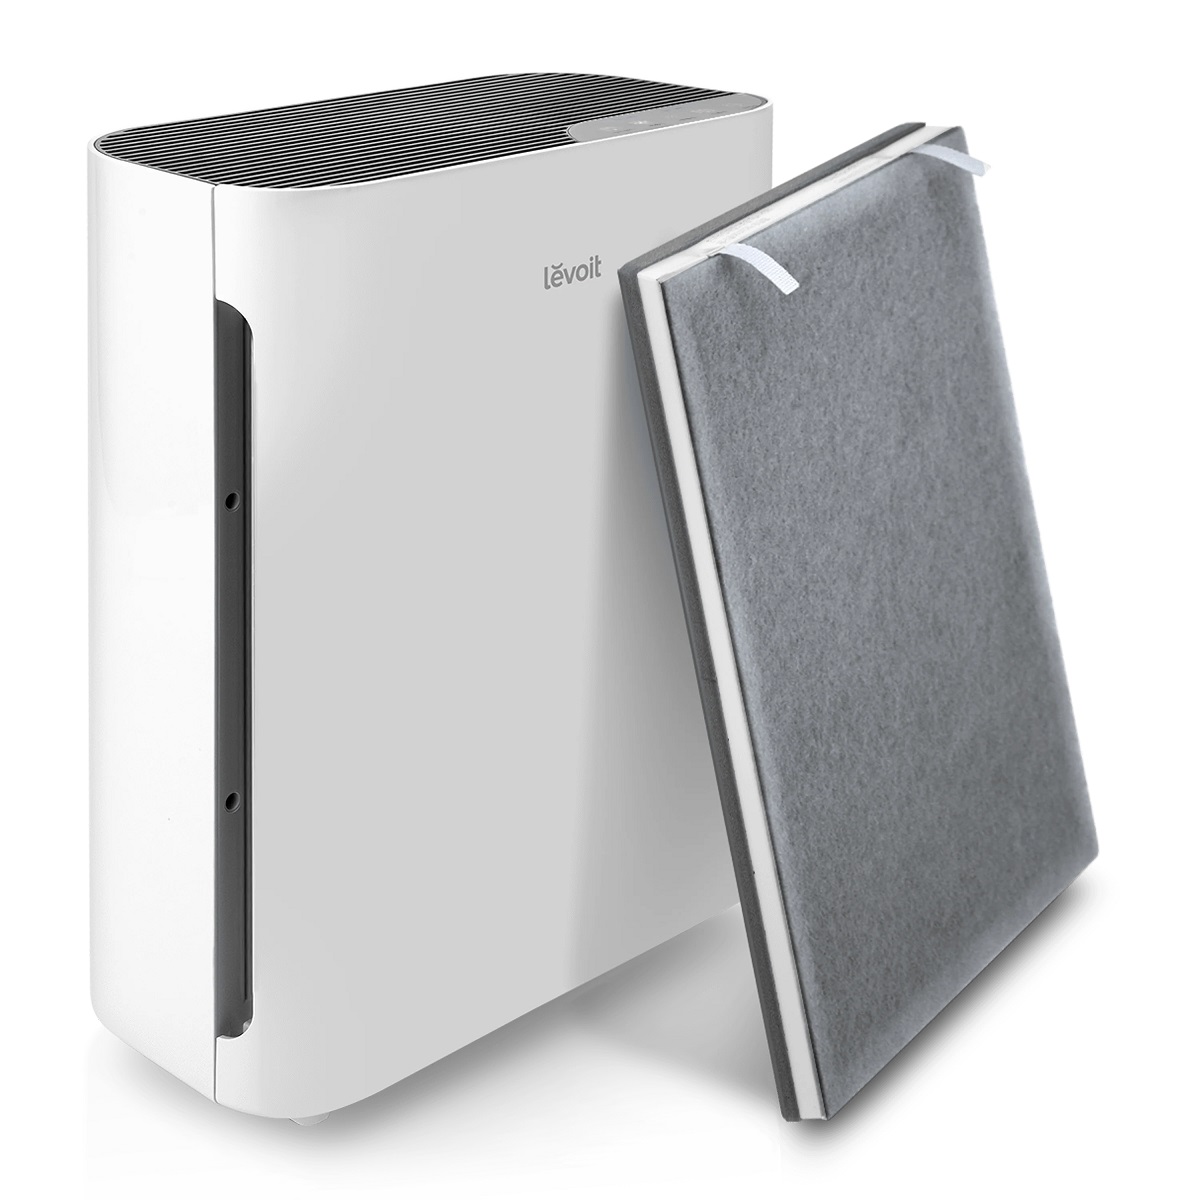
- Remove the Filter: Carefully remove the air purifier filter according to the manufacturer’s instructions. Some filters may be located inside a compartment or accessed from the back of the unit. Take note of how the filter is positioned so you can reinstall it correctly later.
- Inspect the Filter: Before cleaning, inspect the filter for any signs of damage or excessive wear and tear. If the filter is damaged, it may need to be replaced instead of cleaned. Look for any visible debris or buildup that needs to be removed during the cleaning process.
- Check for Replacement Filters: While cleaning the filters is essential, some filters, like HEPA or carbon filters, may need to be replaced periodically. Check if your air purifier requires filter replacements and note down the model number or size for future reference.
By following these preparatory steps, you can ensure that you have the necessary tools and knowledge to clean your air purifier filter efficiently and safely. Now, let’s move on to the specific cleaning methods for different types of air purifier filters.
Cleaning Methods for Different Air Purifier Filters
Now that you have prepared for the cleaning process, let’s dive into the specific methods for cleaning different types of air purifier filters:
- Cleaning a Pre-filter: Pre-filters are typically washable or vacuum-friendly, making them easy to clean. If the pre-filter is washable, gently remove it from the air purifier and rinse it under running water. Use a mild detergent if necessary to remove stubborn dirt or stains. Allow the pre-filter to air dry completely before reinstalling it. If the pre-filter is not washable, use a vacuum cleaner with a brush attachment to remove any debris or dust.
- Cleaning a HEPA Filter: HEPA filters are highly efficient and should be cleaned with caution to avoid damage. Check the manufacturer’s instructions for any specific cleaning guidelines. In some cases, HEPA filters may not be washable and may need to be replaced. If the HEPA filter is washable, gently rinse it under running water to remove dust and debris. Avoid using harsh chemicals or excessive water pressure. Allow the filter to air dry completely before reinstalling it.
- Cleaning a Carbon Filter: Carbon filters are not usually washable and will need to be replaced periodically. However, you can prolong their lifespan by vacuuming the filter or gently tapping it to remove loose particles. If the carbon filter has a fabric cover, you may be able to wash the cover separately. Follow the manufacturer’s instructions for any specific cleaning recommendations.
- Cleaning an Electrostatic Filter: Electrostatic filters are washable and reusable, but proper cleaning is essential to maintain their efficiency. Remove the filter from the air purifier and gently rinse it under running water. Use a mild detergent if necessary to remove stubborn dirt. Be gentle when cleaning to avoid damaging the delicate electrostatic fibers. Allow the filter to air dry completely before reinstalling it.
Remember to always check the manufacturer’s instructions first to ensure that you are using the correct cleaning method for your specific air purifier filter. Following these cleaning methods will help keep your air purifier filters in optimal condition and ensure that they continue to provide clean and fresh air in your home.
Next, let’s discuss some common mistakes to avoid when cleaning air purifier filters.
Read more: How To Clean Homedics Air Purifier Filter
Cleaning a Pre-filter
A pre-filter is an essential component of an air purifier as it captures larger particles such as dust, pet hair, and lint. Cleaning the pre-filter regularly ensures that it maintains its efficiency in trapping these pollutants. Here’s how to clean a pre-filter:
- Turn off and unplug the air purifier: Before cleaning the pre-filter, ensure that the air purifier is powered off and unplugged. This guarantees your safety during the cleaning process.
- Locate and remove the pre-filter: Refer to the manufacturer’s instructions to find the pre-filter in your air purifier. In most cases, it is located in the front or back of the unit. Carefully remove the pre-filter by following the provided guidelines.
- Assess the condition of the pre-filter: Inspect the pre-filter for any visible debris or dirt accumulation. A pre-filter that is heavily clogged may require proper cleaning or replacement.
- Vacuum or wash the pre-filter: Depending on the manufacturer’s instructions, choose an appropriate method to clean the pre-filter:
- Vacuum cleaning: If the pre-filter is washable, but not heavily soiled, you can opt for vacuum cleaning. Attach a brush attachment to your vacuum cleaner and gently run it over the pre-filter to remove dirt, dust, and pet hair. Be thorough in covering all areas of the filter.
- Water washing: If the pre-filter is heavily soiled or washable according to the manufacturer’s instructions, you can wash it with water. Remove the pre-filter and rinse it under cool, running water. Use a mild detergent or soap if necessary to remove stubborn dirt. Avoid using hot water or harsh chemicals as they can damage the pre-filter.
- Dry the pre-filter: After vacuuming or washing, allow the pre-filter to air dry completely. Ensure that it is completely dry to prevent mold or mildew growth. Avoid placing the wet pre-filter back into the air purifier as it can damage the unit.
- Reinstall the pre-filter: Once the pre-filter is dry, carefully reinstall it according to the manufacturer’s instructions. Ensure that it is properly aligned and securely fitted in its designated position.
- Resume the operation of the air purifier: After cleaning and reinstalling the pre-filter, you can turn on the air purifier and continue enjoying clean and fresh air.
Cleaning the pre-filter regularly, approximately every month or as recommended by the manufacturer, will help maintain its efficiency in capturing larger particles. This ensures that your air purifier functions optimally in improving the indoor air quality of your home.
Next, let’s move on to cleaning a HEPA filter, another crucial component of an air purifier.
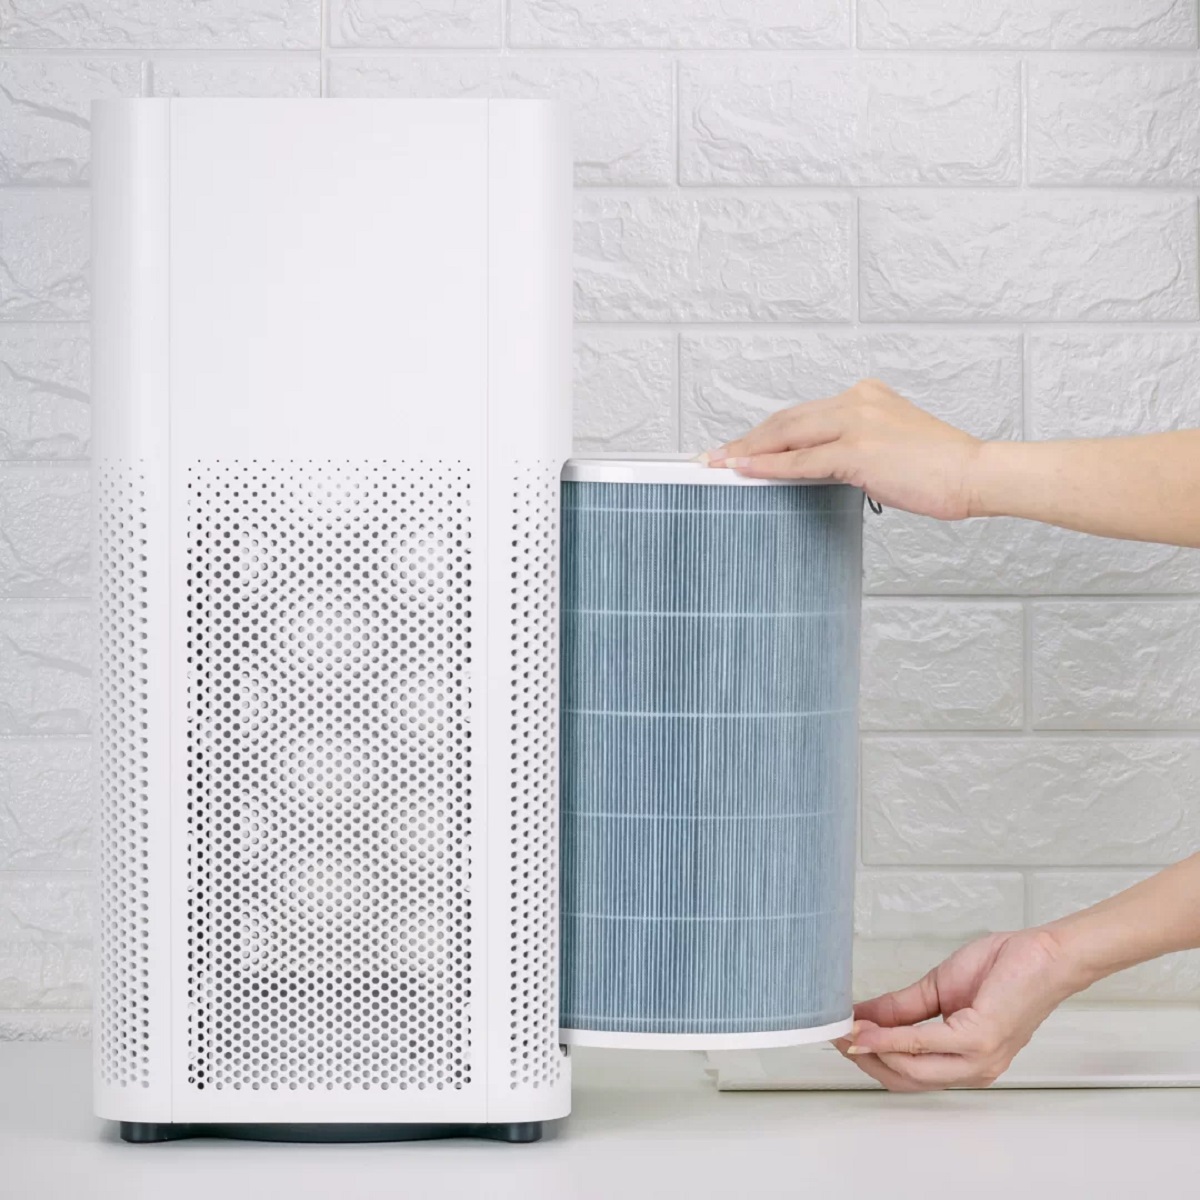
Cleaning a HEPA Filter
A HEPA (High-Efficiency Particulate Air) filter plays a vital role in capturing smaller particles like pollen, mold spores, and bacteria. While HEPA filters are highly efficient, they are not always washable and may require replacement. However, if your HEPA filter is washable, here is a step-by-step guide on how to clean it:
- Turn off and unplug the air purifier: Before cleaning the HEPA filter, ensure that the air purifier is powered off and unplugged for safety reasons.
- Locate and remove the HEPA filter: Consult the manufacturer’s instructions to identify the HEPA filter’s location within your air purifier. Carefully remove the filter according to the provided guidelines.
- Check the condition of the HEPA filter: Examine the filter closely for signs of damage or excessive wear and tear. If the filter is damaged or deteriorated, it may need to be replaced rather than cleaned.
- Wash the HEPA filter: If your HEPA filter is washable, rinse it gently under cool, running water. Avoid using hot water or strong detergents as they can damage the filter’s delicate fibers. Take care not to apply excessive pressure or scrub the filter vigorously.
- Dry the HEPA filter: After washing, allow the HEPA filter to air dry completely. Place it in a well-ventilated area and ensure that it is completely dry before reinstallation. A damp or wet filter could lead to mold or mildew growth.
- Reinstall the HEPA filter: Once the filter is fully dry, carefully reinstall it in its designated position according to the manufacturer’s instructions. Ensure that it is securely fitted and properly aligned within the air purifier.
- Resume the operation of the air purifier: After cleaning and reinstalling the HEPA filter, you can turn on the air purifier and enjoy the benefits of clean and purified air.
It’s important to note that not all HEPA filters are washable. Some are designed for replacement only. Consult the manufacturer’s recommendations for your specific air purifier model to determine whether your HEPA filter can be cleaned or needs to be replaced.
If your HEPA filter is not washable, it is essential to follow the manufacturer’s guidelines regarding replacement intervals. HEPA filters typically last for a certain period or a specific number of hours of use before they need to be replaced.
Cleaning or replacing the HEPA filter regularly ensures that your air purifier continues to effectively capture airborne particles and maintain clean indoor air for you and your family.
Next, we’ll discuss cleaning a carbon filter, which is ideal for eliminating odors and VOCs (Volatile Organic Compounds).
To clean an air purifier filter, first check the manufacturer’s instructions. Most filters can be vacuumed or rinsed with water, but be sure to let it dry completely before reinstalling.
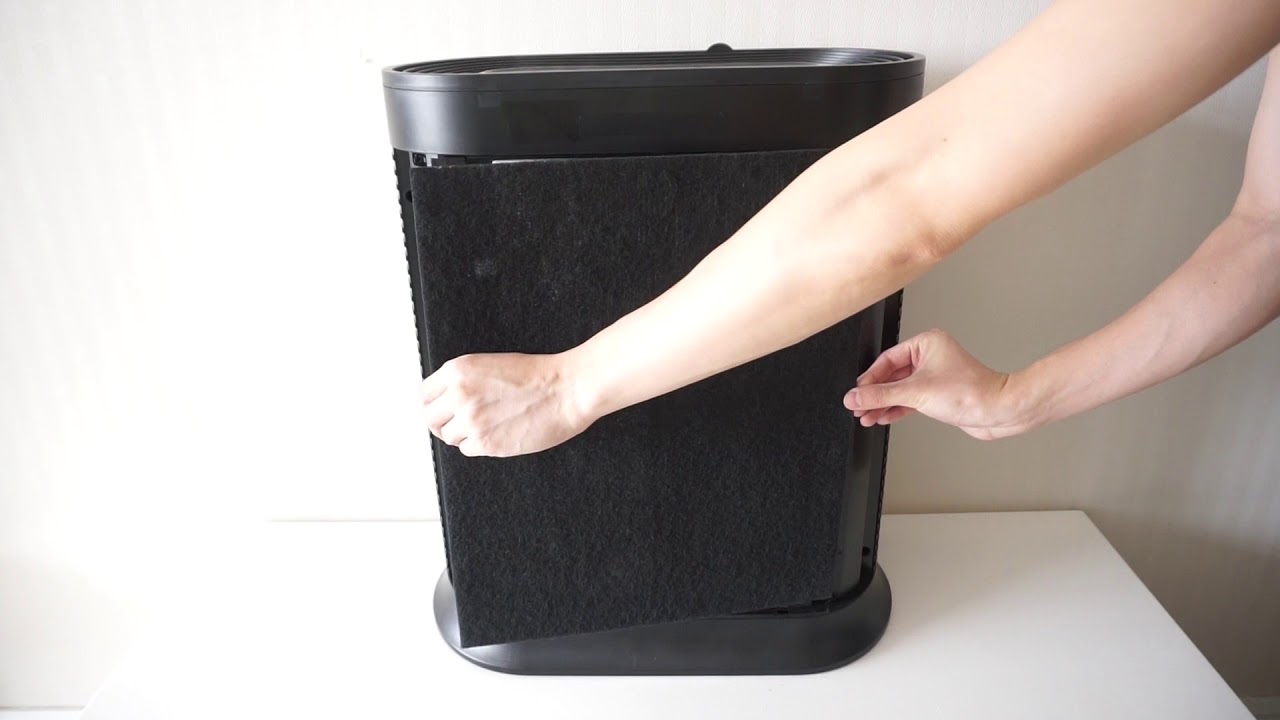
Cleaning a Carbon Filter
A carbon filter is highly effective in removing odors, chemicals, and volatile organic compounds (VOCs) from the air. While carbon filters are not typically washable, there are some steps you can take to maintain and prolong their lifespan:
- Inspect the carbon filter: Before cleaning, inspect the carbon filter for any visible debris or buildup. Take note of its condition and determine if cleaning or replacement is necessary.
- Vacuum the carbon filter: If the carbon filter is not heavily soiled, you can vacuum it to remove loose particles and dirt. Use a vacuum cleaner with a brush attachment and gently run it over the filter’s surface, being careful not to damage the delicate carbon material.
- Tap the carbon filter: Another method to remove loose particles from the carbon filter is to gently tap it against a hard surface. This can dislodge any debris that may be trapped within the carbon pores. Be gentle when tapping to avoid damaging the filter.
- Replace the fabric cover (if applicable): Some carbon filters come with a fabric cover that helps protect the carbon material. If the fabric cover is removable and washable, follow the manufacturer’s instructions for proper cleaning. Be sure to let the cover dry completely before placing it back over the carbon filter.
- Replace the carbon filter (if necessary): Carbon filters have a limited lifespan and may need to be replaced when they become saturated or lose their effectiveness. Refer to the manufacturer’s guidelines for recommendations on when to replace the carbon filter. It’s important to note that cleaning methods may not fully restore the carbon filter’s adsorption capabilities.
Regular maintenance and cleaning of the carbon filter, as well as replacing it as needed, will ensure that it continues to effectively eliminate odors and VOCs from the air. Consult the manufacturer’s instructions or contact customer support if you have any specific questions or concerns about cleaning or replacing the carbon filter.
Now that you know how to clean a carbon filter, let’s move on to cleaning an electrostatic filter, which is a washable and reusable type of filter.
Cleaning an Electrostatic Filter
An electrostatic filter is a washable and reusable type of filter that uses an electrostatic charge to attract and capture airborne particles. Cleaning an electrostatic filter is essential to maintain its efficiency and ensure optimal performance. Here’s how to clean an electrostatic filter:
- Turn off and unplug the air purifier: Start by turning off the air purifier and unplugging it from the power source. This ensures your safety during the cleaning process.
- Remove the electrostatic filter: Refer to the manufacturer’s instructions to locate and remove the electrostatic filter from the air purifier. Take care not to damage the delicate fibers during the removal process.
- Gently rinse the electrostatic filter: Rinse the electrostatic filter under running water using a gentle stream. Avoid using hot water, as it can damage the filter’s electrostatic charge. Use your fingers or a soft brush to lightly remove any visible debris or dirt buildup. Be careful not to apply excessive pressure and avoid scrubbing vigorously.
- Apply mild detergent (if necessary): If the electrostatic filter is still dirty after rinsing, you can use a mild detergent specifically recommended by the manufacturer. Apply a small amount of detergent and gently rub it onto the filter surface. Rinse thoroughly to remove any soap residue.
- Allow the electrostatic filter to dry completely: Once the electrostatic filter is clean, place it in a well-ventilated area and allow it to air dry completely. Make sure it is fully dry before reinstallation to prevent mold or mildew growth.
- Reinstall the electrostatic filter: Once the filter is completely dry, carefully reinstall it according to the manufacturer’s instructions. Ensure that it is securely fitted in its designated position within the air purifier.
- Resume the operation of the air purifier: After cleaning and reinstalling the electrostatic filter, you can turn on the air purifier and continue enjoying clean and purified air in your home.
Regularly cleaning the electrostatic filter, around every two to three months, or as recommended by the manufacturer, will help maintain its efficiency and ensure optimal performance. It is important to follow the manufacturer’s guidelines for cleaning and maintenance to avoid damaging the electrostatic filter. If you have any doubts or concerns about cleaning the electrostatic filter, it is always best to refer to the manufacturer’s instructions or contact customer support for guidance.
Now that you know how to clean an electrostatic filter, let’s discuss some common mistakes to avoid when cleaning air purifier filters.
Read more: How To Clean A Levoit Air Purifier
Mistakes to Avoid When Cleaning Air Purifier Filters
When cleaning air purifier filters, it’s important to avoid certain common mistakes that can potentially damage the filters or compromise their effectiveness. Here are some crucial mistakes to avoid:
- Using harsh chemicals: Avoid using harsh chemicals or cleaning agents that can damage the filter material. Stick to mild detergents or follow the manufacturer’s recommended cleaning solutions, if applicable.
- Using hot water: Some filters, such as HEPA and electrostatic filters, can be sensitive to hot water. Avoid using hot water as it can warp or weaken the filter material. Stick to cool or lukewarm water when rinsing or cleaning the filters.
- Scrubbing too vigorously: While it’s important to clean the filters thoroughly, avoid scrubbing them too vigorously. Scrubbing too hard can damage the filter material or dislodge essential components, compromising their effectiveness.
- Incorrect drying: Ensure that the filters are completely dry before reinstalling them. Damp or wet filters can lead to mold or mildew growth, affecting both the filter’s performance and the air quality in your home.
- Ignoring manufacturer’s instructions: Always refer to the manufacturer’s instructions when cleaning air purifier filters. Different filters and models may have specific cleaning instructions that need to be followed for optimal results. Ignoring these instructions can lead to damage or reduced efficiency.
- Not cleaning or replacing according to schedule: Regular cleaning or replacement of air purifier filters is crucial for maintaining their effectiveness. Following the recommended cleaning schedule or replacement intervals ensures that the filters continue to capture pollutants and provide clean air in your home.
- Reinstalling filters incorrectly: When reinstalling filters, ensure that they are properly aligned and securely fitted. Incorrect installation may result in air leaks or reduced efficiency of the air purifier.
- Skipping filter replacements: Some filters, such as HEPA or carbon filters, may require replacement rather than cleaning. Skipping filter replacements when necessary can compromise the air purifier’s performance and diminish its ability to provide clean air.
By avoiding these mistakes and following the correct cleaning methods and guidelines provided by the manufacturer, you can ensure that your air purifier filters remain in excellent condition and continue to provide you with clean and purified air.
Next, let’s discuss the recommended frequency of cleaning air purifier filters.
Frequency of Cleaning Air Purifier Filters
The frequency of cleaning air purifier filters can vary depending on factors such as the type of filter, the environment in which the air purifier is used, and the manufacturer’s recommendations. However, here are some general guidelines to help you determine how often to clean your air purifier filters:
- Pre-filter: Pre-filters, which capture larger particles like dust and pet hair, should be checked and cleaned more frequently than other filters. A good rule of thumb is to clean the pre-filter every month or whenever it appears visibly dirty. Regular cleaning helps maintain its efficiency in preventing larger particles from reaching the main filter.
- HEPA filter: HEPA filters, which capture smaller particles like pollen and mold spores, have a longer lifespan than pre-filters. Most HEPA filters are not washable and may need to be replaced according to the manufacturer’s instructions. Typically, HEPA filters should be replaced every 6 to 12 months, but some models may require more frequent replacements based on usage and air quality conditions.
- Carbon filter: Carbon filters, designed to remove odors and chemicals, are not typically washable and may need to be replaced periodically. The lifespan of carbon filters can vary depending on the air quality and the intensity of odors they are exposed to. Generally, carbon filters last anywhere from 3 to 6 months before needing replacement.
- Electrostatic filter: Electrostatic filters, which use an electrostatic charge to attract and capture particles, are washable and reusable. It’s recommended to clean electrostatic filters every 3 to 6 months, or as specified by the manufacturer. Regular cleaning ensures that the filter maintains its effectiveness in trapping airborne particles.
It’s important to remember that these are general guidelines, and the frequency of cleaning may vary for different air purifier models and usage conditions. Always refer to the manufacturer’s instructions for your specific air purifier to determine the recommended cleaning schedule and replacement intervals for the filters.
Additionally, it’s worth noting that the indoor air quality and external factors can also impact the cleaning frequency. If you live in an area with high pollution or have specific air quality concerns, you may need to clean or replace the filters more frequently.
By adhering to the appropriate cleaning schedule for your air purifier filters, you can ensure that your air purifier operates at its best and continues to provide clean and healthy air in your home.
Lastly, let’s discuss some common signs that indicate a dirty air purifier filter.
Signs of a Dirty Air Purifier Filter
Knowing the signs of a dirty air purifier filter is crucial for maintaining the efficiency and performance of your air purifier. Here are some common signs that indicate it may be time to clean or replace your air purifier filter:
- Reduced air flow: A clogged or dirty filter can restrict the airflow in your air purifier. If you notice a decrease in the amount of air being expelled by the unit or weaker airflow coming from the vents, it’s a clear indication that the filter needs attention.
- Visible dirt or debris: Take a close look at your air purifier filter. If you can see a buildup of dust, dirt, pet hair, or other debris on the surface of the filter, it’s a sign that it’s time to clean or replace it.
- Unpleasant odors: A dirty or saturated carbon filter may lose its ability to effectively eliminate odors from the air. If you start noticing unpleasant smells in your home that were previously eliminated by the air purifier, it could indicate that the carbon filter needs cleaning or replacement.
- Increased allergy symptoms: If you or your family members begin experiencing allergy symptoms such as sneezing, coughing, or watery eyes despite using the air purifier, it could be an indication that the filters are not effectively capturing allergens. Consider cleaning or replacing the filters to improve the air quality and alleviate allergy symptoms.
- Dust buildup in the room: An air purifier with a clogged or dirty filter may struggle to capture and trap dust particles, resulting in visible dust buildup on surfaces in the room. If you notice an increase in dust accumulation, it’s a sign that the filter is not effectively removing airborne particles.
- Increased noise level: As a filter becomes clogged, the air purifier may have to work harder to pull air through it. This extra effort often leads to increased operating noise. If you notice that your air purifier has become louder than usual, it may be an indication that the filter needs attention.
Keep in mind that different filters may exhibit different signs of dirtiness. Refer to the manufacturer’s instructions for specific signs to look out for based on the type of filter in your air purifier.
Regularly monitoring your air purifier filters and addressing any signs of dirtiness promptly will help ensure that your air purifier operates efficiently and continues to improve the indoor air quality in your home.
Having covered the signs of a dirty air purifier filter, let’s conclude this guide on how to clean an air purifier filter.
Conclusion
Cleaning your air purifier filters is an essential maintenance task to ensure that your air purifier continues to provide clean and healthy air in your home. By understanding the different types of air purifier filters and following the correct cleaning methods, you can effectively remove dirt, dust, allergens, and odors from the air, improving the overall indoor air quality.
Whether you have a pre-filter, HEPA filter, carbon filter, or electrostatic filter, proper cleaning and maintenance are key. Be sure to read and follow the manufacturer’s instructions for your specific air purifier model to ensure that you are using the correct cleaning methods and frequency.
Regular cleaning of your air purifier filters improves their performance, extends their lifespan, and saves you money in the long run. It also helps prevent excessive wear and tear on your air purifier and promotes a healthier living environment for you and your family.
Remember to avoid common cleaning mistakes such as using harsh chemicals, scrubbing too vigorously, or neglecting to properly dry the filters. Always follow the manufacturer’s recommendations and guidelines to avoid damaging the filters or compromising their effectiveness.
Keep an eye out for signs of a dirty filter, including reduced air flow, visible dirt or debris, unpleasant odors, increased allergy symptoms, dust buildup in the room, or increased noise levels in the air purifier. These signs indicate that your filters need attention and may require cleaning or replacement.
Regularly cleaning your air purifier filters, according to the recommended schedule, will ensure that your air purifier continues to function optimally and provide you with clean and purified air.
By following the guidelines in this comprehensive guide, you can effectively clean your air purifier filters and enjoy the benefits of improved indoor air quality. Breathe easy and enjoy the fresh and clean air in your home!
Frequently Asked Questions about How To Clean An Air Purifier Filter
Was this page helpful?
At Storables.com, we guarantee accurate and reliable information. Our content, validated by Expert Board Contributors, is crafted following stringent Editorial Policies. We're committed to providing you with well-researched, expert-backed insights for all your informational needs.

0 thoughts on “How To Clean An Air Purifier Filter”