Articles
How To Clean Dyson Air Purifier
Modified: October 28, 2024
Learn how to clean your Dyson air purifier effectively with these helpful articles. Keep your purifier running smoothly and your air quality fresh.
(Many of the links in this article redirect to a specific reviewed product. Your purchase of these products through affiliate links helps to generate commission for Storables.com, at no extra cost. Learn more)
Introduction
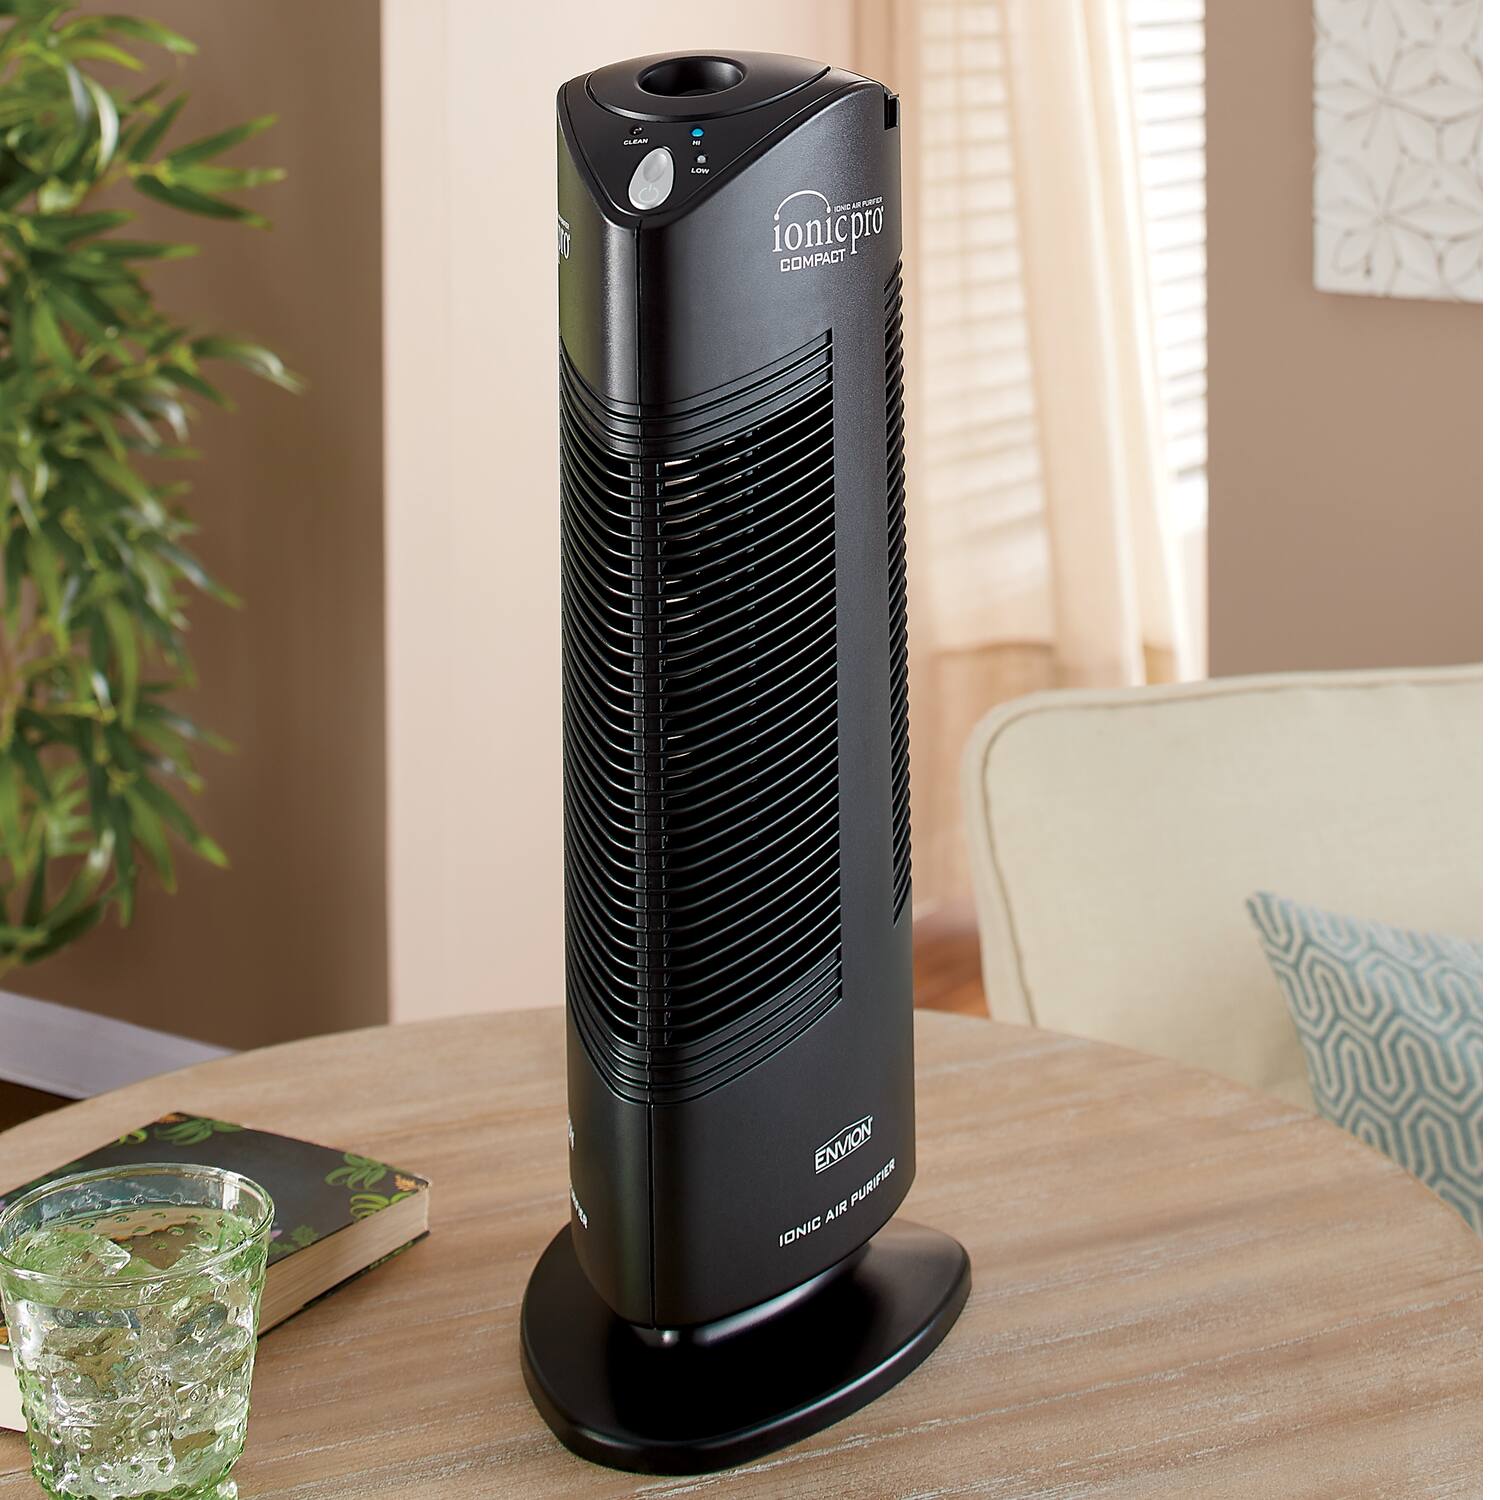
Welcome to this guide on how to clean your Dyson Air Purifier. Keeping your air purifier clean is essential for maintaining its performance and ensuring the quality of the air in your home. Over time, the filters in your Dyson Air Purifier can become clogged with dust, dirt, and other debris, which can reduce its efficiency in removing allergens and pollutants from the air. Regular cleaning will not only improve the air purifier’s effectiveness but also extend its lifespan.
In this article, we will walk you through a step-by-step process to clean your Dyson Air Purifier effectively. We will cover everything from gathering the necessary supplies to reassembling the filters. By following these guidelines, you can ensure that your air purifier remains in optimal condition, providing you with clean and fresh air.
Before we begin, it’s important to note that the specific cleaning instructions may vary slightly depending on the model and type of Dyson Air Purifier you own. It’s always a good idea to consult the user manual that came with your device for any unique cleaning instructions specific to your model.
Now, let’s get started on cleaning your Dyson Air Purifier!
Key Takeaways:
- Regularly cleaning your Dyson Air Purifier is crucial for maintaining its performance and extending its lifespan. Follow the step-by-step guide to ensure clean and fresh air in your home.
- Gather the necessary supplies, turn off and unplug the air purifier, remove and clean each filter, and reassemble them correctly to enjoy the benefits of clean air.
Step 1: Gather necessary supplies
Before you start cleaning your Dyson Air Purifier, it’s important to gather all the necessary supplies. Having everything on hand will make the cleaning process smoother and more efficient. Here are the items you will need:
- Mild dish soap or cleaning solution
- Clean, lint-free cloth or microfiber cloth
- Soft-bristled brush or toothbrush
- Vacuum cleaner with a brush attachment (optional)
- Towels or paper towels
- Clean, warm water
Make sure that the cleaning solution you use is gentle and non-abrasive to avoid damaging any parts of the air purifier. It’s also a good idea to have a clean, dry area to work on, preferably near a sink. With all the necessary supplies gathered, you are now ready to proceed to the next steps of cleaning your Dyson Air Purifier.
Step 2: Turn off and unplug the Dyson Air Purifier
Before you begin cleaning your Dyson Air Purifier, it’s essential to turn off the device and unplug it from the power source. This precautionary step ensures your safety and prevents any damage to the air purifier during the cleaning process.
To turn off the air purifier, locate the power button on the device or use the remote control (if applicable) to power it down. Once the unit is turned off, locate the power cord and unplug it from the electrical outlet. This step is crucial to avoid any potential electrical hazards.
Allow the air purifier to cool down for a few minutes before proceeding with the cleaning process. This will ensure that you don’t accidentally touch hot or moving parts of the unit, reducing the risk of injury during the cleaning process.
By turning off and unplugging the Dyson Air Purifier, you are taking the necessary precautions to protect yourself and the device from any potential harm. Once you have completed this step, you can move on to the next stage of cleaning, which involves removing the filters for cleaning.
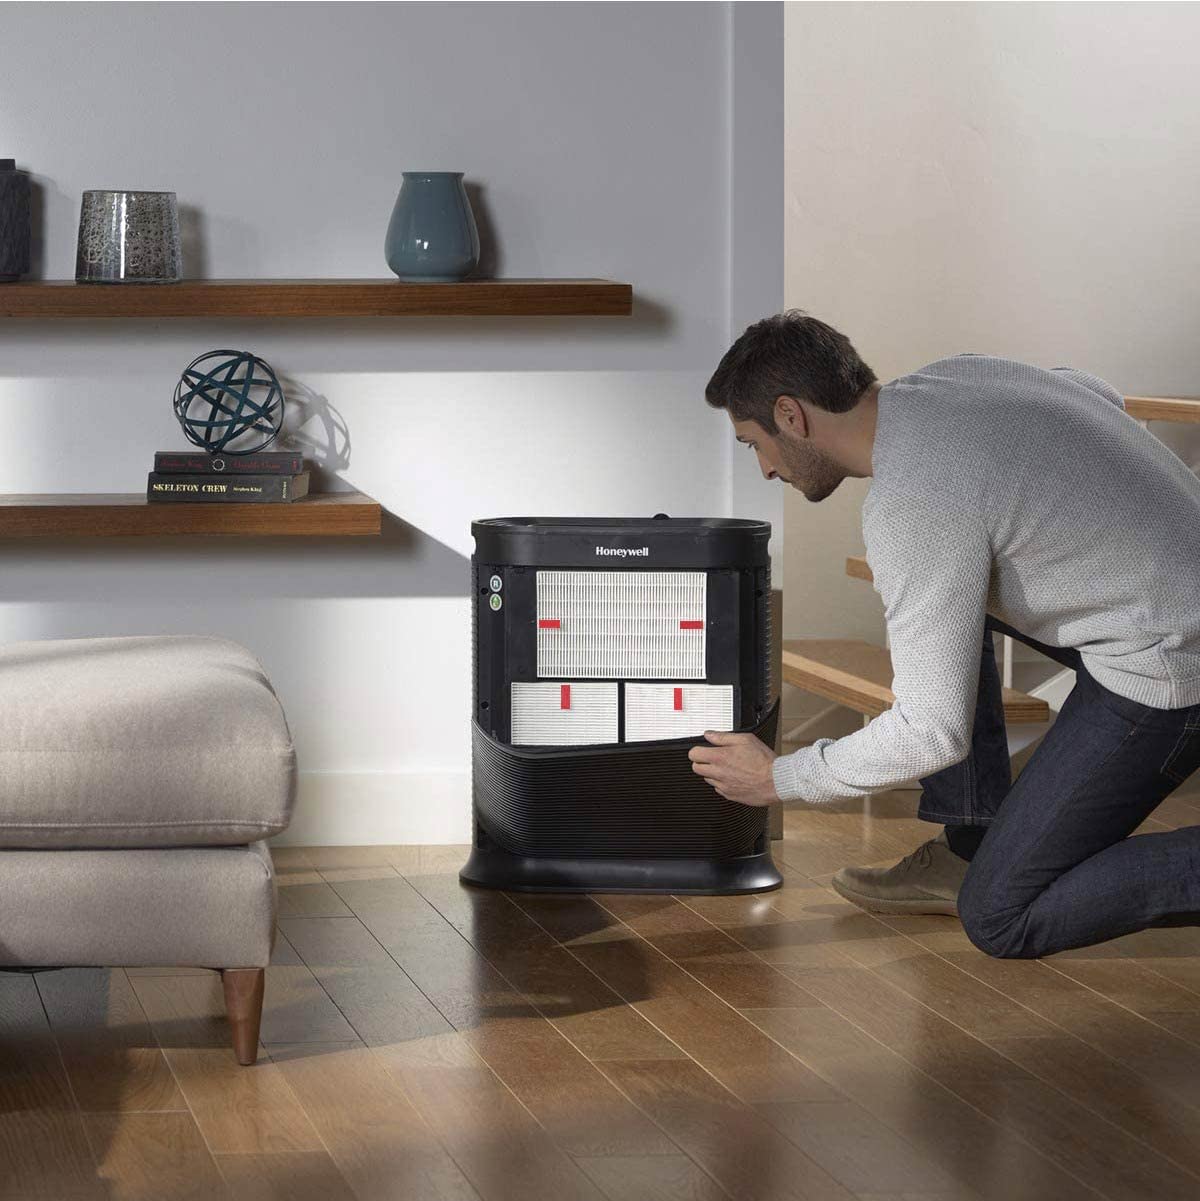
Step 3: Remove the filters
With the Dyson Air Purifier turned off and unplugged, it’s time to remove the filters. The filters are a crucial component of the air purifier and need regular cleaning to maintain the device’s efficiency. The specific type and number of filters may vary depending on the model of your Dyson Air Purifier.
To access the filters, locate the filter compartment on the air purifier. Depending on the model, this compartment may be located at the top, side, or bottom of the unit. Consult the user manual if you are unsure about the location.
Once you have located the filter compartment, follow these steps to remove the filters:
- Open the filter compartment by either lifting a latch, sliding a panel, or unscrewing a cover. The method may vary depending on the model.
- Gently lift the filters out of the compartment. Be careful not to apply too much force, as this may cause damage to the filters or the air purifier.
- If there are multiple filters, take note of their order and orientation for reassembly later. Some models may require the filters to be installed in a specific order.
Once the filters have been removed, set them aside for cleaning. It’s important to handle the filters with care to avoid tearing or damaging them. Now that the filters are detached, you can proceed to the next step, which involves cleaning the pre-filter.
Step 4: Clean the pre-filter
The pre-filter is the first line of defense in your Dyson Air Purifier, capturing larger particles like dust and pet hair. Cleaning the pre-filter regularly is crucial to maintain the air purifier’s effectiveness. Here is how you can clean the pre-filter:
- Remove the pre-filter from the rest of the filters. It is usually a washable filter that can be detached from the main body.
- Take the pre-filter to a sink or basin and rinse it under cold running water. Use your fingers to gently rub away any visible debris from the surface.
- If the pre-filter is heavily soiled, fill a basin with lukewarm water and add a small amount of mild dish soap. Submerge the pre-filter into the soapy water and allow it to soak for a few minutes.
- Gently agitate the pre-filter in the water, loosening any dirt or grime. Use a soft-bristled brush or a toothbrush to gently scrub away stubborn stains or buildup. Be careful not to scrub too hard, as this can damage the pre-filter.
- Rinse the pre-filter thoroughly with clean water to remove any soap residue.
- Shake off any excess water and pat the pre-filter dry with a clean towel or paper towel. Allow it to air dry completely before reinserting it into the air purifier.
It’s important to note that you should always refer to the manufacturer’s instructions for specific cleaning guidelines for your particular model of Dyson Air Purifier. Some models may have a removable pre-filter that can be washed, while others may require the use of a vacuum cleaner with a brush attachment to clean the pre-filter.
Now that the pre-filter is cleaned and dried, you can move on to cleaning the HEPA filter, which is the next step in the process.
Read more: How To Clean Blue Air Purifier
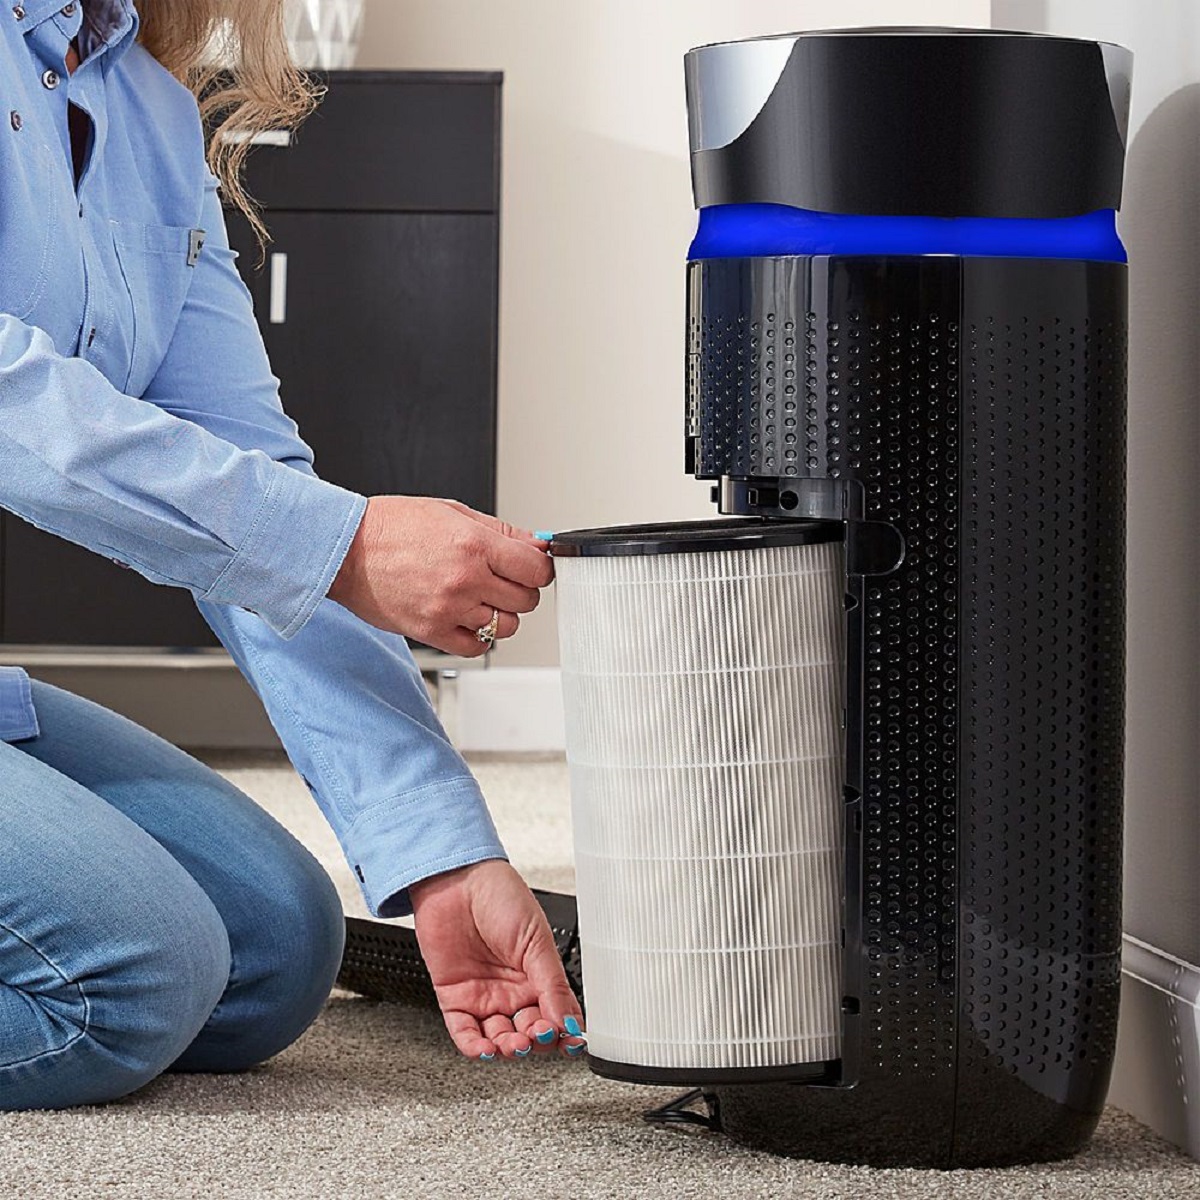
Step 5: Clean the HEPA filter
The HEPA (High-Efficiency Particulate Air) filter is a key component of your Dyson Air Purifier, responsible for capturing small particles like pollen, dust mites, and pet dander. Cleaning the HEPA filter regularly is important to maintain its efficiency and ensure the continued purification of the air in your home. Here is how you can clean the HEPA filter:
- Inspect the HEPA filter for any visible debris or dust accumulation. If there is only light dust, you can proceed with a thorough vacuuming. However, if the filter is heavily soiled or has stubborn stains, it may be necessary to wash it. Refer to the manufacturer’s guidelines for your specific model.
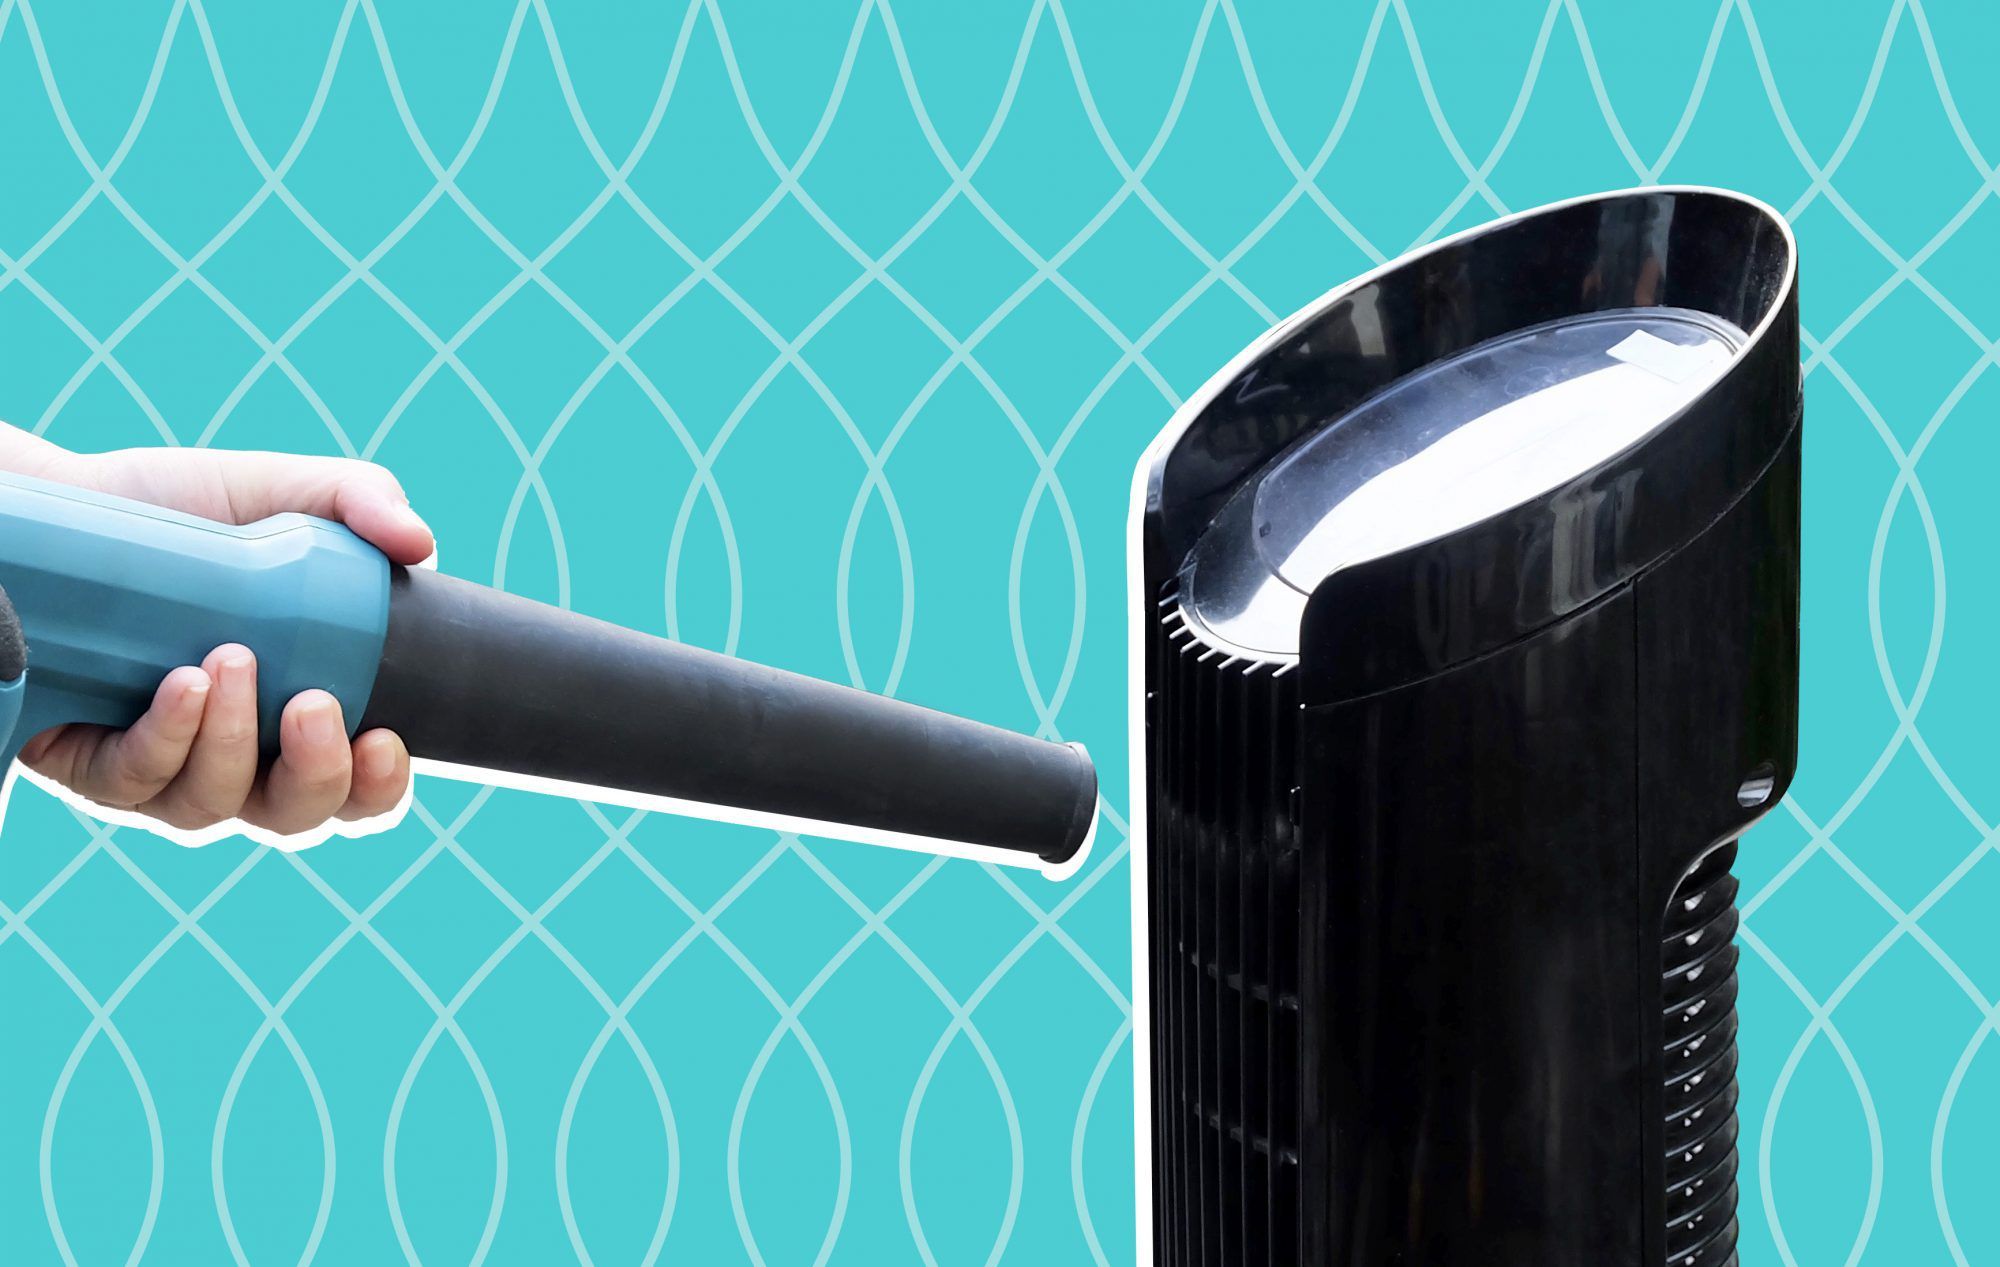
- If vacuuming, use a vacuum cleaner with a brush attachment to gently remove dust and debris from both sides of the filter. Start with a low suction setting to prevent any damage to the delicate filter material.
- If washing is required, check the manufacturer’s instructions for specific cleaning guidance. In some models, the HEPA filter may be washable, while others may require replacement. If it is washable, proceed as follows:
- Fill a basin with lukewarm water and add a small amount of mild dish soap.
- Submerge the HEPA filter into the soapy water and allow it to soak for a few minutes.
- Gently agitate the filter in the water, ensuring to loosen any dirt or debris.
- Rinse the filter thoroughly with clean water to remove any soap residue.
- Shake off any excess water and pat the filter dry with a clean towel or paper towel.
- Set the HEPA filter aside and allow it to air dry completely before reinserting it into the air purifier.
It’s important to note that not all HEPA filters are washable. Some may need to be replaced according to the manufacturer’s recommendations. Be sure to check your Dyson Air Purifier’s user manual or contact Dyson support for the specific cleaning instructions for your model.
With the HEPA filter cleaned and dried, you can now proceed to the next step, which involves cleaning the carbon filter if your Dyson Air Purifier has one.
To clean a Dyson air purifier, first unplug the unit. Then, use a soft, dry cloth to wipe down the exterior. For the filter, follow the manufacturer’s instructions for removal and cleaning. Regular maintenance will ensure optimal performance.
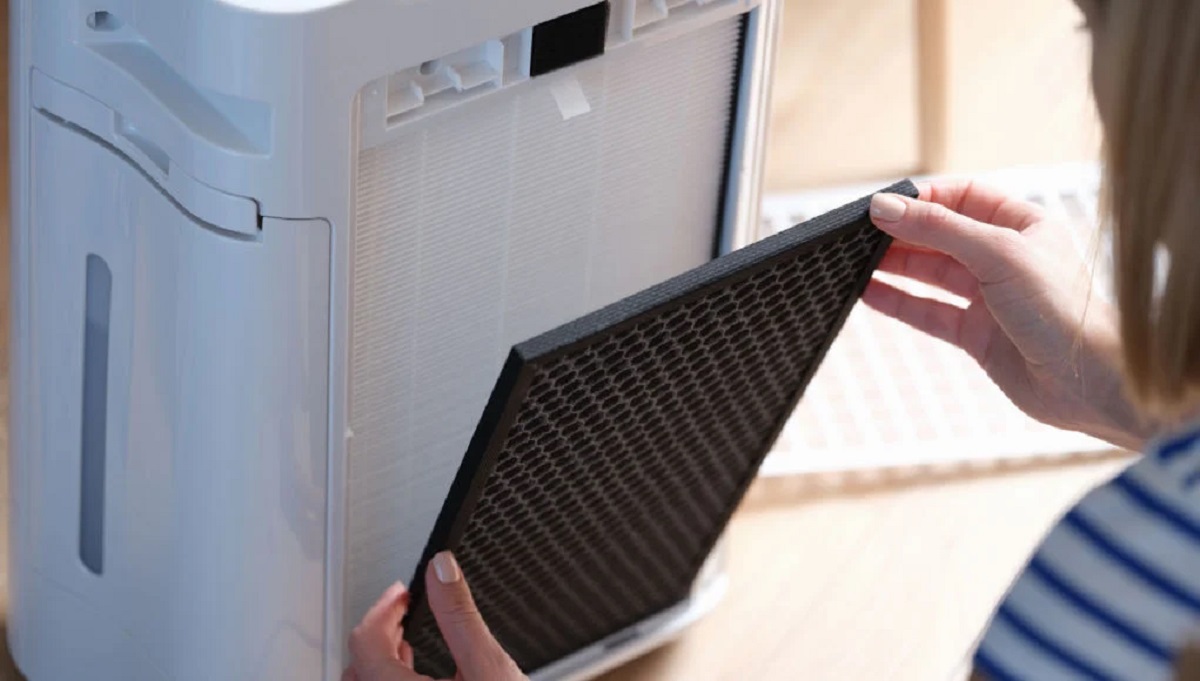
Step 6: Clean the carbon filter (if applicable)
If your Dyson Air Purifier is equipped with a carbon filter, it helps to remove odors, gases, and volatile organic compounds (VOCs) from the air. Cleaning the carbon filter is essential to maintain its effectiveness in odor and gas reduction. Here is how you can clean the carbon filter, if applicable:
- Remove the carbon filter from the filter compartment. Refer to the user manual for specific instructions on how to access the carbon filter.
- Inspect the carbon filter for any visible dirt, dust, or odor retention. If it is only lightly soiled, you can proceed with a gentle cleaning. However, if it is heavily soiled or has a strong odor, it may be necessary to replace it. Check the manufacturer’s recommendations for your model.
- If the carbon filter is washable, rinse it under cool running water to remove any loose debris.
- If there are stubborn stains or odors, create a mixture of equal parts water and vinegar. Submerge the carbon filter in this solution and allow it to soak for 10-15 minutes.
- Gently scrub the carbon filter with a soft-bristled brush or toothbrush to remove any remaining dirt or odor particles.
- Rinse the filter thoroughly with clean water to remove any vinegar residue and debris.
- Shake off any excess water and pat the carbon filter dry with a clean towel or paper towel.
- Set the filter aside and let it air dry completely before reinserting it into the air purifier.
It’s important to note that not all carbon filters are washable. Some may need to be replaced periodically, according to the manufacturer’s recommendations. Be sure to check your Dyson Air Purifier’s user manual or contact Dyson support for specific instructions on cleaning or replacing the carbon filter.
With the carbon filter (if applicable) cleaned and dried, you can now move on to cleaning the outside of the air purifier.
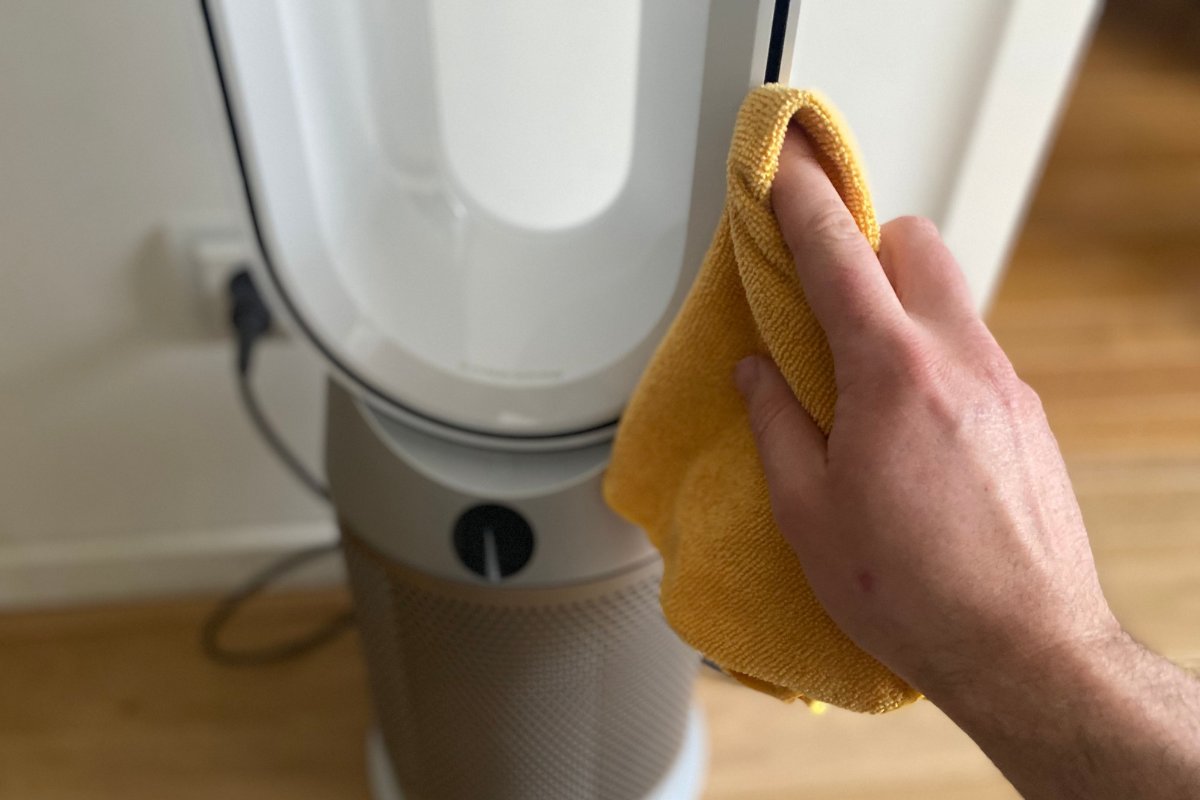
Step 7: Clean the outside of the air purifier
While cleaning the filters is essential for maintaining the performance of your Dyson Air Purifier, it’s also important to clean the exterior of the device to keep it looking its best. Here are the steps to clean the outside of the air purifier:
- First, make sure the air purifier is turned off and unplugged from the power source for safety.
- Wipe down the exterior surfaces of the air purifier with a clean, lint-free cloth or a microfiber cloth. This will help remove any dust, fingerprints, or smudges that may have accumulated.
- If there are any stubborn stains or dirt, dampen the cloth with warm water and a small amount of mild dish soap. Gently wipe the affected area to remove the stains, being careful not to let any moisture enter the internal parts of the device.
- For tight spaces or crevices, you can use a soft-bristled brush or a toothbrush to gently dislodge any dirt or debris.
- Pay special attention to the air vents and grilles on the air purifier. These areas may accumulate dust and require more thorough cleaning. You can use a vacuum cleaner with a brush attachment to remove any accumulated dust or debris.
- Once you have cleaned the exterior surfaces and vents, use a clean, dry cloth to wipe away any remaining moisture on the air purifier.
It’s important to note that you should avoid using harsh chemicals or abrasive cleaners on the air purifier, as they can damage the plastic or other materials. Stick to mild dish soap and water for any stubborn stains or dirt.
With the outside of the air purifier clean and dry, you are now ready to reassemble the filters in the next step.
Step 8: Reassemble the filters
Once you have completed the cleaning process for the filters and the exterior of your Dyson Air Purifier, it’s time to reassemble the filters. Properly reassembling the filters ensures that they function effectively and that the air purifier operates at its optimal capacity. Follow these steps to reassemble the filters:
- Begin by taking the dry, clean pre-filter and placing it back into the filter compartment. Ensure that it is properly aligned and securely fitted.
- If your Dyson Air Purifier has multiple filters, follow the correct order and orientation as noted during the removal process.
- Once all the filters are in place, close the filter compartment securely by latching it, sliding the panel back into position, or screwing on the cover.
- Ensure that all the filters are tightly secured and that there are no gaps or loose connections in the filter compartment.
By reassembling the filters correctly, you are ensuring that the air purifier can effectively capture and filter the pollutants in the air. This step is crucial for the proper functioning of the device and maintaining indoor air quality.
With the filters reassembled, it’s time to move on to the final step – plugging in and turning on your Dyson Air Purifier.
Read more: How To Clean A Levoit Air Purifier
Step 9: Plug in and turn on the Dyson Air Purifier
Once you have completed the cleaning and reassembly process for your Dyson Air Purifier, it’s time to plug it in and turn it on to enjoy the benefits of clean and fresh air in your home. Follow these final steps:
- Locate a suitable electrical outlet near the desired location for your air purifier.
- Check the power cord for any damage or fraying before plugging it into the outlet. If you notice any issues with the cord, it’s important to have it repaired or replaced before using the device.
- Insert the plug of the power cord into the outlet and ensure a secure connection. Do not force the plug into the outlet if it does not fit; consult an electrician if there are any concerns.
- Once the air purifier is plugged in, locate the power button or the power switch on the device.
- Press the power button or flip the power switch to turn on the air purifier.
- Wait for the air purifier to start up and begin purifying the air. The device may have different settings and mode options, so refer to the user manual for specific operation instructions.
It’s important to note that after cleaning and reassembling the filters, it may take a few minutes for the air purifier to reach its full purification efficiency. Allow the device some time to circulate and clean the air in your surroundings.
Congratulations! You have successfully cleaned and reassembled your Dyson Air Purifier. With the device plugged in and turned on, you can now enjoy the clean and fresh air it provides in your home.
Remember to regularly maintain and clean your Dyson Air Purifier to ensure its longevity and continued effectiveness in purifying the air. Refer to the user manual for any additional cleaning tips or recommendations specific to your model.
Thank you for following this step-by-step guide, and we hope your Dyson Air Purifier continues to improve the air quality in your home!
Conclusion
Cleaning your Dyson Air Purifier is a vital step in ensuring its performance, longevity, and the quality of air in your home. By following the step-by-step guide outlined in this article, you can maintain the efficiency of your air purifier and enjoy clean and fresh air for years to come.
Remember to gather all the necessary supplies before starting the cleaning process. Turn off and unplug the air purifier to ensure safety. Remove and clean each filter according to their specific cleaning instructions. Pay attention to the pre-filter, HEPA filter, and carbon filter (if applicable) to remove dust, debris, and odors effectively.
Additionally, take the time to clean the outside of the air purifier using a lint-free cloth and mild dish soap. Reassembling the filters correctly is crucial, ensuring a proper air purification process. Lastly, plug in and turn on your Dyson Air Purifier to enjoy clean and fresh air in your home.
Regular maintenance and cleaning of your air purifier will not only improve air quality but also extend its lifespan. Be sure to consult the user manual for any specific cleaning instructions or recommendations provided by Dyson for your particular model.
Thank you for taking the time to follow this comprehensive guide on how to clean your Dyson Air Purifier. A well-maintained air purifier will provide you and your family with cleaner, healthier air, creating a more comfortable living environment.
Breathe easier and enjoy the benefits of clean air with your Dyson Air Purifier!
Frequently Asked Questions about How To Clean Dyson Air Purifier
Was this page helpful?
At Storables.com, we guarantee accurate and reliable information. Our content, validated by Expert Board Contributors, is crafted following stringent Editorial Policies. We're committed to providing you with well-researched, expert-backed insights for all your informational needs.
0 thoughts on “How To Clean Dyson Air Purifier”