Home>Furniture & Design>Bathroom Accessories>How To Clean A Bath Mat With Suction Cups
Bathroom Accessories
How To Clean A Bath Mat With Suction Cups
Modified: August 17, 2024
Learn how to effectively clean your bath mat with suction cups and keep your bathroom accessories looking fresh and hygienic. Discover the best cleaning methods for bathroom accessories.
(Many of the links in this article redirect to a specific reviewed product. Your purchase of these products through affiliate links helps to generate commission for Storables.com, at no extra cost. Learn more)
Introduction
Cleaning a bath mat with suction cups is an essential part of maintaining a hygienic and inviting bathroom environment. Over time, bath mats can accumulate dirt, grime, and soap scum, which not only diminishes their appearance but also creates a breeding ground for bacteria and mold. By regularly cleaning your bath mat, you can ensure that it remains fresh, clean, and free from potentially harmful microorganisms.
In this comprehensive guide, we will walk you through the step-by-step process of effectively cleaning a bath mat with suction cups. Whether your bath mat is made of rubber, plastic, or another material, these cleaning techniques are designed to restore its cleanliness and extend its lifespan. By following these simple yet effective methods, you can maintain a clean and hygienic bathroom environment for yourself and your family.
So, let's roll up our sleeves and dive into the process of rejuvenating your bath mat to its pristine condition. Whether you're dealing with a bath mat in the shower, bathtub, or any other area of your bathroom, these cleaning tips will help you achieve a sparkling clean result. Get ready to bid farewell to dirt, grime, and unsightly stains as we embark on this journey to revitalize your bath mat and elevate the overall cleanliness of your bathroom space.
Key Takeaways:
- Say goodbye to dirt and grime by following these simple steps to clean your bath mat with suction cups. Keep your bathroom fresh and hygienic for a healthier environment.
- Revitalize your bath mat with suction cups by removing, shaking, scrubbing, and drying it thoroughly. Enjoy a clean, visually appealing, and fully functional bathroom accessory.
Read more: How To Clean A Rubber Bath Mat
Step 1: Remove the Bath Mat
The first step in cleaning a bath mat with suction cups is to carefully remove it from its current location. Whether your bath mat is placed inside the shower, bathtub, or on the bathroom floor, it's important to handle this process with care to avoid splashing water or spreading debris. By removing the bath mat, you can focus on cleaning it thoroughly without any obstructions.
Start by gently lifting the bath mat from its position, ensuring that any excess water or debris on the surface is contained within the mat itself. If the bath mat is particularly dirty or wet, it's advisable to place it on a flat surface in a well-ventilated area to prevent any moisture from seeping into the underlying floor or causing mildew.
As you remove the bath mat, take note of any accumulated dirt, hair, or soap residue that may have collected underneath it. This is an opportune time to inspect the area where the bath mat was placed and address any lingering mess or moisture. By doing so, you can prevent the spread of dirt and grime, ultimately contributing to a cleaner and more hygienic bathroom environment.
Once the bath mat has been successfully removed, you can proceed to the next step of the cleaning process, which involves shaking off loose debris to prepare the mat for a more thorough cleaning. With the bath mat now out of the way, you have a clear canvas to work with, allowing you to focus on restoring its cleanliness and rejuvenating its appearance.
By following these simple yet crucial steps, you can set the stage for a successful bath mat cleaning process, ensuring that every aspect of the mat is addressed with precision and care. With the bath mat removed, you are now ready to embark on the journey of revitalizing and refreshing this essential bathroom accessory.
Step 2: Shake Off Loose Debris
After removing the bath mat from its designated location, the next crucial step in the cleaning process is to shake off any loose debris that may have accumulated on its surface. This simple yet effective technique serves as a preliminary measure to rid the bath mat of dirt, hair, and other particles that can compromise its cleanliness and overall appeal.
To begin, take the bath mat to a suitable outdoor area or a space where shaking it vigorously will not cause a mess. Holding the mat firmly by its edges, gently shake it in an up-and-down motion to dislodge any loose debris embedded within the fibers or suction cups. As you shake the mat, you may notice an array of particles being released, including hair, soap scum, and dirt that have accumulated over time.
In addition to shaking the bath mat, consider using a handheld vacuum cleaner with a brush attachment to further remove stubborn debris. This can be particularly effective for dislodging fine particles that may not be easily shaken off by hand. By running the vacuum over the surface of the bath mat, you can ensure that even the smallest traces of dirt and debris are effectively removed, setting the stage for a more thorough cleaning process.
Furthermore, if the bath mat is designed with raised patterns or textured surfaces, use a soft-bristled brush to gently scrub the areas where debris may be trapped. This targeted approach can help dislodge embedded dirt and grime, preparing the surface for a comprehensive cleaning.
By shaking off loose debris and employing additional cleaning tools as needed, you can effectively prepare the bath mat for the subsequent cleaning steps. This initial phase sets the foundation for a more in-depth cleaning process, ensuring that the surface is free from loose particles and ready to undergo thorough scrubbing and rinsing.
As you complete this step, take a moment to inspect the bath mat for any remaining debris or stains that may require specific attention during the subsequent cleaning stages. By addressing loose debris at this early stage, you are laying the groundwork for a successful and comprehensive cleaning process, ultimately contributing to a fresh and revitalized bath mat.
In summary, shaking off loose debris is a fundamental step in the process of cleaning a bath mat with suction cups. By employing simple yet effective techniques such as vigorous shaking, vacuuming, and targeted brushing, you can ensure that the bath mat is free from surface-level dirt and debris, setting the stage for a more thorough and impactful cleaning process.
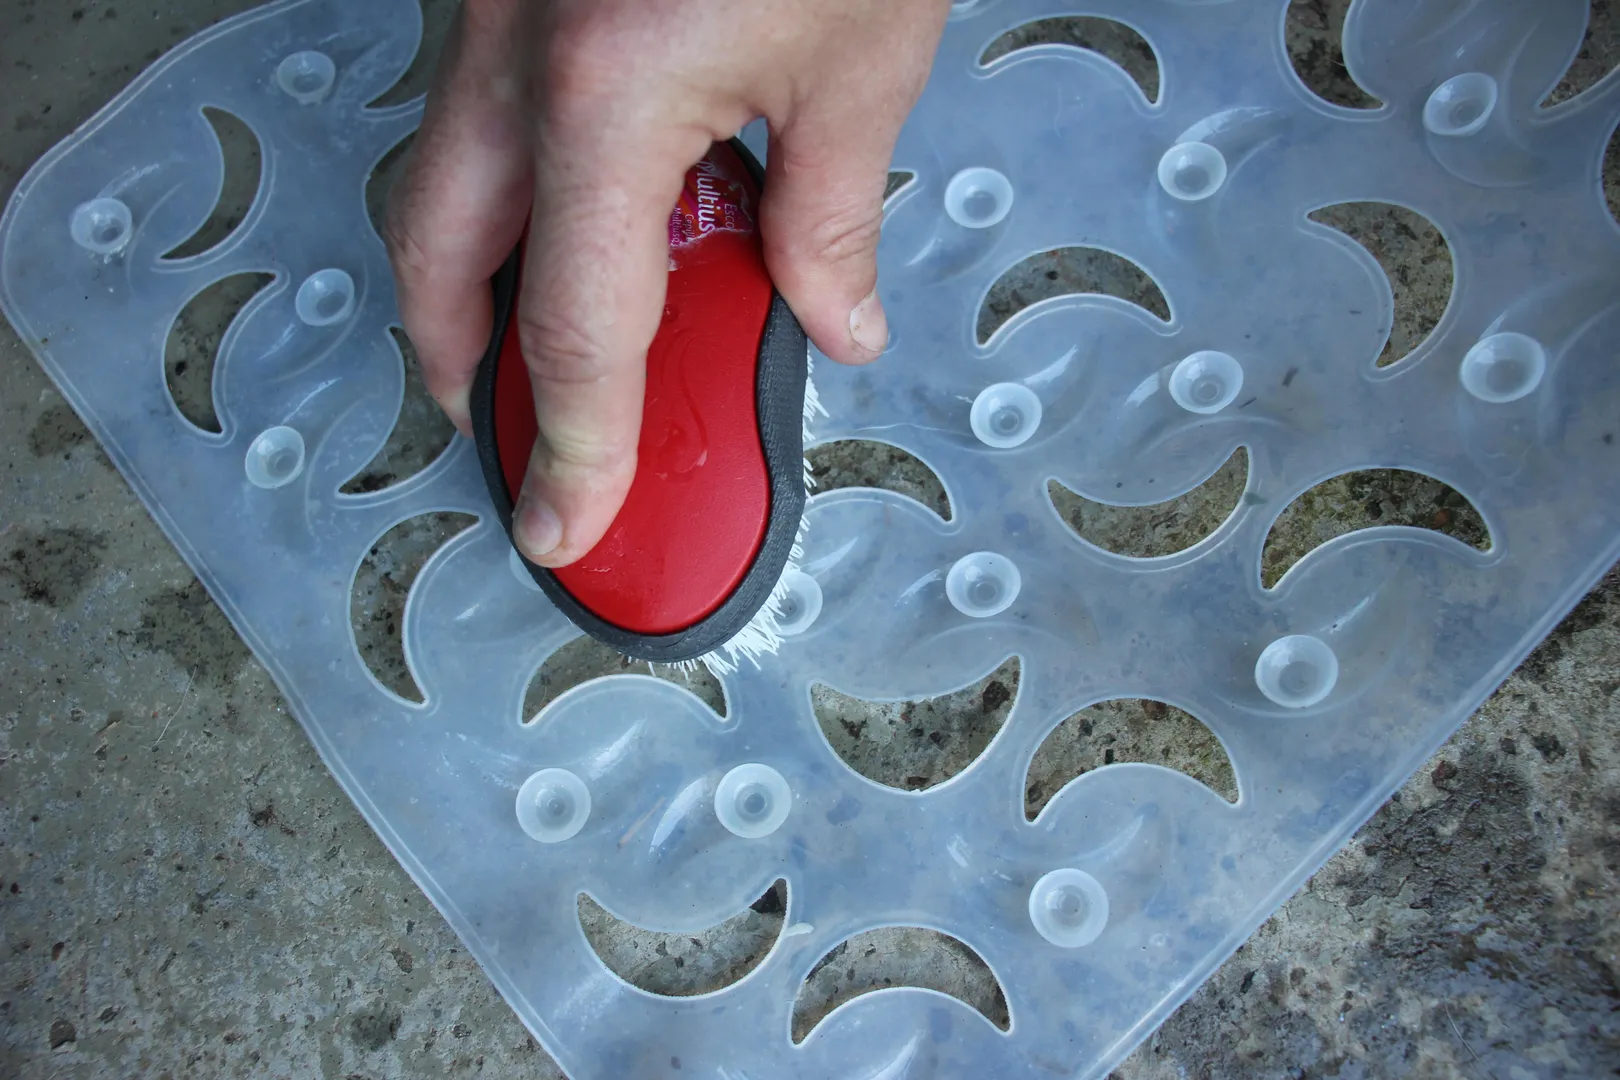
Step 3: Scrub the Suction Cups
Once the loose debris has been shaken off the bath mat, the next critical step in the cleaning process involves scrubbing the suction cups to remove any accumulated grime and ensure their optimal functionality. Suction cups are designed to adhere firmly to the surface, providing stability and preventing the mat from slipping. However, over time, these suction cups can become coated with soap scum, residue, and mineral deposits, compromising their effectiveness. By diligently scrubbing the suction cups, you can restore their grip and maintain the overall integrity of the bath mat.
To begin, prepare a solution of warm water and mild liquid soap in a bucket or basin. The gentle cleaning properties of the soap, combined with the warmth of the water, create an effective cleaning solution that is safe for both the bath mat and the suction cups. Dip a soft-bristled brush or sponge into the soapy water, ensuring that it is adequately saturated.
Next, carefully lift the bath mat and focus on the underside where the suction cups are located. Using the soapy brush or sponge, gently scrub the suction cups in a circular motion, applying moderate pressure to dislodge any accumulated grime. Pay particular attention to the areas where the suction cups meet the surface, as these areas are prone to trapping dirt and soap residue.
As you scrub, periodically rinse the brush or sponge in the soapy water to prevent the transfer of dirt back onto the suction cups. This ensures that the cleaning process remains effective and that the suction cups are thoroughly cleansed. Additionally, if you encounter stubborn residue or mineral deposits, consider using a solution of white vinegar and water to target these areas, as the acidic properties of vinegar can help dissolve mineral buildup and soap scum.
After scrubbing the suction cups, thoroughly rinse the underside of the bath mat with clean water to remove any soapy residue. This step is crucial in ensuring that the suction cups are free from any lingering soap or cleaning solution, as these residues can affect their adherence to the surface. Once rinsed, gently shake the bath mat to remove excess water before proceeding to the next cleaning phase.
By diligently scrubbing the suction cups with a gentle yet effective cleaning solution, you can rejuvenate their functionality and maintain the overall stability of the bath mat. This meticulous approach to cleaning ensures that the suction cups are free from grime and residue, allowing them to securely adhere to the surface and fulfill their intended purpose.
In summary, scrubbing the suction cups is a pivotal step in the process of cleaning a bath mat with suction cups. By employing a gentle cleaning solution and targeted scrubbing techniques, you can effectively remove accumulated grime and maintain the optimal functionality of the suction cups, contributing to a clean, secure, and revitalized bath mat.
To clean a bath mat with suction cups, remove it from the tub and soak it in a mixture of warm water and mild detergent. Scrub the mat with a soft brush, rinse thoroughly, and hang to dry. Avoid using harsh chemicals or bleach to prevent damage to the suction cups.
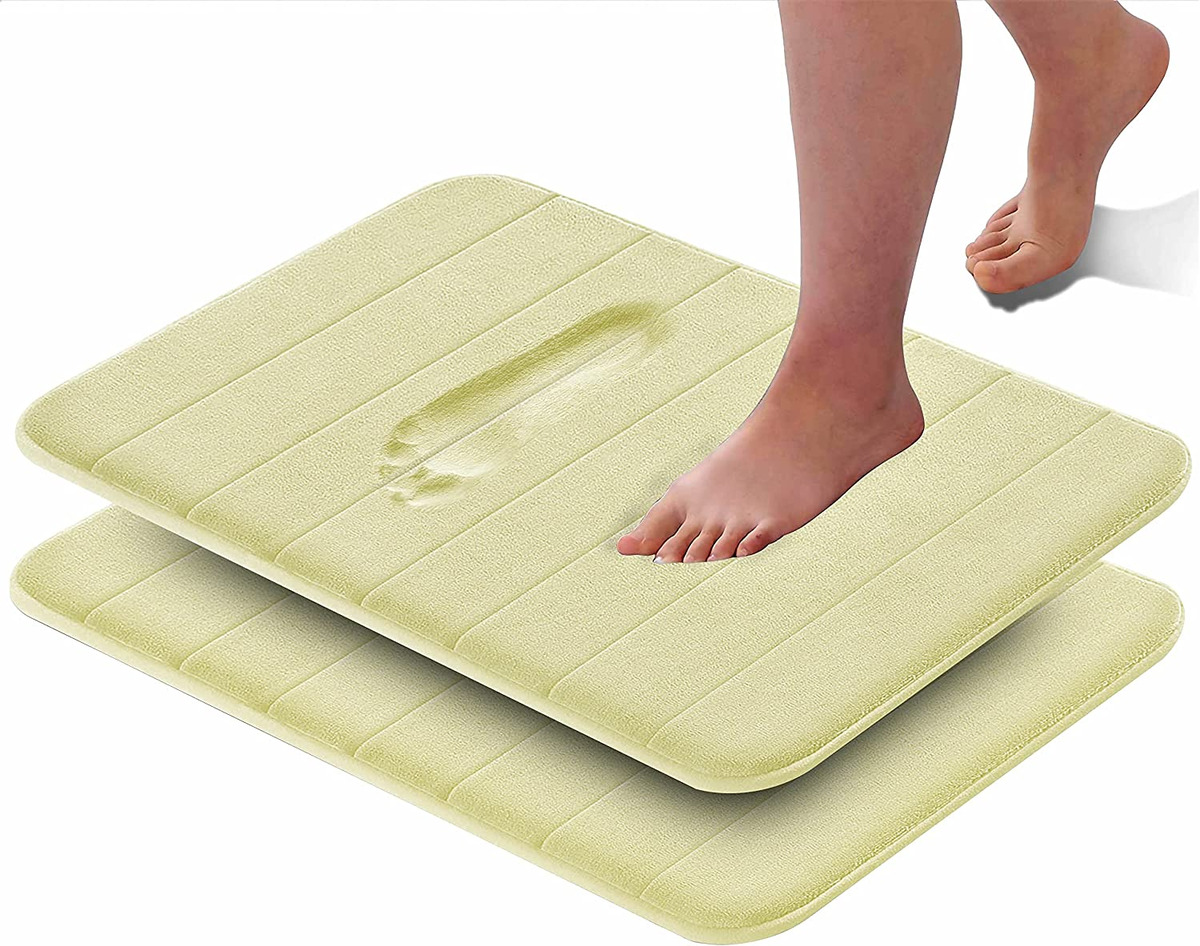
Step 4: Clean the Surface of the Bath Mat
Cleaning the surface of the bath mat is a crucial step in the overall cleaning process, as it directly addresses the visible areas that come into contact with bare feet and provide traction within the bathroom. To effectively clean the surface of the bath mat, you will need to utilize a gentle yet potent cleaning solution and employ thorough scrubbing techniques to remove dirt, stains, and residual soap scum.
Begin by preparing a cleaning solution consisting of warm water and a mild liquid soap or detergent. This combination provides the necessary cleaning power while remaining gentle on the material of the bath mat. Ensure that the cleaning solution is well-diluted to prevent any potential residue or damage to the mat.
Using a soft-bristled brush or sponge, dip it into the cleaning solution and apply it generously to the surface of the bath mat. Work in small sections, focusing on areas that exhibit visible stains, discoloration, or soap residue. Employ circular motions and gentle scrubbing to dislodge dirt and grime, paying particular attention to textured or patterned areas where debris may be trapped.
For stubborn stains or discoloration, consider using a paste made from baking soda and water. This natural abrasive paste can be applied to the affected areas and gently scrubbed to lift stains and restore the original appearance of the bath mat. Allow the paste to sit for a few minutes before rinsing it off with clean water.
After thoroughly scrubbing the surface of the bath mat, rinse it with clean water to remove any residual cleaning solution and loosened debris. Ensure that all traces of soap and dirt are effectively washed away, leaving the surface clean and refreshed.
Once rinsed, gently shake the bath mat to remove excess water before proceeding to the final step of the cleaning process. This ensures that the surface is free from excess moisture and ready for the subsequent drying phase.
By diligently cleaning the surface of the bath mat with a gentle yet effective cleaning solution and targeted scrubbing techniques, you can restore its cleanliness and visual appeal. This meticulous approach ensures that the bath mat is free from dirt, stains, and residual soap scum, contributing to a fresh and revitalized bathroom accessory.
In summary, cleaning the surface of the bath mat is a pivotal step in the overall cleaning process, as it directly addresses the visible areas that come into contact with bare feet and provide traction within the bathroom. By employing gentle yet potent cleaning solutions and thorough scrubbing techniques, you can effectively remove dirt, stains, and residual soap scum, ultimately contributing to a clean, refreshed, and visually appealing bath mat.
Read more: How To Clean Loofah Bath Mat
Step 5: Rinse and Dry the Bath Mat
After completing the thorough cleaning process, the final step in rejuvenating your bath mat with suction cups involves rinsing and drying it to ensure a pristine finish and optimal functionality. This critical phase not only removes any residual cleaning solutions and debris but also sets the stage for a quick and effective drying process, allowing you to return the bath mat to its designated location promptly.
To begin, thoroughly rinse the bath mat with clean water, ensuring that all traces of the cleaning solution and dislodged debris are effectively washed away. Pay particular attention to textured or patterned areas, as these areas may trap residual cleaning solution or dirt. By rinsing the bath mat meticulously, you can guarantee that it is free from any lingering substances, contributing to a clean and refreshed surface.
Once rinsed, gently shake the bath mat to remove excess water, facilitating the subsequent drying process. This step helps expedite the drying time and prevents water from pooling on the surface, ensuring that the bath mat dries evenly and efficiently.
Next, choose a well-ventilated area or an outdoor space to lay the bath mat flat for drying. Position the bath mat in a manner that allows air to circulate around it, promoting thorough and uniform drying. Avoid placing the bath mat in direct sunlight, as prolonged exposure to sunlight may cause certain materials to degrade or fade over time.
Depending on the material of the bath mat, the drying time may vary. Rubber and plastic bath mats typically dry relatively quickly, while fabric or microfiber mats may require a longer drying period. It's essential to allow the bath mat to air dry completely before returning it to its designated location, as residual moisture can lead to mildew or unpleasant odors.
Throughout the drying process, periodically check the bath mat to ensure that it is drying evenly and that no moisture is trapped beneath it. If necessary, gently pat the surface with a clean, dry towel to absorb any excess moisture and expedite the drying time.
Once the bath mat is thoroughly dry, inspect it for any remaining stains or areas that may require additional attention. If needed, spot clean any lingering stains using a targeted cleaning solution and gentle scrubbing techniques, ensuring that the bath mat is pristine and free from blemishes.
By diligently rinsing and drying the bath mat, you can complete the cleaning process with a fresh, revitalized, and fully functional bathroom accessory. This final step ensures that the bath mat is free from residual cleaning solutions, debris, and moisture, allowing you to return it to its designated location with confidence.
In summary, rinsing and drying the bath mat is a pivotal step in the overall cleaning process, as it ensures a pristine finish and optimal functionality. By meticulously rinsing, shaking, and air drying the bath mat, you can complete the rejuvenation process and return it to its designated location with a clean, refreshed, and fully functional state.
Conclusion
In conclusion, the process of cleaning a bath mat with suction cups is a transformative journey that culminates in a refreshed, hygienic, and visually appealing bathroom accessory. By following the step-by-step guide outlined in this comprehensive article, you have acquired the knowledge and techniques necessary to effectively rejuvenate your bath mat and maintain a clean, inviting bathroom environment.
Throughout the cleaning process, you have learned the importance of meticulous attention to detail, from removing the bath mat and shaking off loose debris to scrubbing the suction cups and thoroughly cleansing the surface. Each step was carefully designed to address specific aspects of the bath mat, ensuring that no detail was overlooked in the pursuit of cleanliness and revitalization.
By removing the bath mat from its designated location, you set the stage for a focused and unobstructed cleaning process, allowing you to address every area with precision and care. The act of shaking off loose debris served as a fundamental preparatory step, ensuring that the surface was free from surface-level dirt and particles before proceeding to more in-depth cleaning techniques.
Scrubbing the suction cups was a pivotal phase in the process, as it directly contributed to the functionality and stability of the bath mat. By diligently cleansing the suction cups, you restored their grip and ensured that the mat would securely adhere to the surface, providing a safe and stable footing within the bathroom.
Cleaning the surface of the bath mat was a transformative step that directly addressed visible areas, removing stains, dirt, and residual soap scum to reveal a refreshed and visually appealing surface. The use of gentle yet effective cleaning solutions and targeted scrubbing techniques facilitated the removal of stubborn debris, contributing to a revitalized and visually appealing bath mat.
The final phase of rinsing and drying the bath mat ensured a pristine finish and optimal functionality, allowing you to return the bath mat to its designated location with confidence. By meticulously rinsing and air drying the bath mat, you completed the rejuvenation process, culminating in a clean, refreshed, and fully functional bathroom accessory.
As you reflect on the journey of cleaning your bath mat with suction cups, you can take pride in the transformation you have achieved. Your commitment to maintaining a clean and hygienic bathroom environment has resulted in a revitalized bath mat that not only enhances the aesthetic appeal of the space but also contributes to a healthier and more inviting atmosphere for you and your family.
In essence, the process of cleaning a bath mat with suction cups is a testament to the transformative power of diligent care and attention. By embracing these cleaning techniques as part of your regular maintenance routine, you can ensure that your bath mat remains a clean, hygienic, and visually appealing addition to your bathroom for years to come.
Frequently Asked Questions about How To Clean A Bath Mat With Suction Cups
Was this page helpful?
At Storables.com, we guarantee accurate and reliable information. Our content, validated by Expert Board Contributors, is crafted following stringent Editorial Policies. We're committed to providing you with well-researched, expert-backed insights for all your informational needs.

0 thoughts on “How To Clean A Bath Mat With Suction Cups”