Articles
How To Light Turkey Fryer
Modified: December 6, 2023
Learn how to safely and effectively light your turkey fryer with these informative articles. Get expert tips and advice for a delicious and stress-free frying experience.
(Many of the links in this article redirect to a specific reviewed product. Your purchase of these products through affiliate links helps to generate commission for Storables.com, at no extra cost. Learn more)
Introduction
Welcome to the world of turkey frying! If you’re looking to step up your cooking game and impress your friends and family with a deliciously crispy and juicy turkey, then you’ve come to the right place. In this article, we will guide you through the process of using a turkey fryer to achieve mouthwatering results that will leave everyone wanting more.
Turkey frying has gained immense popularity in recent years as it offers a unique way to cook turkey, creating a crispy golden exterior while keeping the meat tender and flavorful on the inside. However, it’s important to note that turkey frying involves safety precautions and specific steps to ensure a successful and safe cooking experience.
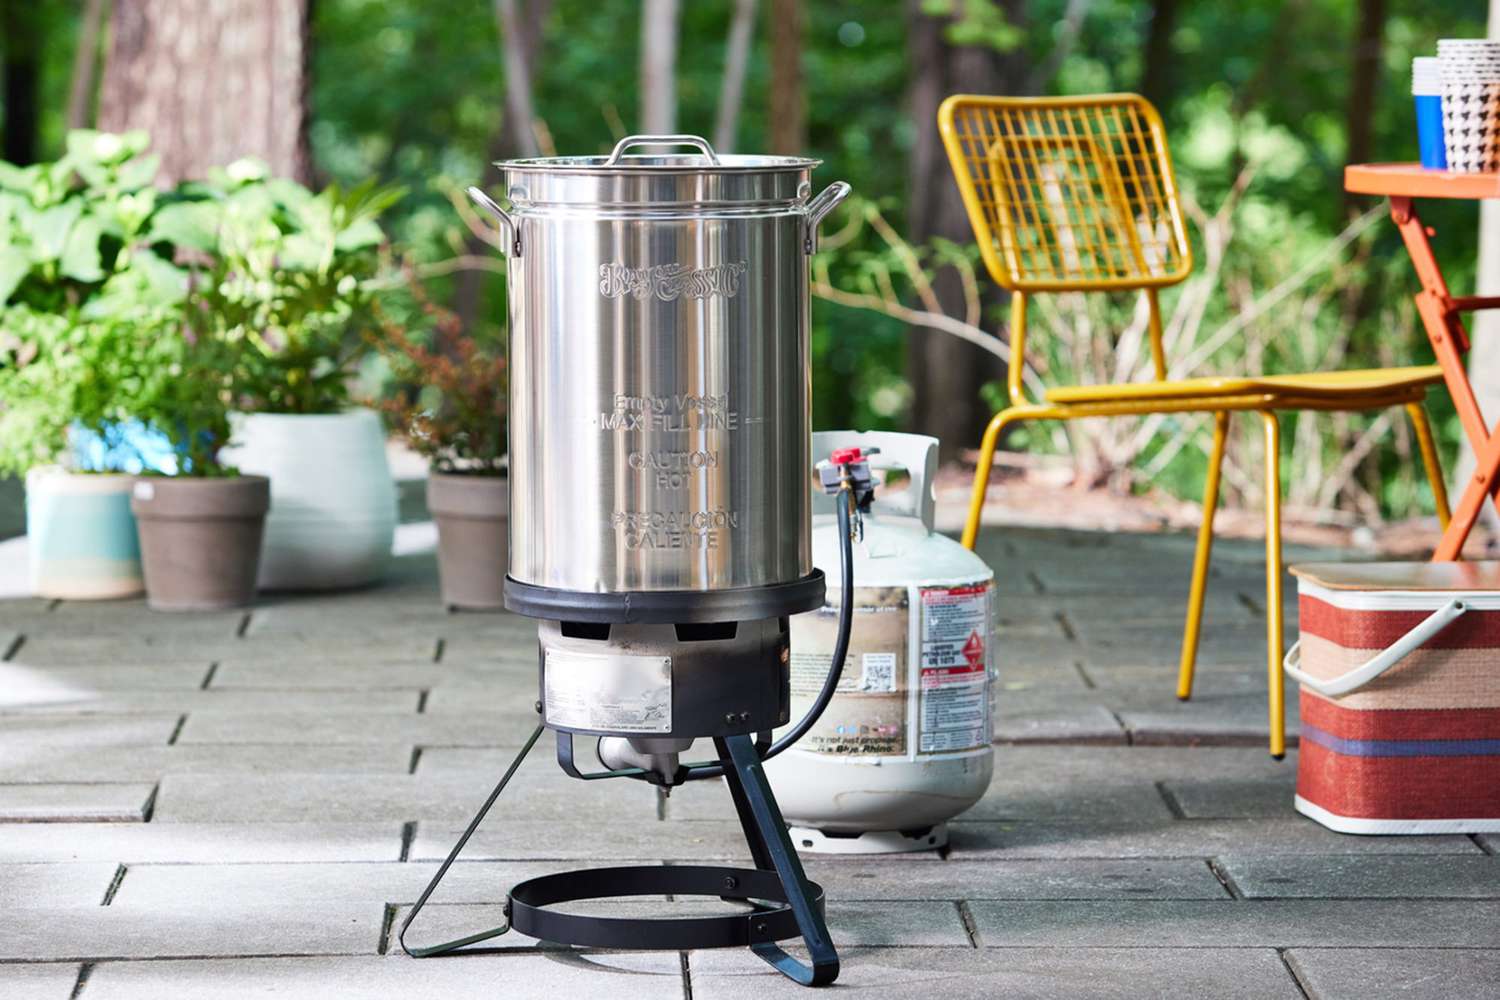
Before diving into the step-by-step process, let’s first discuss the equipment you’ll need. A turkey fryer typically consists of a large pot, a burner, a propane tank, and a thermometer. Additionally, you’ll need a sturdy, heat-resistant hook or tongs to lower and lift the turkey into and out of the fryer. Ensure that you have all the necessary equipment before proceeding.
Now that you’re familiar with the equipment, let’s get started with setting up the turkey fryer and preparing the bird for frying. Follow along as we guide you through each step, providing helpful tips and insights along the way. Get ready to elevate your turkey game and create a culinary masterpiece that will be the centerpiece of your next gathering.
Key Takeaways:
- Elevate your turkey game by following these steps to safely and successfully fry a mouthwatering turkey that will impress your friends and family at your next gathering.
- Prioritize safety, attention to detail, and patience to achieve a perfectly fried turkey that will be the centerpiece of your Thanksgiving or special occasion feast.
Read more: How To Cook Turkey Burgers In Air Fryer
Step 1: Setting up the turkey fryer
Before you start using your turkey fryer, it’s crucial to set it up properly to ensure a safe and efficient cooking process. Here are the essential steps to follow:
- Find a stable and level outdoor cooking area: Turkey frying should always be done outdoors, away from any flammable materials or structures. Look for a flat and stable surface that can accommodate both the fryer and the propane tank.
- Assemble the turkey fryer: Carefully follow the manufacturer’s instructions for assembling the fryer. This usually involves attaching the burner to the bottom of the pot and connecting the propane tank to the burner.
- Place the fryer on a heat-resistant surface: Position the assembled fryer on a heat-resistant surface to avoid any potential damage to the surrounding area. A concrete or paved surface is ideal for this purpose.
- Check the propane tank: Ensure that the propane tank is securely attached to the burner and turned off. Check for any leaks by applying a solution of soapy water to the connections. If bubbles form, there’s a leak, and you should tighten the connections or replace any faulty parts before proceeding.
- Keep a fire extinguisher nearby: Safety should always be a priority when using a turkey fryer. Have a fire extinguisher rated for grease fires readily available nearby in case of an emergency.
By following these steps, you’ll have your turkey fryer set up and ready for the cooking process. Remember, it’s important to double-check all connections and ensure that the fryer and propane tank are secure before proceeding. Now that your fryer is ready to go, let’s move on to the next step: preparing the turkey.
Step 2: Preparing the turkey
Preparing the turkey is a crucial step to ensure a delicious and safe cooking experience. Here’s what you need to do:
- Thaw the turkey: It’s essential to thaw the turkey completely before frying. Thawing can be done in the refrigerator over several days or using a cold water bath. Make sure to remove any giblets or neck from the turkey’s cavity.
- Pat the turkey dry: Once the turkey is thawed, use paper towels to thoroughly pat it dry. Removing excess moisture will prevent hot oil splatters and ensure a better overall fry.
- Season the turkey: This is where you can get creative and add your favorite flavors to the turkey. Generously season the turkey with your preferred herbs, spices, and marinades. Allow the seasoning to penetrate the meat by refrigerating the turkey for at least 2 hours.
- Consider brining: Brining the turkey prior to frying can help enhance the flavor and juiciness. If you choose to brine, prepare a solution of water, salt, sugar, and spices, and let the turkey soak in it overnight.
Once the turkey is thawed, dried, seasoned, and optionally brined, it’s time to move on to the next step: adding oil to the fryer. Proper preparation of the turkey will ensure that it cooks evenly and is packed with flavor. So take your time with this step, and get creative with the seasonings to make your turkey truly extraordinary.
Step 3: Adding oil to the fryer
Now that you’ve prepared the turkey, it’s time to add oil to the fryer. Adding the right amount of oil is crucial for a successful frying process. Here’s how you can do it:
- Select the right oil: Choose a high smoke point oil that is suitable for frying, such as peanut oil, canola oil, or vegetable oil. These oils can withstand the high temperatures required for deep-frying without breaking down or imparting any off flavors.
- Determine the oil quantity: The amount of oil needed will depend on the size of your fryer and the size of the turkey. As a general guideline, fill the fryer with enough oil to completely submerge the turkey. Be sure to leave sufficient space at the top to prevent any overflow when the turkey is added.
- Preheat the oil: Place the filled fryer pot on the burner and turn on the heat. Allow the oil to heat gradually to the recommended temperature, usually around 350°F (175°C). Use a thermometer to monitor the oil temperature consistently.
- Keep safety in mind: When adding the oil to the fryer, be cautious and go slowly to avoid any oil splatters. It’s always a good idea to have protective gloves and long sleeves to protect yourself from hot oil. Safety goggles are also recommended to shield your eyes.
Once the oil is added to the fryer and preheated, you’re now ready to move on to the next step: igniting the fryer burner. Adding the oil properly is crucial for achieving that crispy and golden exterior, so make sure to follow these steps carefully. Get ready for the exciting part of cooking your turkey!
Step 4: Igniting the fryer burner
Now that you have added oil to the fryer, it’s time to ignite the fryer burner. Properly igniting the burner is essential for maintaining a consistent cooking temperature throughout the frying process. Follow these steps to ensure a successful ignition:
- Check the propane tank: Ensure that the propane tank valve is closed before connecting it to the burner. This is an important safety precaution to prevent any gas leaks.
- Connect the propane tank: Attach the propane tank to the burner according to the manufacturer’s instructions. Make sure the connection is secure.
- Open the propane tank valve: Slowly open the propane tank valve to allow gas to flow to the burner. Take care not to open it too quickly, as this can cause a sudden surge of gas.
- Ignite the burner: Use the igniter or a long-reach lighter to ignite the burner. Follow the manufacturer’s instructions for lighting the fryer burner safely.
- Adjust the flame: Once the burner is ignited, adjust the flame to the desired level. Most turkey fryers have a control knob that allows you to increase or decrease the flame intensity.
- Monitor the flame: Keep a close eye on the flame during the cooking process. It should be a steady blue flame. If you notice any irregularities or fluctuations, check for any issues with the gas supply or burner.
Ensuring a proper ignition of the fryer burner is crucial for maintaining a consistent cooking temperature. This will help you achieve that perfectly crispy and evenly cooked turkey. With the burner ignited, you’re now ready to move on to the next step: lowering the turkey into the fryer. Let’s continue the journey towards a deliciously cooked turkey!
Before lighting your turkey fryer, make sure it is on a flat, stable surface away from any flammable materials. Check the propane tank for leaks and ensure the burner is clear of any obstructions. Always follow the manufacturer’s instructions for lighting the fryer.
Read more: How To Cook Turkey Legs In Air Fryer
Step 5: Lowering the turkey into the fryer
Now that your burner is ignited and the oil is heated to the proper temperature, it’s time to lower the turkey into the fryer. This step requires caution and careful handling to ensure a safe and successful frying process. Follow these steps to lower the turkey into the fryer:
- Turn off the burner: Before lowering the turkey, turn off the fryer burner to prevent any potential accidents or oil splatters.
- Secure the turkey: Using a sturdy hook or tongs specifically designed for turkey frying, carefully secure the turkey by inserting the hook through the cavity or gripping it securely.
- Slowly lower the turkey: With the help of another person, slowly and gently lower the turkey into the hot oil. Lower it slowly and steadily to avoid any splashes or spills.
- Be cautious of hot oil splatters: As you lower the turkey into the fryer, you may encounter some hot oil splatters. Take it slow and steady to minimize the risk of burns. Protective gloves and long sleeves are highly recommended during this step.
- Ensure the turkey is fully submerged: Once the turkey is lowered, check to ensure that it is fully submerged in the hot oil. The turkey should be completely covered by the oil for even cooking.
By following these steps, you can safely lower your turkey into the fryer, ready to embark on the cooking process. Remember to take your time and be cautious during this step to prevent any accidents or injuries. With the turkey submerged in the oil, let’s move on to the next step: monitoring the cooking process.
Step 6: Monitoring the cooking process
Once you have successfully lowered the turkey into the fryer, it’s crucial to monitor the cooking process to ensure that the turkey cooks evenly and to prevent any mishaps. Here’s what you need to do:
- Set a timer: Start a timer to keep track of the cooking time. The recommended cooking time is about 3-4 minutes per pound of turkey.
- Check the temperature: Use a meat thermometer to monitor the internal temperature of the turkey. The turkey needs to reach an internal temperature of 165°F (74°C) for safe consumption.
- Adjust the heat: Throughout the cooking process, it’s important to adjust the heat as needed to maintain a consistent oil temperature. This will prevent the turkey from cooking too quickly or too slowly.
- Stay nearby: Never leave the fryer unattended while the turkey is cooking. Stay close to the fryer, keeping an eye on the temperature and the turkey.
- Be prepared for emergencies: Have a fire extinguisher nearby in case of any oil-related fires. It’s always better to be prepared and have the necessary safety equipment on hand.
- Skim excess foam: During the cooking process, foam may accumulate on the surface of the oil. Skim off excess foam to prevent any overflow or potential fire hazards.
- Be patient: Remember that the cooking time may vary depending on the size of the turkey and other factors. It’s important to be patient and avoid rushing the cooking process.
By following these steps, you can ensure that the turkey cooks safely and evenly. Remember to stay vigilant and monitor the cooking process throughout. With the cooking process underway, let’s move on to the next step: removing the turkey from the fryer.
Step 7: Removing the turkey from the fryer
After the turkey has finished cooking to perfection, it’s time to carefully remove it from the fryer. This step requires caution and proper handling to avoid any accidents. Follow these steps to safely remove the turkey from the fryer:
- Turn off the burner: Before attempting to remove the turkey, turn off the fryer burner to prevent any potential accidents.
- Use a sturdy hook or tongs: Using a sturdy hook or specialized turkey frying tongs, carefully lift the turkey out of the fryer. Take it slow and steady to prevent any oil splatters.
- Allow excess oil to drain: As you lift the turkey out of the fryer, allow any excess oil to drip back into the pot. Be careful not to shake or jostle the turkey too much, as it may cause oil splatters or burns.
- Place the turkey on a draining rack or paper towels: Once the excess oil has drained, place the turkey on a draining rack or paper towels to remove any additional oil. This will help ensure a crisp and less oily exterior.
- Let it rest: Allow the turkey to rest for about 15-20 minutes before carving. This resting period allows the juices within the turkey to redistribute, resulting in a more tender and flavorful meat.
By following these steps, you can safely remove the turkey from the fryer and prepare it for serving. Remember to be cautious during this step to prevent any oil-related accidents. With the turkey removed from the fryer and resting, let’s proceed to the final step: letting the turkey rest and serving.
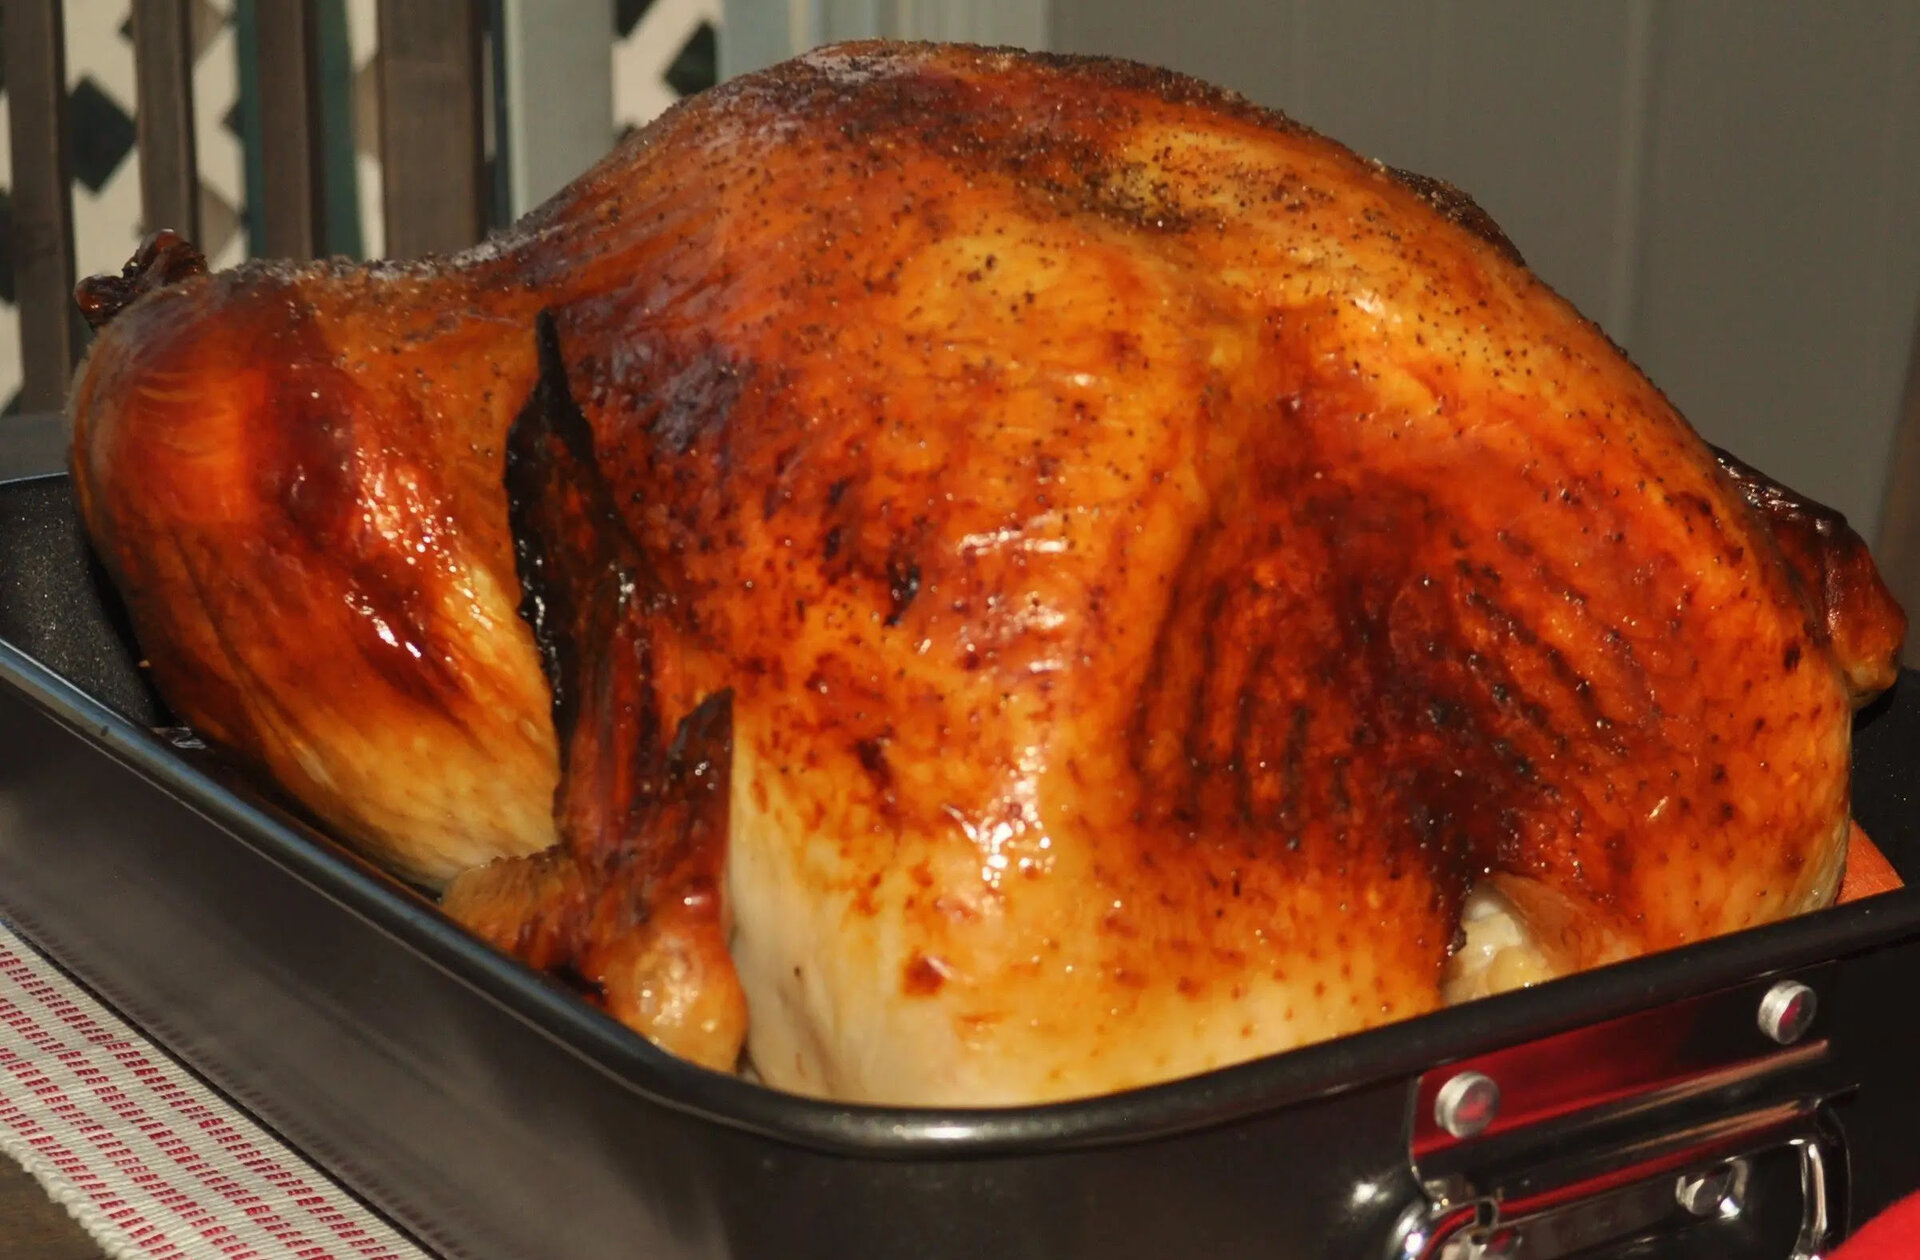
Step 8: Letting the turkey rest and serving
Once the turkey has been removed from the fryer and allowed to drain, it’s time to let it rest and prepare it for serving. This final step is crucial for ensuring a moist and flavorful turkey. Here’s what you need to do:
- Allow the turkey to rest: After removing the turkey from the fryer, let it rest on a cutting board or platter for about 15-20 minutes. This resting period allows the juices to redistribute throughout the meat, resulting in a more tender and flavorful turkey.
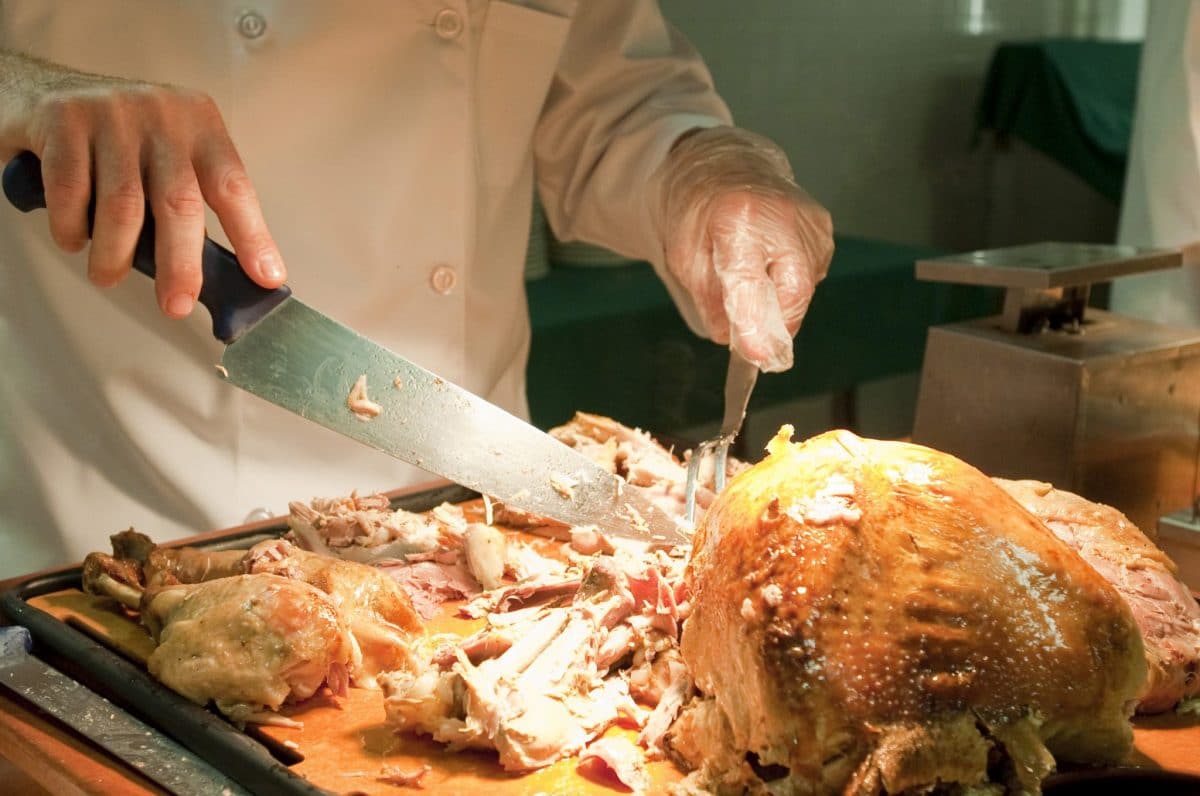
- Carve the turkey: Once the resting period is over, it’s time to carve the turkey. Use a sharp carving knife to slice the turkey into desired portions, such as breast slices, leg and thigh portions, and wings.
- Serve with garnishes: Transfer the carved turkey to a serving platter and garnish it with fresh herbs or slices of citrus fruits for a beautiful presentation. These garnishes can also add a touch of freshness and enhance the flavors of the turkey.
- Serve and enjoy: Your perfectly fried turkey is now ready to be served! Arrange the turkey on individual plates or a buffet spread, and invite everyone to indulge in the deliciously crispy and flavorful masterpiece you’ve created.
Remember to handle the turkey with care while carving to maintain its presentation and integrity. Serve the turkey with your favorite side dishes, such as mashed potatoes, cranberry sauce, and roasted vegetables, to complete the meal.
Congratulations! You’ve successfully completed the process of frying a turkey. Now, sit back, enjoy the fruits of your labor, and relish in the compliments from your friends and family for preparing a mouthwatering turkey like a pro.
While turkey frying can be a fun and delicious way to cook a turkey, it’s important to always prioritize safety. Follow the manufacturer’s instructions for your specific turkey fryer, maintain a safe distance from flammable objects, and never leave the fryer unattended during the cooking process. Enjoy your turkey and happy frying!
Read more: How Long To Cook Turkey Wings In Air Fryer
Conclusion
Congratulations on successfully learning how to use a turkey fryer to create a mouthwatering and crispy turkey! By following the step-by-step guide outlined in this article, you’ve gained the knowledge and skills to bring a whole new level of flavor and texture to your Thanksgiving or other special occasions.
Remember, using a turkey fryer requires caution and adherence to safety guidelines. Always set up your fryer in a secure outdoor space, away from any flammable materials. Ensure that you have all the necessary equipment, such as a sturdy hook or tongs, a reliable thermometer, and a fire extinguisher, to protect yourself and others in case of emergencies.
From setting up the turkey fryer to monitoring the cooking process, each step contributes to achieving a perfectly fried turkey. Whether it’s the careful preparation of the turkey, adding the right amount of oil, or monitoring the cooking time and temperature, attention to detail is key.
With the turkey cooked to perfection, remember to let it rest before carving to allow the juices to redistribute. Serving the turkey with garnishes and pairing it with your favorite side dishes will elevate the entire dining experience.
As you continue your culinary journey, don’t hesitate to experiment with different seasonings and brines to create a turkey that suits your personal taste preferences. With practice and experience, you’ll become a master at frying turkey and impressing your guests with your culinary skills.
However, always prioritize safety and follow the instructions provided by the manufacturer of your turkey fryer. Safety should never be overlooked when it comes to cooking with hot oil.
Now that you have the knowledge and skills, it’s time to put them to use and enjoy the delicious results. So gather your friends and family, and get ready to create unforgettable memories with a perfectly fried turkey that will leave everyone wanting more.
Frequently Asked Questions about How To Light Turkey Fryer
Was this page helpful?
At Storables.com, we guarantee accurate and reliable information. Our content, validated by Expert Board Contributors, is crafted following stringent Editorial Policies. We're committed to providing you with well-researched, expert-backed insights for all your informational needs.


0 thoughts on “How To Light Turkey Fryer”