Articles
How To Freeze Peas From The Garden
Modified: August 24, 2024
Learn the best ways to freeze peas from your own garden with our gardening tips. Preserve the freshness of your harvest with these easy methods.
(Many of the links in this article redirect to a specific reviewed product. Your purchase of these products through affiliate links helps to generate commission for Storables.com, at no extra cost. Learn more)
Introduction
Welcome to our comprehensive guide on how to freeze peas from the garden. If you’re a passionate gardener, you know that there’s nothing quite like the taste of fresh peas straight from your own backyard. However, when you have an abundance of peas and you can’t consume them all at once, freezing is a great option to preserve their freshness and nutritional value for later use.
Freezing peas is a relatively simple process that anyone can do with a little preparation. By following our step-by-step instructions, you’ll be able to enjoy the taste of your homegrown peas all year round. So let’s dive in and learn how to freeze peas from the garden!
Key Takeaways:
- Preserve the vibrant taste of homegrown peas all year round by following simple steps to freeze them from the garden. Enjoy the convenience of having fresh peas readily available for delicious recipes anytime!
- Whether you prefer shelling or freezing peas in their pods, proper preparation and storage ensure the long-term quality and flavor of your homegrown peas. With the right techniques, you can savor the taste of your garden harvest throughout the year.
Read more: How To Grow Snap Peas From Seed
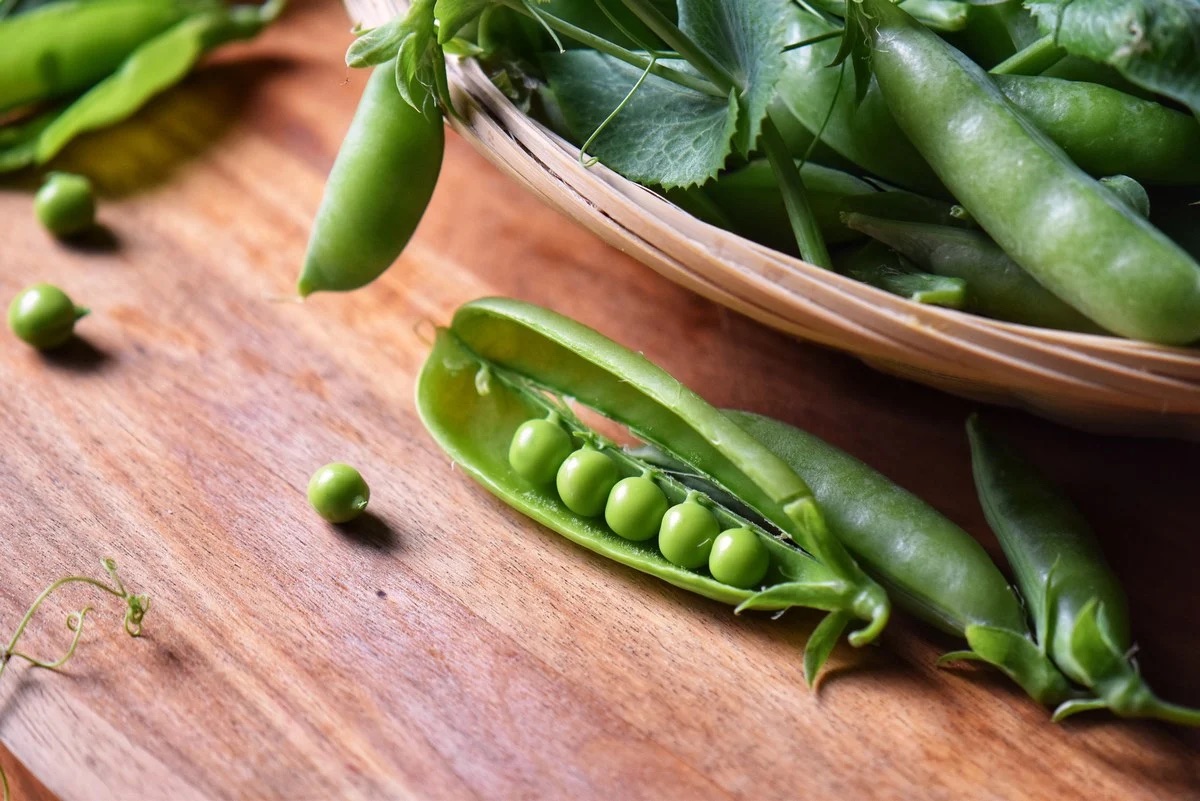
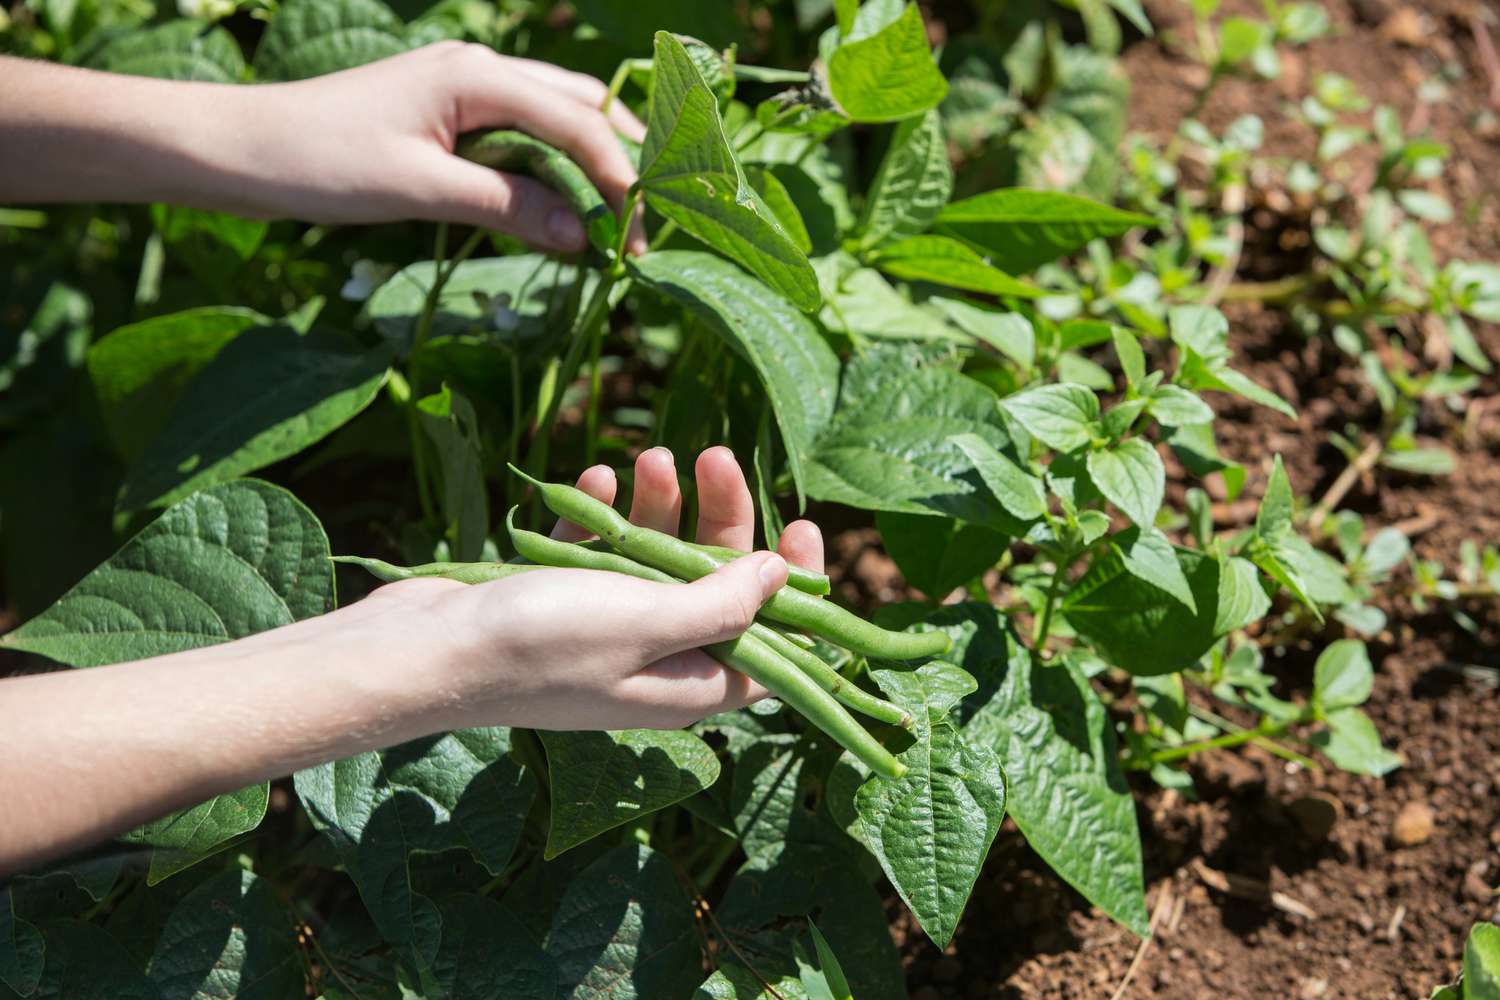
Step 1: Harvesting the peas
The first step in freezing peas from the garden is harvesting them at the right time. Peas are best picked when they are fully mature but still tender. Look for plump pods that have a bright green color and feel firm to the touch. Avoid picking peas that have turned yellow or have become too hard, as they may not freeze well.
To harvest peas, gently hold the stem near the pod with one hand and use your other hand to pull the pod off the plant. Be careful not to damage the plants or the remaining pods while doing so. It’s important to harvest the peas as soon as they reach the desired stage of maturity to ensure the best flavor and texture.
Once you have harvested the peas, it’s a good idea to sort through them and remove any damaged or discolored peas or pods. This will help ensure that the peas you freeze are of the highest quality.
It’s worth noting that peas are best when they are eaten immediately after harvest, as their sweetness tends to diminish over time. However, by freezing them at the peak of their freshness, you can retain much of their flavor and nutritional content.
Step 2: Preparing the peas for freezing
After harvesting the peas, it’s important to properly prepare them before freezing. This step ensures that the peas retain their quality and taste even after they’ve been frozen.
Start by washing the peas thoroughly under cool running water. Remove any dirt, debris, or pests that may be clinging to the pods. You can use a colander or strainer to make this process easier.
Next, trim the ends of the pods using a sharp knife or kitchen scissors. This helps remove any tough or fibrous parts that may not freeze well. You can either trim both ends or just the stem end, depending on your preference.
If desired, you can also choose to shell the peas. Shelling involves removing the peas from their pods, which can be time-consuming but may be preferred if you want to store the peas without the pods. However, freezing peas in their pods can help protect them from freezer burn and maintain their texture.
Once the peas have been washed and trimmed, you have the option to blanch them before freezing. Blanching is the process of briefly boiling the peas to stop enzyme activity and preserve their color, flavor, and nutrients. Blanching can help maintain the quality of the peas during freezing and prevent them from becoming mushy or losing their vibrant green color. However, if you prefer a softer texture, you can skip this step.
Preparing the peas for freezing is an essential step that ensures their long-term quality and flavor. Whether you choose to blanch them or freeze them directly, proper preparation is key to preserving the taste and texture of your homegrown peas.
Step 3: Blanching the peas
Blanching is a crucial step in the process of freezing peas from the garden. It helps to deactivate enzymes that can cause loss of flavor, color, and texture during storage. By blanching the peas, you can maintain their freshness and quality for a longer period of time.
To blanch the peas, start by bringing a large pot of water to a rolling boil. While waiting for the water to boil, prepare a separate bowl or basin filled with ice water. This will be used to quickly cool down the peas after blanching.
Once the water is boiling, carefully add the peas to the pot. It’s important not to overcrowd the pot, as this can lead to uneven blanching. To maintain the vibrant green color of the peas, blanch them for approximately 1-2 minutes. This timing may vary slightly depending on the size and maturity of the peas, so keep a close eye on them.
After blanching, immediately transfer the peas to the ice water bath to halt the cooking process. This helps to retain their crispness and vibrant color. Allow the peas to cool in the ice water for the same amount of time that they were blanched.
Once the peas are completely cooled, drain them well. Excess moisture can lead to the formation of ice crystals and affect the overall quality of the peas during freezing.
Blanching is an important step in ensuring the long-term quality of your frozen peas. Not only does it help to preserve their color and texture, but it also helps to maintain their nutritional value. By following this step, you can freeze peas that are as close to fresh as possible.
Step 4: Cooling and draining the peas
After blanching the peas, it’s essential to cool them down quickly and drain them properly before proceeding with the freezing process. Cooling and draining the peas effectively ensures that they retain their texture and quality during storage.
Once the peas have been removed from the ice water bath, spread them out in a single layer on a clean kitchen towel or a tray lined with paper towels. Gently pat them dry to remove any excess moisture. It’s important to remove as much water as possible to prevent the formation of ice crystals during freezing.
Allow the peas to air dry for about 10-15 minutes. This will help further reduce any moisture and ensure that they are completely dry before packaging and freezing.
While the peas are cooling and drying, you can take this opportunity to prepare your freezer containers or bags. Ensure that they are clean and suitable for freezing. You can also label the containers with the date of freezing to keep track of their freshness.
Once the peas have cooled and dried completely, carefully transfer them to the prepared freezer containers or bags. Try to distribute them evenly to prevent clumping together. If you’re using bags, remove as much air as possible from the bags before sealing them to prevent freezer burn.
Properly cooling and draining the peas is a crucial step in the freezing process. By ensuring that they are dry and properly packaged, you can maintain the overall quality and taste of the peas during their time in the freezer.
Blanch fresh peas in boiling water for 1-2 minutes, then transfer to an ice bath to stop the cooking process. Once cooled, drain and pat dry before placing in airtight containers or freezer bags. Label with the date and store in the freezer for up to 6-12 months.
Read more: How To Keep Gutters From Freezing
Step 5: Packaging the peas
Once the peas have been cooled and drained, it’s time to package them properly for optimal freezing. Proper packaging ensures that the peas are protected from freezer burn and maintain their quality throughout their time in the freezer.
If you prefer to freeze the peas in small portions, consider using individual freezer bags or small freezer-safe containers. This allows you to conveniently take out only the amount of peas you need without thawing the entire batch.
Alternatively, if you have a larger quantity of peas, you can package them in larger resealable freezer bags or containers. Make sure to remove as much air as possible from the bags to prevent freezer burn. If using containers, leave a little bit of headspace to account for expansion during freezing.
Label the packages with the current date to keep track of their freshness. This will help you identify the oldest peas and ensure they are used first.
If you prefer to freeze the peas in their pods, you can simply place them directly into the freezer bags or containers without shelling them. However, it’s essential to ensure that the pods are tightly sealed to prevent any freezer burn.
Once the peas are packaged, place them in the freezer as soon as possible. Keep the temperature of your freezer at or below 0°F (-18°C) to maintain the quality of the peas.
By properly packaging the peas for freezing, you can preserve their freshness and flavor for an extended period. Whether you choose to freeze them in smaller portions or in larger quantities, the right packaging method is key to ensuring the long-term quality of your homegrown peas.
Step 6: Freezing the peas
Now that the peas are properly packaged, it’s time to freeze them. Freezing the peas is the final step in the process and ensures that they will stay fresh and flavorful until you’re ready to use them.
If you have a deep freezer or a freezer with a “quick freeze” setting, it’s recommended to use that option. The faster the peas freeze, the better their quality will be when you thaw them later.
Place the packaged peas in a single layer on a flat surface, such as a baking sheet or tray. This step helps to prevent the peas from sticking together and makes them easier to handle when frozen.
Position the tray or baking sheet with the peas in the coldest part of the freezer. Leave the peas undisturbed for several hours or until they are completely frozen. This process, known as “flash freezing,” ensures that the peas freeze individually rather than forming a solid mass.
Once the peas are fully frozen, you can transfer them to a freezer shelf or drawer for long-term storage. Remember to arrange them in an organized manner for easy access and to prevent any crushing or damage.
It’s important to keep the peas frozen at or below 0°F (-18°C) to maintain their flavor, texture, and nutritional value. Regularly check the temperature of your freezer to ensure it remains at the optimal freezing point.
Congratulations! You have successfully frozen your peas from the garden. Properly freezing them ensures that they will remain fresh and delicious until you’re ready to use them. Now, you can enjoy the taste of your homegrown peas even during the off-season.
Step 7: Storing the frozen peas
Once your peas are frozen, it’s important to store them properly to maintain their quality and flavor. Follow these guidelines to ensure that your frozen peas remain in excellent condition until you’re ready to enjoy them:
1. Organize and label: Keep your frozen peas well-organized by grouping them based on their packaging or date of freezing. Use labels to identify each package. This way, you can easily locate and use the oldest peas first, ensuring that none of them go to waste.
2. Temperature control: Your freezer should be consistently set at or below 0°F (-18°C) to ensure optimal storage conditions for the peas. Regularly check the temperature to ensure it remains stable.
3. Avoid freezer burn: Freezer burn can affect the taste and texture of frozen peas. To prevent freezer burn, make sure the containers or bags are sealed tightly and have minimal air inside. Additionally, consider double-bagging or vacuum-sealing for extra protection.
4. Stack carefully: If you’re storing multiple containers or bags, stack them neatly to maximize space efficiency. However, avoid placing heavy items on top of the peas, as this can crush or damage them.
5. Usage timeline: While properly frozen peas can maintain their quality for up to 8-12 months, it is best to use them within the first 6-8 months for optimal flavor and texture. Be mindful of the storage time and try to use them before the quality starts to decline.
6. Keep it organized: Regularly check your frozen peas inventory to ensure everything is in order. Use the first-in, first-out method (FIFO) to consume the oldest peas before using the newer ones. This helps maintain a consistent rotation and prevents any peas from being forgotten in the back of the freezer.
By following these storage tips, you can ensure that your frozen peas retain their quality and taste. Enjoy the convenience of having your homegrown peas readily available for use in a variety of delicious recipes throughout the year.
Conclusion
Freezing peas from the garden is a fantastic way to preserve their freshness and enjoy the delicious taste of homegrown peas all year round. With just a few simple steps, you can ensure that the peas maintain their flavor, texture, and nutritional value.
From harvesting the peas at the right time to properly preparing, blanching, and packaging them, each step plays a vital role in preserving the quality of the peas. By following these steps and storing the frozen peas correctly, you can enjoy the sweet and vibrant taste of garden-fresh peas whenever you desire.
Remember to label and organize your frozen peas, making it easy to locate them and use them in your favorite recipes. Regularly check your freezer temperature to maintain optimal storage conditions and prevent freezer burn.
Whether you prefer shelling the peas or freezing them in their pods, the choice is yours. Each method has its advantages, and both will give you the pleasure of enjoying your homegrown peas whenever you crave their delightful taste.
Gardening is a rewarding journey, and being able to preserve the fruits of your labor through freezing ensures that none of it goes to waste. So go ahead and freeze those peas, knowing that you have the taste of your garden available to you at any time.
Now that you’re equipped with the knowledge of how to freeze peas from the garden, you can fully enjoy the bountiful harvest and extend the joy of fresh peas beyond the growing season. Happy freezing and bon appétit!
Frequently Asked Questions about How To Freeze Peas From The Garden
Was this page helpful?
At Storables.com, we guarantee accurate and reliable information. Our content, validated by Expert Board Contributors, is crafted following stringent Editorial Policies. We're committed to providing you with well-researched, expert-backed insights for all your informational needs.


0 thoughts on “How To Freeze Peas From The Garden”