Articles
How To Store Sugar Snap Peas
Modified: August 25, 2024
Learn the best methods and tips for storing sugar snap peas in this informative article. Keep your peas fresh and delicious for longer with our expert advice.
(Many of the links in this article redirect to a specific reviewed product. Your purchase of these products through affiliate links helps to generate commission for Storables.com, at no extra cost. Learn more)
Introduction
When it comes to enjoying fresh and delicious vegetables, sugar snap peas often find their way to the top of the list. These crisp and sweet pods are not only a favorite among gardeners, but they also make a versatile addition to a variety of dishes. However, to fully savor the flavors and maintain the quality of sugar snap peas, proper storage is essential.
In this article, we will explore the best methods for storing sugar snap peas to ensure they stay fresh, crunchy, and ready to be enjoyed throughout the year. We will cover everything from harvesting techniques to refrigerator storage, freezing, and even canning. So, let’s dive in and discover how to make the most of your sugar snap peas!
Key Takeaways:
- Enjoy sugar snap peas year-round by storing them in the refrigerator, freezing, or canning. Each method preserves their freshness, allowing you to savor their delightful crunch and sweetness in various recipes.
- Harvest, prepare, and store sugar snap peas with care to maintain their optimal flavor and texture. Whether adding them to salads, stir-fries, or pasta dishes, these versatile pods bring a delightful burst of freshness to your culinary creations.
Read more: How To Store Snap Peas In Fridge
Understanding Sugar Snap Peas
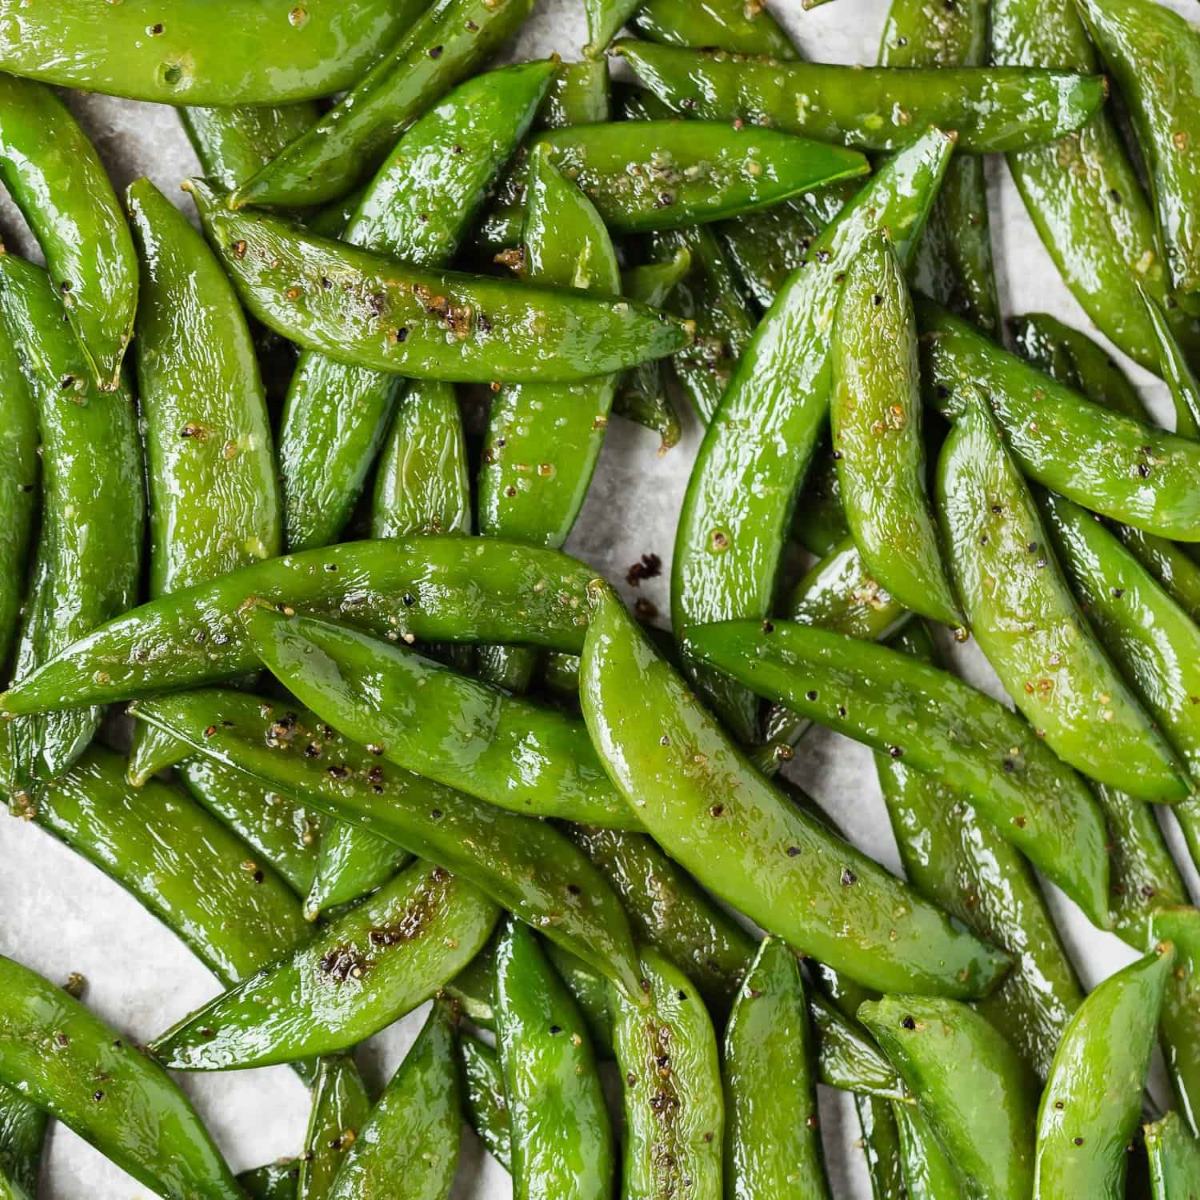
Before diving into the storage methods, it’s important to have a good understanding of sugar snap peas. Sugar snap peas, also known as snap peas or mangetout, are a variety of pea that is known for its edible pod. Unlike snow peas, which are more flat and have small peas inside, sugar snap peas have plump pods filled with full-sized sweet peas.
Sugar snap peas are not only delicious but also pack a nutritional punch. They are rich in vitamins A, C, and K, along with fiber and antioxidants. These crunchy and vibrant green pods are often enjoyed as a snack, added to salads, stir-fries, or steamed as a side dish.
When it comes to choosing sugar snap peas, look for pods that are bright green, firm, and plump. The peas inside should be visible through the translucent skin and should feel tender. Avoid any pods that are discolored or have spots.
Now that we have a better understanding of sugar snap peas, let’s move on to harvesting them at the right time to ensure optimal flavor and quality.
Harvesting Sugar Snap Peas
Harvesting sugar snap peas at the right time is crucial to ensure the best taste and texture. The key is to pick them when they are mature but still tender. Here are some guidelines to help you harvest your sugar snap peas:
- Check the days to maturity: Most sugar snap pea varieties take around 60 to 70 days from planting to maturity. Refer to the seed packet or plant label to determine the expected harvest time.
- Monitor pod development: Keep a close eye on the pods as they grow. The ideal time to harvest is when the pods are plump and firm, but still crisp and snap easily when bent.
- Harvest frequently: Sugar snap peas can mature quickly, especially during warm weather. Harvest every few days to ensure you don’t miss the peak time for picking.
- Use two hands: When picking sugar snap peas, use one hand to hold the plant or stem and the other hand to gently snap the pod off the vine.
- Avoid yanking: It’s important to avoid yanking or pulling the pods forcefully, as this can damage the plant and reduce future harvests.
- Remove damaged pods: Discard any pods that are discolored, have holes, or show signs of pest or disease damage. This will help prevent the spread of any issues and maintain the quality of the remaining peas.
By following these guidelines, you can harvest your sugar snap peas at their peak freshness and flavor. Now that you’ve successfully harvested your peas, let’s move on to preparing them for storage.
Preparing Sugar Snap Peas for Storage
Before storing sugar snap peas, it’s essential to prepare them properly to ensure their longevity and freshness. Follow these steps to prepare your sugar snap peas for storage:
- Sort and clean: Start by sorting through your sugar snap peas and removing any damaged or bruised pods. Discard any pods that show signs of rot or mold. Rinse the remaining peas under cool running water to remove any dirt or debris.
- Remove the strings: Some sugar snap peas have a tough string that runs along the seam of the pod. To remove it, simply snap off the stem end and pull the string down the length of the pod. This step is optional, but it can improve the texture and make the peas more enjoyable to eat.
- Blanching (optional): Blanching is a process of quickly boiling vegetables and then plunging them into ice water to halt the cooking process. Blanching sugar snap peas can help preserve their vibrant green color and texture. To blanch, bring a pot of water to a boil, then add the peas and cook for 2 to 3 minutes. After that, transfer them to a bowl of ice water to cool down completely.
- Drying: Once the sugar snap peas have been blanched or rinsed, it’s important to remove any excess moisture. Lay them out on a clean kitchen towel or paper towels and gently pat them dry.
By following these simple steps, you will ensure that your sugar snap peas are ready to be stored in the most suitable manner. Next, let’s explore the best storage methods for sugar snap peas to help preserve their flavor and texture.
Best Storage Methods for Sugar Snap Peas
Proper storage is essential to maintain the freshness and flavor of sugar snap peas. Here are a few of the best storage methods to consider:
- Refrigerator storage:
- Freezing:
- Canning:
Sugar snap peas are best stored in the refrigerator to maintain their crispy texture. Place the prepared peas in a perforated plastic bag or a container with a lid, lined with a paper towel to absorb any excess moisture. Store them in the vegetable crisper drawer, which provides a slightly higher humidity level. Properly stored sugar snap peas can last for up to a week in the refrigerator.
Freezing sugar snap peas is an excellent option for extending their shelf life. To freeze, blanch the prepared peas for 2 to 3 minutes, then transfer them to an ice bath to cool. Drain well and pat dry, then place them in airtight freezer bags or containers. Be sure to label and date the packages. Sugar snap peas can be frozen for up to 8-10 months, though their texture may become slightly softer after thawing.
If you’re looking for a longer-term storage solution, canning sugar snap peas is a great option. Canned peas can last for up to a year or more. To can sugar snap peas, follow a trusted canning recipe and process them using a pressure canner. Keep in mind that canning requires careful attention to food safety practices and proper sterilization of jars and equipment.
By utilizing these storage methods, you can enjoy the deliciousness of sugar snap peas even when they are out of season. Whether you choose to store them in the refrigerator, freeze them, or can them, you’ll have an abundance of sugar snap peas ready to use in your favorite recipes.
Now that we’ve explored various storage methods, let’s dive into the specifics of storing sugar snap peas in the refrigerator.
To store sugar snap peas, place them in a perforated plastic bag in the refrigerator. They will stay fresh for up to a week. Avoid washing them until ready to use to prevent spoilage.
Read more: How Long For Snap Peas To Germinate
Storing Sugar Snap Peas in the Refrigerator
Refrigerator storage is one of the most common and convenient methods for keeping sugar snap peas fresh and crisp. Here are the steps to store sugar snap peas in the refrigerator:
- Prepare the peas: Sort through the sugar snap peas, removing any damaged or bruised pods. Rinse the peas under cool running water to remove any dirt or debris. Allow them to dry completely.
- Choose the right container: Select a container that has enough space to accommodate the sugar snap peas without overcrowding. Perforated plastic bags or containers with lids that can be left slightly open for ventilation work best. You can also line the container with a paper towel to absorb excess moisture.
- Pack the peas: Place the prepared sugar snap peas inside the chosen container. It’s best to pack them loosely, allowing air to circulate around the pods.
- Store in the vegetable crisper drawer: Place the container of sugar snap peas in the vegetable crisper drawer of your refrigerator. This drawer provides a slightly higher humidity level, which helps to maintain the crispness of the peas.
- Check and use within a week: Regularly check the sugar snap peas for any signs of spoilage or wilting. Consume them within a week for the best quality and flavor.
By storing sugar snap peas in the refrigerator, you can enjoy their freshness and crunchiness for up to a week. This method is convenient and allows you to access the peas whenever you need them for salads, stir-fries, or snacking.
If you want to extend the shelf life of sugar snap peas, freezing is an excellent option. Let’s delve into the process of blanching and freezing sugar snap peas for long-term storage.
Blanching and Freezing Sugar Snap Peas
Blanching and freezing sugar snap peas is a great way to preserve their vibrant color, texture, and flavor for an extended period of time. Follow these steps to blanch and freeze sugar snap peas:
- Prepare the sugar snap peas: Start by sorting through the sugar snap peas and removing any damaged or bruised pods. Rinse the peas under cool running water to remove any dirt or debris. Allow them to dry completely.
- Blanch the peas: Blanching involves briefly cooking the sugar snap peas to halt enzyme activity and preserve their color and texture. Bring a pot of water to a rolling boil, then carefully add the prepared peas. Cook them for 2 to 3 minutes. Keep in mind that the precise timing may vary slightly depending on the size of the peas.
- Cool down in ice water: Using a slotted spoon or tongs, transfer the blanched peas to a bowl of ice water. Submerge them completely and let them sit for the same amount of time they were blanched (2 to 3 minutes). This step stops the cooking process and helps lock in the color and texture.
- Drain and dry: Remove the sugar snap peas from the ice water bath and drain them thoroughly. Pat them dry gently with a clean kitchen towel or paper towels to remove excess moisture.
- Package for freezing: Transfer the blanched and dried sugar snap peas into airtight freezer bags or containers. Try to remove as much air as possible before sealing the bags or containers. Label them with the date and name for easy reference in the future.
- Freeze the peas: Place the packaged sugar snap peas in the freezer, making sure to arrange them in a flat layer initially to prevent them from clumping together. Once frozen, you can reorganize them for easy storage.
Frozen sugar snap peas can be stored for up to 8-10 months in the freezer. When you’re ready to use them, simply remove the desired amount from the freezer and thaw them in the refrigerator or cook them directly from frozen in your favorite recipes.
Now that you know how to freeze sugar snap peas, let’s explore another storage method: canning.
Canning Sugar Snap Peas
If you’re looking for a long-term storage solution, canning sugar snap peas is an excellent option. Canning not only preserves the freshness of the peas but also allows you to enjoy them throughout the year. Follow these steps to can sugar snap peas:
- Prepare the sugar snap peas: Start by sorting through the peas and discarding any damaged or bruised pods. Rinse the peas under cool running water to remove any dirt or debris. Allow them to dry completely.
- Prepare the jars: Wash the canning jars, lids, and bands in hot soapy water. Rinse them thoroughly and place them in a pot of boiling water for a few minutes to sterilize. Remove the jars from the boiling water and set them on a clean towel to cool slightly.
- Prep the sugar snap peas: Trim the ends of the peas if desired. Pack the prepared peas into the sterilized jars, leaving about 1 inch of headspace at the top. You can pack them tightly but be careful not to crush the peas.
- Add boiling water: In a separate pot, bring water to a boil. Pour the boiling water over the sugar snap peas in the jars, again leaving 1 inch of headspace. This will help to ensure the peas are fully covered in liquid during the canning process.
- Seal the jars: Wipe the rims of the jars with a clean, damp cloth to remove any residue. Place prepared lids on the jars and screw on the bands until they are fingertip-tight. This allows for proper sealing during the canning process.
- Process the jars: Depending on your altitude and the size of the jars, refer to a trusted canning guide for the appropriate processing time. Process the jars in a pressure canner according to the guidelines. This step is crucial for safely preserving the sugar snap peas.
- Cool and store: Once the processing time is complete, carefully remove the jars from the canner and place them on a towel-lined countertop. Allow the jars to cool completely. As they cool, you will hear the lids pop, indicating a proper seal. Store the sealed jars in a cool, dark place for long-term storage.
Properly canned sugar snap peas can last for up to a year or more. It’s important to regularly check the jars for any signs of spoilage or compromised seals. If you notice any issues, discard the contents immediately.
Canning sugar snap peas allows you to enjoy their fresh taste and crunchiness all year round, making them a pantry staple. Now let’s move on to exploring how you can incorporate sugar snap peas into your culinary endeavors.
Using Sugar Snap Peas in Recipes
Sugar snap peas are not only delicious on their own but also make a fantastic addition to various recipes. Their crisp texture and sweet flavor can enhance the taste of salads, stir-fries, pasta dishes, and more. Here are a few ideas on how you can use sugar snap peas in your culinary creations:
- Salads: Add a refreshing crunch to your salads by tossing in some blanched and sliced sugar snap peas. They pair well with leafy greens, cherry tomatoes, cucumbers, and a light vinaigrette dressing.
- Stir-fries: Sugar snap peas are a perfect addition to stir-fries, adding vibrant color and crunch. Stir-fry them with other vegetables like bell peppers, carrots, and mushrooms, along with your choice of protein, such as chicken, shrimp, or tofu.
- Pasta dishes: Sugar snap peas can bring a burst of freshness and texture to pasta dishes. Blanch them and toss them into your favorite pasta salad or add them to a creamy pasta dish like Alfredo or carbonara.
- Sautéed side dish: Heat some olive oil or butter in a skillet and sauté sugar snap peas with garlic, salt, and pepper for a simple and flavorful side dish. The quick cooking time will retain their crispiness and natural sweetness.
- Spring rolls: Sugar snap peas are a fantastic ingredient in homemade spring rolls. Combine them with shredded carrots, bean sprouts, and fresh herbs like mint and cilantro. Serve with a flavorful dipping sauce for a delightful appetizer or light meal.
These are just a few examples of how you can incorporate sugar snap peas into your recipes. Don’t be afraid to get creative and experiment with different flavor profiles and cooking methods. They are incredibly versatile and can be enjoyed both raw and cooked.
Now that you have some inspiration for using sugar snap peas in your recipes, it’s important to remember to store any leftovers properly. Let’s summarize everything we’ve discussed so far.
Read more: How To Grow Snap Peas From Seed
Conclusion
Sugar snap peas are a delightful vegetable that brings a burst of freshness and sweetness to any dish. Proper storage is key to ensuring that these vibrant green pods stay crisp, flavorful, and ready to be enjoyed throughout the year. From understanding sugar snap peas and harvesting them at the right time to preparing them for storage, we’ve covered the essential steps to keep your sugar snap peas in optimal condition.
Whether you choose to store them in the refrigerator, freeze them, or can them, each method offers its own benefits for preserving the quality of sugar snap peas. Refrigerator storage keeps them crisp for up to a week, while freezing allows for long-term storage of up to 8-10 months. Canning provides an even longer shelf life, allowing you to savor the taste of sugar snap peas for a year or more.
Additionally, we explored various ways to incorporate sugar snap peas into your culinary endeavors. From adding them to salads, stir-fries, pasta dishes, and spring rolls, these versatile pods bring a delightful crunch and sweetness to your recipes.
Remember to select only the freshest sugar snap peas, properly prepare them for storage, and choose the storage method that suits your needs. Whether you’re enjoying the harvest from your garden or taking advantage of fresh produce from the market, with the right storage techniques, you can savor the deliciousness of sugar snap peas all year round.
So, go ahead, harvest your sugar snap peas, prepare them with care, and store them properly. From vibrant salads to flavorful stir-fries, let the versatility of sugar snap peas elevate your dishes and bring a touch of summer to every season.
Now that you've mastered storing sugar snap peas, why stop there? Extend your savvy to other veggies with our guide on optimal vegetable storage methods. You'll find practical, effective ways to keep all sorts of produce fresh. Whether dealing with root vegetables or leafy greens, this resource is packed with insights to prevent spoilage and maintain nutritional value. Don't miss out on these essential tips to elevate your kitchen prowess!
Frequently Asked Questions about How To Store Sugar Snap Peas
Was this page helpful?
At Storables.com, we guarantee accurate and reliable information. Our content, validated by Expert Board Contributors, is crafted following stringent Editorial Policies. We're committed to providing you with well-researched, expert-backed insights for all your informational needs.


0 thoughts on “How To Store Sugar Snap Peas”