Home>Storage Ideas>Bedroom Storage>12 Genius Storage Tips For An Organized Cleaning Closet
Bedroom Storage
12 Genius Storage Tips For An Organized Cleaning Closet
Modified: November 1, 2024
Discover 12 brilliant storage tips for an organized cleaning closet and transform your bedroom storage woes. Implement these genius solutions today!
(Many of the links in this article redirect to a specific reviewed product. Your purchase of these products through affiliate links helps to generate commission for Storables.com, at no extra cost. Learn more)
Introduction
Having a clean and organized home is something we all strive for, but it can sometimes feel like an impossible task to achieve. One area of the house that often gets overlooked when it comes to organization is the cleaning closet. This small space is the hub for all of your cleaning supplies, from brooms and mops to vacuum cleaners and laundry essentials. With so many items to store, it can quickly become cluttered and chaotic.
Fortunately, there are plenty of genius storage tips and tricks that can help you transform your cleaning closet into an organized oasis. By utilizing clever storage solutions and maximizing every inch of space, you can create a functional and efficient cleaning closet that will make your cleaning routine a breeze.
In this article, we will explore 12 genius storage tips for an organized cleaning closet. From utilizing over-the-door organizers to making use of wasted space underneath the sink, these tips will help you declutter and streamline your cleaning supplies so that everything is easily accessible and neatly arranged. So grab your cleaning gloves and let’s get started!
Key Takeaways:
- Transform your cleaning closet with over-the-door organizers, hanging rods, and shelves to maximize space and keep supplies easily accessible. Labeling, clear bins, and drawer dividers add an extra layer of organization for a seamless cleaning routine.
- Utilize wasted space under the sink and implement a trash and recycling station for efficient waste management. Pegboards and hooks provide versatile storage solutions, creating a well-organized and visually appealing cleaning closet.
Read more: How To Clean Out Closet
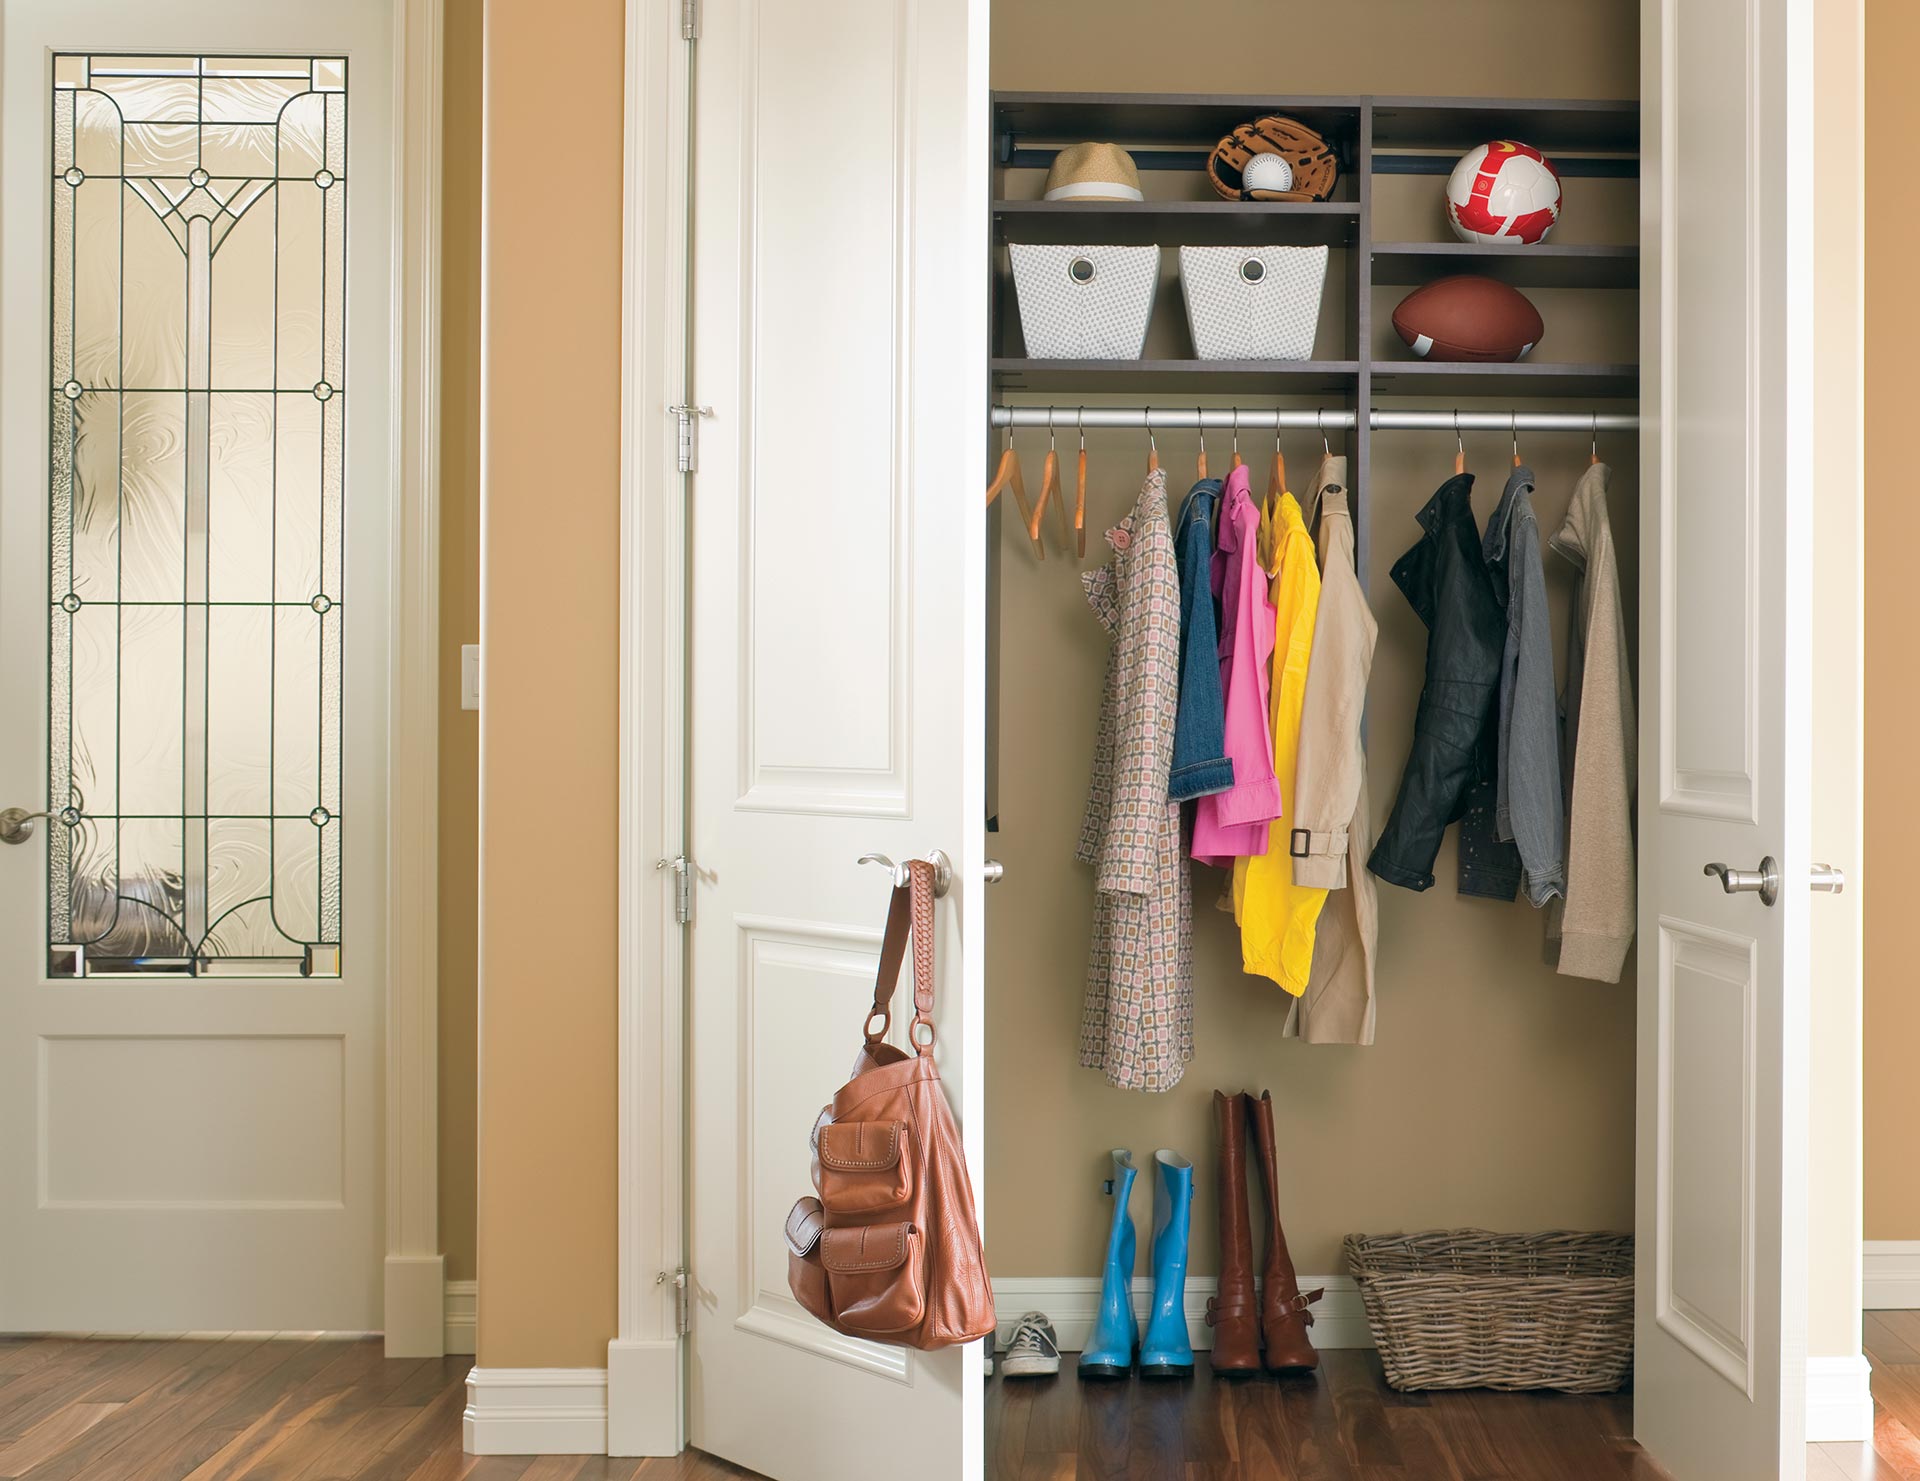
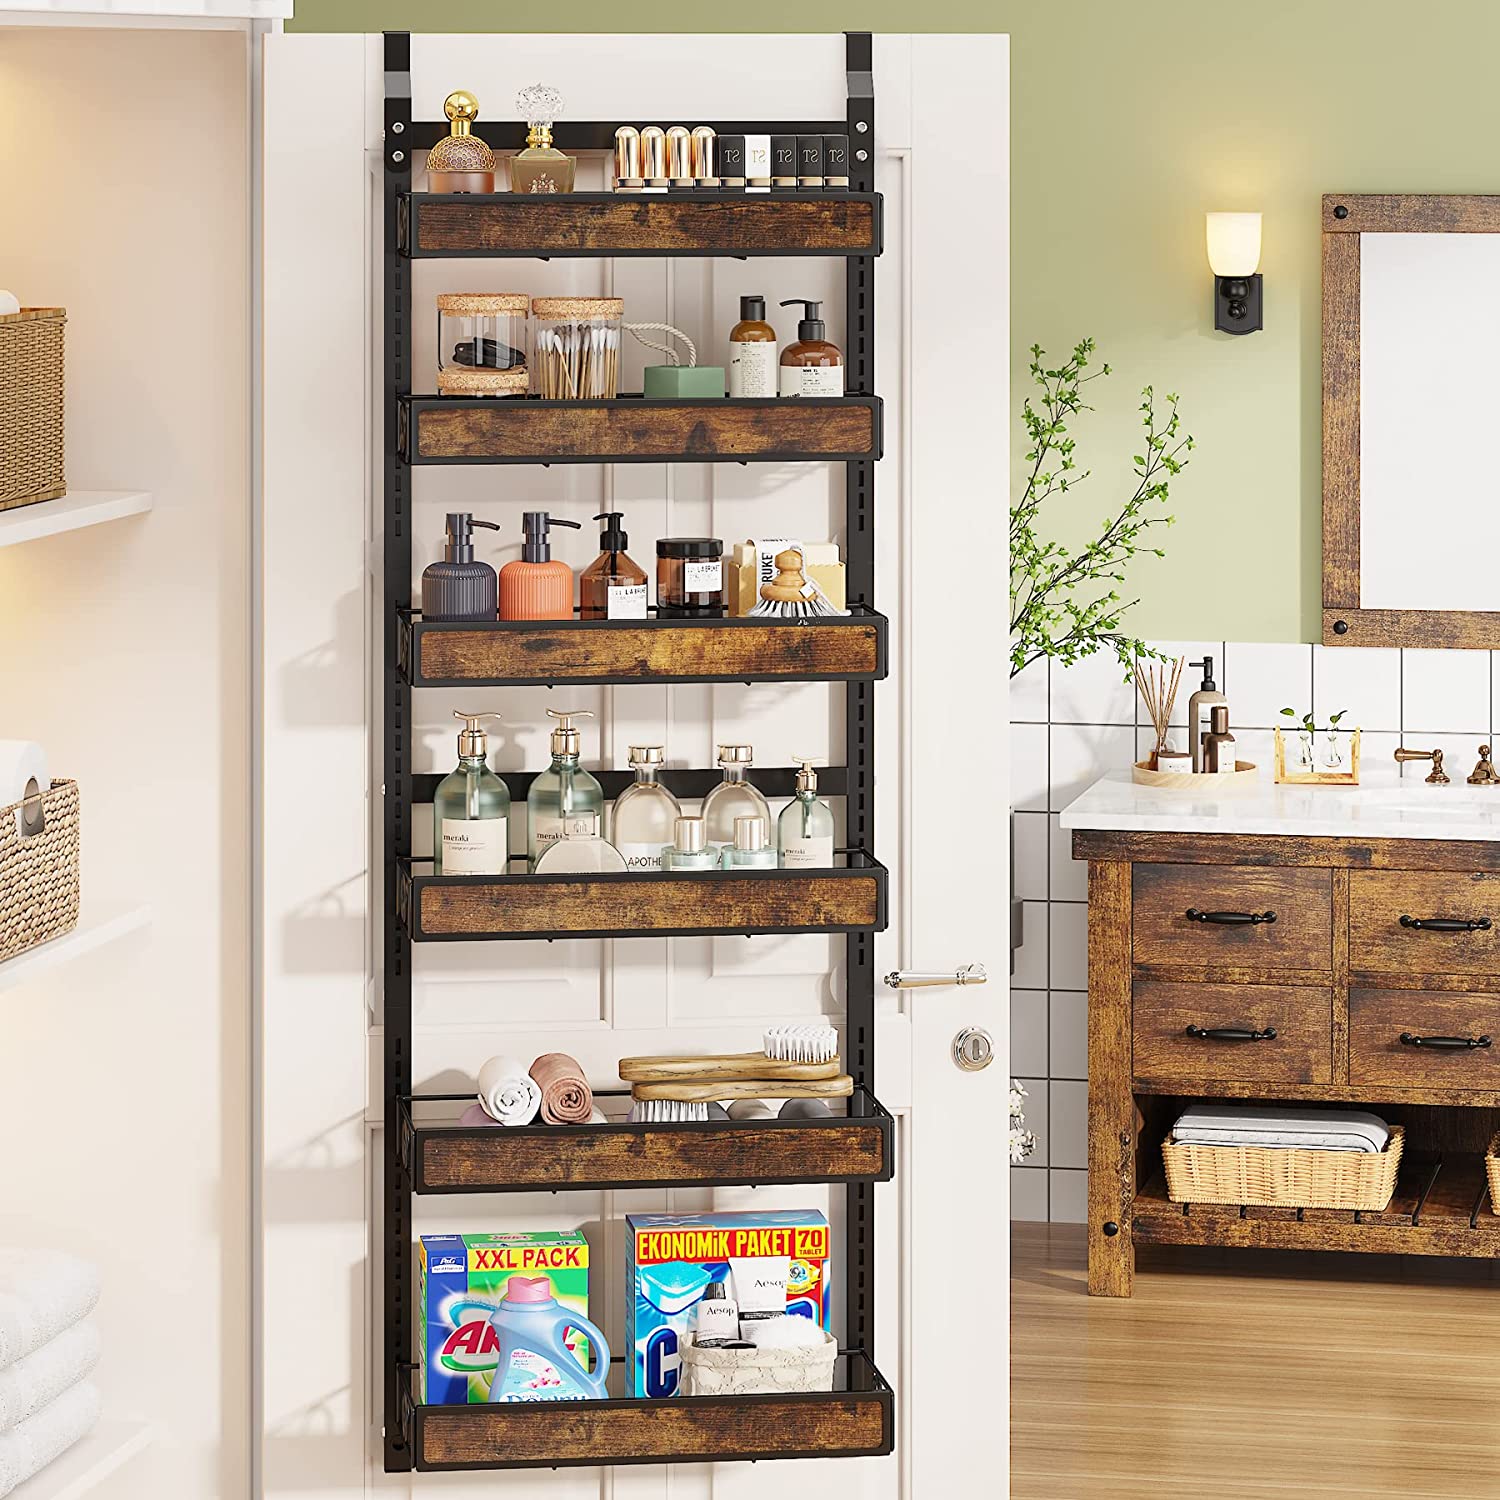
Use Over-the-Door Organizers
When it comes to maximizing space in your cleaning closet, utilizing over-the-door organizers is a game-changer. These versatile storage solutions can turn the back of your closet door into valuable real estate for storing various cleaning supplies.
Over-the-door organizers come in a variety of styles, with options such as pockets, baskets, and hooks. Choose one that suits your needs and attach it to the inside of your cleaning closet door.
One great use for over-the-door organizers is storing small cleaning tools such as brushes, scrubbers, and sponges. Simply place them in the pockets or baskets of the organizer, keeping them easily accessible and preventing them from getting lost in the clutter.
Over-the-door organizers can also be used to store spray bottles or cleaning solutions. Hang them upside down from their triggers using hooks or secure them in the pockets. This not only saves space but also prevents leakage and keeps the bottles within reach.
Another clever way to use over-the-door organizers is by storing microfiber cloths or gloves. Roll them up and place them in the pockets, making them readily available when you need them.
By utilizing over-the-door organizers, you can make the most of the vertical space in your cleaning closet and keep everything neatly organized and easily accessible. Say goodbye to rummaging through cluttered shelves in search of your cleaning supplies!
Utilize Hanging Rods
When it comes to maximizing storage space in your cleaning closet, don’t forget about the power of hanging rods. Installing a hanging rod or tension rod is a great way to create additional storage options for your cleaning supplies.
Hanging rods are perfect for hanging cleaning tools such as brooms, mops, and dusters. Instead of leaning them against the wall or stuffing them in a corner, hang them on the rod to keep them organized and easily accessible. This not only saves floor space but also prevents the bristles from getting bent or damaged.
You can also hang cleaning caddies or baskets from the rod. These caddies are perfect for holding smaller cleaning items and can be easily transported around the house as you clean different areas. It’s a convenient way to keep all your cleaning supplies together and within reach.
If you don’t have space for a permanent hanging rod, tension rods can be a great alternative. These rods can be placed between two walls or cabinets and provide a quick and easy solution for hanging cleaning tools.
Consider utilizing the space underneath your hanging rod as well. Hang a shoe organizer with clear pockets and use it to store cleaning supplies such as gloves, sponges, or cleaning brushes. The clear pockets allow for easy visibility, so you can quickly grab what you need without any hassle.
By utilizing hanging rods in your cleaning closet, you can create additional storage space and keep your cleaning tools and supplies neatly organized and within reach. It’s a simple and practical solution that can make a big difference in your cleaning routine.
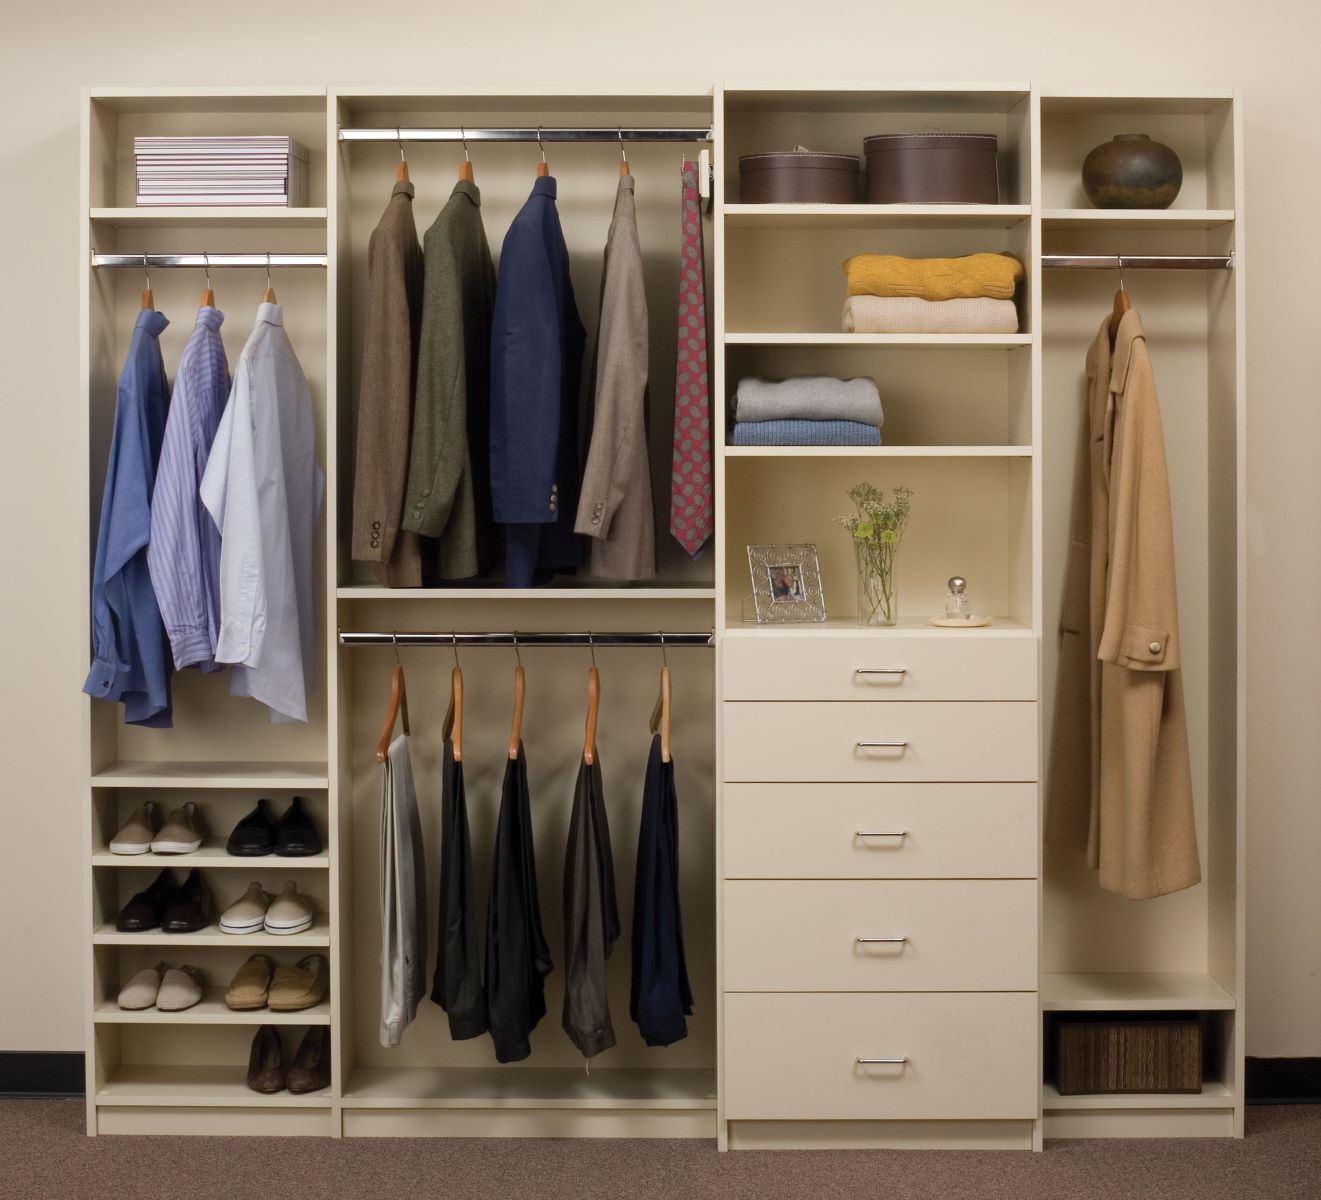
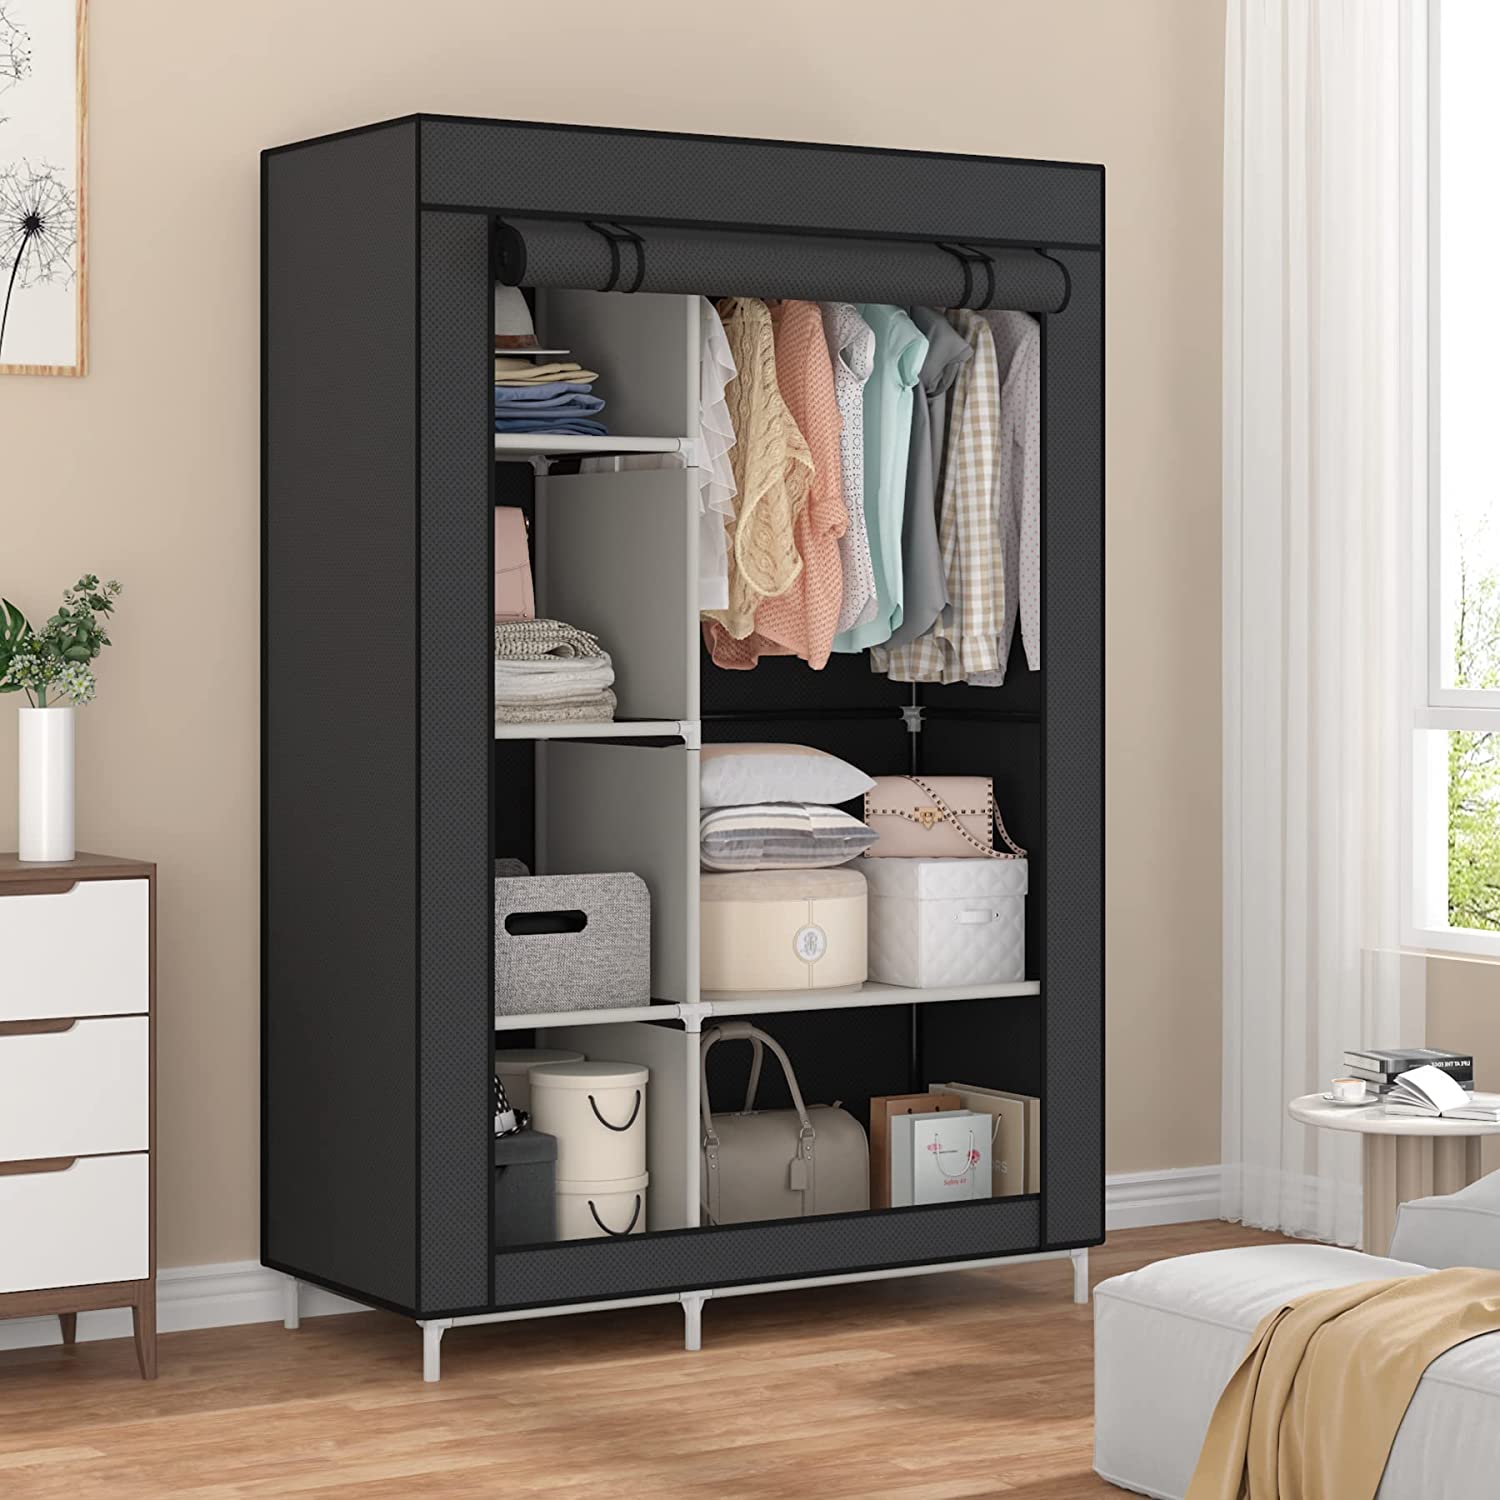
Install Shelves
When it comes to maximizing storage space and organizing your cleaning closet, installing shelves is an absolute must. Shelves provide a practical and efficient way to store your cleaning supplies, making them easily accessible and neatly arranged.
Start by assessing the available space in your cleaning closet and determine the optimal size and configuration for your shelves. Adjustable shelves are a great option as they allow you to customize the height between each shelf to accommodate different-sized items.
Consider installing multiple shelves from floor to ceiling to make the most of vertical space. This will help maximize storage capacity and prevent items from being scattered around or stacked haphazardly.
When arranging your cleaning supplies on the shelves, it’s best to group similar items together. For example, dedicate one shelf for cleaning solutions, another for laundry supplies, and another for miscellaneous items such as trash bags or paper towels.
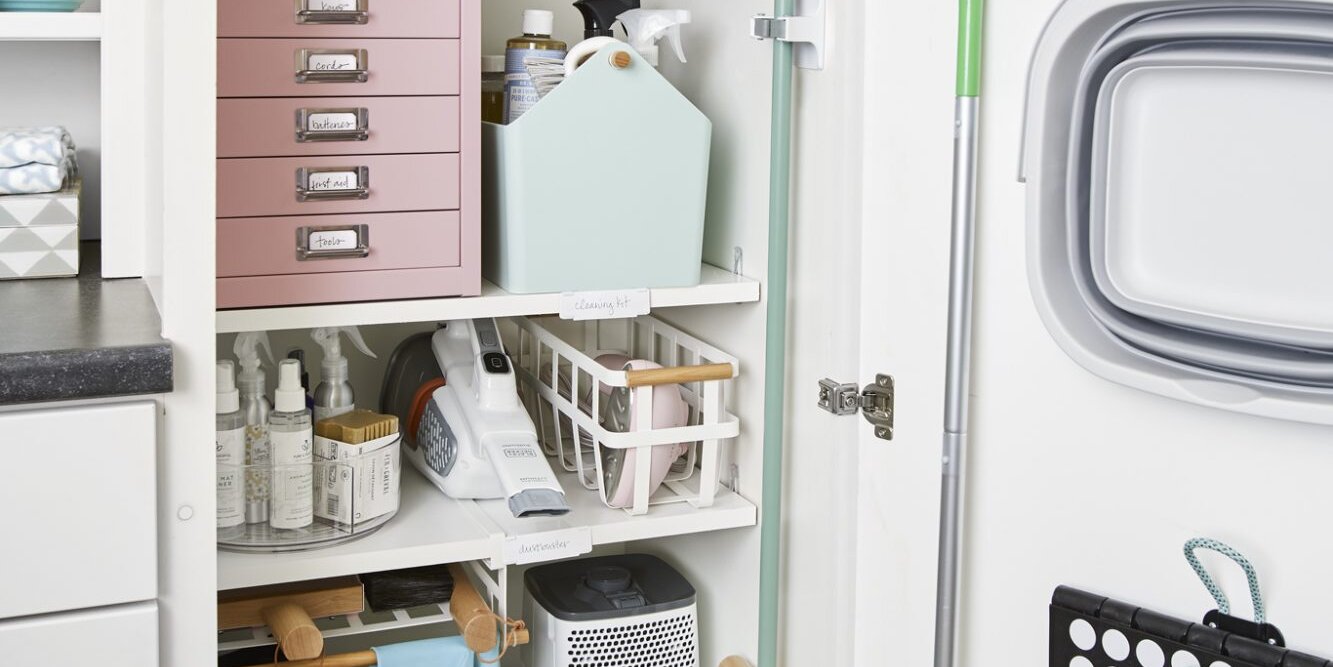
To further maximize space, consider using storage bins or baskets on the shelves. These containers can hold smaller items or group similar cleaning supplies together. Label the bins or baskets for easy identification and to maintain an organized and clutter-free closet.
In addition to the main shelves, don’t forget about utilizing smaller spaces within your cleaning closet. Install narrow shelves on the inside of the closet door or on the sidewalls to store smaller items like cleaning brushes, microfiber cloths, or dusting tools.
By installing shelves in your cleaning closet, you’ll create a streamlined and organized space for all your cleaning supplies. No more digging through a jumble of supplies to find what you need!
Label Everything
One of the key elements of an organized cleaning closet is proper labeling. When everything is labeled, it’s easier to find what you need quickly and efficiently. Plus, it helps maintain the organization you’ve worked so hard to achieve.
Start by investing in some label-making materials, such as adhesive labels, a label maker, or even chalkboard labels. These can be used to label bins, baskets, shelves, and containers within your cleaning closet.
When labeling, be clear and specific. Rather than simply writing “cleaning supplies,” label the bin or shelf with more specific categories like “all-purpose cleaners,” “window cleaning supplies,” or “dusting tools.” This allows you and anyone else using the cleaning closet to easily locate exactly what they need.
If you prefer a more aesthetic approach, consider using decorative labels or color-coded labels to add a touch of style and make things even easier to find. For example, use green labels for cleaning solutions, blue labels for laundry supplies, and red labels for trash bags or disposal items.
In addition to labeling the storage containers, consider labeling the shelves themselves. This will help you maintain the organization even when items get moved around or when new supplies are added. Use small adhesive labels or removable stickers to label each shelf.
Labeling is not only functional but also a fun and creative way to personalize your cleaning closet. It adds a polished and organized look to the space, making it more inviting and enjoyable to use.
So don’t underestimate the power of labels. Spend a little time labeling everything in your cleaning closet and reap the benefits of an organized and easily navigable space.
Use Clear Storage Bins
When it comes to organizing your cleaning closet, clear storage bins are a game-changer. These transparent containers allow you to see and access your cleaning supplies with ease.
Invest in a variety of clear storage bins in different sizes to accommodate different cleaning items. Use larger bins for bulky items like paper towels or toilet paper, and smaller bins for items like cleaning wipes or scrub brushes.
Sort your cleaning supplies into separate bins based on category or use. For example, have one bin for all-purpose cleaners, another for bathroom cleaning supplies, and another for floor cleaning tools. This not only keeps everything organized but also makes it easier to grab what you need for specific cleaning tasks.
When using clear bins, label them for added organization. You can use adhesive labels or write directly onto the bins with a dry-erase marker. This way, you can easily identify the contents of each bin without having to open them.
Clear storage bins also help prevent clutter from accumulating. Since you can readily see what’s inside, you’ll be less likely to accumulate duplicates or hold onto unnecessary items. It’s a simple way to declutter and keep your cleaning closet neat and tidy.
Another benefit of using clear storage bins is that they are stackable. This allows you to maximize vertical space and make the most of the available storage area in your closet. Stack the bins neatly to create a compact and organized space.
Whether you have a large cleaning closet or a smaller storage area, clear storage bins are an essential organization tool. Their transparency, combined with the ability to stack and label them, will make your cleaning supplies easily accessible and keep your closet clutter-free.
Create a Cleaning Tool Holder
Keeping your cleaning tools organized and easily accessible is essential for an efficient cleaning routine. Creating a cleaning tool holder is a smart solution to keep your brooms, mops, and other long-handled cleaning tools neatly stored and within reach.
There are various ways to create a cleaning tool holder. One option is to install hooks or pegs on the walls of your cleaning closet. Hang your brooms and mops by their handles, allowing the bristles or mop heads to hang freely. This prevents them from getting squished or deformed.
Another option is to use a wall-mounted rack designed explicitly for cleaning tools. These racks typically have multiple slots or hooks to hang brooms, mops, and other tools. You can find them in different sizes to accommodate the number of tools you have.
If wall space is limited, consider using a freestanding cleaning tool holder. These holders have slots or hooks to hang your brooms and mops and are often equipped with wheels for easy maneuvering. They can be placed inside your cleaning closet or moved around as needed.
In addition to long-handled tools, a cleaning tool holder can also be used for smaller items like dustpans, brushes, and dusters. Install hooks or clips on the holder to hang these items, keeping them organized and easily accessible.
Creating a designated spot for your cleaning tools not only keeps them organized but also extends their lifespan. Properly storing tools prevents them from getting damaged or tangled with other supplies, ensuring they are always ready for use.
Remember to position your cleaning tool holder in a convenient and easily accessible spot within your cleaning closet. This will make it quick and effortless to grab the necessary tools when you need them.
By creating a cleaning tool holder, you’ll transform your cleaning closet into a well-organized space where every tool has its place. Say goodbye to the frustration of searching for misplaced brooms and mops!
Use clear bins or baskets to store cleaning supplies so you can easily see what you have and access items quickly. Label the containers for even more organization.
Use Hooks for Hanging Supplies
Hooks are incredibly versatile and can be a valuable addition to your cleaning closet for hanging various supplies. They provide a convenient and space-saving solution for keeping items within reach while maximizing storage space.
Firstly, consider installing hooks on the walls or inside the door of your cleaning closet to hang smaller cleaning tools such as scrub brushes, dustpans, or handheld dusters. This keeps them easily accessible and prevents them from getting buried or lost in the clutter.
For hanging gloves or microfiber cloths, use adhesive hooks on the inside of the closet door or on the sidewalls. This not only keeps them organized but also allows them to air dry properly after use, reducing the risk of mold or mildew.
Hooks are also handy for hanging items that are frequently used during cleaning, such as aprons, reusable cleaning cloths, or even spray bottles. By hanging them on hooks, you can quickly grab them as needed without digging through bins or shelves.
If you have a vacuum cleaner or steam mop, consider installing hooks or a wall-mounted storage rack to hang them up. This keeps them off the floor and prevents them from tipping over or taking up valuable shelf space.
Another clever use of hooks in your cleaning closet is for hanging your ironing board or other large cleaning equipment. Install sturdy hooks on the wall or inside the door to hang the ironing board vertically. This frees up valuable floor space and keeps it neatly stowed away when not in use.
When using hooks, make sure they are strong enough to hold the weight of the items you plan to hang. Test their durability and stability before hanging anything important or heavy.
Using hooks in your cleaning closet is an efficient and practical way to keep supplies organized and easily accessible. They help maximize space, reduce clutter, and ensure that your cleaning tools are always within reach when you need them most!
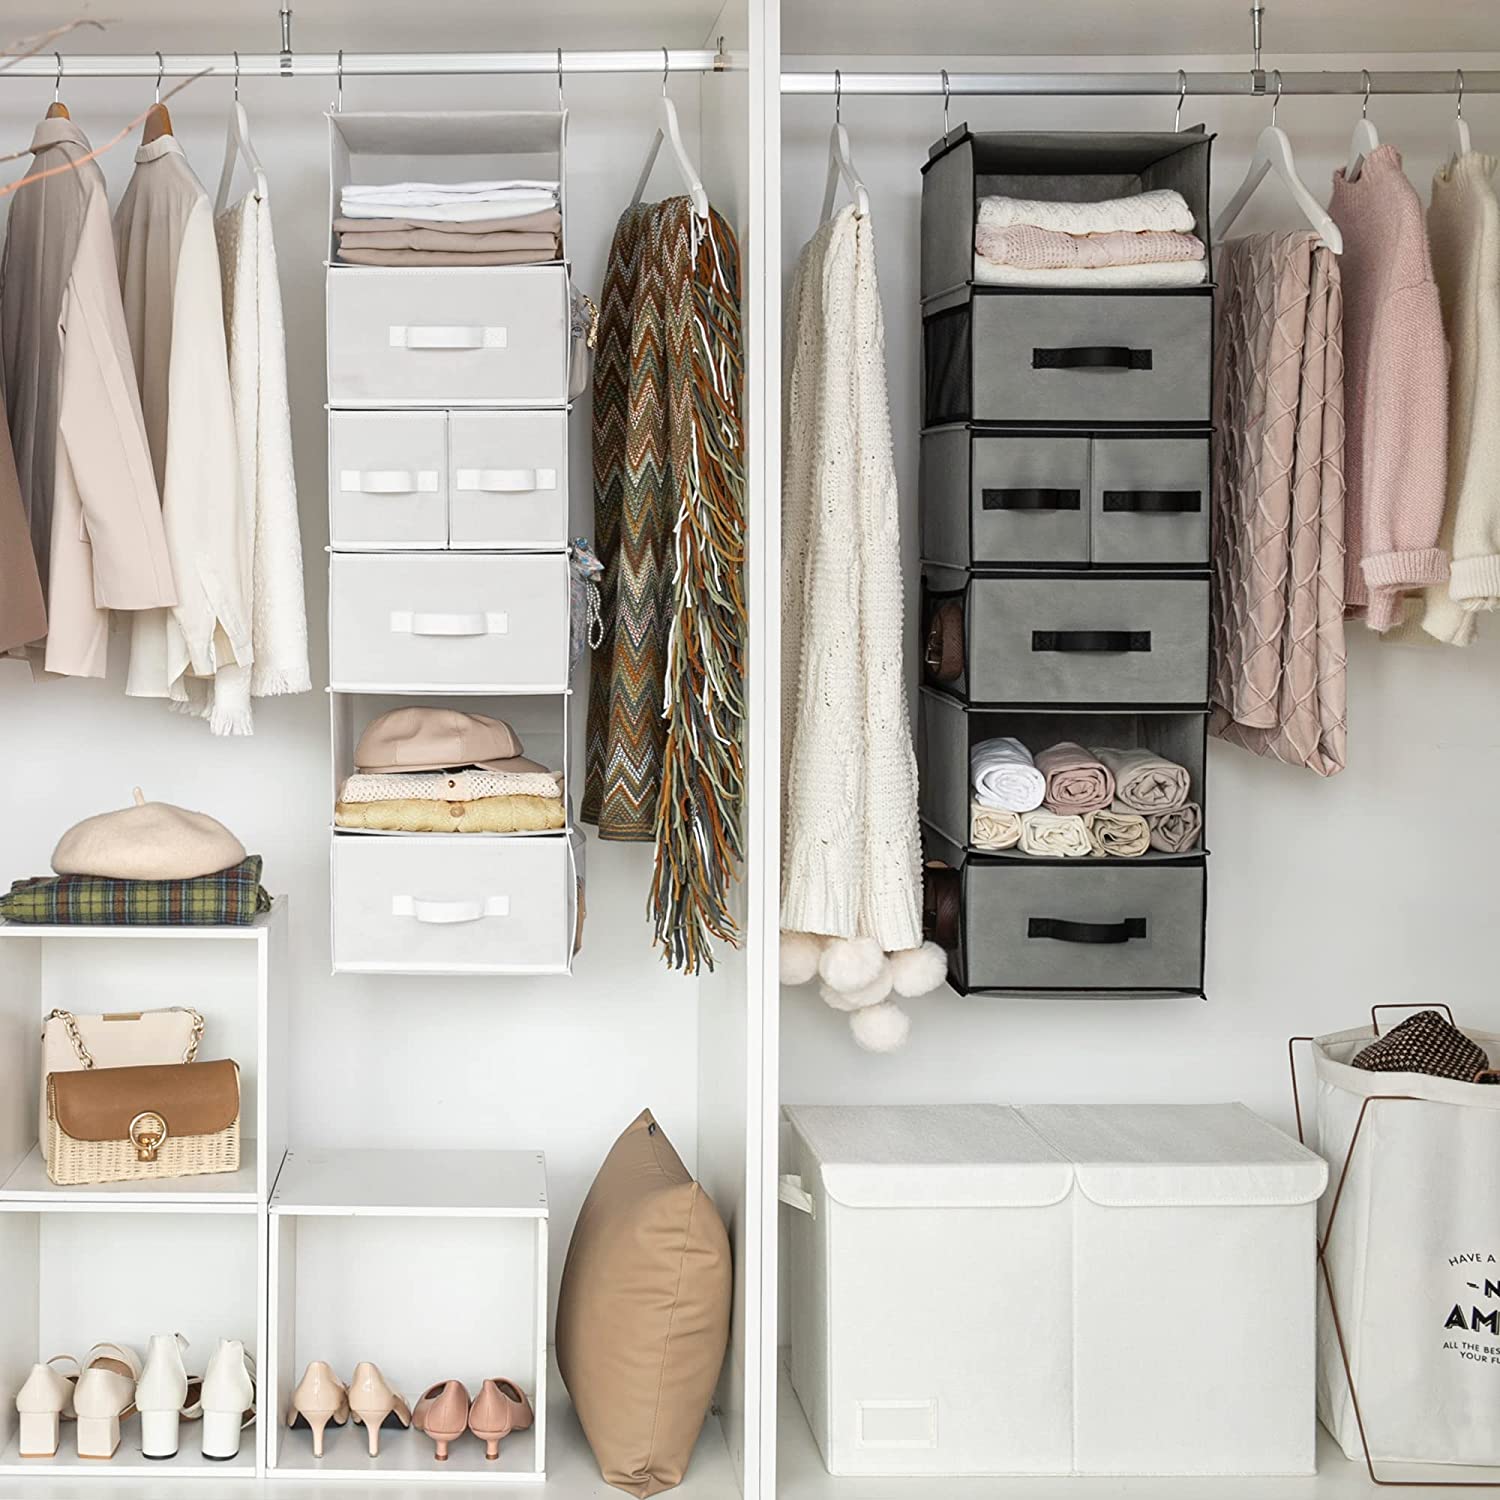
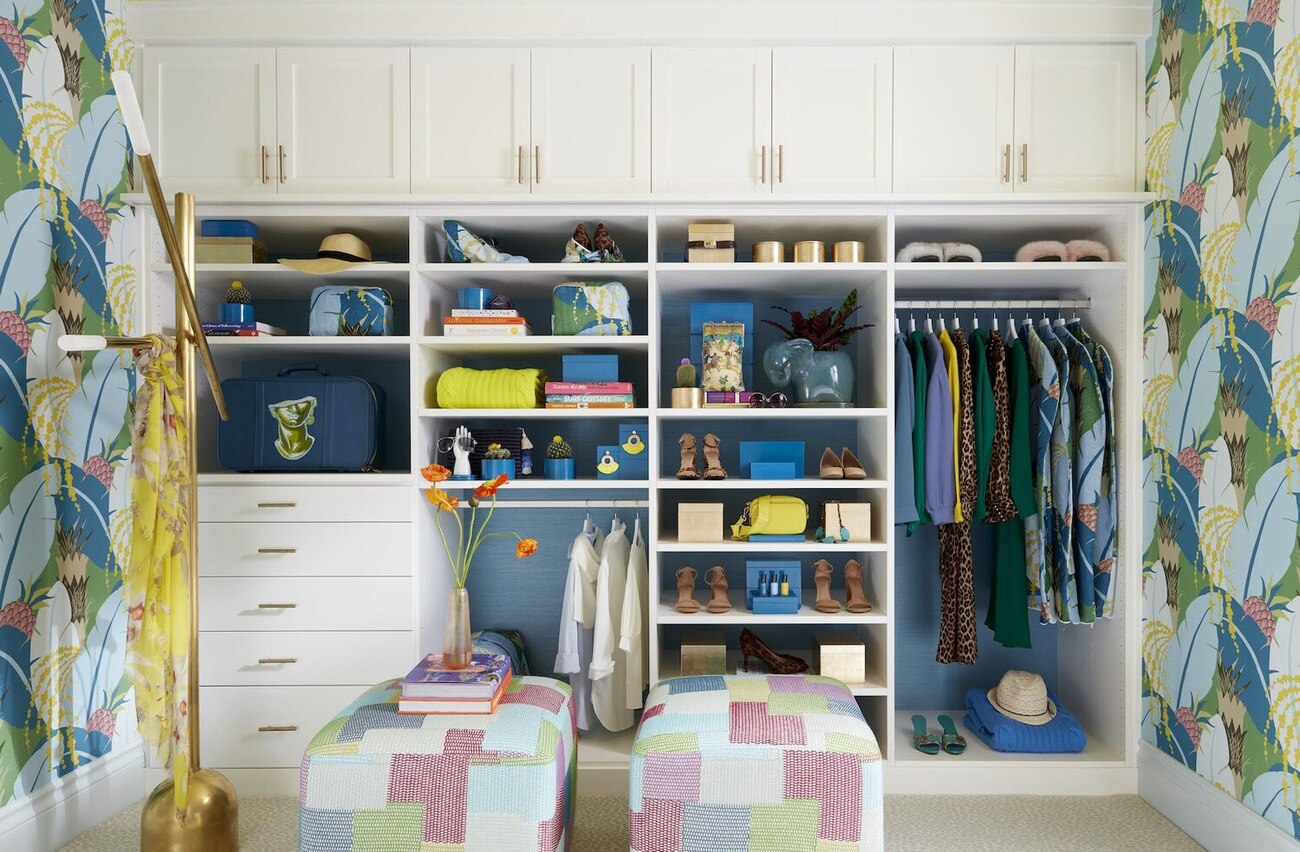
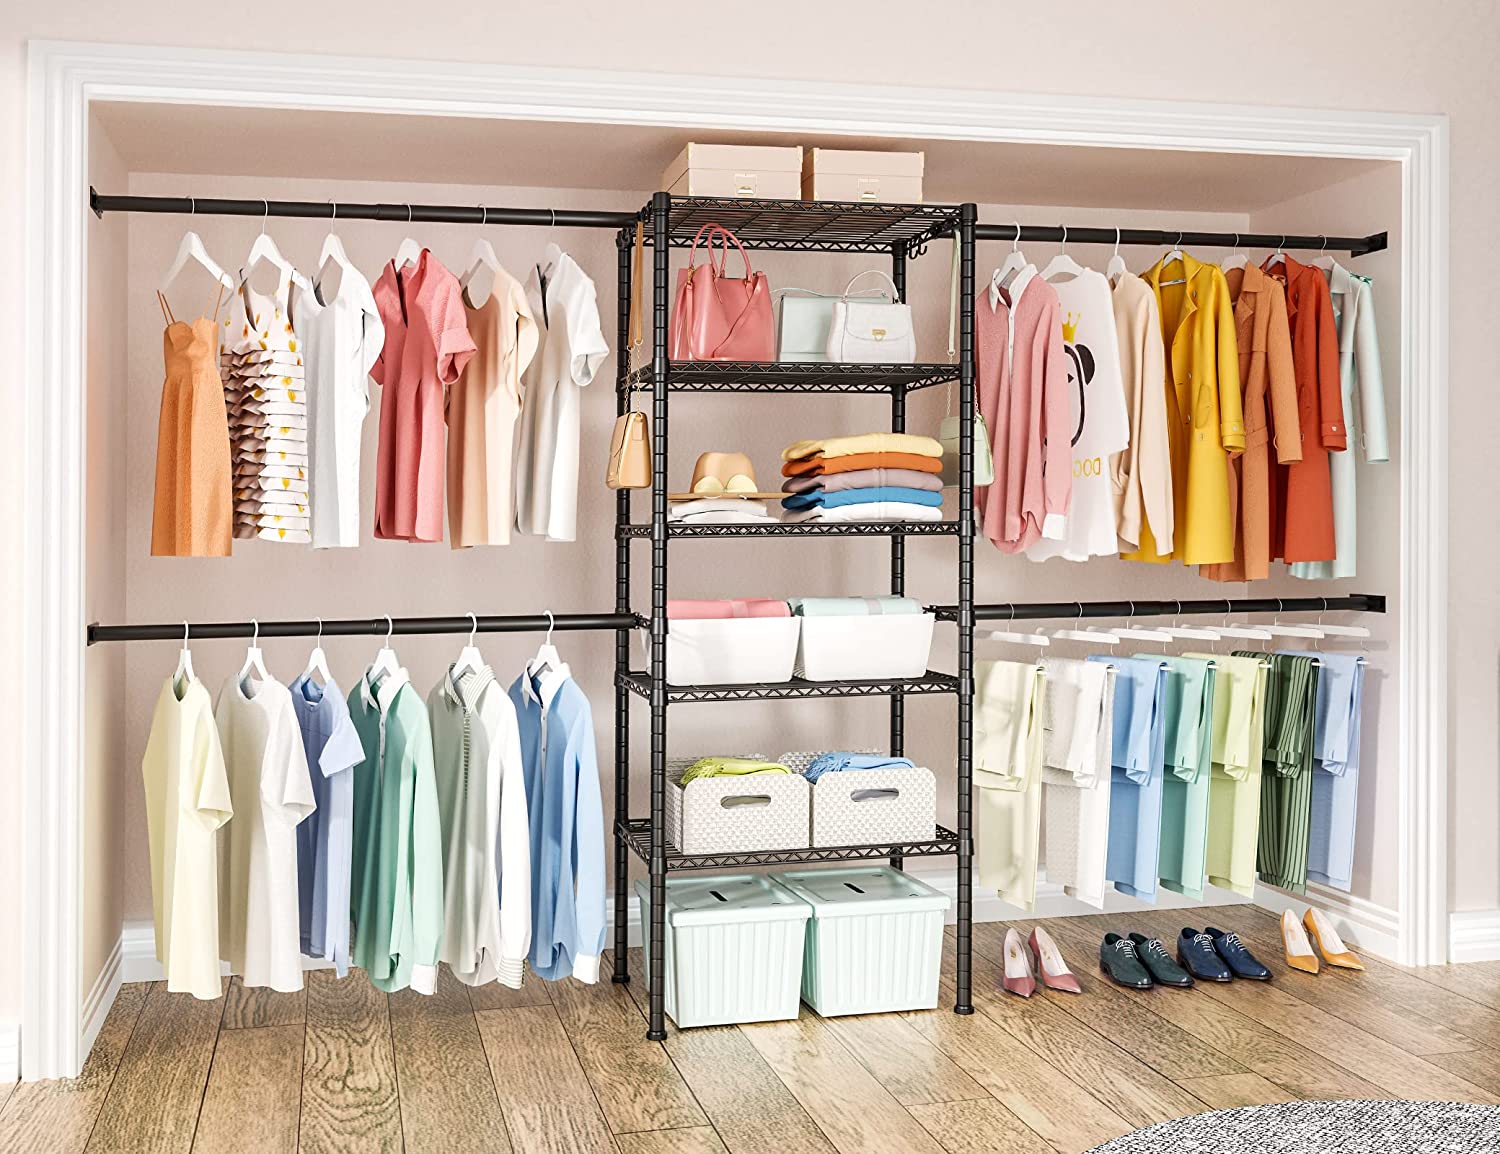
Make Use of Vertical Space
When organizing your cleaning closet, it’s important to utilize every inch of available space. One of the most effective ways to do this is by making use of vertical space. By thinking vertically, you can maximize storage capacity and keep your cleaning supplies neatly organized.
Start by installing shelves that reach from floor to ceiling. This allows you to take advantage of the entire height of your cleaning closet. Use these shelves to store items that are not frequently used or that can be stacked, such as extra paper towels, toilet paper, or cleaning wipes.
Additionally, consider utilizing hanging baskets or wire racks that can be attached to the walls. These are perfect for storing smaller cleaning supplies like bottles, sponges, or gloves. By hanging them vertically, you maximize space while keeping everything easily accessible.
Another way to make use of vertical space is by installing a pegboard on one of the walls. Pegboards are versatile and allow you to hang various items such as spray bottles, tools, or even cleaning cloths. You can customize the arrangement according to your needs and easily rearrange them when necessary.
Don’t forget about the space above the door of your cleaning closet. This often overlooked area can be utilized by installing a shelf or hanging a wire basket. Use it to store items that are not frequently used or seasonal cleaning supplies.
Utilizing vertical space not only maximizes storage capacity but also helps to keep your cleaning closet organized and clutter-free. It allows you to take advantage of the often underutilized vertical space, creating a more efficient and functional cleaning space.
Remember to keep items that you use frequently at eye level or within easy reach. This way, you won’t have to constantly climb or use a step stool to access them.
By making efficient use of the vertical space in your cleaning closet, you’ll create a more organized and visually pleasing space where every inch counts.
Implement a Pegboard
A pegboard is a versatile and practical storage solution that can greatly enhance the organization of your cleaning closet. By implementing a pegboard, you can easily hang and display various cleaning supplies, tools, and accessories in a customizable and accessible way.
First, choose a suitable location within your cleaning closet to install the pegboard. Ensure that it is easily visible and accessible. Consider the size of the pegboard based on your available space and the number of items you need to hang.
Once installed, the pegboard becomes a blank canvas for organizing your cleaning supplies. Use hooks, clips, and baskets specifically designed for pegboards to hang your brooms, mops, dustpans, scrub brushes, and other long-handled tools.
Categorize and arrange your cleaning tools on the pegboard according to their functionality. For example, group all your dusting tools in one area, place your brooms and mops together, and allocate separate sections for smaller items such as spray bottles or cleaning cloths.
The beauty of a pegboard is its flexibility. You can easily rearrange the hooks and accessories as needed to accommodate different supplies or to adjust the arrangement based on your preferences. This versatility allows you to adapt and customize your cleaning closet to your changing needs.
Additionally, a pegboard provides excellent visibility of your cleaning tools, ensuring that everything is easily identifiable and within reach. No more digging through cluttered shelves or rummaging through bins to find the desired item.
Another advantage of implementing a pegboard is that it showcases your cleaning supplies, giving your cleaning closet a neat and organized appearance. It adds a touch of visual appeal and turns your supplies into a functional and decorative display.
Lastly, consider utilizing the space around the pegboard as well. Install shelves or small bins to store additional cleaning supplies or to hold items that might not hang well, such as detergent bottles or cleaning buckets.
Implementing a pegboard is a transformative addition to your cleaning closet. It simplifies the organization of your cleaning supplies, increases accessibility, and adds a visually pleasing element to the space. Say goodbye to cluttered shelves and create a well-organized cleaning closet with the help of a pegboard!
Add a Trash and Recycling Station
An essential component of an organized cleaning closet is a dedicated trash and recycling station. Incorporating this feature into your cleaning closet will streamline waste disposal and help maintain cleanliness in your home.
Start by installing a trash bin or can in your cleaning closet. Choose a size that suits your needs and consider one with a lid to contain odors. Place a plastic bag or liner inside the bin for easy disposal and to prevent any leaks or spills.
In addition to the main trash bin, it’s also beneficial to include designated containers for recycling. Consider adding separate bins or compartments for different recyclable materials such as paper, plastic, glass, and metal. This makes sorting and organizing recyclables hassle-free.
Make sure to label each bin clearly to avoid confusion and encourage proper disposal. This labeling can be as simple as using stickers or adhesive labels with recycling symbols or words indicating the type of waste that goes into each bin.
When placing the trash and recycling station in your cleaning closet, consider the accessibility and convenience factor. Position it near the entrance or within easy reach to encourage proper waste disposal during cleaning tasks. This avoids the need to leave the room to dispose of trash and helps keep your cleaning process efficient and uninterrupted.
Incorporating a trash and recycling station within your cleaning closet not only saves space in other areas of your home but also promotes a clean and eco-friendly environment. It encourages responsible waste management, making it easier for you to keep your home tidy and organized.
Remember to regularly empty the trash and recycling bins to avoid overflow and unpleasant odors. Also, consider using eco-friendly trash bags or liners made from biodegradable materials to minimize environmental impact.
By including a dedicated trash and recycling station in your cleaning closet, you’ll have a central location for waste management, ensuring that your cleaning routine remains efficient and environmentally conscious.
Use Drawer Dividers
When it comes to organizing your cleaning closet, don’t overlook the power of drawer dividers. These handy tools are perfect for keeping smaller cleaning supplies, accessories, and tools neatly separated and easily accessible.
Start by assessing the drawers in your cleaning closet and determine which ones would benefit most from dividers. Drawers with a mix of different items can easily become disorganized and cluttered, making it challenging to find what you need. Dividers are an excellent solution to keep everything in its place.
Choose dividers that are suitable for the size and depth of your drawers. There are different types of dividers available, including adjustable ones that can be arranged to fit your specific needs. Consider dividers with different compartments to accommodate various items of different sizes.
Once you have the dividers, sort your cleaning supplies into categories or types. For example, group together microfiber cloths, sponges, or scrub brushes. Place each category in its designated section of the drawer.
Drawer dividers are also useful for separating and organizing smaller items like cleaning gloves, measuring cups, or even small bottles of cleaning solutions. This prevents them from getting mixed up and ensures that everything is easily accessible.
Labeling can be helpful when using drawer dividers, especially if you have multiple similar compartments. Use adhesive labels or small tags to indicate the contents of each section. This saves time and effort, making it easier to find the specific item you need.
Drawer dividers not only keep your cleaning supplies organized but also protect them from getting damaged. They prevent items from shifting or banging against each other, minimizing wear and tear. This is especially important when dealing with delicate or fragile items like glass cleaner bottles or small tools.
Whether you have deep or shallow drawers in your cleaning closet, incorporating dividers will help maximize space and maintain order. Say goodbye to rummaging through messy drawers and enjoy the ease of finding exactly what you need in an instant.
Utilize Wasted Space Underneath the Sink
One area in the cleaning closet that is often overlooked is the wasted space underneath the sink. This area provides valuable storage potential and can be utilized to maximize the organization of your cleaning supplies.
Start by assessing the available space under your sink and determine how it can best be utilized. Consider installing shelves or storage racks specifically designed for under-sink organization. These can help create compartments and maximize the vertical space, allowing you to store items in a more organized and accessible way.
If you prefer a DIY solution, use stackable bins or baskets to make use of the wasted vertical space. These can be labeled and arranged to hold different cleaning supplies or tools. By utilizing stackable storage containers, you can easily access items at the back of the cabinet without disturbing the others.
Take advantage of the cabinet doors by attaching adhesive hooks or installing hanging racks. These can provide additional storage for items such as gloves, small brushes, or cleaning cloths. Hanging spray bottle holders or organizers are also great options for keeping your cleaning solutions within reach.
Consider using tension rods under the sink to hang bottles with spray triggers. This clever solution not only keeps the bottles organized but also prevents them from falling over and leaking.
Another effective way to utilize the space under the sink is by using a lazy Susan or turntable. These rotating platforms make it easy to access items stored at the back without having to rummage through the entire cabinet. Use a lazy Susan to store cleaning supplies, spray bottles, or even spare sponges.
Make sure to declutter the area under the sink regularly to maintain an organized and efficient space. Dispose of any empty or expired cleaning products and reorganize the remaining items to keep things tidy.
By utilizing the wasted space underneath the sink, you can significantly increase the storage capacity of your cleaning closet. It’s an often overlooked area that, when optimized, can make a significant difference in the organization and accessibility of your cleaning supplies.
Read more: What Is A Walk-in Closet
Conclusion
Having an organized cleaning closet is essential for maintaining a clean and efficient home. By implementing these 12 genius storage tips, you can transform your cleaning closet into a well-organized and functional space.
From utilizing over-the-door organizers and hanging rods to installing shelves and using clear storage bins, these tips help you make the most of every inch of space in your cleaning closet. By creating designated areas for different cleaning supplies and tools, you can ensure that everything is easily accessible and neatly arranged.
Labeling everything in your cleaning closet adds an extra layer of organization, making it simple to find what you need quickly. The use of drawer dividers ensures that smaller items are kept in order and prevents clutter from accumulating.
Don’t forget the often overlooked areas, such as underneath the sink, which can provide valuable storage potential. By using hooks, tension rods, and other innovative solutions, you can make the most of this space and keep your cleaning supplies within reach.
Lastly, creating a trash and recycling station within your cleaning closet promotes responsible waste management and keeps your cleaning routine seamless and efficient.
By implementing these storage tips, you’ll not only have a well-organized cleaning closet but also enjoy a smoother and more enjoyable cleaning experience. You’ll be able to easily find what you need, save time, and maintain a cleaner and more organized home.
So roll up your sleeves, put these genius storage tips to use, and discover how an organized cleaning closet can transform your cleaning routine for the better.
Frequently Asked Questions about 12 Genius Storage Tips For An Organized Cleaning Closet
Was this page helpful?
At Storables.com, we guarantee accurate and reliable information. Our content, validated by Expert Board Contributors, is crafted following stringent Editorial Policies. We're committed to providing you with well-researched, expert-backed insights for all your informational needs.


0 thoughts on “12 Genius Storage Tips For An Organized Cleaning Closet”