Articles
How To Hide An Attic Door
Modified: October 20, 2024
Learn how to effectively hide an attic door with our informative articles. Find step-by-step guides and tips to seamlessly blend your attic entrance into your home decor.
(Many of the links in this article redirect to a specific reviewed product. Your purchase of these products through affiliate links helps to generate commission for Storables.com, at no extra cost. Learn more)
Introduction
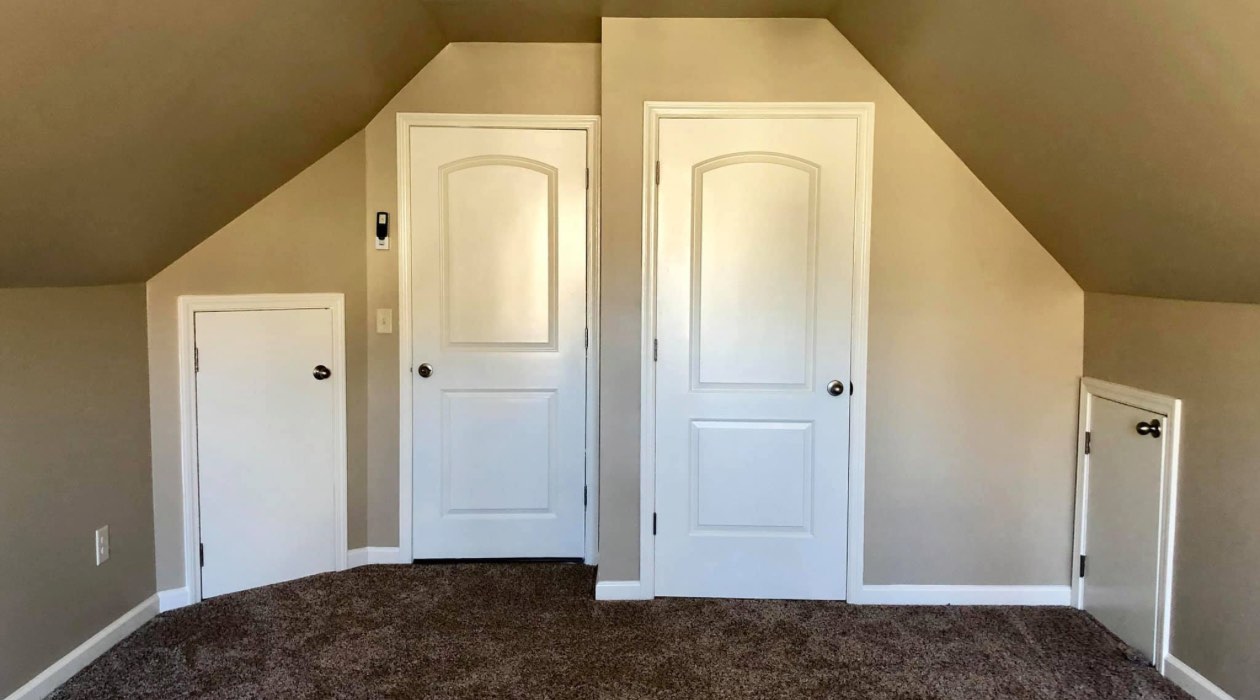
Having an attic in your home can provide valuable additional storage space or even be converted into a functional living area. However, the attic door can often be an eyesore, disrupting the aesthetic appeal of the room it is located in. If you’re looking for a way to hide your attic door and seamlessly integrate it into the surrounding environment, you’re in the right place!
In this article, we will guide you through the process of hiding an attic door to maintain the overall aesthetics of your home while still retaining easy access to the attic when needed. We will provide you with step-by-step instructions and creative ideas to conceal the door in a way that best suits your personal style and the design of your space.
Before diving into the process, it’s essential to assess the attic space and determine the best approach for hiding the door. Consider the size and layout of the room, as well as any existing furniture or design elements that may impact the concealment options. Once you have a clear idea of what you’re working with, you can move forward with choosing the right attic door hiding method.
Disclaimer: Depending on your specific situation, some methods may be more suitable than others. It’s always a good idea to consult with a professional or licensed contractor if you have any concerns or questions about the process.
Key Takeaways:
- Transform your attic door into a seamless part of your home’s design with creative methods like concealing it with a bookshelf or creating a hidden panel. Blend functionality with aesthetics for a visually appealing space.
- Carefully assess your attic space, choose the right door, and follow step-by-step instructions to successfully hide your attic door. Consider final touches and safety to ensure a polished and functional result.
Read more: How To Hide A Door In Living Room
Assessing the Attic Space
Before you start hiding your attic door, it’s important to evaluate the attic space itself. Take the time to familiarize yourself with the dimensions, layout, and any potential obstacles that may impact the hiding process.
First, measure the width and height of the attic door opening. This will give you an idea of the space you have to work with when choosing a hiding method. Additionally, take note of the surrounding walls and any potential obstructions, such as pipes or electrical outlets. These factors will help determine the best approach for concealing the door.
Consider the design style of the room where the attic door is located. If the room has a more traditional or vintage aesthetic, you may want to opt for a hiding method that blends seamlessly with the existing decor. On the other hand, if the room has a more modern or contemporary style, you might prefer a more sleek and minimalistic approach to hide the door.
Another crucial factor to consider is the functionality of the attic space. Will you need frequent access to the attic, or is it mainly for storage purposes? This will help you decide on a hiding method that allows for easy access or one that prioritizes a seamless appearance.
Lastly, take into account any safety regulations that may be applicable. Ensure that the chosen hiding method does not hinder or compromise any safety features, such as fire escape routes or ventilation systems. It’s always better to prioritize safety over aesthetics.
By thoroughly assessing your attic space, you will have a better understanding of the limitations and possibilities when it comes to hiding your attic door. This will enable you to choose the most suitable method that meets your aesthetic preferences, functionality needs, and safety requirements.
Choosing the Right Attic Door
Once you have assessed your attic space and have a clear idea of how you want to hide your attic door, it’s time to choose the right door that fits your needs. There are a few key factors to consider when making this decision.
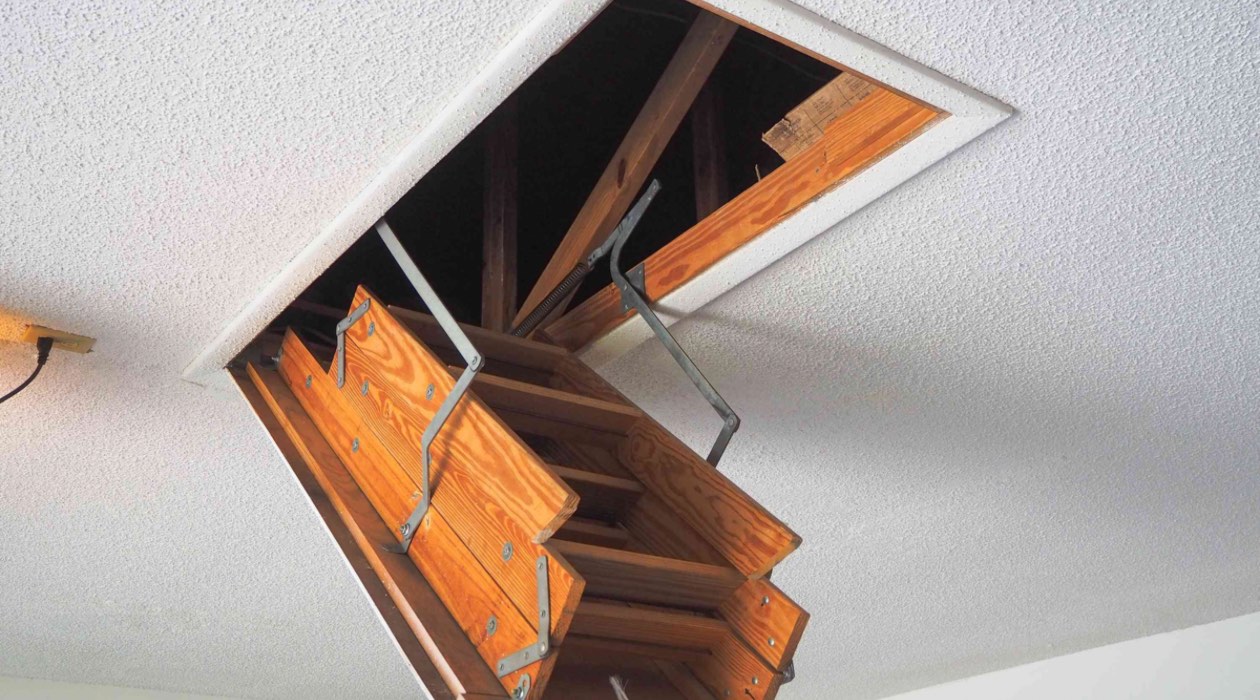
Type of Door: The first consideration is the type of door you want for your attic. The most common options are pull-down stairs, sliding doors, or hinged doors. Each has its own advantages and drawbacks, so consider the functionality, ease of use, and space constraints when making your choice.
Materials: Attic doors can be made from a variety of materials, including wood, metal, and fiberglass. Choose a material that aligns with the overall design aesthetic of your home and offers durability for prolonged use.
Insulation: If your attic requires insulation, opt for a door that has built-in insulation or the ability to add insulation. This will help maintain temperature control and energy efficiency in your home. Look for doors with weatherstripping to prevent drafts.
Size: Ensure that the attic door’s dimensions match the opening of your attic space. Measure the opening accurately to avoid any installation issues.
Security and Safety: Consider features such as locks, handrails, and non-slip surfaces for safety and ease of use. Depending on your specific needs, you may want a door that offers additional security measures.
Budget: Lastly, consider your budget when choosing the right attic door. Compare prices and features to find a balance between quality and affordability.
By carefully considering these factors, you can choose an attic door that serves both its functional purpose and seamlessly integrates into your chosen hiding method. Take your time researching and exploring options to find the perfect door that meets your specific requirements.
Tools and Materials Needed
Before you begin the process of hiding your attic door, gather the necessary tools and materials to ensure a smooth and efficient project. Having everything prepared in advance will save you time and hassle. Here’s a list of the basic tools and materials you’ll need:
Tools:
- Measuring tape
- Level
- Screwdriver or drill
- Saw (if required for modifying the door or creating a hidden panel)
- Utility knife
- Paintbrushes or rollers
- Sanding block
- Caulk gun (if needed for sealing gaps)
Materials:
- Attic door (if you haven’t already chosen one)
- Paint or wallpaper (if you plan on camouflaging the door)
- Trim or molding (if desired for a more finished look)
- Hinges and screws (if installing a new door or modifying an existing one)
- Wood or plywood (if creating a hidden panel)
- Adhesive or glue (if needed for attaching a bookshelf or other concealing element)
- Fabric or wallpaper adhesive (if using fabric or wallpaper to hide the door)
- Finishing nails or brad nails (if using trim or molding)
- Spackle or wood filler (if necessary for patching holes or imperfections)
Remember, the specific tools and materials needed may vary depending on the hiding method you choose. Take the time to research and plan accordingly before starting the project. It’s always better to have all the necessary items on hand to avoid delays or trips to the hardware store.
Once you have gathered your tools and materials, you’re ready to move to the next step: following the step-by-step instructions for hiding your attic door. Let’s dive into the process and create a seamless and stylish solution for concealing your attic door!
Steps for Hiding an Attic Door
Now that you have assessed your attic space, chosen the right attic door, and gathered the necessary tools and materials, it’s time to start hiding your attic door. Follow these step-by-step instructions to achieve a seamless and aesthetically pleasing result:
- Prepare the area: Clear the area around the attic door, removing any furniture or objects that may obstruct your work. Protect the surrounding walls and floor with drop cloths or plastic sheets to prevent any damage during the process.
- Remove existing door (if applicable): If you have an existing attic door that needs to be hidden, remove it by unscrewing any hinges or latches. Carefully lift and remove the door from its frame.
- Modify the door (if applicable): Depending on the hiding method you have chosen, you may need to modify the door. For example, if you are creating a hidden panel, measure and cut the door to fit the desired dimensions. Use a saw or utility knife to make the necessary adjustments.
- Create hidden panel or concealment element: If you have decided to create a hidden panel or use another concealing element such as a bookshelf, follow the specific instructions for that method. Secure the panel or element in place using adhesive, screws, or other appropriate fasteners.
- Install the new door (if applicable): If you have selected a new attic door, install it following the manufacturer’s instructions. Use the appropriate hinges and screws to secure the door to the frame. Ensure that the door opens smoothly and securely.
- Camouflage with paint or wallpaper: If you want to further conceal the door, consider using paint or wallpaper to match the surrounding walls. Sand any rough edges or surfaces before applying the paint or wallpaper adhesive. Allow sufficient drying time between coats if multiple layers are necessary.
- Add finishing touches: To achieve a polished look, consider adding trim or molding around the attic door. Measure and cut the trim to fit the desired dimensions, then secure it in place using finishing nails or brad nails. Fill any nail holes or gaps with spackle or wood filler, then sand and paint the trim to match.
- Clean up: Lastly, clean up the work area and remove any protective coverings. Dispose of any debris or unused materials responsibly.
Remember to follow proper safety procedures throughout the process, such as wearing protective goggles and gloves when handling tools or materials. If you encounter any difficulties or uncertainties, consult with a professional or licensed contractor for guidance.
By following these step-by-step instructions, you can successfully hide your attic door and transform it into a seamless and integrated part of your home’s design. Now, let’s explore some creative methods for concealing the attic door!
Read more: How To Secure Attic Door
Concealing the Door with a Bookshelf
One creative and stylish way to hide your attic door is by incorporating a bookshelf into the design. A bookshelf not only conceals the door but also adds functionality and visual interest to the space. Here’s how you can achieve this:
- Measure and plan: Measure the dimensions of the attic door and determine the size and style of bookshelf that will effectively conceal it. Consider the height, width, and depth of the bookshelf, making sure it fits the available space and aligns with the surrounding decor.
- Select and prepare the bookshelf: Choose a bookshelf that fits your aesthetic preferences and supports the weight of the books or objects you plan to place on it. If necessary, assemble the bookshelf according to the manufacturer’s instructions.
- Position the bookshelf: Position the bookshelf in front of the attic door, ensuring that it covers the door entirely. Make sure the bookshelf is stable and secure, ensuring it doesn’t accidentally tip over or move when in use.
- Secure the bookshelf: Depending on the size and weight of the bookshelf, you may need to secure it to the wall for added stability. Use brackets or anchors to firmly attach the bookshelf to the wall, following the manufacturer’s instructions.
- Organize the shelves: Arrange your books, decorative items, or other objects on the shelves to create an attractive and organized display. Consider adding decorative baskets or boxes to hold smaller items and maintain a clean and tidy appearance.
- Accessorize: Enhance the overall look of the bookshelf by adding personal touches such as framed photos, plants, or artwork. This will add character and make it seamlessly blend with the rest of the room’s decor.
- Optional: Add a hidden door: Take the bookshelf concealment to the next level by incorporating a hidden door within the bookshelf itself. This can be achieved by creating a hidden panel that swings open to reveal the attic door behind it. Ensure proper measurements and proper installation of hinges and handles.
- Final touches: Stand back and assess the overall appearance of the bookshelf hiding the attic door. Make any necessary adjustments or additions to achieve the desired aesthetic. Consider painting or staining the bookshelf to complement the room’s color scheme.
Remember, when concealing the attic door with a bookshelf, it’s important to ensure that the bookshelf is securely installed and does not obstruct the functionality of the attic door. Take extra precautions to avoid overloading the shelves with too much weight, which could potentially destabilize the bookshelf.
By utilizing a bookshelf as a decorative and functional element, you can effectively hide your attic door while adding an attractive feature to the room. Now, let’s explore another method for concealing your attic door: creating a hidden panel.
Use a decorative folding screen or room divider to conceal the attic door. This will not only hide the door but also add a stylish touch to the room.
Creating a Hidden Panel
If you’re looking for a more discreet way to hide your attic door, creating a hidden panel can be an elegant and seamless solution. This method involves blending the panel with the surrounding wall, making the attic door practically invisible. Follow these steps to create a hidden panel:
- Measure and plan: Measure the dimensions of the attic door opening and determine the size of the hidden panel. Consider the height, width, and thickness of the panel, ensuring it fits the available space and matches the existing wall.
- Select the material: Choose a material that matches the surrounding wall, such as wood or plywood. It should be sturdy enough to support the panel’s weight and durable enough to withstand daily use.
- Prepare the material: Cut the material to the appropriate size for the hidden panel. If necessary, sand any rough edges or surfaces to ensure a smooth and seamless finish. You can also paint or stain the panel to match the wall color if desired.
- Create a frame: Construct a sturdy frame for the hidden panel using additional pieces of wood or plywood. The frame should match the dimensions of the panel and provide support and stability. Attach the frame to the wall surrounding the attic door opening.
- Attach the panel: Securely attach the hidden panel to the frame using hinges or another appropriate method. Ensure that the panel swings open smoothly and remains flush with the wall when closed.
- Conceal the panel: Conceal any visible hinges or gaps by installing molding or trim around the edges of the hidden panel. This will create a finished look and further enhance the seamless appearance.
- Optional: Add a handle or latch: Install a discrete handle or latch on the hidden panel to make it easy to open and close when accessing the attic. Choose a style that blends with the overall design aesthetic of the room.
- Test and adjust: Test the functionality of the hidden panel by opening and closing it multiple times. Make any necessary adjustments to ensure smooth operation and a secure fit.
- Final touches: Stand back and assess the hidden panel in its closed position. Ensure that it seamlessly merges with the surrounding wall and is virtually undetectable. If necessary, touch up the paint or make any final adjustments to achieve the desired result.
Creating a hidden panel allows you to maintain the functionality of the attic door while keeping it out of sight when not in use. It provides a clean and seamless look, blending the attic door with the surrounding wall and maintaining the overall aesthetic of the room.
Now that you’ve learned how to create a hidden panel, let’s explore another method for hiding an attic door: installing a false ceiling.
Installing a False Ceiling
If you want a more extensive method for hiding your attic door while transforming the entire room’s appearance, consider installing a false ceiling. This option allows you to create a new, lowered ceiling that conceals the attic door and adds a touch of elegance to the space. Follow these steps to install a false ceiling:
- Measure and plan: Measure the dimensions of the room and determine how far you want to lower the ceiling. Take into consideration the height of the attic door and ensure there is enough space between the false ceiling and the existing ceiling to accommodate the door when opened.
- Prepare the area: Clear the room of any furniture or objects and cover the floor and walls with protective materials to prevent damage during the installation process.
- Mount the tracks: Install metal tracks around the perimeter of the room, following the manufacturer’s instructions. These tracks will hold the framework for the false ceiling.
- Install the framework: Attach metal studs to the tracks at regular intervals to create the framework for the false ceiling. Ensure the studs are level and securely fastened.
- Add insulation (if desired): Depending on your needs, you may choose to add insulation between the existing ceiling and the false ceiling. This will help with soundproofing and energy efficiency. Follow proper insulation installation guidelines to ensure safety and effectiveness.
- Install the ceiling panels: Cut ceiling panels to fit the dimensions of the room and the desired shape of the false ceiling. Secure the panels to the framework using screws or other appropriate fasteners. Ensure that the panels are even and level, creating a smooth and seamless appearance.
- Optional: Add recessed lighting or other fixtures: If desired, incorporate recessed lighting or other fixtures into the false ceiling to enhance the ambiance of the room. Consult with an electrician to ensure proper installation and adherence to electrical codes.
- Conceal the attic door: Paint or wallpaper the false ceiling to match the walls and blend seamlessly with the room’s design. Ensure the surface is smooth and free of imperfections.
- Final touches: Stand back and assess the false ceiling, ensuring that it effectively hides the attic door and enhances the aesthetics of the room. Make any necessary adjustments or additions to achieve the desired result.
Installing a false ceiling not only hides the attic door but also adds a touch of sophistication to the room. It can enhance the overall ambiance and provide an opportunity to incorporate unique lighting features or additional design elements.
Remember to follow safety guidelines and consult with professionals if you have any concerns or questions during the installation process. Now, let’s explore another method for hiding your attic door: camouflaging it with wallpaper or paint.
Camouflaging with Wallpaper or Paint
If you’re looking for a simple and cost-effective method to hide your attic door while adding visual interest to the room, consider camouflaging it with wallpaper or paint. This method allows you to seamlessly blend the door into the surrounding wall, creating a cohesive and aesthetically pleasing design. Follow these steps to camouflage your attic door:
- Choose a suitable design: Select a wallpaper pattern or paint color that matches or complements the existing wall. Consider the room’s decor and choose a design that seamlessly integrates with the overall aesthetic.
- Prepare the area: Clear the area around the attic door, removing any furniture or objects that may obstruct your work. Protect the surrounding surfaces with drop cloths or painter’s tape to prevent any accidental splatters or smudges.
- Prepare the door surface: Clean the attic door surface thoroughly and ensure it is smooth and free of any imperfections. Sand any rough areas and wipe away any dust or debris before applying the wallpaper or paint.
- Camouflage with wallpaper: If using wallpaper, measure and cut the wallpaper to fit the size of the door. Apply wallpaper adhesive to the back of the wallpaper and carefully position it onto the door, smoothing out any bubbles or wrinkles. Allow sufficient drying time for the adhesive to set and the wallpaper to adhere properly.
- Camouflage with paint: If using paint, apply a coat of primer to the attic door to ensure proper adhesion of the paint. Once the primer is dry, apply multiple coats of paint using a roller or brush, making sure to achieve an even and smooth finish. Allow each coat of paint to dry fully before applying the next one.
- Seamless integration: To create a more seamless integration, extend the wallpaper or paint beyond the door edges onto the surrounding wall. This will help to blend the door into the overall wall design and create a cohesive appearance.
- Final touches: Stand back and assess the camouflaged attic door. Make any necessary touch-ups or adjustments to ensure a seamless and cohesive look. Consider adding decorative elements, such as artwork or wall sconces, to further enhance the visual appeal of the space.
Camouflaging your attic door with wallpaper or paint is a versatile and customizable method that allows you to seamlessly hide the door while adding a touch of style to the room. It’s a cost-effective option that can be easily changed or updated over time.
Remember to choose high-quality wallpaper or paint that is suitable for the specific surface and follow proper application techniques. If you’re unsure or unfamiliar with the process, consult with a professional or experienced painter to ensure the best results.
Now that you’ve learned various methods for hiding your attic door, it’s time to put your skills into action and transform your space. Make sure to consider your personal style, the existing room design, and functional needs when selecting the most suitable method for hiding your attic door.
Good luck with your project, and enjoy the seamless and visually appealing result!
Read more: How To Hide A Fireplace
Final Touches and Considerations
As you near the completion of hiding your attic door, there are a few final touches and important considerations to keep in mind. These details will help ensure a polished and successful outcome:
Inspect for any visible imperfections: Take a close look at the hidden attic door and the surrounding area. Check for any visible imperfections such as gaps, uneven surfaces, or areas where the hiding method may not be seamless. Make any necessary touch-ups or adjustments to create a flawless appearance.
Consider lighting: Take lighting into account when concealing the attic door. Ensure that the chosen method does not block any existing light fixtures or impede the distribution of light in the room. If needed, install additional lighting fixtures to maintain proper illumination throughout the space.
Test functionality: Ensure that your chosen hiding method does not hinder the functionality of the attic door. Test the door’s opening and closing to ensure it operates smoothly and without any restrictions. Pay attention to any potential safety hazards, such as doors that swing too close to furniture or walls.
Maintenance and accessibility: Consider how easy it will be to access the attic when necessary. Ensure that your chosen hiding method allows for convenient and hassle-free entry to the attic whenever needed. Additionally, plan for any required maintenance or repairs to the hiding method in the future.
Blend with the surroundings: Ensure that the hidden attic door seamlessly blends with the surrounding space. Whether it’s matching the color scheme, replicating the wall texture, or aligning with the existing architectural elements, strive for a cohesive and harmonious integration of the hidden door with the overall room design.
Safety considerations: Maintain safety as a top priority when hiding your attic door. Ensure that any modifications or installations are done in compliance with safety standards. Be aware of any fire safety codes, electrical wirings, or other safety precautions specific to your area, and consult with professionals if necessary.
Personalize and decorate: Once the attic door is effectively hidden, take the opportunity to personalize and decorate the space. Add elements that reflect your personal style and enhance the overall ambiance of the room. Consider artwork, decorative accents, or furniture arrangements to create a cohesive and inviting atmosphere.
By focusing on these final touches and considerations, you can ensure that your hidden attic door not only serves its functional purpose but also enhances the overall aesthetics of the room. Take pride in your work and enjoy the newfound seamless appearance of your space!
Congratulations on successfully hiding your attic door! With your creativity and attention to detail, you have transformed your room into a visually appealing and functional space. In addition to hiding the attic door, you have added a touch of elegance or personalized style to your environment.
Remember, each method and hiding option discussed in this article has its own unique benefits and considerations. Choose the one that aligns with your style, meets your functional needs, and enhances the overall design of your home.
Good luck with your home improvement project, and may your hidden attic door add to the charm and functionality of your space for years to come!
End of Article
Conclusion
Hiding an attic door is a creative and practical solution to maintain the aesthetics of your space while still having convenient access to your attic. Throughout this article, we have explored various methods for hiding an attic door, from concealing it with a bookshelf to creating a hidden panel, installing a false ceiling, or camouflaging it with wallpaper or paint.
Each method offers its own unique benefits and considerations, allowing you to choose the one that best suits your personal style and the design of your home. By following the step-by-step instructions provided, you can successfully hide your attic door and achieve a seamless and visually appealing result.
Remember to carefully assess your attic space, select the right attic door, and gather the necessary tools and materials. Take time to plan and execute the hiding method that best fits your needs, ensuring that it integrates seamlessly into the surrounding environment.
Don’t forget about the final touches and considerations – inspect for any imperfections, test the functionality, and ensure that your chosen method is safe and accessible. Personalize and decorate the space to make it truly your own.
Now, armed with the knowledge and creativity gained from this article, you can embark on your journey to hide your attic door and transform your space into a more visually appealing and functional area.
Good luck with your project, and may your hidden attic door become a seamless and stylish addition to your home!
End of Article
Frequently Asked Questions about How To Hide An Attic Door
Was this page helpful?
At Storables.com, we guarantee accurate and reliable information. Our content, validated by Expert Board Contributors, is crafted following stringent Editorial Policies. We're committed to providing you with well-researched, expert-backed insights for all your informational needs.


0 thoughts on “How To Hide An Attic Door”