Articles
How To Install Gas Logs In Fireplace
Modified: October 19, 2024
Learn the step-by-step process of installing gas logs in your fireplace with our helpful articles. Ensure a warm and cozy home this winter with our expert tips and guidance.
(Many of the links in this article redirect to a specific reviewed product. Your purchase of these products through affiliate links helps to generate commission for Storables.com, at no extra cost. Learn more)
Introduction
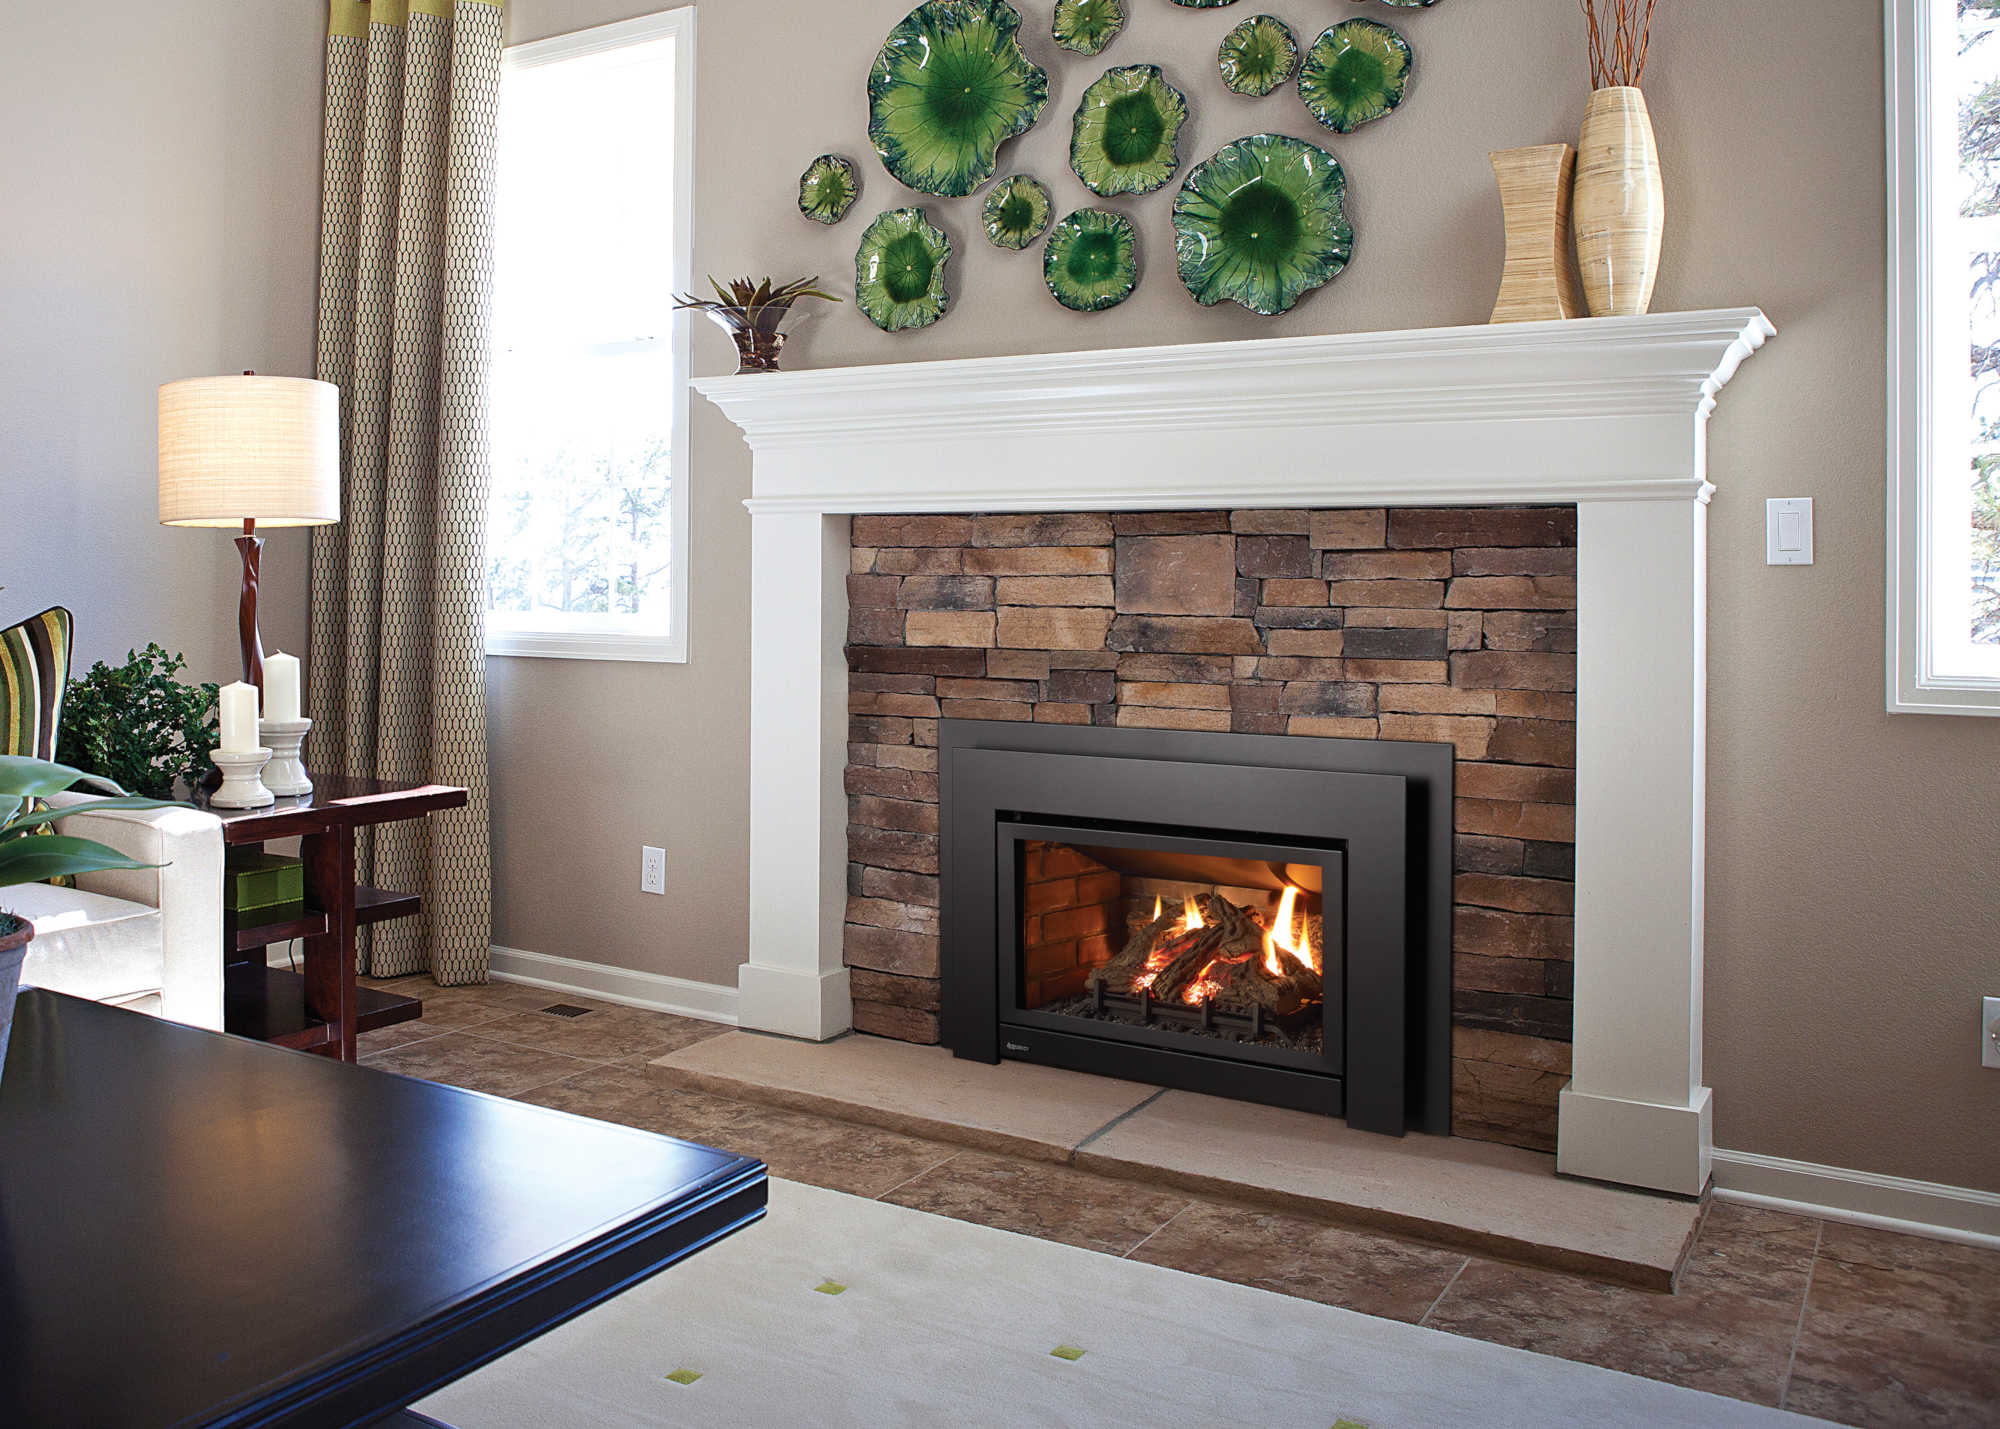
Welcome to the world of cozy and convenient heating with gas logs in your fireplace. Whether you’re looking to upgrade your existing fireplace or install a brand new one, gas logs offer a beautiful and efficient solution. With their realistic look and ease of use, gas logs have become a popular choice among homeowners.
In this article, we will guide you through the process of installing gas logs in your fireplace. From safety precautions to choosing the right gas logs and step-by-step instructions, we will cover everything you need to know to successfully complete this project.
But before we jump into the installation process, it’s important to note that safety should always be a top priority. Gas-related projects can be potentially dangerous if not handled correctly, so it’s crucial to follow all safety precautions and guidelines throughout the installation process.
Now, let’s dive into the world of gas logs and learn how to install them in your fireplace.
Key Takeaways:
- Safety first! Before installing gas logs, follow safety precautions, check fireplace compatibility, choose the right logs, and gather tools. Turn off the gas supply, prepare the fireplace, connect the gas line, test for leaks, and complete the final steps for a cozy and safe fireplace experience.
- Enjoy the warmth and convenience of a gas log fireplace by following the installation process carefully. Once installed, maintain the fireplace regularly for continued safety and ambiance. Happy heating!
Read more: What Is A Gas Log Fireplace
Safety Precautions
Installing gas logs in your fireplace involves working with natural gas or propane, which can be hazardous if not handled properly. It’s essential to take the necessary safety precautions to ensure a safe and successful installation. Here are some safety guidelines to follow:
- Read and understand the manufacturer’s instructions: Before starting the installation, thoroughly read and familiarize yourself with the instructions provided by the gas log manufacturer. This will help you understand the specific requirements and guidelines for your particular product.
- Turn off the gas supply: Prior to starting any work, make sure to shut off the gas supply to your fireplace. Locate the gas shut-off valve, usually located near the fireplace or in the basement. Turn the valve to the “off” position and verify that the gas supply is completely shut off.
- Ensure proper ventilation: Gas log installations require adequate ventilation to prevent the buildup of carbon monoxide. Ensure that your fireplace and chimney are in good condition and that the flue is clean and unobstructed. If you are unsure about the condition of your chimney, consider having it inspected by a professional.
- Use personal protective equipment (PPE): When working with gas lines and equipment, it is important to protect yourself. Wear safety goggles, gloves, and a dust mask to prevent injury and minimize exposure to dust and debris.
- Avoid open flames and sparks: Keep all open flames, cigarettes, and sparks away from the installation area. Even a small spark can ignite a gas leak, causing a fire or explosion. Be cautious and keep the area free from potential ignition sources.
- Check for gas leaks: Before starting the installation, it’s essential to check for gas leaks. Apply a mixture of soapy water to all gas connections and joints. If you notice any bubbles forming, it indicates a gas leak. In such cases, turn off the gas supply immediately and consult a professional.
- Follow local codes and regulations: Gas log installations must comply with local codes and regulations. Ensure that you are familiar with the requirements in your area and obtain any necessary permits before beginning the installation. Ignoring these regulations may lead to fines or safety hazards.
By following these safety precautions, you can minimize the risks associated with gas log installation and ensure a safe and enjoyable fireplace experience in your home.
Checking the Fireplace Compatibility
Before you begin the installation process, it’s important to determine if your fireplace is compatible with gas logs. Not all fireplaces are designed to accommodate gas logs, so it’s essential to check for compatibility. Here are the steps to follow:
- Check the fuel type: Determine whether your fireplace is designed for natural gas or propane. This information is crucial in selecting the appropriate gas logs for your fireplace.
- Inspect the fireplace structure: Examine the interior of your fireplace to ensure that the structure is in good condition. Look for cracks, damages, or signs of wear that may pose a safety risk. If you notice any issues, consult a professional before proceeding with the gas log installation.
- Verify the venting system: Gas logs require proper ventilation to vent out the combustion gases. Check if your fireplace has a functional venting system, such as a chimney or direct vent. Ensure that the venting system is clear and unobstructed.
- Measure the fireplace dimensions: Measure the width, depth, and height of your fireplace to determine the appropriate size of gas logs. Select gas logs that fit comfortably within the fireplace without blocking the opening or impeding air circulation.
- Consider the heat output: Gas logs generate heat when in operation. Ensure that your fireplace can handle the heat output of the gas logs without causing damage or posing a fire hazard. Refer to the manufacturer’s guidelines for the recommended heat output compatibility.
- Consult a professional if unsure: If you’re uncertain about the compatibility of your fireplace or have any concerns, it’s best to consult a professional. A fireplace technician or installer can assess your fireplace and provide expert advice on whether gas logs can be safely installed.
Checking the compatibility of your fireplace is essential to ensure a successful gas log installation. By following these steps and addressing any potential issues, you can proceed with confidence knowing that your fireplace is ready for gas log installation.
Choosing the Right Gas Logs
Selecting the right gas logs for your fireplace is crucial for achieving the desired aesthetic and functionality. Here are some factors to consider when choosing gas logs:
- Material: Gas logs are available in different materials, such as ceramic, refractory cement, or even ceramic fibers. Each material offers a unique look and durability. Consider the appearance and longevity of the gas logs based on the material.
- Size and Style: Gas logs come in various sizes and styles to match different fireplace dimensions and personal preferences. Measure the dimensions of your fireplace accurately to ensure the gas logs fit properly. Additionally, choose a style that matches your desired aesthetic, whether it’s realistic-looking logs or modern contemporary designs.
- Venting Type: Determine the venting type of your fireplace, whether it’s vented or ventless. Vented gas logs require a functional chimney or flue for proper ventilation, while ventless gas logs operate without the need for external venting. Choose gas logs that are compatible with your fireplace’s venting type.
- Heat Output: Consider the heat output of gas logs to determine their efficiency and ability to heat your space. Gas logs have different heat ratings, measured in British Thermal Units (BTUs). Select gas logs with an appropriate heat output for your fireplace and heating needs.
- Remote Control Options: Some gas logs can be controlled remotely, allowing you to adjust the flame height and heat settings from the comfort of your couch. If convenience is a priority for you, look for gas logs with remote control capabilities.
- Realistic Features: If you want your gas logs to closely resemble real wood burning in a fireplace, look for features like detailed bark textures, charred or glowing embers, and natural-looking flame patterns. These realistic features can enhance the ambiance and authenticity of your gas log fireplace.
Take time to research and compare different gas log options to find the perfect fit for your fireplace. Read customer reviews, visit showrooms, and consult with professionals to make an informed decision. Choosing the right gas logs will ensure that your fireplace not only looks beautiful but also functions efficiently.
Gathering Required Tools and Materials
Before you begin the gas log installation process, it’s important to gather all the necessary tools and materials. Having everything prepared ahead of time will make the installation smoother and more efficient. Here’s a list of the tools and materials you’ll need:
Read more: How To Measure A Fireplace For Gas Logs
Tools:
- Adjustable wrench
- Screwdriver (if required for your specific gas log model)
- Pipe wrench
- Plumbers tape
- Drill (if creating holes for gas line connection)
- Hammer
- Tape measure
- Level
- Safety goggles
- Gloves
- Dust mask
- Safety ladder
Materials:
- Gas logs kit (including burner assembly and logs)
- Pipeline for gas supply
- Flexible gas line (if required for your specific gas log model)
- Gas keys or key valve for gas shut-off
- Gas leak detector solution (soapy water)
- Masonry screws or adhesive (if necessary for securing the gas logs)
- Clear silicone or high-temperature caulk (for sealing any gaps or cracks)
- Fireplace grate or grate support (if needed to elevate the gas logs)
Ensure that you have all the necessary tools and materials before starting the installation process. This will save you time and prevent any delay or interruption during the installation.
Turning Off the Gas Supply
Before you can begin the gas log installation, it’s crucial to turn off the gas supply to your fireplace. This step is essential for safety and prevents any accidental gas leaks. Here’s how to turn off the gas supply:
- Locate the gas shut-off valve: The gas shut-off valve is typically located near the fireplace or in the basement. It may be a lever, handle, or knob. Take a moment to familiarize yourself with the location of the shut-off valve.
- Turn the valve to the “off” position: Using an adjustable wrench or appropriate tool, turn the gas shut-off valve to the “off” position. This will stop the flow of gas to the fireplace and ensure that no gas is present in the lines.
- Verify the gas supply is off: After turning off the valve, it’s essential to verify that the gas supply is indeed off. Check for any pilot lights or burner flames in your fireplace. If you see any flames or smell gas, immediately evacuate the area and contact your gas provider or a qualified technician for assistance.
- Wait for a few minutes: Allow a few minutes for any residual gas in the lines to dissipate before proceeding with the installation. This will minimize the risk of gas leaks during the installation process.
It’s worth mentioning that if you are unsure about turning off the gas supply or have any concerns, it is recommended to seek the assistance of a professional. They can safely shut off the gas supply and guide you through the installation process.
By following these steps and turning off the gas supply, you ensure a safe working environment and minimize the risks associated with gas log installation.
Preparing the Fireplace
Once you have turned off the gas supply, it’s time to prepare the fireplace for installing the gas logs. Proper preparation ensures that the gas logs fit securely and function correctly. Follow these steps to prepare the fireplace:
- Clean the fireplace: Start by thoroughly cleaning the fireplace. Remove any debris, ashes, or existing logs. Use a brush and dustpan to sweep away any loose particles and ensure a clean workspace.
- Inspect the fireplace components: Check the components of the fireplace, such as the burners or gas outlets. Ensure they are clean and free from any blockage or damage. If you notice any issues, consult a professional or the gas log manufacturer for further guidance.
- Secure the burner assembly: If your gas log kit includes a burner assembly, securely place it in the center of the fireplace. Follow the instructions provided by the manufacturer to ensure proper alignment.
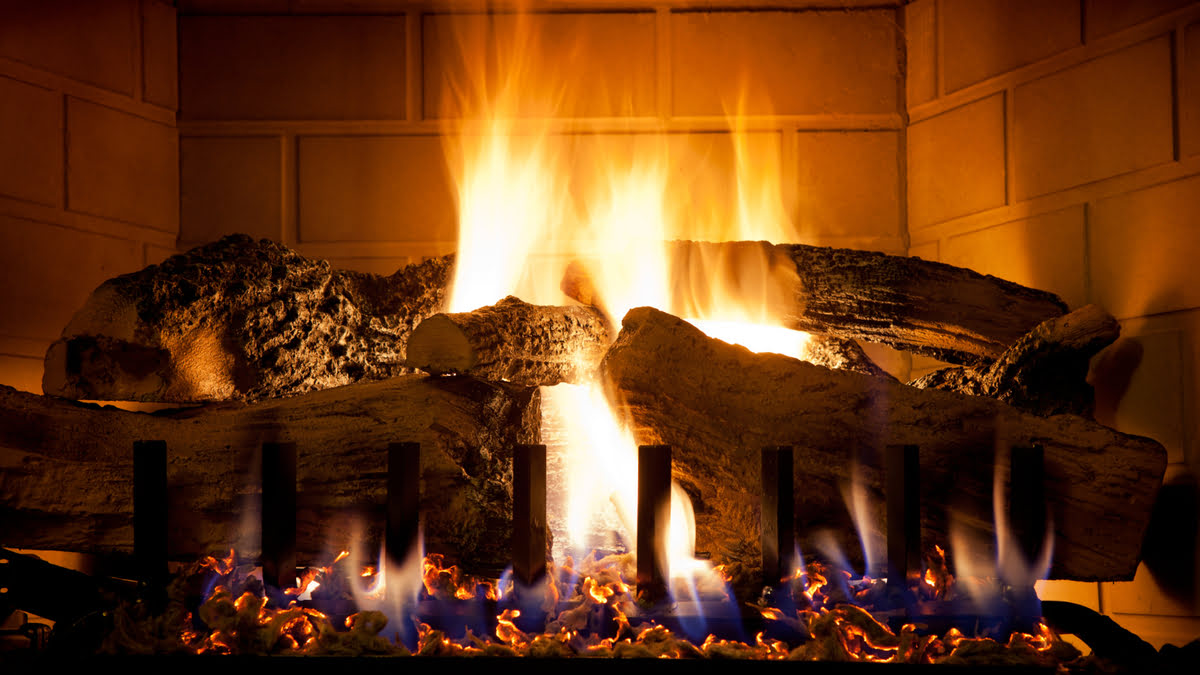
- Position the gas logs: Arrange the gas logs on top of the burner assembly according to the manufacturer’s instructions. The logs should be placed in a realistic and aesthetically pleasing manner. Ensure they are secure and won’t shift when the gas is turned on.
- Consider using a grate or grate support: Depending on the design of your gas logs, you may need to elevate them using a fireplace grate or a grate support. This helps create proper airflow and enhances the realistic look of the logs.
- Seal any gaps or cracks: Inspect the area around the gas logs and ensure there are no visible gaps or cracks. Use clear silicone or high-temperature caulk to seal any openings. This step helps prevent any gas leaks and ensures proper functionality.
- Double-check the positioning: Before moving on to the next steps, double-check that the burner assembly and gas logs are properly aligned and securely positioned. A level can be useful to ensure they are straight and balanced.
By following these steps to prepare the fireplace, you create a solid foundation for installing the gas logs. Taking the time to properly clean and position the components ensures a safe and aesthetically pleasing installation.
Before installing gas logs in a fireplace, make sure to thoroughly clean the fireplace and have the gas line professionally inspected for any leaks or damage. This will ensure a safe and efficient installation.
Read more: How To Arrange Gas Fireplace Logs
Installing the Gas Logs
Now that you have prepared the fireplace, it’s time to install the gas logs. Follow these steps to ensure a successful installation:
- Refer to the manufacturer’s instructions: Before you begin the installation, carefully read and follow the instructions provided by the gas log manufacturer. Each model may have specific installation steps and requirements.
- Attach the gas logs to the burner assembly: Depending on your gas log kit, there may be various attachment methods. Follow the manufacturer’s guidelines to securely attach the gas logs to the burner assembly. This typically involves placing the logs over the burner in their designated positions.
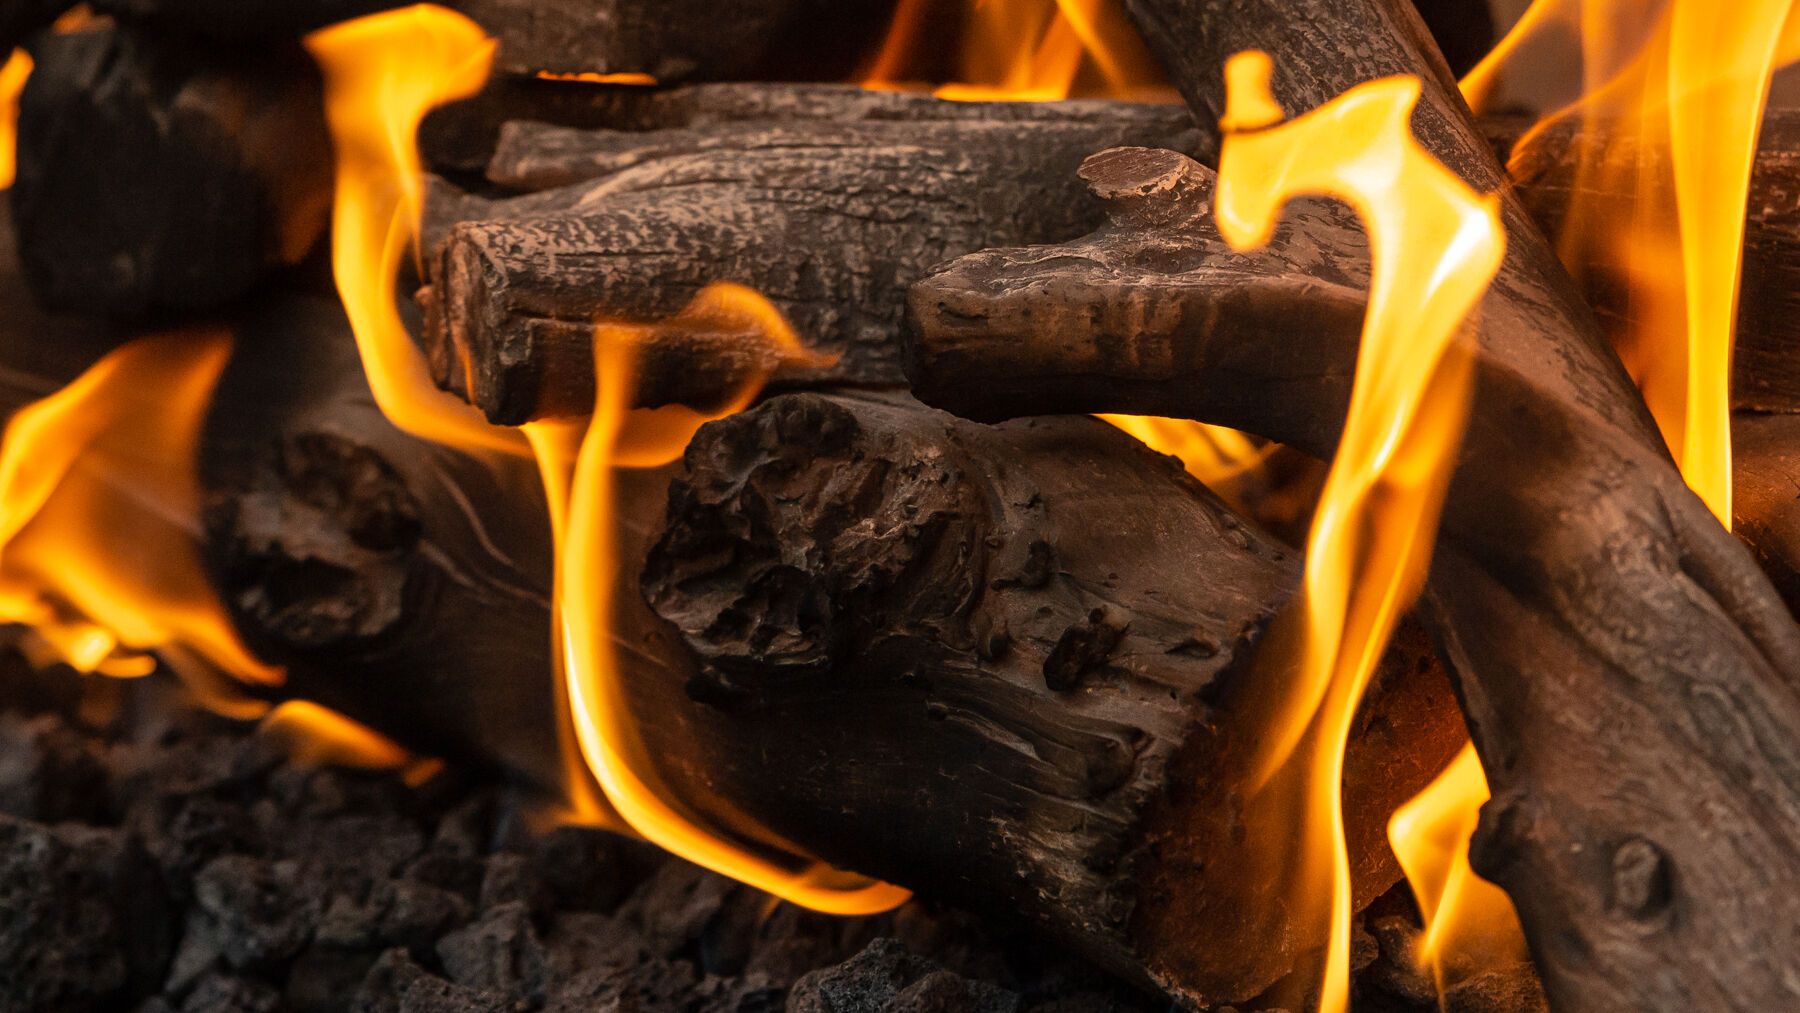
- Position the logs realistically: Arrange the gas logs in a way that replicates the natural look of a wood-burning fire. Pay attention to the placement of each log, creating a balanced and visually appealing scene. Refer to the manufacturer’s instructions or provided images for guidance.
- Secure the logs (if necessary): Some gas log models require additional securing to ensure stability. Use masonry screws or special adhesives, if specified by the manufacturer, to secure the logs in place. This step is important to prevent any movement or shifting during operation.
- Check for clearance: Ensure that there is sufficient clearance between the gas logs and any surrounding surfaces. Verify that the logs are not touching the walls or any flammable materials. This allows for proper ventilation and prevents the risk of overheating.
- Follow any additional installation steps: Depending on the specific gas log model, there may be additional steps to follow, such as adjusting the burner flame height or adding decorative elements. Refer to the manufacturer’s instructions for these additional installation steps.
- Double-check the installation: Once the gas logs are in place, double-check the overall installation. Ensure that the logs are securely attached, the burner assembly is aligned correctly, and all connections are tight and leak-free. Pay attention to any warning signs or irregularities, and address them before proceeding.
By following these steps and carefully following the manufacturer’s instructions, you can successfully install your gas logs and create a beautiful and functional fireplace.
Connecting the Gas Line
Connecting the gas line is a critical step in the gas log installation process. This step should be undertaken with caution and precision to ensure a safe and reliable gas supply. Here’s a step-by-step guide on how to connect the gas line:
- Gather the necessary materials: You will need a flexible gas line, pipe wrenches, plumbers tape, and a gas shut-off key or valve.
- Locate the gas supply line: Identify the existing gas supply line that leads to your fireplace. It may be located near the fireplace or in the basement. Turn off the main gas supply to the line.
- Prepare the gas line connection: Use a pipe wrench to remove any existing fittings or caps from the gas supply line. Clean the threaded connection of the gas line to ensure a proper seal.
- Apply plumbers tape: Wrap several layers of plumbers tape clockwise around the existing gas line threads. This helps create a tight seal and prevents gas leaks.
- Attach the flexible gas line: Connect one end of the flexible gas line to the gas supply line. Use a pipe wrench to tighten the connection securely. Be careful not to overtighten, as this can damage the threads.
- Secure the other end of the gas line: Connect the other end of the flexible gas line to the gas inlet on the burner assembly. Again, use a pipe wrench to tighten the connection, ensuring a firm seal without over-tightening.
- Inspect for gas leaks: With the gas line connections in place, it’s crucial to check for gas leaks. Apply a mixture of soapy water to all the connections and joints. If you see bubbles forming, it indicates a gas leak. In such cases, turn off the gas supply immediately and fix the leak before proceeding.
- Turn on the gas supply: Once you’ve verified that there are no gas leaks, turn on the gas supply using the gas shut-off key or valve. Check for any unusual smells or sounds and ensure that gas is flowing to the burner assembly.
Connecting the gas line properly is essential for the safe operation of your gas logs. Remember to exercise caution and enlist the help of a professional if you’re unsure about any aspect of the installation process.
Testing for Gas Leaks
Testing for gas leaks is a crucial step in the gas log installation process to ensure the safety and reliability of your fireplace. Here’s a step-by-step guide to testing for gas leaks:
- Make a gas leak detection solution: Mix a small amount of dish soap with water to create a soapy solution. This will be used to identify any gas leaks.
- Prepare the gas line connections: Ensure that all the gas line connections are properly tightened and secure. Double-check the fittings and joints to make sure they are in good condition.
- Apply the solution to the gas line connections: Using a brush or sponge, apply the soapy solution to each of the gas line connections, including the valve connections and joints. It’s important to cover the entire area with the solution.
- Observe for bubbles: Once the soapy solution is applied, observe the connections closely. If there are any gas leaks, small bubbles will start to form, indicating the presence of escaping gas.
- Inspect for gas leaks: Pay close attention to the gas line connections and any areas where bubbles are forming. If you see bubbles, there is a gas leak. In this case, tighten the connections further or consult a professional for assistance in fixing the leak.
- Recheck the gas line connections: After addressing any gas leaks, reapply the soapy solution and recheck all the gas line connections. Ensure that there are no more bubbles forming, indicating that the gas line connections are now secure and leak-free.
- Monitor for gas odor: Even if there are no bubbles forming, it’s important to monitor for any gas odor. If you smell gas near the gas line connections or anywhere around the fireplace, immediately turn off the gas supply and seek professional assistance.
Testing for gas leaks is a critical step in the installation process to ensure a safe and reliable gas log fireplace. It’s important to undertake this test diligently and address any gas leaks promptly to prevent potential hazards.
Final Steps and Clean-up
After successfully installing the gas logs and ensuring there are no gas leaks, there are a few final steps to complete the installation process and ensure a clean and tidy outcome. Follow these steps to wrap up the installation:
- Secure the access panel: If your fireplace has an access panel or door, make sure it is securely closed and fastened in place. This helps prevent any accidental tampering or access to the gas line connections.
- Test the functionality of the gas logs: With the gas supply turned on, test the functionality of the gas logs. Use the gas shut-off key or valve to adjust the flame height to your desired level. Ensure that the gas logs ignite properly and provide the desired heat output.
- Arrange any decorative elements: If your gas log kit includes additional decorative elements, such as rocks or glass beads, arrange them to enhance the overall aesthetic of the fireplace. Follow the manufacturer’s instructions for proper placement.
- Clean up the work area: Remove any dust, debris, or packaging materials from the installation process. Use a broom or vacuum cleaner to sweep the area around the fireplace and ensure a clean and safe environment.
- Dispose of any waste materials responsibly: Properly dispose of packaging materials, such as cardboard boxes or plastic wraps, following local recycling guidelines. Dispose of any other waste materials generated during the installation in an appropriate manner.
- Review the gas log user manual: Familiarize yourself with the user manual provided with your gas log kit. This will provide important safety information, maintenance tips, and troubleshooting guidance. Take the time to understand the proper operation and maintenance of your gas logs.
- Consider professional inspection: If you are unsure about any aspect of the installation or have concerns about the performance of your gas logs, consider scheduling a professional inspection and maintenance. A certified technician can ensure that everything is installed correctly and functioning optimally.
By following these final steps and cleaning up the work area, you can complete the gas log installation process with confidence. Enjoy the warmth and ambiance of your newly installed gas log fireplace!
Read more: Where To Buy Gas Logs For Fireplace
Conclusion
Congratulations! You have successfully learned how to install gas logs in your fireplace. By following the safety precautions, checking fireplace compatibility, choosing the right gas logs, gathering the necessary tools and materials, turning off the gas supply, preparing the fireplace, connecting the gas line, testing for gas leaks, and completing the final steps and clean-up, you now have a beautiful and efficient gas log fireplace to enjoy.
Gas logs provide a convenient and realistic alternative to traditional wood-burning fireplaces. They offer the warmth and coziness of a fire without the hassle of collecting and storing firewood, cleaning up ashes, or dealing with chimney maintenance. With their realistic appearance and adjustable flame height, gas logs create a captivating focal point in any room.
Remember, safety should always be a top priority when working with gas-related projects. Follow the manufacturer’s instructions carefully, take necessary safety precautions, and consider consulting a professional if you have any concerns or uncertainties throughout the installation process.
Once your gas log fireplace is installed, be sure to regularly inspect and maintain it according to the manufacturer’s guidelines. This may include cleaning the logs, checking for any damage or wear, and scheduling professional inspections on a regular basis. Proper maintenance ensures the longevity and continued safety of your gas log fireplace.
Sit back, relax, and enjoy the warmth and ambiance of the beautiful gas log fireplace you have installed. Whether it’s a cozy evening at home or entertaining guests, your gas log fireplace will provide a welcoming and inviting atmosphere for years to come.
Happy heating!
Frequently Asked Questions about How To Install Gas Logs In Fireplace
Was this page helpful?
At Storables.com, we guarantee accurate and reliable information. Our content, validated by Expert Board Contributors, is crafted following stringent Editorial Policies. We're committed to providing you with well-researched, expert-backed insights for all your informational needs.


0 thoughts on “How To Install Gas Logs In Fireplace”