
Articles
How To Make A Panini In A Waffle Iron
Modified: August 20, 2024
Learn how to make delicious panini sandwiches using just a waffle iron with this helpful article. Elevate your cooking skills with our easy-to-follow instructions.
(Many of the links in this article redirect to a specific reviewed product. Your purchase of these products through affiliate links helps to generate commission for Storables.com, at no extra cost. Learn more)
Introduction
Who doesn’t love a delicious and crispy Panini? The combination of melted cheese, savory meats, and flavorful vegetables pressed between two slices of bread makes for a mouthwatering meal. While traditionally made using a Panini press, did you know that you can make a Panini in a waffle iron? Yes, you heard it right! This unconventional method not only saves you the cost of investing in a Panini press but also adds a unique twist to your Panini-making experience.
In this article, we will walk you through the step-by-step process of how to make a Panini in a waffle iron. But before we get into the nitty-gritty details, let’s talk about how to choose the right waffle iron for your Panini-making adventures.
Key Takeaways:
- Transform your waffle iron into a versatile Panini maker! With the right waffle iron and carefully selected ingredients, you can enjoy crispy, cheesy Panini without the need for a traditional Panini press.
- Savor the joy of creating and indulging in homemade Panini. From assembling to serving, making a Panini in a waffle iron adds a unique twist to your culinary adventures, making every bite a delightful experience.
Read also: 15 Amazing Waffle Iron Panini Press For 2025
Choosing the Right Waffle Iron
When it comes to making a Panini in a waffle iron, selecting the right waffle iron is crucial. Here are a few factors to consider:
-
Type of Waffle Iron – There are two main types of waffle irons: the standard waffle iron and the Belgian waffle iron. Both can be used to make a Panini, but the standard waffle iron tends to provide a thinner and crisper crust, while the Belgian waffle iron creates a thicker and fluffier texture.
-
Size and Shape – The size and shape of the waffle iron will impact the size and shape of your Panini. If you prefer a larger Panini, opt for a waffle iron with a larger cooking surface. Similarly, if you want a Panini with distinct ridges, choose a waffle iron with deep grooves.
-
Nonstick Surface – Look for a waffle iron with a nonstick surface to prevent your Panini from sticking and ensure easy cleanup.
-
Adjustable Temperature Settings – Some waffle irons come with adjustable temperature settings, allowing you to control the heat for perfectly cooked Panini. This feature comes in handy as different types of bread and fillings may require different cooking temperatures.
Once you have chosen the right waffle iron for your Panini-making adventure, it’s time to prepare the ingredients for your delicious Panini.
Preparing the Panini Ingredients
Before you start assembling your Panini, it’s essential to prepare the ingredients properly. Here are a few tips:
-
Bread – Choose a bread that holds up well to heat and pressure. Ciabatta, French baguette, sourdough, or focaccia are excellent choices. Slice the bread into even-sized pieces that will fit inside your waffle iron.
-
Meat – Whether you prefer thinly sliced turkey, ham, roast beef, or chicken, make sure to stack the meat evenly on your Panini. This will ensure even cooking and distribution of flavors.
-
Cheese – Use a cheese that melts well, such as mozzarella, cheddar, or Swiss. Add a generous amount of cheese to give your Panini that gooey and irresistible texture.
-
Vegetables – Get creative with your vegetable choices. Add sliced tomatoes, onions, bell peppers, or even fresh spinach leaves for a burst of flavor and added nutrition.
-
Condiments – Don’t forget to add your favorite condiments like pesto, mayonnaise, mustard, or olive oil. These will enhance the overall taste of your Panini.
Once you have prepared all the ingredients, it’s time to preheat the waffle iron.
Preheating the Waffle Iron
Before you can start assembling and cooking your Panini, it’s important to preheat the waffle iron. Follow these steps:
-
Ensure that your waffle iron is clean and free from any residue or debris. Wipe it down with a clean cloth or paper towel if necessary.
-
Plug in the waffle iron and set it to the desired temperature. If your waffle iron has adjustable temperature settings, choose a medium-high heat to ensure a golden crust without burning.
-
Close the waffle iron and let it preheat for a few minutes, allowing it to reach the desired temperature. This will vary depending on your waffle iron’s specific instructions.
-
While the waffle iron is preheating, you can start assembling your Panini with the prepared ingredients.
With the waffle iron preheated, it’s time to move on to the next step: assembling the Panini.
Assembling the Panini
Now that your waffle iron is preheating, it’s time to assemble your Panini. Follow these steps to create a delicious and perfectly layered Panini:
-
Take two slices of bread and lay them on a clean surface. This will be the top and bottom of your Panini.
-
Apply your desired condiments, such as pesto, mayonnaise, mustard, or olive oil, to one side of each bread slice. This will add flavor and moisture to your Panini.
-
Add your chosen meats, such as turkey, ham, roast beef, or chicken, to one side of the bread. Make sure to distribute it evenly for consistent taste.
-
Layer the sliced cheese on top of the meat. This will allow the cheese to melt and create a deliciously gooey texture.
-
Place any additional fillings, such as sliced tomatoes, onions, bell peppers, or fresh spinach leaves, on top of the cheese. Be creative and add your favorite combinations.
-
Close the Panini by placing the second slice of bread, condiment side down, on top of the fillings. Ensure that the fillings are evenly distributed and do not spill out of the bread.
Now that your Panini is assembled, it’s time to move on to the exciting part – cooking it in the waffle iron!
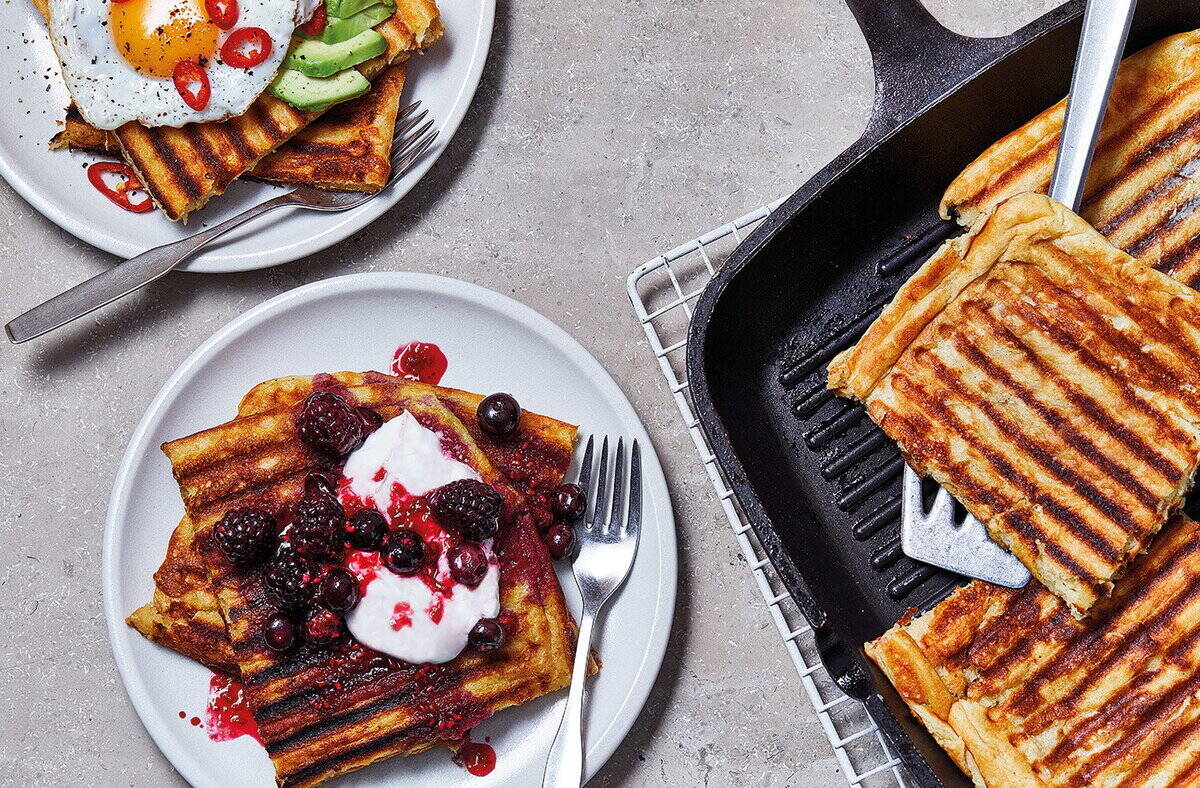
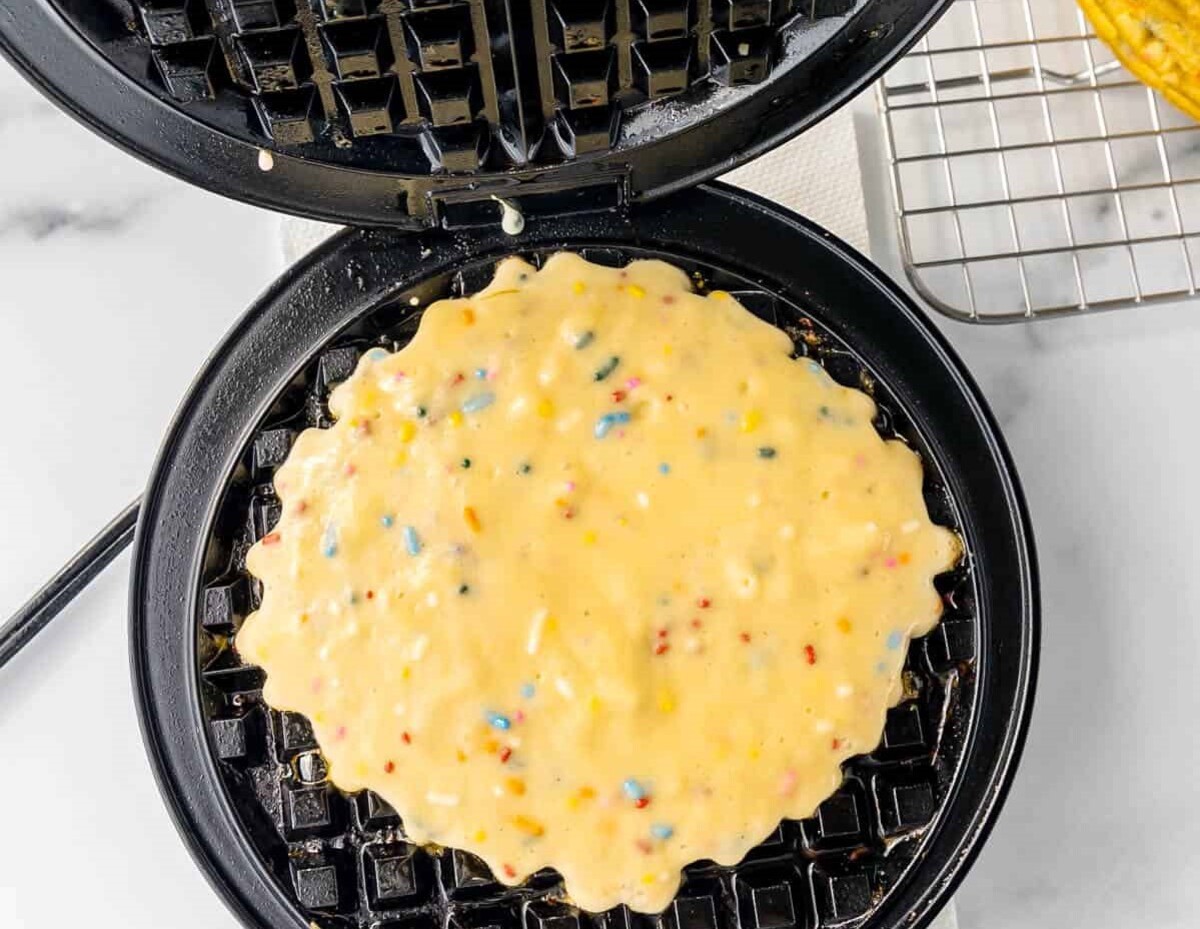
Preheat the waffle iron, assemble your panini with your favorite ingredients, and then place it in the waffle iron. Close the lid and cook for 3-5 minutes until the bread is crispy and the cheese is melted. Enjoy your delicious panini!
Read more: How To Make Waffle In A Waffle Iron
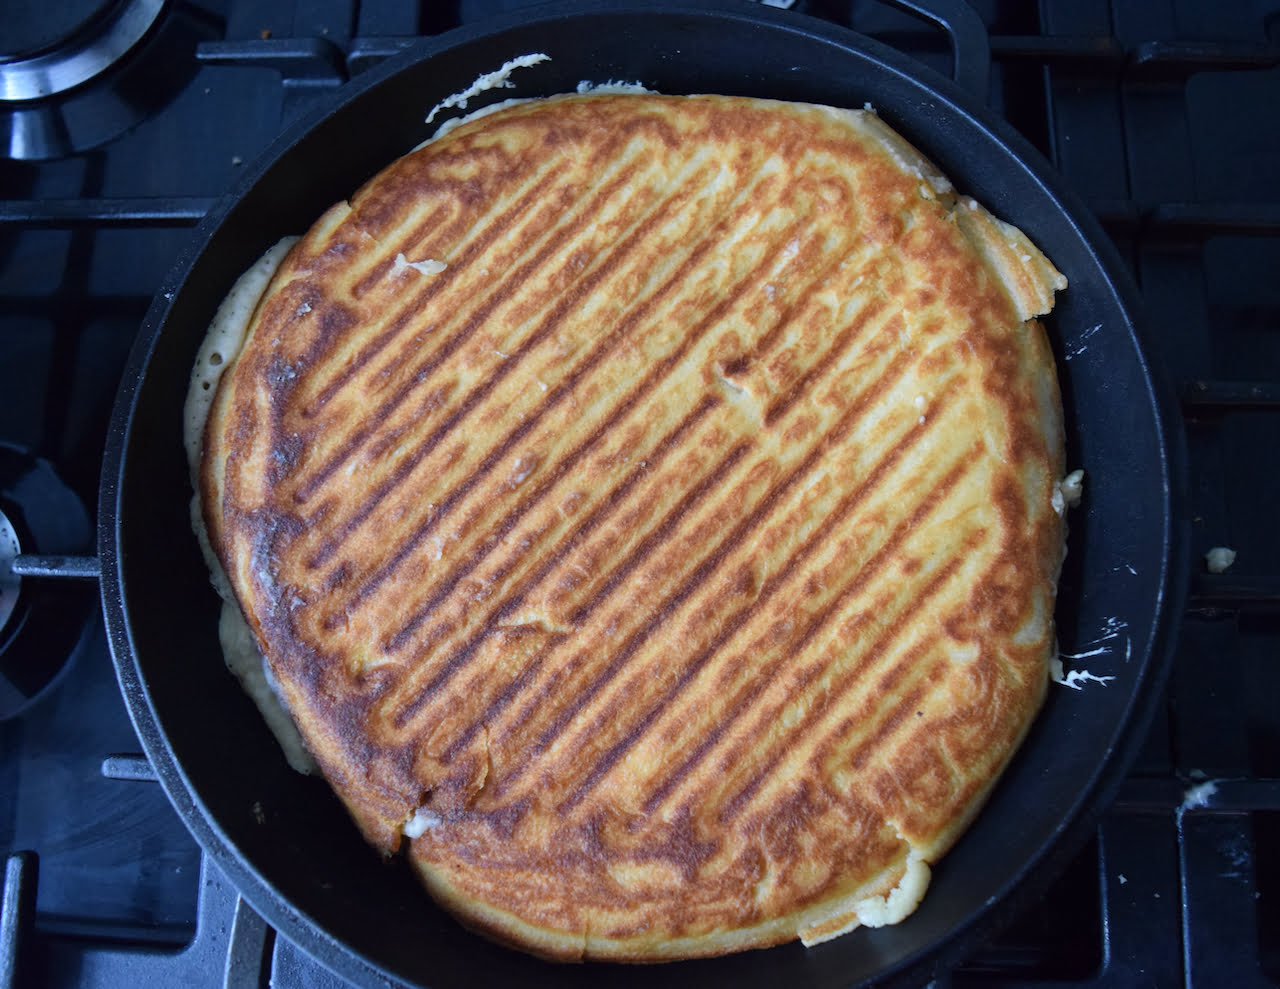
Cooking the Panini in the Waffle Iron
With your Panini assembled and ready to go, it’s time to cook it in the waffle iron. Follow these steps for perfectly cooked and crispy Panini:
-
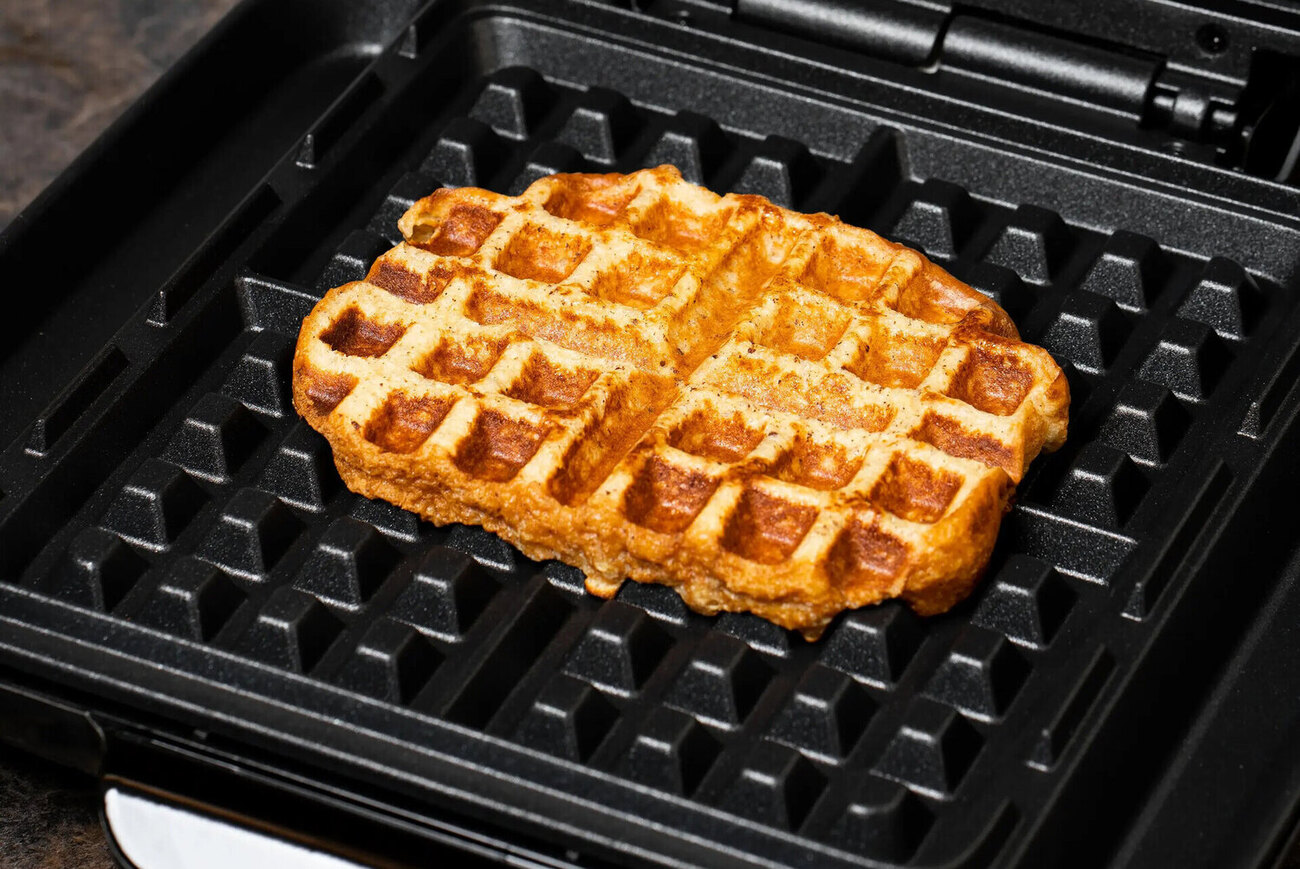
Open the preheated waffle iron and carefully place your assembled Panini in the center.
-
Gently press the top of the waffle iron down to ensure even cooking and to create those signature waffle iron grill marks on your Panini.
-
Cook the Panini for about 3-5 minutes, or until the bread is golden brown and the cheese is melted and gooey. Cooking time may vary depending on the heat of your waffle iron and the thickness of your Panini.
-
Once the Panini is cooked to your desired level, carefully open the waffle iron and use a spatula to remove the Panini. Be cautious as the waffle iron and Panini will be hot.
-
Place the cooked Panini on a cutting board or plate and allow it to cool slightly. This will make it easier to handle and cut.
Now that your Panini is cooked to perfection, it’s time to serve and enjoy.
Removing the Panini from the Waffle Iron
Removing the Panini from the waffle iron requires a gentle touch and careful handling. Here are the steps to safely and successfully remove your delicious Panini:
-
Make sure that the waffle iron is completely unplugged or turned off to avoid any accidents.
-
Using oven mitts or heat-resistant gloves, open the waffle iron carefully, ensuring that you don’t burn yourself on the hot surfaces.
-
Using a spatula or tongs, gently lift the Panini from the waffle iron. Take your time to prevent it from falling apart or sticking to the cooking plates.
-
Place the Panini on a cutting board or serving plate. Be cautious, as the Panini and the waffle iron may still be hot.
-
Allow the Panini to cool for a few minutes before cutting or serving. This will prevent any potential burns or injuries.
Now that you’ve successfully removed the Panini from the waffle iron, it’s time to indulge in its delicious flavors.
Serving and Enjoying your Panini
Now that your Panini is cooked to perfection and ready to be served, it’s time to enjoy the delicious flavors you’ve created. Here are a few tips for serving and savoring your Panini:
-
Cut the Panini into halves or quarters using a sharp knife. This will make it easier to handle and enjoy.
-
Plate your Panini on a serving dish or individual plates, arranging them neatly to showcase their enticing filling and golden crust.
-
Add some garnishes or side dishes to complement your Panini. A fresh salad, a bowl of soup, or a side of crispy fries can elevate the overall meal experience.
-
Serve your Panini immediately while it’s still warm and the cheese is melty. The flavors and textures are at their best when enjoyed right away.
-
Take a moment to admire your creation before taking that first delicious bite. The crispy exterior, the melted cheese, and the flavorful fillings are sure to make your taste buds dance with joy.
-
Embrace the joy of eating your Panini by savoring each bite. Take your time to enjoy the combination of flavors and the satisfying crunch.
Whether you’re enjoying your Panini as a quick lunch, a satisfying dinner, or a delightful snack, savor the moment and relish in the delectable experience you’ve created.
Now that you know how to make a Panini in a waffle iron, it’s time to put your newfound knowledge to the test. Gather your favorite ingredients, fire up your waffle iron, and get creative with your Panini fillings. With a little bit of experimentation and a whole lot of deliciousness, you’ll soon be enjoying homemade Panini like never before.
Conclusion
Making a Panini in a waffle iron is not only a creative and fun twist on a classic sandwich, but it also allows you to enjoy a deliciously crispy and cheesy meal without the need for a traditional Panini press. With the right waffle iron and careful assembly, you can create a mouthwatering Panini that will satisfy your cravings.
From choosing the right waffle iron and preparing the ingredients to preheating the waffle iron and assembling the Panini, each step plays an important role in creating the perfect Panini. Ensuring the waffle iron is adequately preheated and carefully removing the cooked Panini are crucial for a successful and enjoyable cooking experience.
Once your Panini is cooked to perfection, it’s time to savor the flavors and enjoy the delicious combination of fillings nestled between the crispy bread. Whether you’re enjoying a classic combination like ham and cheese or getting creative with unique ingredients, the options for Panini creations are endless.
So, the next time you’re in the mood for a Panini, don’t fret if you don’t have a Panini press. Grab your waffle iron, follow these step-by-step instructions, and indulge in a homemade Panini that will leave your taste buds satisfied and your stomach happy.
Remember, making a Panini in a waffle iron is not only convenient and cost-effective, but it also adds a touch of excitement and uniqueness to your culinary adventures. So go ahead, get creative, and enjoy the delightful experience of making and savoring a delicious Panini in your waffle iron.
Frequently Asked Questions about How To Make A Panini In A Waffle Iron
Was this page helpful?
At Storables.com, we guarantee accurate and reliable information. Our content, validated by Expert Board Contributors, is crafted following stringent Editorial Policies. We're committed to providing you with well-researched, expert-backed insights for all your informational needs.


0 thoughts on “How To Make A Panini In A Waffle Iron”