Home>Articles>How To Make Butter Wafer Cookies In A Waffle Iron
Articles
How To Make Butter Wafer Cookies In A Waffle Iron
Modified: August 26, 2024
Learn how to make delicious butter wafer cookies using a waffle iron. This informative article provides step-by-step instructions and tips to create crispy, melt-in-your-mouth treats.
(Many of the links in this article redirect to a specific reviewed product. Your purchase of these products through affiliate links helps to generate commission for Storables.com, at no extra cost. Learn more)
Introduction
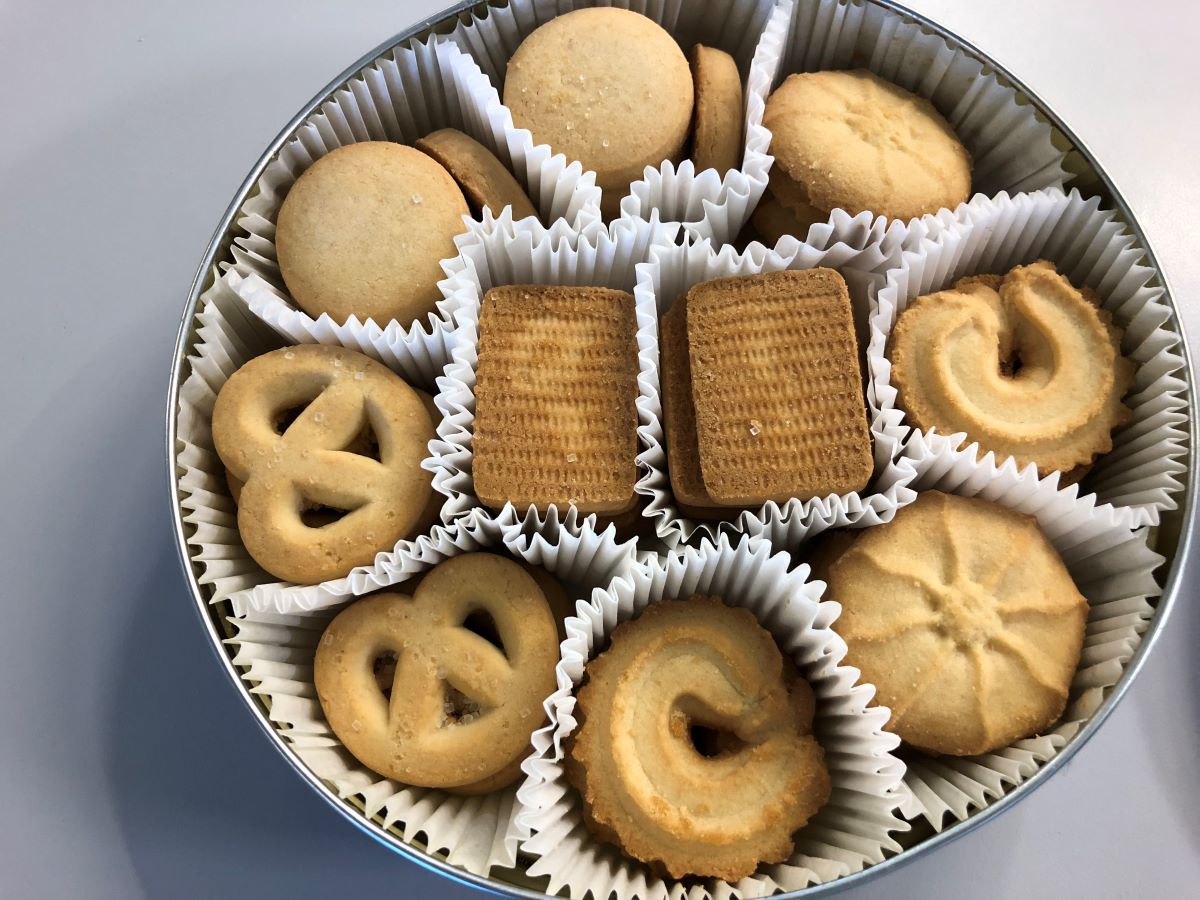
Welcome to the wonderful world of butter wafer cookies! These delicious treats are a delightful combination of crispy wafers and the rich, indulgent flavor of butter. What sets them apart is their unique preparation method – they are made using a waffle iron!
If you’re tired of the same old cookie recipes and want to try something new, making butter wafer cookies in a waffle iron is the perfect choice. Not only are they incredibly delicious, but they also have a charming and distinctive shape that will impress your friends and family. Whether you’re a seasoned baker or a beginner in the kitchen, this article will guide you through the step-by-step process of creating these irresistible homemade cookies.
In this article, we will cover everything you need to know to make butter wafer cookies in a waffle iron. We’ll start by gathering the necessary ingredients and equipment. Then, we’ll move on to preparing the butter wafer cookie dough. We’ll discuss how to heat and prepare the waffle iron for baking the cookies. Next, we’ll dive into the process of making the butter wafer cookies in the waffle iron. Finally, we’ll explore different serving and storing options, as well as share some tips and variations to elevate your butter wafer cookie game.
So, let’s get ready to embark on this delicious baking adventure and learn how to make butter wafer cookies in a waffle iron!
Key Takeaways:
- Indulge in the delightful world of butter wafer cookies made in a waffle iron, combining crispy wafers and rich buttery flavor. Elevate your baking game with unique shapes, serving options, and storage tips for these delectable treats.
- Unleash your creativity and experiment with flavors, textures, and presentations to make your butter wafer cookies truly standout. From chocolate lovers to nutty delights, infuse love and uniqueness into every batch for a delightful baking adventure.
Read more: How Long To Cook Cookies In A Waffle Iron
Gathering Ingredients and Equipment
Before diving into the process of making butter wafer cookies in a waffle iron, it’s important to gather all the necessary ingredients and equipment. This will ensure a smooth and efficient baking experience. Luckily, you don’t need any fancy or hard-to-find ingredients for these cookies. Here’s what you’ll need:
Ingredients:
- 1 ½ cups all-purpose flour
- 1 cup unsalted butter, softened
- ¾ cup granulated sugar
- 1 teaspoon vanilla extract
- ¼ teaspoon salt
- 2 large eggs
These basic ingredients form the foundation of the butter wafer cookie dough. However, if you’re feeling adventurous, you can also add in some extras like chocolate chips, chopped nuts, or even a sprinkle of cinnamon for a touch of spice.
Equipment:
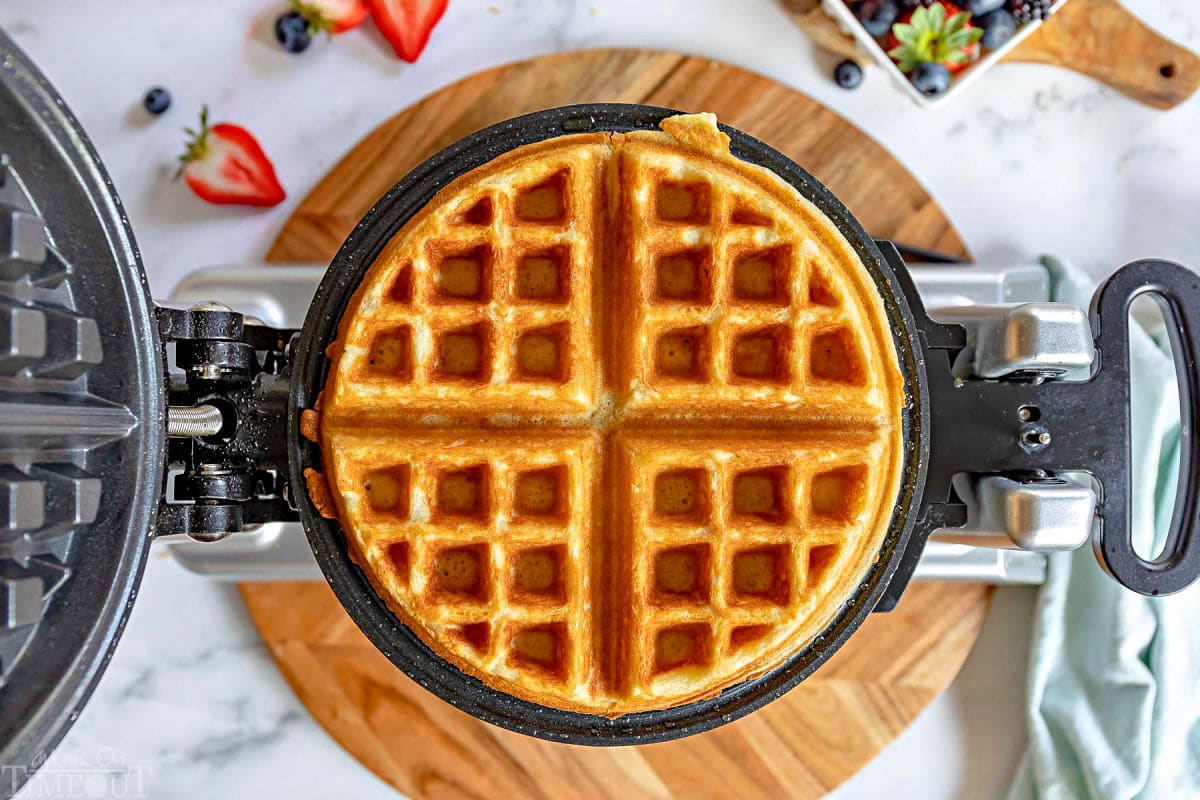
- A waffle iron: The star of the show! Make sure you have a waffle iron that creates deep imprints rather than shallow ones for the perfect butter wafer cookie texture.
- A mixing bowl: Use a large mixing bowl to combine the ingredients and create the cookie dough.
- An electric mixer: While you can mix the ingredients by hand, an electric mixer will make the process quicker and easier.
- A silicone spatula or wooden spoon: This will come in handy for mixing the dough and scraping it off the waffle iron.
- A measuring cup and spoons: Ensure accurate measurements for the ingredients.
- Parchment paper or non-stick cooking spray: These will prevent the cookies from sticking to the waffle iron.
Once you have collected all the necessary ingredients and equipment, you’re ready to move on to the next step: preparing the butter wafer cookie dough. So put on your apron, and let’s get baking!
Preparing the Butter Wafer Cookie Dough
Now that you have gathered all the ingredients and equipment, it’s time to prepare the butter wafer cookie dough. This step is crucial as it lays the foundation for the deliciousness that awaits. Follow these simple steps to create the perfect dough:
- Start by preheating your waffle iron according to the manufacturer’s instructions. This will ensure that it reaches the optimal temperature for baking the cookies.
- In a large mixing bowl, cream together the softened butter and granulated sugar using an electric mixer. Mix until the mixture becomes light and fluffy.
- Add the eggs to the butter-sugar mixture, one at a time, and beat well after each addition. This will ensure that the eggs are fully incorporated into the dough.
- Add the vanilla extract and salt to the mixture and mix until everything is well combined.
- Sift the all-purpose flour into a separate bowl to remove any lumps. Then gradually add the flour to the butter mixture, mixing on low speed until a soft dough forms. Be careful not to overmix, as this can result in tough cookies.
- At this point, you can add any additional ingredients or flavorings of your choice, such as chocolate chips or nuts. Gently fold them into the dough until they are evenly distributed.
- Once the dough is ready, cover it with plastic wrap and refrigerate for at least 30 minutes. Chilling the dough will make it easier to handle and will also enhance the flavor and texture of the cookies.
While the dough is chilling, use this time to clean up your workspace and prepare the waffle iron. You’re now ready to move on to the next step: heating and preparing the waffle iron for baking the butter wafer cookies!
Read more: How To Make Waffle In A Waffle Iron
Heating and Preparing the Waffle Iron
Now that you have prepared the butter wafer cookie dough, it’s time to heat and prepare the waffle iron for baking. Following these steps will ensure that your cookies come out perfectly golden and crispy:
- Before heating the waffle iron, make sure it is clean and free from any residue from previous use. You can wipe it down with a damp cloth or use a non-abrasive sponge.
- Next, preheat the waffle iron according to the manufacturer’s instructions. Depending on your waffle iron, this may involve plugging it in and turning it on or setting the desired temperature.
- While the waffle iron is heating, prepare a sheet of parchment paper or apply a thin layer of non-stick cooking spray to the waffle iron’s surface. This will prevent the dough from sticking to the iron and make it easier to remove the cookies later.
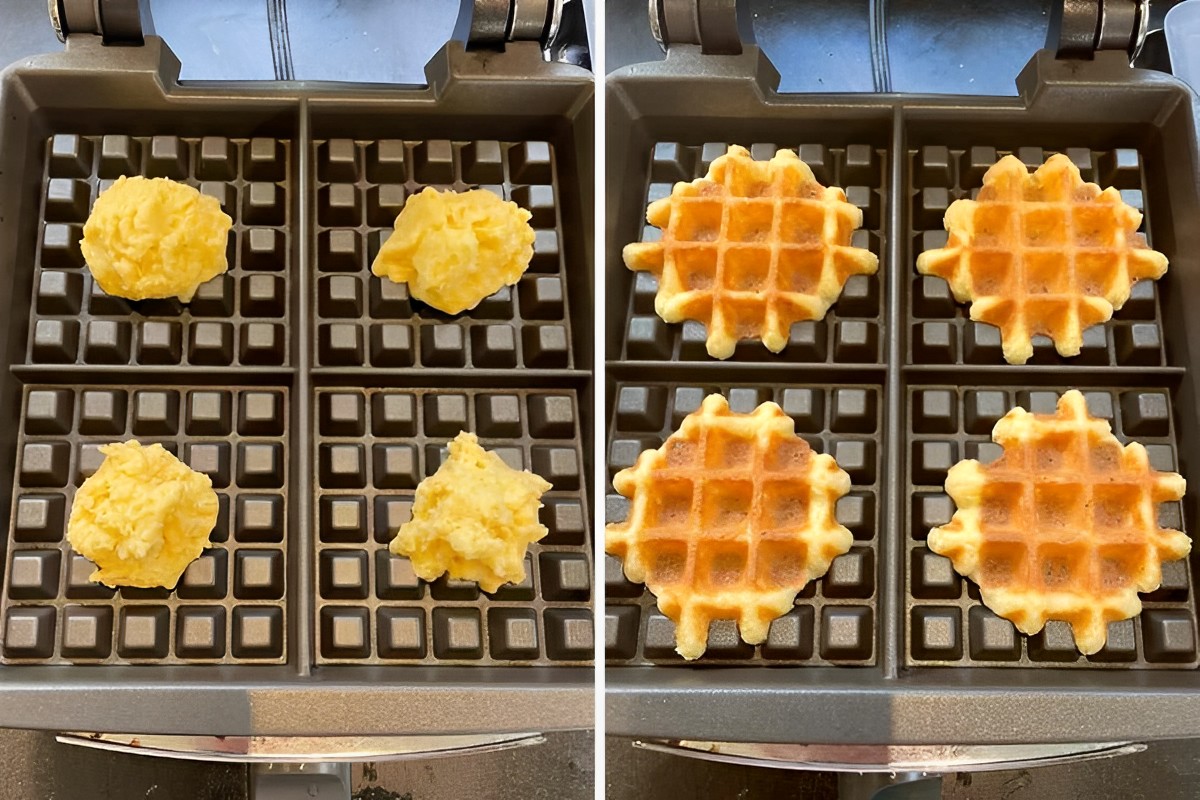
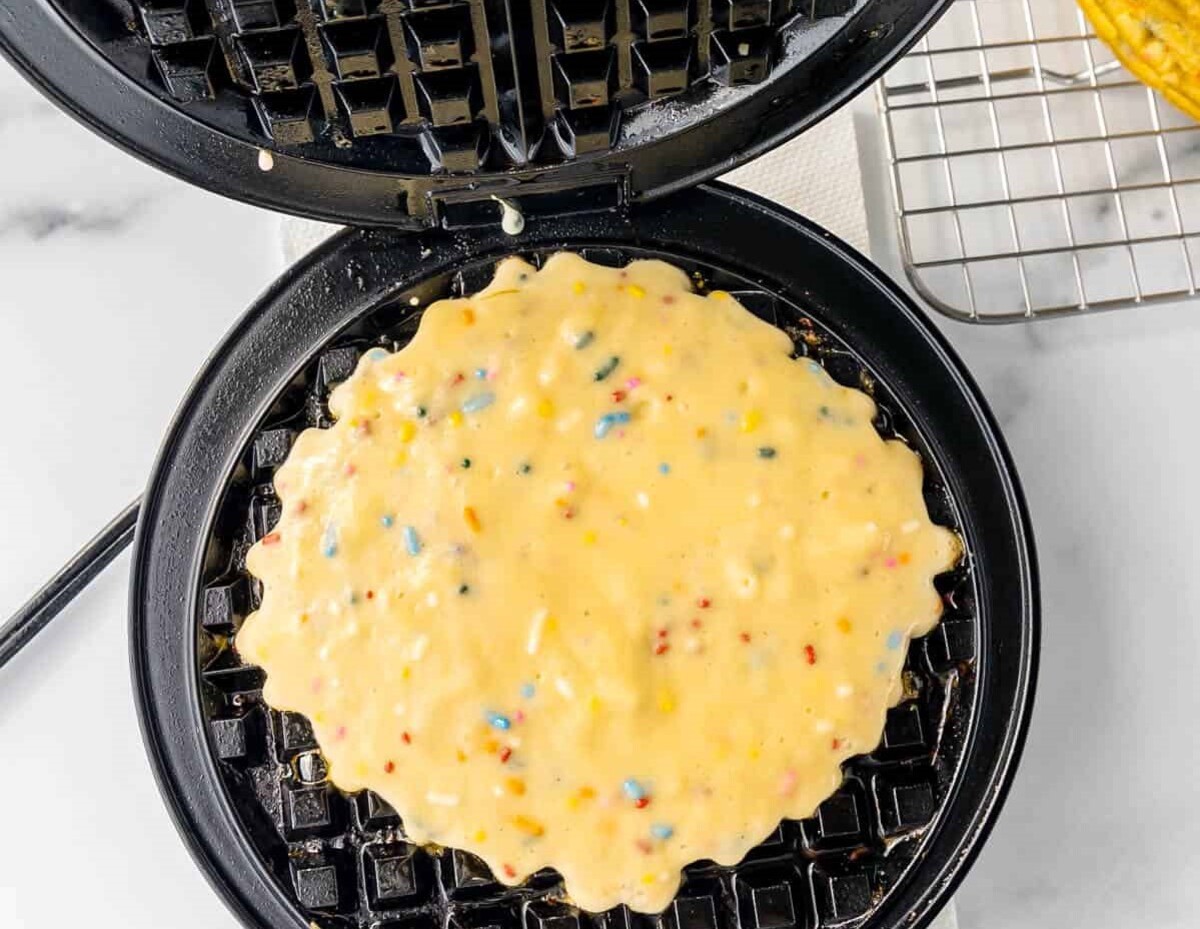
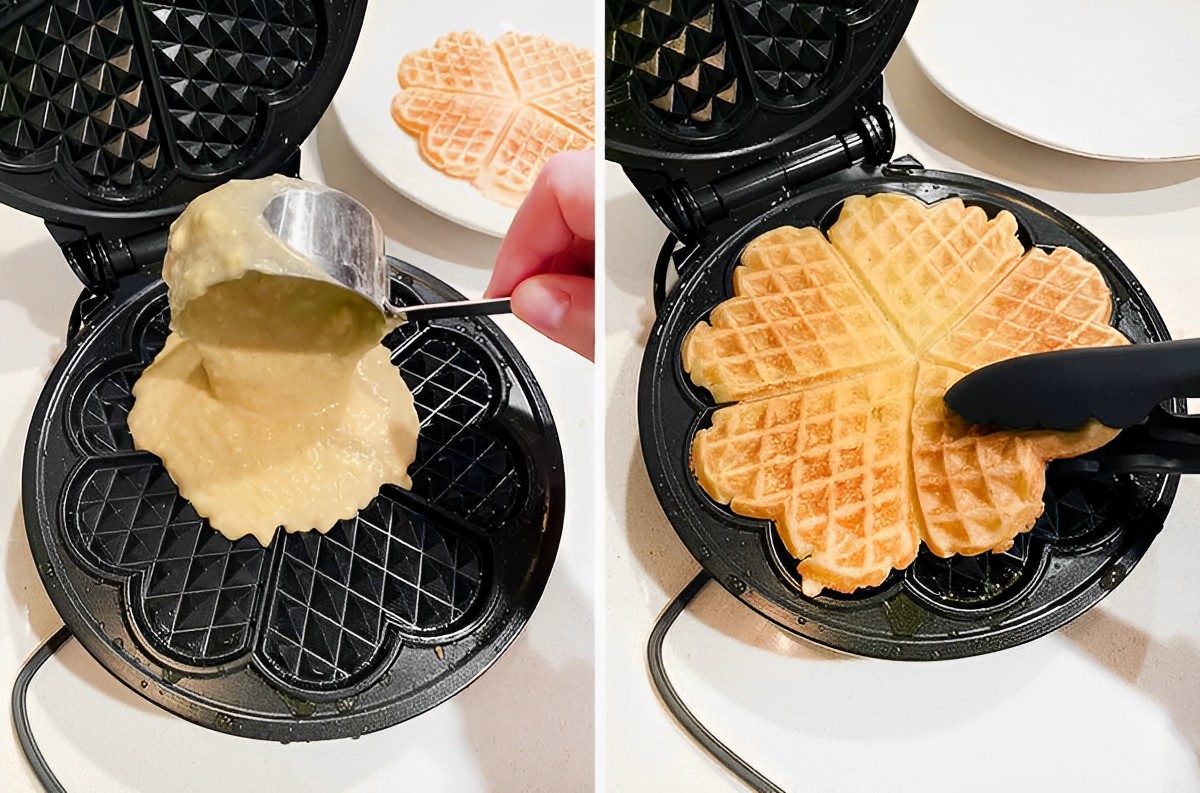
- Once the waffle iron is preheated, it’s time to start baking the butter wafer cookies. Take a small portion of the chilled dough and roll it into a ball about the size of a ping-pong ball.
- Place the dough ball onto the prepared waffle iron, close the lid, and press gently to flatten the dough. Be careful not to press too hard, as this can cause the dough to spread too thin or overflow from the sides of the iron.
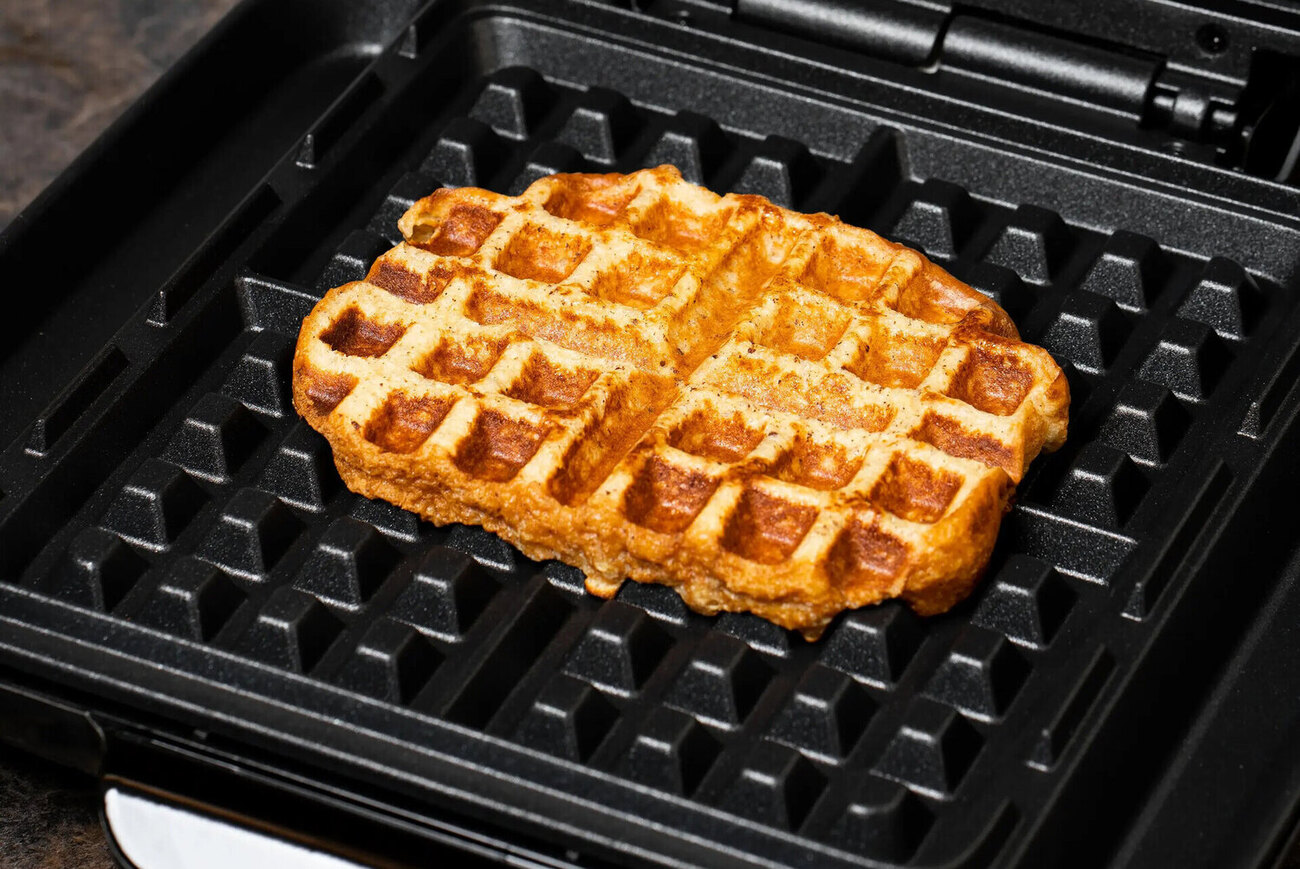
- Allow the cookies to bake in the waffle iron for about 2 to 3 minutes, or until they turn golden brown and crispy. Keep an eye on them to prevent overcooking.
- Once the cookies are done, carefully remove them from the waffle iron using a silicone spatula or wooden spoon. Place them on a wire rack to cool completely.
- Repeat the process with the remaining dough, making sure to reapply the non-stick coating to the waffle iron as needed.
With the waffle iron heated and prepared, and the tantalizing aroma of fresh-baked cookies filling your kitchen, it’s time to move on to the next step: making butter wafer cookies in the waffle iron!
Making Butter Wafer Cookies in the Waffle Iron
Now that the waffle iron is heated and prepared, it’s time to dive into the exciting process of making butter wafer cookies! Follow these steps to achieve perfectly crispy and delicious cookies:
- Take a portion of the chilled butter wafer cookie dough and roll it into a small ball, about the size of a ping-pong ball.
- Place the dough ball onto the preheated and prepared waffle iron grid. Close the lid and gently press down to flatten the dough slightly.
- Cook the cookies for approximately 2 to 3 minutes, or until they turn golden brown and crispy. Avoid overcooking, as it can lead to burnt cookies.
- Using a silicone spatula or wooden spoon, carefully remove the cookies from the waffle iron. Place them on a wire rack to cool completely. They will become even crispier as they cool.
- Repeat steps 1 to 4 with the remaining dough, making sure to reapply non-stick coating to the waffle iron as needed.
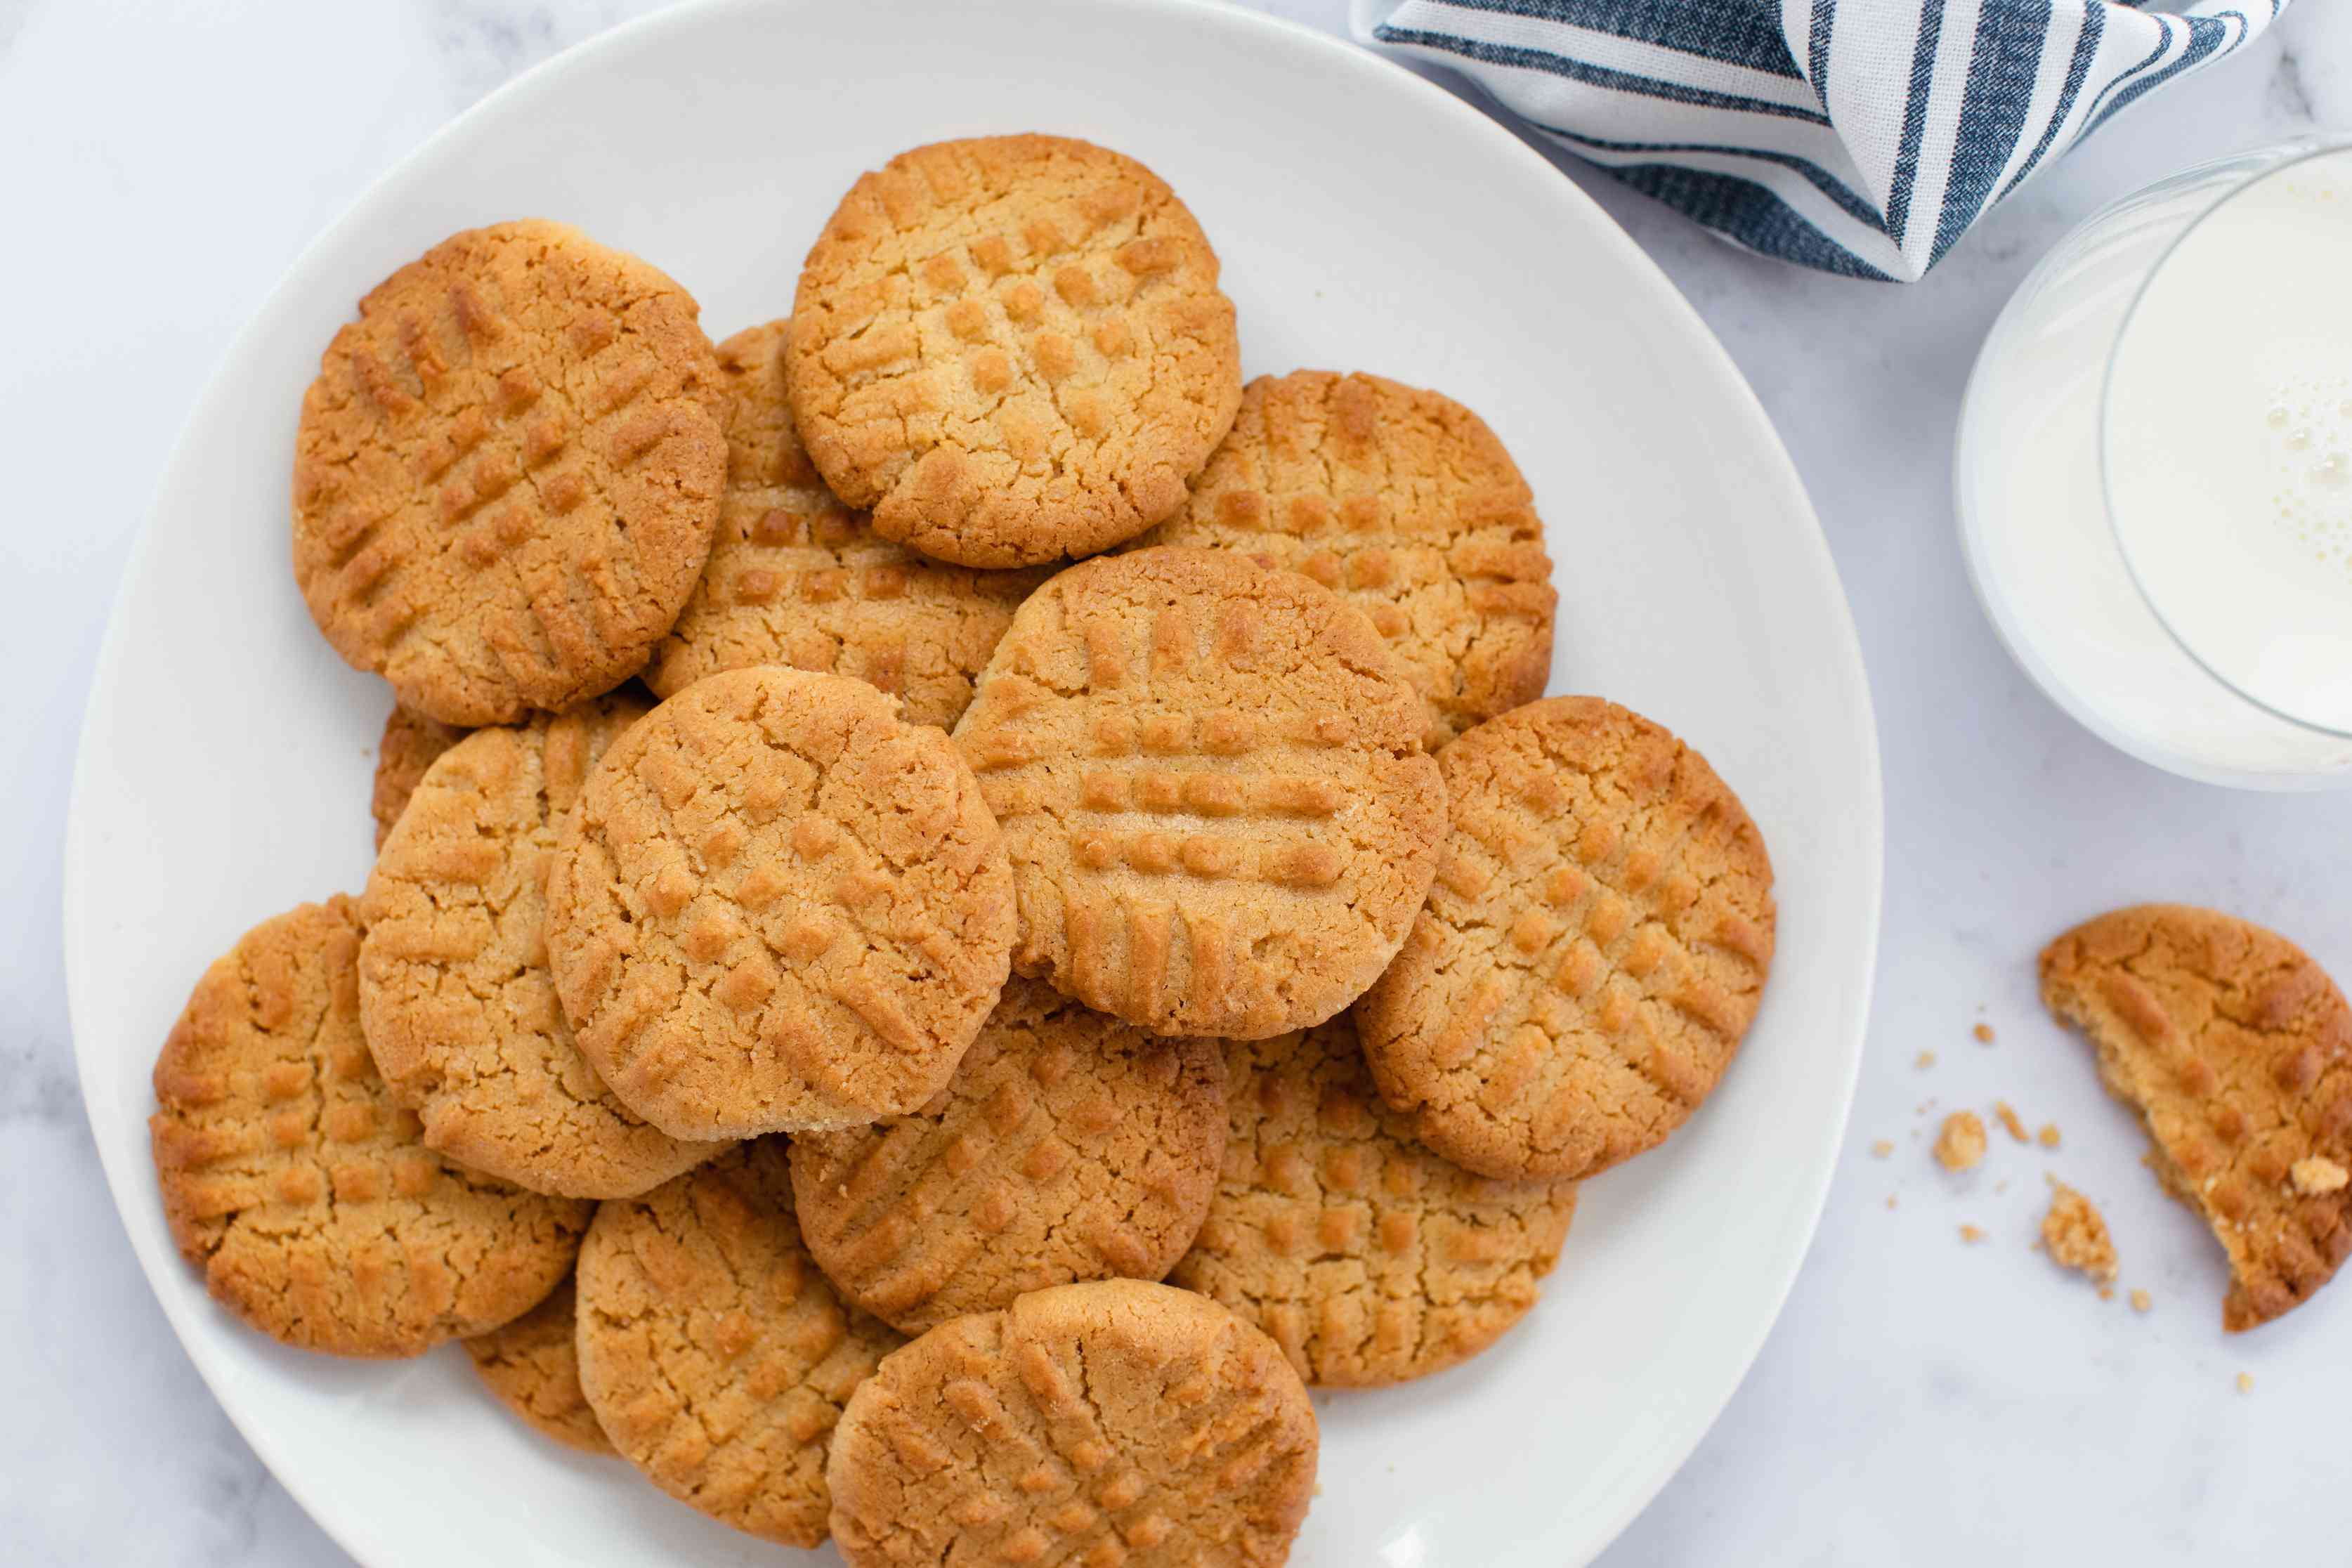
One of the great advantages of making butter wafer cookies in a waffle iron is the beautiful pattern that they acquire during the cooking process. The imprints left by the waffle iron add a unique touch to these cookies, making them visually appealing and even more enticing to eat.
Once all the cookies have cooled, it’s time to indulge in their buttery deliciousness. Serve them with a glass of milk, a cup of tea, or simply enjoy them on their own. However you choose to enjoy them, these homemade butter wafer cookies are sure to please.
Now that you know how to make butter wafer cookies in a waffle iron, let’s move on to the next section and learn about serving and storing these delectable treats!
Serving and Storing Butter Wafer Cookies
Now that you have baked a batch of delicious butter wafer cookies, it’s time to explore different serving options and learn how to store them to maintain their crispiness and flavor.
Serving:
Butter wafer cookies are versatile and can be served in various ways to suit your preferences. Here are a few serving suggestions:
- Enjoy them as is: Butter wafer cookies are delightful on their own, with their crispy texture and buttery flavor. Serve them on a platter or in a cookie jar for everyone to grab and enjoy.
- Pair them with beverages: These cookies go exceptionally well with a hot cup of tea, coffee, or a refreshing glass of milk. Dip them or savor them alongside your favorite drink.
- Create ice cream sandwiches: Take your butter wafer cookies to the next level by making ice cream sandwiches. Simply sandwich a scoop of your favorite ice cream between two cookies and press gently. Freeze for a while to allow the ice cream to set.
- Add them to dessert recipes: Butter wafer cookies can be crushed and used as a delicious crust for cheesecakes or as a topping for ice cream sundaes. They provide a delightful crunch and flavor to any dessert creation.
Read more: How To Make A Waffle Without A Waffle Iron
Storing:
To ensure that your butter wafer cookies stay fresh and maintain their crispy texture, proper storage is essential. Here are some tips for storing them:
- Allow the cookies to cool completely before storing them. This will help them retain their crispiness.
- Store the cookies in an airtight container to prevent them from becoming stale or absorbing moisture from the surroundings.
- If you live in a humid climate, add a piece of bread or a few silica gel packets to the storage container to absorb any excess moisture.
- Avoid storing the cookies in the refrigerator, as the moisture can cause them to lose their crispness.
- Properly stored, butter wafer cookies can stay fresh for up to a week. However, they are so delicious that they are unlikely to last that long!
Now that you know how to serve and store your butter wafer cookies, it’s time to put your baking skills to use and enjoy these delectable treats.
Before we conclude, let’s explore some tips and variations to elevate your butter wafer cookie game even further.
Tips and Variations for Butter Wafer Cookies
Baking is a wonderful art that always leaves room for experimentation and creativity. When it comes to butter wafer cookies, there are endless possibilities to make them even more delightful. Here are some tips and variations to help you take your butter wafer cookie game to the next level:
Tips:
- Ensure that your waffle iron is properly preheated before adding the cookie dough. This will help achieve a crispy texture and prevent sticking.
- Use non-stick cooking spray or parchment paper for easy removal of the cookies from the waffle iron.
- Chill the dough before baking. This helps the cookies hold their shape and prevents spreading.
- Experiment with different flavors by adding spices like cinnamon, nutmeg, or even a touch of citrus zest to the dough.
- For a fun twist, roll the dough balls in colored sugar before placing them on the waffle iron for a festive look.
- Don’t overcrowd the waffle iron. Leave enough space between the cookies to allow for even cooking and expansion.
Variations:
- Chocolate Lovers: Add chocolate chips or chunks to the dough for a rich and indulgent version of butter wafer cookies.
- Nutty Delight: Incorporate chopped nuts like pecans, almonds, or walnuts into the dough for a crunchy twist.
- Flavored Butters: Infuse your cookie dough with flavored butters like salted caramel, coffee, or even matcha for a unique and decadent taste.
- Sandwich Cookies: Spread a layer of Nutella, peanut butter, or jam between two cookies for a tasty sandwich treat.
- Ice Cream Toppings: Crush the cookies and sprinkle them over your favorite ice cream flavors for a delightful crunch.
Feel free to mix and match these tips and variations to create your own signature butter wafer cookies. Let your imagination run wild!
Now that you have all the knowledge and inspiration needed to make incredible butter wafer cookies, it’s time to put on your apron, fire up that waffle iron, and indulge in the sweet and crunchy goodness that these cookies have to offer.
Happy baking!
Make sure to preheat your waffle iron before adding the butter wafer cookie batter. This will help ensure that the cookies cook evenly and have a crispy texture.
Read more: How To Make Waffle Fries With A Waffle Iron?
Conclusion
Congratulations! You have successfully learned how to create delectable butter wafer cookies in a waffle iron. This unique baking technique brings an exciting twist to traditional cookie recipes and allows you to enjoy the perfect combination of crispy wafers and rich butter flavor.
Throughout this article, we covered everything you need to know, from gathering the ingredients and equipment to preparing the butter wafer cookie dough. We explored the process of heating and preparing the waffle iron, as well as the step-by-step instructions for making these delightful cookies. We also discussed serving and storing options, along with helpful tips and variations to elevate your baking game.
Remember, baking is not just about following a recipe; it’s about infusing love, creativity, and your unique touch into every batch of cookies you make. Don’t be afraid to experiment with flavors, textures, and presentations to make your butter wafer cookies truly standout.
So, whether you choose to enjoy butter wafer cookies on their own, as ice cream sandwiches, or in creative dessert recipes, they are sure to bring joy to your taste buds and put a smile on the faces of those who indulge in them.
Now it’s time to gather your ingredients, preheat that waffle iron, and embark on your own butter wafer cookie baking adventure. Let the aroma of butter and the sound of sizzling wafers fill your kitchen, as you create moments of sweetness and delight for yourself and your loved ones.
Happy baking, and may your butter wafer cookies always be crispy, buttery, and utterly delicious!
Frequently Asked Questions about How To Make Butter Wafer Cookies In A Waffle Iron
Was this page helpful?
At Storables.com, we guarantee accurate and reliable information. Our content, validated by Expert Board Contributors, is crafted following stringent Editorial Policies. We're committed to providing you with well-researched, expert-backed insights for all your informational needs.


0 thoughts on “How To Make Butter Wafer Cookies In A Waffle Iron”