Home>Articles>How To Make Norwegian Waffles With A Regular Waffle Iron
Articles
How To Make Norwegian Waffles With A Regular Waffle Iron
Modified: August 26, 2024
Learn how to make delicious Norwegian waffles using a regular waffle iron. Our articles provide step-by-step instructions and tips for perfect waffle making.
(Many of the links in this article redirect to a specific reviewed product. Your purchase of these products through affiliate links helps to generate commission for Storables.com, at no extra cost. Learn more)
Introduction
Welcome to this delightful culinary adventure where we will learn how to make Norwegian waffles using a regular waffle iron. Norwegian waffles, or “vafler” as they are called in Norway, are a beloved traditional treat that is enjoyed by people of all ages. These waffles are known for their light and fluffy texture, crisp edges, and deliciously sweet flavor.
Making Norwegian waffles is a wonderful way to spend time with loved ones, to indulge in a delicious homemade dessert, or to impress guests with a unique and tasty treat. With a few simple ingredients and a regular waffle iron, you can bring the taste of Norway into your home and create unforgettable memories.
In this article, we will guide you through the step-by-step process of making Norwegian waffles. From gathering the necessary ingredients to perfectly cooking and serving the waffles, we’ll cover it all. So, let’s dive in and discover the secrets of making these mouthwatering Norwegian waffles!
Key Takeaways:
- Indulge in a delightful culinary adventure by making Norwegian waffles with a regular waffle iron. Create light, fluffy waffles with a crisp exterior and customize them with your favorite toppings for a memorable homemade treat.
- Experience the joy of Norwegian culinary traditions in your own home. With simple ingredients and equipment, you can bring the taste of Norway to your breakfast table and impress your loved ones with mouthwatering Norwegian waffles.
Ingredients
To make Norwegian waffles with a regular waffle iron, you will need the following ingredients:
- 2 cups all-purpose flour
- 1/4 cup granulated sugar
- 2 teaspoons baking powder
- 1/2 teaspoon salt
- 2 eggs
- 2 cups milk
- 1/2 cup melted butter
- 1 teaspoon vanilla extract
These ingredients are readily available in most kitchens or can be easily obtained from your local grocery store. The all-purpose flour serves as the base for the waffle batter, while the granulated sugar adds sweetness. Baking powder helps to give the waffles their fluffy texture, and salt enhances the overall flavor.
The eggs act as a binding agent, helping to hold the ingredients together. Milk provides moisture, and melted butter adds richness and a buttery taste. Finally, a touch of vanilla extract brings a delightful aroma to the waffles, creating a tempting scent as they cook in the waffle iron.
Feel free to experiment and customize the recipe to your taste. You can add a pinch of cinnamon or nutmeg for a hint of warmth and spice. For those with dietary restrictions, you can also substitute ingredients like almond milk or gluten-free flour depending on your needs.
Now that we have our ingredients ready, let’s move on to the equipment needed to make these delicious Norwegian waffles!
Equipment
To make Norwegian waffles with a regular waffle iron, you will need the following equipment:
- A regular waffle iron: This is the key tool for making delicious waffles. You can use any standard waffle iron that is specifically designed for making waffles. It is typically made of two hinged metal plates with a patterned grid.
- A mixing bowl: You will need a large mixing bowl to combine the dry ingredients and the wet ingredients. Choose a bowl that is big enough to accommodate the batter and allow for easy mixing.
- A whisk or spatula: A whisk or spatula is essential for mixing the waffle batter. This will help ensure that all the ingredients are evenly incorporated.
- A measuring cup and spoons: Accurate measurements are crucial for the success of your waffles. Use a measuring cup and spoons to measure out the ingredients precisely.
- A ladle or measuring cup with a spout: This will make it easier to pour the waffle batter onto the waffle iron without making a mess. A ladle or measuring cup with a spout provides more control and allows for even distribution of the batter.
- A wire cooling rack: Once the waffles are cooked, you’ll need a wire cooling rack to place them on. This will prevent them from becoming soggy as they cool.
- A plate or serving platter: Finally, you’ll need a plate or serving platter to present your delicious Norwegian waffles. Choose a plate large enough to accommodate the size of your waffles and leave room for any desired toppings or accompaniments.
Make sure all the equipment is clean and in good condition before starting. Having the right equipment on hand will make the waffle-making process smooth and enjoyable. Now that we have our ingredients and equipment ready, let’s move on to the step-by-step instructions for making Norwegian waffles!
Step 1: Preparing the Batter
The first step in making Norwegian waffles with a regular waffle iron is to prepare the batter. Follow these simple instructions:
- In a large mixing bowl, combine the all-purpose flour, granulated sugar, baking powder, and salt. Use a whisk or spatula to mix the dry ingredients together until they are well combined.
- In a separate bowl, whisk together the eggs, milk, melted butter, and vanilla extract. Make sure to whisk until the ingredients are fully incorporated and the mixture is smooth.
- Pour the wet ingredients into the bowl with the dry ingredients. Use a whisk or spatula to gently stir the mixture until a smooth batter forms. Take care not to overmix, as this can result in dense waffles.
- Let the batter rest for about 10 minutes. This resting time allows the ingredients to hydrate and results in lighter, fluffier waffles.
The batter should have a pourable consistency, similar to pancake batter. If it appears too thick, you can add a splash of milk and gently mix until the desired consistency is achieved. On the other hand, if the batter is too thin, you can add a tablespoon of flour at a time until it thickens.
Now that our batter is ready, let’s move on to the next step: preheating the waffle iron.
Step 2: Preheating the Waffle Iron
Now that the batter is prepared, it’s time to preheat the waffle iron. Follow these steps:
- Plug in your regular waffle iron and turn it on. Most waffle irons have an indicator light that turns on when it’s preheating.
- While the waffle iron is preheating, give it a light coating of cooking spray or brush it lightly with melted butter. This will prevent the waffles from sticking to the iron and ensure easy removal.
- Wait for the indicator light to signal that the waffle iron is heated and ready for use. This typically takes a few minutes.
Preheating the waffle iron is essential as it allows the batter to cook evenly and ensures that the waffles are crispy on the outside and soft on the inside.
Now that the waffle iron is preheated and ready, let’s move on to pouring the batter in the next step.
Add a touch of cardamom to the waffle batter for an authentic Norwegian flavor. Serve with sour cream and jam for a traditional topping.
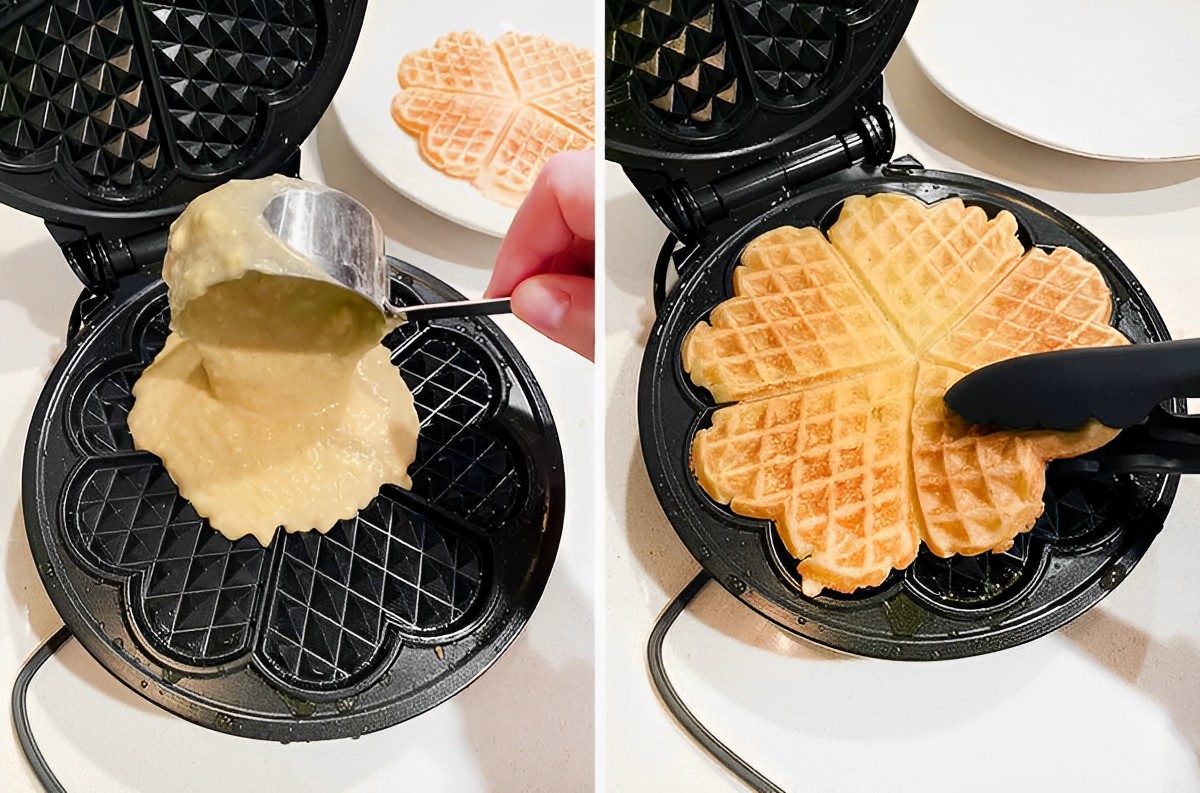
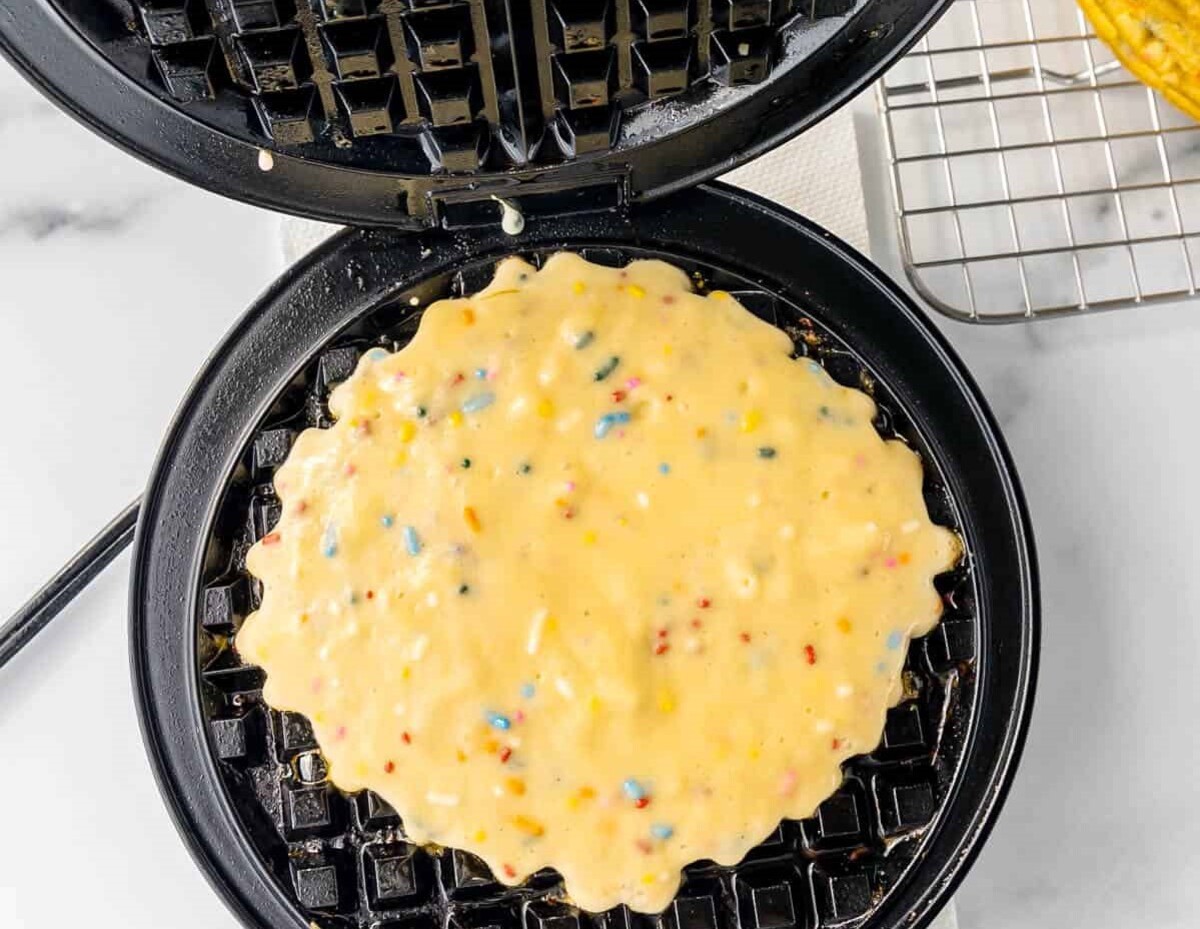
Step 3: Pouring the Batter
With the preheated waffle iron ready, it’s time to pour the batter and start cooking those delicious Norwegian waffles. Follow these steps:
- Gently stir the batter one last time to ensure it is well mixed.
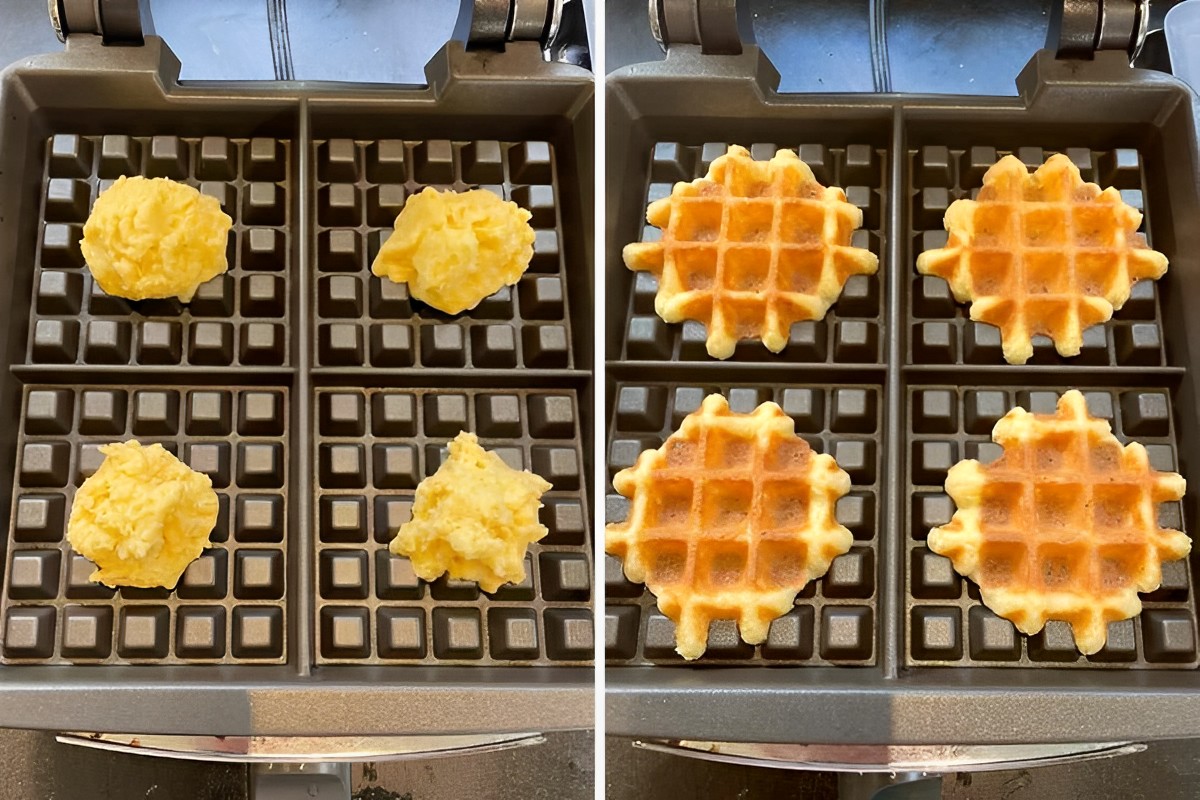
- Using a ladle or measuring cup with a spout, pour an appropriate amount of batter onto the center of the waffle iron. The amount will depend on the size of your waffle iron and how thick you prefer your waffles.
- Quickly but carefully, use the back of the ladle or a spatula to spread the batter evenly across the surface of the waffle iron, making sure to cover all the grids.
- Close the lid of the waffle iron and allow the waffles to cook according to the manufacturer’s instructions. This usually takes about 3-5 minutes, but it may vary depending on your waffle iron and desired level of crispness.
Remember not to overfill the waffle iron with batter, as it may overflow and make a mess. Start with a small amount and adjust accordingly to achieve the desired thickness and size of your waffles.
Once the batter is poured, close the lid and resist the temptation to peek until the cooking time is complete. Opening the waffle iron prematurely may cause the waffles to break or become unevenly cooked.
Now that the batter is poured, let’s move on to cooking the waffles in the next step.
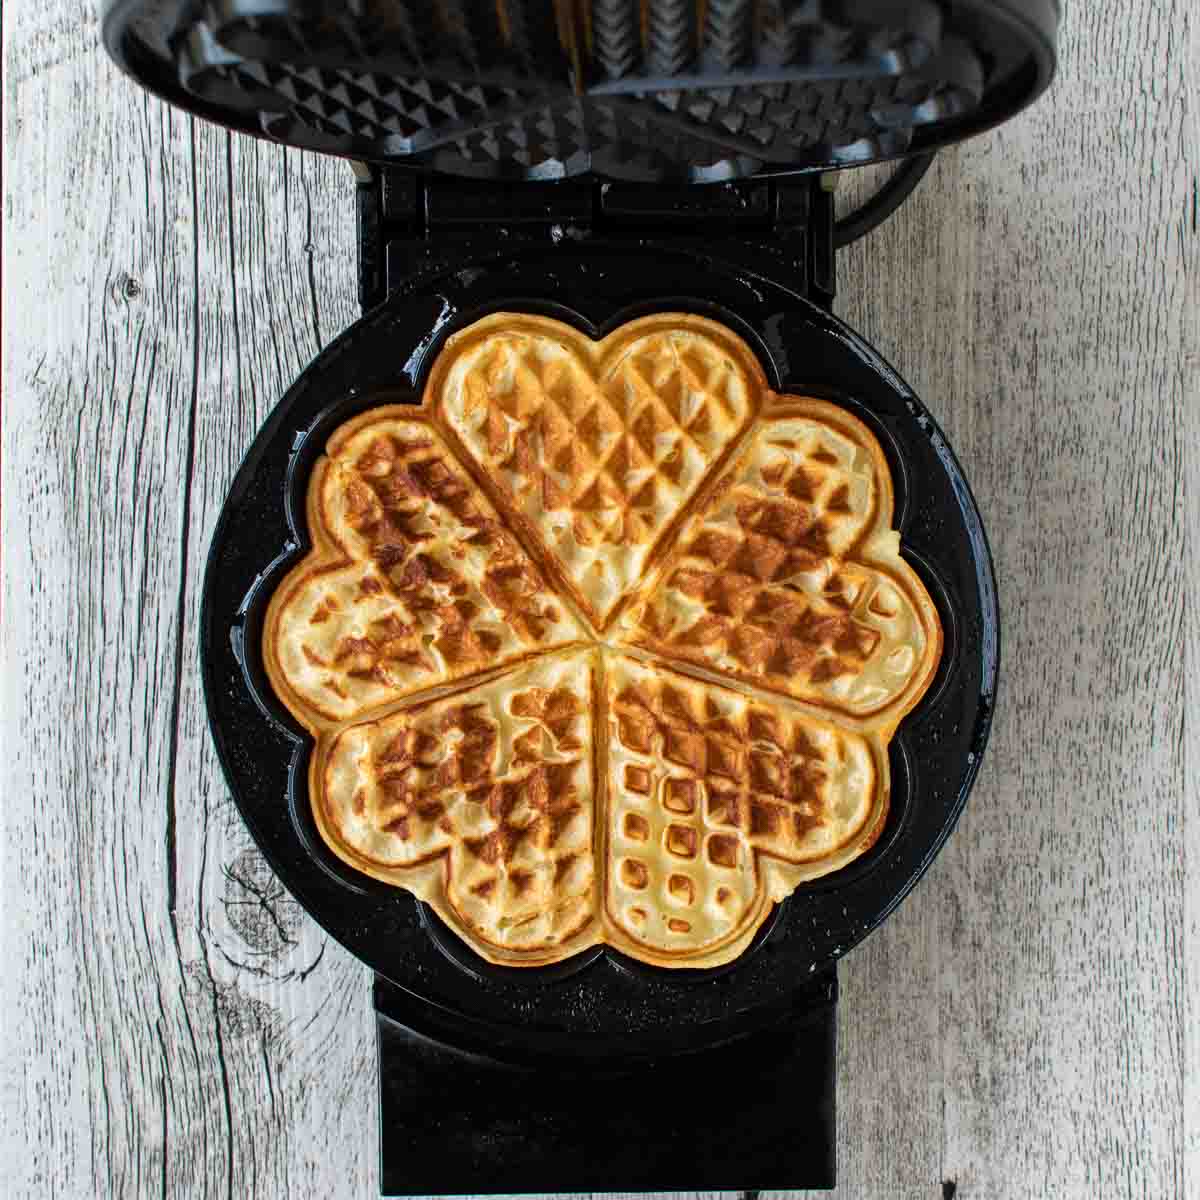
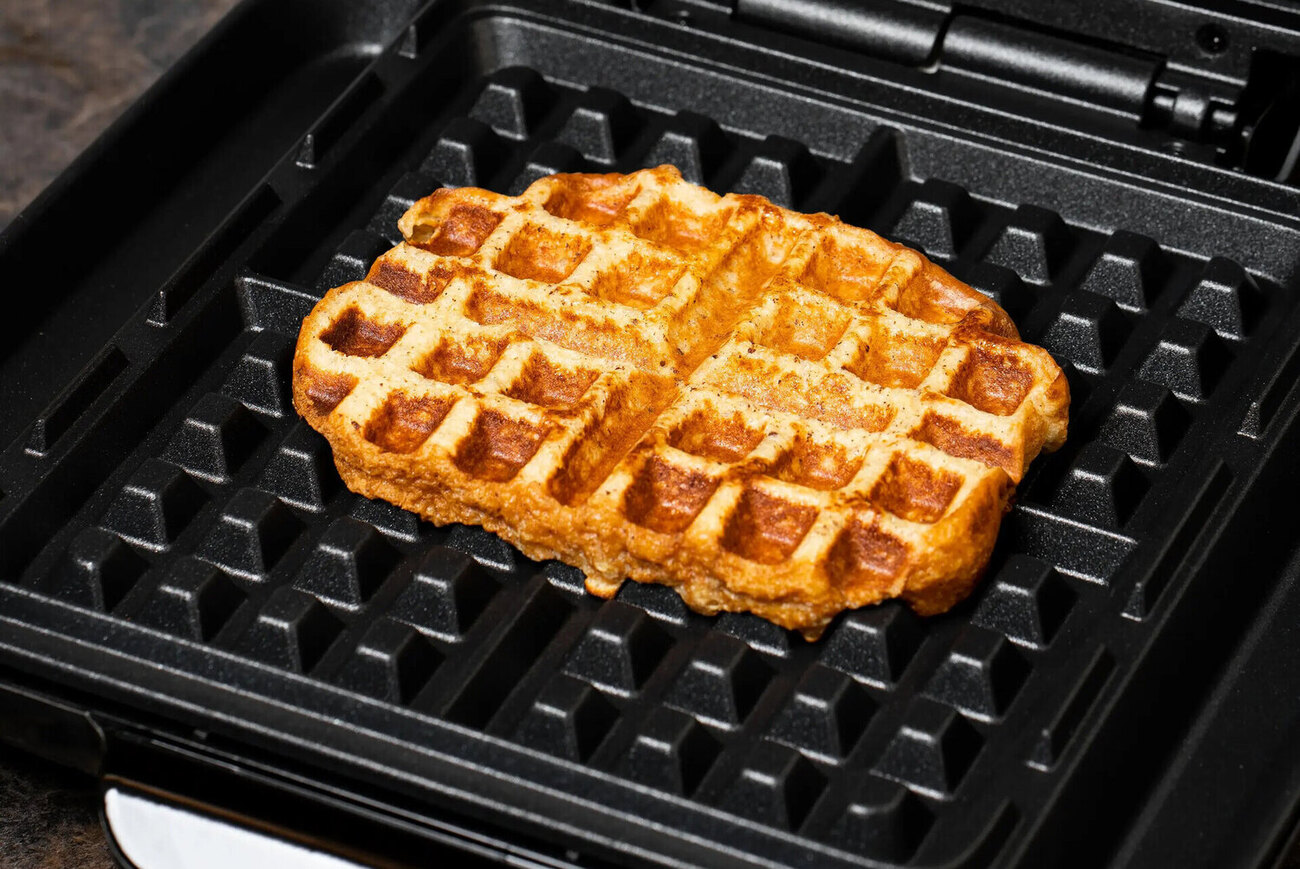
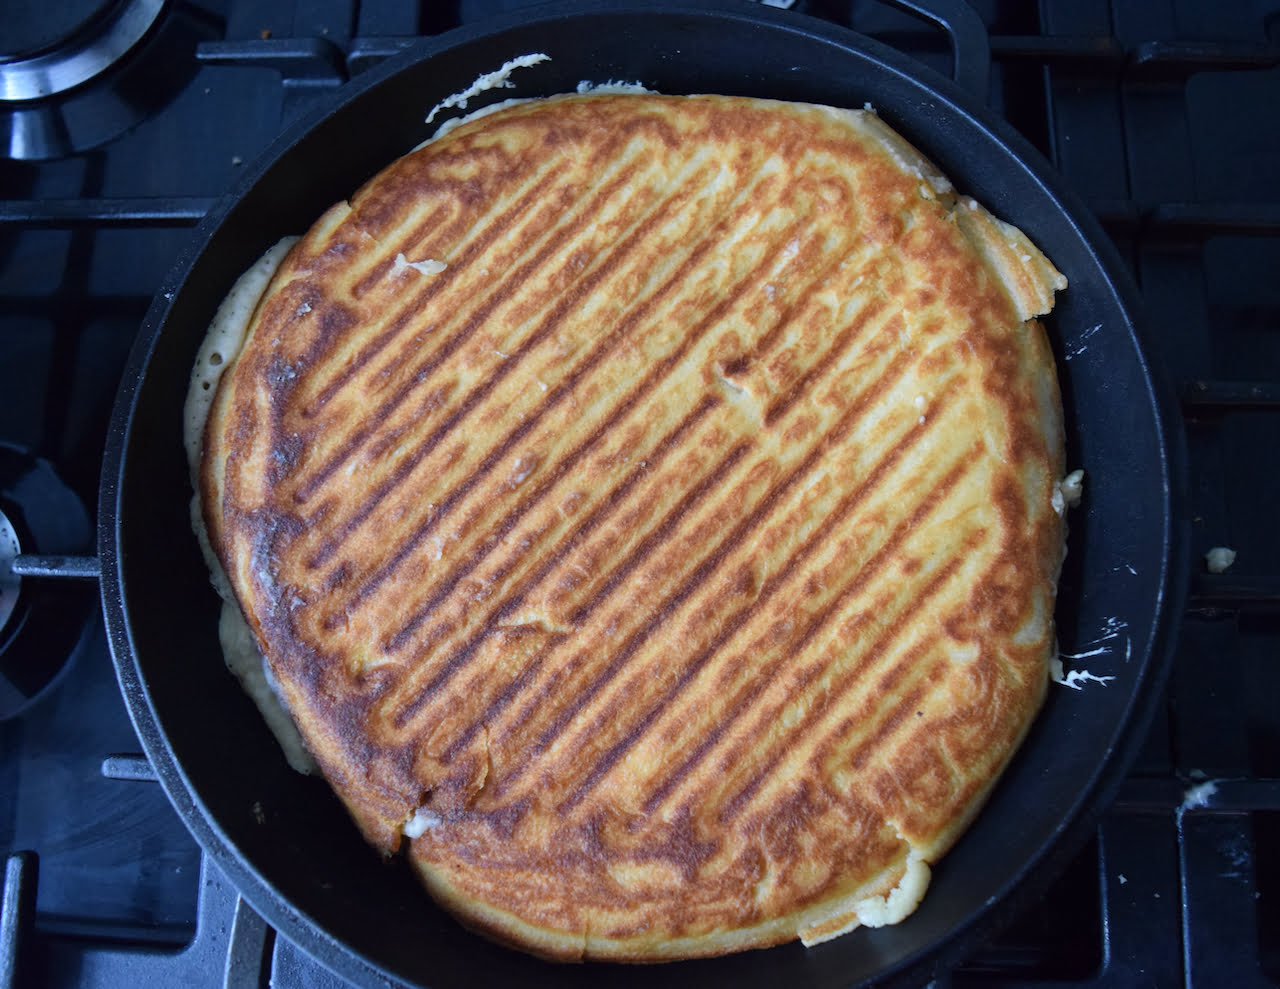
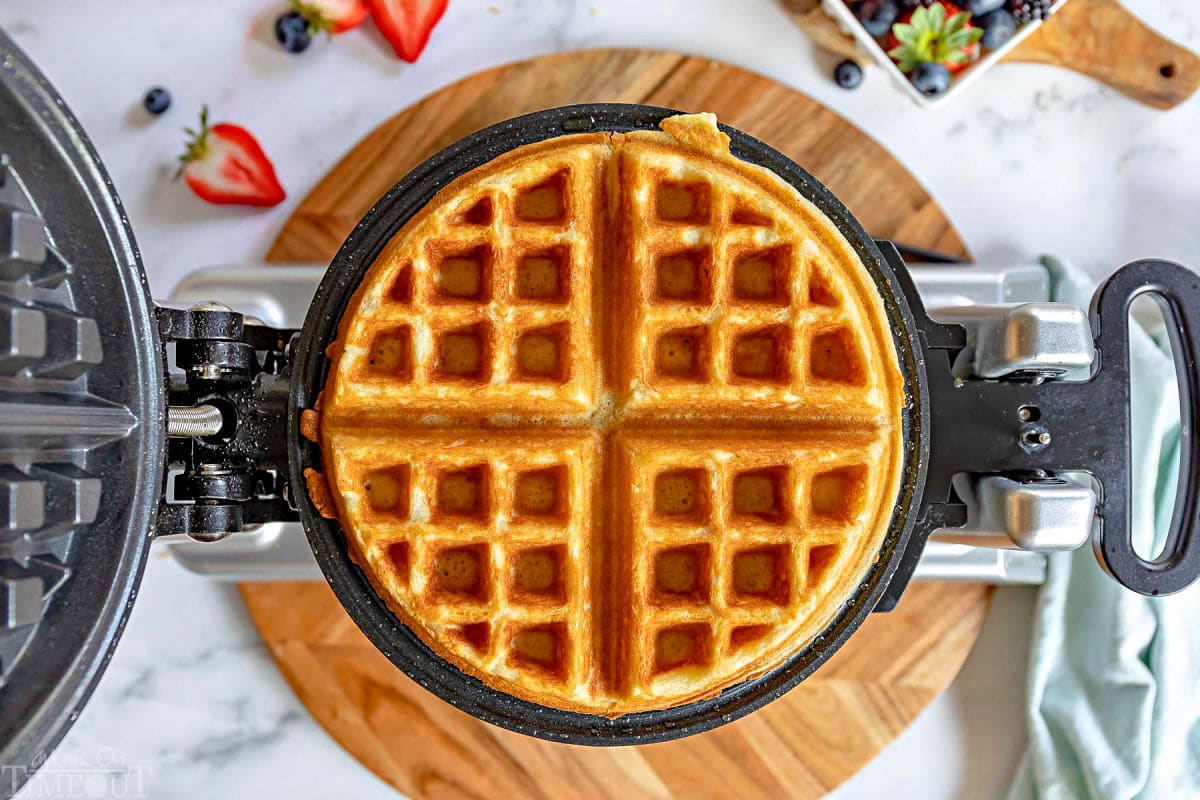
Step 4: Cooking the Waffles
Now comes the exciting part – cooking the waffles to perfection. Follow these steps to ensure your Norwegian waffles turn out crispy, golden, and delicious:
- Leave the waffle iron closed and allow the waffles to cook for the recommended time. This will vary depending on your waffle iron and desired level of doneness.
- Avoid opening the waffle iron too soon as this can disrupt the cooking process and result in undercooked waffles. You can use the indicator light on the waffle iron as a general guide, but it’s best to wait until the waffles are golden brown.
- Once the waffles are cooked, carefully lift the lid of the waffle iron. Use a heatproof spatula to remove the cooked waffles, starting from the outer edges and working your way towards the center.
- Place the cooked waffles on a wire cooling rack to allow any excess steam to escape. This will help keep the waffles crisp and prevent them from becoming soggy.
Repeat the pouring and cooking process with the remaining batter until all the waffles are cooked. If you notice that the waffle iron is sticking, you can lightly reapply cooking spray or melted butter between batches to prevent any sticking issues.
Cooking times may vary, so it’s a good idea to do a test waffle first to determine the optimal cook time for your specific waffle iron.
Now that the waffles are cooked and ready, let’s move on to the final step: serving the delicious Norwegian waffles!
Step 5: Removing the Waffles from the Iron
After the waffles have cooked to perfection, it’s time to remove them from the waffle iron. Follow these steps to remove the waffles without any hassle:
- Using a heatproof spatula, gently lift the edge of the cooked waffle. The waffle should easily release from the surface of the waffle iron.
- Continue sliding the spatula underneath the waffle, working your way towards the center. Be careful not to exert too much force or the waffle may tear.
- Lift the cooked waffle completely off the waffle iron and transfer it to a plate or serving platter.
- Repeat the process with the remaining waffles, being cautious not to overcrowd the plate and risk damaging the waffles.
If the waffles are sticking to the waffle iron, it may be an indication that they need a bit more cooking time. In this case, gently close the lid and cook for an additional minute or two before attempting to remove them again.
As you remove the waffles from the iron, you’ll notice their beautiful golden-brown color and enticing aroma. Now, all that’s left is to serve them up and enjoy!
Let’s move on to the final step: serving the delicious Norwegian waffles!
Step 6: Serving the Waffles
The moment you’ve been waiting for has arrived – it’s time to serve those mouthwatering Norwegian waffles. Follow these steps to create a delightful waffle experience:
- Place the cooked waffles on a serving platter or individual plates, arranging them in a neat stack.
- For a classic touch, serve the waffles with a generous drizzle of maple syrup or melted butter. This adds a touch of sweetness and richness to the waffles.
- You can also get creative with toppings. Consider adding a dollop of whipped cream, a sprinkle of powdered sugar, or a handful of fresh berries to enhance the flavor and presentation.
- If you prefer a savory twist, try serving Norwegian waffles with a side of crispy bacon or a dollop of creamy scrambled eggs. This creates a wonderful sweet and savory combination.
- Don’t forget to add a hot cup of coffee, tea, or a refreshing glass of juice to complement your Norwegian waffles and complete the meal.
Remember, serving waffles is a highly customizable experience. You can tailor the toppings and accompaniments to suit your personal preferences and experiment with different flavors.
Now that your Norwegian waffles are beautifully served, it’s time to dig in and savor the delightful combination of flavors and textures. Enjoy this special treat with family and friends, and make lasting memories around the breakfast table.
Congratulations! You have successfully made Norwegian waffles with a regular waffle iron. Enjoy the fruits of your labor and revel in the joy of homemade deliciousness!
By following these easy steps, you can bring a taste of Norway into your home and enjoy these delectable waffles whenever you like. Happy cooking and bon appétit!
That concludes our guide on how to make Norwegian waffles with a regular waffle iron. We hope you found this article informative and inspiring. Now, go ahead and enjoy your homemade Norwegian waffles!
Read also: 14 Incredible Regular Waffle Iron For 2025
Conclusion
Congratulations! You have embarked on a culinary adventure and learned how to make mouthwatering Norwegian waffles with a regular waffle iron. These light and fluffy treats are a delightful addition to any breakfast or brunch spread, and they are sure to please family and friends with their irresistible flavor and texture.
Throughout this article, we have explored the step-by-step process of making Norwegian waffles, from preparing the batter to cooking them to perfection. We have also covered the essential ingredients and equipment needed for this delicious endeavor.
By following the simple instructions provided, you can achieve waffles that are crisp on the outside and tender on the inside. You have the creative freedom to customize your waffles by adding various toppings, such as syrup, butter, fruit, or even savory options like bacon or eggs.
Making Norwegian waffles with a regular waffle iron is not only a wonderful way to indulge in a homemade treat but also an opportunity to connect with Norwegian culinary traditions and experience a taste of Norway from the comfort of your own home.
We hope you’ve enjoyed this culinary journey and that you feel inspired to gather your ingredients, fire up your waffle iron, and create a stack of delicious Norwegian waffles that will surely impress your loved ones. So, don your apron, get cooking, and savor the joy of a homemade breakfast favorite.
Thank you for joining us on this adventure. Happy waffle-making!
Frequently Asked Questions about How To Make Norwegian Waffles With A Regular Waffle Iron
Was this page helpful?
At Storables.com, we guarantee accurate and reliable information. Our content, validated by Expert Board Contributors, is crafted following stringent Editorial Policies. We're committed to providing you with well-researched, expert-backed insights for all your informational needs.


0 thoughts on “How To Make Norwegian Waffles With A Regular Waffle Iron”