Articles
How To Make Pizzelles With Waffle Iron
Modified: August 25, 2024
Learn how to make delicious pizzelles using your waffle iron with these helpful articles. Master the art of creating these traditional Italian cookies at home.
(Many of the links in this article redirect to a specific reviewed product. Your purchase of these products through affiliate links helps to generate commission for Storables.com, at no extra cost. Learn more)
Introduction
Welcome to the delicious world of pizzelles – delicate, crispy, and oh-so-delightful treats that are sure to tickle your taste buds. In this article, we will explore the art of making pizzelles using a waffle iron, unlocking the secrets to creating perfectly shaped and perfectly flavored pizzelles.
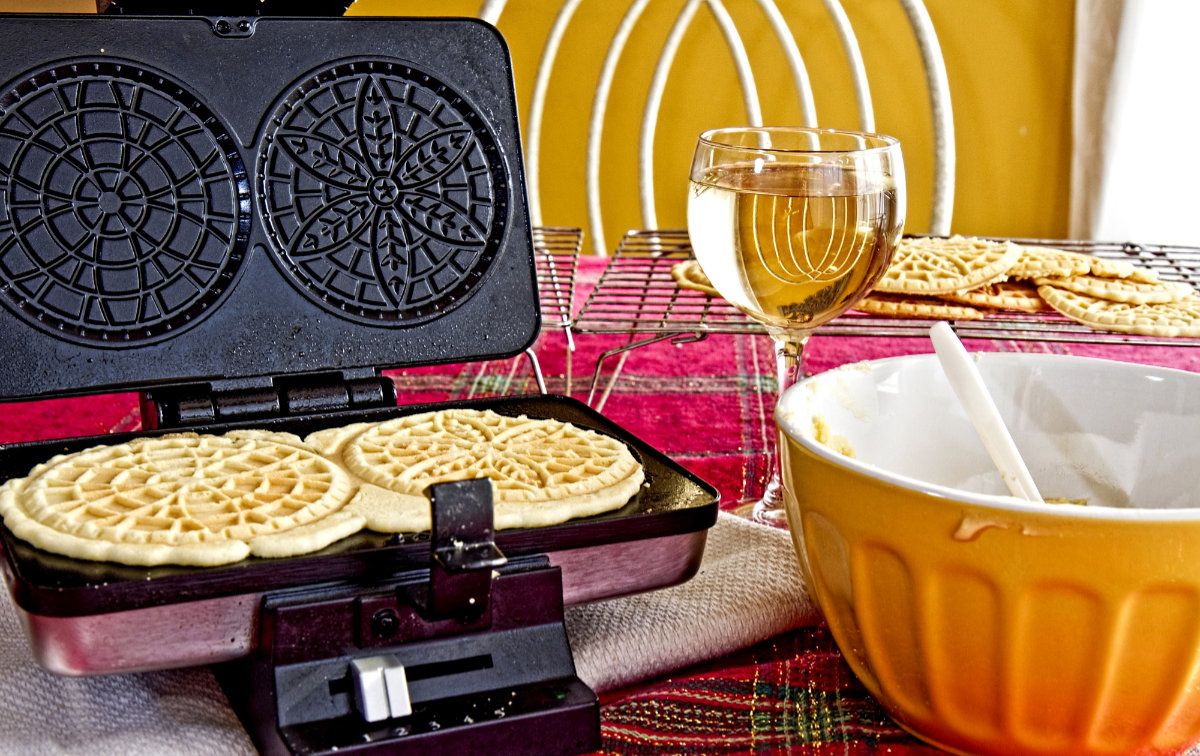
If you’re unfamiliar with pizzelles, let me introduce you to these delightful Italian cookies. Pizzelles are thin, wafer-like cookies traditionally made in Italy during special occasions and celebrations. They have a distinctive waffle-like pattern on one side and are often flavored with vanilla or anise.
While pizzelles can be made using a specialized pizzelle iron, you can achieve equally delicious results using a regular waffle iron. This opens up the opportunity for more people to try their hand at making these delectable treats right in their own kitchens.
In the following sections, we will guide you through the process of making pizzelles with a waffle iron, providing you with step-by-step instructions and helpful tips along the way. Whether you’re a seasoned baker or a novice in the kitchen, we assure you that this is a recipe you can confidently undertake.
So, let’s roll up our sleeves, preheat our waffle irons, and get ready to indulge in the wonderful world of pizzelles!
Key Takeaways:
- Embrace the art of making pizzelles with a waffle iron, from preparing the batter to mastering the cooking process. Get creative with flavors, shapes, and serving options to delight your taste buds and impress your guests.
- Discover the versatility of pizzelles and unlock the secrets to achieving perfectly shaped, crispy, and flavorful cookies. With helpful tips and tricks, you can confidently embark on a pizzelle-making adventure in your own kitchen.
Read more: How To Make Waffle In A Waffle Iron
What Are Pizzelles?
Pizzelles are delightful Italian cookies that have been enjoyed for generations. These delicate, wafer-like treats are known for their intricate designs and crisp texture. The word “pizzelle” comes from the Italian word “pizze,” meaning round and flat. Traditionally, pizzelles are made using a pizzelle iron, a special tool that creates the signature pattern on the cookies.
Pizzelles have a rich history in Italian baking, with origins dating back to the Middle Ages. Originally, they were made using handheld irons heated over an open fire. Over time, pizzelle irons evolved, and now they are available in electric versions that make the process much simpler and more efficient.
One of the defining characteristics of pizzelles is their versatility. While traditional pizzelles are flavored with either vanilla or anise, you can customize them to suit your taste preferences. You can experiment with different flavors such as chocolate, lemon, almond, or even savory options like herbs and spices.
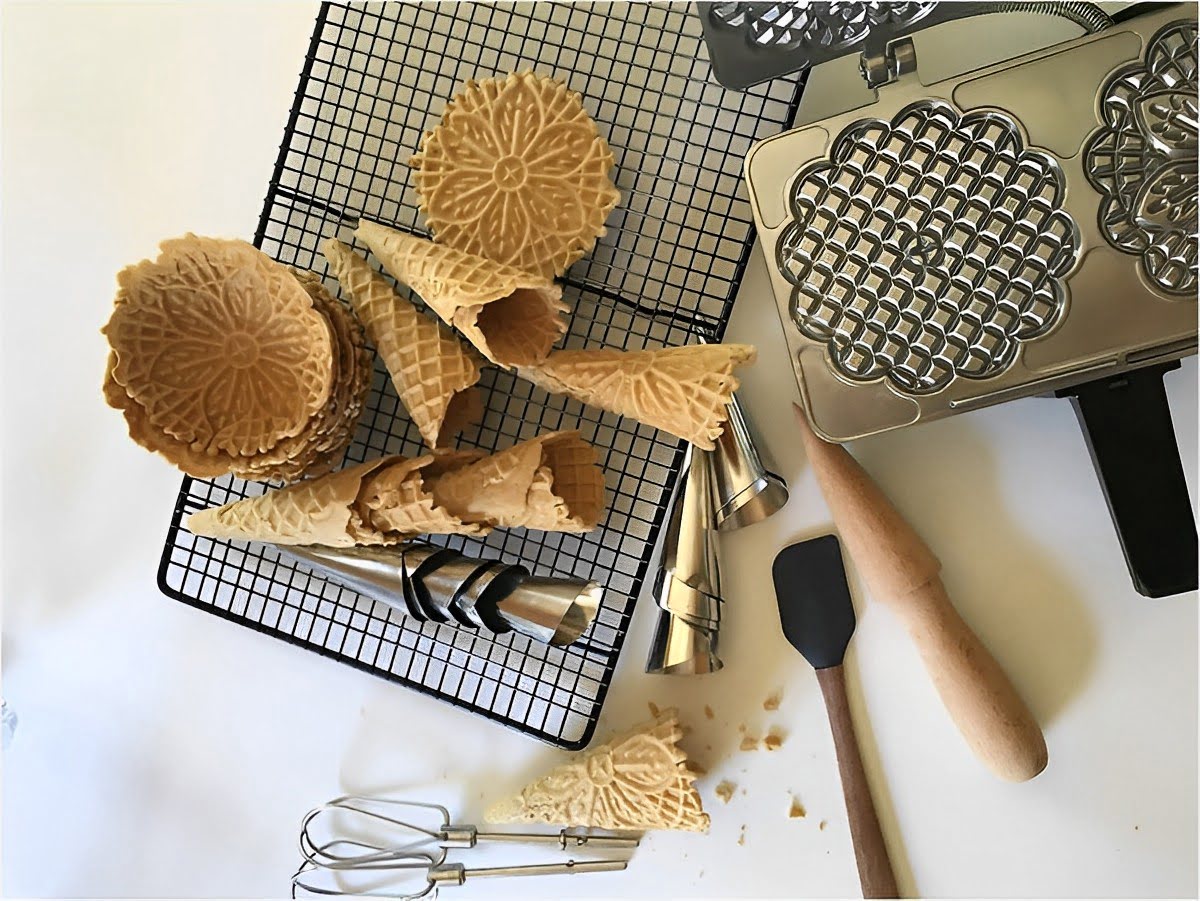
These delectable cookies are often enjoyed on their own, but they are also a popular addition to various desserts. Pizzelles can be rolled into cannoli shells, shaped into cones for ice cream, or even used as a base for tiramisu. The possibilities are endless.
Not only are pizzelles delicious, but they are also visually stunning. The intricate patterns created by the pizzelle iron add a touch of elegance to any dessert platter or cookie jar. The distinct design makes them a favorite choice for holiday baking and special occasions.
Now that we have a good understanding of what pizzelles are, let’s move on to the next section, where we’ll explore how to prepare the batter for these delectable treats.
Preparing the Batter
Before we can start making pizzelles with a waffle iron, we need to prepare the perfect batter. The batter is what gives the pizzelles their light and crispy texture, so it’s essential to get it just right.
To prepare the pizzelle batter, you will need the following ingredients:
- 2 cups all-purpose flour
- 1 teaspoon baking powder
- ½ cup granulated sugar
- ½ cup unsalted butter, melted
- 3 large eggs
- 1 teaspoon vanilla extract (or any other flavor of your choice)
Once you have gathered all the ingredients, follow these simple steps to prepare the batter:
- In a mixing bowl, combine the flour and baking powder. Whisk them together to ensure they are evenly mixed.
- In a separate bowl, beat the sugar and melted butter until well combined.
- Add the eggs to the sugar and butter mixture, one at a time, and beat well after each addition.
- Stir in the vanilla extract (or your chosen flavoring).
- Gradually add the flour mixture to the wet ingredients, stirring until a smooth batter forms. Be careful not to overmix, as this can make the pizzelles tough.
Once the batter is ready, cover it with plastic wrap and let it rest at room temperature for about 10-15 minutes. This resting time allows the ingredients to fully blend together and gives the batter a chance to thicken slightly, resulting in better-formed pizzelles.
Now that our batter is prepared, it’s time to move on to the next step: heating the waffle iron. Keep reading to learn how to achieve the perfect temperature for making pizzelles!
Heating the Waffle Iron
Before we can start making pizzelles, it’s important to ensure that the waffle iron is properly heated. The right temperature is crucial for achieving pizzelles with a crispy texture and beautiful color.
Here’s how to heat the waffle iron for making pizzelles:
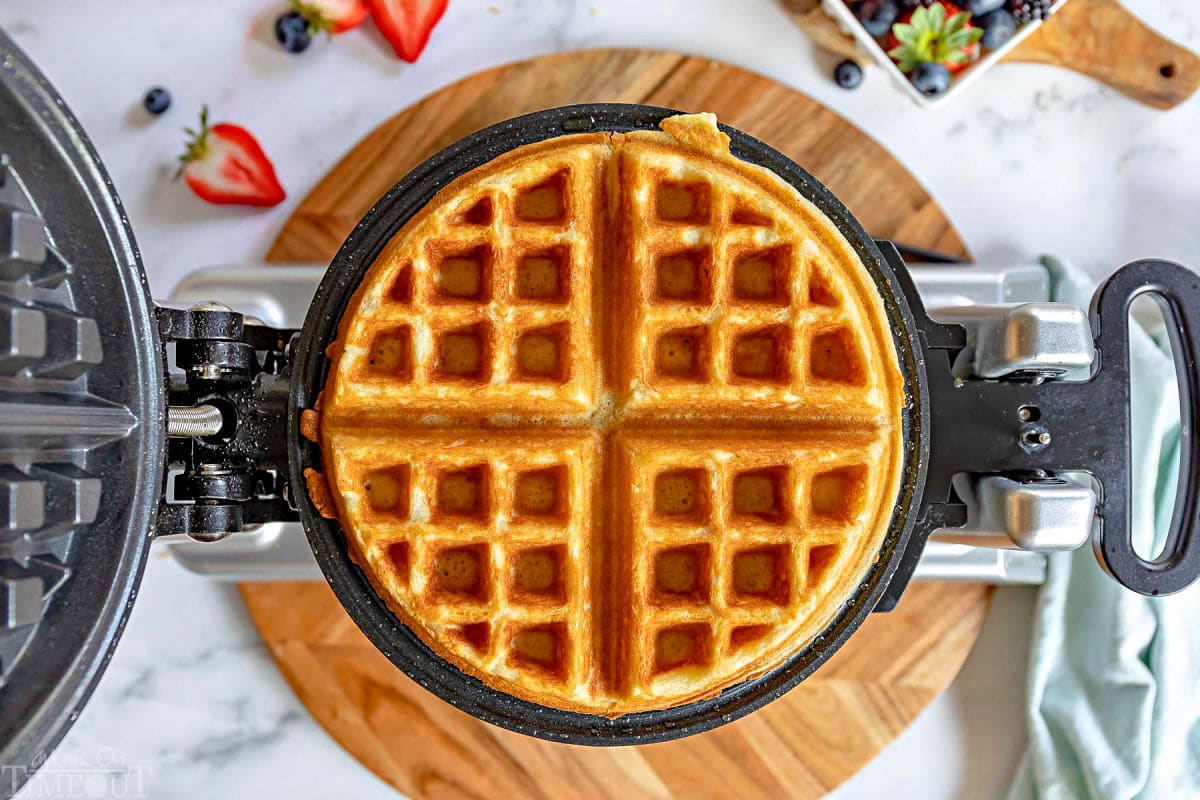
- Plug in the waffle iron and preheat it according to the manufacturer’s instructions. Most waffle irons will have an indicator light that will turn on when the iron is heated and ready to use.
- While the iron is heating up, take this time to lightly grease the plates with cooking spray or a small amount of melted butter. This step will prevent the pizzelle batter from sticking to the iron and ensure easy removal once they are cooked.
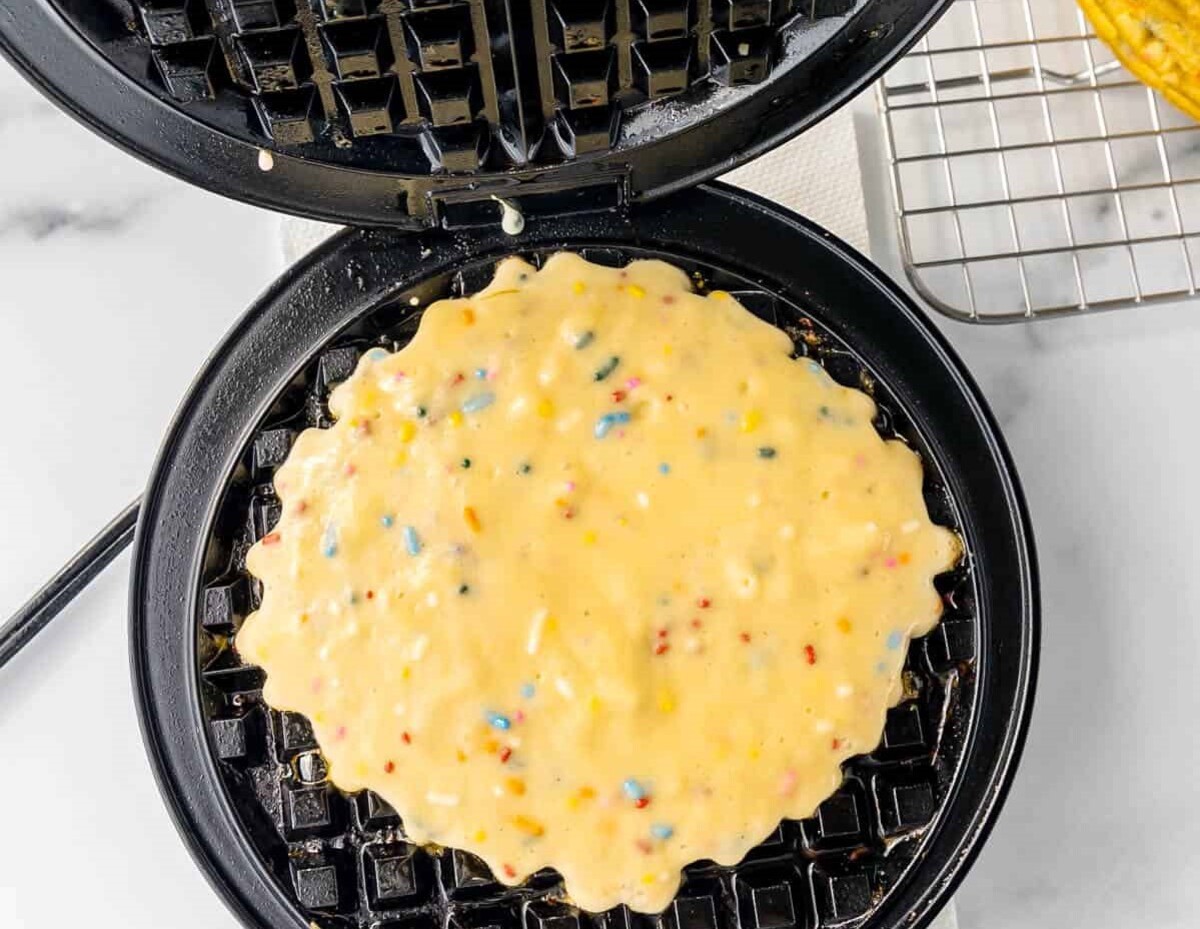
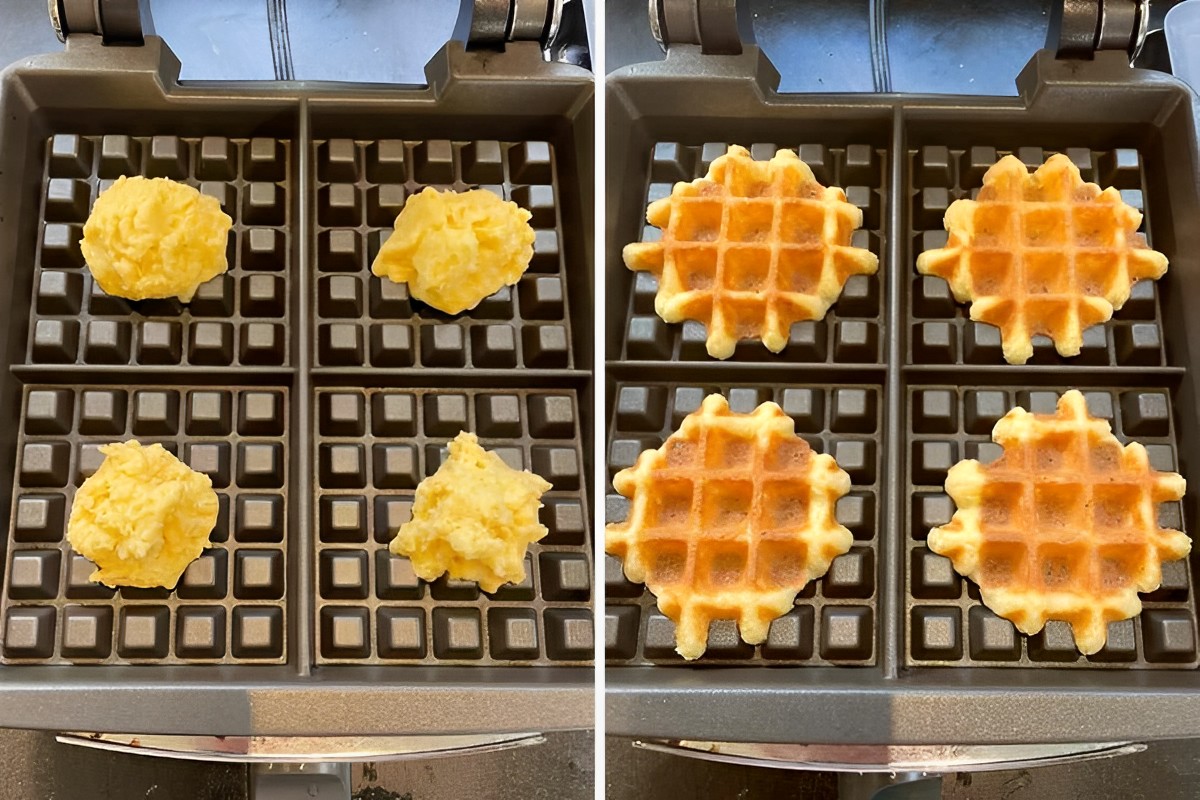
- Once the iron has reached the desired temperature, open it up and spoon about a tablespoon of the prepared pizzelle batter onto each patterned grid. The amount may vary depending on the size of your waffle iron; aim to fill the center of each pattern without overflowing.
- Close the iron and gently press it together. Apply gentle pressure to evenly distribute the batter and create the desired thickness. Be careful not to press too hard, as this can cause the batter to spread out too thin.
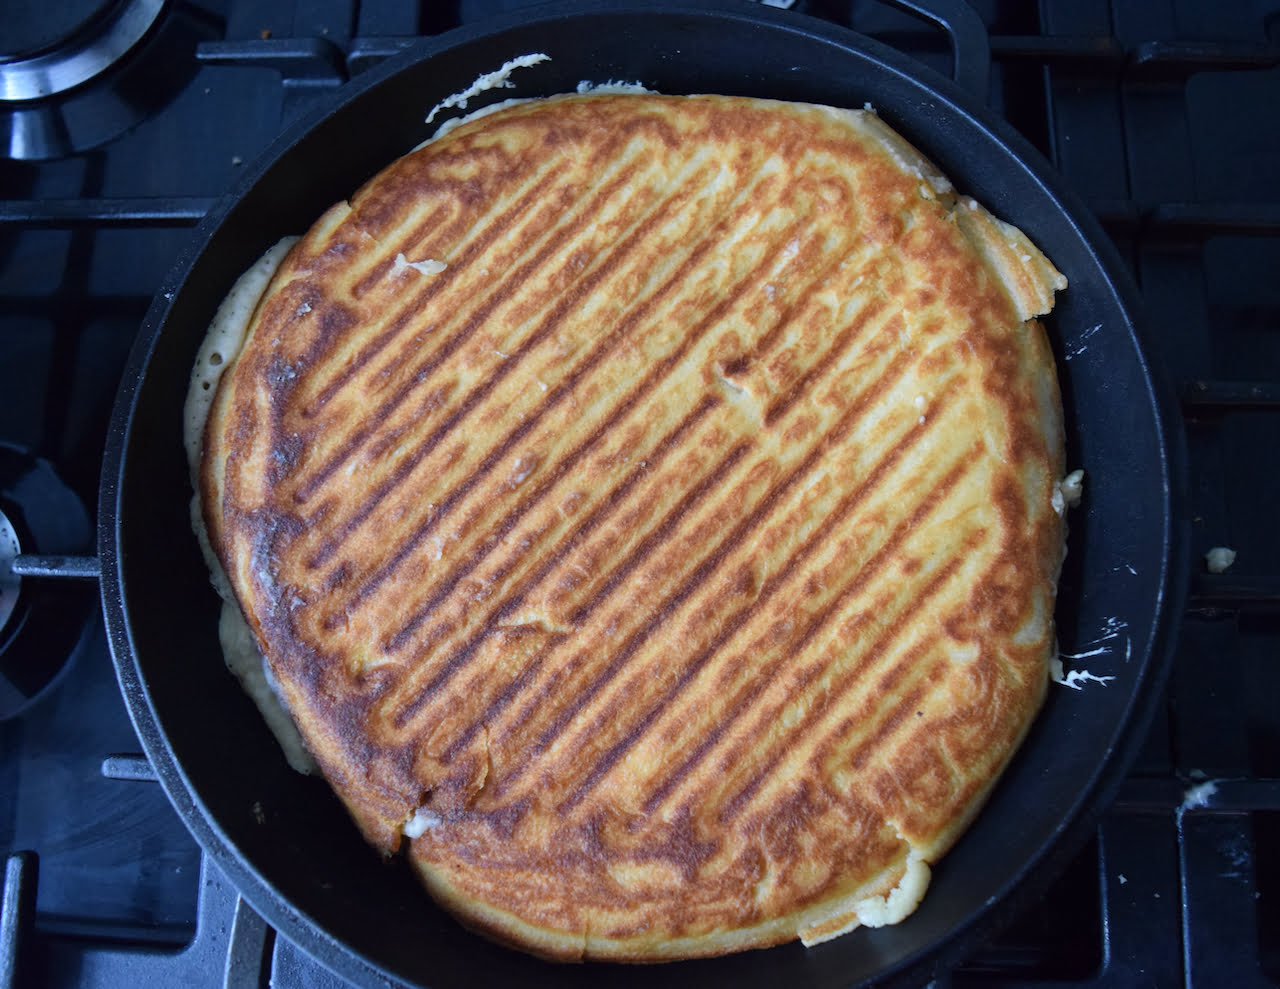
- Now it’s time to let the magic happen! Cook the pizzelles for about 1-2 minutes or until they are golden brown and crisp. Timing may vary depending on the specific waffle iron and personal preference, so make sure to keep an eye on them.
Once the pizzelles are cooked to perfection, open the waffle iron and carefully remove them using a non-metallic spatula. Place them on a wire rack to cool completely.
It’s important to note that the first few pizzelles may not turn out perfectly as the iron needs to reach the optimal temperature. Don’t be discouraged if the first one or two pizzelles aren’t as crispy or golden as you’d like. Just adjust the cooking time or temperature slightly and continue with the rest of the batch.
Now that you have mastered heating the waffle iron, it’s time to dive into the process of actually making the pizzelles. Keep reading to learn the step-by-step instructions for creating these delectable treats!
Making Pizzelles with the Waffle Iron
Now that the waffle iron is heated and ready, it’s time to start making the pizzelles. The process is simple, but it requires a bit of practice to get the perfect shape and texture. Follow these steps to make pizzelles with a waffle iron:
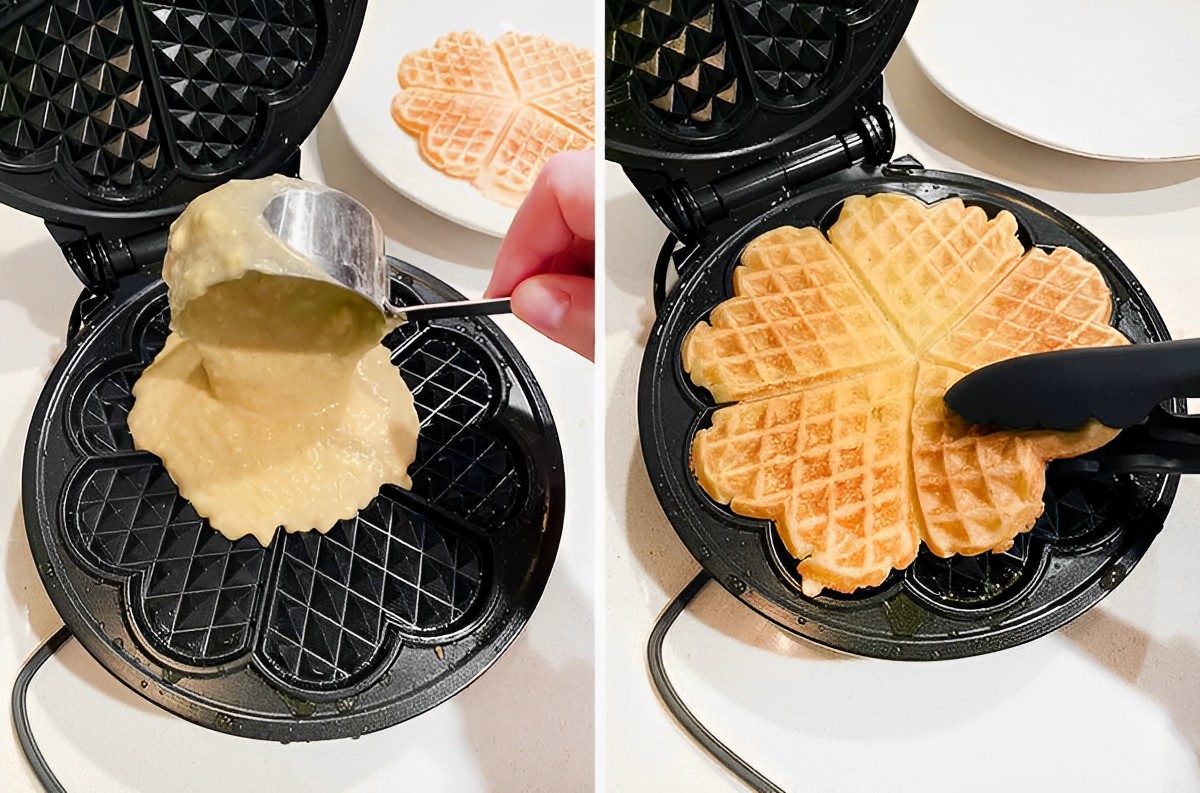
- Open the heated waffle iron and spoon a tablespoon of the prepared pizzelle batter onto each patterned grid. Again, adjust the amount depending on the size of your waffle iron.
- Close the waffle iron and gently press it together to evenly distribute the batter. Remember, you don’t want to press too hard, as this can cause the batter to spread too thin.
- Cook the pizzelles for about 1-2 minutes or until they are golden brown and crisp. Keep an eye on them to prevent overcooking.
- Once cooked, carefully open the waffle iron and remove the pizzelles using a non-metallic spatula. Transfer them to a wire rack to cool completely.
- Repeat the process with the remaining batter, making sure to lightly grease the waffle iron between each batch to prevent sticking.
As you become more comfortable with making pizzelles, you can experiment with different shapes and sizes. For example, instead of placing a tablespoon of batter in the center of each patterned grid, you can try placing it more towards the edge to create pizzelles with a decorative border.
It’s important to note that pizzelles are best when they are thin and delicate. If you find that your pizzelles are coming out too thick, try using less batter and spreading it out more towards the edges. On the other hand, if you prefer a slightly thicker pizzelle, feel free to adjust the batter amount accordingly.
Once you have finished making the pizzelles, you can move on to the exciting part – adding flavor variations to make each batch unique and delicious. Continue reading to discover some mouthwatering flavor options to take your pizzelles to the next level!
Make sure to preheat your waffle iron before pouring the pizzelle batter. This will ensure even cooking and a crispy texture.
Read more: How To Make A Waffle Without A Waffle Iron
Tips and Tricks for Perfect Pizzelles
To achieve pizzelles that are beautifully shaped, crispy, and full of flavor, here are some helpful tips and tricks to keep in mind:
- Properly heat the waffle iron: Ensure that your waffle iron is fully heated before adding the batter. This will help create the perfect texture and prevent sticking.
- Grease the waffle iron: Lightly grease the plates of the waffle iron between each batch to prevent the pizzelles from sticking. A thin layer of cooking spray or melted butter works well.
- Don’t overfill: Be mindful of the amount of batter you use for each pizzelle. Adding too much batter can result in an overflow and difficult removal from the iron. Start with a tablespoon of batter in the center and adjust as needed.
- Spread the batter evenly: When closing the waffle iron, apply gentle pressure to evenly distribute the batter. This will ensure a consistent thickness and shape.
- Timing is key: Pay close attention to the cooking time. Pizzelles can quickly go from golden brown to overdone. Aim for about 1-2 minutes, or until they are nicely browned.
- Cool completely: After removing the pizzelles from the iron, allow them to cool completely on a wire rack. This will help them crisp up and hold their shape.
- Store properly: To maintain their crispness, store the pizzelles in an airtight container at room temperature. They can last for a week or longer if stored properly.
- Get creative with flavors: Don’t be afraid to experiment with different flavor variations. Add a touch of almond extract, lemon zest, or cocoa powder to the batter for a unique twist.
- Serve with style: Pizzelles are wonderful on their own, but they also make a great accompaniment to ice cream, gelato, or a cup of hot coffee. Get creative and serve them in unique ways to impress your guests.
Remember, practice makes perfect. The more you make pizzelles, the better you will become at achieving the ideal texture, shape, and flavor. So have fun, be patient, and enjoy the process of creating these delectable treats!
Now that you have some tips and tricks under your belt, let’s explore the world of flavor variations to add even more excitement to your pizzelles. Keep reading for some delightful flavor ideas!
Flavor Variations for Pizzelles
While traditional pizzelles are flavored with vanilla or anise, there are plenty of exciting flavor variations you can explore to add a unique twist to your pizzelles. Here are some delicious flavor ideas to inspire your culinary creativity:
- Chocolate: Add cocoa powder to the batter for a rich and indulgent chocolatey flavor. You can also enhance it with chocolate chips or a drizzle of melted chocolate on top.
- Lemon: Zest a fresh lemon and add it to the batter for a bright and zesty pizzelle. You can also add a touch of lemon juice for an extra burst of citrus flavor.
- Almond: Substitute almond extract for the vanilla extract to infuse your pizzelles with a delicate almond flavor. You can also sprinkle sliced almonds on top for added crunch.
- Orange: Add orange zest or a splash of orange juice to the batter to give your pizzelles a refreshing citrus twist.
- Coconut: Mix in shredded coconut into the batter for a tropical flair. You can even dip the cooled pizzelles in melted white chocolate and sprinkle more coconut on top.
- Maple: Replace the sugar with maple syrup to create a delightful maple-flavored pizzelle. It pairs perfectly with a drizzle of maple syrup or a sprinkle of powdered sugar.
- Spice: Incorporate warm spices like cinnamon, nutmeg, or cardamom into the batter to give your pizzelles a cozy and aromatic touch.
- Matcha: For a unique and vibrant flavor, add matcha powder to the batter. It will infuse the pizzelles with a subtle earthy and grassy taste.
Feel free to get creative and mix and match these flavors or invent your own combinations. The beauty of making pizzelles is that you can customize them to suit your taste preferences and create a variety of flavors to satisfy everyone’s cravings.
Now that you have explored some delicious flavor variations, it’s time to learn how to serve and store your freshly made pizzelles!
Serving and Storing Pizzelles
Once you have baked a delicious batch of pizzelles, it’s time to think about how to best serve and store them to ensure they stay fresh and flavorful. Here are some tips on serving and storing pizzelles:
Serving:
- Pizzelles are often enjoyed on their own as delightful treats. Arrange them on a platter and serve them as a sweet snack or dessert option.
- For an elegant touch, roll the warm pizzelles into cylinders or cones while they are still flexible. Once they cool and harden, you’ll have beautiful pizzelle cannoli shells.
- Sprinkle the pizzelles with powdered sugar or cocoa powder for an added touch of sweetness and visual appeal.
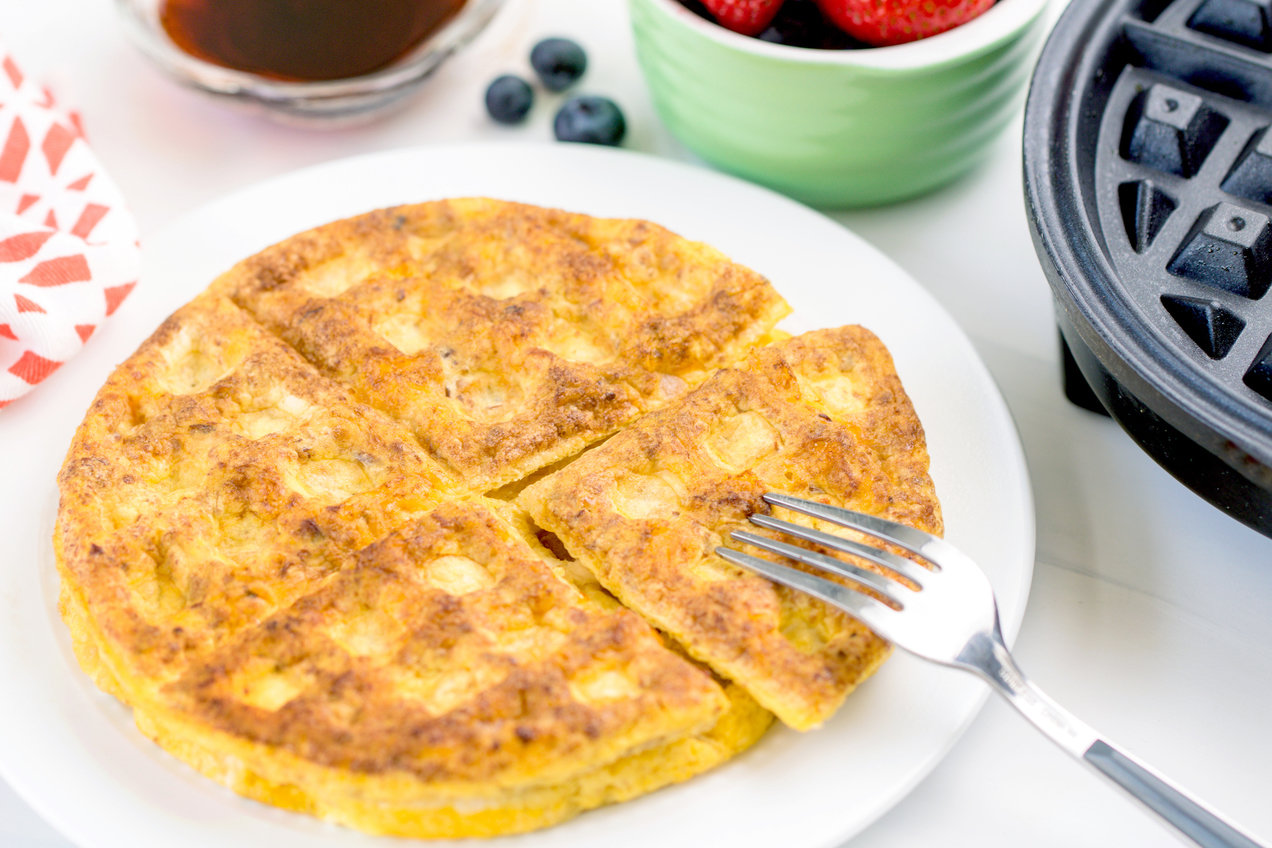
- Pizzelles make wonderful companions for ice cream or gelato. Serve them alongside a scoop of your favorite flavor for a delicious dessert combination.
- Pair pizzelles with a cup of hot coffee or tea for a delightful afternoon treat.
Storing:
- Air-tight container: Store the cooled pizzelles in an airtight container to maintain their crispness. Place a piece of parchment paper between each layer to prevent them from sticking together.
- Room temperature: Pizzelles can be stored at room temperature for up to one week. They will gradually soften over time but still remain enjoyable.
- Freezing: If you want to extend the shelf life of your pizzelles, they can be frozen. Place them in a freezer-safe container or bag, separating the layers with parchment paper. They can be stored in the freezer for up to two months. Thaw them at room temperature before serving.
- Refresh: If your pizzelles have lost their crispness, you can place them in a preheated oven at a low temperature (around 300°F/150°C) for a few minutes to restore their crunch.
Remember to label your storage container or bag with the date to keep track of their freshness. Although pizzelles are best enjoyed fresh, these storage tips will help ensure that you can savor their deliciousness for days or weeks to come.
Now that you are equipped with the knowledge of serving and storing pizzelles, it’s time to wrap up this article and unleash your creativity in making these delectable treats. Enjoy the art of pizzelle making and have fun experimenting with different flavors and variations. Buon appetito!
Conclusion
Congratulations! You have reached the end of our journey into the world of making pizzelles with a waffle iron. We hope this article has provided you with valuable insights and inspiration to create these delightful Italian cookies right in your own kitchen.
We started by introducing you to the wonderful world of pizzelles – thin, crispy, and intricately patterned cookies that have captivated taste buds for generations. We then walked you through the process of preparing the batter, heating the waffle iron, making the pizzelles, and provided tips and tricks for achieving perfect results.
We also dove into the realm of flavor variations, encouraging you to get creative and explore different flavors such as chocolate, lemon, almond, and more. The versatility of pizzelles allows you to personalize them and delight your taste buds with unique combinations.
Lastly, we discussed how to serve and store your pizzelles to ensure they stay fresh and delicious for as long as possible. Whether enjoyed on their own, as cannoli shells, or paired with ice cream or coffee, pizzelles are sure to bring joy to any occasion.
Now it’s time for you to dive into the kitchen, armed with the knowledge and enthusiasm to make your own batch of pizzelles. Embrace the process, have fun, and don’t be afraid to experiment with flavors and shapes.
Remember, making pizzelles is not just about the end result, it’s about the joy of creating something delicious and sharing it with loved ones. So gather your ingredients, preheat your waffle iron, and let the aroma of freshly baked pizzelles fill your home.
Thank you for joining us on this pizzelle-making adventure. We hope you find success and satisfaction in each batch you create. May your pizzelles be crispy, your flavors be delightful, and your kitchen be filled with warmth and happiness. Buon appetito!
Now that you've mastered making pizzelles with a waffle iron, why not put that appliance to another fun use? Check out our guide on how to cook tater tots using a waffle iron. This easy method not only saves time but also adds a delightful crunch to your favorite snack. Perfect for quick meals or inventive party treats, you'll love how versatile your waffle iron can be!
Frequently Asked Questions about How To Make Pizzelles With Waffle Iron
Was this page helpful?
At Storables.com, we guarantee accurate and reliable information. Our content, validated by Expert Board Contributors, is crafted following stringent Editorial Policies. We're committed to providing you with well-researched, expert-backed insights for all your informational needs.


0 thoughts on “How To Make Pizzelles With Waffle Iron”