Articles
How To Mill Lumber With Hand Tools
Modified: December 7, 2023
Learn how to mill lumber with hand tools in this informative article. Discover the essential steps and techniques for a rewarding woodworking experience.
(Many of the links in this article redirect to a specific reviewed product. Your purchase of these products through affiliate links helps to generate commission for Storables.com, at no extra cost. Learn more)
Introduction
Welcome to the world of woodworking, where the art of milling lumber with hand tools is a timeless craft. While power tools have become more prevalent in modern woodworking, there is something special about the process of using hand tools to transform a rough piece of lumber into a beautifully finished product.
Milling lumber with hand tools allows you to connect with the wood in a more intimate way. It requires patience, precision, and an understanding of the nuances of each tool. By using hand tools, you have the ability to control every cut and shape, ensuring that the final result is exactly as you envisioned.
In this article, we will guide you through the process of milling lumber with hand tools. We will cover everything from choosing the right tools to safety precautions, as well as the step-by-step process of transforming rough lumber into a finished piece. So, let’s grab our tools, put on our safety gear, and dive into the art of milling lumber with hand tools!
Key Takeaways:
- Embrace the timeless craft of milling lumber with hand tools to connect intimately with wood, exercise precision, and create beautifully finished woodworking projects.
- Prioritize safety, meticulous preparation, and attention to detail to transform rough lumber into polished, seamless, and visually appealing pieces through the art of hand tool woodworking.
Read more: How To Store Lumber In Garage
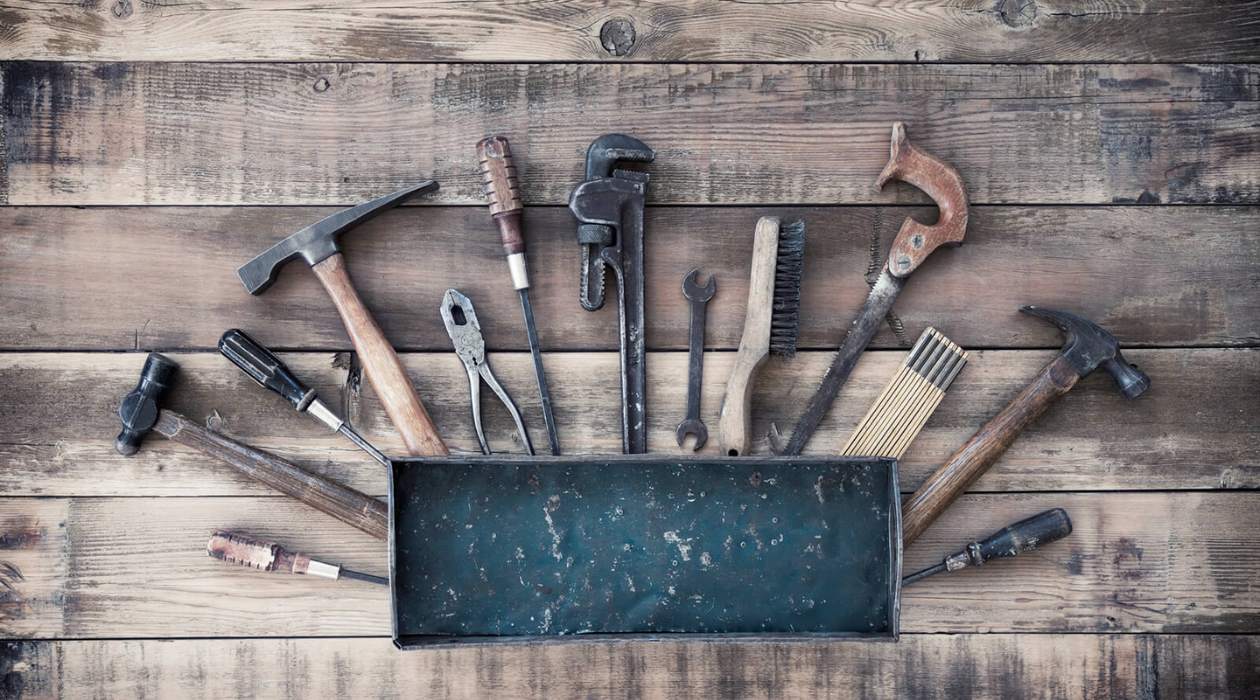
Choosing the Right Hand Tools
When it comes to milling lumber with hand tools, selecting the right tools is crucial. You want to ensure that you have the necessary tools to perform each step of the milling process with precision and efficiency. Here are some essential hand tools you’ll need:
- Hand Saw: A high-quality hand saw is a must-have for milling lumber. Look for a saw with a sharp blade and a comfortable handle that allows for controlled and accurate cuts.
- Hand Plane: A hand plane is essential for smoothing and flattening the surfaces of the lumber. Choose a plane with a sharp iron and an adjustable depth so that you can achieve the desired thickness and smoothness of the wood.
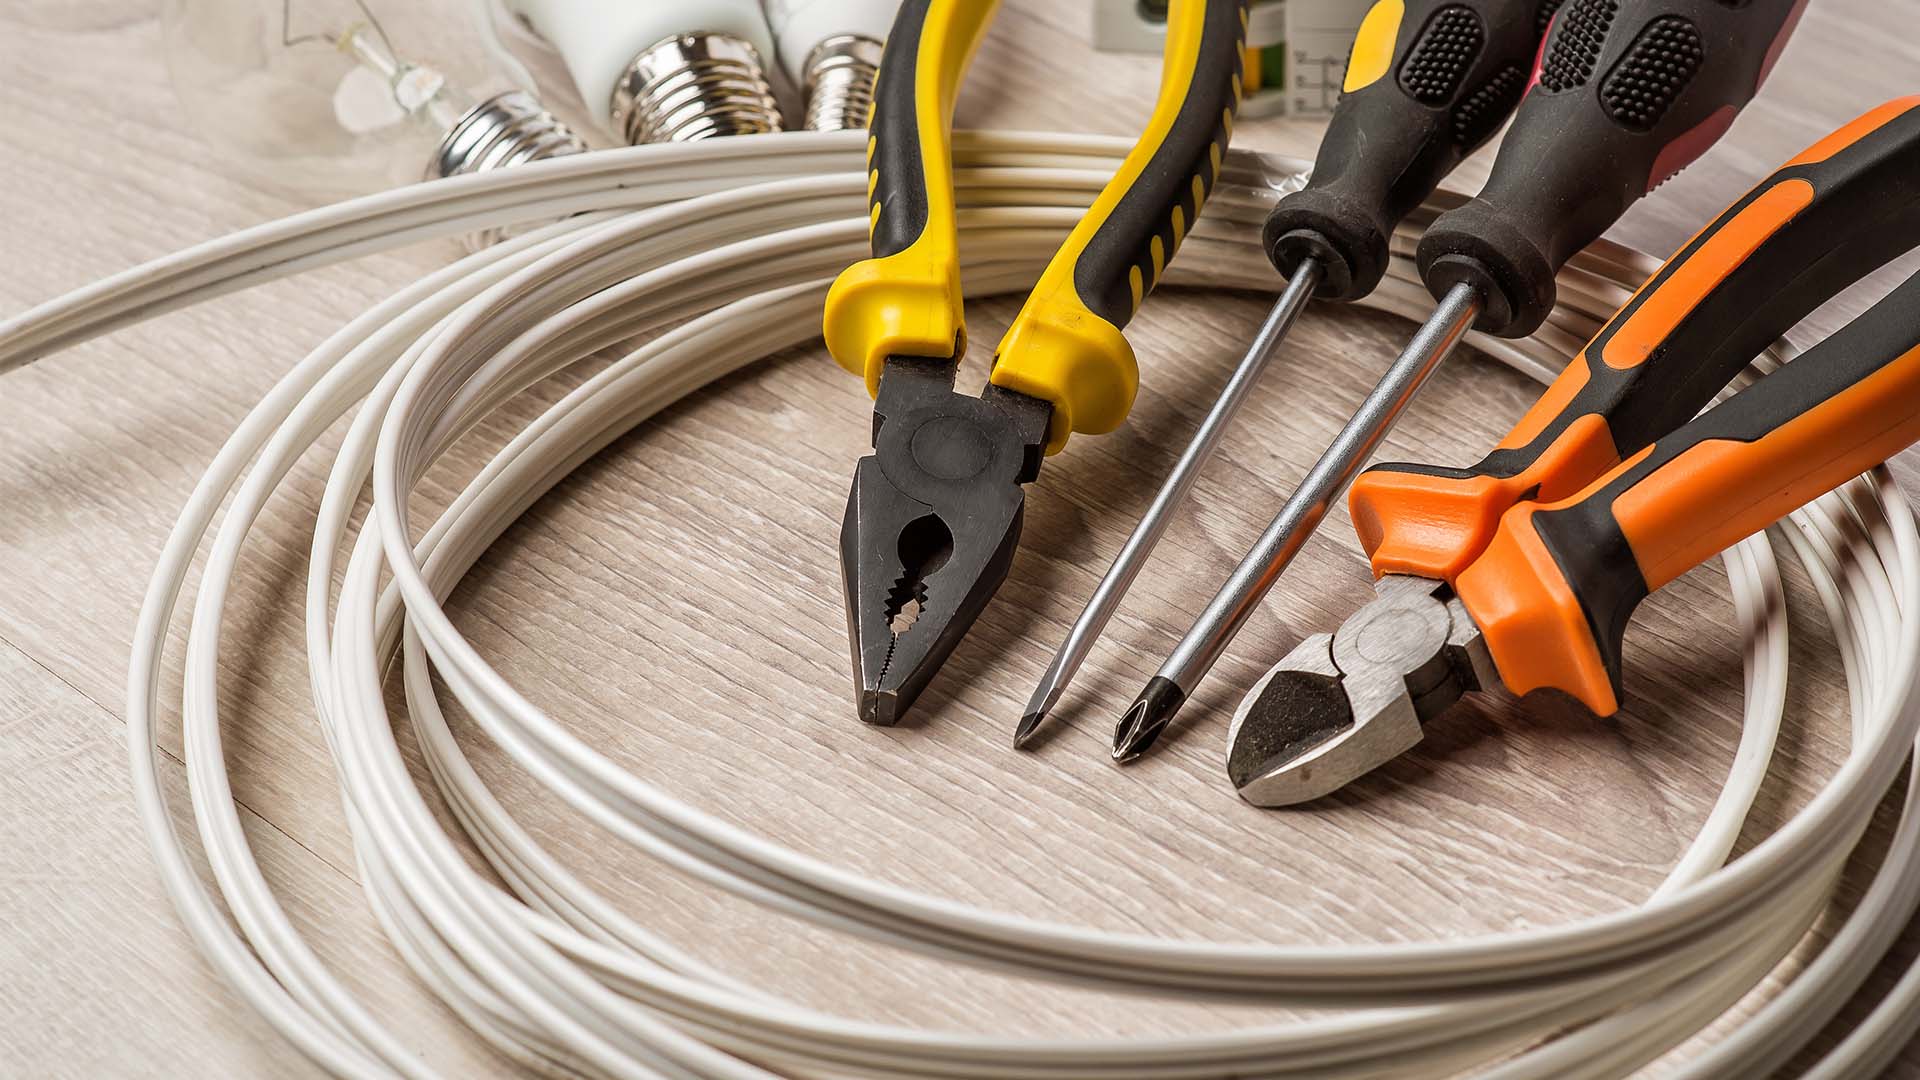
- Marking Tools: To mark the wood for cutting and shaping, you’ll need marking tools such as a marking gauge, a pencil, and a measuring tape. These tools will help you make precise and consistent marks on the lumber.
- Chisels: Chisels are necessary for removing waste material and creating clean, crisp joints. Invest in a set of chisels with different sizes to accommodate various tasks and ensure accurate and precise cuts.
- Hammer and Mallet: A hammer and a mallet are essential for driving chisels and other cutting tools into the wood. Choose a hammer with a comfortable grip and a mallet made of a soft material, such as rubber or wood, to prevent damage to the wood.
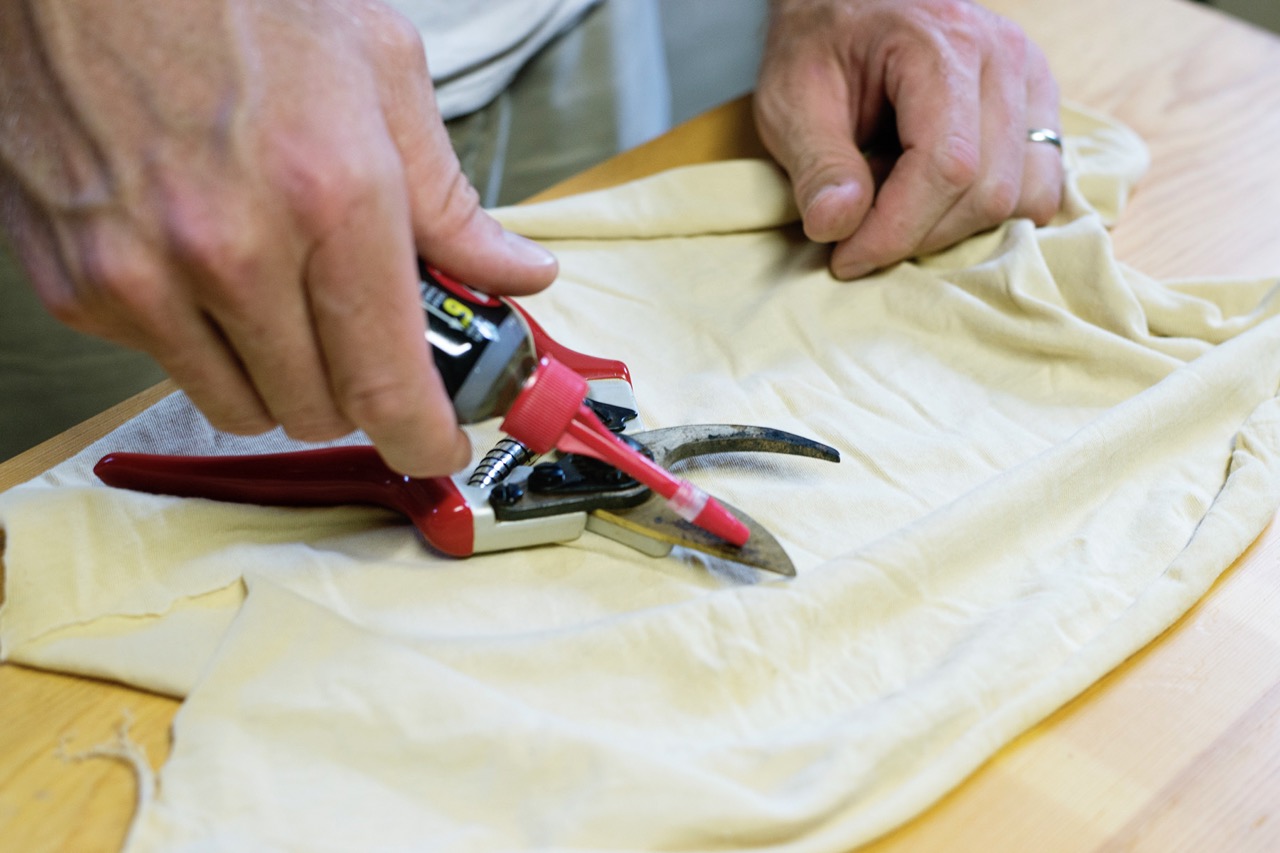
- Sharpening Tools: Keeping your hand tools sharp is crucial for achieving clean and precise cuts. Invest in sharpening stones or honing guides to maintain the sharpness of your tools.
When choosing hand tools for milling lumber, prioritize quality over quantity. Invest in high-quality tools that will last a lifetime and provide the best results. Additionally, consider the ergonomics and comfort of the tools, as you’ll be spending considerable time using them.
Lastly, don’t forget to maintain and care for your hand tools. Regularly clean and oil them to prevent rust and ensure optimal performance. With the right selection of hand tools and proper maintenance, you’ll be well-equipped to embark on your milling journey.
Safety Precautions
Working with hand tools can be a rewarding and enjoyable experience, but it is important to prioritize safety throughout the milling process. Here are some essential safety precautions to keep in mind:
- Eye Protection: Always wear safety glasses or goggles to protect your eyes from flying debris and wood chips. Woodworking can produce small particles that can cause serious eye injuries.
- Hearing Protection: Protect your hearing by wearing earplugs or earmuffs, especially when using tools that produce loud noises, such as hand saws or hammers. Prolonged exposure to loud noises can lead to hearing damage.
- Dust Mask: When working with hand tools, especially during cutting and shaping, wear a dust mask to protect your lungs from inhaling fine wood particles. Breathing in wood dust over time can lead to respiratory problems.
- Proper Tool Handling: Familiarize yourself with the correct handling and grip of each tool. Use tools as intended and never force or misuse them, as this can lead to accidents or injuries.
- Secure Workpiece: Before working on a piece of lumber, securely clamp it down to a workbench or any stable surface. This prevents the wood from moving or slipping while you work, reducing the risk of accidents.
- Sharp Tools: Keep your hand tools sharp and in good condition. Dull tools can cause slips or require excessive force, increasing the chance of accidents. Regularly sharpen and maintain your tools for optimum performance.
- Clear Workspace: Maintain a clean and clutter-free work area. Remove any obstructions or tripping hazards to ensure safe movement while working with hand tools.
- Mindful Cutting: Pay close attention to your cutting actions. Take your time and focus on each cut to avoid slips or accidental contact with your body parts. A momentary lapse in concentration can lead to serious injuries.
- Learn Proper Techniques: Take the time to learn and practice proper cutting, planing, and shaping techniques. Seeking guidance from experienced woodworkers or taking classes can help you master the skills safely.
Remember, safety should always be a top priority when working with hand tools. By following these precautions, you can minimize the risk of injuries and create a safe woodworking environment to fully enjoy the milling process.
Preparing the Lumber
Before you can start milling lumber with hand tools, it’s important to properly prepare the wood. This involves several steps to ensure that the lumber is in the best possible condition for the milling process. Here’s how to prepare the lumber:
- Inspect the Wood: Examine the lumber for any defects, such as knots, cracks, or warping. It’s best to choose pieces of lumber that are relatively straight, have minimal defects, and are appropriate for your intended project.
- Measure and Cut: Measure the length and width of the lumber according to your project requirements. Use a hand saw or a power saw to make precise cuts and trim the lumber to the desired size.
- Remove Rough Edges: Use a hand plane or a scraper to smooth out any rough edges or imperfections on the surface of the wood. This will provide a clean and even surface for the subsequent milling steps.
- Check Moisture Content: It’s important to determine the moisture content of the wood before milling. High moisture content can lead to warping or shrinking of the wood over time. Use a moisture meter to ensure that the lumber is adequately dried or acclimated to your workshop environment.
- Allow for Acclimation: If the moisture content of the lumber is too high or the wood has been recently stored in a different environment, allow it to acclimate in your workshop for a few days. This helps to minimize the risk of warping or shrinking during the milling process.
- Stack and Store Properly: When storing the prepared lumber, make sure to stack the pieces in a stable and upright position, allowing for proper air circulation. This helps to prevent the wood from bowing or twisting and ensures that it remains in good condition until you’re ready to start milling.
By taking the time to properly prepare the lumber, you’ll be setting yourself up for success in the milling process. This ensures that the wood is free from defects, has the correct dimensions, and is suitable for your project. With a well-prepared piece of lumber, you can move on to the next steps of milling with confidence.
Marking the Wood
After preparing the lumber, the next step in milling with hand tools is marking the wood. Marking helps you accurately position and guide your cuts, ensuring that you achieve the desired dimensions and shapes. Here’s how to effectively mark the wood:
- Layout Considerations: Before marking, plan out your cuts and layout carefully. Consider the dimensions, joints, and any specific design elements you want to incorporate into your project. This will help you determine where to make the necessary marks on the wood.
- Measuring: Use a measuring tape or a ruler to measure and mark the dimensions and locations for your cuts. Make precise and clear marks on the wood using a pencil or a marking knife. Accuracy is key to achieving the desired results.
- Marking Gauge: A marking gauge is a handy tool for creating consistent and parallel lines on the wood. Set the marking gauge to the desired distance and run it along the edge of the wood. This will create a clear reference line for your cuts.
- Reference Faces and Edges: When marking the wood, it’s important to designate reference faces and edges. These are flat and straight surfaces that you can use as reference points throughout the milling process. Mark them with an “X” or another identifying symbol to avoid confusion.
- Joint Marking: If you’re planning to create joints, such as dovetails or mortise and tenons, use marking tools like a marking gauge or a mortise gauge to accurately mark the locations and depths of the joints. This ensures that your joints fit together seamlessly.
- Additional Design Marks: If you’re incorporating specific design elements, such as curves or decorative features, use templates or tracing tools to mark and transfer the design onto the wood. This will help guide your cuts and ensure that you achieve the desired aesthetic.
Take your time while marking the wood and double-check your measurements and layout before making any cuts. Accurate and precise marking is crucial for achieving the desired results in milling lumber with hand tools. It ensures that your cuts are aligned and your joinery is seamless, leading to a well-crafted and visually appealing final piece.
When milling lumber with hand tools, always start with a sharp saw and chisels to make the process easier and more efficient. Keep your tools well-maintained to ensure clean and precise cuts.
Read more: How To Hand Form Body Panels With Hand Tools
Rough Cutting the Lumber
Once you have marked the wood, it’s time to start rough cutting the lumber. This step involves making initial cuts to remove excess material and bring the wood closer to the desired shape and size. Here’s how to effectively rough cut the lumber with hand tools:
- Safety First: Before you begin, ensure that you are wearing appropriate safety gear, including safety glasses and hearing protection. Keep a clear workspace and ensure that the wood is securely clamped or held in place to prevent any movement or accidents during the cutting process.
- Using a Hand Saw: If you are using a hand saw for rough cutting, choose a saw with teeth suitable for your wood type and thickness. Align the saw with your marked line and start cutting with a controlled and steady motion. Let the saw do the work and avoid applying excessive force, as it can lead to inaccurate cuts or damage to the saw or the wood.
- Using a Jigsaw or a Bandsaw: If you have access to a jigsaw or a bandsaw, these power tools can be helpful for rough cutting larger or more complex shapes. Follow your marked lines and guide the saw along the path with smooth and even movements. Take your time to ensure accurate cuts and avoid rushing through the process.
- Stay Slightly Outside the Lines: When rough cutting the lumber, it’s a good practice to cut slightly outside of your marked lines. This allows for additional material removal during the subsequent steps, ensuring that you have room for fine-tuning and refining the shape of the wood.
- Check for Flatness: After making the rough cuts, check the surfaces of the wood for flatness. Use a straightedge or a level to identify any areas that require further trimming or smoothing. This step is important to ensure that your final piece is true and accurately aligned.
- Measure and Compare: Throughout the rough cutting process, it’s essential to periodically measure and compare your workpiece against your project’s specifications. This helps you stay on track and make any necessary adjustments to achieve the desired dimensions and shapes.
Rough cutting the lumber is an important step in the milling process. It allows you to remove excess material and start shaping the wood towards its final form. By following these steps and using the appropriate hand tools, you’ll be one step closer to transforming rough lumber into a beautifully crafted piece.
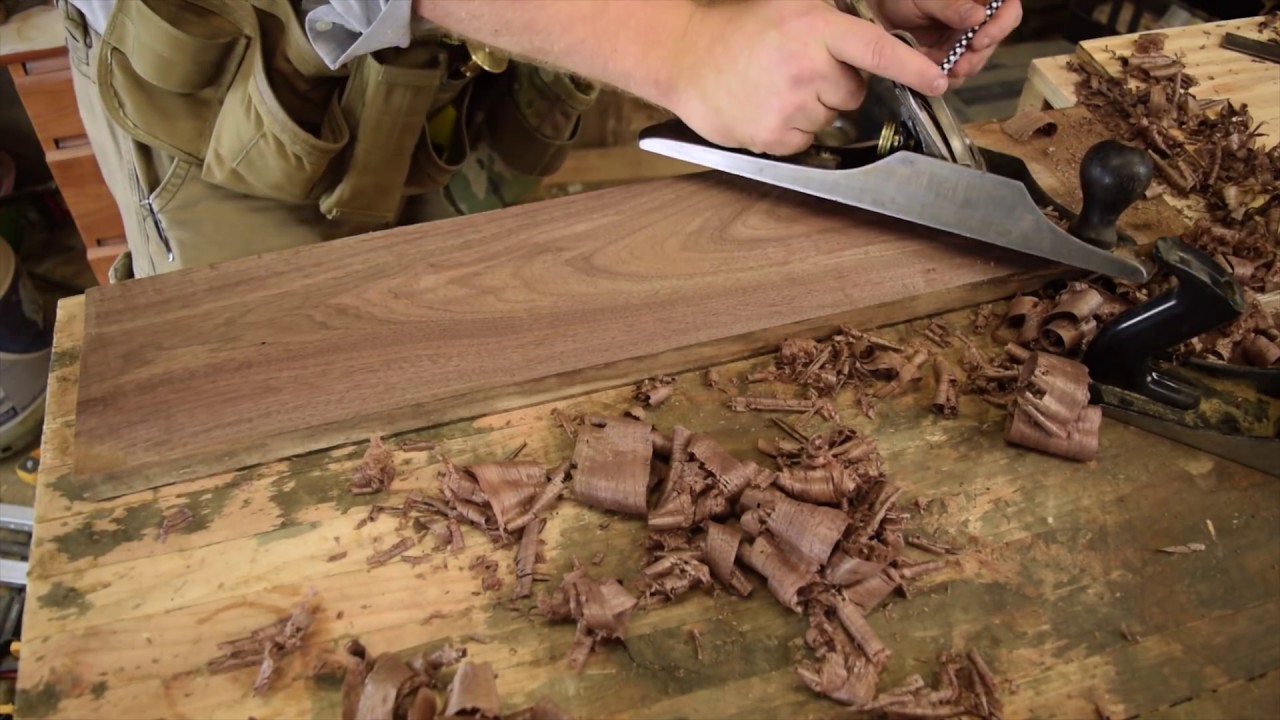
Smoothing the Surfaces
After rough cutting the lumber, the next step in milling with hand tools is to smooth the surfaces of the wood. This process ensures that the wood is free from any rough patches, tool marks, or imperfections, resulting in a clean and refined finish. Here’s how to effectively smooth the surfaces of your lumber:
- Choosing the Right Hand Plane: Select a hand plane appropriate for the size and type of wood you’re working with. Smoothing planes or jack planes are commonly used for this step. Ensure that the plane’s blade is sharp, properly adjusted, and securely held in place.
- Orientation of the Grain: Identify the direction of the wood grain, as this will influence your planing technique. For a smoother result, it’s generally best to plane with the grain or slightly diagonal to it, rather than against it.
- Start with a Reference Surface: Identify a reference surface on your workpiece, such as a flat face or edge. This will serve as a guide to ensure that the plane is level and in line with the desired surface. Begin planing with light, smooth strokes, maintaining a steady and consistent motion.
- Work Across the Grain: After planing the reference surface, start planing across the grain to level the remaining surfaces. This helps to remove any high spots and promote a more even and consistent surface throughout the piece.
- Checking for Flatness: Regularly check the flatness of the surfaces as you plane. Use a straightedge, such as a straight board or a level, to identify any areas that require further planing. Continue to remove material until the surfaces are smooth and even.
- Removing Tearout: Tearout, which occurs when fibers in the wood are torn out during planing, can leave undesirable rough patches. To minimize tearout, adjust your planing technique by using a shallower plane depth, planing at a steeper angle, or employing a different type of hand plane, such as a low-angle plane or a scraper.
- Finishing Passes: Once the majority of the roughness has been removed, make light and shallow passes with the hand plane to create a smoother surface. Take care to avoid removing too much material and compromising the dimensions of your workpiece.
- Sand for Finer Surface: To achieve an even finer finish, you can sand the surfaces of the wood using sandpaper or sanding blocks. Start with coarser grit sandpaper and progressively work your way to finer grits, ensuring that you sand evenly and follow the wood grain.
Smoothing the surfaces of the wood is crucial for achieving a polished final result. It requires attention to detail and a delicate touch to create a smooth and even surface that showcases the natural beauty of the wood. By following these steps and using proper planing techniques, you can transform rough lumber into a refined piece ready for the next stages of your woodworking project.
Jointing the Boards
When milling lumber with hand tools, jointing the boards is an essential step to create seamless and strong connections between pieces. Jointing involves creating flat and even surfaces on the edges of the boards, allowing them to fit together tightly and securely. Here’s how to effectively joint the boards with hand tools:
- Selecting the Boards: Choose boards that have straight edges and minimal warping or twisting. This will make the jointing process easier and produce better results. If necessary, use a hand plane or a jointer to remove any rough or uneven spots on the edges of the boards before beginning the jointing process.
- Preparing the Workbench: Ensure that your workbench is clean, stable, and level. This provides a solid and even surface to support the boards during the jointing process, allowing for accurate and consistent cuts with your hand tools.
- Reference Edge: Select one board to serve as the reference edge. This board will be used as a guide for jointing the remaining boards. Plane the reference edge to create a flat and even surface, using smooth and consistent strokes with a hand plane.
- Marking the Boards: Mark your boards with a pencil or a marking knife to indicate the areas that need to be removed during the jointing process. These marks will guide you in removing any irregularities or high spots along the edges of the boards.
- Jointing Technique: Hold the board firmly against the workbench, making sure the marked area is facing upwards. Position the hand plane at an angle to remove the material across the width of the board, focusing on the marked areas. Use smoothing and consistent strokes, applying even pressure to create a flat and straight edge.
- Checking for Flatness: Regularly check the flatness of the jointed edge by visually inspecting or using a straightedge. Ensure that the board is flat from end to end, without any twists or unevenness. Make any necessary adjustments by continuing to plane until the edge is smooth and even.
- Fitting the Joint: Once all the boards have been jointed, test the fit of the joint by aligning the edges and applying light pressure. The joint should fit snugly and without gaps along the entire length. If needed, make slight adjustments to achieve a tight fit.
- Gluing and Clamping: Apply woodworking glue along the jointed edges and press the boards together. Use clamps to secure the joint while the glue sets. Follow the manufacturer’s instructions for the recommended drying time. Ensure that the joint remains flat and aligned during this process.
Jointing the boards is a critical step for creating strong and seamless connections in woodworking projects. By following these steps and employing proper jointing techniques, you can achieve precise and secure joints that enhance the overall craftsmanship of your finished piece.
Assembly and Finishing
After completing the jointing process, it’s time to move on to the assembly and finishing stage of milling lumber with hand tools. This step involves bringing together the individual components of your project and adding the final touches to achieve a polished final piece. Here’s how to effectively assemble and finish your project:
- Dry Fit: Before applying any glue or fasteners, conduct a dry fit of the components to ensure that everything aligns properly. This allows you to make any necessary adjustments or modifications before proceeding with permanent assembly.
- Gluing: If your project requires glue, carefully apply woodworking adhesive to the appropriate surfaces, following the manufacturer’s instructions. Apply even pressure when joining the pieces together, wiping off any excess glue that squeezes out. Use clamps or tape to hold the components in place while the glue dries.
- Fastening: Depending on the project, you may need to incorporate fasteners, such as screws or nails, to reinforce the joints. Pre-drill holes to prevent splitting and ensure accurate placement. Use a countersink to recess the heads of the fasteners for a clean and flush finish.
- Sanding: Once the project is assembled, sand the surfaces and edges to achieve a smooth and uniform finish. Start with a coarse-grit sandpaper to remove any rough spots or excess glue, then gradually work your way up to finer-grit sandpaper for a polished final result. Sand in the direction of the wood grain for the best outcome.
- Applying a Finish: Choose an appropriate finish for your project, such as stain, paint, or varnish, to protect and enhance the appearance of the wood. Follow the manufacturer’s instructions for application, ensuring even coverage and allowing sufficient drying time between coats.
- Final Touches: Pay attention to the small details that can elevate the overall quality of your project. Fill any visible gaps or imperfections with wood filler, and carefully touch up the finish where needed. Smooth any sharp edges or corners with sandpaper to ensure a safe and comfortable final piece.
- Quality Check: Take the time to inspect your project from all angles, ensuring that every joint is secure, surfaces are smooth, and the finish is even. Make any necessary refinements to achieve a high-quality and professionally finished piece.
Assembly and finishing are the final steps in the milling process that bring your project to life. By following these steps and taking care with the details, you can ensure that your finished piece not only looks visually appealing but also stands the test of time.
Conclusion
Millling lumber with hand tools is a gratifying and rewarding process that allows you to create beautifully crafted pieces. Through careful selection of tools, adherence to safety precautions, and systematic workflow, you can transform rough lumber into finished projects that showcase your woodworking skills.
Choosing the right hand tools is essential for success in milling lumber. Opt for high-quality tools that are suited to your project’s requirements and take the time to properly maintain and care for them. This ensures optimal performance and longevity.
Safety should always be a priority when working with hand tools. Protect your eyes, ears, and lungs with appropriate safety gear, and follow proper tool handling techniques to minimize risks. By prioritizing safety, you can fully enjoy the woodworking process while reducing the chance of accidents.
Preparing the lumber sets the foundation for a successful milling process. Inspect the wood for defects, trim it to the desired dimensions, and ensure proper acclimation. These steps help to create a suitable starting point for shaping and refining the wood.
Marking the wood accurately is crucial for achieving precise cuts and shapes. Take the time to measure and mark your lumber, using marking tools and gauges to guide your work. Clear and consistent markings are key to achieving the desired dimensions and designs.
Rough cutting the lumber involves removing excess material and shaping the wood closer to its final form. Using hand saws, jigsaws, or bandsaws, take care to make accurate cuts while staying just outside the marked lines. Regularly measure and compare against your desired dimensions to ensure accuracy.
Smoothing the surfaces of the wood enhances the overall appearance and feel of your project. Utilize hand planes and sandpaper to create flat and polished surfaces, taking care to check for flatness and eliminate any tearout. Consistent strokes and attention to detail are key to achieving a smooth and refined finish.
Jointing the boards allows for seamless connections between pieces. By creating flat and even surfaces on the edges, you can achieve tight and secure joints. Take your time to align and plane your boards accurately, ensuring a strong and aesthetically pleasing final result.
Assembly and finishing bring your project together and add the final touches. Ensure a proper fit, use appropriate glue or fasteners, and pay attention to the small details. Sanding the surfaces and applying a finish will enhance the appearance and protect the wood from wear and tear.
In conclusion, milling lumber with hand tools is a remarkable craft that allows you to create pieces of exceptional quality. Taking the time to choose the right tools, follow safety precautions, and meticulously execute each step of the process will result in beautifully milled lumber and stunning woodworking projects. So, embrace the art of hand tool woodworking, and let your creativity and craftsmanship shine in every project you undertake.
Frequently Asked Questions about How To Mill Lumber With Hand Tools
Was this page helpful?
At Storables.com, we guarantee accurate and reliable information. Our content, validated by Expert Board Contributors, is crafted following stringent Editorial Policies. We're committed to providing you with well-researched, expert-backed insights for all your informational needs.


0 thoughts on “How To Mill Lumber With Hand Tools”