
Articles
How To Build A Desk With Hand Tools
Modified: January 8, 2024
Learn how to build a desk using only hand tools with our comprehensive articles. Perfect for DIY enthusiasts looking for a rewarding woodworking project.
(Many of the links in this article redirect to a specific reviewed product. Your purchase of these products through affiliate links helps to generate commission for Storables.com, at no extra cost. Learn more)
Introduction
Welcome to the world of DIY woodworking! Building your own furniture can be a rewarding and fulfilling experience. If you’re looking to add a personal touch to your workspace, building a desk with hand tools is a fantastic project to undertake.
Not only does building a desk with hand tools allow you to showcase your craftsmanship, but it also gives you full control over the design and functionality of the desk. Whether you need a spacious desk for your home office or a compact one for a small apartment, with the right tools and techniques, you can create a desk that perfectly fits your needs.
In this article, we will guide you through the step-by-step process of building a desk with hand tools. From gathering the necessary tools and materials to applying a protective finish, you’ll learn everything you need to know to successfully complete this project.
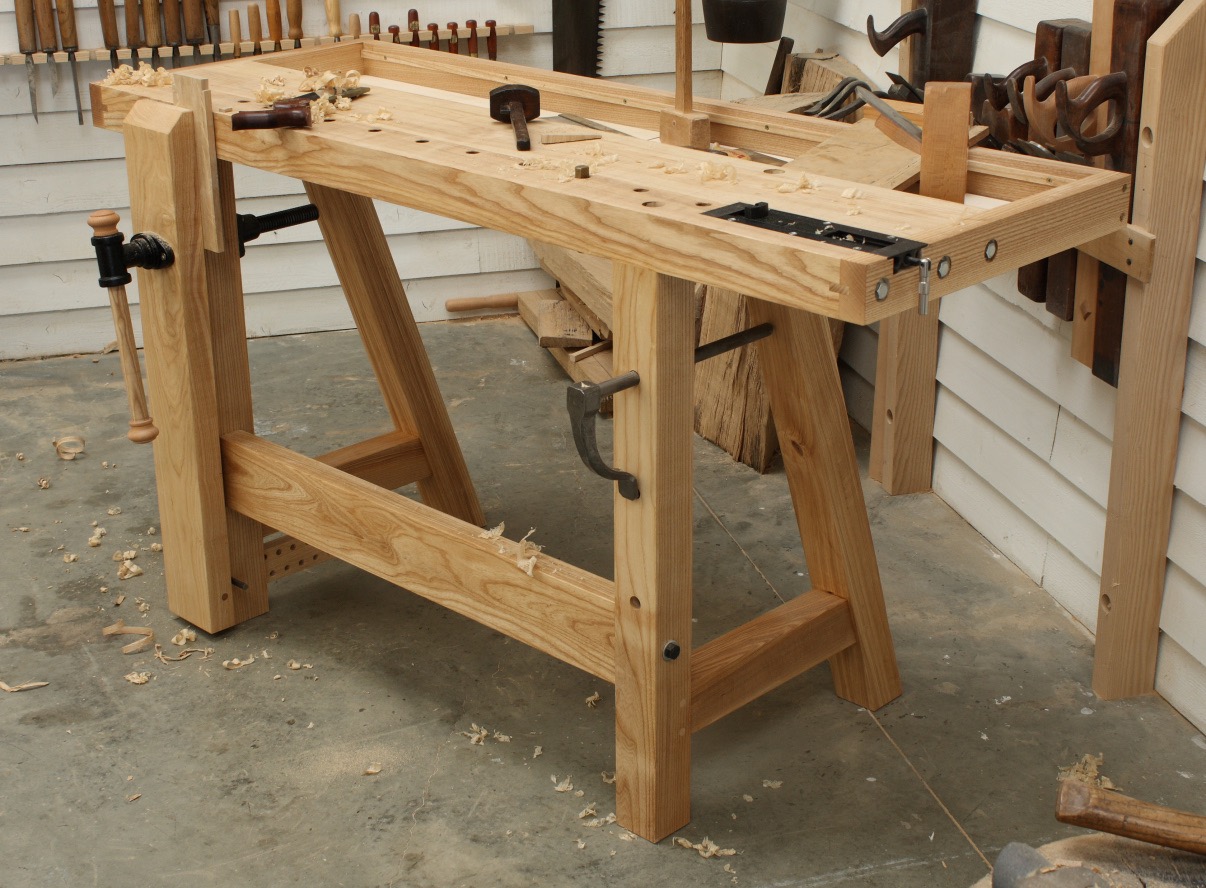
It’s important to note that building a desk with hand tools requires patience, attention to detail, and a basic understanding of woodworking principles. While power tools can certainly speed up the process, using hand tools allows you to connect with the wood on a deeper level, creating a connection between you and your finished piece.
So, if you’re ready to roll up your sleeves and embark on a woodworking adventure, let’s get started on building your very own desk with hand tools!
Key Takeaways:
- Building a desk with hand tools is a rewarding journey that allows you to create a personalized workspace while developing a deep appreciation for woodworking craftsmanship and the art of transforming raw wood into functional furniture.
- By following the step-by-step process of gathering tools, preparing wood, and applying a protective finish, you can build a desk that not only meets your needs but also reflects your unique style and creativity.
Read more: How To Build A Drawer With Hand Tools
Step 1: Gather the necessary tools and materials
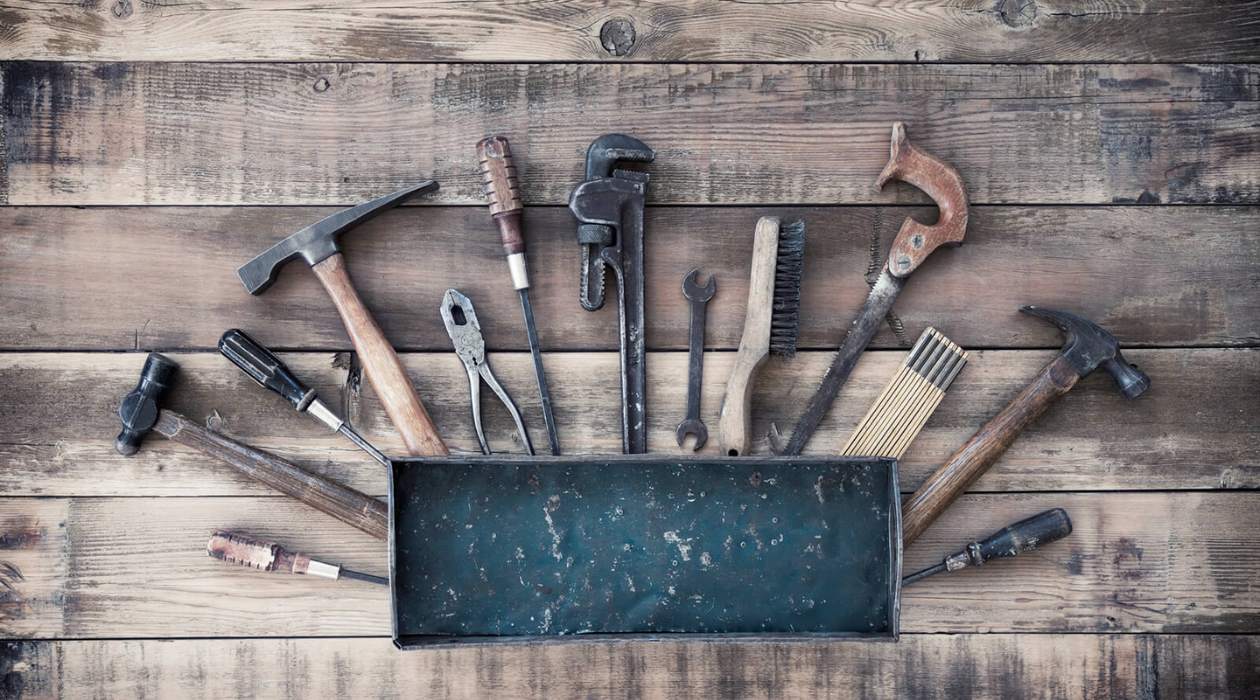
Before you begin building your desk, it’s essential to gather all the necessary tools and materials. Having everything prepared beforehand will ensure a smoother and more efficient building process. Here’s a list of the tools and materials you’ll need:
Tools:
- Measuring tape
- Miter saw or handsaw
- Chisels
- Hand plane
- Clamps
- Drill
- Screwdriver
- Hammer
- Sanding block or sandpaper
- Woodworking square
- Level
- Pencil
Materials:
- Wood boards for the desktop, legs, and frame
- Screws
- Wood glue
- Wood dowels
- Protective finish (such as varnish or paint)
When it comes to selecting the wood for your desk, choose a durable and aesthetically pleasing option that fits your preferences and budget. Common choices include pine, oak, or walnut. Make sure to measure and calculate the dimensions of the wood boards based on the size of the desk you want to build.
Once you have gathered all the necessary tools and materials, you’re ready to move on to the next step: preparing the wood for the desk.
Step 2: Prepare the wood for the desk
Preparing the wood is a crucial step in ensuring the stability and longevity of your desk. Before you start cutting and shaping the wood, it’s important to check for any imperfections and make necessary adjustments. Here’s how you can prepare the wood for your desk:
1. Inspect the wood: Carefully examine each wood board to look for any cracks, knots, or warping. If you come across any defects, consider replacing the board or cutting around the damaged areas.
2. Plane the wood: Use a hand plane to remove any rough or uneven surfaces from the wood boards. This step will not only improve the appearance but also ensure a smoother and more uniform finish.
3. Smooth the edges: Use a sanding block or sandpaper to round off and smooth the edges of the wood boards. This will minimize the risk of splinters and give the desk a more polished look.
4. Sand the surfaces: Sand the surfaces of the wood boards to remove any existing finishes or imperfections. Start with a coarser grit sandpaper and gradually move to a finer grit for a smooth and even surface.
5. Apply wood conditioner (optional): If you’re using a hardwood that is prone to blotching, consider applying a wood conditioner before staining or painting. This will help the wood absorb the finish more evenly.
By taking the time to properly prepare the wood, you’ll ensure a solid foundation for your desk. With the wood now ready, you can move on to the next step: measuring and marking the dimensions for the desk.
Read more: How To Build A Guitar With Hand Tools
Step 3: Measure and mark the dimensions of the desk
Accurate measurements are crucial for building a desk that fits your space perfectly. In this step, you’ll learn how to measure and mark the dimensions of the desk to ensure precision and symmetry.
Here’s how you can proceed:
1. Determine the desk size: Consider the available space where you plan to place the desk. Measure the length, width, and height requirements to determine the overall size of the desk.
2. Mark the dimensions on the wood: Transfer the measurements onto the wood boards using a pencil and a woodworking square. Ensure that your markings are clear and accurate on all required pieces.
3. Double-check the measurements: Take the time to double-check your measurements to avoid any mistakes. Use a tape measure or a ruler to confirm that the dimensions are consistent and align with your initial calculations.
4. Make adjustments if necessary: If you find any discrepancies or need to make modifications, now is the time to do so. You can re-measure and re-mark the wood boards to ensure accuracy before moving on to the next step.
Remember, precision in measuring and marking is crucial to avoid any errors during the construction process. By taking the time to carefully measure and mark the dimensions, you’re setting the stage for a well-proportioned and visually appealing desk.
With the dimensions marked, you’re now ready to move on to the next step: cutting the wood pieces to size.
Step 4: Cut the wood pieces to size
Now that you have marked the dimensions on the wood boards, it’s time to cut them to the desired size. This step requires precision and accuracy to ensure that all the pieces fit together perfectly. Here’s how you can cut the wood pieces to size:
1. Set up your cutting area: Find a spacious and well-lit area where you can safely cut the wood boards. Ensure that you have enough space to maneuver the boards and set up any necessary tools or clamps.
2. Measure and mark the cutting lines: Using the dimensions you marked in the previous step, measure the required lengths on the wood boards. Use a square to draw straight cutting lines across the boards, ensuring that they are parallel to the edges.
3. Choose the appropriate cutting tool: Depending on your preference and skill level, you can use a miter saw or a handsaw to make the cuts. Make sure that your chosen cutting tool is sharp and suitable for cutting through the thickness of the wood.
4. Secure the wood boards: Before making any cuts, securely clamp the wood boards to a stable surface or workbench. This will prevent the wood from moving or splintering during the cutting process.
5. Make the cuts: Carefully align the cutting line with the blade of your saw and slowly and steadily cut through the wood. Take your time and maintain a consistent cutting speed to ensure clean and accurate cuts.
6. Double-check and adjust: After making each cut, double-check the length of the cut piece to ensure it matches the desired dimension. Make any necessary adjustments or recuts as needed.
Repeat this process for each wood board, cutting them all to their respective sizes as per your marked dimensions. With all the wood pieces now cut to size, you’re ready to move on to the next step: sanding and smoothing the edges and surfaces for a professional finish.
Step 5: Sand and smooth the edges and surfaces
Now that you have cut the wood pieces to size, it’s time to refine the edges and surfaces to achieve a polished and professional finish. Sanding and smoothing the wood will not only enhance the aesthetics of your desk but also ensure a comfortable and safe workspace. Here’s how you can sand and smooth the edges and surfaces:
1. Gather the necessary sanding tools: You’ll need a sanding block or sandpaper with varying grits. Start with a coarse grit (such as 80 or 100) to remove any rough areas or uneven surfaces, and gradually work your way up to a finer grit (such as 220) for a smooth finish.
2. Sand the edges: Hold the sandpaper or sanding block firmly and sand the edges of each wood piece. Move the sandpaper in a back-and-forth or circular motion to even out any roughness or sharp edges. Be mindful of the shape and contour of the edges to maintain symmetry.
3. Smooth the surfaces: Sand the surfaces of the wood pieces using the same sandpaper or sanding block. Apply even pressure and work systematically to cover the entire surface. This process will remove any imperfections and prepare the wood for a flawless finish.
4. Remove dust: Before moving on to a finer grit, make sure to remove any dust or debris from the wood. Use a clean cloth or a brush to wipe away the sanding residue, ensuring a clean surface for the next sanding step.
5. Progress to finer grits: Repeat the sanding process with progressively finer grits of sandpaper. This will further smooth the wood surfaces, eliminating any remaining roughness or scratches from the initial sanding. Remember to remove dust between each sanding step.
6. Check for smoothness: Run your hand over the sanded surfaces and edges to ensure they are smooth to the touch. If you encounter any rough patches, spend some extra time sanding those areas until they are equally smooth.
By sanding and smoothing the edges and surfaces of the wood, you’re creating a more visually appealing and comfortable desk. This step also prepares the wood for the next stage of construction: assembling the desk frame.
Step 6: Assemble the desk frame
With the wood pieces sanded and smoothed, it’s time to start assembling the desk frame. The frame provides structural support and stability to the desk, ensuring it stays sturdy for years to come. Here’s how you can assemble the desk frame:
1. Lay out the frame pieces: Organize the wood pieces according to the desk frame design. Make sure to refer to your measurements and layout plans to ensure accuracy.
2. Attach the frame sides: Start by aligning the long side pieces with the corresponding shorter end pieces. Apply a thin layer of wood glue along the contact surfaces and join the pieces together. Use clamps to hold the pieces firmly in place while the glue dries.
3. Reinforce with screws: Once the wood glue has dried, reinforce the joints by inserting screws through the side pieces into the end pieces. Predrill holes to prevent the wood from splitting, and then secure the pieces together using a drill and screwdriver.
4. Add support pieces: Depending on your desk design, you may need to add additional support pieces within the frame. Measure and cut these pieces to size, and secure them in place using wood glue and screws. This will further strengthen the desk frame.
5. Check for squareness: Use a woodworking square to check that the frame is square and all corners are at a 90-degree angle. Adjust the frame as necessary by gently tapping the pieces into alignment with a mallet or hammer.
6. Allow the frame to dry and set: After assembling the frame, allow it to dry and set completely. Follow the instructions provided by the wood glue manufacturer to determine the drying time.
Once the desk frame is fully dry, you can move on to the next step: attaching the legs to the desk frame. By carefully assembling the desk frame, you’re laying the foundation for a stable and durable desk that is ready to support your work.
When building a desk with hand tools, make sure to measure and mark your cuts accurately before using a saw. This will help ensure that your pieces fit together properly.
Read more: How To Tear A Building Down With Hand Tools
Step 7: Attach the legs to the desk frame
Now that the desk frame is assembled, it’s time to attach the legs to provide stability and support to the desk. The legs not only serve a functional purpose but also contribute to the overall aesthetic of the desk. Here’s how you can attach the legs to the desk frame:
1. Decide on the leg placement: Determine the desired placement of the legs on the desk frame. Measure and mark the position of each leg using a pencil and a woodworking square, ensuring they are evenly spaced and align with the corners of the frame.
2. Prepare the legs: If the legs are unfinished or need smoothing, sand them to achieve a smooth and even surface. Ensure that the legs are the correct length according to your desired desk height.
3. Apply wood glue: Apply a thin layer of wood glue to the top surface of each leg where it will come into contact with the frame. This will help secure the legs firmly in place.
4. Position and secure the legs: Carefully position each leg in its marked location on the frame, pressing it down firmly onto the glued surface. Use clamps to hold each leg in place while the glue sets.
5. Reinforce with screws: Once the wood glue is dry, reinforce the connection by driving screws through the frame into the legs. Predrill holes in the frame to prevent splitting, and then secure the screws using a drill or a screwdriver.
6. Check for stability: After attaching all the legs, check the desk for stability. Gently rock the desk back and forth to ensure that the legs are securely attached and there is no wobbling or instability. Make any necessary adjustments or tighten screws if needed.
By attaching the legs to the desk frame, you’re adding the final touches that transform the frame into a functional and complete desk. The legs provide crucial support and stability to ensure that your desk is ready to withstand the demands of your work environment.
Step 8: Install the desktop surface
With the desk frame and legs securely in place, it’s time to install the desktop surface, which will serve as your workspace. Installing the desktop surface requires careful alignment and precision to ensure a level and sturdy work surface. Here’s how you can install the desktop surface:
1. Measure and cut the desktop surface: Measure the dimensions of the desk frame and transfer them onto the wood board that will serve as your desktop surface. Use a miter saw or handsaw to cut the board to the desired size.
2. Prepare the desktop surface: Sand the edges and surfaces of the desktop board to smooth out any roughness and create a clean, polished finish. Remove any dust or debris from the surface before proceeding.
3. Align the desktop surface: Carefully place the desktop board onto the desk frame, ensuring that it is aligned with the edges of the frame. Use a level to ensure that the desktop surface is perfectly horizontal and adjust if necessary.
4. Secure the desktop surface: Once the desktop surface is properly aligned, attach it to the desk frame. Predrill holes through the desktop board and into the frame, and then use screws to secure it in place. Make sure to distribute the screws evenly along the edges for optimal stability.
5. Check for levelness: Use a level to double-check that the desktop surface is level in all directions. If needed, adjust the screws to achieve a perfectly level work surface.
6. Test the stability: After the desktop surface is securely installed, test the stability by gently applying pressure to different areas. Ensure that the surface does not shift or wobble. If any instability is detected, reinforce the attachment points or make the necessary adjustments.
By installing the desktop surface, your desk is now fully functional and ready to support your work. Take a moment to admire your craftsmanship, as you’ve successfully transformed a collection of wood boards into a functional and aesthetically pleasing piece of furniture.
Step 9: Apply a protective finish to the desk
Applying a protective finish to your desk is essential for preserving its beauty and durability, as well as safeguarding it from everyday wear and tear. A protective finish not only enhances the appearance of the wood but also provides a layer of defense against moisture, stains, and scratches. Here’s how you can apply a protective finish to your desk:
1. Choose the right finish: There are various options available for finishing wood, such as varnish, polyurethane, or lacquer. Consider the aesthetic you want to achieve, the level of protection needed, and the application method that suits your preferences and skill level.
2. Prepare the workspace: Find a well-ventilated area with adequate ventilation and cover your work surface with a drop cloth or newspaper to protect it from any accidental spills or drips.
3. Sand the wood (optional): If you prefer a smooth and flawless finish, you can lightly sand the desk with fine-grit sandpaper to create an even surface. This will also help the finish adhere better to the wood.
4. Apply the first coat: Follow the manufacturer’s instructions on the finish container to properly prepare and apply the finish. Use a brush, roller, or cloth to apply an even layer of the finish to the entire desk surface, including the top, sides, and edges.
5. Allow the first coat to dry: Give the first coat ample time to dry according to the instructions provided by the finish manufacturer. Avoid touching or placing any objects on the desk during the drying process.
6. Apply subsequent coats (if necessary): Depending on the type of finish you’re using, you may need to apply multiple coats for optimal protection and durability. Follow the same process as the initial coat, ensuring each layer is even and fully dry before applying the next one.
7. Lightly sand between coats (optional): If desired, you can lightly sand the desk surface with fine-grit sandpaper between coats to achieve an even smoother finish. This step can help remove any imperfections or bubbles that may have formed during the previous application.
8. Allow the final coat to cure: Once you’ve applied the desired number of finish coats, allow the final coat to fully cure as per the manufacturer’s instructions. This will ensure that the finish is completely dry and hardened before you start using the desk.
By applying a protective finish to your desk, you’re not only enhancing its appearance but also safeguarding it for years to come. The finish will keep the wood looking beautiful and protect it from daily wear and tear, making your desk more resistant to moisture, stains, and scratches.
Step 10: Final touches and adjustments
As you near the completion of your desk-building project, it’s time to focus on the final touches and make any necessary adjustments to ensure your desk is perfect. This step involves making aesthetic enhancements and addressing any minor issues that may have been overlooked. Here’s what you can do for the final touches:
1. Fill any gaps or holes: Inspect the desk for any noticeable gaps or holes in the wood. Use wood filler or putty to fill in these imperfections, following the manufacturer’s instructions. Once dry, sand the filled areas smooth to create a seamless appearance.
2. Smooth any rough spots: Run your hands along all the edges and surfaces of the desk to check for any rough or uneven spots. Use sandpaper or a sanding block to smooth out these areas, ensuring a comfortable and polished finish.
3. Apply touch-up paint or stain (if necessary): If you’re using paint or stain to finish the desk, inspect the surface for any areas that may require touch-ups. Apply a small amount of paint or stain on a brush or cloth, and carefully touch up these spots to match the overall appearance.
4. Install any additional features: This is the time to add any additional features or accessories to your desk, such as a keyboard tray, cable management system, or drawer organizers. Follow the manufacturer’s instructions to properly install these components.
5. Check for stability: Once you’ve completed the final touches, check the overall stability of the desk. Give it a gentle shake or apply light pressure on different parts to ensure that it remains sturdy and balanced. If any instability is found, make necessary adjustments or reinforce weak points.
6. Clean and protect the desk: Before placing any items on your new desk, give it a thorough cleaning using a mild cleaner and a soft cloth. Apply furniture wax or polish to protect the finish and keep the wood looking its best for years to come.
By focusing on the final touches, you’re adding those little details that truly elevate your desk-building project. Taking the time to make necessary adjustments and incorporating any desired features ensures that you have a fully functional and visually pleasing workspace that is tailored to your needs.
Congratulations! You have successfully completed all the steps to build your desk with hand tools. Enjoy your new desk and the satisfaction that comes with creating a piece of furniture with your own hands.
Read more: How To Build Log Cabin With Hand Tools
Conclusion
Building a desk with hand tools is a rewarding and fulfilling endeavor that allows you to create a workspace tailored to your needs. Throughout this guide, we have covered the step-by-step process of building a desk, from gathering the necessary tools and materials to applying a protective finish. By following these steps, you can build a desk that is not only functional but also reflects your personal style and craftsmanship.
Throughout the journey of building your desk, you have experienced the joy of working with your hands, the patience required for precise measurements, and the satisfaction of seeing your vision come to life. Building furniture with hand tools not only provides a sense of accomplishment but also allows you to connect with the materials and develop a deeper appreciation for the art of woodworking.
Remember, each desk-building project is unique, and you can customize your desk to suit your specific preferences and requirements. Whether you choose a minimalist design or an intricately crafted piece, the possibilities are endless. Embrace the creative process and enjoy the journey of transforming raw wood into a functional and beautiful workspace.
Now that you have the knowledge and skills to build a desk with hand tools, why stop here? Consider applying your newfound woodworking expertise to other projects. Explore different furniture designs, experiment with various wood types, and continue honing your skills. Building furniture by hand allows you to create lasting pieces of art and develop a deep appreciation for the craftsmanship involved.
So, go ahead and embark on your next woodworking adventure, armed with the confidence and skills you have acquired. Whether it’s building a bookshelf, crafting a dining table, or creating custom furniture pieces, let your imagination and creativity soar. The possibilities are endless when you combine the power of hand tools with your passion for woodworking.
Good luck and happy woodworking!
Frequently Asked Questions about How To Build A Desk With Hand Tools
Was this page helpful?
At Storables.com, we guarantee accurate and reliable information. Our content, validated by Expert Board Contributors, is crafted following stringent Editorial Policies. We're committed to providing you with well-researched, expert-backed insights for all your informational needs.


0 thoughts on “How To Build A Desk With Hand Tools”