Articles
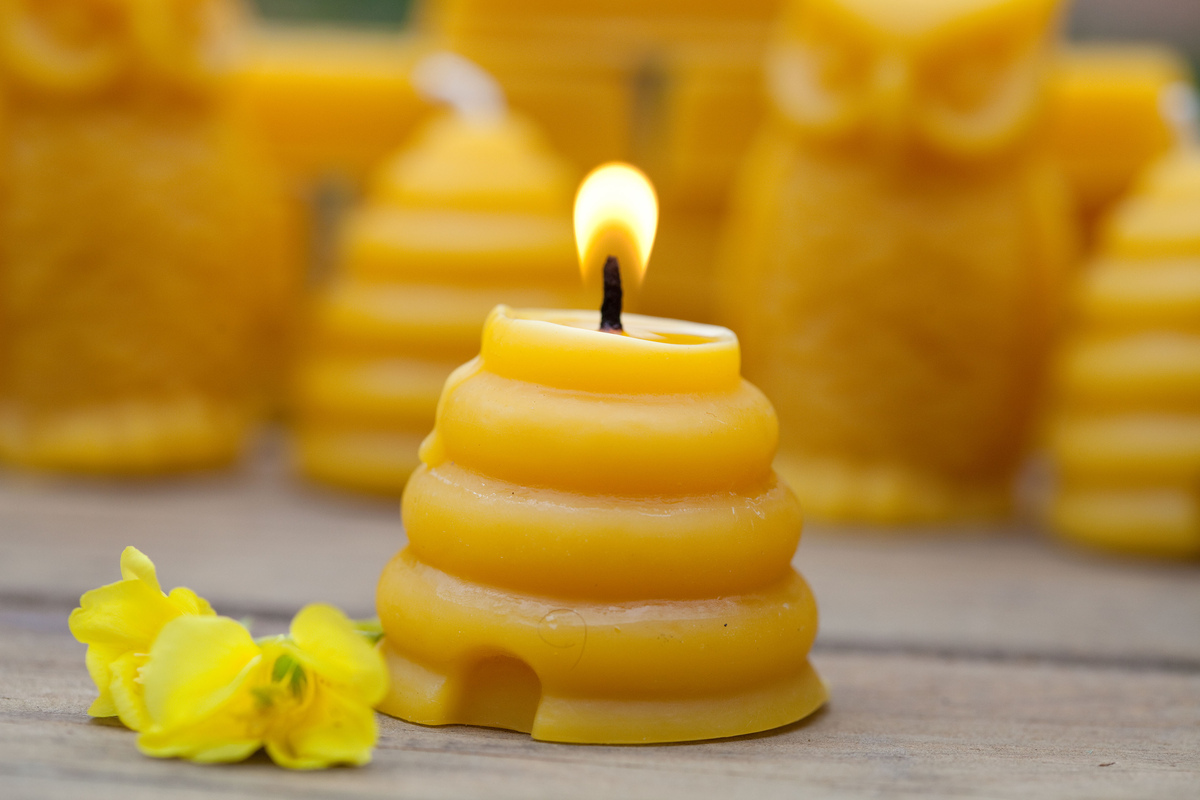
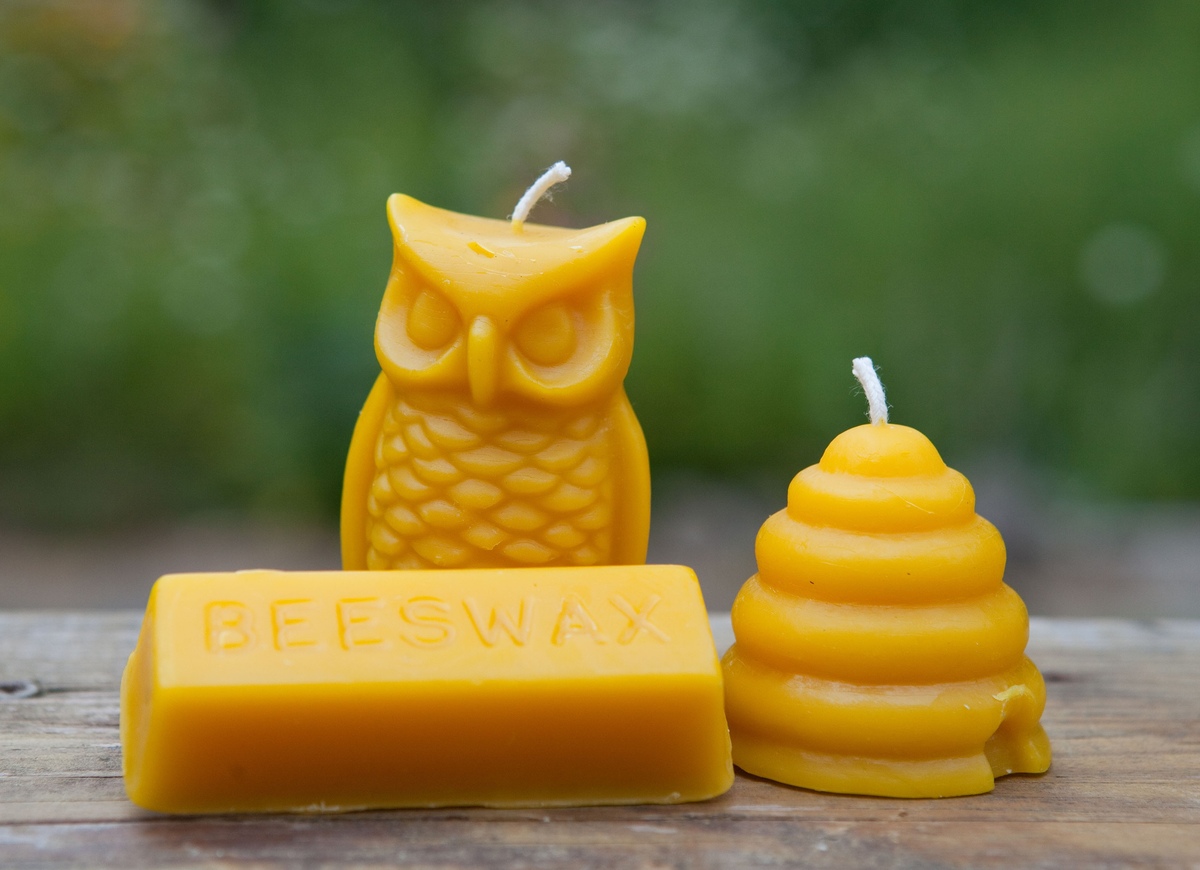
How To Naturally Color Beeswax Candles
Modified: October 20, 2024
Learn how to naturally color beeswax candles with our informative articles. Discover tips, techniques, and eco-friendly dye options for beautiful, sustainable candle making.
(Many of the links in this article redirect to a specific reviewed product. Your purchase of these products through affiliate links helps to generate commission for Storables.com, at no extra cost. Learn more)
Introduction
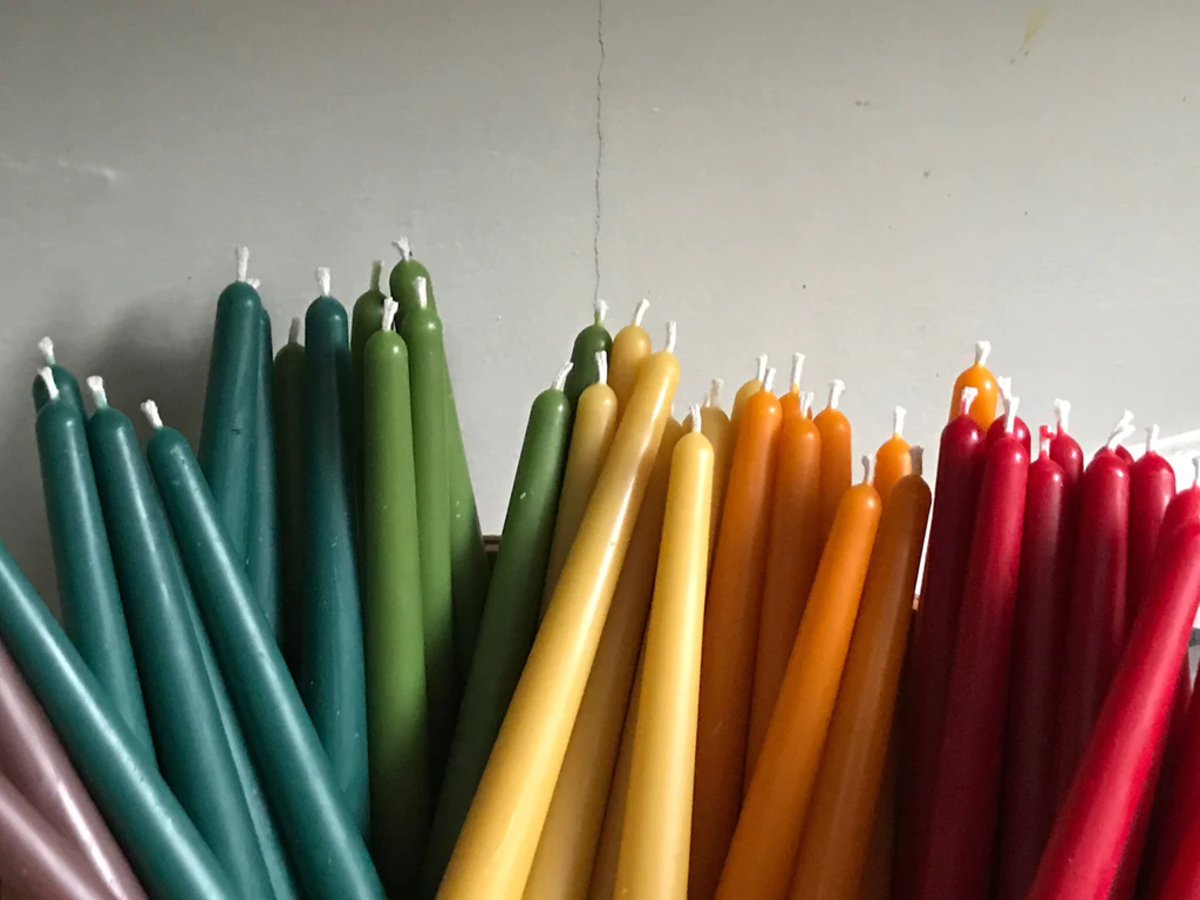
In today’s world, where people are becoming more conscious about the products they use and their impact on the environment, natural alternatives are gaining popularity. This is especially true when it comes to household items, such as candles. Beeswax candles have long been cherished for their clean burn and natural fragrance. To further enhance their appeal, many people are now turning to natural methods to add color to their beeswax candles.
Using natural coloring options not only adds visual interest to your candles but also allows you to create unique and personalized designs. From vibrant hues to subtle earth tones, natural coloring can help you achieve the perfect ambiance for any occasion.
In this article, we will delve into the world of coloring beeswax candles naturally. We will explore the reasons why natural coloring is preferred, discuss various options for coloring, and provide step-by-step instructions on how to achieve beautiful, naturally colored beeswax candles.
Key Takeaways:
- Embrace the beauty of nature and enhance your candle-making experience by using natural coloring options such as dried flowers, spices, and essential oils to create stunning and personalized beeswax candles.
- Prioritize safety, experiment with color combinations, and enjoy the creative process of naturally coloring beeswax candles to achieve unique and visually appealing results while promoting a healthier and more sustainable lifestyle.
Read more: What Are Beeswax Candles Good For
Why Use Natural Coloring for Beeswax Candles
When it comes to coloring beeswax candles, using natural options is not only environmentally friendly but also beneficial for your health. Here are a few reasons why you should consider using natural coloring:
- Chemical-Free: Many conventional candle dyes contain synthetic chemicals that can release harmful toxins when burned. Natural coloring options, on the other hand, are free from these harmful chemicals, ensuring a safer and healthier environment.
- Eco-Friendly: Synthetic coloring agents are often derived from petroleum, which is a non-renewable resource and has a negative impact on the environment. By choosing natural coloring options, such as plant-based materials, you can reduce your carbon footprint and promote sustainability.
- Subtle and Earthy Tones: Natural coloring agents, such as dried flowers and herbs, spices, and fruit juices, offer a wide range of subtle and earthy tones. These hues not only add a touch of natural beauty to your candles but also create a calming and soothing atmosphere.
- Personalization: Natural coloring allows for endless possibilities when it comes to creating unique and personalized candles. You can experiment with different combinations of coloring agents to achieve the desired shade, creating candles that perfectly match your personality and style.
- Enhanced Aromatherapy: Many natural coloring options, such as essential oils, not only add color but also impart a delightful aroma to your candles. This can enhance the overall ambiance and provide additional therapeutic benefits.
By using natural coloring for your beeswax candles, you can enjoy their aesthetic appeal while promoting a healthier and more sustainable lifestyle.
Choosing Natural Coloring Options
When it comes to coloring your beeswax candles naturally, there are several options to choose from. Each option offers its own unique qualities and can produce stunning results. Here are five popular natural coloring options:
1. Dried Flowers and Herbs
Dried flowers and herbs not only add beautiful colors to your candles but also impart a gentle fragrance. You can use a variety of flowers and herbs, such as lavender, rose petals, chamomile, and hibiscus, to achieve different shades. Simply crush or grind the dried petals or herbs into a powder and mix it into the melted beeswax to incorporate the color.
2. Powdered Spices
Spices are another natural coloring option that can give your candles warm and earthy tones. Cinnamon, turmeric, paprika, and cocoa powder can be used to achieve shades ranging from golden browns to deep oranges. Mix the spices with a small amount of oil or melted beeswax before adding them to the main batch to ensure even distribution of color.
Read more: How To Make Rolled Beeswax Candles
3. Natural Food Coloring
If you prefer more vibrant and intense colors, natural food coloring can be a great option. Look for food coloring made from plant-based sources, such as beet juice, spirulina, or turmeric extract. Remember to use only a small amount at a time to avoid overpowering the beeswax and affecting its performance.
4. Fruit and Vegetable Juices
Using fruit and vegetable juices is a simple and effective way to add color to your candles. Beet juice, carrot juice, or berry juices can produce beautiful shades of pink, orange, and red. You can either squeeze fresh juices or use store-bought ones. However, bear in mind that fruit and vegetable juices may alter the scent of your candles.
5. Essential Oils
Essential oils not only provide fragrance but can also add a subtle tint to your candles. Some essential oils, like chamomile or lavender, can give a pale yellow hue, while others, like patchouli or cedarwood, can add a touch of amber or brown. Add only a few drops of essential oil to achieve the desired color.
Remember to experiment and have fun with these natural coloring options. Mix and match them to create your own unique color palette and discover the perfect shades for your beeswax candles.
Dried Flowers and Herbs
Dried flowers and herbs are not only a beautiful way to add color to your beeswax candles but also provide a delightful aroma. Here’s how you can use dried flowers and herbs to naturally color your candles:
- Choose Your Dried Flowers and Herbs: Select a variety of dried flowers and herbs that offer the colors you desire. Lavender, rose petals, chamomile, hibiscus, and calendula are popular choices. You can either purchase them or dry them yourself.
- Prepare the Flowers and Herbs: If using store-bought dried flowers and herbs, they are usually ready to use. However, if you are drying them yourself, ensure they are fully dried before use. Crush or grind them into a powder using a mortar and pestle or a blender.
- Mix the Coloring Agent: In a separate container, mix the powdered dried flowers or herbs with a small amount of melted beeswax or a carrier oil like coconut oil. This helps evenly distribute the color when added to the main batch of melted beeswax.
- Add the Coloring Agent to the Beeswax: Once the beeswax is melted, remove it from the heat source and allow it to cool slightly. Then, add the mixture of powdered flowers or herbs to the melted beeswax. Stir thoroughly to ensure the color is evenly distributed.
- Pour and Set the Candles: Once the beeswax and coloring agent are well mixed, carefully pour the mixture into your candle molds or containers. Insert the wick into the center of the candles and allow them to cool and solidify completely.
Keep in mind that different dried flowers and herbs will produce different shades of color. Experiment with different combinations and ratios to achieve your desired hues. Remember, a little goes a long way, so start with a small amount of coloring agent and gradually add more if needed.
Using dried flowers and herbs not only adds color to your beeswax candles but also infuses them with a delicate fragrance. It’s a wonderful way to create unique and visually appealing candles that bring the beauty of nature into your home.
Read more: How To Make Beeswax Scented Candles
Powdered Spices
If you prefer warm and earthy tones, powdered spices can be an excellent choice for naturally coloring your beeswax candles. Here’s how you can use powdered spices to add beautiful hues to your candles:
- Select Your Spices: Choose from a variety of powdered spices to achieve different colors and shades. Cinnamon, turmeric, paprika, cocoa powder, and nutmeg are popular options. Make sure the spices are finely ground for smooth incorporation into the beeswax.
- Prepare the Spice Mixture: In a small bowl, mix the desired powdered spices with a small amount of oil or melted beeswax. This helps the spices disperse evenly within the candle mixture.
- Add the Spice Mixture to the Beeswax: Melt the beeswax and remove it from the heat source. Allow it to cool slightly before adding the spice mixture. Stir well to ensure the spices are thoroughly incorporated.
- Pour and Set the Candles: Carefully pour the colored beeswax mixture into your candle molds or containers. Place the wick at the center of each candle and let them cool and solidify completely.
Each powdered spice will yield different colors. Cinnamon can create warm shades of brown, while turmeric can produce vibrant yellow tones. Paprika offers rich orange hues, cocoa powder provides deep browns, and nutmeg gives a subtle tan shade.
Remember to start with a small amount of powdered spice and gradually add more if you want a deeper color. Be cautious not to overload the beeswax with too much spice, as it can affect the candle’s performance and burn quality.
Using powdered spices not only adds color to your beeswax candles but also imparts a subtle natural scent. It’s a wonderful way to create candles with a cozy, rustic feel, perfect for creating a warm and inviting atmosphere in your home.
Natural Food Coloring
If you’re looking for vibrant and intense colors in your beeswax candles, natural food coloring can be a fantastic option. Here’s how you can use natural food coloring to add beautiful and eye-catching hues to your candles:
- Choose Plant-Based Food Coloring: Look for natural food coloring options that are derived from plant-based sources. Beet juice, spirulina extract, turmeric extract, and spinach powder are some examples of natural food coloring options you can use. These can be found at health food stores or online.
- Mix the Food Coloring: In a small bowl, mix a small amount of the chosen natural food coloring with a carrier oil or a small amount of melted beeswax. This helps to evenly distribute the color throughout the candle mixture.
- Add the Coloring to the Beeswax: Heat the beeswax until melted, then remove it from the heat source. Allow it to cool slightly before adding the mixture of natural food coloring. Stir well to ensure the color is evenly incorporated into the beeswax.
- Pour and Set the Candles: Carefully pour the colored beeswax mixture into your candle molds or containers. Place the wick at the center of each candle and let them cool and solidify completely.
Using natural food coloring can give you a wide range of vibrant colors. Beet juice creates shades of red and pink, spirulina extract offers a brilliant blue-green color, turmeric extract gives a bright yellow hue, and spinach powder provides a subtle green shade.
Remember to use the natural food coloring in moderation, as a little can go a long way. Start with a small amount and gradually add more if desired. Keep in mind that some natural food colorings may affect the scent of your candles, so consider pairing them with complementary essential oils, if desired.
Using natural food coloring is not only a great way to achieve intense colors in your beeswax candles, but it also ensures that you’re making environmentally friendly choices. Enjoy the vibrant and eye-catching candles created with natural food coloring!
Fruit and Vegetable Juices
Adding color to your beeswax candles can be as simple as using fruit and vegetable juices. Not only do they offer vibrant hues, but they also bring a natural and refreshing touch to your candles. Here’s how you can use fruit and vegetable juices to naturally color your candles:
- Choose Your Juices: Select fruits and vegetables that provide the colors you desire. Beet juice, carrot juice, and berry juices like raspberry or blueberry can create beautiful shades of red, orange, and pink. You can use freshly squeezed juices or store-bought ones.
- Mix the Juice: In a small container, combine the fruit or vegetable juice with a small amount of melted beeswax. Mix well to ensure even distribution of color throughout the candle mixture.
- Add the Juice to the Beeswax: Heat the beeswax until fully melted, then remove it from the heat source. Allow it to cool slightly before adding the juice mixture. Stir thoroughly to incorporate the color evenly into the beeswax.
- Pour and Set the Candles: Carefully pour the colored beeswax mixture into your candle molds or containers. Place the wick in the center of each candle and allow them to cool and solidify completely.
Keep in mind that the natural pH and acidity of fruit and vegetable juices may affect the scent of your beeswax candles. Consider pairing the colored beeswax with complementary essential oils to enhance the fragrance if desired.
Using fruit and vegetable juices allows you to achieve vibrant and natural colors in your beeswax candles. Experiment with different combinations, ratios, and types of juices to create unique and visually appealing candles that bring a touch of nature to your space.
Essential Oils
Essential oils not only provide captivating scents but can also add a subtle tint to your beeswax candles. They offer a natural and aromatic way to color your candles while creating a soothing and relaxing atmosphere. Here’s how you can use essential oils to naturally color your candles:
- Select Your Essential Oils: Choose essential oils that not only offer the desired color but also complement the scent of your beeswax candles. Some essential oils, such as chamomile, lavender, and lemongrass, provide a pale yellow hue. Others, such as patchouli or cedarwood, can add a touch of amber or brown.
- Add the Essential Oils: Once the beeswax is melted, remove it from the heat source and allow it to cool slightly. Add a few drops of your chosen essential oil to the melted beeswax and stir well to ensure even distribution of color.
- Pour and Set the Candles: Carefully pour the colored beeswax mixture into your candle molds or containers. Place the wick at the center of each candle and allow them to cool and solidify completely.
Essential oils provide a subtle tint to your candles, so the color may not be as vibrant as other options. However, they offer the added benefit of enhancing the scent of your beeswax candles, creating a holistic and enjoyable experience.
Remember to use essential oils in moderation, as they are highly concentrated. Start with just a few drops, and you can add more if you desire a deeper color. Pairing different essential oils can also create unique shades and aromas for your candles.
Using essential oils as a natural coloring option allows you to incorporate both color and fragrance into your beeswax candles. It’s a wonderful way to create personalized and aromatic candles that promote relaxation and well-being.
Read more: How To Make Natural Candles
How to Color Beeswax Candles Naturally
Now that you have explored different options for natural coloring, let’s delve into the step-by-step process of coloring beeswax candles naturally:
- 1. Preparing the Beeswax: Start by melting the beeswax in a double boiler or a dedicated wax melting pot. Gradually heat the beeswax until it reaches a liquid state, stirring occasionally to ensure even melting. Be careful not to overheat the wax, as it can result in discoloration or degradation of its quality.
- 2. Choosing and Preparing the Natural Coloring Agent: Select your preferred natural coloring option, such as dried flowers and herbs, powdered spices, natural food coloring, fruit and vegetable juices, or essential oils. Follow the specific instructions provided for each coloring option to prepare the coloring agent, such as grinding dried flowers or mixing spices with carrier oil.
- 3. Mixing the Coloring Agent with Beeswax: Once the beeswax is melted, remove it from the heat source and allow it to cool slightly. Add the prepared coloring agent to the melted beeswax, whether it’s the powdered dried flowers, spices, natural food coloring, fruit juice, or essential oil. Stir thoroughly to ensure the color is evenly incorporated into the beeswax.
- 4. Pouring and Setting the Candles: Carefully pour the colored beeswax mixture into your chosen candle molds or containers. Insert the wick into the center of each candle, ensuring it remains straight and centered. Allow the candles to cool and solidify completely, which usually takes a few hours.
Throughout the coloring process, it’s crucial to maintain proper safety precautions. Be cautious when working with hot wax and ensure proper ventilation in your workspace. Additionally, follow any additional guidelines provided for the specific natural coloring option you choose.
Remember to experiment and have fun with the coloring process. You can mix and match various coloring options to create unique hues and patterns. Keep in mind that the amount of coloring agent used will affect the intensity of the color in your candles, so start with small amounts and adjust as desired.
By following these steps, you can successfully color your beeswax candles naturally, adding a touch of beauty and uniqueness to your homemade creations.
Preparing the Beeswax
Before you can begin coloring your beeswax candles naturally, it’s important to properly prepare the beeswax. Follow these steps to ensure your beeswax is ready for coloring:
- Gather Your Supplies: Start by gathering all the necessary supplies, including beeswax, a double boiler or dedicated wax melting pot, a heat-resistant container, a stirring utensil, and a thermometer. Having everything within reach will make the process more efficient.
- Cut or Grate the Beeswax: If you are using beeswax in block form, cut it into smaller chunks or grate it using a cheese grater. This helps the wax melt evenly and reduces the overall melting time.
- Prepare the Heat Source: Set up a double boiler or place a dedicated wax melting pot on a heat source. Fill the bottom pot or the melting pot with water and place the beeswax in the top pot or container. Alternatively, you can use a heat-resistant container to melt the wax directly in a water bath.
- Melt the Beeswax: Gradually heat the water in the bottom pot or the melting pot until it reaches a simmer. The steam generated will melt the beeswax in the top pot or container. Stir the beeswax occasionally to aid in the melting process and ensure even heat distribution.
- Monitor the Temperature: As the wax melts, it’s important to keep an eye on the temperature. Use a thermometer to monitor the temperature of the beeswax. Beeswax typically melts between 144 to 147 degrees Fahrenheit (62 to 64 degrees Celsius). Avoid overheating the wax, as it can result in discoloration or degrade its quality.
- Remove from Heat: Once the beeswax has completely melted, remove it from the heat source. Allow it to cool slightly before proceeding with the natural coloring process. This will help prevent the color from becoming distorted or affected by excessive heat.
Properly preparing the beeswax sets a solid foundation for coloring your candles naturally. Taking the time to melt the wax gently and monitor the temperature ensures that you have a smooth and workable base for adding your chosen coloring agents.
Remember to practice safe handling when working with hot wax and heat sources. Use caution to avoid burns and ensure proper ventilation in your workspace. With a well-prepared beeswax base, you can move on to selecting and incorporating the natural coloring agents to create beautifully colored beeswax candles.
Choosing and Preparing the Natural Coloring Agent
After preparing the beeswax, the next step in coloring your candles naturally is selecting and preparing the natural coloring agent. Here’s how you can choose and prepare the coloring agent to achieve your desired candle colors:
- Selecting a Natural Coloring Agent: There are several options to choose from when it comes to natural coloring agents. You can opt for dried flowers and herbs, powdered spices, natural food coloring, fruit and vegetable juices, or essential oils. Consider the variety of colors and effects you want to achieve when making your selection.
- Preparing Dried Flowers and Herbs: If using dried flowers and herbs, select a variety that provides the colors you desire for your candles. Lavender, rose petals, chamomile, hibiscus, and calendula are popular choices. Grind or crush the dried flowers and herbs into a powder using a mortar and pestle or a blender. Ensure that the powder is fine and free of large pieces.
- Mixing Spices: For powdered spices, such as cinnamon, turmeric, paprika, cocoa powder, or nutmeg, mix the desired spices together to create your desired color combination. You can also adjust the ratios of each spice to achieve the desired hue.
- Preparing Natural Food Coloring: When using natural food coloring, choose plant-based options like beet juice, spirulina extract, turmeric extract, or spinach powder. Shake or stir the natural food coloring well to ensure it’s properly mixed before adding it to the beeswax.
- Using Fruit and Vegetable Juices: For fruit and vegetable juices, choose juices like beet juice, carrot juice, or berry juices such as raspberry or blueberry. Use freshly squeezed juices or store-bought ones, ensuring that they are pure and free from added sugars or preservatives.
- Adding Essential Oils: If using essential oils for coloring and scent, choose oils that provide the desired color and complement the fragrance of your beeswax candles. Chamomile, lavender, lemongrass, patchouli, and cedarwood are a few examples of essential oils that can add subtle hues to your candles.
Ensure that the natural coloring agent you choose is finely ground, mixed well, or properly prepared as per the specific instructions for each option. This ensures that the color is evenly distributed and incorporated into the beeswax.
By carefully selecting and preparing your chosen natural coloring agent, you can create beautiful and vibrant colors in your beeswax candles. Each option offers its own unique qualities and allows you to create candles that reflect your personal style and preferences.
To naturally color beeswax candles, try adding dried flowers, herbs, or spices to the melted beeswax for a beautiful and aromatic result.
Mixing the Coloring Agent with Beeswax
Once you have selected and prepared your desired natural coloring agent, it’s time to mix it with the melted beeswax to achieve the desired color in your candles. Here’s how you can effectively mix the coloring agent with the beeswax:
- Melt the Beeswax: Start by melting the beeswax, following the instructions provided earlier. Heat the wax until it is completely melted and in a liquid state. Remove it from the heat source and allow it to cool slightly.
- Prepare the Coloring Agent: Depending on the type of coloring agent you are using, whether it’s dried flowers and herbs, powdered spices, natural food coloring, fruit and vegetable juices, or essential oils, follow the specific instructions to properly prepare it. For example, mix dried flowers and herbs with a small amount of melted beeswax or carrier oil. For powdered spices, mix them with a small amount of oil or melted beeswax. Ensure that the coloring agent is well incorporated and evenly distributed.
- Add the Coloring Agent: Once the coloring agent is prepared and the beeswax has cooled slightly, it’s time to incorporate the color. Add the prepared coloring agent to the melted beeswax. Use a stirring utensil to thoroughly mix the coloring agent and the beeswax. Stir well to ensure that the color is evenly dispersed throughout the wax.
- Blend Until Even: Continuously stir the mixture until you achieve a smooth and consistent color. The coloring agent should blend seamlessly into the beeswax, without any clumps or streaks. Take your time to ensure that the color is well mixed, as it will determine the final appearance of your candles.
During the mixing process, it’s important to work efficiently and avoid prolonged exposure to heat, as the beeswax will begin to cool and solidify. If necessary, gently reheat the mixture to maintain its liquid state while mixing to ensure a uniform color in your candles.
By carefully and thoroughly mixing the coloring agent with the melted beeswax, you can achieve consistent and vibrant colors in your candles. Take your time and pay attention to detail, as this step plays a crucial role in creating visually appealing and beautifully colored beeswax candles.
Read also: 12 Unbelievable Beeswax Candles for 2025
Pouring and Setting the Candles
After mixing the coloring agent with the beeswax, it’s time to pour the mixture into your chosen candle molds or containers and allow them to set. Follow these steps to ensure successful pouring and setting of your naturally colored beeswax candles:
- Prepare Your Candle Molds or Containers: Set up your chosen candle molds or containers on a flat, heat-resistant surface. If necessary, secure the wick in the center of each mold or container using a wick holder or by tying it around a pencil or skewer placed across the top.
- Pour the Colored Beeswax Mixture: Carefully pour the colored beeswax mixture into each mold or container. Start from one corner and pour slowly to avoid any spills or splashes. Fill the molds or containers to the desired height, leaving some space at the top for the wax to expand as it cools and solidifies.
- Release Air Bubbles: To release any air bubbles trapped in the mixture, gently tap the molds or containers on a solid surface a few times after pouring. This will help prevent any unsightly air pockets in your finished candles.
- Allow the Candles to Set: Place the filled molds or containers in a cool and undisturbed area to allow the candles to set. The setting time can vary depending on the size and thickness of your candles, but it usually takes several hours or overnight.
- Trim and Finish: Once the candles are completely set and solidified, carefully remove them from the molds or trim them if using containers. Trim the wick to approximately ¼ inch (6mm) using sharp scissors. Your naturally colored beeswax candles are now ready to be enjoyed!
During the setting process, it’s important to avoid disturbing or moving the candles too much, as this can result in uneven surfaces or unintended mixing of colors. Allow the candles to cool and solidify undisturbed for the best results.
Remember to be patient and give the candles enough time to fully set and harden before handling or burning them. This will ensure that they maintain their color and shape throughout their lifespan.
By carefully pouring and allowing your candles to set undisturbed, you can achieve professional-looking naturally colored beeswax candles that are both visually striking and eco-friendly.
Tips for Achieving Desired Colors
When coloring your beeswax candles naturally, you may have specific hues and shades in mind that you want to achieve. Here are some helpful tips to help you achieve your desired colors:
- Start with Small Amounts: When adding natural coloring agents to your beeswax, start with small amounts and gradually increase if needed. Remember that a little goes a long way, and it’s easier to darken the color than to lighten it. Experimenting with different ratios can help you achieve the perfect shade.
- Keep in Mind the Natural Color of Beeswax: Beeswax has its own natural color, ranging from pale yellow to golden brown. Keep this in mind when selecting and mixing your coloring agents. The natural color of beeswax can influence the final appearance of your colored candles.
- Mix Colors: Don’t be afraid to mix different natural coloring agents to create unique shades. Combining dried flowers with spices, or blending fruit juice with essential oils, can result in beautiful and unexpected colors. Play with combinations to achieve your desired hues.
- Experiment and Take Notes: Keep a record of the ratios and combinations of coloring agents you use and the resulting color. This will help you replicate your favorite shades in future candle-making endeavors. Don’t be afraid to try new combinations and keep track of what works best for your desired colors.
- Consider Candle Size and Thickness: Keep in mind that the size and thickness of your candles can affect the intensity of the color. Thicker candles may appear darker than thinner ones due to the amount of wax involved. Consider adjusting the amount of coloring agent used based on the size of your candles.
- Take Lighting into Account: The lighting conditions in which your candles will be used can also influence how colors appear. Natural light, soft candlelight, or bright indoor lighting can all have an impact on how the colors are perceived. Consider the environment in which the candles will be displayed and choose colors accordingly.
Remember, the beauty of natural coloring is the uniqueness and variation it offers. Embrace the organic nature of the process, and don’t worry too much about achieving perfect replication. Each naturally colored beeswax candle will have its own charm and character.
By following these tips and embracing the artistic process of coloring, you can create stunning and visually appealing beeswax candles that reflect your personal style and creativity.
Safety Precautions
When working with beeswax and natural coloring agents to create your candles, it’s important to prioritize safety. Here are some essential safety precautions to keep in mind during the candle-making process:
- Work in a Well-Ventilated Area: Ensure that your workspace is well-ventilated to prevent the accumulation of fumes. Beeswax and some natural coloring agents may produce odors or release gases when heated. Good ventilation helps in maintaining a safe and comfortable working environment.
- Use Heat-Resistant Tools and Containers: When heating and handling hot wax, use heat-resistant tools and containers. Beeswax can reach high temperatures when melted, and using appropriate equipment helps prevent burns or accidents.
- Monitor Wax Temperature: Beeswax has a melting point of around 144 to 147 degrees Fahrenheit (62 to 64 degrees Celsius). Avoid overheating the wax, as it can degrade the quality or cause discoloration. Use a thermometer to monitor the temperature and heat it gradually to the desired melting point.
- Handle Hot Wax with Care: Exercise caution when working with hot wax. Beware of potential burn risks and take steps to protect your skin and surfaces from accidental spills or splashes. Keep a fire extinguisher nearby as a precautionary measure.
- Avoid Overloading the Wax: When incorporating natural coloring agents into the beeswax, add them gradually to avoid overloading the wax. Too much coloring agent can impact the overall performance and burn quality of the candles. Start with small amounts and adjust as needed to achieve the desired color intensity.
- Consider Allergens: Be mindful of potential allergies or sensitivities to certain natural coloring agents or essential oils. Perform a patch test if you are unsure about any potential reactions, especially if you or others have known allergies or sensitivities to specific plants or substances.
- Keep Flames Under Supervision: Once your candles are made and ready to be lit, always keep an eye on burning candles, and never leave them unattended. Ensure that candles are placed away from flammable materials, in an appropriate holder or container that can withstand the heat.
- Follow Basic Candle Safety: Adhere to general candle safety guidelines, such as placing candles on heat-resistant surfaces, keeping them away from drafts, keeping the wick trimmed to ¼ inch (6mm), and extinguishing candles before leaving the room or going to sleep.
By prioritizing safety throughout the candle-making process, you can enjoy the creative and aromatic experience of crafting and burning naturally colored beeswax candles with peace of mind.
Conclusion
Coloring beeswax candles naturally not only adds an aesthetic touch but also allows you to create personalized and environmentally friendly creations. By choosing natural coloring options such as dried flowers and herbs, powdered spices, natural food coloring, fruit and vegetable juices, or essential oils, you can create stunning candles that enhance the ambiance of any space.
Throughout this article, we explored the various natural coloring options and provided step-by-step instructions on how to color beeswax candles naturally. From preparing the beeswax to choosing and preparing the coloring agent, mixing it with the beeswax, and pouring and setting the candles, each step contributes to creating beautiful and visually appealing candles.
Along the way, we offered tips for achieving desired colors, encouraging experimentation and the use of different combinations to create unique hues. We also highlighted the importance of safety precautions, emphasizing proper ventilation, handling hot wax with care, monitoring temperatures, and working in a well-organized and safe environment.
Coloring beeswax candles naturally not only benefits the environment but also enhances your overall candle-making experience. The range of colors and scents that can be achieved allows for endless creativity and personalization. Whether you’re seeking warm and earthy tones or vibrant and intense colors, natural coloring options offer a variety of choices.
So, next time you embark on your candle-making journey, consider coloring your beeswax candles naturally. Immerse yourself in the beauty of natural materials, embrace the artistic process, and enjoy the soothing and aromatic ambiance created by your naturally colored beeswax candles.
Frequently Asked Questions about How To Naturally Color Beeswax Candles
Was this page helpful?
At Storables.com, we guarantee accurate and reliable information. Our content, validated by Expert Board Contributors, is crafted following stringent Editorial Policies. We're committed to providing you with well-researched, expert-backed insights for all your informational needs.