Articles
How To Make Multi-Color Candles
Modified: January 4, 2024
Learn how to make beautiful multi-color candles with step-by-step instructions and helpful tips in our informative articles. Enhance your candle-making skills today!
(Many of the links in this article redirect to a specific reviewed product. Your purchase of these products through affiliate links helps to generate commission for Storables.com, at no extra cost. Learn more)
Introduction
Candles have been a source of light and warmth for centuries. They create a soothing ambiance and add a touch of elegance to any space. While traditional candles come in a single color, multi-color candles offer a unique and vibrant twist to the art of candle making.
In this article, we will guide you through the process of making multi-color candles. Whether you are a seasoned candle maker or a beginner, this step-by-step tutorial will help you create beautiful and eye-catching candles that will impress your friends and family.
To make multi-color candles, you will need some basic materials such as wax, colorants, molds, and wicks. Don’t worry if you are unfamiliar with these terms – we will explain everything in detail as we go along.
So, let’s dive in and explore the wonderful world of multi-color candle making!
Key Takeaways:
- Create vibrant multi-color candles by carefully layering and mixing wax. Experiment with color combinations to craft unique and captivating candles that impress friends and family.
- Prioritize safety and creativity when making multi-color candles. From preparing wax to unmolding the final product, enjoy the process and unleash your imagination to create stunning, personalized candles.
Read more: What Color Are Hanukkah Candles
Materials Needed
- Wax: Beeswax or soy wax are popular choices for candle making. Make sure to choose a high-quality wax that melts easily.
- Colorants: You can use either liquid or solid colorants. Liquid colorants are easier to work with and provide more vibrant colors.
- Fragrance Oils (optional): If you want scented candles, choose fragrance oils that are specifically designed for candle making.
- Molds: You can use silicone molds, metal molds, or even repurpose household items like mason jars or teacups as molds.
- Wicks: Choose wicks that are appropriate for the size of your candles. Pre-tabbed wicks are easier to work with as they have a metal base attached.
- Double Boiler or Wax Melter: This will be used to melt the wax. If you don’t have a dedicated wax melter, a heatproof container placed inside a larger pot with water works well as a makeshift double boiler.
- Thermometer: A thermometer is necessary to monitor the temperature of the wax and ensure it doesn’t get too hot.
- Stirring Utensil: Use a heat-resistant spoon or spatula for stirring the wax and colorants.
- Protective Equipment: It’s important to wear heat-resistant gloves and a long-sleeved shirt to protect yourself from hot wax.
- Workspace Protection: Cover your work area with old newspaper or a disposable tablecloth to protect it from any wax spills.
These are the basic materials you will need to make multi-color candles. However, feel free to get creative and experiment with different accessories, such as decorative additives or unique candle holders, to add your own personal touch to the final product.
Now that you have gathered all the necessary materials, let’s move on to the next step – preparing the wax.
Step 1: Preparing the Wax
The first step in making multi-color candles is preparing the wax. Here’s how:
- Measure and weigh the desired amount of wax you will need for your candles. A general rule of thumb is to use approximately one pound of wax per standard-sized candle.
- If you are using larger blocks of wax, chop them into smaller pieces. This will help the wax melt more evenly and quickly.
- Set up a double boiler or a makeshift double boiler by placing a heatproof container inside a larger pot filled with water. Make sure the water level is at least 2-3 inches below the rim of the inner container.
- Place the chopped wax into the inner container and turn on the heat to medium-low. Allow the wax to slowly melt, stirring occasionally with a heat-resistant spoon or spatula to ensure even heating.
- Monitor the temperature of the wax using a thermometer. It is important to melt the wax at the recommended temperature specified by the manufacturer. Different types of wax have different melting points, so make sure to refer to the instructions for the specific wax you are using.
- Once the wax has completely melted and reached the desired temperature, it is ready for colorant and fragrance (if desired). Turn off the heat and remove the inner container from the double boiler.
Preparing the wax is a crucial step as it ensures that the colorants mix evenly and that the candles solidify properly. Take your time to melt the wax slowly and make sure to read the instructions provided by the wax manufacturer for any specific guidelines.
Now that your wax is ready, we can move on to the fun part – choosing and mixing colors for your multi-color candles.
Step 2: Choosing and Mixing Colors
Choosing and mixing colors is where you can get creative and bring your vision to life. Here’s how you can create beautiful color combinations for your multi-color candles:
- Select the colorants you want to use. You can choose from a wide range of liquid or solid colorants available in the market. Consider the color palette you want to achieve and gather the appropriate colorants.
- Start with a small amount of wax in a separate container. This will be used for testing the colors without affecting the entire batch of wax.
- Add a small amount of colorant to the wax and stir well to incorporate it. Start with a small amount and gradually add more until you achieve the desired color intensity. Remember, it’s easier to add more colorant than to dilute an overly saturated color.
- Test the color by dipping a piece of white paper or a cotton swab into the colored wax. This will give you a better idea of how the color will appear when solidified.
- If you are happy with the color, repeat the process with the rest of the wax, adding the colorants according to your desired color combinations. You can create gradients by using varying shades of the same color or experiment with contrasting colors for a bold effect.
- Stir the wax thoroughly to ensure the colorants are evenly distributed throughout the wax. This will ensure that each layer of the candle has consistent color throughout.
Remember to keep track of your color combinations and the amount of colorant used, especially if you plan to recreate them in the future. This will help you achieve consistent results in your multi-color candles.
Now that you have mixed your colors, we can move on to the next step – preparing the molds for pouring.
Step 3: Preparing the Molds
Preparing the molds is an important step in making multi-color candles. This will ensure that your candles set properly and have a smooth finish. Follow these steps to prepare your molds:
- Ensure that your chosen molds are clean and free from any dust or debris. If necessary, wash them with warm soapy water and dry them thoroughly.
- If you are using rigid molds, such as metal or plastic, you may need to apply a mold release spray or a thin layer of oil to the inside of the molds. This will make it easier to unmold the candles once they have set.
- If you are using flexible silicone molds, they generally do not require any preparation or greasing as the candles will easily release from the molds once solidified.
- Place the prepared molds on a flat surface, such as a baking sheet or tray, to make it easier to transport them without disturbing the poured wax.
- Arrange the molds in a way that allows you to pour the wax smoothly and efficiently. It is best to have all your molds ready before proceeding to the next step.
Preparing the molds properly will ensure that your multi-color candles come out smoothly and without any imperfections. Take the time to clean and prepare your molds before starting the pouring process.
Now that your molds are ready, we can move on to the next step – pouring the first layer of wax.
Read more: How To Naturally Color Beeswax Candles
Step 4: Pouring the First Layer
Now that you have prepared your molds, it’s time to pour the first layer of wax for your multi-color candles. Follow these steps to ensure a successful pour:
- Ensure that your melted wax is at the recommended pouring temperature. Refer to the instructions provided by the wax manufacturer for the specific temperature.
- Start with the lowest color in your color scheme. This will be the bottom layer of your candle.
- Slowly pour the melted wax into the prepared mold, filling it up to the desired height for the first layer. Be careful not to overfill the mold, as the subsequent layers need space to be poured.
- Allow the first layer of wax to cool and solidify partially. The wax should have a skin formed on the surface but should still be warm and slightly flexible to the touch. This will ensure good adhesion between the layers.
- While waiting for the first layer to cool, keep the remaining wax at the appropriate pouring temperature. You can use a heat source to maintain the temperature if needed.
Pouring the first layer of wax is crucial as it acts as the foundation for the rest of the layers. Take your time to pour it carefully, ensuring that the wax fills the mold evenly and without any air bubbles.
Now that the first layer is poured and cooling, we can move on to the next step – adding subsequent layers of wax.
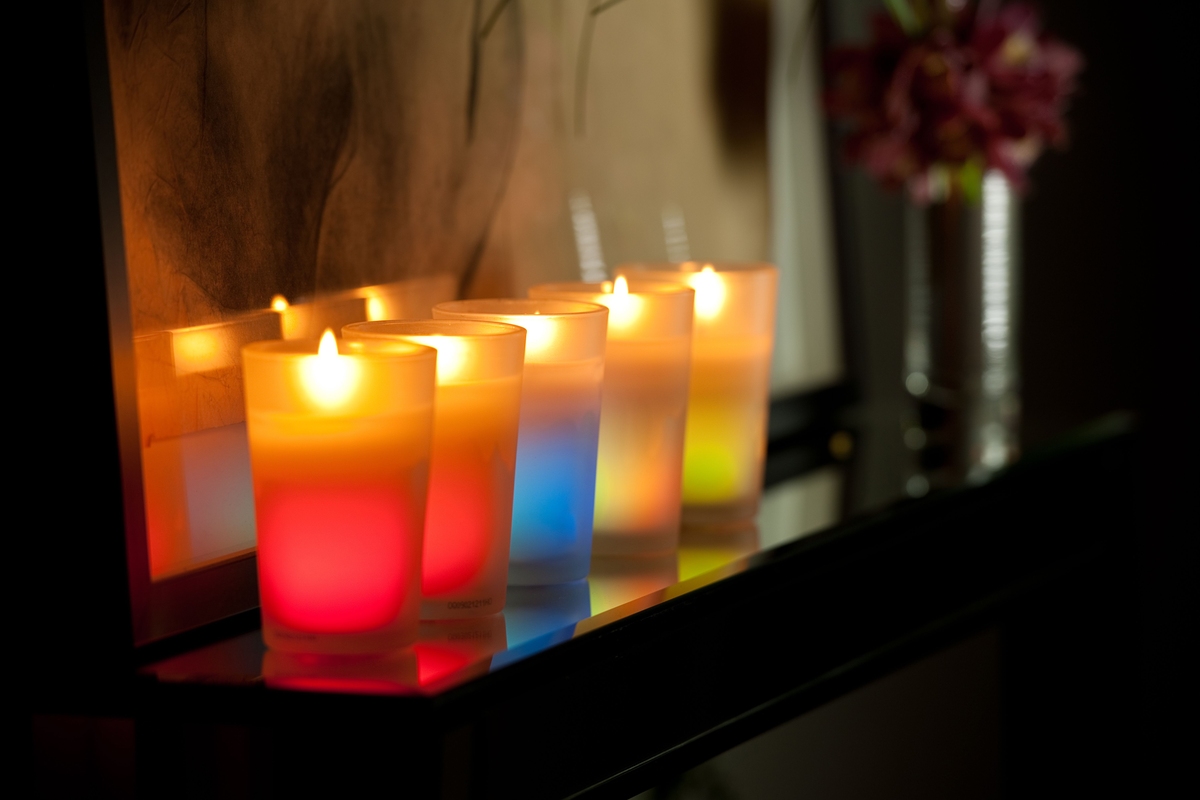
To make multi-color candles, pour layers of different colored wax into the mold, allowing each layer to cool before adding the next. Use a thermometer to ensure the wax is at the right temperature for pouring.
Step 5: Adding Subsequent Layers
Adding subsequent layers of wax is where the magic of creating multi-color candles truly comes to life. Follow these steps to create beautiful and vibrant layers:
- Ensure that the first layer of wax has cooled and solidified partially, but is still warm and slightly flexible to the touch.
- Prepare the next color of wax that you want to add to your candles. Make sure it is at the recommended pouring temperature.
- Slowly pour the next layer of melted wax into the mold, being careful not to disturb the first layer. Pour it gently and evenly, filling the mold up to the desired height for the second layer.
- Allow the second layer to cool and solidify partially before adding the next layer. Repeat this process for each subsequent layer, alternating colors as desired.
- To create defined layers, you can use a spoon or a skewer to gently push down the sides of the solidified wax from the previous layer. This will help create a clean separation between each layer.
Adding subsequent layers requires patience and precision. Take your time to pour each layer slowly, allowing it to cool partially before adding the next layer. This will create distinct layers of colors in your multi-color candles.
Continue adding layers until you reach the desired height for your candles. Remember to alternate colors and pour the wax evenly for a visually appealing result.
Now that the layers are complete, we can move on to the next step – inserting the wicks into the candles.
Step 6: Inserting the Wicks
Now that your multi-color candles have been layered, it’s time to insert the wicks. Follow these steps to securely attach the wicks to your candles:
- Prepare your wicks by cutting them to the appropriate length. Leave a couple of inches of extra wick length to ensure easy trimming later on.
- Insert the wick through the little hole at the bottom of the mold, ensuring that the metal tab or sustainer is at the bottom of the mold and centered.
- Secure the wick in place by using a wick holder or by tying the excess wick around a pencil or chopstick laid across the top of the mold. This will keep the wick centered and straight as the wax sets.
- Ensure that the wick is taut and straight before proceeding.
Inserting the wicks properly is crucial for a successful burn and a beautifully finished candle. Taking the time to securely attach the wicks will prevent them from moving or shifting during the burning process.
Now that the wicks are in place, we will move on to the next step – allowing the candles to cool and solidify.
Step 7: Allowing the Candles to Cool
After adding the wicks, it’s time to let your multi-color candles cool and solidify. Follow these steps to ensure a proper cooling process:
- Place the molds containing the layered wax in a cool and undisturbed area. Avoid any direct drafts or exposure to heat sources, as this may cause uneven cooling and potential cracking.
- Allow the candles to cool and solidify completely. This process typically takes a few hours, depending on the size and thickness of your candles.
- Resist the temptation to touch or move the candles during the cooling period, as this may disrupt the solidification process.
- Monitor the cooling process to ensure that the candles are setting properly and no signs of melting or deformation occur.
Allowing the candles to cool completely is essential for them to set and retain their shape. Rushing this step may result in candles that are prone to melting or crumbling.
Now that your candles have cooled and solidified, we can move on to the final step – unmolding and trimming the candles.
Read more: How To Make A Heater With Candles
Step 8: Unmolding and Trimming the Candles
The final step in creating your multi-color candles is to unmold them from the molds and trim the wicks. Follow these steps to complete the process:
- Gently remove the candles from the molds. If you are using silicone molds, flex the sides of the mold to release the candles. For rigid molds, gently tap the sides or use a gentle twisting motion to loosen the candles.
- Once the candles are released from the molds, inspect them for any imperfections or uneven edges. Smooth out any rough or uneven areas by gently rubbing them with your fingers or using a smoothing tool.
- Trim the wicks to a suitable length, leaving about ¼ inch above the surface of the candles. This will allow for a clean and even burn when you light the candles.
- Clean up any excess wax or debris from the candles using a soft cloth or paper towel.
Unmolding the candles should be done with care to avoid any damage to the layers or shape. Take your time and be gentle when removing them from the molds.
With the candles unmolded and the wicks trimmed, your multi-color candles are now ready to be displayed or gifted. Enjoy the beautiful glow and captivating colors that you have created!
Congratulations! You have successfully completed the process of making multi-color candles. Have fun experimenting with different color combinations and creating unique designs that reflect your personal style.
Remember to always exercise caution when working with hot wax and open flames. Follow safety guidelines and never leave burning candles unattended.
Thank you for joining us on this candle-making journey. Happy candle making!
Conclusion
Making multi-color candles is a creative and enjoyable process that allows you to create beautiful and unique pieces of functional art. By following the steps outlined in this article, you can craft vibrant and eye-catching candles that will be sure to impress.
From preparing the wax and choosing the perfect colors to layering the wax and inserting the wicks, each step plays a crucial role in the final outcome of your candles. Taking the time to properly prepare and execute each step will result in candles that not only look stunning but also burn evenly and beautifully.
Throughout the process, don’t be afraid to get creative and experiment with different color combinations and mold shapes. The possibilities are endless, and you can let your imagination run wild to create truly unique and personalized multi-color candles for yourself or as thoughtful gifts for loved ones.
Always remember to prioritize safety when working with hot wax and open flames. Take necessary precautions, such as wearing protective gear and ensuring a safe workspace, to reduce the risk of accidents.
Now that you have learned how to make multi-color candles, it’s time to gather the materials, unleash your creativity, and embark on your candle-making journey. Have fun, be inventive, and enjoy the process of turning simple wax into beautiful works of art!
Happy candle making!
Frequently Asked Questions about How To Make Multi-Color Candles
Was this page helpful?
At Storables.com, we guarantee accurate and reliable information. Our content, validated by Expert Board Contributors, is crafted following stringent Editorial Policies. We're committed to providing you with well-researched, expert-backed insights for all your informational needs.


