Articles
How To Reload Bullets With Hand Tools
Modified: August 16, 2024
Learn how to reload bullets using only hand tools with our informative articles. Discover step-by-step instructions and expert tips for a successful reloading experience.
(Many of the links in this article redirect to a specific reviewed product. Your purchase of these products through affiliate links helps to generate commission for Storables.com, at no extra cost. Learn more)
Introduction
Reloading your own bullets with hand tools can be a rewarding and cost-effective endeavor for firearms enthusiasts. Not only does it allow you to customize your ammunition to suit your specific needs, but it also gives you a deep understanding of the inner workings of your firearm. While reloading bullets may seem like a complex process, with the right knowledge and tools, it can be easily accomplished.
Before diving into the process of reloading bullets, it is important to understand the importance of safety. Reloading ammunition requires careful attention to detail and adherence to proper procedures to ensure your own safety and the safety of others. Always wear safety glasses, work in a well-ventilated area, and follow all safety guidelines provided by the manufacturer of the reloading equipment.
In this article, we will walk you through the step-by-step process of reloading bullets using only hand tools. From disassembling the bullet to seating the new bullet, we will cover each stage in detail, providing you with the knowledge you need to safely and effectively reload your own ammunition.
Before we begin, it is essential to gather the necessary tools and equipment. While there are many specialized reloading tools available on the market, we will focus on the basic hand tools that are readily accessible to most reloaders.
Key Takeaways:
- Reloading bullets with hand tools is a rewarding and cost-effective way for firearms enthusiasts to customize their ammunition, gain a deeper understanding of their firearms, and save money in the long run. It requires patience, attention to detail, and adherence to safety protocols.
- Prioritizing safety, accuracy, and consistency is crucial when reloading bullets with hand tools. Following safety precautions, investing in quality tools, and thorough testing and verification are essential for a successful and satisfying reloading experience.
Read more: How To Hand Form Body Panels With Hand Tools
Safety Precautions
Reloading ammunition requires utmost caution and attention to safety. Mishandling any of the components or failing to follow proper procedures can result in serious injury or damage. Here are some vital safety precautions to keep in mind when reloading bullets:
- Always wear safety glasses: Protecting your eyes from potential hazards such as primer sparks or flying debris is crucial. Ensure you have high-quality safety glasses that provide adequate protection.
- Work in a well-ventilated area: The process of reloading bullets involves handling various chemicals and powders. Good ventilation helps to mitigate the risk of exposure to harmful fumes.
- Follow the manufacturer’s guidelines: Each hand tool and reloading component comes with specific instructions and safety recommendations. It is essential to read and fully understand these guidelines before starting the reloading process.
- Keep the workspace clean and organized: A clutter-free workspace decreases the likelihood of accidental mixing of components and reduces the chances of errors or accidents.
- Use proper hand tool techniques: Understanding how to safely handle each hand tool is essential. Ensure you have a firm grip and keep your fingers away from moving parts.
- Double-check measurements and weights: Precision is vital when reloading bullets. Always double-check measurements and weights to ensure you are within the recommended limits. Using incorrect measurements can lead to dangerous overloads or underloads.
- Store components properly: When not in use, keep powders, primers, and other components stored securely in a cool, dry place away from heat sources and open flames.
- Avoid distractions: Distractions can lead to mistakes. Make sure you are fully focused on the reloading process and eliminate any potential distractions.
- Dispose of waste and hazardous materials properly: Used primers, powder residues, and other waste should be disposed of according to local regulations. Never leave hazardous materials lying around.
By following these safety precautions, you can minimize the risks associated with reloading bullets and ensure a safe and enjoyable reloading experience.
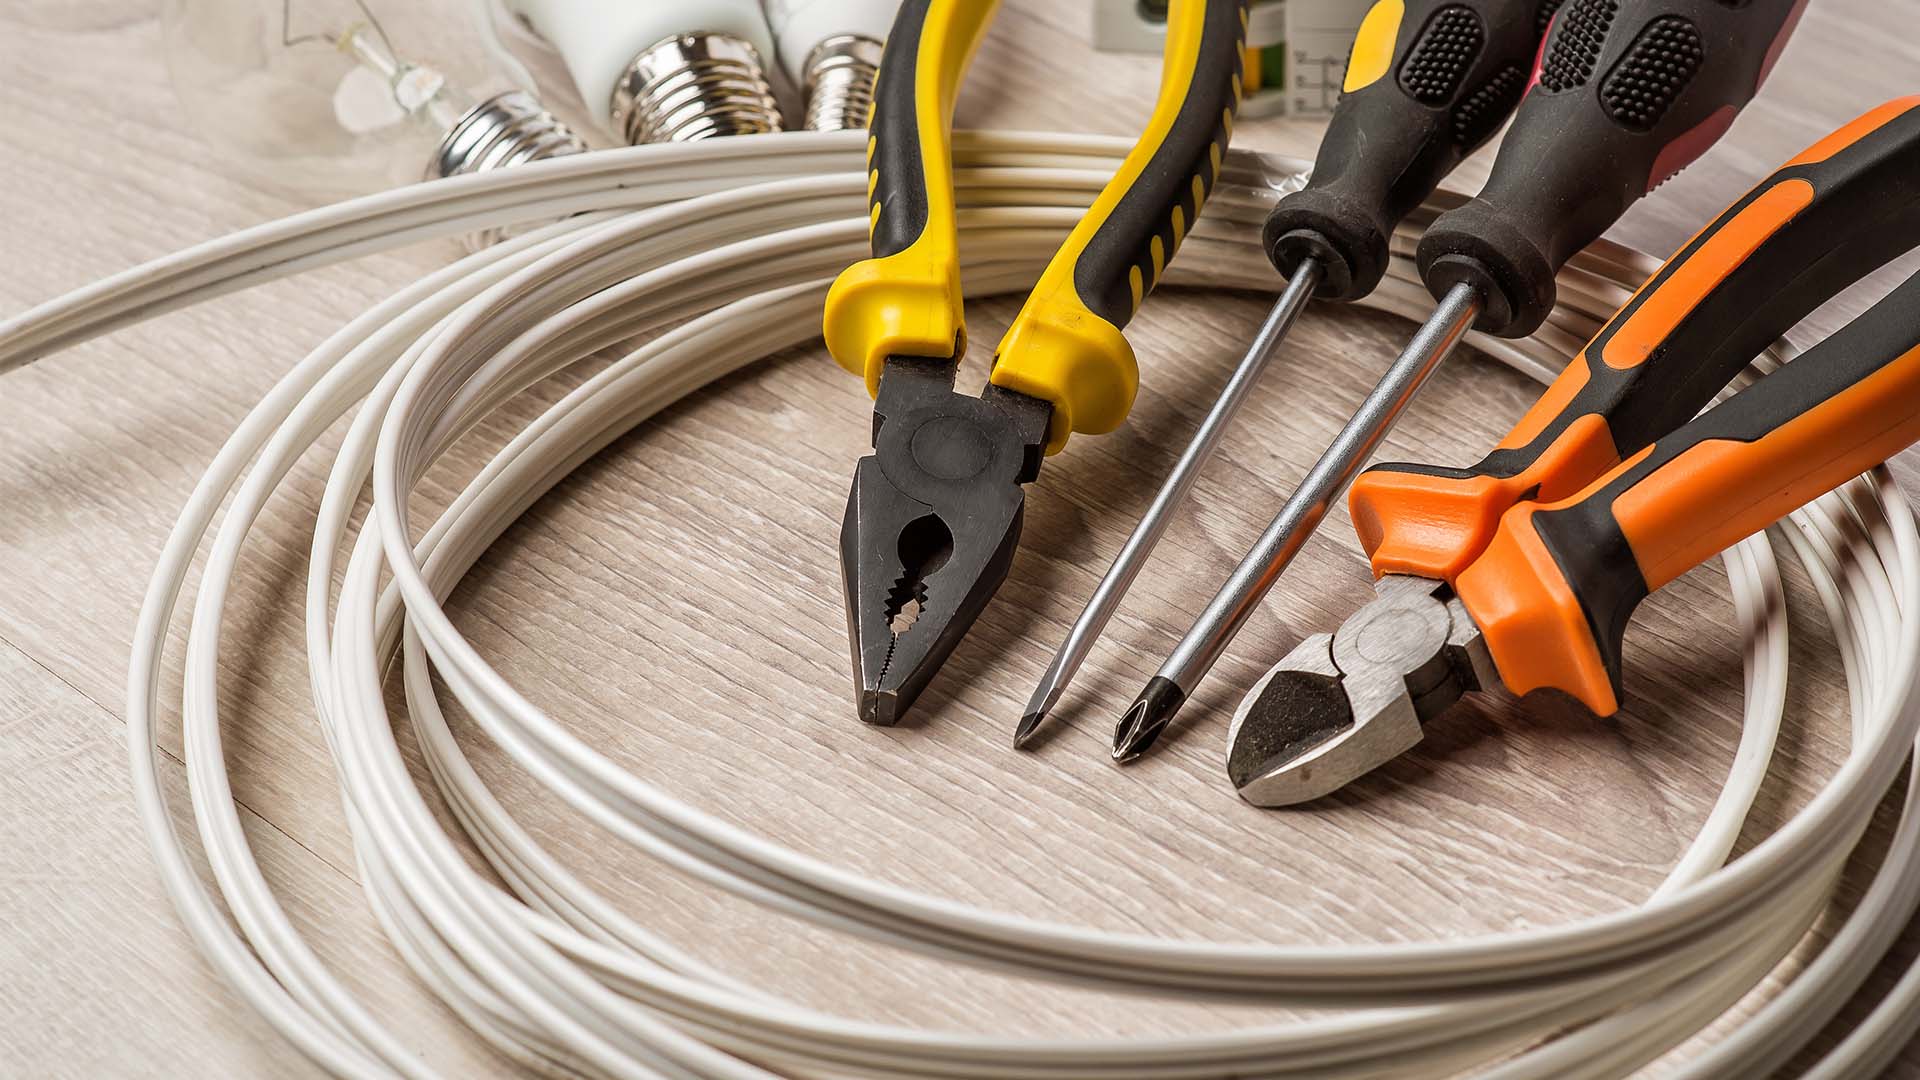
Necessary Tools and Equipment
Reloading bullets with hand tools requires a specific set of equipment to safely and effectively complete the process. While there are advanced reloading setups available, we will focus on the basic tools that are essential for reloading bullets by hand. Here are the necessary tools and equipment you will need:
- Reloading Press: A reloading press is the centerpiece of any reloading setup. It provides the necessary leverage to perform various reloading tasks. Choose a quality press that suits your needs and budget.
- Die Set: A die set consists of various dies that are used to resize, deprime, expand, seat, and crimp the bullet. Different dies are available for each specific task. Make sure to select the appropriate die set for your caliber.
- Calipers: Calipers are essential for accurate measurement of case length, bullet diameter, and overall cartridge length. Use a reliable set of calipers to maintain consistency in your reloads.
- Case Trimmer: A case trimmer is used to ensure that the case length is within specification. It helps to maintain consistent chambering and accuracy. Choose a trimmer that works with your chosen caliber.
- Priming Tool: A priming tool is used to insert fresh primers into the resized and cleaned bullet cases. There are various types of priming tools available, including handheld and bench-mounted options.
- Powder Scale: A powder scale is necessary for measuring the correct amount of gunpowder for each cartridge. It ensures that the powder charge is within the desired range. Select a high-quality scale that provides precise measurements.
- Powder Funnel: A powder funnel is used to pour gunpowder into the resized case without spilling. It helps to guide the powder smoothly into the case mouth, minimizing waste and ensuring consistent charges.
- Case Tumbler: A case tumbler is optional but recommended for cleaning the bullet cases. It removes dirt, debris, and tarnish, providing clean and polished brass cases for reloading.
- Case Lube: Case lube reduces friction when resizing the bullet cases. It allows for smoother and easier resizing and helps prevent cases from getting stuck in the dies.
- Bullet Puller: A bullet puller is used to disassemble bullets quickly and safely. It allows you to easily remove the bullet from the case without damaging either component.
These tools, along with your components such as bullet casings, bullets, primers, and gunpowder, form the foundation of your reloading setup. Always invest in quality tools to ensure consistent and safe reloading results.
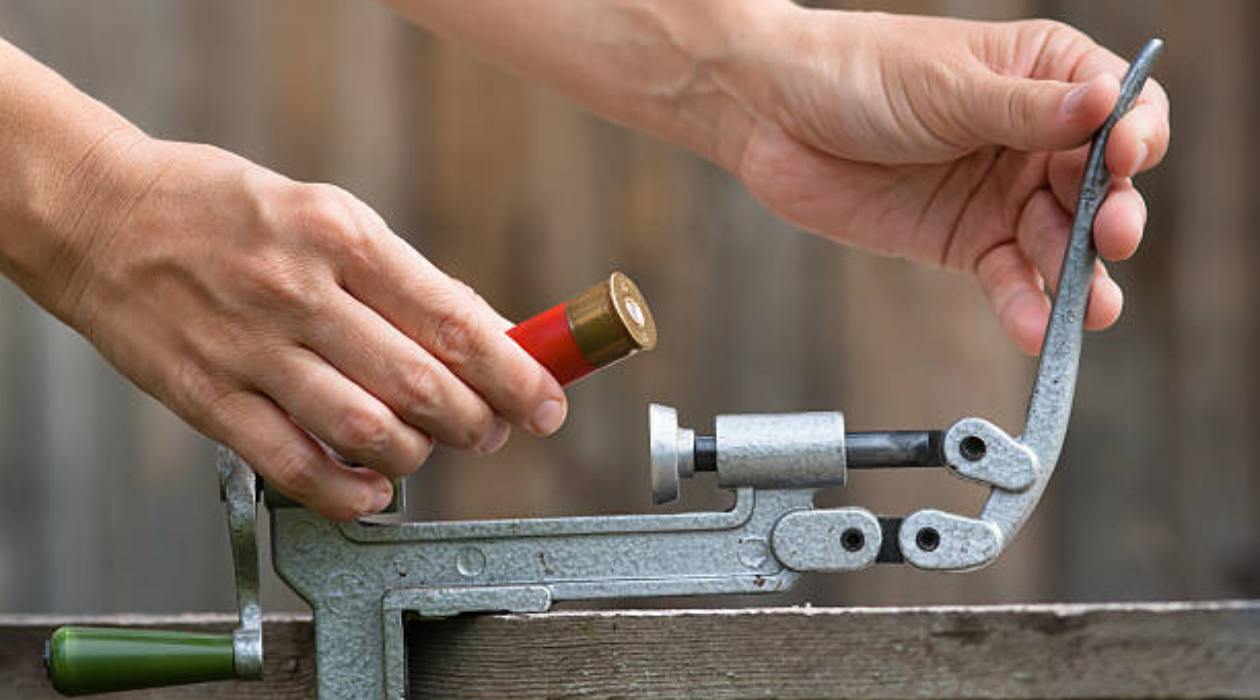
Disassembling the Bullet
Before you can start reloading a bullet, you need to disassemble the existing bullet to reuse the bullet casing. Disassembling a bullet involves removing the primer and pulling the bullet from the case. Here’s a step-by-step guide on how to disassemble a bullet:
- Ensure safety: Before handling any ammunition, make sure you are in a well-ventilated area, wearing safety glasses, and following all safety precautions.
- Secure the bullet: Place the bullet in a bullet puller, making sure it is securely held in place.
- Remove the primer: Using a decapping pin, push out the primer from the bottom of the bullet casing. Apply consistent pressure to avoid damaging the case.
- Pull the bullet: Once the primer is removed, tighten the bullet puller securely to grip the bullet and pull it out of the case. Apply steady force until the bullet is completely separated from the casing.
Once you have successfully disassembled the bullet and have the bullet casing ready, you can proceed to the next steps of the reloading process. Remember to handle the components carefully and ensure they are clean and free from any dirt or debris before moving forward.
It is worth noting that disassembling bullets should only be done with factory-produced ammunition. Reloaded ammunition should not be disassembled due to the risks involved with unknown powder charges and potential damage to components.
By following these steps, you can safely and effectively disassemble a bullet and prepare it for the reloading process.
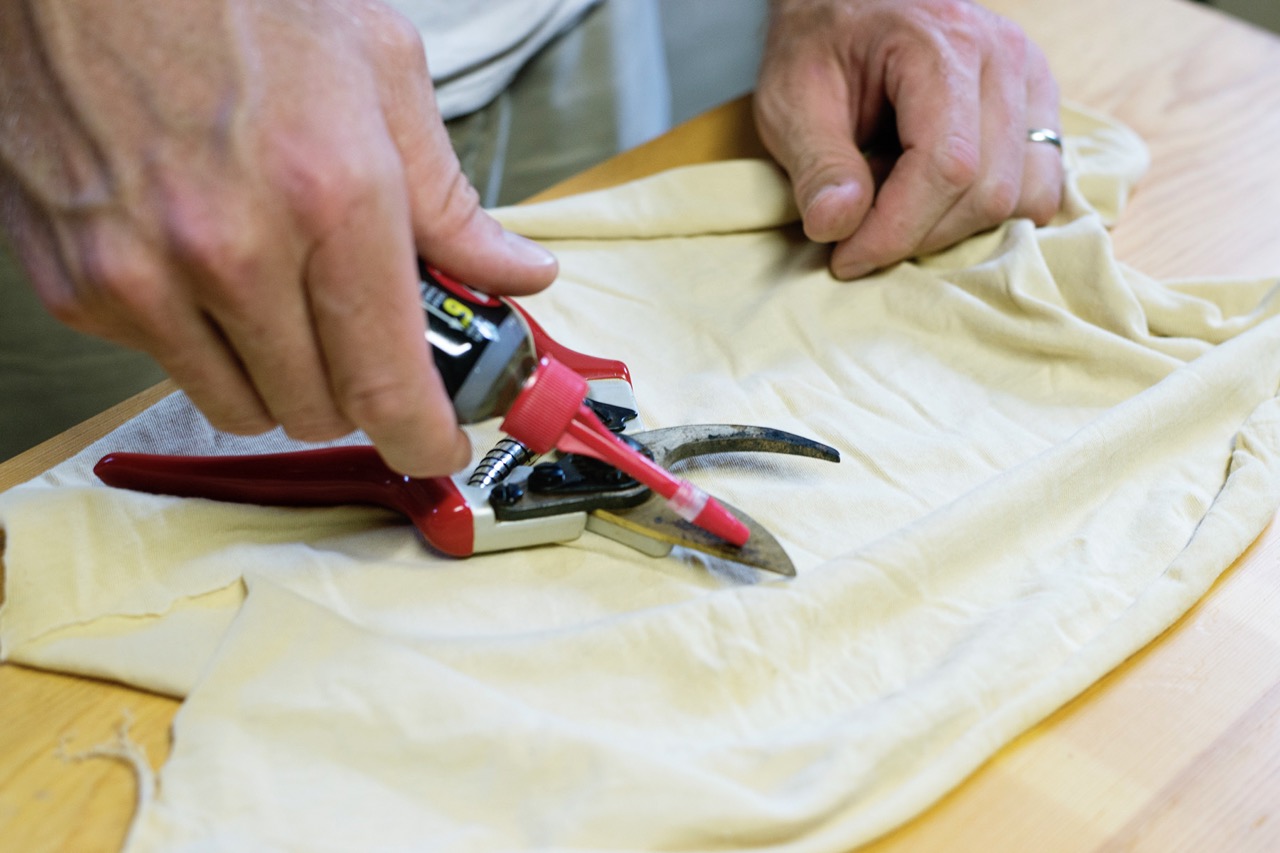
Cleaning the Bullet Casing
Once you have disassembled the bullet and obtained the bullet casing, the next step is to clean the casing. Cleaning the bullet casing is essential to remove any dirt, debris, or residual powder that may affect the functionality and reliability of your reloaded ammunition. Here’s a step-by-step guide on how to clean the bullet casing:
- Gather the necessary materials: You will need a suitable case cleaner or tumbler, cleaning media, and a container to hold the cleaned casings.
- Inspect the casing: Before cleaning, inspect each casing for any signs of damage, such as cracks or splits. Discard any casings that are damaged beyond repair.
- Add cleaning media: Place the bullet casings in the case cleaner or tumbler and add the appropriate cleaning media, such as crushed walnut shells or stainless steel pins.
- Remove and inspect the casings: Once the cleaning cycle is complete, carefully remove the casings from the cleaner. Inspect each casing to ensure they are clean and free from any debris or residue.
- Dry the casings: Allow the casings to air dry thoroughly before proceeding to the next step. You can also use a soft cloth to remove excess moisture.
- Inspect the casings again: After drying, carefully inspect each casing to ensure they are completely clean and ready for the reloading process.
Cleaning the bullet casing is an important step in the reloading process as it helps maintain the integrity of the ammunition and ensures reliable performance. Properly cleaned casings also help in achieving consistent bullet seating and crimping results.
Remember to follow all safety precautions when handling reloaded ammunition, and always store the cleaned casings in a secure and dry location until you are ready to move on to the next reloading steps.
Inspecting and Replacing Components
After cleaning the bullet casing, it is crucial to inspect all the components for any signs of damage or wear. This step ensures that the reloaded ammunition will function safely and reliably. Here’s a step-by-step guide on inspecting and replacing components:
- Inspect the bullet casing: Examine the cleaned bullet casing for any cracks, splits, or deformities. Discard any casings that show signs of damage beyond repair.
- Check the primer pocket: Inspect the primer pocket of the casing to ensure there are no obstructions or residual primer material. Use a small brush or pick to remove any debris or fouling if needed.
- Inspect the primer: Before inserting a new primer, inspect it for any damage or deformities. Only use primers that are in good condition and free from defects.
- Inspect the bullet: Examine the bullet for any signs of damage or deformities. Check the seating area for any bulges or irregularities that may affect the reloaded ammunition’s performance.
- Measure the case length: Use calipers to measure the overall length of the bullet casing. Ensure it falls within the specified range for your particular caliber.
- Check the expander and resizing die: Inspect the expander and resizing die for any signs of wear or damage. Ensure they are clean and well-lubricated to ensure smooth resizing and bullet seating.
- Replace any worn or damaged components: If any components, such as the casing, primer, or bullet, show signs of damage or wear, replace them with new, quality components.
Proper inspection and replacement of components are crucial for the safety and reliability of reloaded ammunition. By identifying and addressing any potential issues during the inspection process, you can help prevent malfunctions or accidents when firing the reloaded rounds.
Remember to handle all components with care and always follow the recommended guidelines provided by the manufacturers of the reloading equipment and components. Taking the time to inspect and replace components as necessary ensures that your reloaded ammunition is of the highest quality and performance.
When reloading bullets with hand tools, always double-check your measurements and follow the reloading manual’s instructions precisely to ensure safety and accuracy.
Measuring and Adding Gunpowder
Accurately measuring and adding gunpowder to the bullet casing is a critical step in the reloading process. Incorrect powder charges can lead to unsafe conditions or poor performance. Here’s a step-by-step guide on how to measure and add gunpowder:
- Choose the appropriate gunpowder: Select a gunpowder that is suitable for your specific caliber and intended load. Refer to reloading manuals or reliable online sources for recommended powder types and loads.
- Set up a reliable powder scale: Ensure your powder scale is properly calibrated and zeroed before measuring the gunpowder. Follow the manufacturer’s instructions for setting up and using the scale accurately.
- Prepare the powder measure: Use a powder measure to dispense the desired amount of gunpowder. Set the measure to the appropriate charge weight according to the reloading manual or load data for your specific caliber and bullet weight.
- Dispense the gunpowder: With the bullet casing positioned directly beneath the powder measure, operate the measure smoothly to dispense the precise amount of gunpowder into the casing. Ensure that all the powder is transferred to the casing without spilling or overflowing.
- Inspect the charge: Once the gunpowder is dispensed into the casing, visually inspect the charge to ensure it matches the desired weight. Look for any irregularities, such as clumping or uneven distribution of powder.
- Double-check the powder charge: Use calipers or a powder trickler to verify the powder charge is within the recommended range. It is essential to take these additional steps to ensure accuracy and consistency.
When measuring and adding gunpowder, it is crucial to handle the powder with care and avoid static electricity or sparks in the reloading area. Follow all safety guidelines and handle the gunpowder responsibly to minimize the risk of accidents.
Accurate and consistent powder charges are vital for safe and reliable ammunition. By meticulously measuring and adding gunpowder following the recommended load data, you can ensure optimal performance and consistency in your reloaded rounds.
Seating the New Bullet
Seating the new bullet into the bullet casing is a critical step in the reloading process. Properly seating the bullet ensures proper alignment and consistent performance. Here’s a step-by-step guide on how to seat the new bullet:
- Adjust the bullet seating die: Begin by adjusting the bullet seating die to the desired overall cartridge length. Use the reloading manual or load data for your specific caliber and bullet type as a reference.
- Insert the bullet into the casing: Take a new bullet and carefully align it with the mouth of the casing. Gently press the bullet against the casing, making sure it is seated straight and level.
- Place the casing in the press: Insert the bullet casing into the reloading press, aligning it with the bullet seating die. Ensure the casing is aligned properly and firmly held in place.
- Seat the bullet: Lower the press handle, applying consistent and even pressure to seat the bullet into the casing. The bullet seating die will push the bullet into the casing to the desired depth.
- Check the seating depth: Once the bullet is seated, inspect the overall cartridge length to verify it matches the desired length specified in the reloading manual or load data. Use calipers to measure the length accurately.
- Adjust if necessary: If the seating depth is not within the desired range, adjust the bullet seating die accordingly. Make incremental adjustments until the correct length is achieved.
When seating the bullet, ensure that it is seated to the proper depth, allowing for reliable chambering and consistent performance. Pay attention to any signs of excessive pressure or resistance during the seating process.
Remember to follow the reloading manual or load data specific to your caliber and bullet type for proper seating depth and optimal performance. Consistency and attention to detail are key in this step to ensure quality reloaded ammunition.
Crimping the Bullet
After seating the new bullet into the bullet casing, the next step in the reloading process is crimping the bullet. Crimping secures the bullet in place and prevents it from shifting during transportation or chambering. Here’s a step-by-step guide on how to crimp the bullet:
- Choose the appropriate crimp die: Select a crimp die that is designed for your specific caliber and bullet type. Different dies are available for various bullet profiles and crimping styles.
- Adjust the crimp die: Install the crimp die into the reloading press and adjust it according to the recommended specifications in the reloading manual or load data for your specific caliber and bullet type.
- Place the casing in the press: Insert the bullet casing with the seated bullet into the reloading press, aligning it with the crimp die. Ensure the casing is positioned properly and securely held in place.
- Crimp the bullet: Lower the press handle to bring the crimp die into contact with the mouth of the casing. Apply steady and even pressure to crimp the case mouth around the bullet.
- Inspect the crimp: After crimping, visually inspect the crimp to ensure it is secure and uniform. Look for any signs of over-crimping or under-crimping, such as excessive deformation of the case mouth or inadequate tension around the bullet.
- Check the overall cartridge length: Measure the overall cartridge length, including the crimp, using calipers to ensure it matches the desired length specified in the reloading manual or load data.
- Adjust if necessary: If the crimp or overall cartridge length is not within the desired range, make incremental adjustments to the crimp die and repeat the crimping process until the correct length and crimp are achieved.
Crimping the bullet is crucial for both semi-automatic and revolver ammunition to ensure proper chambering and reliable function. A well-executed crimp helps maintain bullet alignment and prevents bullet setback, which can cause inconsistent pressures and potential malfunctions.
Always follow the recommended crimping specifications provided in the reloading manual or load data specific to your caliber and bullet type. Pay close attention to the overall cartridge length, as improper crimping can affect feeding and accuracy.
By mastering the art of crimping, you can ensure that your reloaded ammunition is securely assembled and performs consistently and reliably.
Read more: How To Store Bullets
Testing and Verification
Once you have completed the bullet reloading process, testing and verifying the performance of your reloaded ammunition is crucial. Testing ensures that your ammunition meets your desired specifications and performs safely and effectively. Here’s a step-by-step guide on testing and verifying your reloaded ammunition:
- Choose a safe shooting range: Find a suitable shooting range that allows for testing and firing of your reloaded ammunition. Ensure that you follow all range rules and regulations and practice proper firearm safety.
- Prepare for testing: Set up a safe and controlled environment for testing your ammunition. Gather the necessary equipment, including eye and ear protection, targets, and a suitable firearm.
- Start with a small batch: Begin testing with a small batch of reloaded ammunition to ensure consistency and reliability. This allows you to make any necessary adjustments before reloading a larger quantity.
- Record test data: Keep a logbook or notebook to record important data, such as the load specifications, bullet type, powder type, and any observations or issues during testing.
- Fire the rounds: Load and fire the reloaded ammunition following proper firearm safety protocols. Pay attention to recoil, accuracy, and any signs of pressure signs or malfunctions.
- Evaluate performance: Examine the target for accuracy and consistency. Observe the recoil and cycling of the firearm. Look for any signs of overpressure, such as flattened primers or bulging cases.
- Verify functionality: Ensure that the reloaded ammunition feeds reliably in your firearm, cycles the action smoothly, and ejects properly. Test multiple rounds to confirm consistent performance.
- Compare results: Compare the performance of your reloaded ammunition to factory-loaded ammunition of the same caliber and bullet type. Check for any noticeable differences in accuracy, recoil, or reliability.
- Make adjustments if necessary: If you encounter any issues or inconsistencies during testing, go back to your reloading setup and make necessary adjustments to improve performance.
It is important to note that testing and verifying your reloaded ammunition is an ongoing process. Regular testing allows you to refine your reloading techniques and ensure consistent results.
Always prioritize safety during testing and follow all recommended safety procedures. Pay attention to any signs of excessive pressure or malfunctions and address them immediately. Your safety and the safety of others should always be the top priority.
By thoroughly testing and verifying your reloaded ammunition, you can have confidence in its performance and reliability, knowing that you have produced safe and effective rounds.
Conclusion
Reloading bullets with hand tools is a rewarding and cost-effective endeavor for firearms enthusiasts. Throughout the process, we have discussed the necessary precautions, tools, and step-by-step procedures involved in reloading your own ammunition. As a responsible reloader, always prioritize safety, accuracy, and consistency.
By following safety precautions, such as wearing safety glasses, working in a well-ventilated area, and following manufacturer guidelines, you can ensure the well-being of yourself and others. Remember to keep your workspace clean and organized to prevent errors and accidents.
Having the necessary tools and equipment, including a quality reloading press, die set, calipers, powder scale, and priming tool, is crucial for a successful reloading experience. By investing in these tools, you can achieve precise and consistent results.
The step-by-step guide we discussed covered disassembling the bullet, cleaning the bullet casing, inspecting and replacing components, measuring and adding gunpowder, seating the new bullet, crimping the bullet, and finally, testing and verifying the performance of your reloaded ammunition. It is essential to follow each step carefully and consult reliable sources for load data specific to your caliber and bullet type.
Testing and verifying your reloaded ammunition is necessary to ensure its safety and reliability. By experimenting with small batches, recording data, and comparing results, you can make adjustments and improve the accuracy and consistency of your reloaded rounds. Regular testing and evaluation are key to refining your reloading techniques.
In conclusion, reloading bullets with hand tools allows you to customize your ammunition, gain a deeper understanding of your firearm, and save money in the long run. However, it requires patience, attention to detail, and adherence to safety protocols. With practice and experience, you can become proficient in reloading your own bullets and experience the satisfaction of firing rounds that you have personally crafted.
Remember to always consult reputable reloading manuals, manufacturers’ guidelines, and experienced reloaders for guidance and support. Happy reloading!
Frequently Asked Questions about How To Reload Bullets With Hand Tools
Was this page helpful?
At Storables.com, we guarantee accurate and reliable information. Our content, validated by Expert Board Contributors, is crafted following stringent Editorial Policies. We're committed to providing you with well-researched, expert-backed insights for all your informational needs.


0 thoughts on “How To Reload Bullets With Hand Tools”