Articles
How To Remove Broan Range Hood Fan Blade
Modified: February 27, 2024
Learn how to remove the fan blade of your Broan range hood in this informative article. Step-by-step instructions and tips are provided for a smooth removal process.
(Many of the links in this article redirect to a specific reviewed product. Your purchase of these products through affiliate links helps to generate commission for Storables.com, at no extra cost. Learn more)
Introduction
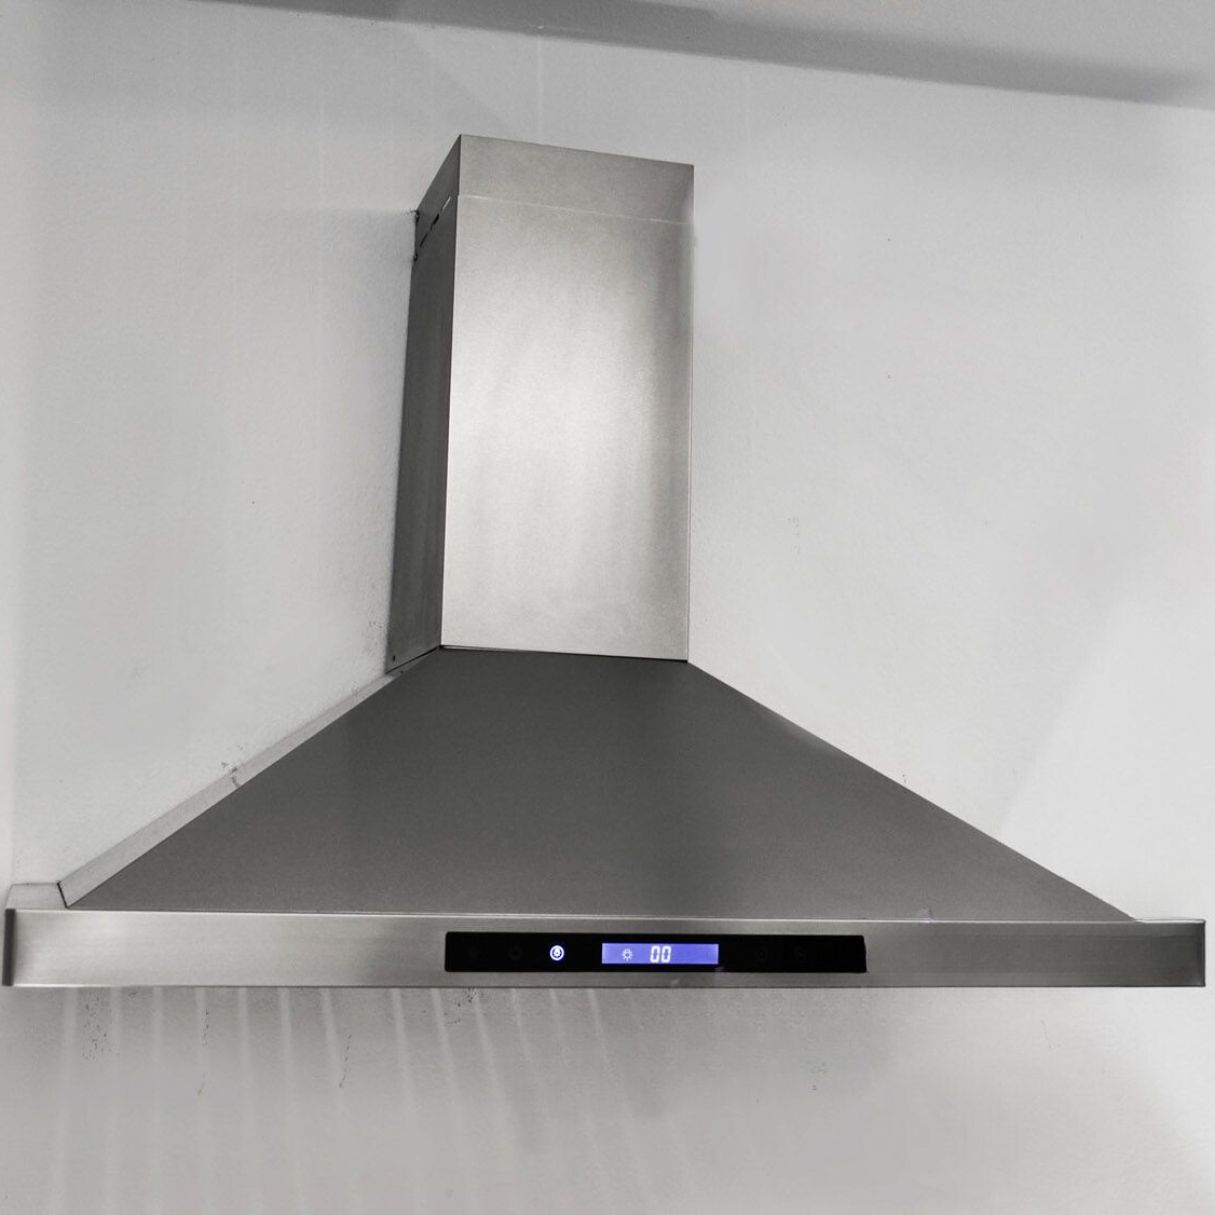
Range hoods are an essential component of any kitchen, helping to remove smoke, odors, and grease particles from the air. One common issue that homeowners may encounter with their Broan range hood is a malfunctioning or noisy fan blade. Over time, the fan blade can become clogged with grease or debris, causing it to spin less efficiently or generate excessive noise.
If you’re experiencing issues with your Broan range hood fan blade, don’t fret. This article will guide you through the step-by-step process of removing and cleaning the fan blade, ensuring optimal performance and quiet operation. By following these instructions and taking the necessary safety precautions, you can restore your range hood to its full functionality and enjoy a clean and quiet kitchen environment.
Note: It’s always a good idea to consult the manufacturer’s instructions for your specific Broan range hood model before attempting any maintenance or repairs. Additionally, if you’re uncomfortable performing these tasks yourself, it’s recommended to seek the assistance of a qualified professional.
In the following sections, we will outline the necessary safety precautions, tools and materials needed, and the step-by-step process to remove and clean the fan blade of your Broan range hood. So, let’s get started and bring back the efficiency and tranquility to your kitchen!
Key Takeaways:
- Regular maintenance, including cleaning the fan blade and replacing the grease filter, is crucial for optimal performance and a quiet kitchen environment with your Broan range hood.
- Prioritize safety by following the step-by-step process and taking necessary precautions, ensuring a successful and efficient cleaning of your Broan range hood fan blade.
Read more: How To Remove Broan Range Hood Filter
Safety Precautions
Before starting any maintenance or repair tasks on your Broan range hood, it’s crucial to prioritize safety. By following these safety precautions, you can minimize the risk of accidents or injuries:
- Disconnect the Power: Before working on your range hood, make sure to turn off the power supply. Locate the circuit breaker or fuse that controls the range hood and switch it off. This will help prevent electric shock while handling the fan blade and motor.
- Wear Protective Gear: It’s essential to protect yourself during this process. Wear safety goggles to shield your eyes from any debris or cleaning solutions. Additionally, wearing gloves will provide an added layer of protection.
- Maintain a Clean Work Area: Clear the surrounding area of any objects or clutter that may impede your movements. This will minimize the risk of tripping or knocking over tools while you work.
- Use the Correct Tools: Make sure to use the appropriate tools for the job. This may include screwdrivers, pliers, a wrench, or other tools as specified by the manufacturer’s instructions.
- Work with a Partner: If possible, it’s always beneficial to have someone else present while working on your range hood. They can provide assistance if needed and help ensure your safety.
- Follow Manufacturer’s Instructions: While these instructions provide a general guide, it’s important to consult the manufacturer’s instructions specific to your Broan range hood model. This will ensure that you follow the recommended procedures and precautions.
By adhering to these safety precautions, you can create a secure environment for yourself while working on your Broan range hood. Now, let’s gather the necessary tools and materials to begin the process of removing and cleaning the fan blade.
Tools and Materials Needed
Before you can start removing and cleaning the fan blade of your Broan range hood, it’s important to gather all the necessary tools and materials. Here’s a list of items you’ll need for this task:
- Screwdriver (either a flathead or Phillips, depending on the screws used in your range hood)
- Needle-nose pliers
- Wrench or adjustable pliers
- Soft cloth or sponge
- Mild dish soap or range hood cleaner
- Clean water
- New grease filter (if needed or desired)
When selecting a screwdriver, ensure that it properly fits the screws on your range hood to avoid damaging them. Needle-nose pliers will be useful for disconnecting the motor wiring, while a wrench or adjustable pliers may be necessary to remove the fan blade retaining clip.
In terms of cleaning materials, a soft cloth or sponge will be effective for wiping down the fan blade and motor. To remove grease and dirt buildup, you can use mild dish soap diluted with water, or a specialized range hood cleaner if preferred.
If you notice that your grease filter is in poor condition or heavily clogged, it may be a good time to replace it. You can purchase a compatible replacement grease filter from a hardware store or directly from the Broan manufacturer’s website.
Now that you have all the necessary tools and materials assembled, it’s time to proceed with the step-by-step process of removing and cleaning the fan blade of your Broan range hood. Follow along carefully, and remember to refer to the manufacturer’s instructions for any specific guidelines pertaining to your range hood model.
Step 1: Turn Off Power
The first step in safely removing and cleaning the fan blade of your Broan range hood is to turn off the power supply. This will ensure that you are not at risk of electrical shock while working on the appliance.
Locate the circuit breaker or fuse box that controls the power to your range hood. Depending on your electrical setup, you may have a dedicated circuit for the range hood or it may be connected to a shared circuit. Find the appropriate switch or fuse and turn it off.
For added safety, it’s a good idea to test the range hood to ensure that power has been successfully disconnected. Switch on the fan and lights to verify that they are no longer operational.
Once you have confirmed that the power is off, you can move on to the next steps of removing and cleaning the fan blade. Remember to exercise caution and always treat electrical components with care to prevent accidents.
Now that the power is disconnected, it’s time to move on to Step 2: removing the grease filter. Gather your tools and materials and let’s proceed to the next step in the process.
Step 2: Remove the Grease Filter
Once the power is turned off, you can begin removing the grease filter from your Broan range hood. The grease filter helps to trap grease particles and prevent them from entering and clogging the fan blade or motor.
Follow these steps to remove the grease filter:
- Locate the grease filter on your range hood. It is typically located underneath the vent cover or inside the range hood itself.
- Gently pull or slide the grease filter out of its slot. Depending on your range hood model, it may be secured with clips or retainers. If necessary, refer to the manufacturer’s instructions for specific guidance on removing the grease filter.
- Inspect the grease filter for any visible signs of damage or heavy grease buildup. If the filter appears worn out or excessively dirty, it may be a good idea to replace it with a new one.
To clean the grease filter, you can wash it with warm water and mild dish soap, or place it in the dishwasher if it is dishwasher-safe. Allow the filter to air dry completely before reinstalling it.
If you have a charcoal filter in addition to the grease filter, this is also a good time to check its condition. Charcoal filters are designed to remove odors and should be replaced periodically, as specified by the manufacturer.
Now that the grease filter is removed and clean, we can move on to removing the fan blade retaining clip in Step 3.
Read more: How To Install Broan Range Hood
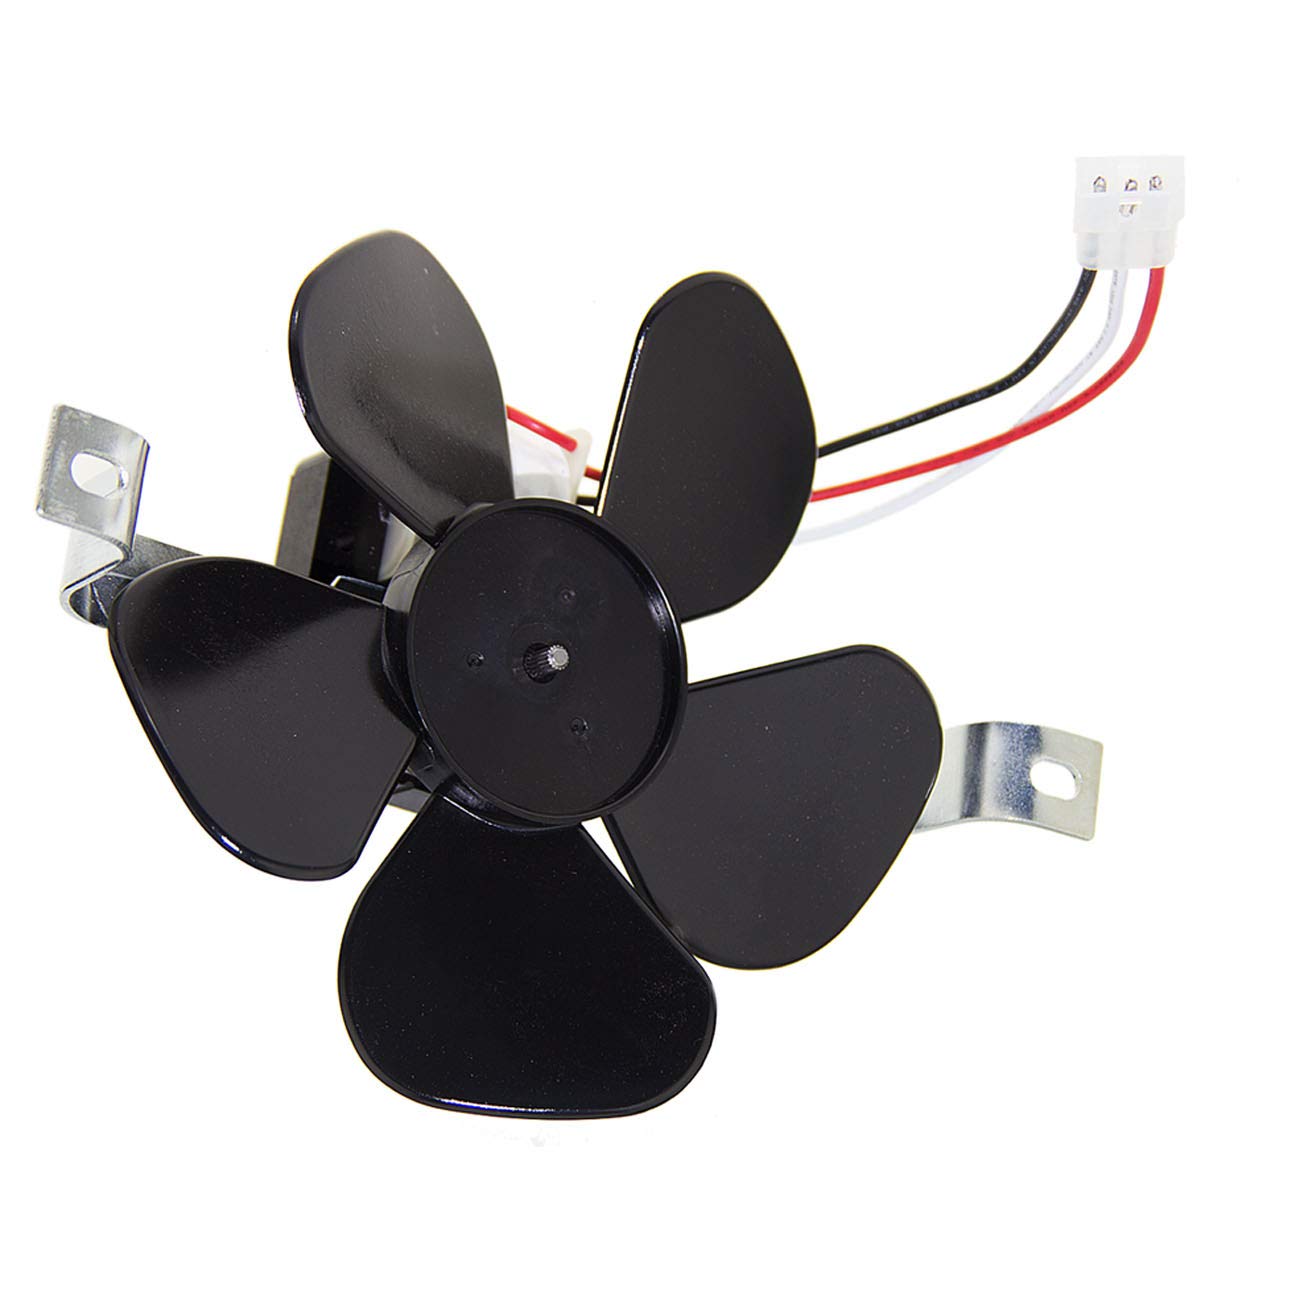
Step 3: Remove the Fan Blade Retaining Clip
With the grease filter removed, you can now proceed to remove the fan blade retaining clip. This clip secures the fan blade to the motor shaft and needs to be removed before you can detach the fan blade.
Follow these steps to remove the fan blade retaining clip:
- Locate the fan blade retaining clip. It is typically positioned near the center of the fan blade, securing it in place on the motor shaft.
- Using a pair of needle-nose pliers, carefully squeeze the ends of the retaining clip together. This will release the clip’s grip on the motor shaft. Be cautious not to apply excessive force, as this may damage the clip.
- Once the retaining clip is released, remove it from the motor shaft and set it aside in a safe place. Take note of its orientation, as you will need to reinstall it in the same position later.
Now that the fan blade retaining clip is removed, you can proceed to disconnect the wiring from the motor in Step 4. Remember to handle all components with care and avoid any excessive force that could lead to damage.
Keep following the step-by-step process to ensure a smooth and successful removal and cleaning of your Broan range hood fan blade. We’re making progress towards a cleaner and more efficient appliance!
Step 4: Disconnect the Motor Wiring
Now that the fan blade retaining clip is removed, the next step is to disconnect the wiring from the motor. Disconnecting the motor wiring will allow you to fully remove the fan blade from the range hood for cleaning.
Follow these steps to disconnect the motor wiring:
- Locate the wiring connection between the motor and the range hood. This connection is usually found near the base of the motor.
- Using a screwdriver or pliers, carefully loosen or remove the screws or connectors that secure the wiring together.
- Gently pull apart the wiring connection, ensuring not to damage the wires or connectors. This will fully separate the fan blade and motor from the electrical supply.
- Once the motor wiring is disconnected, take a moment to inspect the wires for any signs of damage or wear. If you notice any issues, it’s recommended to consult a qualified professional for further assistance.
Remember to exercise caution while working with electrical components. Avoid pulling on the wires too forcefully to prevent damage, and ensure that the power is still turned off throughout this process.
With the motor wiring disconnected, we can now move on to the next step: unscrewing the fan blade from the motor shaft. Stay focused and continue following the step-by-step process for a successful removal and cleaning of your Broan range hood fan blade.
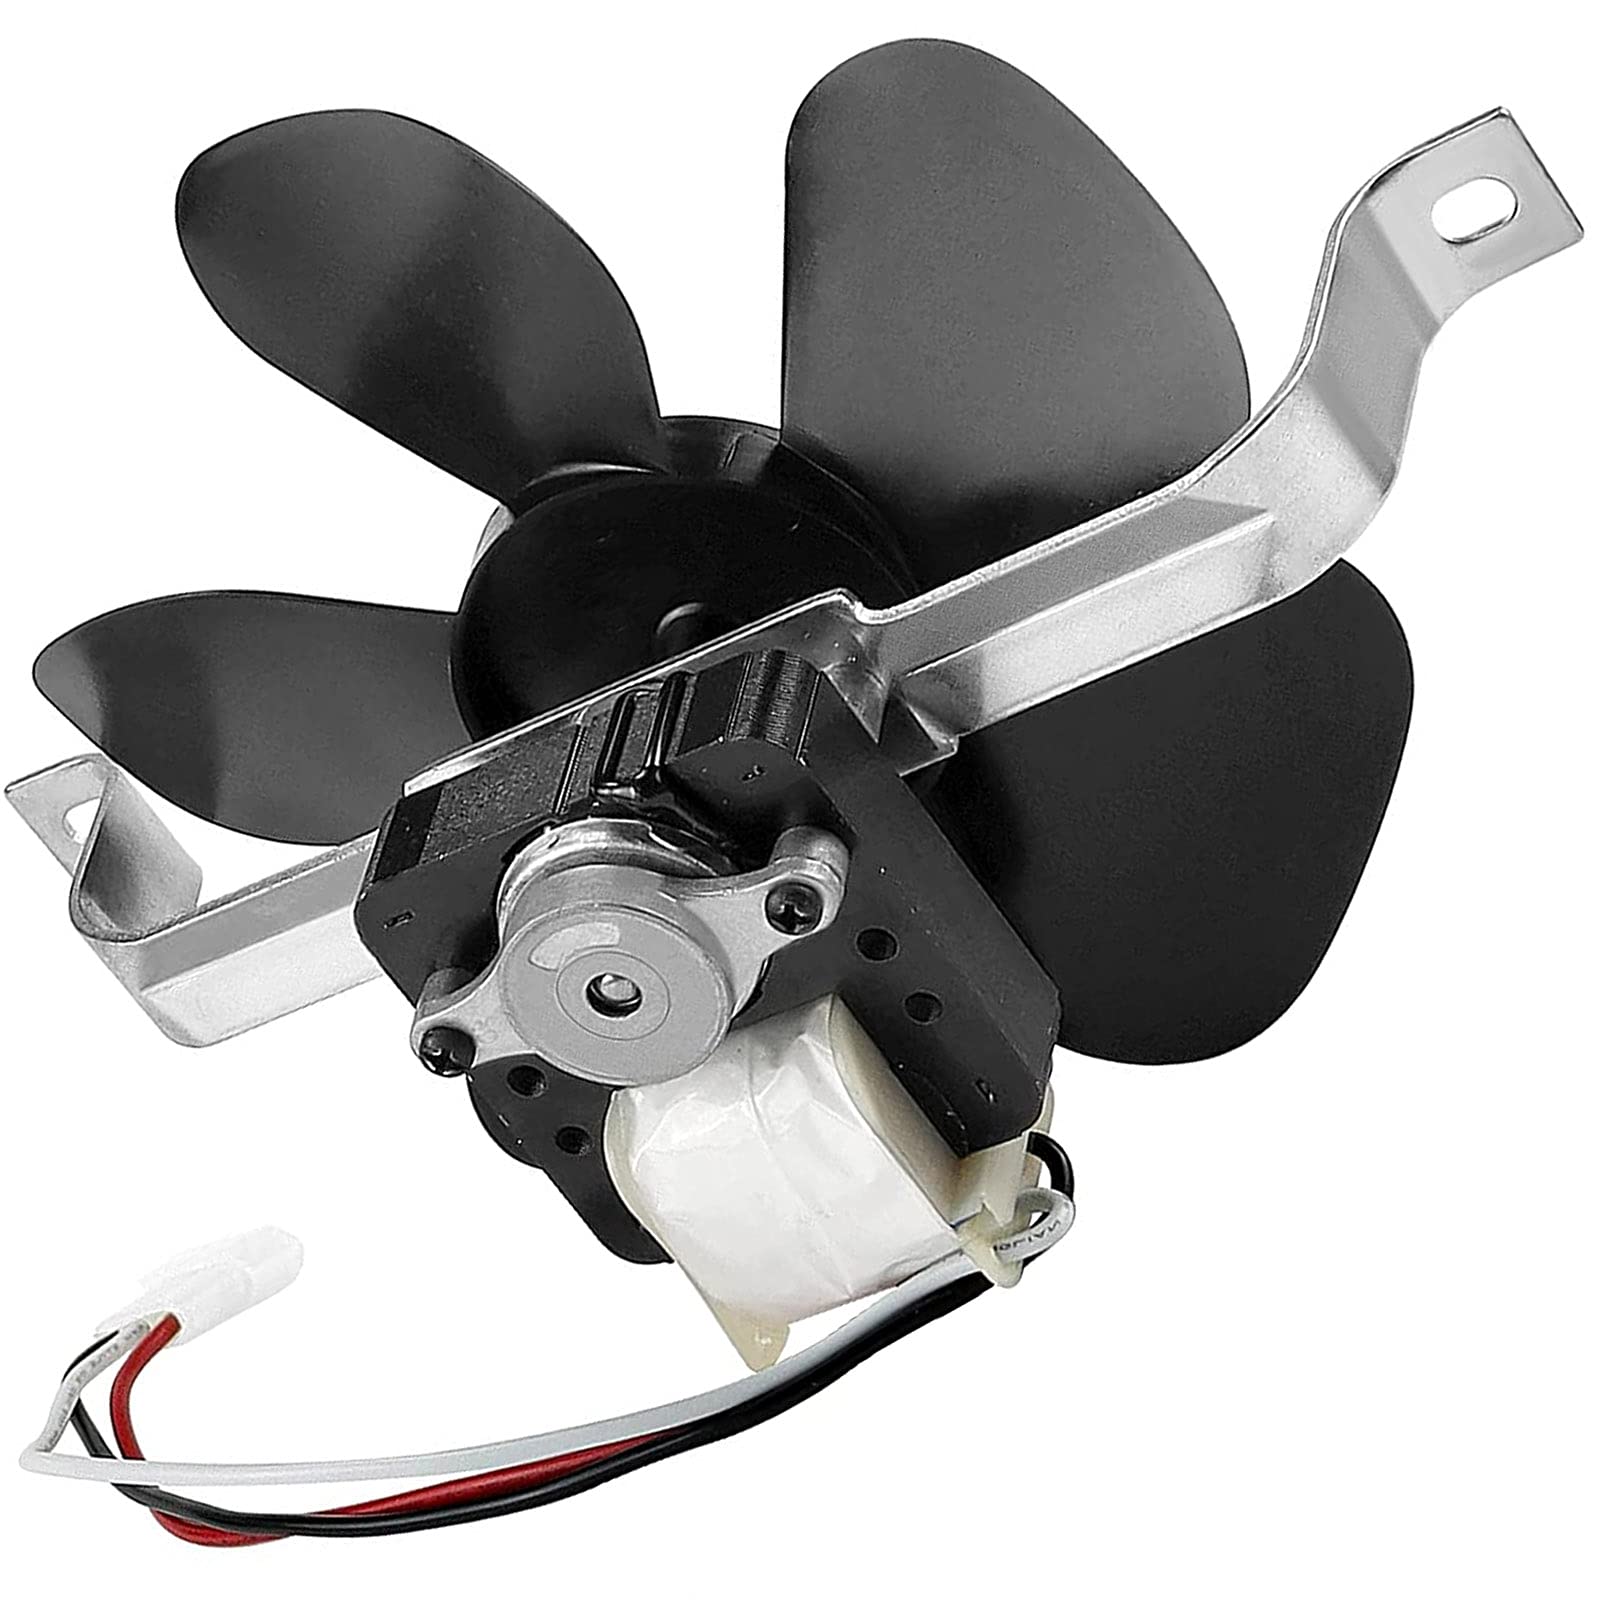
Step 5: Unscrew the Fan Blade from the Motor Shaft
Now that the motor wiring is disconnected, you can proceed to unscrew the fan blade from the motor shaft. Removing the fan blade will allow you to clean it thoroughly and address any issues that may be affecting its performance.
Follow these steps to unscrew the fan blade from the motor shaft:
- Locate the screw or nut that secures the fan blade to the motor shaft. The exact location and type may vary depending on your Broan range hood model.
- Using a screwdriver or wrench, carefully loosen and remove the screw or nut. Make sure to keep track of any washers or spacers that may be present.
- Once the screw or nut is removed, gently pull the fan blade away from the motor shaft. Take care not to damage the fan blade or the motor during this process.
- Inspect the fan blade for any visible signs of damage or excessive dirt and debris. Use a soft cloth or brush to remove any buildup and ensure that the fan blade is clean and free from obstructions.
When cleaning the fan blade, you can use a mild dish soap diluted with water to remove grease and dirt. Alternatively, a specialized range hood cleaner can be used if desired. Ensure that the fan blade is completely dry before reinstallation.
Now that the fan blade is removed and cleaned, it’s time to move on to Step 6: cleaning the fan blade and motor. Stay focused and continue following the step-by-step process to successfully maintain your Broan range hood fan blade.
Before removing the Broan range hood fan blade, make sure to turn off the power to the hood to avoid any accidents. Use a screwdriver to remove the screws holding the fan blade in place, then carefully lift and remove the blade from the motor shaft.
Step 6: Clean the Fan Blade and Motor
With the fan blade removed, it’s time to clean both the fan blade and the motor. Over time, dust, grease, and debris can accumulate on these components, affecting their performance and potentially causing noise issues.
Follow these steps to clean the fan blade and motor:
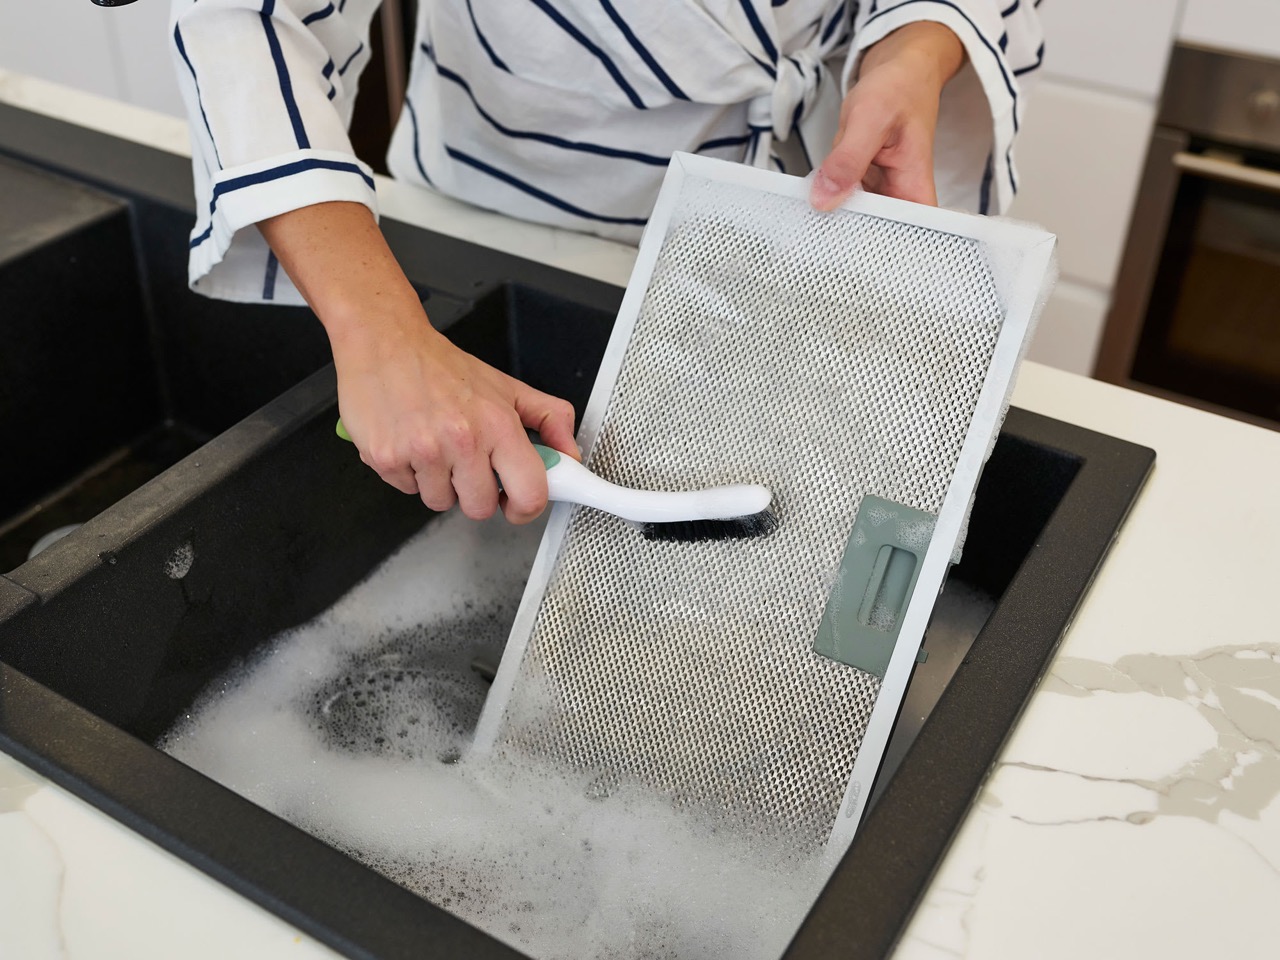
- Start by cleaning the fan blade. Use a soft cloth or sponge and a mixture of mild dish soap and water to wipe down the fan blade thoroughly. Pay special attention to removing any grease or grime buildup.
- If necessary, you can also use a soft brush or toothbrush to gently scrub the fan blade, ensuring you reach all the crevices and edges.
- Rinse the fan blade with clean water to remove any soap residue.
- Set the fan blade aside to air dry completely before reinstallation.
- Next, clean the motor. Use a soft cloth or sponge dampened with water to wipe down the motor housing and any accessible surfaces. Be careful not to get the motor excessively wet, as this could cause damage.
- For stubborn grease or dirt buildup on the motor, you can use a mild degreaser or specialized range hood cleaner. Apply the cleaner according to the manufacturer’s instructions and wipe away the residue with a clean cloth.
- Take this opportunity to inspect the motor for any signs of damage or wear. If you notice any issues, it’s recommended to consult a qualified professional for further assistance.
Once the fan blade and motor are both clean and dry, you can proceed to the next step: reinstalling the fan blade. Stay focused and continue following the step-by-step process to successfully maintain your Broan range hood fan blade.
Step 7: Reinstall the Fan Blade
Now that you have cleaned the fan blade and motor, it’s time to reattach the fan blade to the motor shaft. Proper reinstallation ensures that the fan blade spins smoothly and efficiently, improving the overall performance of your Broan range hood.
Follow these steps to reinstall the fan blade:
- Position the fan blade back onto the motor shaft, aligning it with the opening or slot.
- If applicable, place any washers or spacers back onto the motor shaft before securing the fan blade.
- Using a screwdriver or wrench, gently tighten the screw or nut that secures the fan blade to the motor shaft. Be careful not to overtighten, as this could damage the components.
- Ensure that the fan blade is securely attached and does not wobble or move excessively.
With the fan blade reinstalled, give it a gentle spin by hand to ensure that it rotates freely without hitting any nearby components or interfering with the motor housing.
Now that the fan blade is back in place, let’s move on to Step 8: reconnecting the motor wiring. Follow the steps carefully to ensure safe and proper reconnection of the wires. We’re almost done with the process, so keep up the good work!
Step 8: Reconnect the Motor Wiring
With the fan blade securely reinstalled, it’s time to reconnect the motor wiring. This step will restore the electrical connection between the motor and the power supply, allowing your Broan range hood to function properly.
Follow these steps to reconnect the motor wiring:
- Take the loose ends of the motor wiring and align them with the corresponding wires from the power supply.
- Using wire connectors or twist-on wire nuts, securely join the wires together. Match the colors of the wires (black to black, white to white, etc.) to ensure correct connections.
- Once the wires are joined, gently tug on each connection to ensure they are secure.
If your Broan range hood uses terminal blocks for the motor wiring, simply insert the stripped ends of the wires into the designated terminals and tighten the screws to secure the connection. Consult the manufacturer’s instructions for specific guidance on terminal block connections.
Double-check that all connections are properly made and that there are no loose or exposed wires. This will help ensure safe and reliable operation of your range hood.
Now that the motor wiring is reconnected, we can proceed to Step 9: reattaching the fan blade retaining clip. Let’s keep up the momentum and continue with the final steps of the process!
Step 9: Reattach the Fan Blade Retaining Clip
Now that the motor wiring is reconnected, the next step is to reattach the fan blade retaining clip. This clip plays a crucial role in securing the fan blade to the motor shaft and ensuring proper functioning of your Broan range hood.
Follow these steps to reattach the fan blade retaining clip:
- Take the fan blade retaining clip and position it over the motor shaft, aligning it with the grooves or notches.
- Press the retaining clip onto the motor shaft, making sure it fits securely and engages with the correct slots.
- Using needle-nose pliers, carefully squeeze the ends of the retaining clip together to firmly secure it in place. Ensure that the clip is tightly fastened and does not easily come loose.
It’s important to reinstall the fan blade retaining clip correctly to prevent the fan blade from becoming loose or detached during operation. Double-check that the clip is properly aligned and tightly secured.
With the fan blade retaining clip reattached, you’re almost done with the process. A clean and properly secured fan blade is within reach. Let’s move on to Step 10 and complete the final step of reinstallation: replacing the grease filter.
Step 10: Replace the Grease Filter
With the fan blade successfully reattached, the final step in the process is to replace the grease filter. The grease filter helps to capture grease particles and prevent them from accumulating within your Broan range hood.
Follow these steps to replace the grease filter:
- Take a new grease filter that is compatible with your Broan range hood model. If you already have a clean and reusable filter, you can skip to step 3.
- Position the grease filter in its designated slot, ensuring that it fits securely.
- If your grease filter is washable and reusable, make sure it is completely dry before reinstalling it. Inspect the filter for any signs of damage, such as tears or holes, and replace if necessary.
- Slide the grease filter firmly into place, ensuring that it is properly seated and aligned.
Replacing the grease filter is an important part of maintaining your Broan range hood’s efficiency and preventing grease buildup. It helps to improve air flow and filter out grease particles, keeping your range hood working effectively.
Now that you have successfully replaced the grease filter, take a moment to admire your refreshed and clean Broan range hood. The fan blade is now clean, secure, and functioning optimally.
Take a final look at the range hood to ensure that all components are properly installed and that the fan blade spins freely without any obstructions. If everything looks good, it’s time to restore power to your range hood.
Go ahead and switch the power supply back on at the circuit breaker or fuse box. Test the fan and lights to ensure they are functioning correctly.
Congratulations! You have successfully removed, cleaned, and reinstalled the fan blade of your Broan range hood. By following these steps, you have extended the lifespan of your appliance and improved its performance. Enjoy a quiet and efficient kitchen environment!
Remember, if you encounter any difficulties or are unsure about any step in the process, it’s recommended to consult the manufacturer’s instructions or seek assistance from a qualified professional.
Thank you for following along with this guide. We hope it has been helpful in maintaining your Broan range hood!
Additional Tips and Warnings:
– Regularly clean the grease filter to ensure optimal performance and prevent grease buildup.
– Consult the manufacturer’s instructions for any specific guidelines or recommendations related to your Broan range hood model.
– If you notice excessive noise or performance issues after cleaning, it may be a sign of a more significant problem. In such cases, it’s advisable to seek professional assistance.
Read more: Why Is My Broan Range Hood Blinking
Additional Tips and Warnings
Here are some additional tips and warnings to keep in mind when removing, cleaning, and reinstalling the fan blade of your Broan range hood:
Tips:
- Regular maintenance is key: Cleaning your fan blade and grease filter periodically will help maintain the efficiency and longevity of your Broan range hood.
- Follow a regular cleaning schedule: Depending on your cooking habits, it’s recommended to clean the fan blade and grease filter every 1-3 months.
- Inspect the fan blade: While cleaning, take the opportunity to inspect the fan blade for any signs of damage, such as cracks or bent blades. Any damaged blades should be replaced promptly.
- Wipe down the motor housing: During the cleaning process, also wipe down the motor housing to remove any dust or debris that may have accumulated.
- Use caution when handling electrical components: Always disconnect the power supply before working on your range hood. Be mindful of the wires and connectors to avoid any electrical mishaps.
Warnings:
- Never attempt to clean or perform any maintenance on your range hood while it is still connected to the power supply.
- Do not immerse the fan motor in water or expose it to excessive moisture. This can cause damage to the motor and compromise its performance.
- If you are unsure or uncomfortable with any step in the process, it’s best to seek professional assistance.
- Ensure that all connections and attachments are properly secured before restoring power to your range hood.
- Pay attention to any specific warnings or limitations provided by the manufacturer for your Broan range hood model.
By following these additional tips and warnings, you can safely and effectively maintain your Broan range hood and keep it operating at its best. Enjoy a clean and efficient kitchen environment with your freshly cleaned fan blade!
Remember, if you have any concerns or questions during the maintenance process, it’s always recommended to consult the manufacturer’s instructions or reach out to a qualified professional for guidance.
Conclusion
Congratulations! You have successfully learned how to remove, clean, and reinstall the fan blade of your Broan range hood. By following the step-by-step process and taking the necessary safety precautions, you have improved the performance, efficiency, and cleanliness of your kitchen appliance.
Regular maintenance of your range hood, including cleaning the fan blade and replacing the grease filter, is essential to ensure optimal airflow, remove grease and odors, and prevent excessive noise. By keeping your range hood well-maintained, you can enjoy a clean and quiet kitchen environment while cooking your favorite meals.
Throughout this process, we emphasized the importance of safety precautions, such as turning off the power supply and wearing protective gear. These precautions will help prevent accidents and ensure your well-being while working on your Broan range hood.
Remember to consult the manufacturer’s instructions for your specific Broan range hood model, as they may provide additional guidelines or specifications. If at any point you feel unsure or uncomfortable, it’s always best to seek the assistance of a qualified professional to ensure the job is done correctly.
By following the additional tips provided, including regular maintenance, adhering to a cleaning schedule, and inspecting the fan blade and motor for any signs of damage, you can prolong the lifespan of your Broan range hood and maintain its optimal performance.
Thank you for following along with this comprehensive guide on how to remove, clean, and reinstall the fan blade of your Broan range hood. We hope that you found the information helpful and that your range hood now functions flawlessly, providing you with a comfortable and efficient cooking experience.
Remember, a well-maintained range hood not only keeps your kitchen environment clean and fresh, but also adds value to your home. So, take pride in your efforts to care for your Broan range hood and enjoy its benefits for years to come.
Frequently Asked Questions about How To Remove Broan Range Hood Fan Blade
Was this page helpful?
At Storables.com, we guarantee accurate and reliable information. Our content, validated by Expert Board Contributors, is crafted following stringent Editorial Policies. We're committed to providing you with well-researched, expert-backed insights for all your informational needs.

0 thoughts on “How To Remove Broan Range Hood Fan Blade”