
Articles
How To Fix Range Hood Fan
Modified: October 19, 2024
Discover helpful articles on how to fix your range hood fan. Get step-by-step instructions and expert tips to keep your kitchen ventilation system running smoothly.
(Many of the links in this article redirect to a specific reviewed product. Your purchase of these products through affiliate links helps to generate commission for Storables.com, at no extra cost. Learn more)
Introduction
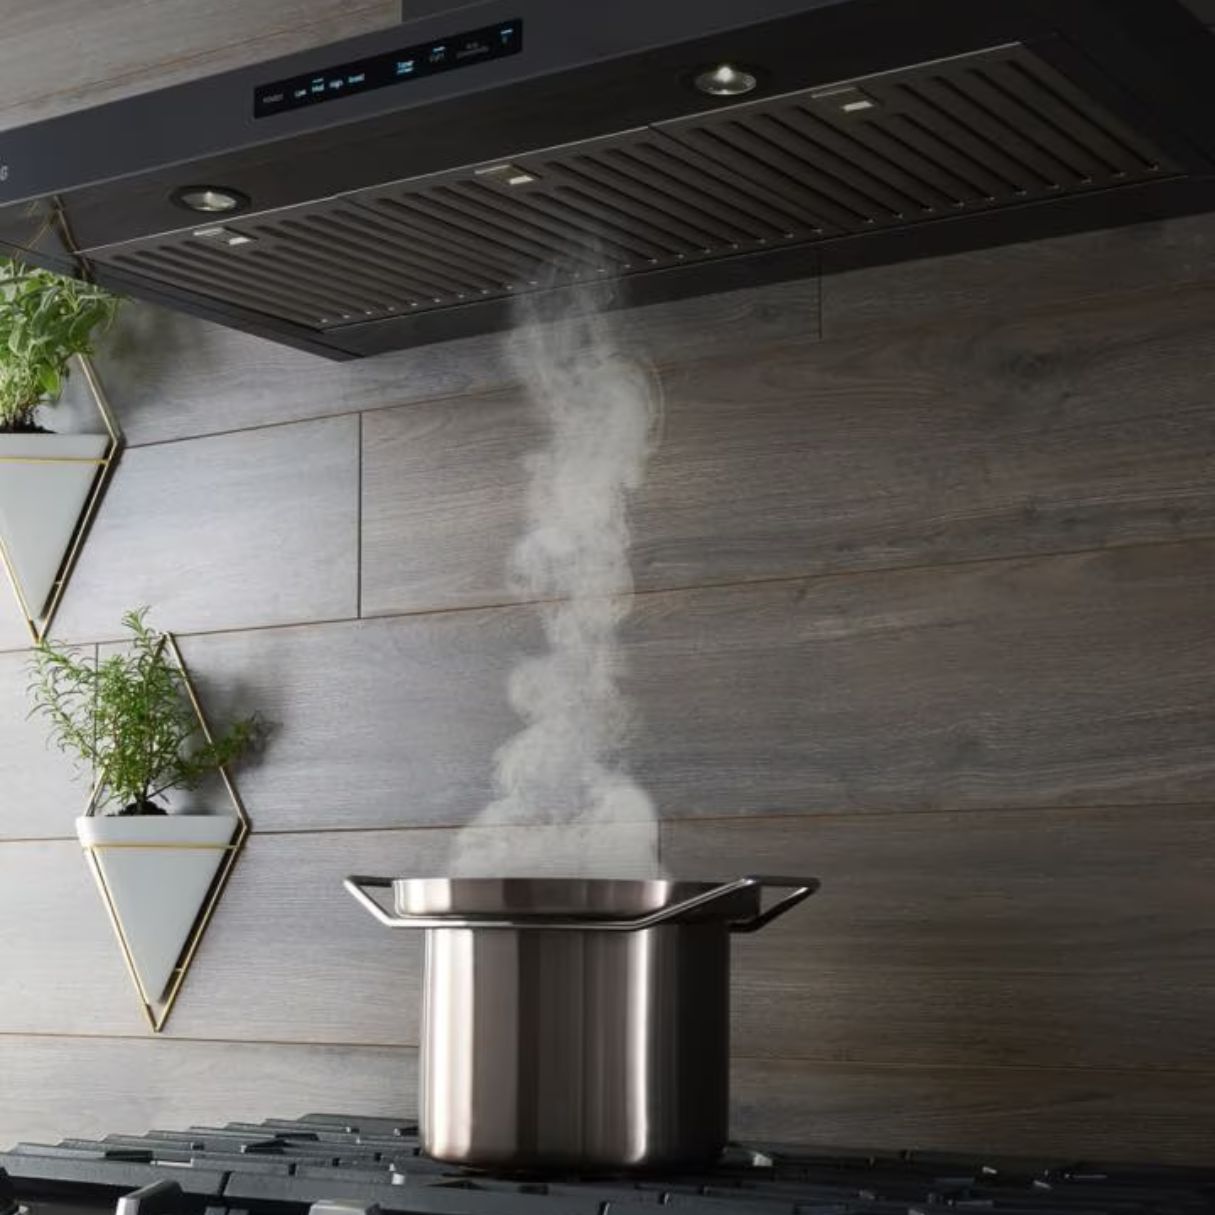
A range hood fan is an essential appliance in any kitchen. It helps to remove smoke, steam, and cooking odors, keeping the air clean and fresh. However, like any mechanical device, range hood fans can experience issues over time. These issues can range from noisy operation and weak airflow to complete malfunction. If you’re facing problems with your range hood fan, don’t worry – in this article, we’ll guide you through the steps to troubleshoot and fix common issues.
Before diving into the troubleshooting process, it’s important to note that range hood fans come in various types, such as ducted and ductless. The troubleshooting steps may vary depending on the type and model of your range hood fan. Always consult the manufacturer’s manual or seek professional help if you’re unsure about any specific steps.
In the following sections, we’ll cover some of the most common issues that can occur with range hood fans and provide step-by-step instructions on how to fix them. From cleaning the fan blades to testing and replacing the motor, we’ve got you covered. So, let’s get started!
Key Takeaways:
- Keep your range hood fan in top condition by regularly cleaning or replacing the fan blades, checking and resetting the circuit breaker, and inspecting and tightening loose electrical connections.
- Prioritize safety when troubleshooting and fixing your range hood fan, and seek professional assistance if you encounter persistent issues or feel uncomfortable working with electrical components.
Read more: How To Replace A Range Hood Fan Motor
Common Issues with Range Hood Fan
Range hood fans can encounter a variety of problems that affect their performance and functionality. Understanding these common issues will help you diagnose the problem and take appropriate action. Here are some of the most common issues you may encounter with your range hood fan:
- Noisy operation: If your range hood fan is making unusual noises, such as rattling, humming, or squeaking, it may be due to loose components, worn-out fan motor bearings, or debris accumulation. Excessive noise can be irritating and a sign that something is amiss.
- Weak airflow: If you notice reduced airflow from your range hood fan, it could be due to a clogged or dirty filter, obstructed vents or ducts, or a malfunctioning motor. Inadequate airflow can prevent the effective removal of smoke, steam, and odors, compromising the ventilation in your kitchen.
- Non-functional fan: If the range hood fan stops working altogether, it could be due to various causes, such as a tripped circuit breaker, faulty wiring connections, or a malfunctioning motor. A non-functional fan can affect the overall performance of your range hood and make cooking in your kitchen uncomfortable.
- Ineffective lighting: Many range hood fans include built-in lights to illuminate the cooking area. If the lights fail to work or are dim, it could be due to loose bulbs, faulty wiring, or a defective light switch. Proper lighting is important for visibility while cooking, so addressing this issue is crucial.
- Unpleasant odors: If your range hood fan is not effectively removing cooking odors, it may be due to a buildup of grease and debris in the filter or exhaust system. Additionally, if you have a ductless range hood, it’s essential to regularly replace the charcoal filters to maintain optimal odor removal.
Identifying the specific issue with your range hood fan is the first step in troubleshooting and fixing the problem. In the next sections, we will provide you with a step-by-step guide on how to address these common issues.
Tools and Materials Needed
Before you begin troubleshooting and fixing your range hood fan, it’s important to gather the necessary tools and materials. Having these on hand will make the process smoother and more efficient. Here’s a list of the tools and materials you’ll need:
- Flathead screwdriver
- Phillips screwdriver
- Adjustable wrench
- Needle-nose pliers
- Clean cloth or sponge
- Mild dish soap or kitchen cleaner
- Replacement filters (if necessary)
- Replacement fan motor (if necessary)
- Electrical tester or multimeter
- Circuit breaker testing tool
- Flashlight
These tools and materials will help you perform various tasks, such as removing the vent cover, cleaning or replacing the fan blades, checking electrical connections, and testing the motor. Make sure to have the appropriate tools for your specific range hood model and follow safety precautions while working with electrical components.
Additionally, it’s essential to refer to the manufacturer’s manual or documentation for your range hood fan. The manual will provide specific instructions and guidelines for your particular model, ensuring a successful troubleshooting and repair process.
Now that you have the necessary tools and materials ready, you’re all set to begin troubleshooting and fixing your range hood fan. In the following sections, we’ll guide you through the step-by-step process to address common issues and get your range hood fan back up and running smoothly.
Step 1: Power Off the Range Hood
Before you start working on your range hood fan, it’s crucial to ensure your safety by turning off the power supply. This will prevent any electrical accidents and allow you to work on the fan safely. Follow these steps to power off the range hood:
- Locate the circuit breaker box in your home. It is usually found in the basement, utility room, or garage.
- Open the circuit breaker box and look for the breaker labeled “range hood” or a similar description. It might also be grouped with other kitchen appliances.
- Flip the switch corresponding to the range hood to the “off” position. You may hear a click or see the switch move to indicate that the power is off.
- Double-check that the power is indeed off by testing the range hood controls or attempting to turn on the fan and lights. If everything remains inactive, it confirms that the power supply has been successfully turned off.
It’s important to note that some range hood models may have a separate power switch located on the unit itself. In such cases, make sure to turn off both the circuit breaker and the unit’s power switch.
Keeping the power off throughout the troubleshooting and repair process is crucial for your safety. It will prevent any potential electric shocks or accidents while working on the range hood fan. Once you have powered off the range hood, you can proceed to the next steps of troubleshooting and fixing the issues.
Step 2: Remove the Vent Cover
Once you have turned off the power to your range hood, the next step is to remove the vent cover. Removing the vent cover will give you access to the fan blades and other components that may need cleaning or inspection. Follow these steps to remove the vent cover:
- Locate the screws or clips that hold the vent cover in place. These are usually positioned along the edges or corners of the cover.
- Using a screwdriver or your fingers, carefully remove the screws or release the clips by gently pushing or pulling them.
- Once the screws or clips are removed, carefully lift the vent cover away from the range hood. Be cautious not to damage the cover or any surrounding surfaces in the process.
- Set the vent cover aside in a safe place where it won’t get damaged or misplaced.
Removing the vent cover may vary depending on the model and make of your range hood. Some vent covers may require additional steps or tools, so refer to your manufacturer’s manual for specific instructions.
Once the vent cover is removed, take a moment to inspect the interior of the range hood. Look for any visible signs of dirt, debris, or grease buildup. These can affect the performance of the fan and contribute to potential issues. If you notice significant buildup, it may be necessary to clean or replace the fan blades, which we will discuss in the next step.
Now that you have removed the vent cover and assessed the condition of the range hood interior, you are ready to proceed with the next steps of troubleshooting and fixing your range hood fan.
Read also: 12 Superior Range Hood Exhaust Fan For 2025
Step 3: Clean or Replace the Fan Blades
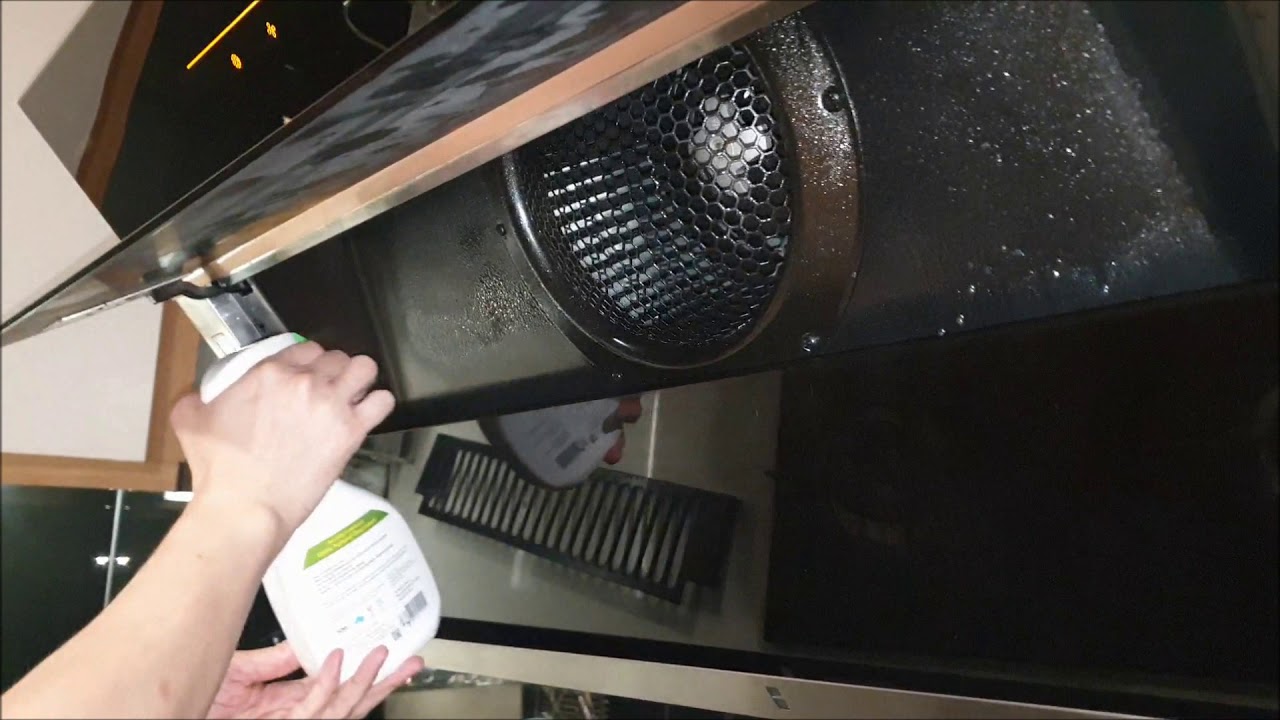
After removing the vent cover and inspecting the interior of the range hood, it’s time to clean or replace the fan blades. Over time, the fan blades can accumulate dust, grease, and debris, which can affect their performance and airflow. Follow these steps to clean or replace the fan blades:
Cleaning the Fan Blades
- Prepare a mixture of mild dish soap or kitchen cleaner and warm water in a bucket or sink.
- Dip a clean cloth or sponge into the soapy water solution and wring out any excess liquid.
- Gently wipe down the fan blades, removing any visible dirt, grease, or debris. Be careful not to bend or damage the blades.
- If the fan blades are particularly dirty or greasy, you may need to repeat the process using a fresh batch of soapy water.
- Once cleaned, rinse the fan blades with clean water to remove any remaining soap residue.
- Allow the blades to air dry completely before reinstalling them.
Replacing the Fan Blades
- If the fan blades are damaged or heavily worn, they may need to be replaced. Refer to your manufacturer’s manual or documentation for the specific fan blade replacement process for your range hood model.
- Order the appropriate replacement fan blades from the manufacturer or a trusted supplier.
- Follow the instructions provided with the replacement fan blades to remove the old blades and install the new ones. It may involve unscrewing or releasing clips that secure the blades to the motor.
- Ensure that the new blades are aligned properly and securely fastened to the motor to prevent any wobbling or imbalance during operation.
Once you have cleaned or replaced the fan blades, take a moment to inspect the interior of the range hood again. Remove any loose dirt or debris that may have accumulated during the cleaning or replacement process. This will help ensure optimal performance and airflow.
Now that you have cleaned or replaced the fan blades, you can proceed to the next steps to further troubleshoot and fix any issues with your range hood fan.
Step 4: Check and Reset the Circuit Breaker
If your range hood fan is not functioning at all, it’s important to check the circuit breaker before proceeding with further troubleshooting steps. A tripped circuit breaker can prevent power from reaching the range hood. Follow these steps to check and reset the circuit breaker:
- Locate the circuit breaker box in your home. It is usually found in the basement, utility room, or garage.
- Open the circuit breaker box and look for the breaker labeled “range hood” or a similar description. It might also be grouped with other kitchen appliances.
- Inspect the breaker to see if it is in the “off” position or somewhere between “on” and “off.”
- If the breaker is in the “off” position or in an intermediate position, gently push it to the “off” position and then firmly switch it to the “on” position.
- You may hear a click or see the switch move to indicate that the power has been restored.
It’s important to note that a circuit breaker can trip due to an electrical overload or a fault in the circuit. If the circuit breaker trips repeatedly after being reset, it indicates a persistent problem that requires further investigation. In such cases, it is advisable to consult a qualified electrician to diagnose and resolve the issue.
Once you have checked and reset the circuit breaker, test the range hood fan by turning it on. If it starts working normally, you have successfully resolved the issue. However, if the fan still doesn’t work, continue to the next steps to inspect and address any potential electrical connection problems.
Remember to prioritize your safety at all times while working with electrical components. If you are unsure or uncomfortable handling electrical connections, it’s always best to seek professional assistance.
Check the power supply and circuit breaker to ensure the fan is getting electricity. Clean the fan and grease filters regularly to maintain proper airflow. If the fan still isn’t working, it may be a motor or wiring issue that requires professional repair.
Read more: How To Remove Broan Range Hood Fan Blade
Step 5: Inspect and Tighten Loose Electrical Connections
If your range hood fan is still not operating properly after checking the circuit breaker, it’s time to inspect and tighten any loose electrical connections. Loose connections can disrupt the flow of electricity and prevent the fan from functioning. Follow these steps to inspect and tighten the electrical connections:
- Ensure the power to the range hood is turned off at the circuit breaker to avoid any risk of electrical shock.
- Locate the electrical junction box at the back or top of the range hood. This box houses the electrical connections for the fan and lights.
- Use a screwdriver or wrench, depending on the type of fasteners used, to remove the cover of the junction box.
- Inspect the electrical connections inside the junction box. Look for any loose or disconnected wires.
- If you find any loose wires, use a pair of needle-nose pliers to carefully tighten the connections. Ensure they are secure and snug.
- While inspecting the connections, also check for any signs of damage or corrosion on the wires. If you notice any, it may be necessary to replace the affected wiring.
- Once you have tightened or replaced any loose or damaged wires, carefully place the cover back onto the junction box and secure it with the screws or fasteners.
After tightening the electrical connections, it’s essential to check if the range hood fan is functioning properly. Restore power at the circuit breaker and turn on the fan to see if it operates as expected. If the fan still doesn’t work, move on to the next step to test and potentially replace the fan motor.
Remember, if you feel uncomfortable or unsure when working with electrical components, it’s best to seek the assistance of a qualified electrician to ensure your safety and prevent any further damage.
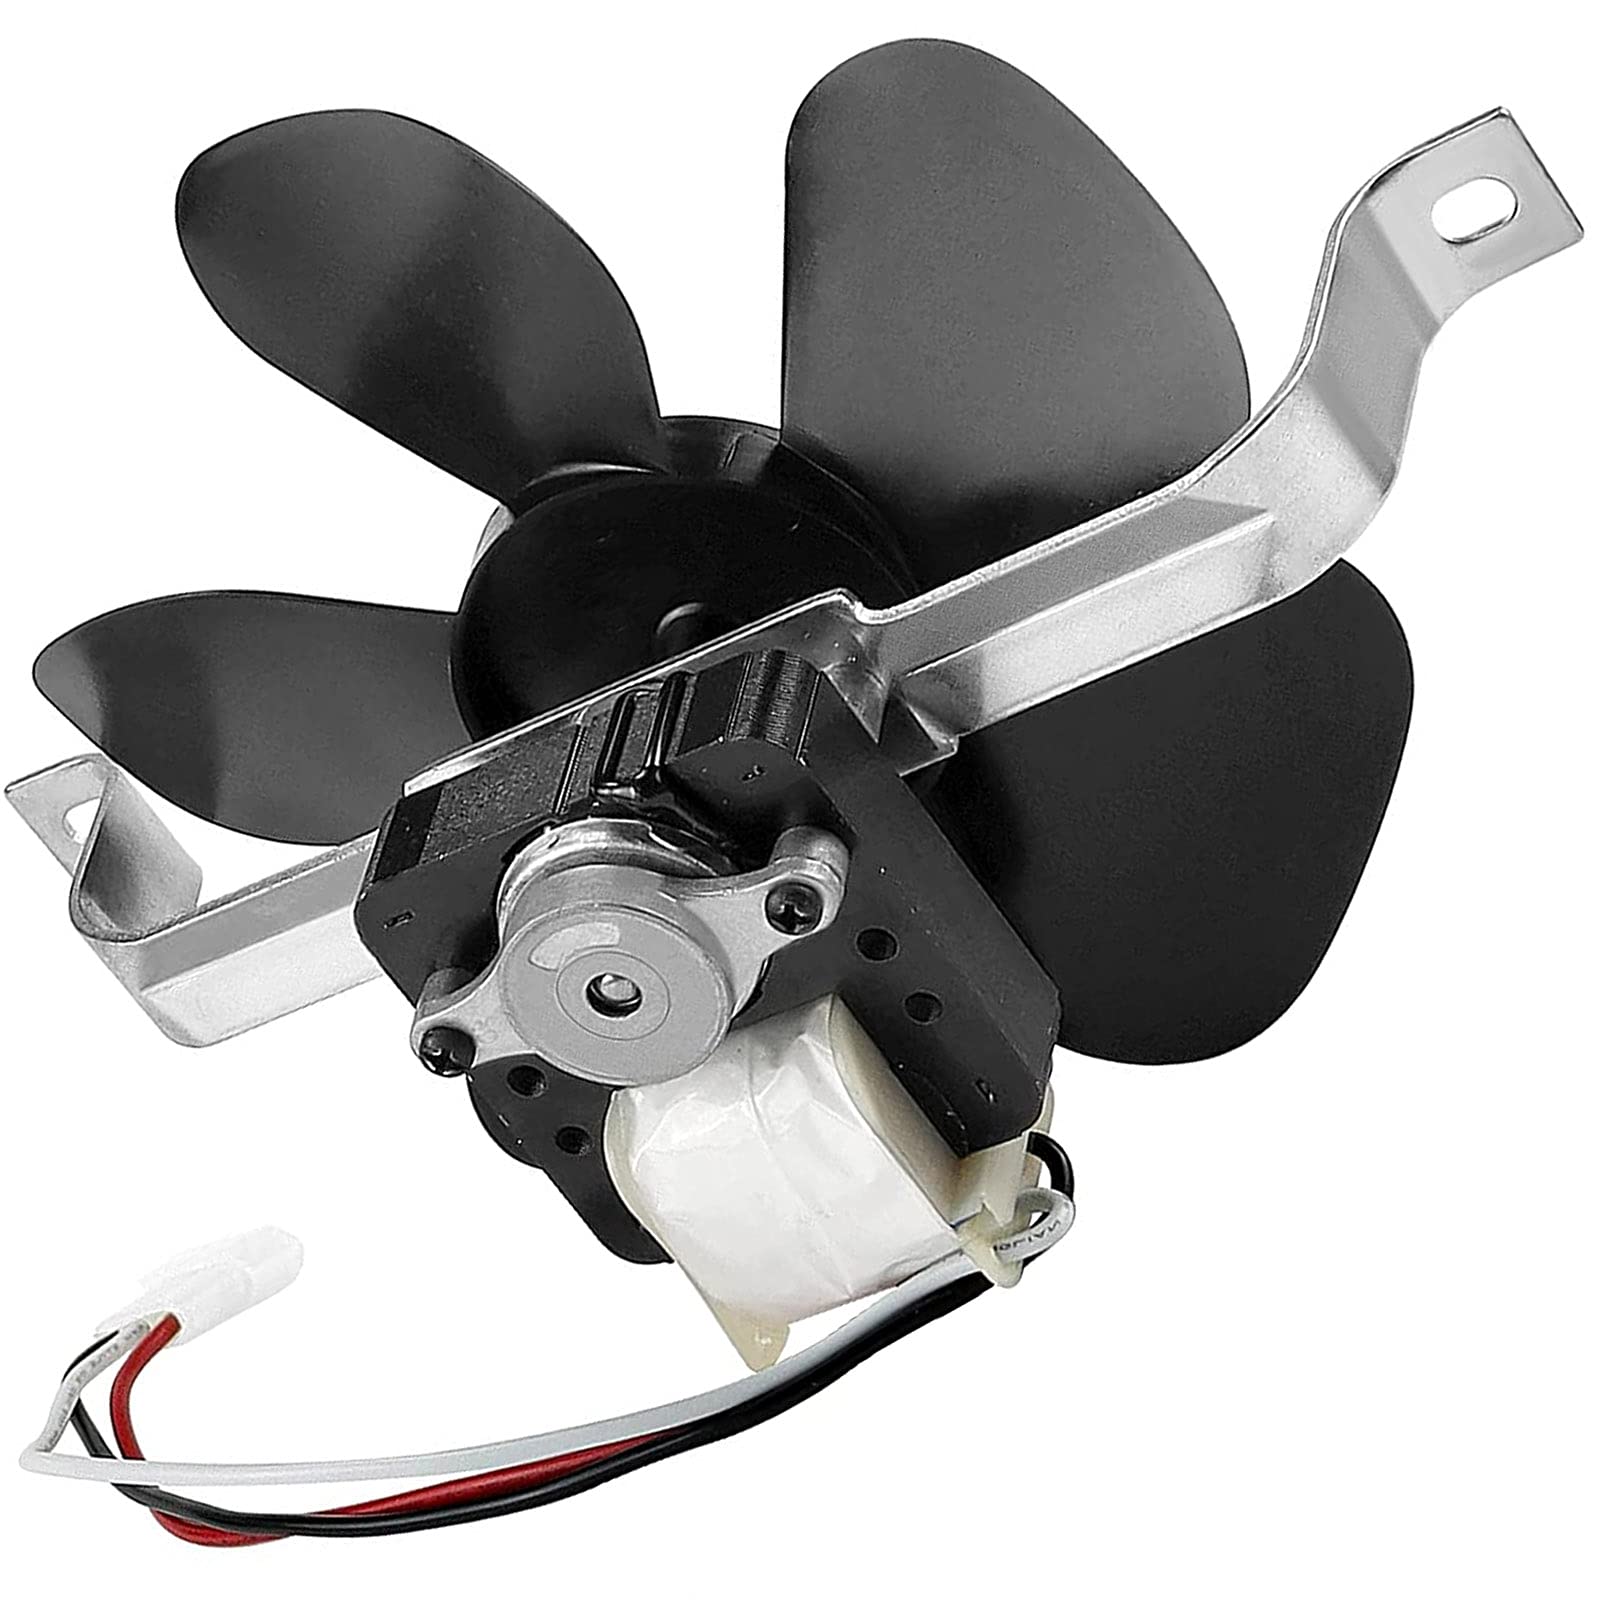
Step 6: Test and Replace the Fan Motor
If your range hood fan is still not functioning properly after checking the circuit breaker and tightening the electrical connections, it’s time to test and potentially replace the fan motor. A faulty motor can cause the fan to stop working or operate at a diminished capacity. Follow these steps to test and, if necessary, replace the fan motor:
- Ensure the power to the range hood is turned off at the circuit breaker.
- Locate the fan motor within the range hood. It is usually positioned within the housing and connected to the fan blades.
- Using a screwdriver, remove any screws or fasteners securing the motor to the housing.
- Disconnect the electrical wires attached to the motor. Take note of the wire connections or photograph them for reference when reconnecting the new motor.
- Once the motor is disconnected, carefully remove it from the housing.
- To test the motor, use an electrical tester or a multimeter to check for continuity. Follow the instructions that came with your testing tool, ensuring that it is set to the appropriate settings for continuity testing.
- Place the testing probes on the motor’s terminals. If there is no continuity or a significant resistance reading, it indicates a faulty motor that needs to be replaced.
- If the motor fails the continuity test, order a replacement motor from the manufacturer or a reputable supplier. Make sure to get the correct motor model that is compatible with your range hood.
- Install the new motor by following the reverse steps of removal. Carefully connect the electrical wires, referring to the notes or photographs taken earlier to ensure proper connection.
- Secure the motor back into the housing with the screws or fasteners.
Once the new motor is installed, restore power at the circuit breaker and test the range hood fan to see if it operates correctly. If the fan now runs smoothly, you have successfully resolved the issue. However, if the fan still doesn’t function, it may be necessary to consult a professional technician or contact the manufacturer for further assistance.
Remember, working with electrical components can be hazardous, so if you are unsure or uncomfortable, it’s best to seek professional help to ensure your safety and avoid any potential damage.
Step 7: Reassemble and Test the Range Hood Fan
After troubleshooting and fixing any issues with your range hood fan, it’s time to reassemble the components and test the fan to ensure it is functioning properly. Follow these steps to reassemble and test your range hood fan:
- If you had removed the vent cover earlier, carefully position it back onto the range hood. Align the screw holes or clips and secure it in place using the appropriate screws or locking mechanisms.
- Double-check that all electrical connections are secure and properly tightened.
- Wipe down the exterior surfaces of the range hood with a clean cloth or sponge to remove any dirt or fingerprints.
- Restore power at the circuit breaker by flipping the corresponding switch to the “on” position.
- Turn on the range hood fan and observe its operation. Ensure that the fan runs smoothly, providing adequate airflow and removing smoke and odors effectively.
- Test the fan’s various speed settings, if applicable, to ensure they are functioning correctly.
- Check the lights, if your range hood includes built-in lighting, to ensure they are working properly and providing sufficient illumination.
If you notice any issues or abnormalities during the testing phase, double-check the troubleshooting steps you have taken and ensure that all components are properly reassembled. If the problem persists, it may be necessary to consult a professional technician or contact the manufacturer for further assistance.
Regular maintenance and cleaning of your range hood fan can help prevent future issues. Refer to the manufacturer’s manual for specific maintenance guidelines and recommendations. By keeping your range hood clean and well-maintained, you can ensure its optimal performance and prolong its lifespan.
Congratulations on troubleshooting and fixing your range hood fan! With these steps, you should now have a fully functional and efficient range hood, providing you with effective ventilation and a pleasant cooking experience.
Conclusion
The range hood fan is a crucial component in your kitchen, helping to keep the air clean and fresh while cooking. However, like any appliance, it can experience issues over time. By following the steps outlined in this article, you can troubleshoot and fix common problems with your range hood fan, restoring its functionality and efficiency.
We began by introducing the common issues that can occur with range hood fans, including noisy operation, weak airflow, non-functioning fans, ineffective lighting, and unpleasant odors. Identifying these issues allows you to pinpoint the problem and take appropriate action.
We then discussed the tools and materials needed to carry out the troubleshooting and repair process, ensuring you have everything necessary for a successful outcome.
The step-by-step instructions included powering off the range hood, removing the vent cover, cleaning or replacing the fan blades, checking and resetting the circuit breaker, inspecting and tightening loose electrical connections, testing and replacing the fan motor if needed, and finally reassembling and testing the range hood fan.
Throughout the process, we emphasized the importance of safety and provided tips on seeking professional assistance when unsure or uncomfortable working with electrical components.
By following these steps, you can address the common issues that may arise with your range hood fan and restore its proper functioning. Regular maintenance and cleaning of your range hood fan will also help prevent future problems.
Remember, if you encounter persistent issues or if you are not confident in your abilities, it’s always advisable to seek assistance from a professional technician or contact the manufacturer for further guidance.
With a well-functioning range hood fan, you can enjoy a clean and pleasant cooking environment, free from smoke, steam, and unwanted odors. Happy cooking!
Frequently Asked Questions about How To Fix Range Hood Fan
Was this page helpful?
At Storables.com, we guarantee accurate and reliable information. Our content, validated by Expert Board Contributors, is crafted following stringent Editorial Policies. We're committed to providing you with well-researched, expert-backed insights for all your informational needs.


0 thoughts on “How To Fix Range Hood Fan”