Articles
How To Remove Tree Stump With Hand Tools
Modified: January 22, 2024
Learn how to remove tree stumps safely and efficiently using only hand tools. Our expert articles provide step-by-step instructions and tips for successful stump removal.
(Many of the links in this article redirect to a specific reviewed product. Your purchase of these products through affiliate links helps to generate commission for Storables.com, at no extra cost. Learn more)
Introduction
Removing a tree stump from your yard can be a challenging task, but with the right tools and techniques, you can accomplish it with hand tools. Whether you want to make room for new landscaping or simply get rid of an unsightly stump, this guide will show you the step-by-step process of removing a tree stump using hand tools.
Before we dive into the details, it’s important to note that removing a tree stump can be physically demanding and potentially dangerous. It’s crucial to prioritize safety throughout the entire process. If you’re not confident in your abilities or feel uncomfortable doing it yourself, it may be best to hire a professional stump removal service.
Now, let’s go over the necessary safety precautions before we get started.
Key Takeaways:
- Safely and successfully remove tree stumps using hand tools by prioritizing safety, gathering the right tools, and following a step-by-step process. Transform your yard and reclaim your outdoor space with confidence.
- Prioritize safety, gather the right tools, and follow a step-by-step process to successfully remove tree stumps using hand tools. Transform your yard and reclaim your outdoor space with confidence.
Safety Precautions
When it comes to removing a tree stump with hand tools, safety should always be your top priority. Here are some essential safety precautions to keep in mind:
- Wear protective gear: Before you begin, make sure to wear appropriate protective gear, such as gloves, safety glasses, and sturdy boots. This will help protect you from any potential injuries or flying debris.
- Clear the area: Ensure that the area around the tree stump is clear of any obstacles or hazards. Remove any loose branches, rocks, or debris that could cause you to trip or fall during the removal process.
- Check for utility lines: Before you start digging, it’s crucial to contact your local utility companies to locate any underground utility lines, such as gas, water, or electrical lines. Hitting these lines can cause serious damage or even be life-threatening.
- Use proper tools: Make sure you have the right tools for the job. This includes a shovel, digging bar, pruning shears, hand saw, and a sturdy pry bar. Using sharp and well-maintained tools will make the process safer and more efficient.
- Be cautious of falling branches: If there are any branches attached to the stump, be careful when cutting or removing them. They may be unstable and could fall unexpectedly, causing injury.
- Work in daylight: It’s best to tackle stump removal during daylight hours when visibility is optimal. Working in well-lit conditions will help you see any potential hazards and prevent accidents.
- Take breaks: Removing a tree stump can be physically demanding. Take frequent breaks to rest and hydrate, especially if you’re working in hot weather. Pushing yourself too hard can lead to exhaustion and increase the risk of accidents.
By following these safety precautions, you can minimize the risk of injuries and ensure a safe and successful tree stump removal process. Now, let’s move on to the tools and materials you’ll need.
Tools and Materials Needed
Before you begin the tree stump removal process, gather the necessary tools and materials to ensure a smooth and efficient operation. Here are the tools and materials you’ll need:
- Shovel: A sturdy and sharp shovel will be your primary tool for digging around the stump and loosening the soil.
- Digging bar: A heavy-duty digging bar will help you break through tough roots and rocks.
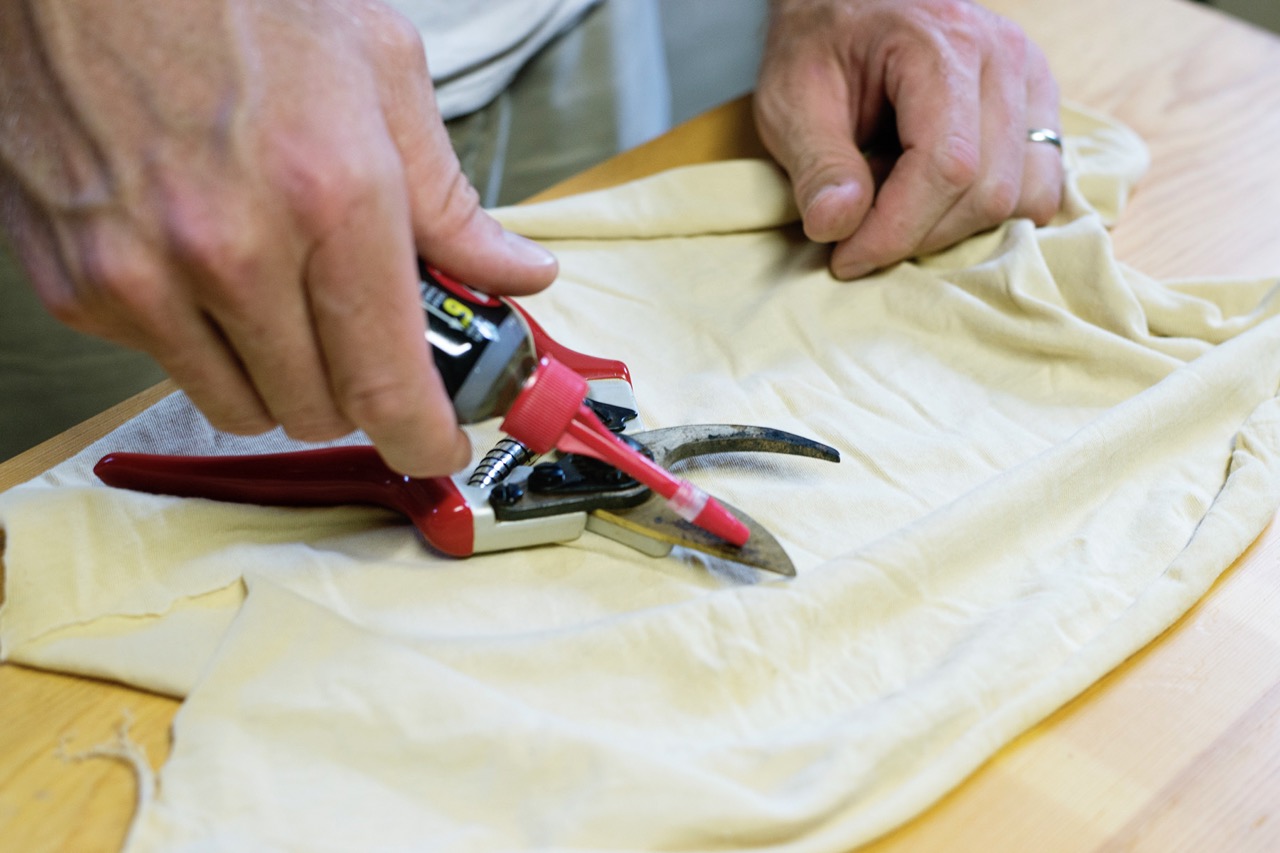
- Pruning shears: Use pruning shears to trim any small branches or foliage that may be blocking your access to the tree stump.
- Hand saw: If the tree stump has larger roots that need to be cut, a hand saw can come in handy for this task.
- Sturdy pry bar: A sturdy pry bar will assist in leveraging and lifting the stump once it’s loosened from the ground.
- Safety gear: As mentioned earlier, wear appropriate safety gear, including gloves, safety glasses, and sturdy boots, to protect yourself from potential injuries.
- Wheelbarrow or tarp: Use a wheelbarrow or tarp to collect and transport the debris from the stump removal process.
- Fill material: After removing the stump, you’ll need fill material to backfill the hole. This can include soil, mulch, or gravel.
Make sure that all your tools are in good working condition and properly maintained before you begin. By having the right tools and materials at hand, you’ll be fully equipped to tackle the tree stump removal process. In the next steps, we’ll guide you through the process of removing the tree stump using these tools and materials.
Step 1: Clear the Area Around the Stump
Before you start digging around the tree stump, it’s essential to clear the area to create a safe working environment. Follow these steps to clear the area around the stump:
- Remove any debris: Clear away any rocks, branches, or other debris from around the stump. This will prevent obstacles from getting in your way while you work.
- Trim surrounding vegetation: Use pruning shears to trim any overhanging branches or foliage that may obstruct your access to the stump. This will provide you with a clear pathway and workspace.
- Mark utility lines: Before you dig, make sure you have located and marked any underground utility lines, such as gas, water, or electrical lines. This will help you avoid damaging these lines during the stump removal process.
- Create a safe perimeter: Set up a safety perimeter around the work area to prevent anyone from accidentally entering while you’re working. Use caution tape or cones to clearly mark the boundaries.
By clearing the area around the stump, you’ll have a safe and organized workspace where you can focus on the stump removal process. With the area prepared, it’s time to move on to the next step: digging around the stump.
Step 2: Dig Around the Stump
Now that the area around the tree stump is clear, it’s time to start digging. By digging around the stump, you’ll expose the roots and make it easier to remove. Follow these steps to dig around the stump:
- Start with a trench: Begin by digging a trench around the perimeter of the stump. The trench should be approximately one to two feet away from the stump and about one foot deep. This will allow you to access the roots and create space for loosening the stump.
- Use a shovel: Use a sturdy shovel to remove the soil from the trench. Loosen the soil by pushing the shovel into the ground and then lifting it to remove the dirt. Continue this process until you’ve excavated the entire trench around the stump.
- Expose the roots: As you dig, you’ll start exposing the roots of the stump. Use the shovel or a digging bar to carefully loosen the soil around the roots. Be cautious not to damage the roots as you work.
- Clear away the soil: As you go deeper, it can be helpful to use a hand trowel or your hands to clear away the loose soil around the roots. This will give you better visibility and access to the roots for the next step.
Remember to take your time and be patient while digging around the stump. The goal is to create enough space to work with the roots and make the removal process easier. Once you have successfully dug around the stump and exposed the roots, you’re ready to move on to the next step: cutting the roots.
When removing a tree stump with hand tools, start by digging around the stump to expose the roots. Use a mattock or grub hoe to cut and remove the roots, then use a pry bar to loosen and remove the stump.
Read more: How To Remove A Tire With Hand Tools
Step 3: Cut the Roots
With the area around the tree stump excavated and the roots exposed, it’s time to start cutting the roots to loosen the stump. Cutting the roots will make it easier to remove the stump from the ground. Follow these steps to cut the roots:
- Identify major roots: Take a look at the exposed roots and identify the major ones that are connecting the stump to the ground. These are the roots that will need to be cut. Use pruning shears or a hand saw to trim any smaller roots that may be in the way.
- Cut the major roots: Once you’ve identified the major roots, carefully cut them one by one. Use a sharp hand saw or a pair of loppers to make clean cuts. Start with the smaller roots and work your way towards the larger ones. It may take some effort to cut through thicker roots, so be patient and take breaks if needed.
- Remove the cut roots: As you cut each root, clear away the debris and discard the cut pieces. This will make it easier to see and access the remaining roots that still need to be cut.
- Continue cutting and clearing: Work your way around the stump, cutting and clearing the roots until you’ve removed all the major connections. This will significantly loosen the stump from the ground and prepare it for the next step – prying.
Remember to be cautious while cutting the roots to avoid any injuries. Take your time, make clean cuts, and remove the debris as you go. Once all the major roots have been cut, you’re ready to move on to step 4: prying the stump.
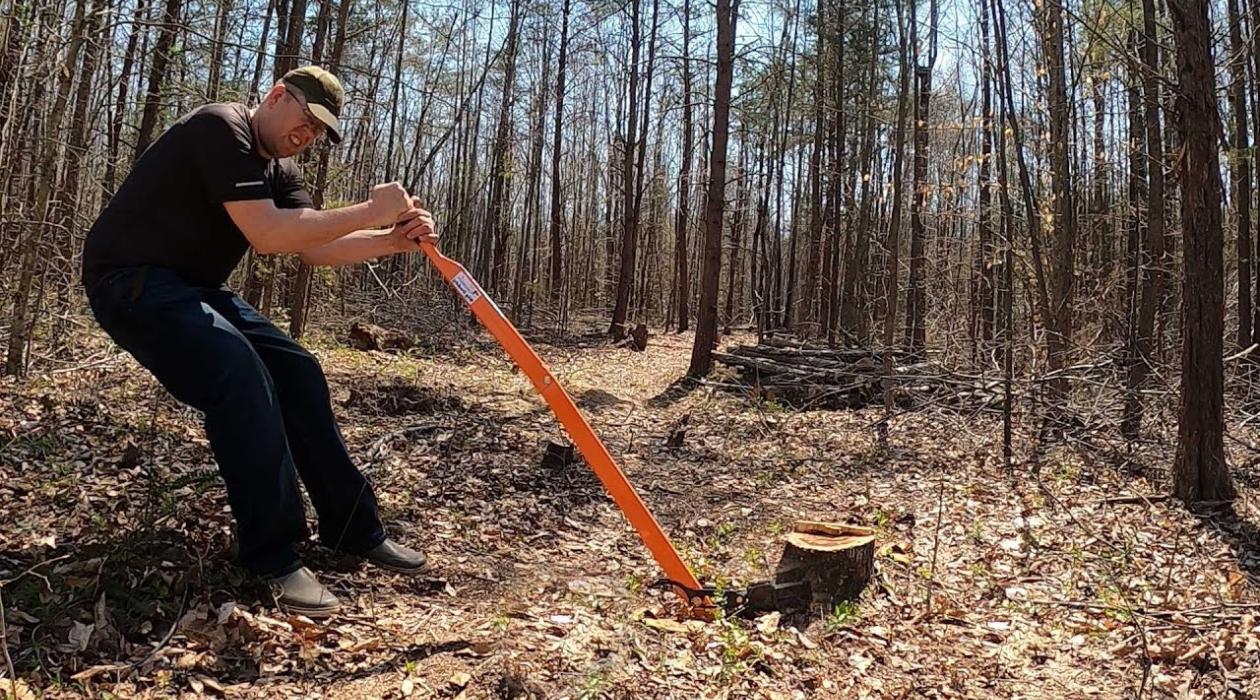
Step 4: Pry the Stump
Now that you have cut the major roots, it’s time to pry the stump to further loosen it from the ground. Prying the stump will help lift it out of the hole, making it easier to remove. Follow these steps to pry the stump:
- Position the pry bar: Place a sturdy pry bar or a digging bar under the stump, near the cut roots. Position it in a way that allows you to apply leverage when prying.
- Use a fulcrum: To create more leverage, use a sturdy piece of wood as a fulcrum. Place it under the pry bar, closer to the stump, to act as a pivot point.
- Apply pressure: With the pry bar in position, apply steady pressure to lift and pry the stump. Use your body weight to push down on the bar or step on it if needed. Be cautious and exert the pressure gradually to avoid any sudden movements.
- Repeat the process: Move the pry bar to different points around the stump and repeat the prying process. This will help loosen the stump further with each attempt.
- Rock the stump: As you pry, the stump may start to loosen and become more movable. Rock it back and forth to test its stability. If it feels loose and ready to be removed, you’re ready to move on to the next step.
Prying the stump can be physically demanding, so take breaks as needed. Be patient and persistent in applying pressure to gradually lift and loosen the stump. Once it feels sufficiently loose and movable, it’s time to proceed to step 5: removing the stump.
Step 5: Remove the Stump
With the stump loosened and ready for removal, it’s time to actually remove it from the ground. Follow these steps to successfully remove the stump:
- Clear the surrounding area: Before attempting to remove the stump, clear away any debris or loose soil from around it. This will create a clear path for the stump as you lift it out.
- Get a firm grip: Depending on the size and weight of the stump, you may need assistance in lifting it out. Get a firm grip on the stump, either by wrapping ropes around it or using lifting straps.
- Simultaneously lift and wiggle: With a secure grip, start lifting the stump from the ground. As you lift, wiggle it from side to side to loosen it further. This will help dislodge any remaining roots and make the removal easier.
- Remove any remaining roots: Once the stump is partially lifted out, use a shovel or pruning shears to cut any remaining roots that are still attached to the stump. This will free it completely and allow for its complete removal.
- Carry or transport the stump: Once the stump is completely free from the ground, carefully carry or transport it to its final destination. This can be a designated area for disposal or a compost pile if you plan to reuse the wood.
Removing the stump can be physically demanding, especially if it’s large or deeply rooted. Enlist the help of others if needed and take breaks as required. With careful lifting and maneuvering, you should be able to successfully remove the stump from your yard.
Now that the stump is removed, there’s just one final step remaining: filling the hole left behind.
Step 6: Fill the Hole
After removing the stump, you’ll be left with a hole in the ground. It’s important to properly fill this hole to ensure a safe and level surface in your yard. Follow these steps to fill the hole:
- Remove any remaining debris: Clear away any remaining debris or loose soil from the hole. This will provide a clean surface for filling.
- Backfill with soil: Start by backfilling the hole with soil. Use a shovel to evenly distribute the soil around the hole, filling it up to ground level. Compact the soil gently as you go to avoid any potential settling in the future.
- Add compost or mulch: To improve the soil quality and provide nutrients, consider adding a layer of compost or mulch on top of the backfilled soil. This will help promote healthy growth of grass or plants in the area.
- Water the area: Once the hole is filled, water the area thoroughly. This will help settle the soil and promote proper drainage.
- Monitor and adjust: Over time, the backfilled soil may settle. Monitor the filled area and add additional soil if needed to maintain a level surface.
By following these steps, you’ll be able to fill the hole left behind by the removed stump and restore the landscape of your yard. Remember to properly dispose of the stump and any excess materials in an appropriate manner.
Congratulations! You have successfully removed the tree stump using hand tools. Not only have you improved the aesthetics of your yard, but you’ve also gained valuable experience in tackling outdoor projects. Remember to always prioritize safety and take the necessary precautions when working with hand tools.
With this guide, you’re now equipped with the knowledge and steps to remove tree stumps using hand tools. Happy stump removal!
Read more: How To Treat Tree Stumps For Outdoor Use
Conclusion
Removing a tree stump with hand tools may seem like a daunting task, but with the right techniques and tools, it can be accomplished successfully. By following the step-by-step process outlined in this guide, you can effectively remove tree stumps from your yard and improve the overall appearance of your landscape.
Throughout the stump removal process, it’s crucial to prioritize safety. Wear appropriate protective gear, clear the area around the stump, and be mindful of underground utility lines. Taking these precautions will help prevent accidents and ensure a safe working environment.
Gathering the necessary tools and materials is essential for a smooth stump removal operation. Shovels, digging bars, pruning shears, and a sturdy pry bar are some of the key tools you’ll need. Additionally, wear safety gear, such as gloves and safety goggles, to protect yourself during the process.
The step-by-step process includes clearing the area around the stump, digging around the stump to expose the roots, cutting the roots to loosen the stump, prying the stump with a pry bar, removing the stump from the ground, and finally, filling the hole left behind.
By following these steps and taking breaks when needed, you can successfully remove a tree stump with hand tools. Remember to properly dispose of the stump and debris, and fill the hole left behind with soil and compost or mulch to ensure a level and aesthetically pleasing surface.
Removing a tree stump with hand tools is a challenging but rewarding task that can enhance the overall look and functionality of your yard. However, if you’re not comfortable or confident in your abilities, it’s always a good idea to hire a professional stump removal service to ensure the job is done safely and efficiently.
Now that you have the knowledge and guidelines, it’s time to put them into action. Get ready to transform your yard by removing those unwanted tree stumps and reclaiming your outdoor space.
Frequently Asked Questions about How To Remove Tree Stump With Hand Tools
Was this page helpful?
At Storables.com, we guarantee accurate and reliable information. Our content, validated by Expert Board Contributors, is crafted following stringent Editorial Policies. We're committed to providing you with well-researched, expert-backed insights for all your informational needs.


0 thoughts on “How To Remove Tree Stump With Hand Tools”