Articles
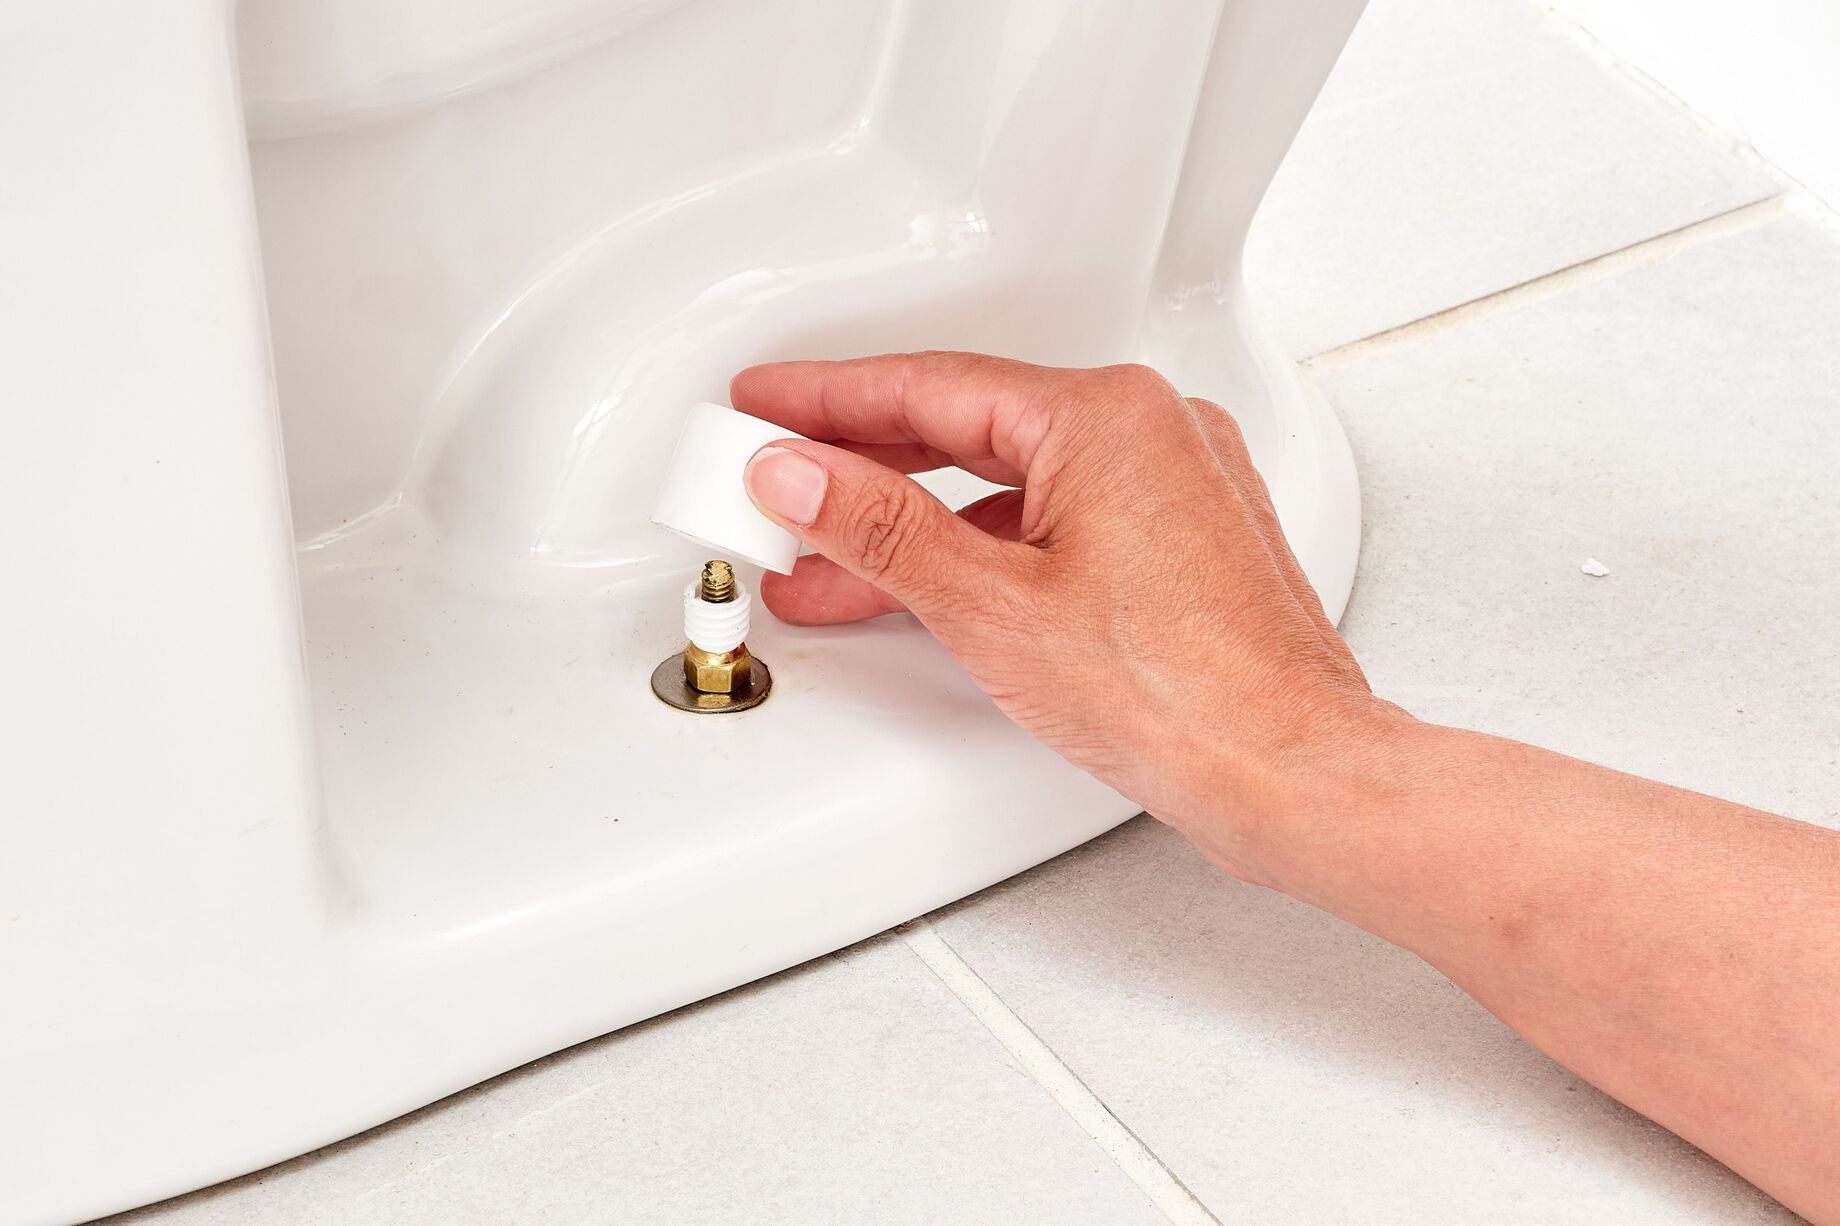
How To Remove A Broken Bolt With Hand Tools
Modified: December 7, 2023
Learn how to remove a broken bolt with hand tools in this informative article. Discover step-by-step instructions and helpful tips for a successful bolt extraction.
(Many of the links in this article redirect to a specific reviewed product. Your purchase of these products through affiliate links helps to generate commission for Storables.com, at no extra cost. Learn more)
Introduction
Encountering a broken bolt can be a frustrating and challenging problem, especially when you don’t have access to power tools. However, with the right approach and hand tools, you can successfully remove a broken bolt without the need for expensive equipment. In this article, we will guide you through the step-by-step process of removing a broken bolt using just hand tools.
Before we start, it’s important to note that removing a broken bolt can be a delicate task and requires careful handling. Patience, precision, and a systematic approach are key to successfully extracting the broken bolt. Additionally, following proper safety precautions is vital to avoid any accidents or injuries. So, let’s dive in and explore the process of removing a broken bolt with hand tools!
Key Takeaways:
- Patience, precision, and proper safety measures are crucial when removing a broken bolt with hand tools. Assess the situation, choose the right tools, and apply gradual force to increase your chances of success.
- Employ various techniques such as using vice grips, extractor kits, tapping with a hammer and chisel, and applying heat to tackle stubborn broken bolts. Adapt your approach, stay persistent, and seek professional help if needed.
Read more: How To Remove A Tire With Hand Tools
Assessing the Situation
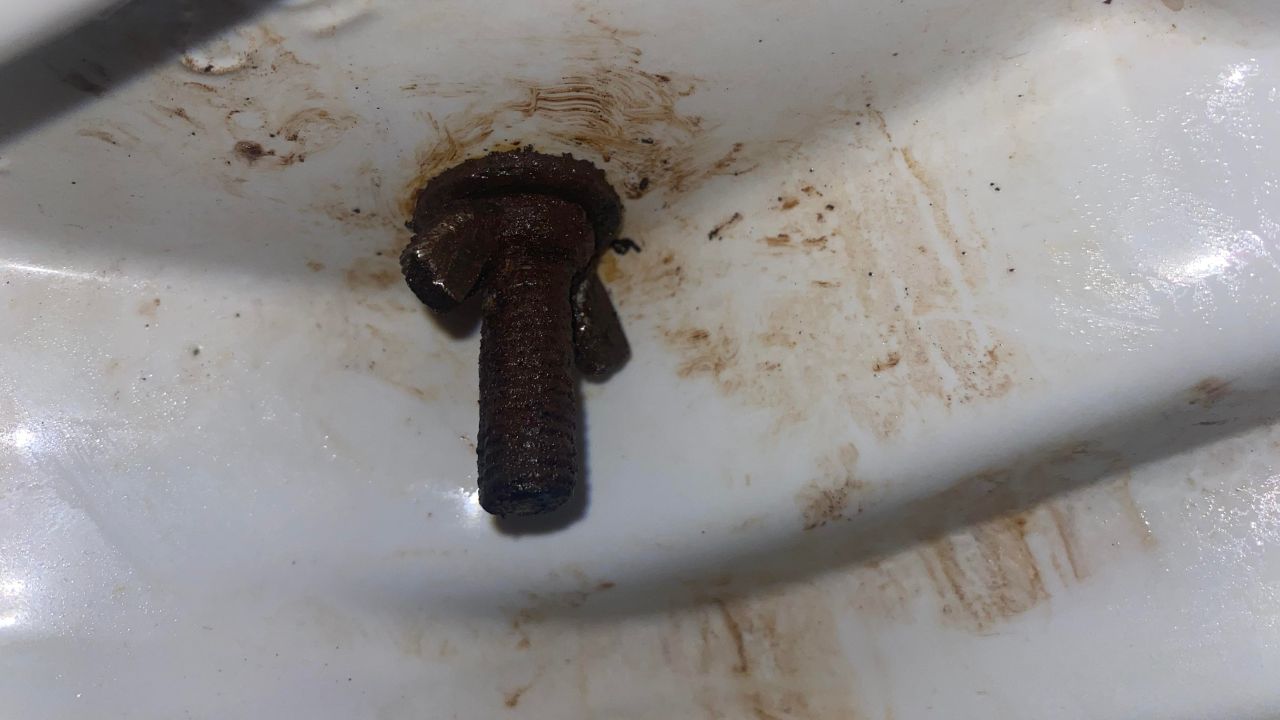
Before you begin the process of removing a broken bolt, it’s essential to assess the situation and understand the extent of the problem. Take a moment to inspect the broken bolt and surrounding area. Consider the type of material the bolt is embedded in, the size of the bolt, and the level of damage it has incurred.
In some cases, the broken bolt may be protruding from the surface, making it easier to grip and remove. However, if the bolt is flush with the surface or broken off below the surface, it will require a different approach.
If the broken bolt is old or rusty, it may be more difficult to remove. In such cases, applying a penetrating oil can help loosen the bolt and make the extraction process smoother. Additionally, if the broken bolt is located in a hard-to-reach area or if there are any obstacles in the vicinity, you may need to adjust your approach and use specialized tools.
Assessing the situation will help you determine the best course of action and the tools required for the job. It will also give you an understanding of the potential challenges that may arise during the bolt removal process.
Once you have thoroughly assessed the situation, you can move on to the next step – preparing for the removal process by taking the necessary safety precautions.
Safety Precautions
When it comes to removing a broken bolt, safety should be your top priority. Working with hand tools can present certain risks, so it’s important to take appropriate safety precautions to protect yourself and avoid any accidents or injuries. Here are some essential safety measures to follow:
- Wear protective gear: Before you begin, ensure that you are wearing safety goggles to protect your eyes from flying debris. Additionally, gloves can provide an extra layer of protection for your hands.
- Secure the work area: Make sure your work area is clean and free from any unnecessary clutter. Keeping the area organized will prevent potential tripping hazards and allow you to work with ease.
- Stabilize the object: If the object containing the broken bolt is movable, secure it to prevent any movement during the removal process. Use clamps or vises to firmly hold the object in place.
- Avoid excessive force: Applying too much force when attempting to remove the broken bolt can lead to physical strain or damage to the surrounding structure or object. Work steadily and apply moderate force to avoid any mishaps.
- Use the right tools and techniques: Using improper tools or techniques can pose a safety risk. Make sure you are using the appropriate hand tools for the job and are familiar with their correct usage.
- Be cautious with heat application: If you are planning to use heat during the bolt removal process, be mindful of flammable materials in the vicinity. Keep a fire extinguisher nearby as a precaution.
- Take breaks if needed: Removing a broken bolt can be a time-consuming process. If you start feeling tired or fatigued, take regular breaks to prevent accidents caused by diminished concentration.
By adhering to these safety precautions, you can minimize the risk of accidents and ensure a safer bolt removal process. Now that you are aware of the necessary safety measures, let’s move on to selecting the right tools for the job.
Choosing the Right Tools
When it comes to removing a broken bolt with hand tools, having the right tools for the job is crucial. Here are some essential tools that you may need:
- Adjustable Wrench: An adjustable wrench, also known as a spanner, is a versatile tool that can be adjusted to fit different sizes of nuts and bolts. It provides a firm grip and allows you to apply torque to loosen the broken bolt.
- Socket Set: A socket set consists of various socket sizes that attach to a ratcheting handle. It can be particularly useful when dealing with larger bolts or when a more secure grip is needed.
- Pliers: Locking pliers, also known as vice grips, are designed for gripping and holding objects firmly. They can be used to grip onto the broken bolt and provide leverage for turning it.
- Screw Extractor Set: A screw extractor set is specifically designed to remove broken or stripped screws and bolts. It typically includes drill bits and extractors of various sizes to match the dimensions of the broken bolt.
- Drill: A power drill or a hand drill can be used along with a drill bit to create a starting point for the screw extractor. It is essential to choose the appropriate size of the drill bit to match the extractor.
- Hammer and Chisel: A hammer and chisel can be used as a last resort to tap and loosen the broken bolt. However, this method should be used with caution and only when other extraction methods have failed.
- Penetrating Oil: Applying a penetrating oil, such as WD-40 or PB Blaster, can help loosen a stubborn broken bolt. It helps to lubricate the threads and reduce friction during the extraction process.
Depending on the specific situation and the condition of the broken bolt, you may require additional tools or variations of the ones mentioned above. Assessing the situation and understanding the nature of the bolt damage will help you determine the most appropriate tools to use.
Once you have selected the necessary tools, the next step is to apply a penetrating oil to the broken bolt to assist in loosening it. We will discuss the process of applying penetrating oil in the next section.
Applying Penetrating Oil
Before attempting to remove a broken bolt, it’s often helpful to apply a penetrating oil to the area. Penetrating oil is designed to loosen rust, corrosion, and debris, making it easier to turn and extract the bolt. Here’s how to apply penetrating oil effectively:
- Clean the area: Wipe away any dirt or loose debris from around the broken bolt using a clean cloth or a brush. This will ensure that the penetrating oil can reach the bolt’s surface more effectively.
- Give it time to soak: Apply the penetrating oil generously to the broken bolt, making sure to coat the threads and the surrounding area. Allow the oil to soak in for at least 10-15 minutes. For heavily corroded or stubborn bolts, you may need to let it soak overnight.
- Reapply if necessary: If the bolt is particularly stubborn or if it has been exposed to harsh elements, you may need to apply the penetrating oil multiple times. Reapply the oil and let it soak again before attempting to loosen the bolt.
While the penetrating oil is soaking in, it’s a good time to gather the necessary hand tools and prepare the work area for the extraction process. Once the oil has had sufficient time to penetrate the bolt, you can move on to the next step – loosening the bolt.
Note: Remember to follow the manufacturer’s instructions and safety guidelines when using penetrating oil. Some oils may be flammable, so exercise caution and keep open flames away from the work area.
Loosening the Bolt
After applying the penetrating oil to the broken bolt, it’s time to start the process of loosening it. Here are the steps to follow:
- Select the appropriate tool: Depending on the size and accessibility of the broken bolt, choose the right tool for the job. This could be an adjustable wrench, socket set, pliers, or any other suitable tool that allows you to grip and apply torque to the bolt.
- Position the tool: Position the tool firmly on the head of the broken bolt, ensuring a secure grip. Make sure the tool is aligned properly to prevent any slippage or damage to the surrounding area.
- Apply steady pressure: Start applying steady, even pressure in a counterclockwise direction to loosen the bolt. Avoid using excessive force initially to prevent stripping or damaging the bolt further.
- Apply additional force if necessary: If the bolt doesn’t budge, you may need to increase the force gradually. Use caution while applying more pressure to avoid any sudden movements or slips.
- Alternate between tightening and loosening: In some cases, a technique called “back and forth” or “rocking” may help in loosening the bolt. Gently tighten the bolt in a clockwise direction, then immediately loosen it counterclockwise. Repeat this back and forth motion to break the bond between the bolt and the threaded hole.
If the bolt still doesn’t loosen, do not force it excessively. Continuing to apply excessive force may result in further damage to the bolt or the surrounding area. In such situations, it’s best to explore alternative methods of extraction, which we will discuss in the next sections.
If the bolt begins to turn and loosen, continue rotating it carefully until it can be completely removed. Once the bolt is removed, inspect the threaded hole for any damage or remaining debris. Clean the area if necessary before proceeding further.
If the above methods don’t work, don’t worry. There are still other techniques and tools that can be used to tackle a stubborn broken bolt. We will explore these methods in the following sections.
Apply penetrating oil to the broken bolt and let it sit for a few hours to help loosen it. Use a left-handed drill bit to drill into the bolt, which may help it to back out as the drill bit turns.
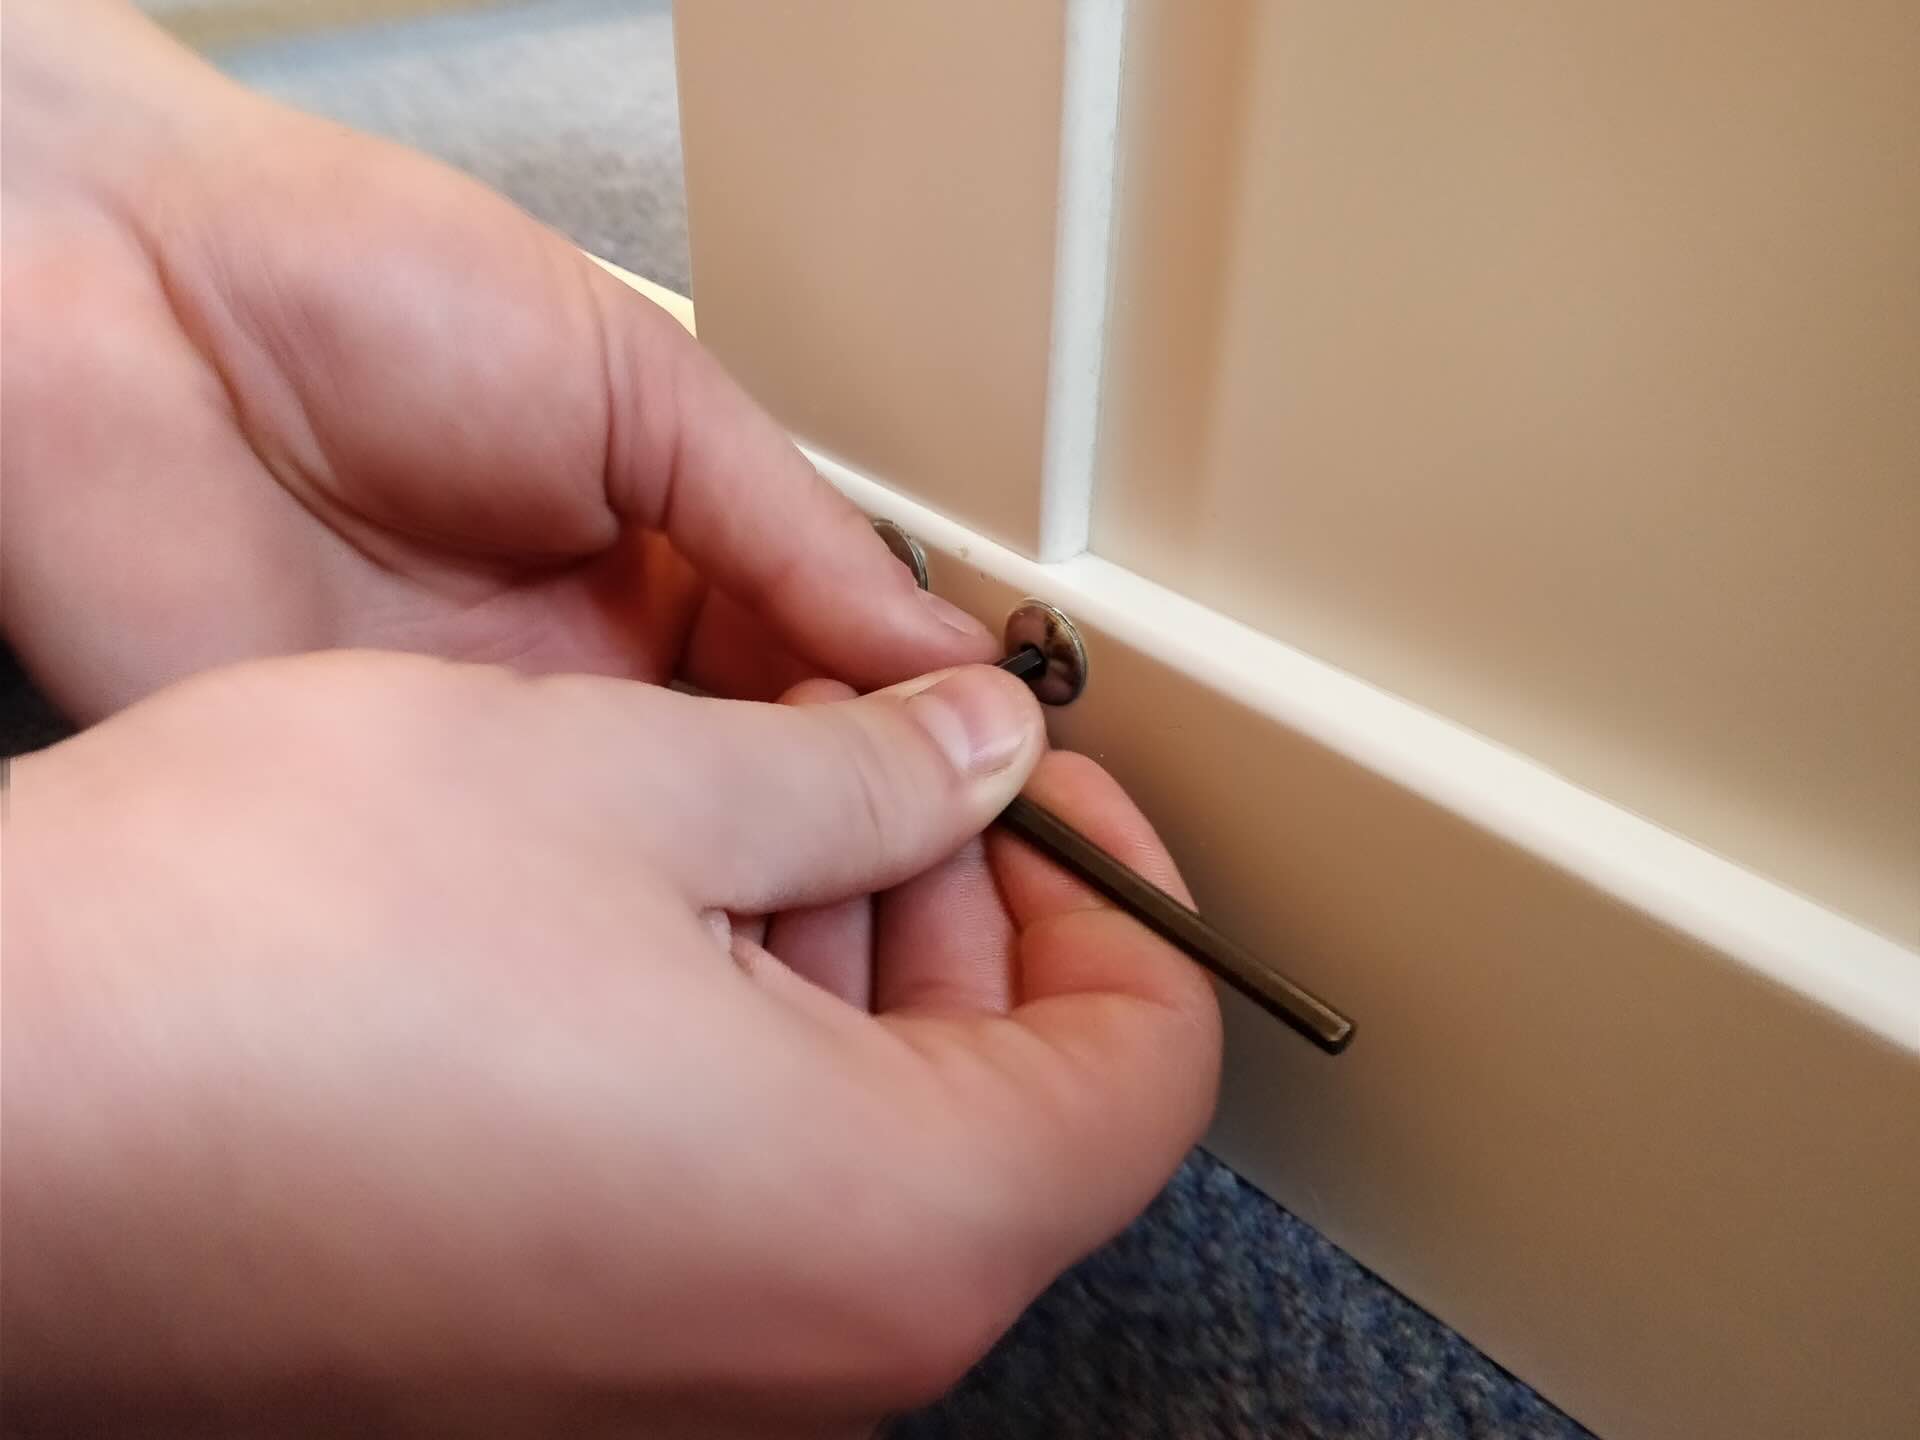
Using Vice Grips or Locking Pliers
If the previous methods of loosening the broken bolt didn’t work, another effective approach is to use vice grips or locking pliers. These tools provide a strong grip on the bolt, allowing you to apply more torque and force without damaging the surrounding area. Here’s how to use vice grips or locking pliers to remove a stubborn broken bolt:
- Select the right size: Choose vice grips or locking pliers that are appropriate for the size of the broken bolt. Ensure that the jaws of the tool can securely grip the bolt without slipping.
- Position the tool: Position the jaws of the vice grips or locking pliers around the head of the broken bolt, ensuring a firm and secure grip.
- Tighten the tool: Use the adjustment mechanism on the vice grips or locking pliers to tighten the grip on the bolt. Make sure it is securely locked in place.
- Apply torque: With a firm hold on the bolt using the vice grips or locking pliers, apply torque in a counterclockwise direction to loosen the bolt. Use a wrench or another tool for added leverage if necessary.
- Rocking motion: If the bolt is still stubborn, try applying a rocking motion by alternately tightening and loosening the grip while applying torque. This can help break the bond between the bolt and the threaded hole.
When using vice grips or locking pliers, it’s important to use caution and avoid excessive force to prevent damaging the bolt further or causing injury. If the bolt begins to loosen, continue rotating it in a counterclockwise direction until it can be completely removed.
In case the vice grips or locking pliers are unable to grip the bolt securely due to its size or accessibility, you may need to explore other extraction methods, which we will discuss in the next sections.
Remember, each broken bolt situation is unique, and different techniques may be required depending on factors such as bolt size, material, and overall condition. If the bolt is still firmly stuck, don’t be discouraged. There are more methods to try. We will cover these approaches in the upcoming sections.
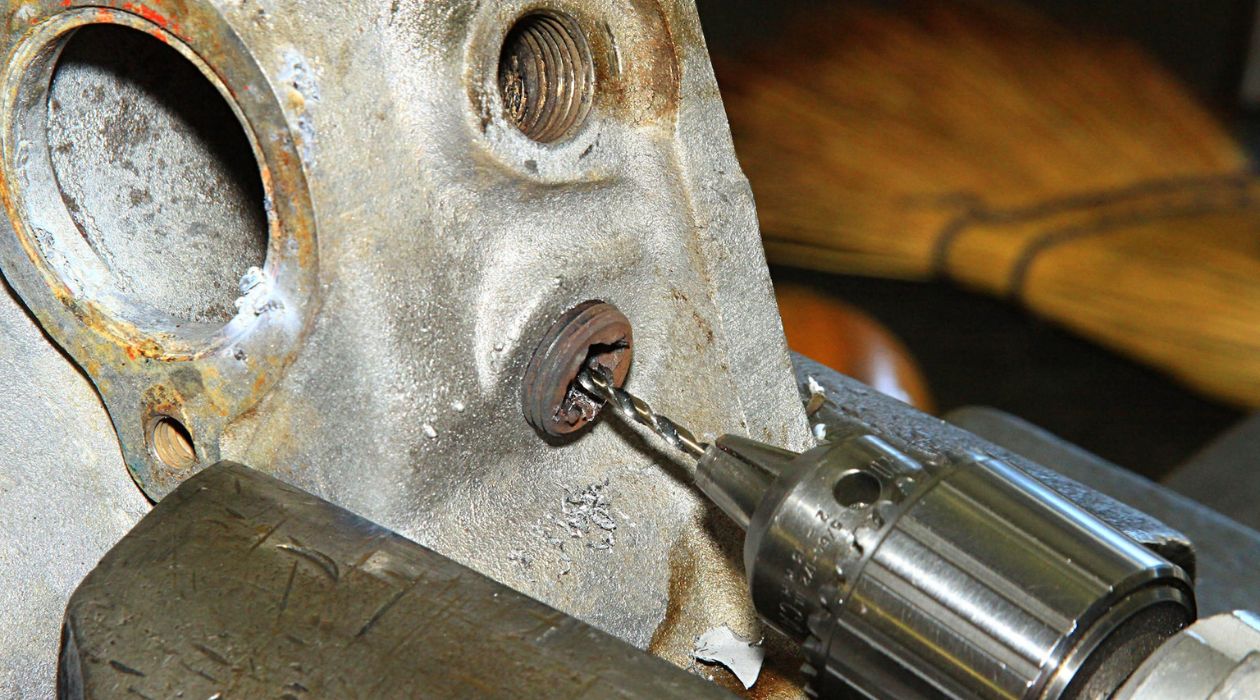
Trying an Extractor Kit
If the previous methods of removing the broken bolt haven’t been successful, it may be time to try an extractor kit. Extractor kits are designed specifically for removing broken bolts and screws, even in challenging situations. Here’s how to use an extractor kit:
- Select the appropriate extractor: Choose an extractor from the kit that matches the size and type of the broken bolt. Extractors typically come in different sizes and designs to accommodate various bolt sizes and conditions.
- Create a pilot hole: Use a drill bit from the kit to create a pilot hole in the center of the broken bolt. The size of the drill bit should correspond to the size indicated by the extractor instructions.
- Insert the extractor: Insert the extractor into the pilot hole, ensuring it fits securely and engages with the bolt. Tap it lightly into place using a hammer if necessary.
- Apply counterclockwise force: Attach a wrench or T-handle to the extractor and apply counterclockwise force to turn it. The extractor will grip the bolt, allowing you to rotate it out of the threaded hole.
- Apply steady pressure: Maintain steady pressure while turning the extractor. Avoid sudden movements or excessive force to prevent further damaging the bolt or the surrounding area.
- Reverse if necessary: If the bolt doesn’t loosen, check if the extractor is securely engaged. If not, reposition the extractor and try again. If all else fails, you may need to reverse the direction and attempt to back the bolt out.
Extractor kits can be effective in removing broken bolts, but it’s important to follow the instructions provided with the kit. Each extractor may have specific guidelines and requirements for optimal performance.
If the extractor doesn’t work or if the bolt breaks further during extraction, it’s advisable to seek professional assistance or consider more advanced extraction methods. Sometimes, the broken bolt may require more specialized tools or techniques to be successfully removed.
Now, let’s explore another technique that can be used in certain situations – tapping with a hammer and chisel.
Tapping with a Hammer and Chisel
If the previous methods haven’t yielded success in removing the broken bolt, another technique worth trying is tapping with a hammer and chisel. This method can help loosen the bolt by creating slight movements and vibrations. Here’s how to use a hammer and chisel to remove a stubborn broken bolt:
- Select a suitable chisel: Choose a chisel that is narrow enough to fit alongside the broken bolt, allowing you to tap it without damaging the surrounding area. A cold chisel or center punch can work well for this purpose.
- Position the chisel: Position the chisel against the edge of the broken bolt, ensuring that it is perpendicular to the surface.
- Tap the chisel: Using a hammer, gently tap the chisel to create small movements and vibrations in the bolt. The idea is to create enough force to loosen the bolt without causing it to break further or damage the surrounding material.
- Rotate and repeat: After a few taps, carefully rotate the bolt counterclockwise using a wrench or pliers. Alternate between tapping and rotating until the bolt starts to loosen.
- Watch for signs of movement: As you tap and rotate, keep a close eye on the broken bolt. Look for any signs of movement or shifting. If you notice even a slight improvement, continue with the technique until the bolt can be fully removed.
It’s important to exercise caution while using a hammer and chisel to remove the bolt. Use controlled and precise tapping to avoid any damage to the surrounding area or further breakage of the bolt. If this method doesn’t work, it may be necessary to explore more advanced techniques or seek professional assistance.
Remember, patience and persistence are key when dealing with a stubborn broken bolt. By systematically trying different methods, you increase your chances of successful extraction. Now, let’s discuss another potential method – applying heat.
Read more: How To Remove Tree Stump With Hand Tools
Applying Heat
In some cases, applying heat to the broken bolt can be an effective method for removal. Heat expands the metal, causing it to loosen and break the bond with the threaded hole. Here’s how to apply heat to remove a stubborn broken bolt:
- Gather the necessary tools: Before applying heat, make sure you have a heat source such as a propane torch or a butane torch. Ensure you have adequate ventilation and a fire-resistant area to work in.
- Heat the area: Direct the flame of the torch onto the surrounding area of the broken bolt. Apply heat evenly and avoid prolonged exposure to prevent damage to nearby components or materials.
- Focus heat on the bolt: After heating the surrounding area, direct the flame specifically onto the broken bolt. Apply the heat in short bursts, focusing on the bolt’s center and covering the entire circumference.
- Allow for expansion and contraction: After heating the bolt, let it cool down naturally. The heat causes the metal to expand, and as it cools, the contraction may help break the bond between the bolt and the threaded hole.
- Attempt removal: Once the bolt has cooled down, use an appropriate tool such as a wrench or pliers to apply counterclockwise force and attempt to remove the bolt. If it doesn’t loosen, repeat the process of heating and cooling, gradually increasing the force applied.
Applying heat requires caution and precision. Always prioritize safety and follow safety guidelines for using heat sources. Additionally, be aware of flammable materials in the surrounding area and have a fire extinguisher on hand as a safety precaution.
If the heat method doesn’t work, it may be time to explore alternative options or seek professional assistance. Removing a stubborn broken bolt can be challenging, and sometimes specialized tools or techniques may be required.
Now that we have covered various extraction methods, let’s summarize some general guidelines for success in removing a broken bolt.
Guidelines for Success
Removing a broken bolt can be a complex task, but by following these guidelines, you can increase your chances of success:
- Assess the situation: Take the time to thoroughly assess the condition of the broken bolt, the surrounding area, and any potential obstacles. This will help you choose the appropriate tools and techniques for the job.
- Take safety precautions: Prioritize your safety by wearing protective gear, securing the work area, and using caution when applying force or using heat. Follow manufacturer guidelines for any tools or products you use.
- Choose the right tools: Select the proper tools for the job, such as wrenches, pliers, extractors, and heat sources. Ensure they are the right size and type for the bolt you are working with.
- Apply penetrating oil: Use a penetrating oil to help loosen the bolt by applying it generously and giving it time to soak. Reapply if needed, especially for stubborn or rusted bolts.
- Use gradual force: Apply steady and controlled force when trying to loosen the bolt. Avoid using excessive force, as it may cause further damage or break the bolt completely.
- Explore different methods: If one method doesn’t work, try alternative techniques such as using vice grips or locking pliers, extractor kits, tapping with a hammer and chisel, or applying heat. Be patient and persistent in your attempts.
- Know when to seek professional help: If all your efforts fail to remove the broken bolt, or if you are uncertain about the next steps, it’s wise to seek assistance from a professional or someone experienced in bolt extraction.
Remember, every broken bolt situation is unique, and some methods may work better than others depending on the specific circumstances. It’s important to adapt and adjust your approach as needed.
By following these guidelines, exercising patience, and employing the proper techniques, you can increase your chances of successfully removing a broken bolt with hand tools. Don’t be discouraged if it takes multiple attempts or trying different methods. With determination and the right approach, you can overcome this challenge.
Now, armed with these guidelines, you are ready to tackle the task of removing a broken bolt. Good luck!
Conclusion
Removing a broken bolt with hand tools may seem like a daunting task, but it is entirely possible with the right approach and techniques. By following the guidelines outlined in this article, you can increase your chances of success while ensuring your safety throughout the process.
Remember to assess the situation thoroughly, choose the appropriate tools, and take all necessary safety precautions. Applying penetrating oil, using vice grips or locking pliers, trying an extractor kit, tapping with a hammer and chisel, and applying heat are all viable methods that you can employ depending on the circumstances.
It’s important to remain patient and persistent, understanding that each broken bolt situation is unique and may require different approaches. Don’t be discouraged if one method doesn’t work—simply move on to the next method until you achieve the desired outcome.
If all else fails, don’t hesitate to seek professional assistance. Sometimes, removing a stubborn broken bolt may require specialized knowledge and tools. A professional can provide the expertise needed to overcome the challenge.
With the right mindset and determination, you can successfully remove a broken bolt using hand tools. Stay focused, take your time, and don’t rush the process. By following the steps outlined in this article, you will be well-equipped to tackle the task at hand.
So, go ahead and tackle that broken bolt with confidence. You have the knowledge and tools to get the job done. Best of luck!
Frequently Asked Questions about How To Remove A Broken Bolt With Hand Tools
Was this page helpful?
At Storables.com, we guarantee accurate and reliable information. Our content, validated by Expert Board Contributors, is crafted following stringent Editorial Policies. We're committed to providing you with well-researched, expert-backed insights for all your informational needs.


0 thoughts on “How To Remove A Broken Bolt With Hand Tools”