Articles
How To Hook Up A Gas Dryer
Modified: May 6, 2024
Step-by-step articles on how to hook up a gas dryer, including safety precautions and troubleshooting tips.
(Many of the links in this article redirect to a specific reviewed product. Your purchase of these products through affiliate links helps to generate commission for Storables.com, at no extra cost. Learn more)
Introduction
Hooking up a gas dryer may seem daunting at first, but with the right tools and a little know-how, it can be a straightforward process. Whether you’re replacing an old gas dryer or installing a new one, this guide will walk you through the steps to ensure a safe and successful installation.
Before we dive into the specifics, it’s important to note that working with gas can be dangerous if proper precautions are not taken. If you’re not confident in your abilities or have any concerns, it’s best to consult a professional for assistance.
In this article, we’ll cover the necessary safety precautions, tools and materials you’ll need, as well as a step-by-step guide to hooking up your gas dryer. By following these instructions, you’ll be able to enjoy the convenience of a functional and efficient gas dryer in no time.
Key Takeaways:
- Prioritize safety by turning off the gas supply, wearing protective gear, and checking for leaks to ensure a hazard-free gas dryer installation.
- Gather the necessary tools and materials, follow step-by-step instructions, and test the dryer’s functionality for a successful gas dryer hookup.
Read more: How To Hook Up An Electric Dryer
Safety Precautions
Before starting any work on your gas dryer, it’s important to prioritize safety to prevent accidents and ensure the well-being of yourself and others. Here are some crucial safety precautions to follow:
- Turn off the gas supply: Before attempting any installation or maintenance on your gas dryer, always turn off the gas supply. Locate the gas shut-off valve near the dryer and turn it clockwise until it stops. This will ensure that no gas is flowing to the appliance while you work.
- Disconnect the power: In addition to shutting off the gas, make sure to unplug the dryer from the electrical outlet. This eliminates any risk of electrical shock while working on the appliance.
- Wear appropriate safety gear: Whenever working with gas appliances, it’s wise to wear protective gear such as gloves and safety glasses. This will protect you from any potential hazards or accidents that may arise during the installation process.
- Ensure proper ventilation: Gas dryers emit potentially harmful gases, so it’s essential to have proper ventilation in the installation area. Ensure that there is adequate airflow to prevent the buildup of potentially dangerous fumes.
- Inspect for gas leaks: Before connecting the gas line to the dryer, it’s crucial to inspect for any gas leaks. Apply a solution of soapy water to the gas line fittings and connections and observe for any bubbles. If you notice any bubbles forming, there is a gas leak. In such cases, do not proceed with the installation and seek professional assistance.
- Follow manufacturer’s instructions: Every gas dryer is unique, so it’s important to read and follow the manufacturer’s instructions carefully. This ensures that you correctly install and operate the appliance according to their specifications.
By adhering to these safety precautions, you can minimize the risks associated with working on a gas dryer and ensure a safe installation process. Always prioritize safety above all else to protect yourself and your home.
Required Tools and Materials
Before you begin the installation process, make sure you have the necessary tools and materials on hand. Having everything ready beforehand will save you time and keep the installation process smooth. Here is a list of the tools and materials you’ll need:
Tools:
- Adjustable wrench
- Pipe wrench
- Teflon tape
- Screwdriver
- Gas leak detector solution
- Tubing cutter
- Tape measure
- Utility knife
Materials:
- New gas line hose
- Gas shut-off valve
- Gas pipe fittings
- Dryer vent hose
- Clamps
- Electrical cord (if not already provided)
It’s important to use the right tools and materials for the job to ensure a secure and reliable connection. The adjustable wrench and pipe wrench will come in handy for tightening and loosening nuts and fittings. Teflon tape is essential for creating a watertight seal on threaded connections.
The gas leak detector solution is used to check for any gas leaks once the gas line is connected. It’s crucial to invest in a high-quality solution to accurately detect any leaks and ensure your safety.
The tubing cutter is used to cut the gas line to the required length, while the tape measure helps you measure and ensure proper placement of the gas line and vent hose.
Lastly, make sure you have the necessary materials, such as a new gas line hose, gas shut-off valve, gas pipe fittings, and a dryer vent hose. These components are essential for connecting the gas line and ensuring proper ventilation.
By gathering all the required tools and materials beforehand, you’ll have everything you need to complete the installation smoothly and efficiently.
Read more: How To Hook Up A Stacked Washer And Dryer
Step 1: Check the Gas Source
Before starting the installation process, it’s important to first ensure that you have an existing gas source in the location where the gas dryer will be installed. If you’re replacing an old gas dryer, this step may not be necessary.
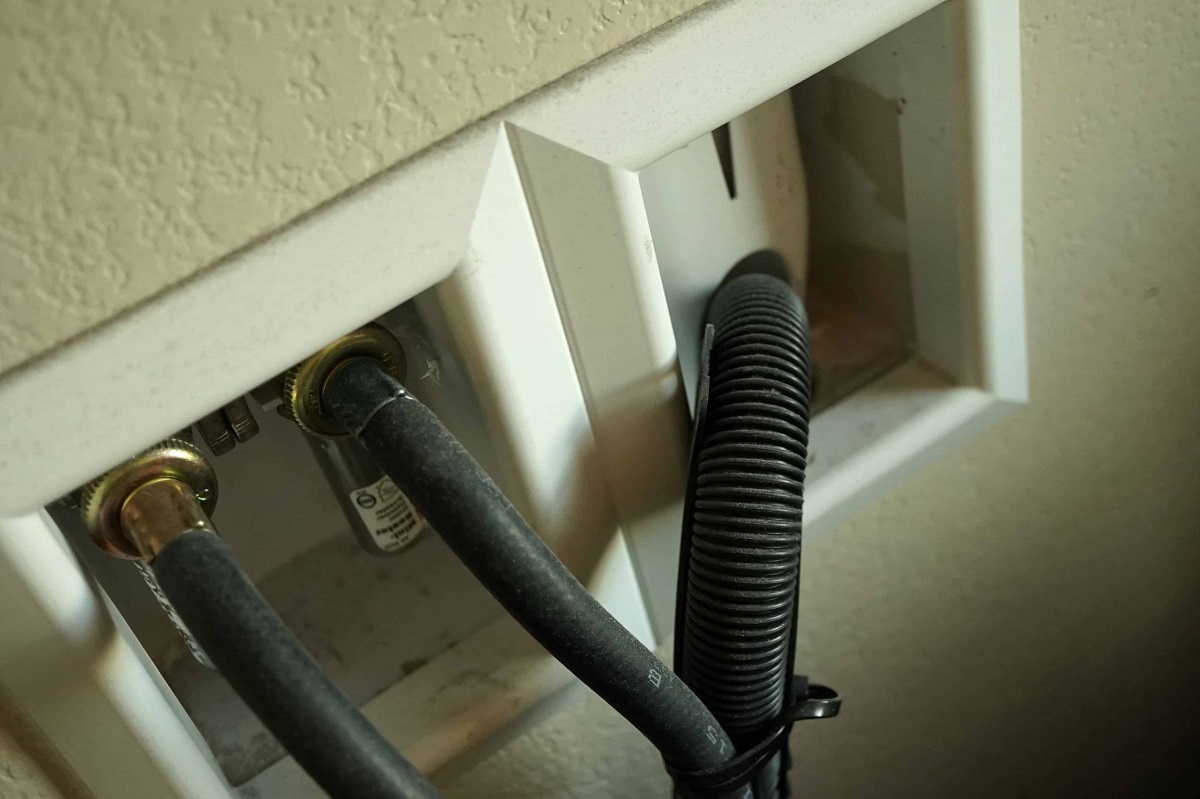
Locate the gas line in the vicinity of where you plan to install the dryer. This is typically a black pipe that connects to a gas shut-off valve. Take a moment to inspect the gas line for any signs of damage, such as cracks or corrosion. If you notice any issues, it’s best to consult a professional to have them addressed.
Moving forward, it’s important to confirm that the gas source is compatible with a gas dryer. Generally, residential homes in the United States use either natural gas or propane as the fuel source for gas appliances like dryers. Natural gas is typically supplied through a utility company, while propane requires a separate tank.
If you’re unsure about the type of gas source you have, consult your local utility company or a professional for assistance. They will be able to provide guidance on the type of gas source available in your area.
It’s crucial to match the gas source with the gas dryer. This information can typically be found in the dryer’s specifications or instruction manual. Ensure that your gas dryer is designed to be compatible with the available gas source.
By checking the gas source and confirming its compatibility with your gas dryer, you can ensure a smooth installation process and prevent any issues or complications down the line.
Step 2: Shut Off the Gas Supply
Before you begin any work on your gas dryer, it’s important to shut off the gas supply. This is a crucial step that ensures your safety and prevents any gas leaks during the installation process.
Locate the gas shut-off valve near the dryer. This valve will be connected to the gas line and will have a handle or lever that can be turned to shut off the gas flow. The shut-off valve is typically perpendicular to the gas line when in the closed position.
Use an adjustable wrench to turn the shut-off valve clockwise until it stops. This will shut off the flow of gas to the dryer and prevent any gas from escaping while you work. It’s important to make sure the valve is fully closed to avoid any potential leaks.
Once you have shut off the gas supply, it’s also a good idea to open a nearby window or provide proper ventilation in the area. This will help dissipate any remaining gas fumes and ensure a safe environment before proceeding with the installation.
If you’re not confident in identifying or shutting off the gas supply, it’s strongly recommended to seek professional assistance. Gas-related tasks can be dangerous if not handled properly, so it’s better to be cautious and consult a professional if you’re unsure.
By shutting off the gas supply, you’re taking an important step towards ensuring a safe and successful installation of your gas dryer. Remember to double-check that the gas flow has been fully stopped before proceeding to the next steps.
Step 3: Disconnect the Old Dryer
If you’re replacing an old gas dryer, you’ll need to disconnect it before installing the new one. Follow these steps to safely and properly disconnect the old dryer:
- Turn off the power: Before disconnecting the old dryer, unplug it from the electrical outlet. This will prevent any risk of electrical shock while handling the appliance.
- Disconnect the gas line: Locate the gas line connection on the back of the old dryer. It will be a flexible gas line or a rigid pipe with a threaded connection. Use an adjustable wrench or pipe wrench to loosen the nut connecting the gas line to the dryer. Turn the nut counterclockwise until it is loose enough to be removed. Be cautious as you disconnect the gas line to prevent any gas leaks.
- Cap the gas line: Once the gas line is disconnected from the old dryer, it’s recommended to cap it off to prevent any potential gas leaks. You can find gas line caps at most hardware stores. Ensure that the gas line is properly capped with the appropriate fitting. This will maintain the integrity of the gas supply and ensure safety during the installation process.
- Detach the vent hose: The old dryer will be connected to a vent hose that allows proper ventilation for the dryer. Locate the connection point between the dryer and the vent hose. Loosen the clamp securing the vent hose to the dryer using a screwdriver or pliers, depending on the type of clamp. Slide the clamp down the hose and disconnect the vent hose from the dryer.
- Remove the old dryer: With all the connections detached, you can now carefully move the old dryer away from its current location. It’s advisable to have someone assist you with this step, as dryers can be heavy and awkward to maneuver.
By following these steps, you can safely disconnect the old gas dryer in preparation for the installation of the new one. Remember to proceed with caution and, if needed, consult the manufacturer’s instructions for your specific dryer model for any additional steps or considerations.
Step 4: Install the New Gas Line
Installing a new gas line is a critical step in hooking up a gas dryer. Follow these steps to properly install the new gas line:
- Measure and cut the gas line: Measure the distance from the gas supply valve to the location where the new gas line will connect to the dryer. Use a tubing cutter to cut the gas line to the appropriate length. Ensure that the cut is smooth and clean.
- Prepare the gas line fittings: Before connecting the gas line, ensure that the fittings are properly prepared. Use a utility knife to remove any burrs or rough edges from the pipe’s end. This will ensure a clean and secure connection.
- Apply Teflon tape: Wrap a few layers of Teflon tape clockwise around the threaded ends of the gas line fittings. This tape helps create a tight seal between the fittings and prevents gas leaks. Make sure to wrap the tape in the opposite direction of thread rotation, so it doesn’t unravel when connecting the fittings.
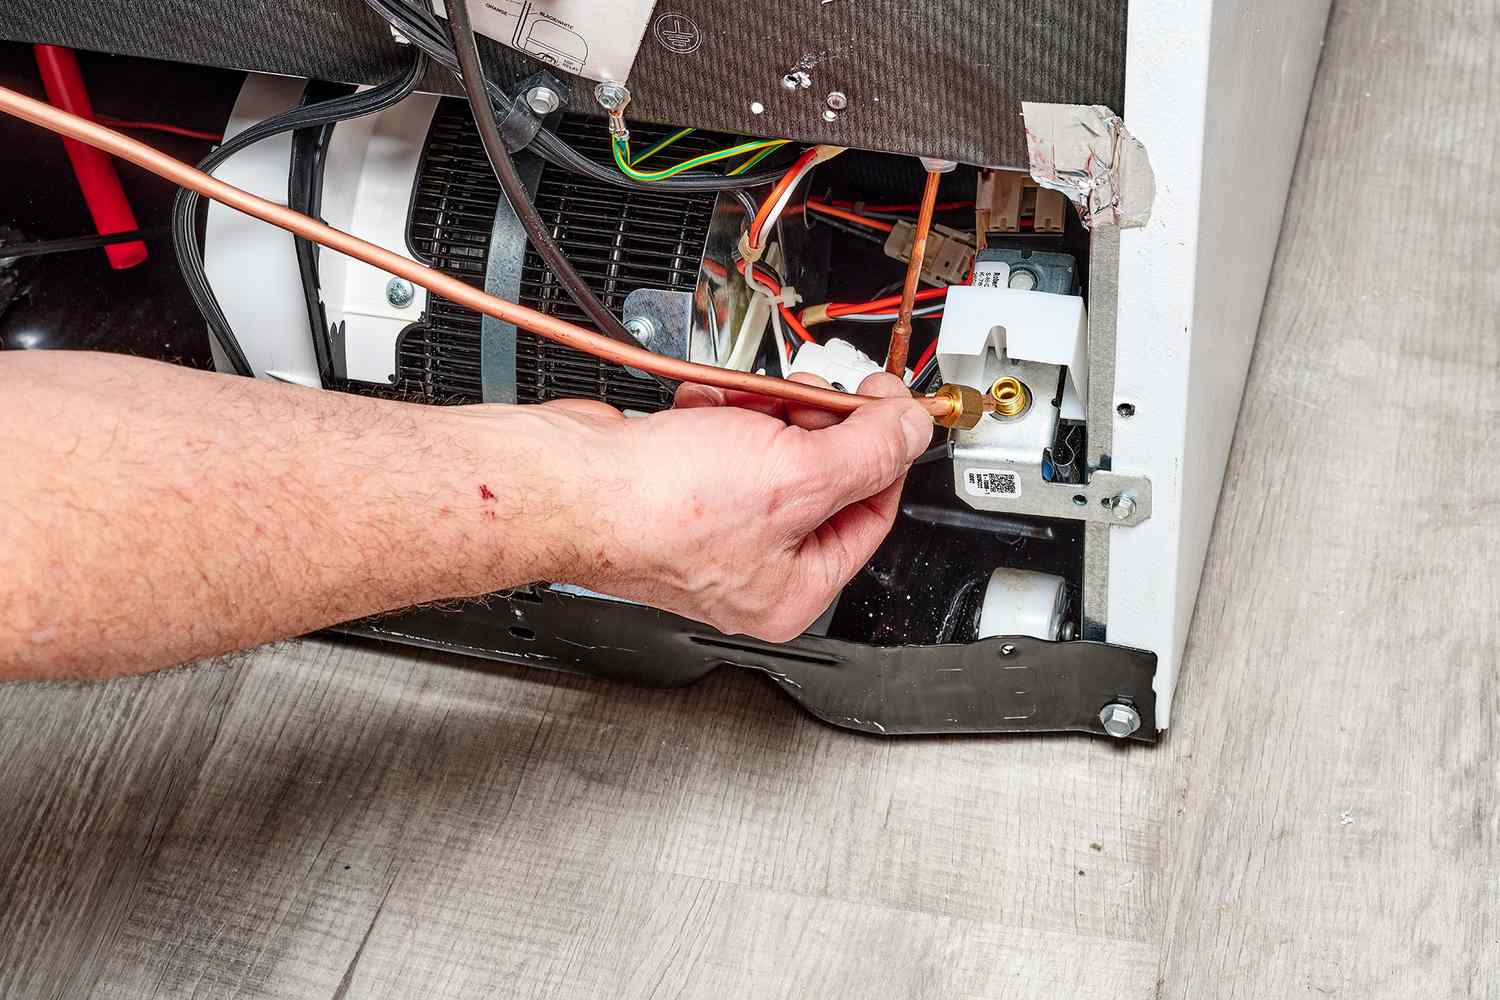
- Connect the gas line: With the fittings prepared, screw them onto the gas supply valve and the inlet connection on the back of the gas dryer. Use an adjustable wrench to tighten the fittings securely. Be careful not to overtighten, as it can damage the threads or fittings.
- Check for leaks: Once the gas line is connected, it’s important to check for any gas leaks. Apply a solution of soapy water to the connections and joints. If you see bubbles forming, it indicates a gas leak. In this case, immediately shut off the gas supply and tighten the fittings. If the leak persists, seek professional assistance.
It’s crucial to handle the gas line with care and ensure proper connections to prevent gas leaks. Take your time during this step to ensure the fittings are secured and the gas line is correctly installed.
Remember to follow the manufacturer’s instructions for your specific gas dryer model, as the installation process may vary slightly. By installing the new gas line properly, you’re one step closer to hooking up the gas dryer and enjoying its benefits.
Read more: How To Hook Up A Dryer Vent In A Tight Space
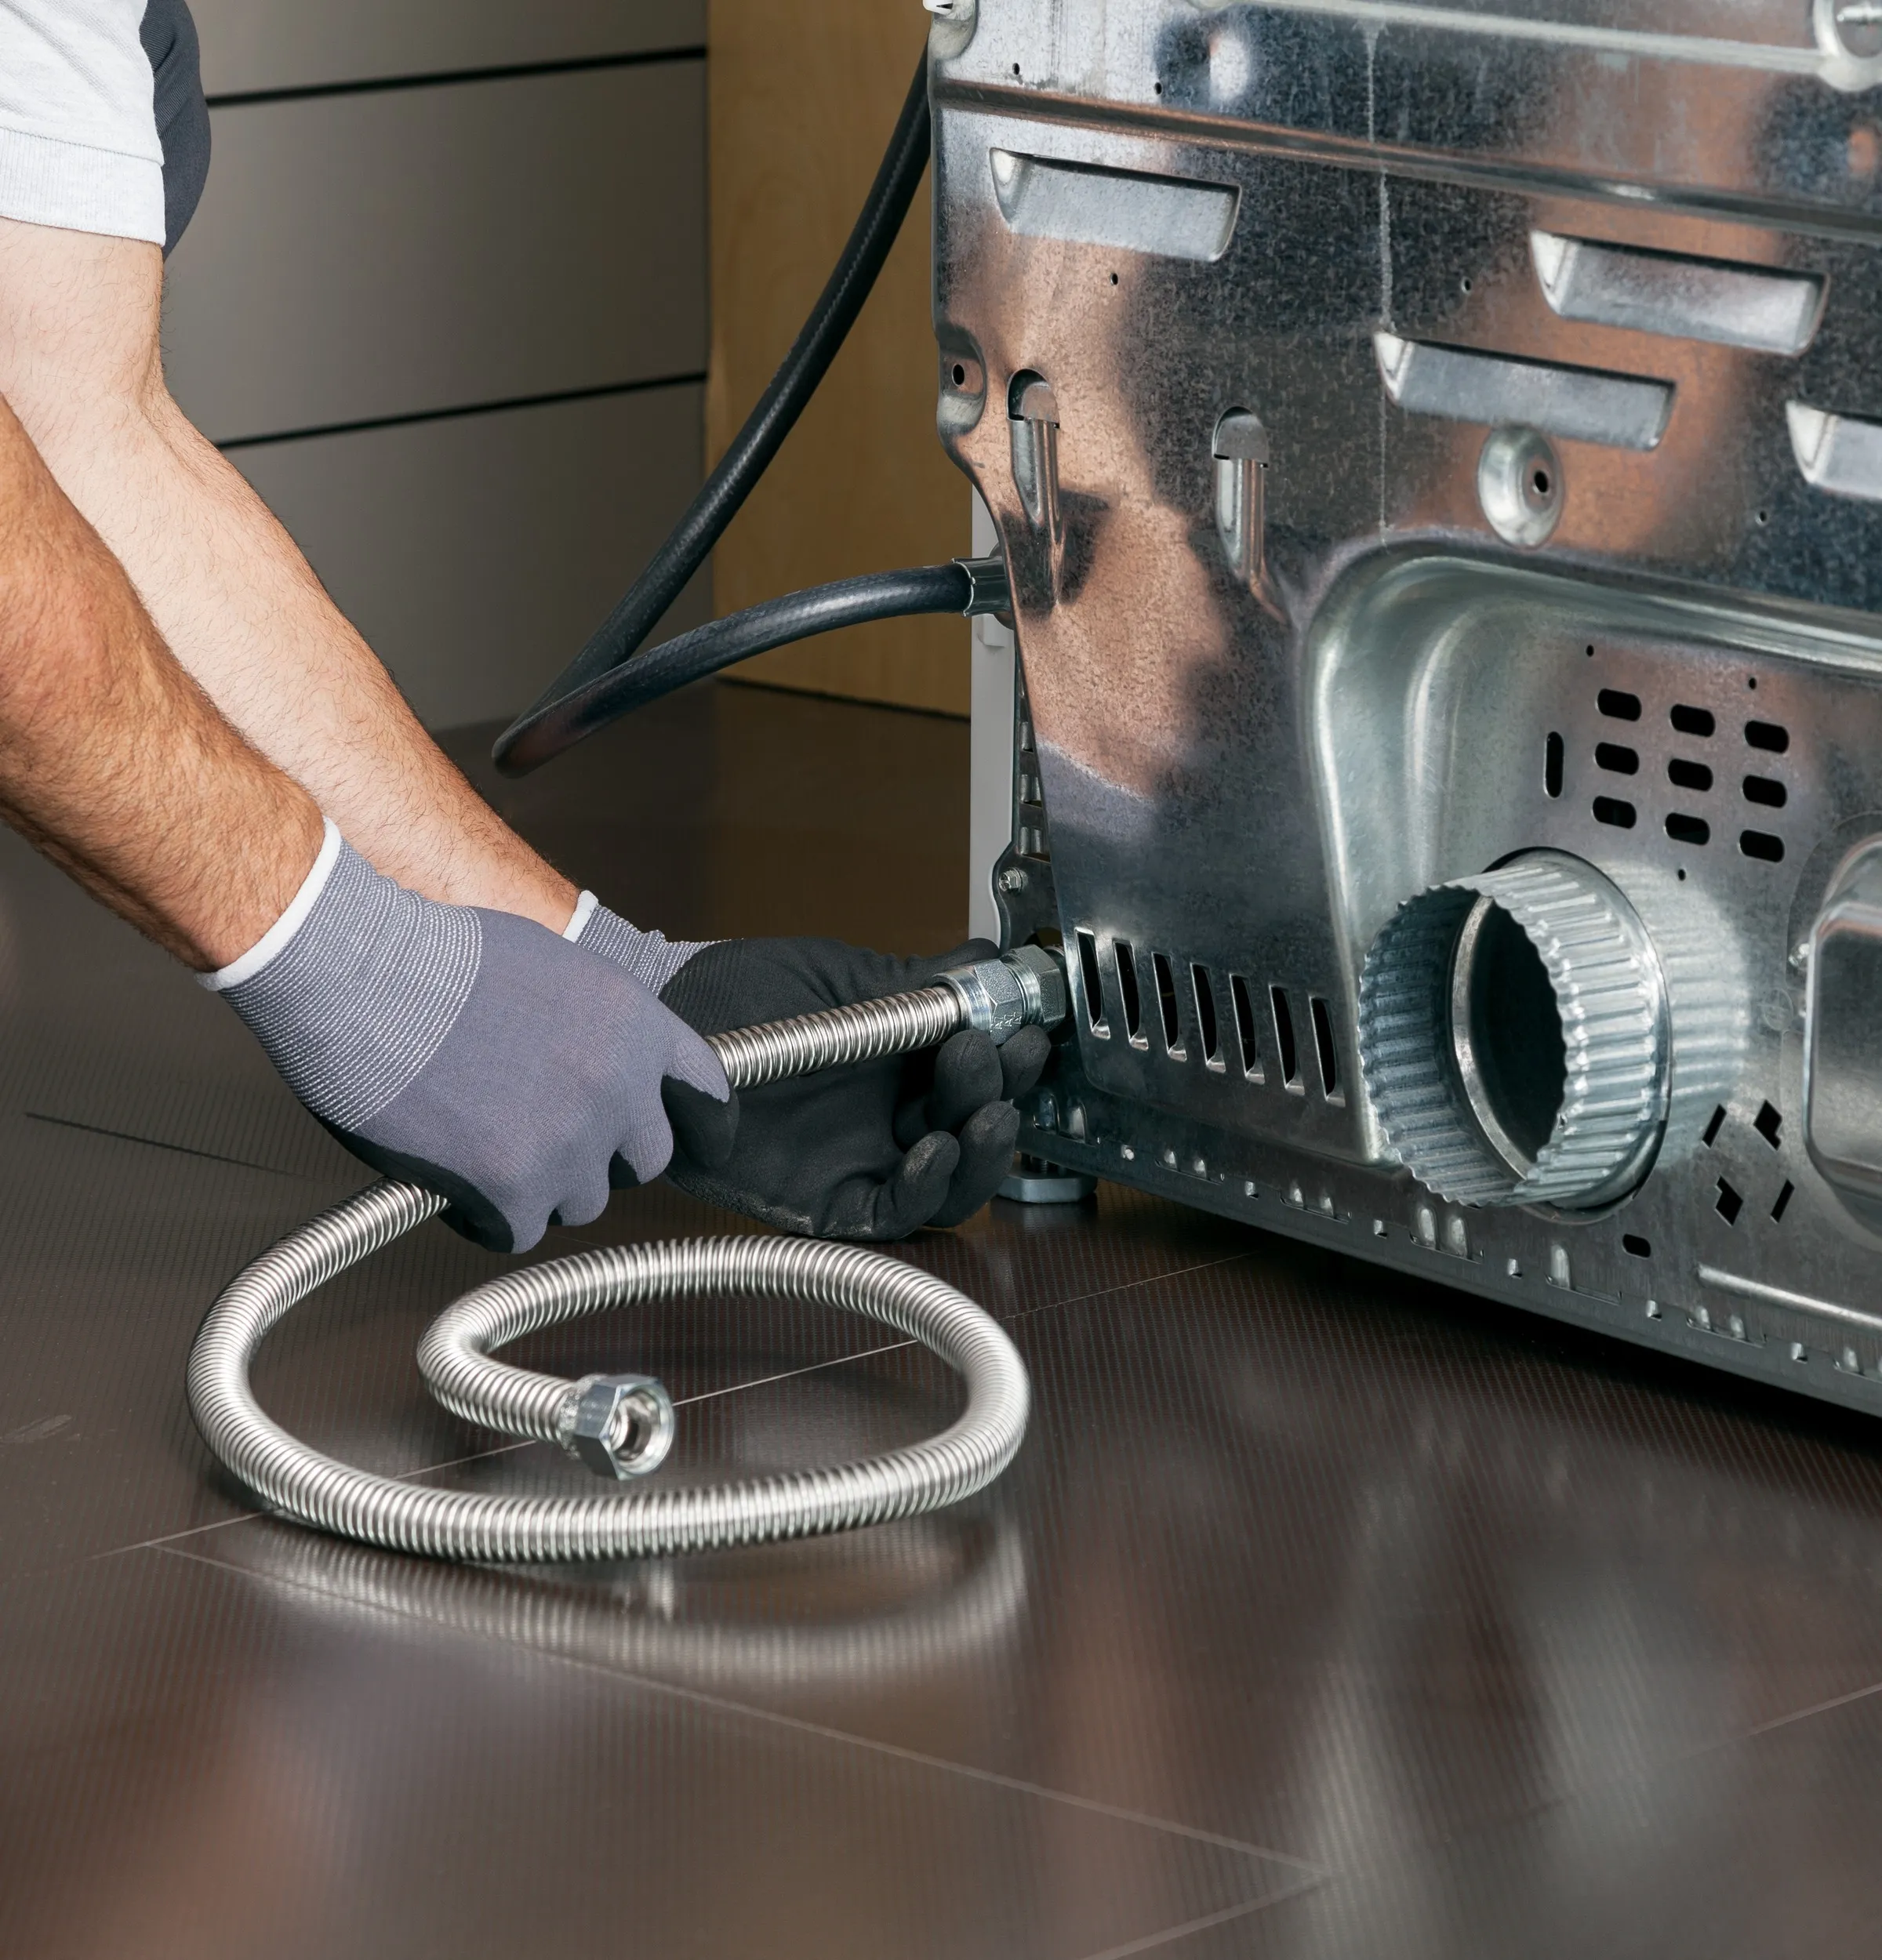
Step 5: Connect the Gas Line to the Dryer
With the new gas line installed, it’s time to connect it to the gas dryer. Follow these steps to properly connect the gas line:
- Position the dryer: Move the new gas dryer into its desired location, ensuring that there is enough space behind it to access the gas line connection.
- Locate the gas inlet: On the back of the dryer, locate the gas inlet connection. It is usually at the bottom or near the bottom of the back panel. Remove the protective cap covering the inlet.
- Prepare the gas line connection: If not already done, wrap a few layers of Teflon tape clockwise around the threaded end of the gas line fitting that will connect to the dryer’s gas inlet. This tape helps create a tight seal and prevent gas leaks.
- Connect the gas line: Align the threaded end of the gas line fitting with the gas inlet on the dryer. Begin to screw the fitting onto the dryer’s gas inlet by hand, making sure it starts straight and threads easily. Once it’s snug, use an adjustable wrench to tighten the fitting securely. Avoid overtightening, as it can damage the threads or cause leaks. Refer to the manufacturer’s instructions for any specific torque requirements.
- Check for leaks: After connecting the gas line, it’s essential to check for any leaks. Apply a solution of soapy water to the gas line fitting and the connection between the gas line and dryer. If you see bubbles forming, it indicates a gas leak. In this case, immediately shut off the gas supply and tighten the fitting. If the leak persists, seek professional assistance.
Connecting the gas line to the dryer is a critical step in the installation process. Take your time to ensure the fitting is securely tightened and that there are no leaks. Properly connecting the gas line sets the stage for a safe and efficient operation of the gas dryer.
Always refer to the manufacturer’s instructions for your specific gas dryer model, as the installation process may vary. By connecting the gas line correctly, you’re one step closer to completing the installation of your gas dryer.
When hooking up a gas dryer, always make sure to use a new gas line and secure all connections with a wrench to prevent leaks. Also, test for leaks with a soapy water solution before using the dryer.
Step 6: Test for Leaks
After connecting the gas line to the dryer, it’s crucial to test for any potential gas leaks. Performing this step will ensure the safety and proper functioning of your gas dryer. Here’s how to test for leaks:
- Turn on the gas supply: Once the gas line is connected and secured, turn on the gas supply by turning the gas shut-off valve counterclockwise.
- Prepare a gas leak detection solution: Mix a solution of soapy water in a spray bottle. Ensure that the mixture is well-mixed.
- Spray the solution on the gas connections: Starting with the connection between the gas line and the dryer, spray the gas leak detection solution on the threaded fittings and joints. Pay close attention to any potential areas where leaks could occur.
- Observe for bubbles: Watch closely for any bubbles forming, as they indicate a gas leak. If you notice any bubbles, it means there is a leak that needs to be addressed.
- Take immediate action: If you detect a gas leak, turn off the gas supply immediately by turning the gas shut-off valve clockwise. Tighten the fittings and connections as needed to stop the leak. If the leak persists, consult a professional for assistance. Do not proceed with the installation until the gas leak has been resolved.
Testing for gas leaks is a crucial step in ensuring the safety of your gas dryer installation. Even the smallest gas leak can pose serious risks, so it’s essential to be thorough in this process.
If no bubbles are observed and there are no indications of leaks, you can proceed with confidence to the next steps of the installation process. However, it’s always a good practice to periodically check for gas leaks throughout the life of your gas dryer to ensure ongoing safety and performance.
By conducting a thorough test for leaks, you can ensure the proper functioning and safety of your gas dryer installation.
Step 7: Secure the Dryer Vent Hose
Proper ventilation is crucial for the safe and efficient operation of a gas dryer. Securing the dryer vent hose ensures that lint and moisture are effectively expelled from your home. Follow these steps to secure the dryer vent hose:
- Determine the vent hose route: Identify the best path for the vent hose to exit your home. Ideally, this should be a straight route with minimal bends or turns. Avoid excessively long vent hose lengths, as they can hinder the airflow and cause lint buildup.
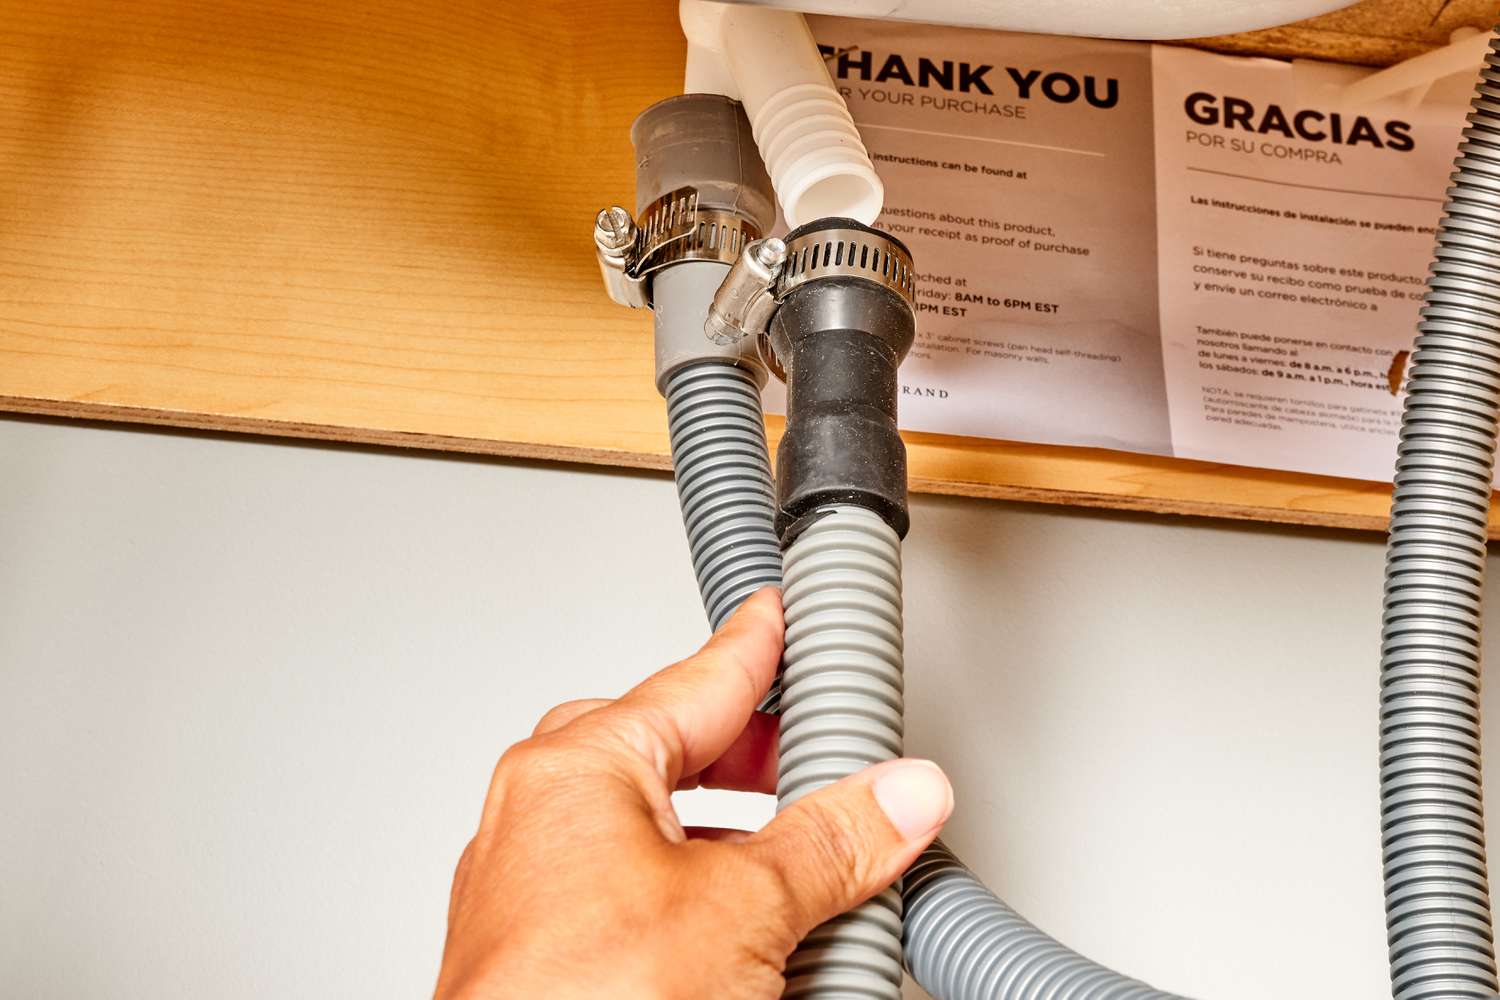
- Attach the vent hose to the dryer: Slide one end of the vent hose over the dryer’s vent outlet located on the back of the appliance. Secure it in place with a clamp or a zip tie. Ensure a snug fit to prevent any air leaks.
- Connect the other end of the vent hose: Extend the other end of the vent hose to the designated vent opening or wall duct. Attach it securely using another clamp or zip tie. Make sure the connection is tight and secure to prevent any air or lint leakage.
- Check for obstructions: Before finalizing the installation, ensure that there are no obstructions in the vent hose or the vent opening. Remove any lint or debris that may have accumulated inside the hose or the vent opening.
- Double-check the secure connections: Once everything is in place, double-check that both ends of the vent hose are securely fastened. Give them a gentle tug to ensure they are firmly attached.
Properly securing the dryer vent hose ensures that the hot air and moisture from the gas dryer are effectively vented outside. This helps prevent lint buildup and reduces the risk of fire hazards.
Remember to regularly clean the vent hose and vent opening to remove any accumulated lint or debris. This will help maintain proper airflow and maximize the efficiency of your gas dryer.
By securely attaching and maintaining the dryer vent hose, you’re ensuring the safety and optimal performance of your gas dryer installation.
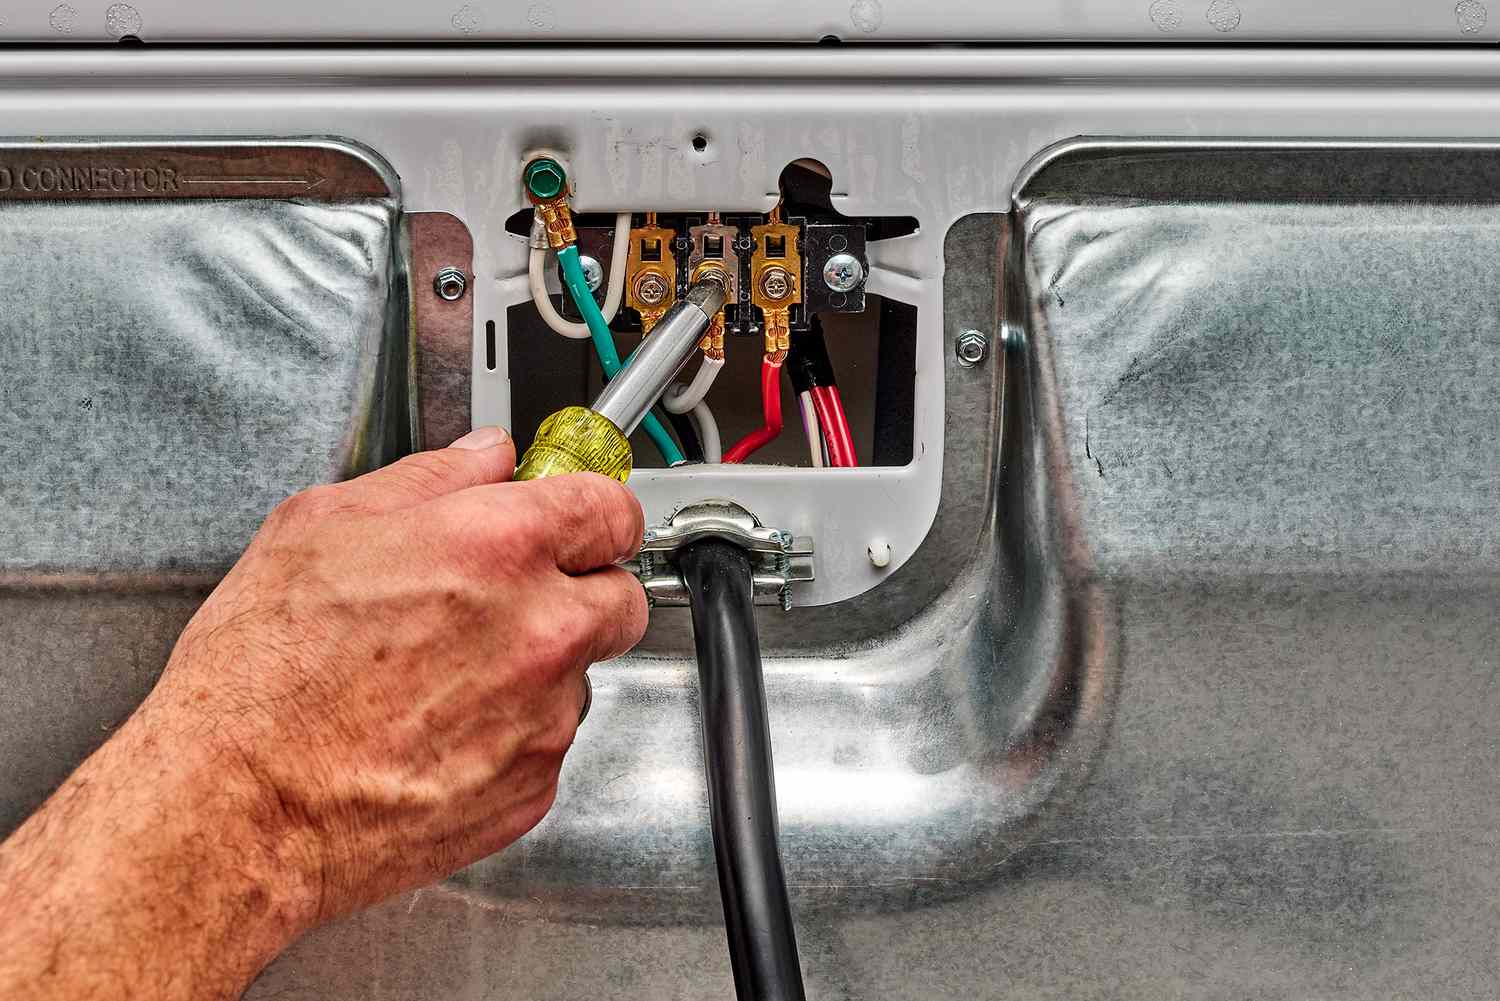
Step 8: Plug in the Dryer
Now that the gas line is connected and the vent hose is secured, it’s time to plug in the gas dryer. Follow these steps to safely complete this final installation step:
- Ensure the gas shut-off valve is open: Before plugging in the dryer, ensure that the gas shut-off valve on the gas line is fully open. Turning the valve counterclockwise will ensure that the gas is flowing to the dryer.
- Position the dryer’s electrical cord: Locate the electrical outlet near the installation area. Carefully position the gas dryer to allow for easy access to the outlet.
- Connect the dryer’s electrical cord: Take the electrical cord that came with the gas dryer and plug it into the electrical outlet. Ensure that the plug is securely connected and that the prongs are inserted properly.
- Push the dryer into place: Once the electrical cord is connected, gently push the gas dryer into its final position. Be mindful of any obstacles or walls to avoid damaging the appliance or the surrounding area.
- Ensure proper clearance: It’s important to provide proper clearance around the gas dryer to ensure proper airflow. Make sure there is enough space behind and around the appliance to prevent any obstruction of airflow or venting.
By plugging in the gas dryer, you are completing the installation process and preparing the appliance for use.
Ensure that the gas shut-off valve is open to allow for the flow of gas to the dryer. Also, double-check the electrical connection to ensure that the dryer is receiving power. This will ensure that the gas dryer is ready for operation.
Once you’ve completed this step, you can move on to the final step of testing and confirming that your gas dryer is functioning correctly.
Read more: How To Hook Up A Doorbell
Step 9: Test the Dryer
After the gas dryer is properly installed and plugged in, it’s essential to test its functionality to ensure it’s operating correctly. Follow these steps to test your gas dryer:
- Ensure the gas shut-off valve is open: Verify that the gas shut-off valve on the gas line is fully open. Turning the valve counterclockwise will ensure the gas is flowing to the dryer.
- Select the appropriate drying cycle: Set the gas dryer to a desired drying cycle based on the type of load you plan to dry. Refer to the dryer’s manual for guidance on selecting the appropriate cycle.
- Load the dryer: Load the gas dryer with a small load of laundry. Avoid overloading the dryer, as this can negatively impact its performance and efficiency.
- Start the dryer: Press the applicable buttons or turn the dryer’s dial to start the drying cycle. Listen for the sound of the dryer igniting and the gas burner coming on. Observe if the dryer’s drum begins to rotate smoothly.
- Monitor the drying process: Observe the progress of the drying cycle. Pay attention to any unusual noises, odors, or malfunctions. Ensure that the clothes are drying properly and that the gas dryer is emitting hot air.
- Check for excessive heat: As the dryer operates, check the temperature of the hot air coming out of the vent. While the air should be warm, it should not be excessively hot. Unusually high temperatures may indicate a problem with the dryer, and professional assistance should be sought in such cases.
- Verify proper venting: Inspect the dryer vent hose and vent opening to ensure that air is flowing freely and that there are no obstructions. Proper venting is crucial for the efficient operation of the gas dryer.
- Monitor for an extended period: Allow the dryer to run for a complete drying cycle while monitoring its performance. This will ensure that it functions properly and that there are no issues or concerns.
By testing the gas dryer, you are ensuring that it operates safely and efficiently. Monitoring the drying process, checking for proper venting, and observing the dryer’s performance will help identify any potential problems or malfunctions.
If you notice any issues or have concerns about the gas dryer’s performance, it’s advisable to consult the dryer’s manual or contact the manufacturer for assistance. They can provide guidance or arrange for professional service if necessary.
Once you are satisfied with the gas dryer’s performance and everything is functioning correctly, you can confidently enjoy the convenience and efficiency of your newly installed gas dryer.
Conclusion
Congratulations! You have successfully learned how to hook up a gas dryer. By following the step-by-step guide and taking the necessary safety precautions, you have completed the installation process and now have a functional and efficient gas dryer in your home.
Throughout the installation process, it was important to prioritize safety. By shutting off the gas supply, wearing appropriate safety gear, and checking for gas leaks, you ensured a secure and hazard-free installation.
You also gathered the necessary tools and materials, such as an adjustable wrench, Teflon tape, and a gas line hose, and followed the proper procedures to connect the gas line to the dryer. By securing the dryer vent hose and plugging in the dryer, you completed the final steps of the installation process.
After ensuring all connections were secure and the gas dryer was properly plugged in, you tested the dryer’s functionality, monitored its performance, and verified the proper venting of hot air and moisture. By doing so, you confirmed that the gas dryer was operating safely and efficiently.
Remember, if at any point during the installation process you felt unsure or uncomfortable, it is always best to consult a professional for assistance. Safety should always be the top priority when working with gas appliances.
With the gas dryer successfully hooked up, you can now enjoy the convenience and benefits it offers. From faster drying times and energy efficiency to gentle care for your laundry, a gas dryer is a valuable addition to any home.
As you utilize your gas dryer, make sure to maintain it properly by cleaning the lint filter regularly, checking and cleaning the vent hose as needed, and scheduling routine maintenance as recommended by the manufacturer.
Thank you for following this guide, and best of luck with your newly installed gas dryer!
Now that you've mastered hooking up a gas dryer, why not dive into more projects around your house? For those itching to spruce up their living space without breaking the bank, our article on how to DIY home improvement offers a plethora of practical tips. Whether you're looking to repaint, refurbish, or just reorganize, this guide has you covered. And don't forget about keeping your home in top shape. Check out our essential article on what home maintenance should I do to keep your sanctuary safe and sound, ensuring everything from appliances to roofing is in check.
Frequently Asked Questions about How To Hook Up A Gas Dryer
Was this page helpful?
At Storables.com, we guarantee accurate and reliable information. Our content, validated by Expert Board Contributors, is crafted following stringent Editorial Policies. We're committed to providing you with well-researched, expert-backed insights for all your informational needs.
0 thoughts on “How To Hook Up A Gas Dryer”