Articles
How To Replace Doorbell Button
Modified: January 22, 2024
Learn how to replace your doorbell button with step-by-step instructions and helpful tips. Read our helpful articles on doorbell button replacement.
(Many of the links in this article redirect to a specific reviewed product. Your purchase of these products through affiliate links helps to generate commission for Storables.com, at no extra cost. Learn more)
Introduction
When it comes to home maintenance and repairs, sometimes even the smallest components deserve attention. One such component is the doorbell button, which acts as the gateway for visitors to announce their presence. Over time, these buttons can become worn out, damaged, or simply outdated, requiring replacement to maintain both functionality and aesthetics. Fortunately, replacing a doorbell button is a relatively simple task that can be completed with just a few tools and a little bit of know-how.
In this guide, we will walk you through the steps of replacing a doorbell button, ensuring that your visitors can always announce their arrival with ease. From removing the old button to connecting the wires and mounting the new one, we’ll cover everything you need to know to complete this project successfully.
Before we get started, let’s go over the materials and tools you will need:
- New doorbell button
- Screwdriver (flathead or Phillips, depending on the type of screws used)
- Wire cutters/strippers
- Electrical tape
With these items on hand, you’ll be ready to tackle this project and restore your doorbell button to its former glory. Let’s dive in!
Key Takeaways:
- Easily upgrade your home’s entrance by replacing a worn-out doorbell button with just a few tools and simple steps. Prioritize safety, test the new button, and welcome visitors with a functional and stylish entryway.
- With the right materials and step-by-step guidance, you can confidently replace your doorbell button, enhancing both functionality and aesthetics. Prioritize safety, test the new button, and enjoy a welcoming entryway for years to come.
Read also: 12 Amazing Doorbell Buttons for 2025
Materials and Tools Needed
Before you begin replacing your doorbell button, it’s essential to gather all the necessary materials and tools. Having everything ready beforehand will make the process smoother and more efficient. Here’s a list of what you’ll need:
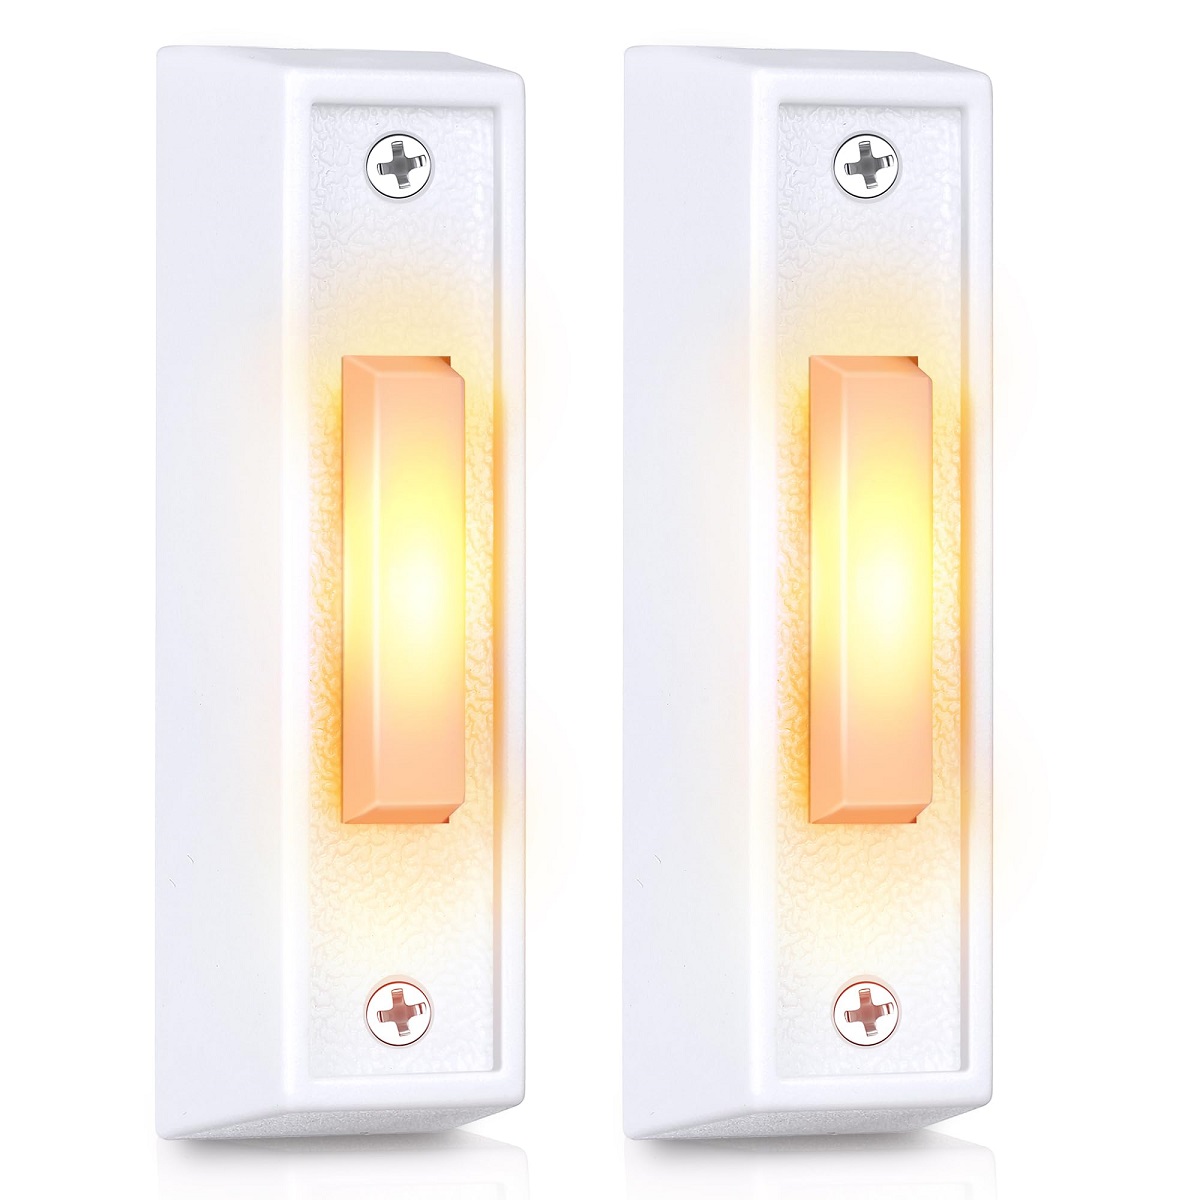
- New Doorbell Button: You’ll need a replacement doorbell button that matches the wiring system of your current doorbell. Consider the design and style you prefer as well.
- Screwdriver: Depending on the type of screws used to secure your doorbell button, you’ll need either a flathead or Phillips screwdriver. Check the screws on your existing button to determine the appropriate screwdriver type.
- Wire Cutters/Strippers: These tools are necessary for cutting and stripping the wires connected to the old doorbell button. They allow you to remove the old button safely and prepare the wires for the new one.
- Electrical Tape: Electrical tape is used to insulate the wired connections, ensuring a secure and safe installation. It helps protect against stray electrical currents and prevents wires from accidentally coming into contact with each other or metal surfaces.
Having these materials and tools ready will save you time and frustration during the replacement process. Make sure to check if any of the items mentioned above are missing from your toolkit before you begin the project.
Now that you have all the necessary materials and tools, it’s time to start replacing your doorbell button. In the following steps, we will guide you through the process, from removing the old button to mounting the new one. Let’s get started!
Step 1: Remove the Old Doorbell Button
The first step in replacing a doorbell button is to remove the old, worn-out button. Follow these steps to remove the old doorbell button:
- Turn off the Power: Before starting any electrical work, it’s important to turn off the power to the doorbell system. Locate the circuit breaker or fuse box and switch off the power circuit that controls the doorbell.
- Inspect the Doorbell Button: Take a close look at the existing doorbell button to determine how it is secured. Some buttons may be attached with screws, while others may have a snap-on or adhesive backing.
- Remove the Screws: If your doorbell button is secured with screws, use a screwdriver (flathead or Phillips, depending on the screw type) to carefully loosen and remove the screws. Set the screws aside in a safe place.
- Detach the Button: Once the screws are removed, gently pull the button away from the wall or mounting surface. If the button has a snap-on or adhesive backing, carefully detach it by prying it away from the surface.
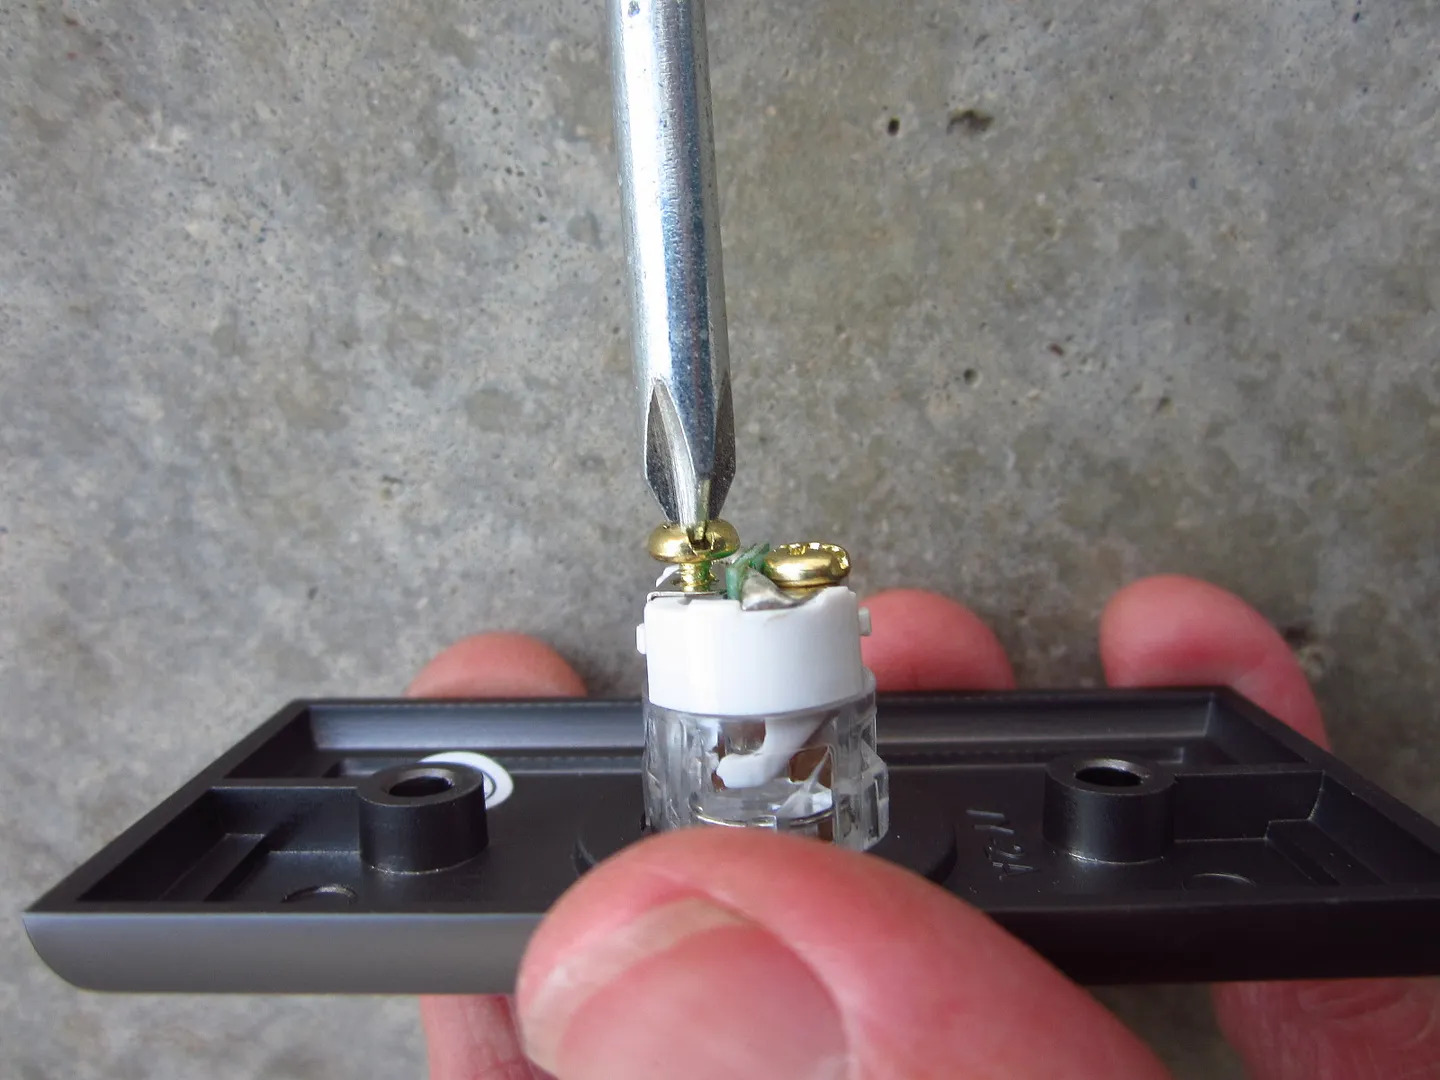
- Disconnect the Wires: With the button removed, you will see two wires connected to the back of the button. Carefully disconnect the wires by either unscrewing them or pulling them off the terminals.
With the old doorbell button removed and the wires disconnected, you have completed the first step of the replacement process. Take a moment to inspect the wires for any signs of damage or wear. If necessary, use wire cutters/strippers to trim the ends of the wires to ensure a clean connection for the new button.
Now that you have successfully removed the old doorbell button, you’re ready to move on to the next step: disconnecting the wires.
Step 2: Disconnect the Wires
After removing the old doorbell button, the next step is to disconnect the wires connected to it. Follow these steps to safely disconnect the wires:
- Inspect the Wires: Take a close look at the wires you just exposed after removing the old doorbell button. Look for any signs of damage, fraying, or loose connections. If you notice any issues, it’s important to address them before continuing.
- Identify the Wire Connections: There should be two wires connected to the back of the old doorbell button. One wire is typically colored white or gray and represents the “common” wire, while the other wire is usually colored red or another vibrant color and represents the “transformer” wire.
- Disconnect the Wires: To disconnect the wires, you will either need to unscrew them from the terminals or pull them off if they are attached with connectors. Use a screwdriver if necessary to loosen the terminals and release the wires.
- Label the Wires: It’s a good practice to label the wires before disconnecting them, especially if they are not color-coded. You can use small pieces of tape or sticky notes to mark each wire, indicating whether it is the “common” or “transformer” wire.
- Secure the Wires: After disconnecting the wires, make sure to secure them so they don’t accidentally touch each other or come into contact with metal surfaces. You can use electrical tape to wrap each wire individually.
By carefully disconnecting the wires, you have completed the second step of replacing your doorbell button. Take a moment to ensure all connections are secure and labeled correctly before moving on to the next step.
In the next step, we will prepare the new doorbell button for installation.
Step 3: Prepare the New Doorbell Button
With the old doorbell button removed and the wires disconnected, it’s time to prepare the new doorbell button for installation. Follow these steps to get the new button ready:
- Inspect the New Doorbell Button: Before proceeding, take a close look at the new doorbell button you purchased. Make sure it is compatible with your existing doorbell system and matches your desired design and style.
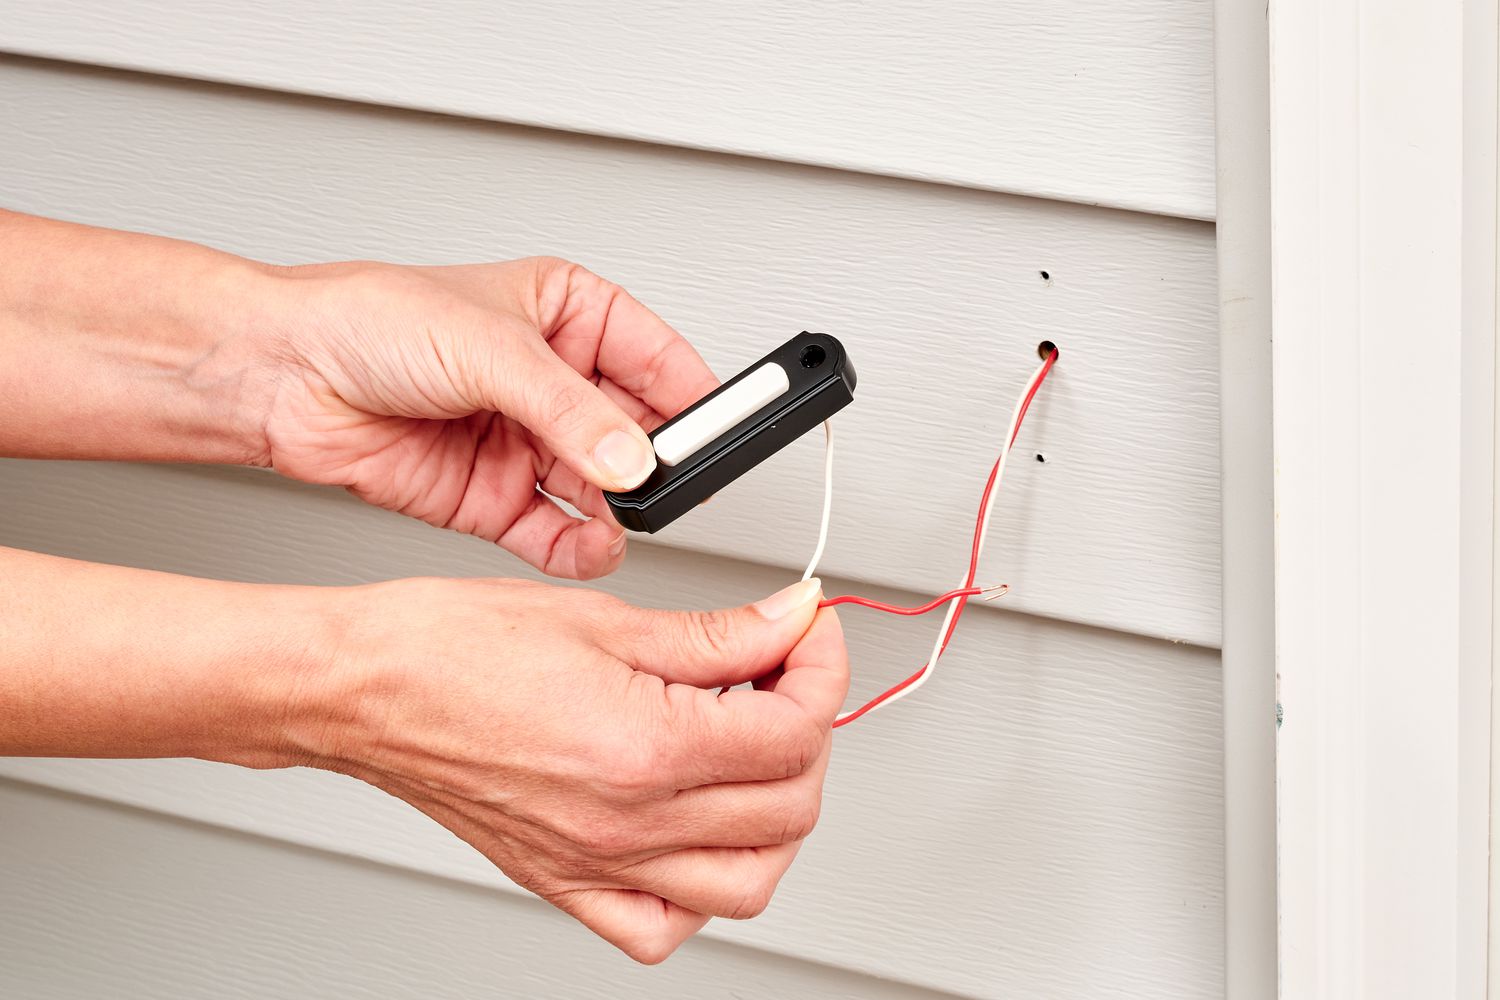
- Match the Wires: On the back of the new doorbell button, you will find two terminals labeled “common” and “transformer.” Match the labeled wires from your previous step to their corresponding terminals on the new button.
- Prepare the Wire Ends: If the ends of the wires are not already stripped, use wire cutters/strippers to remove about 1/4 inch of insulation from each wire end. This will ensure a clean and secure connection to the new doorbell button.
- Attach the Wires: Take each labeled wire and attach it to its corresponding terminal on the new doorbell button. If the button has screw terminals, wrap each wire around the screw in a clockwise direction and tighten the screw to secure the connection. If the button has snap-on connectors, push the wire ends into the appropriate labeled connectors.
As you prepare the new doorbell button, double-check that the wires are securely attached to the correct terminals. Ensure there are no loose connections or exposed wire, as this can lead to a malfunctioning doorbell system.
Now that you have prepared the new doorbell button, you’re ready to move on to the next step: connecting the wires to the new button.
When replacing a doorbell button, make sure to turn off the power to the doorbell system to avoid any electrical hazards. Use a screwdriver to remove the old button and disconnect the wires, then connect the wires to the new button and secure it in place. Test the doorbell to ensure it is working properly before turning the power back on.
Read also: 10 Best Led Doorbell Button for 2025
Step 4: Connect the Wires to the New Button
With the new doorbell button prepared, it’s time to connect the wires to the button. Follow these steps to ensure a secure and proper connection:
- Ensure the Power is Still Off: Before proceeding, double-check that the power to the doorbell system is still turned off. This is crucial for your safety while working with electrical connections.
- Identify the Terminal Labels: On the back of the new doorbell button, you will find two terminals labeled “common” and “transformer.” These labels may also be indicated with letters such as “C” and “T.”
- Connect the Wires: Take the wire labeled as the “common” wire and connect it to the terminal labeled as “common” or “C.” If the button has screw terminals, wrap the wire clockwise around the screw and tighten it. If it has snap-on connectors, insert the wire end into the corresponding labeled connector.
- Connect the “Transformer” Wire: Take the wire labeled as the “transformer” wire and connect it to the terminal labeled as “transformer” or “T.” Again, wrap the wire around the screw in a clockwise direction and tighten it or insert it into the appropriate connector.
When connecting the wires, make sure they are securely attached to the respective terminals on the new doorbell button. Double-check the connections to ensure there are no loose wires or exposed ends that may cause a short circuit.
Once the wires are properly connected, it’s time to move on to the next step: mounting the new doorbell button.
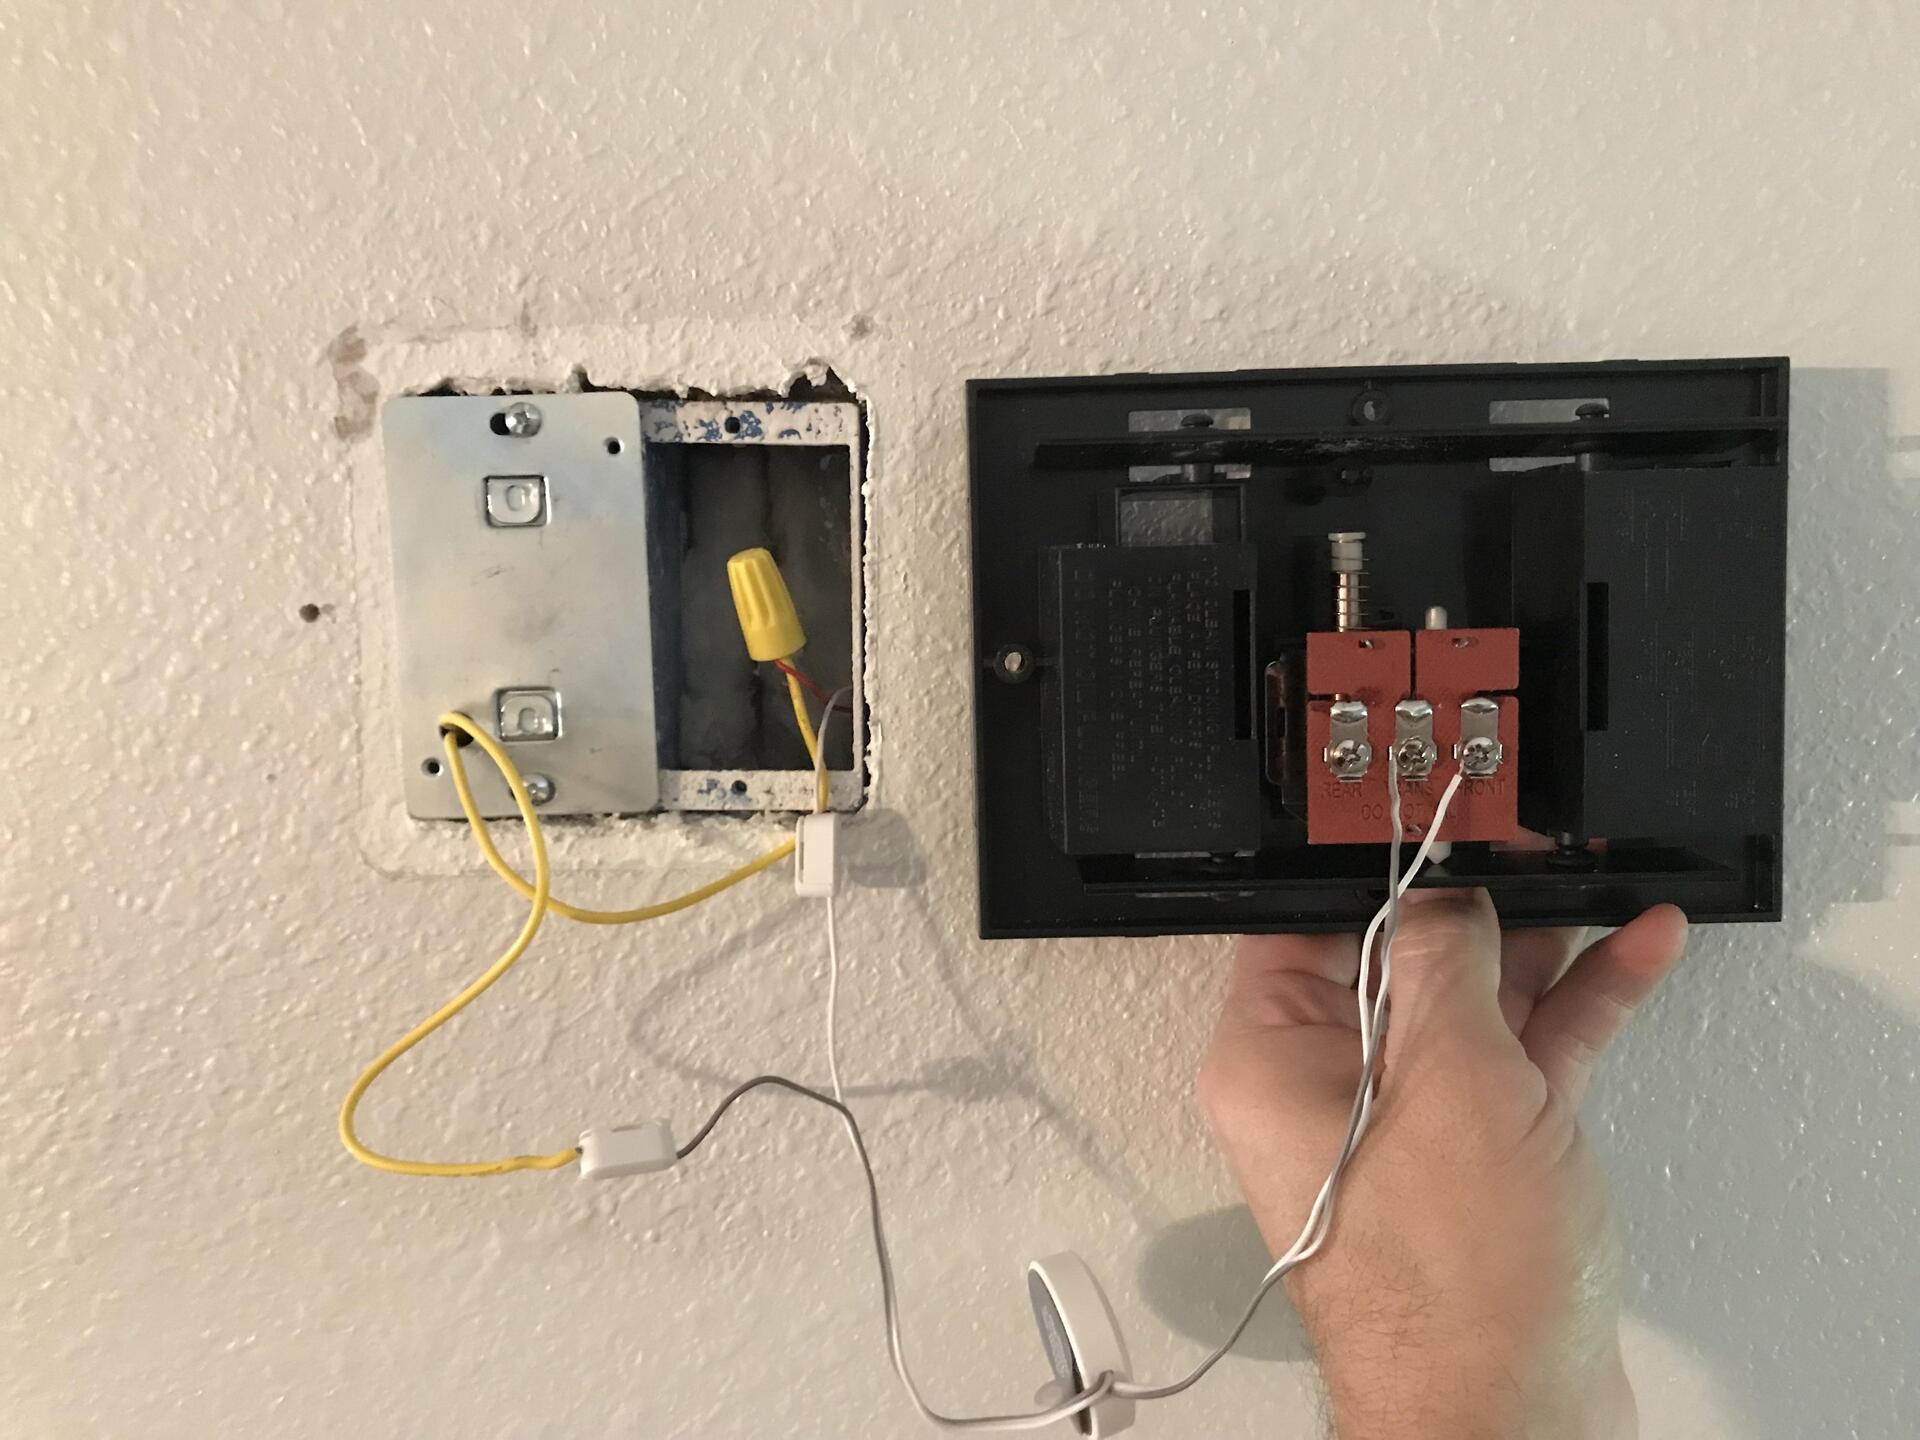
Step 5: Mount the New Doorbell Button
After connecting the wires to the new doorbell button, it’s time to mount it in its designated location. Follow these steps to securely mount the new button:
- Choose the Mounting Location: Select a location for the new doorbell button that is easily visible and accessible to visitors. It should also be within reach of the wires you just connected.
- Prepare the Mounting Surface: Clean the mounting surface to ensure a proper and secure installation. Remove any dust, dirt, or debris that may hinder the adhesion or stability of the new button.
- Align the Screw Holes: If your new doorbell button has screw holes, align them with the existing holes or make new ones if necessary. Ensure the button is level and securely positioned on the mounting surface.
- Mount the Button: If the new button has screw holes, use the appropriate screwdriver to attach it to the wall or mounting surface. Tighten the screws until the button is firmly secured. If the button has adhesive backing, firmly press it against the mounting surface to ensure it sticks in place.
When mounting the new doorbell button, ensure that it is properly aligned and securely attached. A loose or misaligned button may not function correctly or may become easily damaged.
Now that the new doorbell button is securely mounted, it’s time for the final step: testing the new button to ensure it works properly.
Step 6: Test the New Button
After completing the installation process, it’s crucial to test the new doorbell button to ensure it is functioning as expected. Follow these steps to test the button:
- Turn On the Power: Before testing the new button, make sure to turn the power back on at the circuit breaker or fuse box. Restoring power is essential for the doorbell system to function.
- Press the Button: Stand near the new doorbell button and press it firmly. You should hear a chime or bell sound, indicating that the button is working and that the doorbell system is operational.
- Check for Proper Operation: Listen for any unusual sounds or malfunctions when the doorbell button is pressed. Ensure that the chime or bell sound is clear and audible throughout your home. Additionally, check if the button resets and is ready for the next use after being pressed.
If the doorbell chime does not sound or if there are any issues with the functionality of the new button, double-check the wiring connections and ensure they are properly seated on the terminals. You may also need to consult the manufacturer’s instructions or seek professional assistance if necessary.
Congratulations! You have successfully replaced your doorbell button. With the new button properly installed and tested, you can now enjoy a fully functional and aesthetically pleasing doorbell system.
Remember to exercise caution when working with electricity, always following safety guidelines and turning off the power before any installation or repair procedure. If you feel unsure or uncomfortable, do not hesitate to seek assistance from a qualified professional.
By following these steps, you have completed the process of replacing your doorbell button. Now you can welcome visitors with a functioning and visually appealing doorbell button for years to come.
Happy doorbell button replacement!
Conclusion
Replacing a doorbell button may seem like a small task, but it can greatly enhance the functionality and appearance of your home’s entrance. By following the step-by-step guide outlined above, you can easily replace your old, worn-out button and replace it with a new one that reflects your personal style.
Throughout the process, it’s crucial to prioritize safety by turning off the power before starting any electrical work and ensuring secure wire connections. Take your time to carefully remove the old button, disconnect the wires, and prepare the new button for installation. Mount the new button in an accessible and visible location, and test its functionality to ensure it works properly.
Remember, if you encounter any difficulties during the replacement process, it’s always recommended to seek assistance from a professional electrician. They will have the expertise and knowledge to troubleshoot any potential issues and ensure a safe installation.
With a fresh, functional doorbell button in place, you can enjoy the convenience of announcing visitors and greeting them with a welcoming chime or bell. Additionally, the new button can add a stylish touch to the overall aesthetics of your entryway.
Now that you have the knowledge and confidence to replace a doorbell button, you can embark on this home improvement project with ease. So, go ahead and give your doorbell a well-deserved upgrade!
Frequently Asked Questions about How To Replace Doorbell Button
Was this page helpful?
At Storables.com, we guarantee accurate and reliable information. Our content, validated by Expert Board Contributors, is crafted following stringent Editorial Policies. We're committed to providing you with well-researched, expert-backed insights for all your informational needs.


0 thoughts on “How To Replace Doorbell Button”