Articles
How To Replace Wired Doorbell
Modified: August 16, 2024
Learn how to replace a wired doorbell with this informative article. Step-by-step guide and tips to ensure a smooth installation process.
(Many of the links in this article redirect to a specific reviewed product. Your purchase of these products through affiliate links helps to generate commission for Storables.com, at no extra cost. Learn more)
Introduction
Replacing a wired doorbell can be a simple and fulfilling home improvement project. Whether your existing doorbell is malfunctioning or you simply want to upgrade to a newer model, this guide will walk you through the step-by-step process of replacing your wired doorbell.
A wired doorbell is a convenient and reliable way to alert you when someone is at your door. Unlike wireless doorbells that rely on batteries, a wired doorbell is directly connected to your electrical system, ensuring a consistent power source. By following these instructions, you’ll be able to replace your wired doorbell safely and efficiently, without the need for professional assistance.
Before we begin, keep in mind that safety should always be a priority when working with electrical systems. Make sure to turn off the power supply to your doorbell before starting this project. Additionally, if you’re unsure about any aspect of the installation process, consult with a licensed electrician.
Now, let’s gather the necessary tools and materials to get started.
Key Takeaways:
- Replacing a wired doorbell is a simple DIY project that enhances home convenience and security. Follow the step-by-step guide for a successful installation, ensuring safety and functionality.
- Prioritize safety by turning off the power supply and testing the new doorbell’s functionality. Enjoy the convenience and peace of mind that a new wired doorbell brings to your home.
Read more: How To Wire A Doorbell
Step 1: Gather the necessary tools and materials
Before you begin replacing the wired doorbell, it’s important to gather all the necessary tools and materials. Having everything prepared ahead of time will make the installation process smoother and more efficient. Here’s a list of items you’ll need:
- Screwdriver (flathead or Phillips, depending on the type of screws used)
- New wired doorbell
- Wire strippers
- Electrical tape
- Wire nuts
- Mounting screws
- Drill (for mounting the new doorbell)
- Voltage tester (to ensure the power is off)
You may also need additional tools or materials depending on the specific doorbell model and any unique requirements for your installation. It’s always a good idea to refer to the manufacturer’s instructions or consult an electrician if you have any doubts.
Once you have gathered all the necessary tools and materials, you’re ready to move on to the next step: turning off the power supply.
Step 2: Turn off the power supply
Before you begin disassembling the old wired doorbell or working with any electrical components, it’s crucial to ensure your safety by turning off the power supply. This step is essential to prevent any potential electrical shocks or accidents.
To turn off the power supply to your doorbell, follow these steps:
- Locate the circuit breaker panel in your home. It is usually found in a utility room, basement, or garage.
- Open the circuit breaker panel door to access the breakers. Each breaker should be labeled to specify which area of the house it controls.
- Locate the circuit breaker labeled “Doorbell” or something similar. Alternatively, you can turn off the power to the entire house to ensure complete safety.
- Flip the switch for the doorbell breaker to the “Off” position. If you’re turning off the main power supply, flip the main breaker switch to the “Off” position.
- Use a voltage tester to double-check that the power is indeed off. Place the tester on the doorbell wires or any other exposed wires to ensure that there is no electrical current. If the tester indicates no voltage, you can proceed with confidence.
Once you have confirmed that the power supply is switched off, you can proceed to the next step: removing the old wired doorbell.
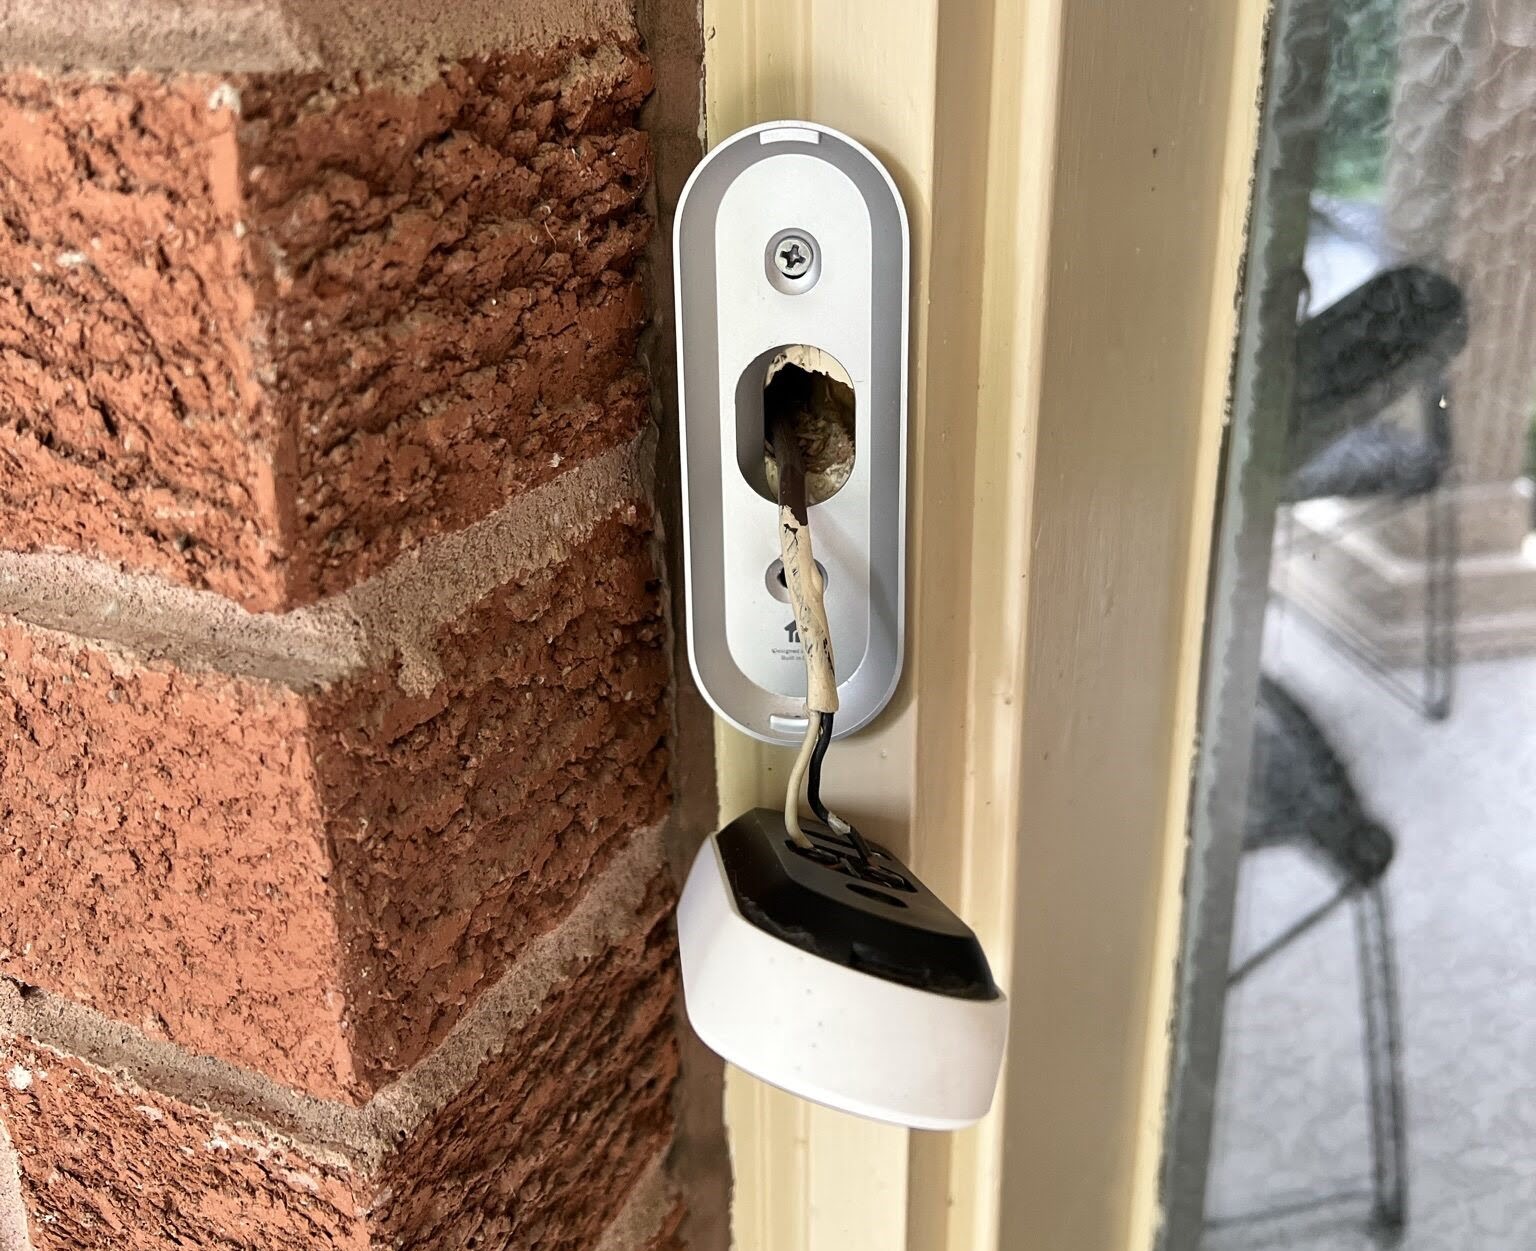
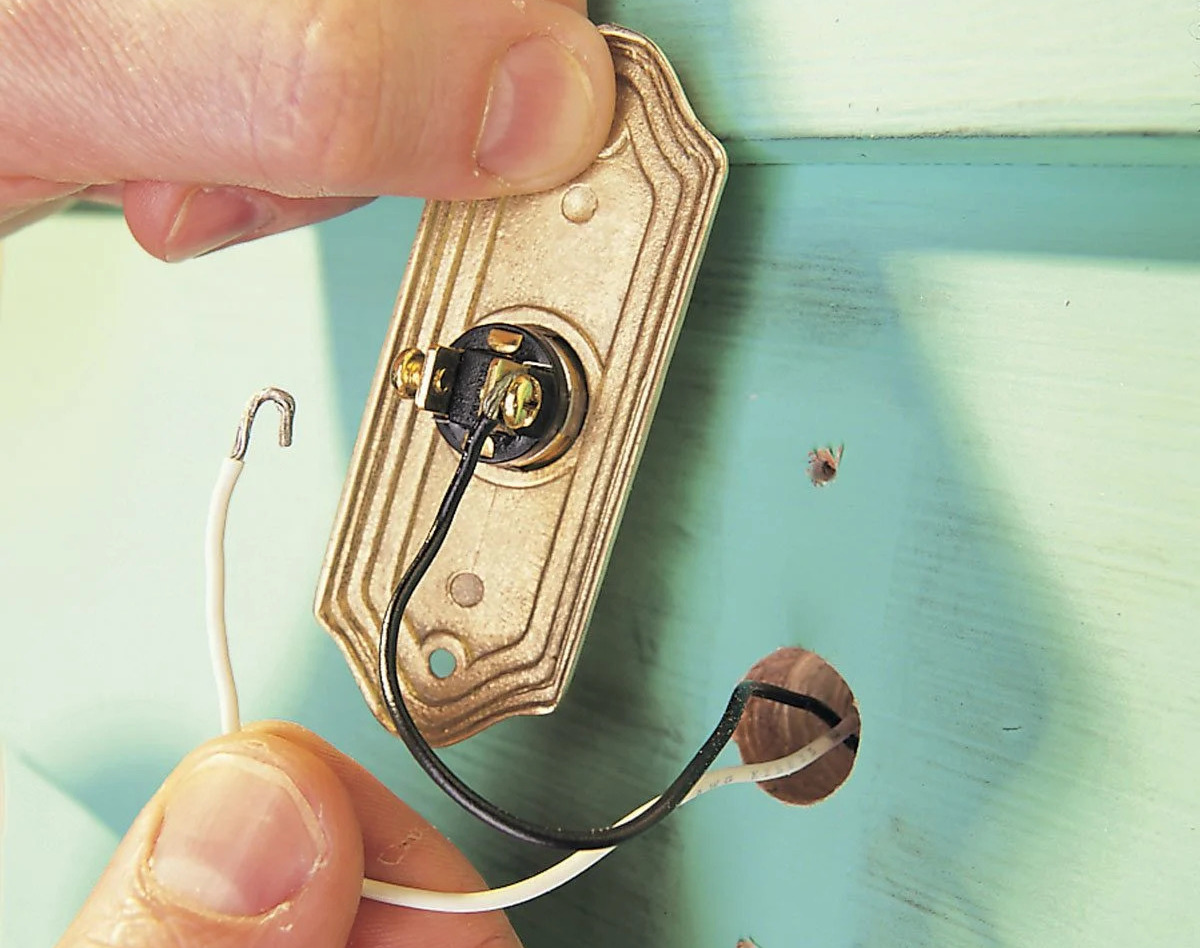
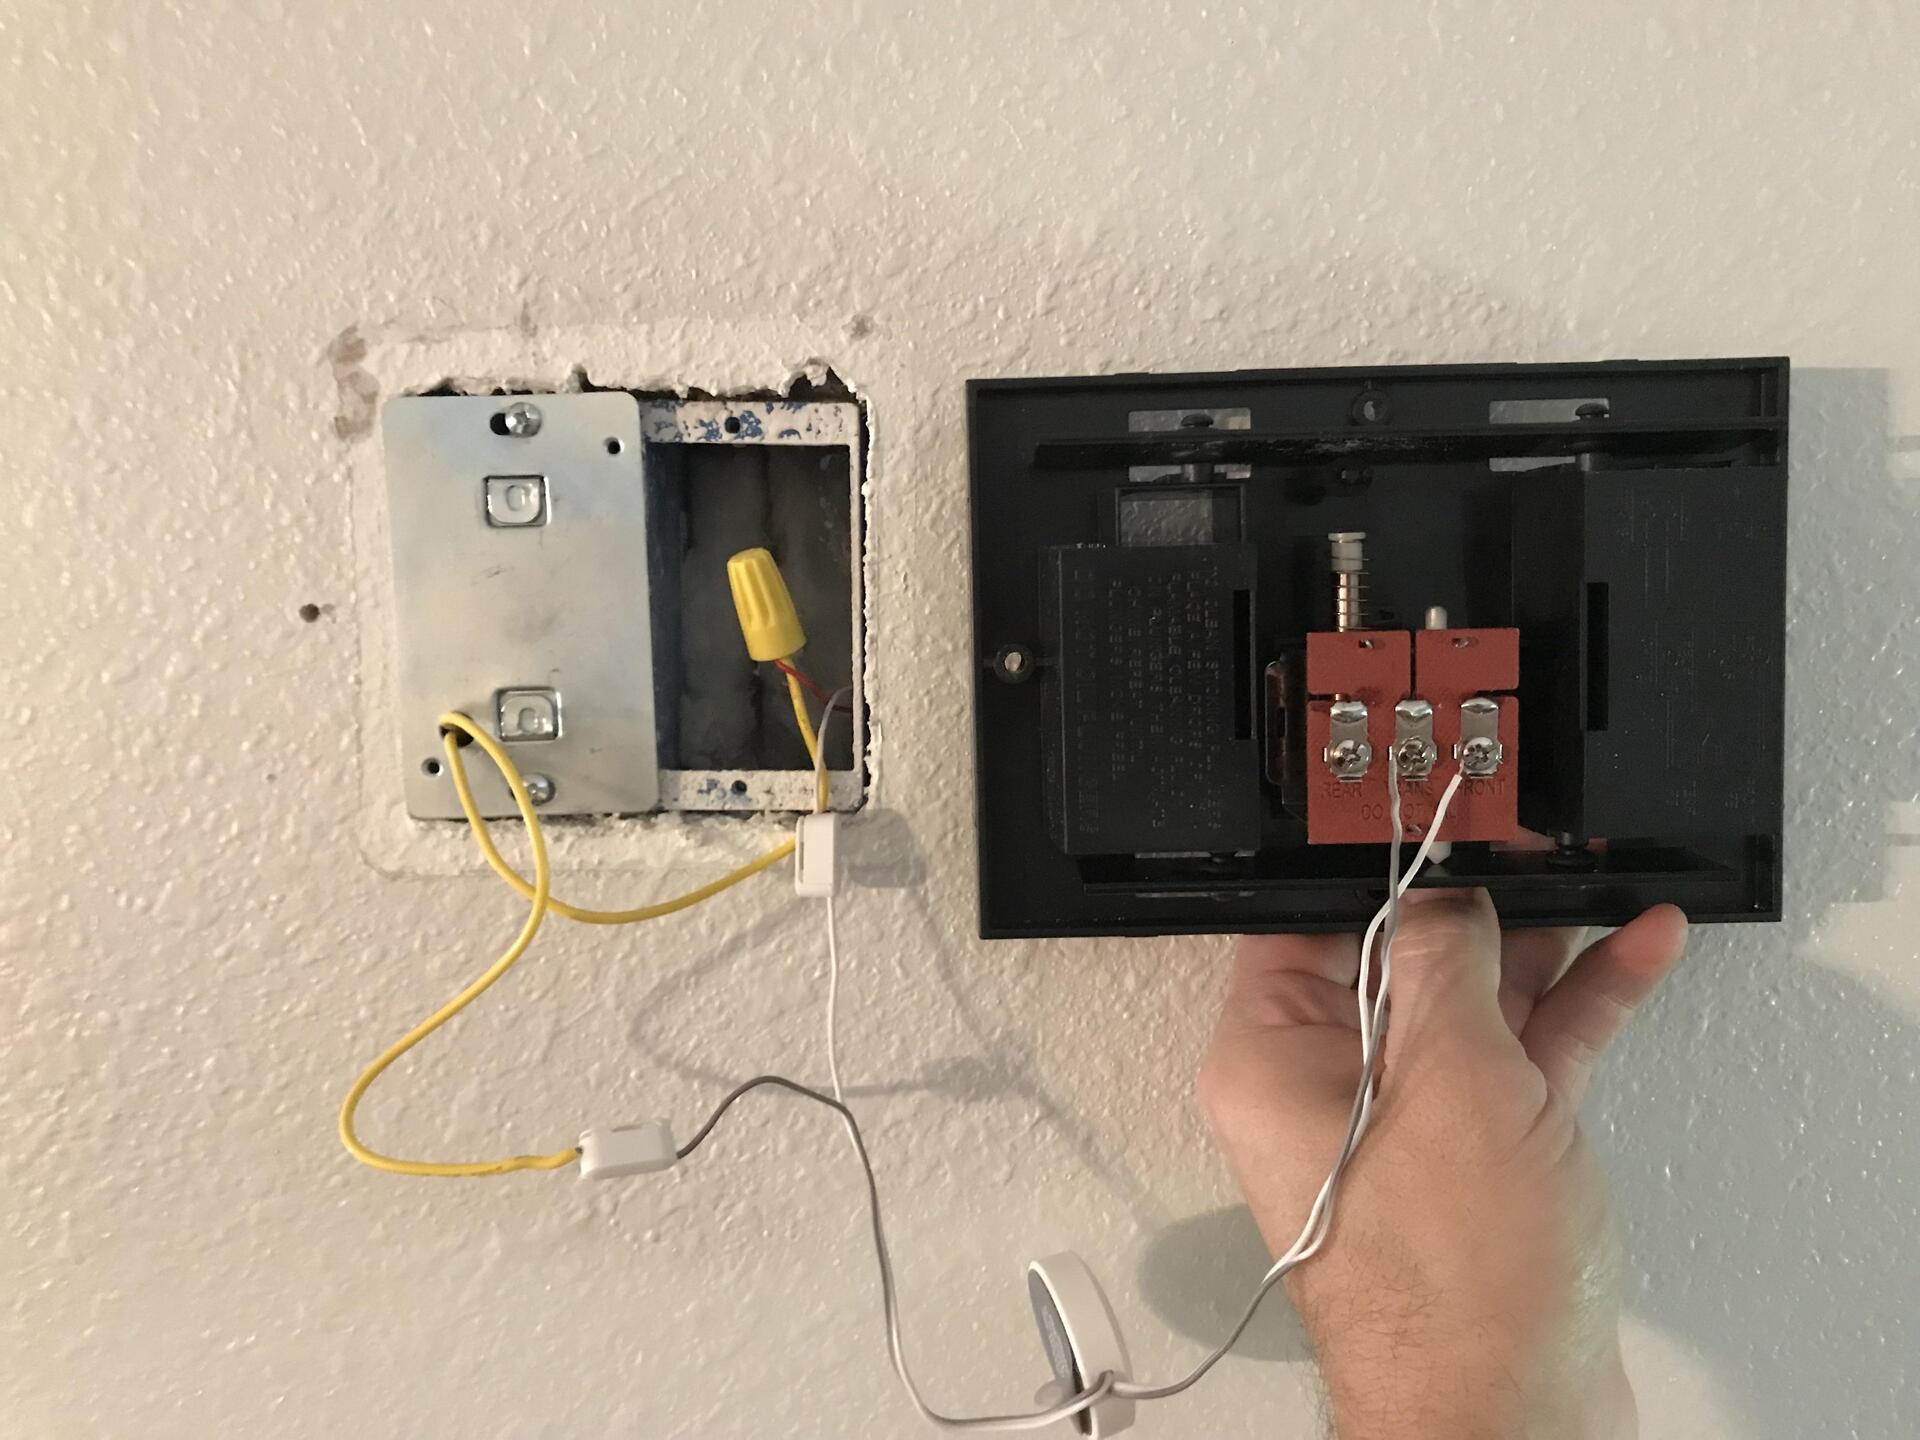
Step 3: Remove the old wired doorbell
Now that you have turned off the power supply and ensured your safety, it’s time to remove the old wired doorbell. Follow these steps to effectively remove the old unit:
- Inspect the existing doorbell to understand its mounting mechanism. You may find screws or clips holding it in place.
- Using a screwdriver, carefully remove any screws securing the doorbell to the wall or door frame. Keep track of the screws as you will need them later.
- If the doorbell is held in place with clips, gently pry them open using a flathead screwdriver to release the unit from its mounting.
- Once the screws or clips have been removed, carefully detach the wired doorbell from the wall or door frame.
- Be cautious not to damage the wires that are connected to the doorbell. If necessary, gently unwind or unclip the wires from any hooks or fasteners.
- Once the old doorbell has been removed, take a moment to inspect the wiring. Look for any signs of wear or damage. If you notice any issues, it’s recommended to contact an electrician for assistance.
With the old wired doorbell removed, you’re now ready to prepare the new doorbell for installation.
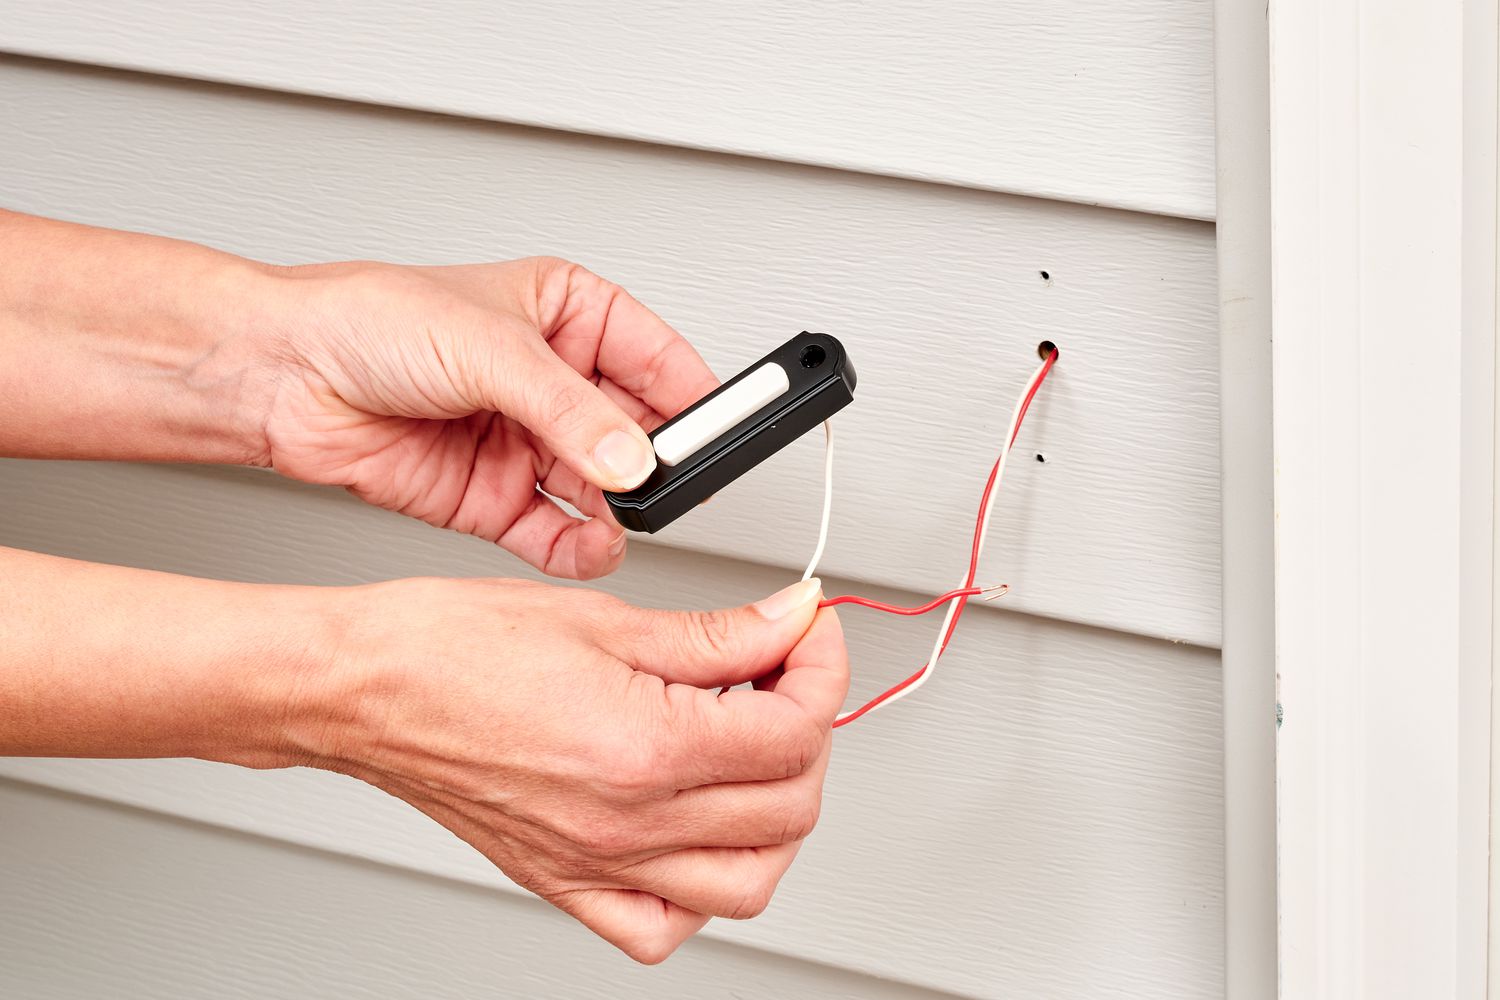
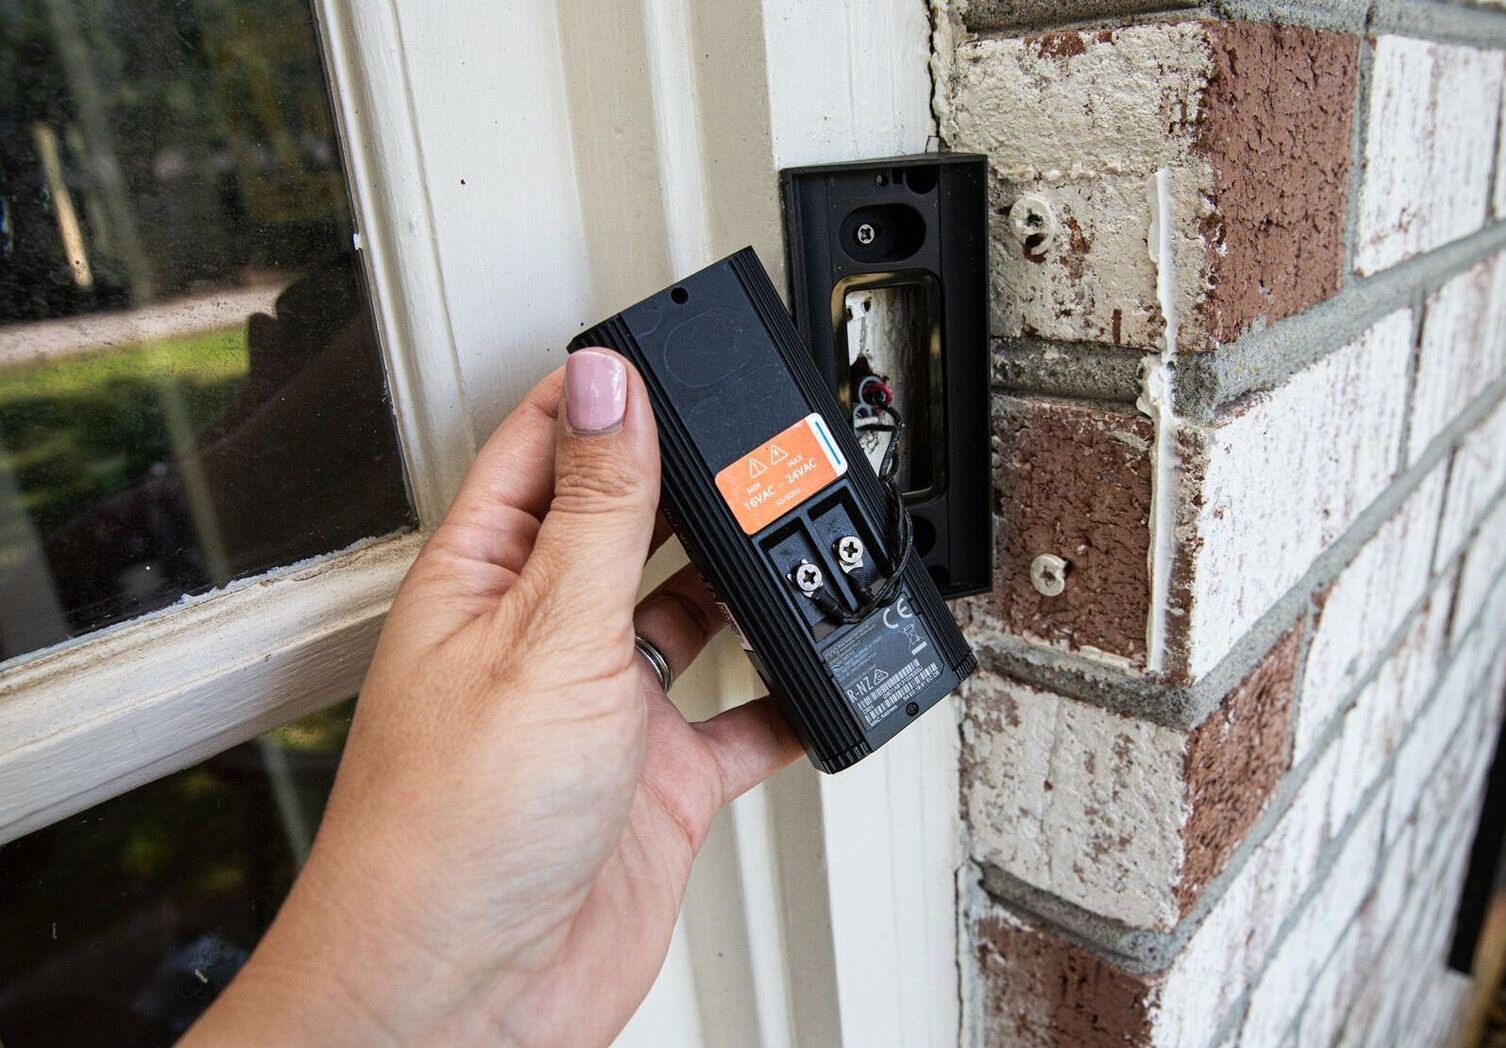
Step 4: Prepare the new wired doorbell
With the old wired doorbell safely removed, it’s time to prepare the new doorbell for installation. Follow these steps to properly prepare the new unit:
- Take a moment to read the manufacturer’s instructions that came with your new wired doorbell. Familiarize yourself with the specific requirements and recommendations for your particular model.
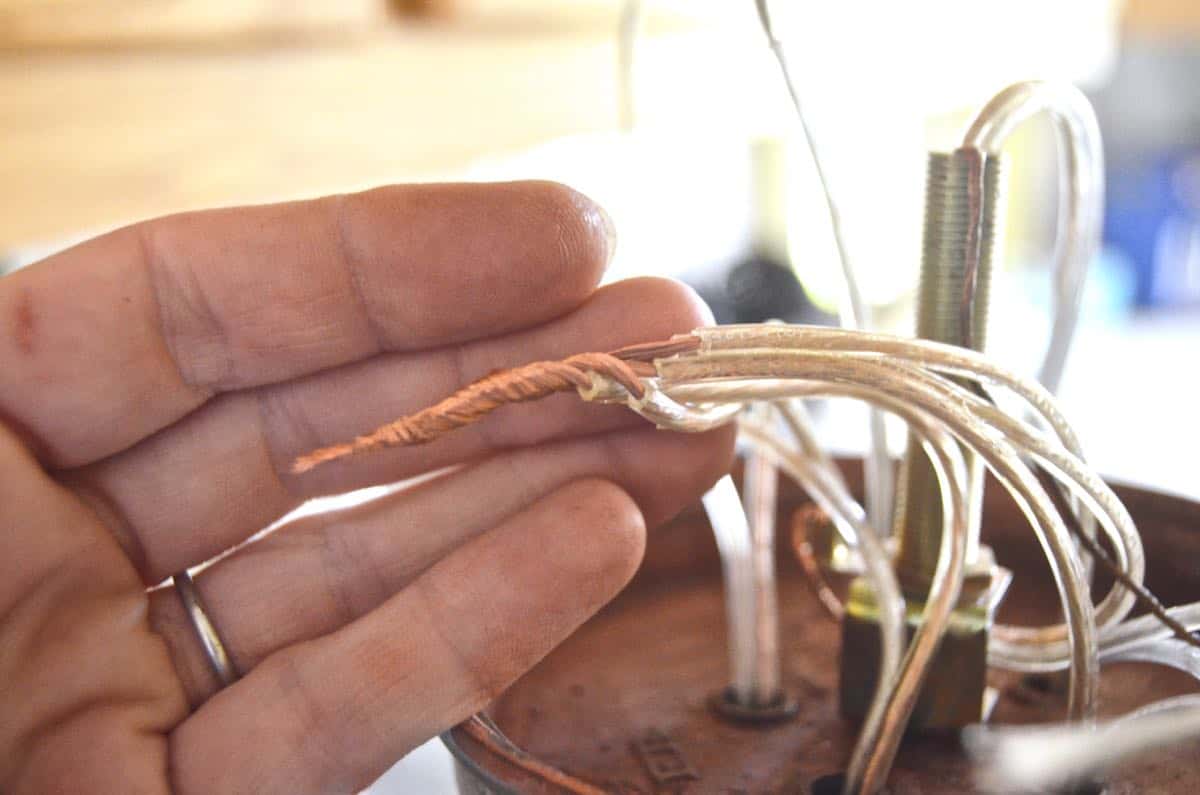
- Inspect the wiring on the new doorbell. Typically, you will find two terminals labeled “Front” and “Transformer.” These terminals are where you will connect the wires from your existing doorbell.
- If necessary, use wire strippers to remove a small portion of the insulation from the end of each wire. This will expose the bare copper wire, allowing for proper connection.
- Take note of the wire colors or letters. In most cases, the wires will be color-coded or labeled with letters such as “F” for the front door and “T” for the transformer. This will help you connect the wires correctly.
- Apply electrical tape to the exposed wire ends to ensure a secure and insulated connection. This will prevent any accidental contact and minimize the risk of electrical issues.
- Now is a good time to test the new doorbell before final installation. Follow the manufacturer’s instructions to ensure that it functions properly.
By preparing the new wired doorbell in advance, you are ensuring a smoother installation process. With the new unit ready, it’s time to move on to the next step: connecting the wires.
Before replacing a wired doorbell, always turn off the power at the circuit breaker to avoid any electrical accidents.
Read more: How To Install Wired Nest Doorbell
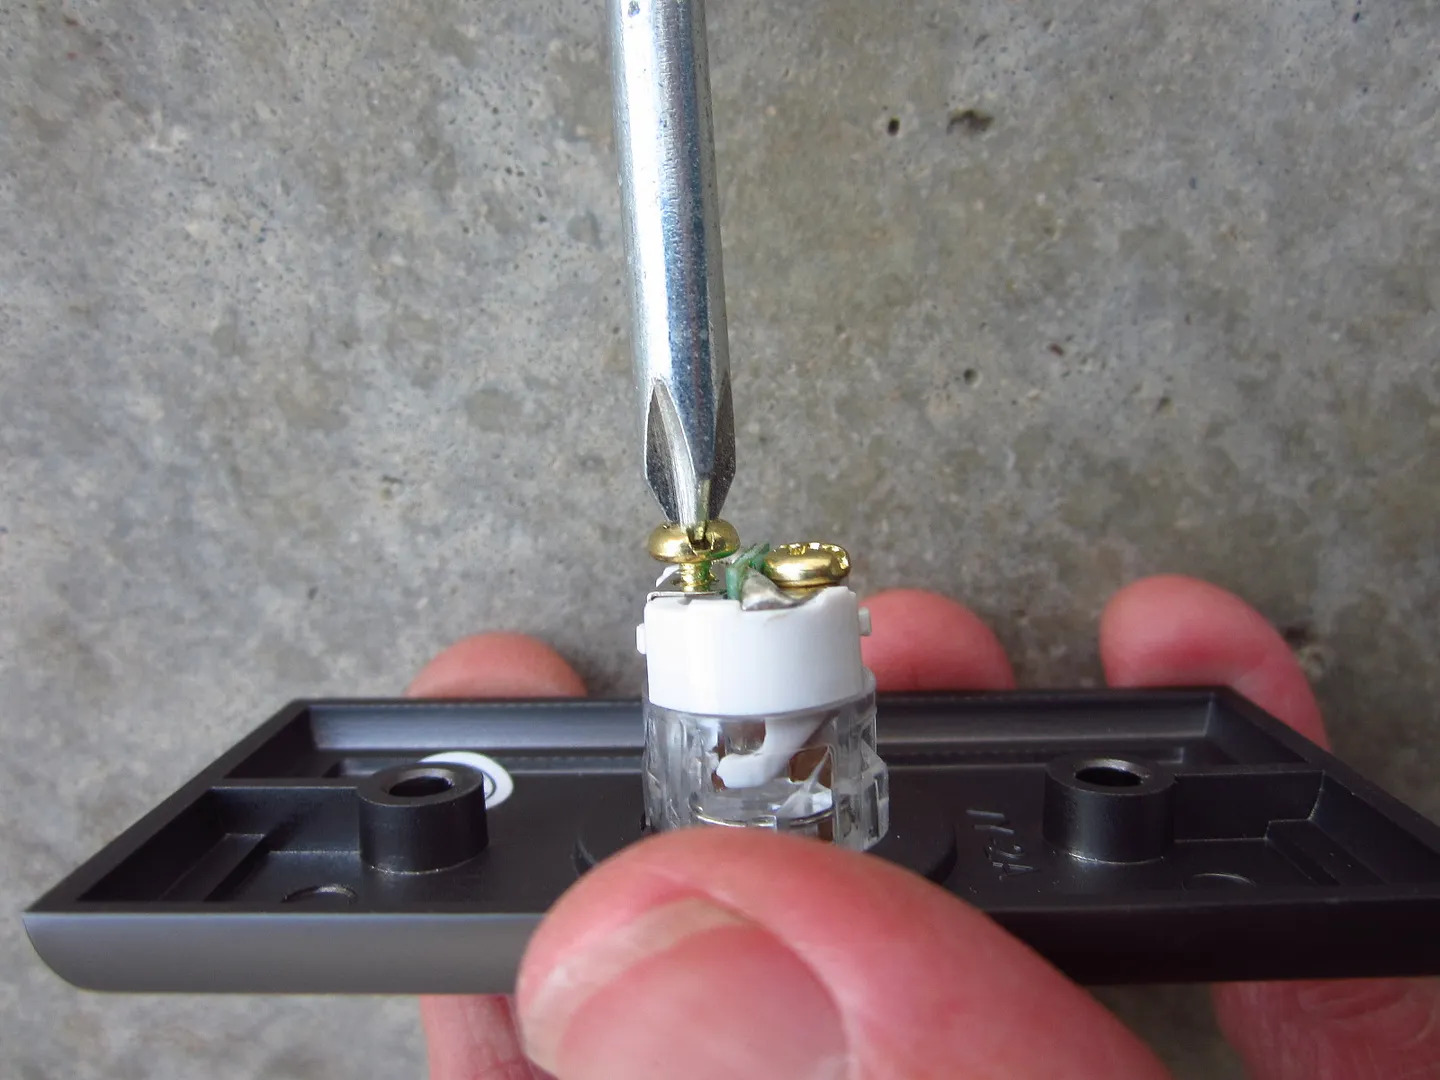
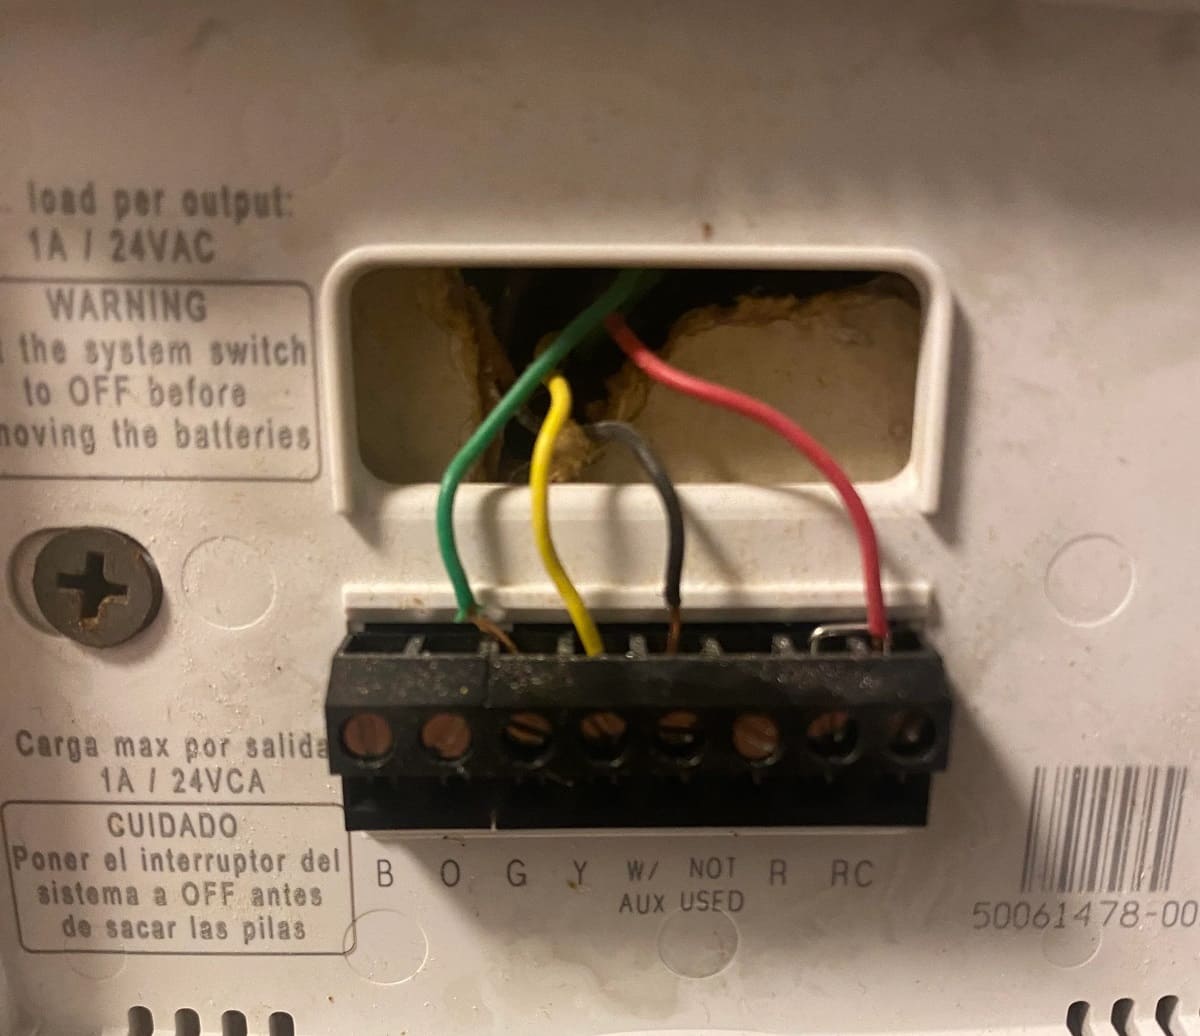
Step 5: Connect the wires to the new doorbell
Now that you have prepared the new wired doorbell, it’s time to connect the wires. Follow these steps to properly connect the wires to the new doorbell:
- Take a moment to familiarize yourself with the labeling on the terminals of the new doorbell. Usually, you will find terminals labeled “Front” and “Transformer.”
- Identify the wires coming from your existing doorbell. You may see two or more wires, depending on your system.
- Referencing the color-coding or letter labeling on the wires, connect the wire from the front door to the terminal labeled “Front” on the new doorbell. If there is an additional wire from the transformer, connect it to the terminal labeled “Transformer.”
- Secure the connections by twisting the wires together clockwise. This will ensure a solid and reliable connection.
- Once the wires are securely connected, cover the exposed connections with wire nuts. Twist the wire nuts clockwise over the connected wires until they are tightly secured.
- Ensure that the connection is secure by gently pulling on the wires. They should not come loose or disconnect from the terminals.
- With the wires connected and secured, carefully tuck them inside the back of the new doorbell housing.
By properly connecting the wires to the new doorbell, you are ensuring that it will function correctly when installed. Now, let’s move on to the next step: mounting the new doorbell.
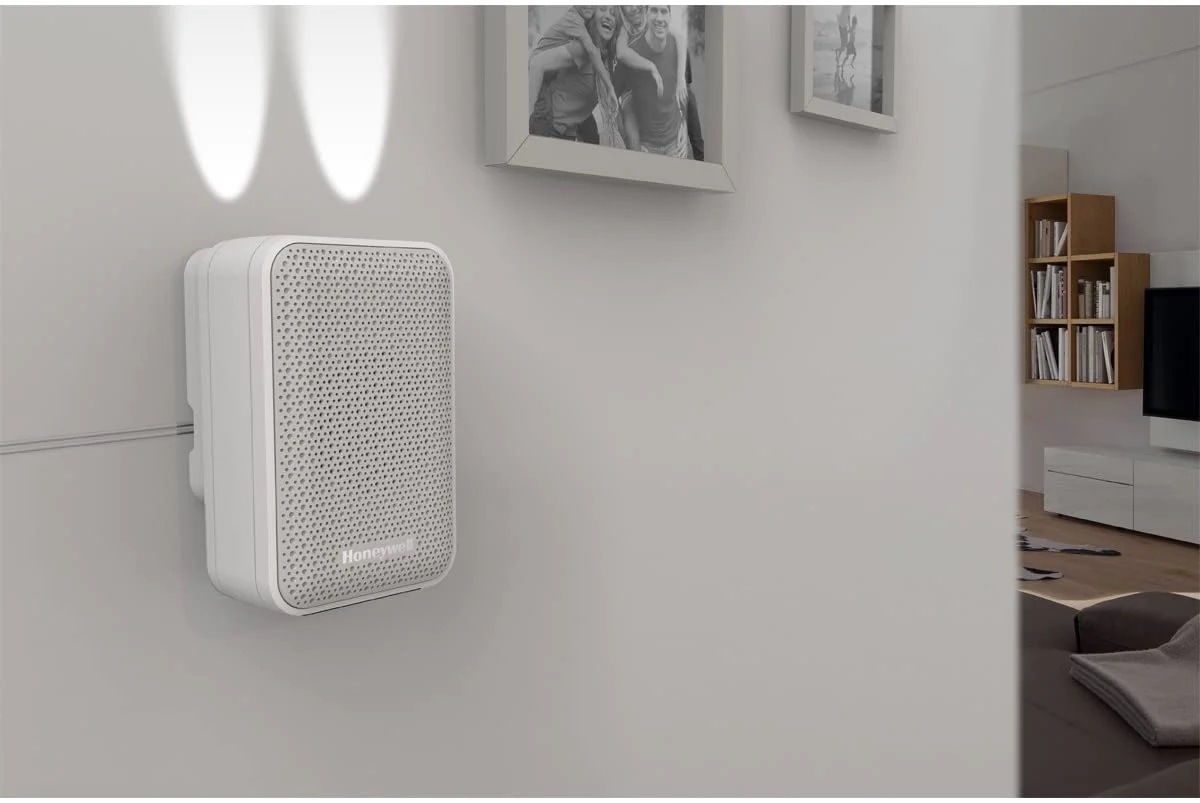
Step 6: Mount the new doorbell
Now that the wires are properly connected to the new doorbell, it’s time to mount it in its designated location. Follow these steps to effectively mount the new wired doorbell:
- Choose the desired location for the new doorbell. It is typically mounted near the front entrance of your home, either on the wall or the door frame.
- Hold the new doorbell against the chosen location and use a pencil to mark the positions of the screw holes.
- Set the new doorbell aside and grab a drill. Use an appropriate drill bit size for the screws provided with your doorbell. This will allow you to create pilot holes for easy screw insertion.
- Using the marked positions as a guide, carefully drill pilot holes at each marked spot. Be mindful of the depth and ensure that the holes are slightly smaller than the screws to provide a secure fit.
- With the pilot holes drilled, align the new doorbell with the holes and insert the mounting screws. Use a screwdriver to tighten the screws until the doorbell is securely mounted.
- Make sure the new doorbell is level and properly aligned with the surroundings for aesthetic appeal.
Once the new doorbell is securely mounted, it’s time to move on to the next step: testing the new wired doorbell.
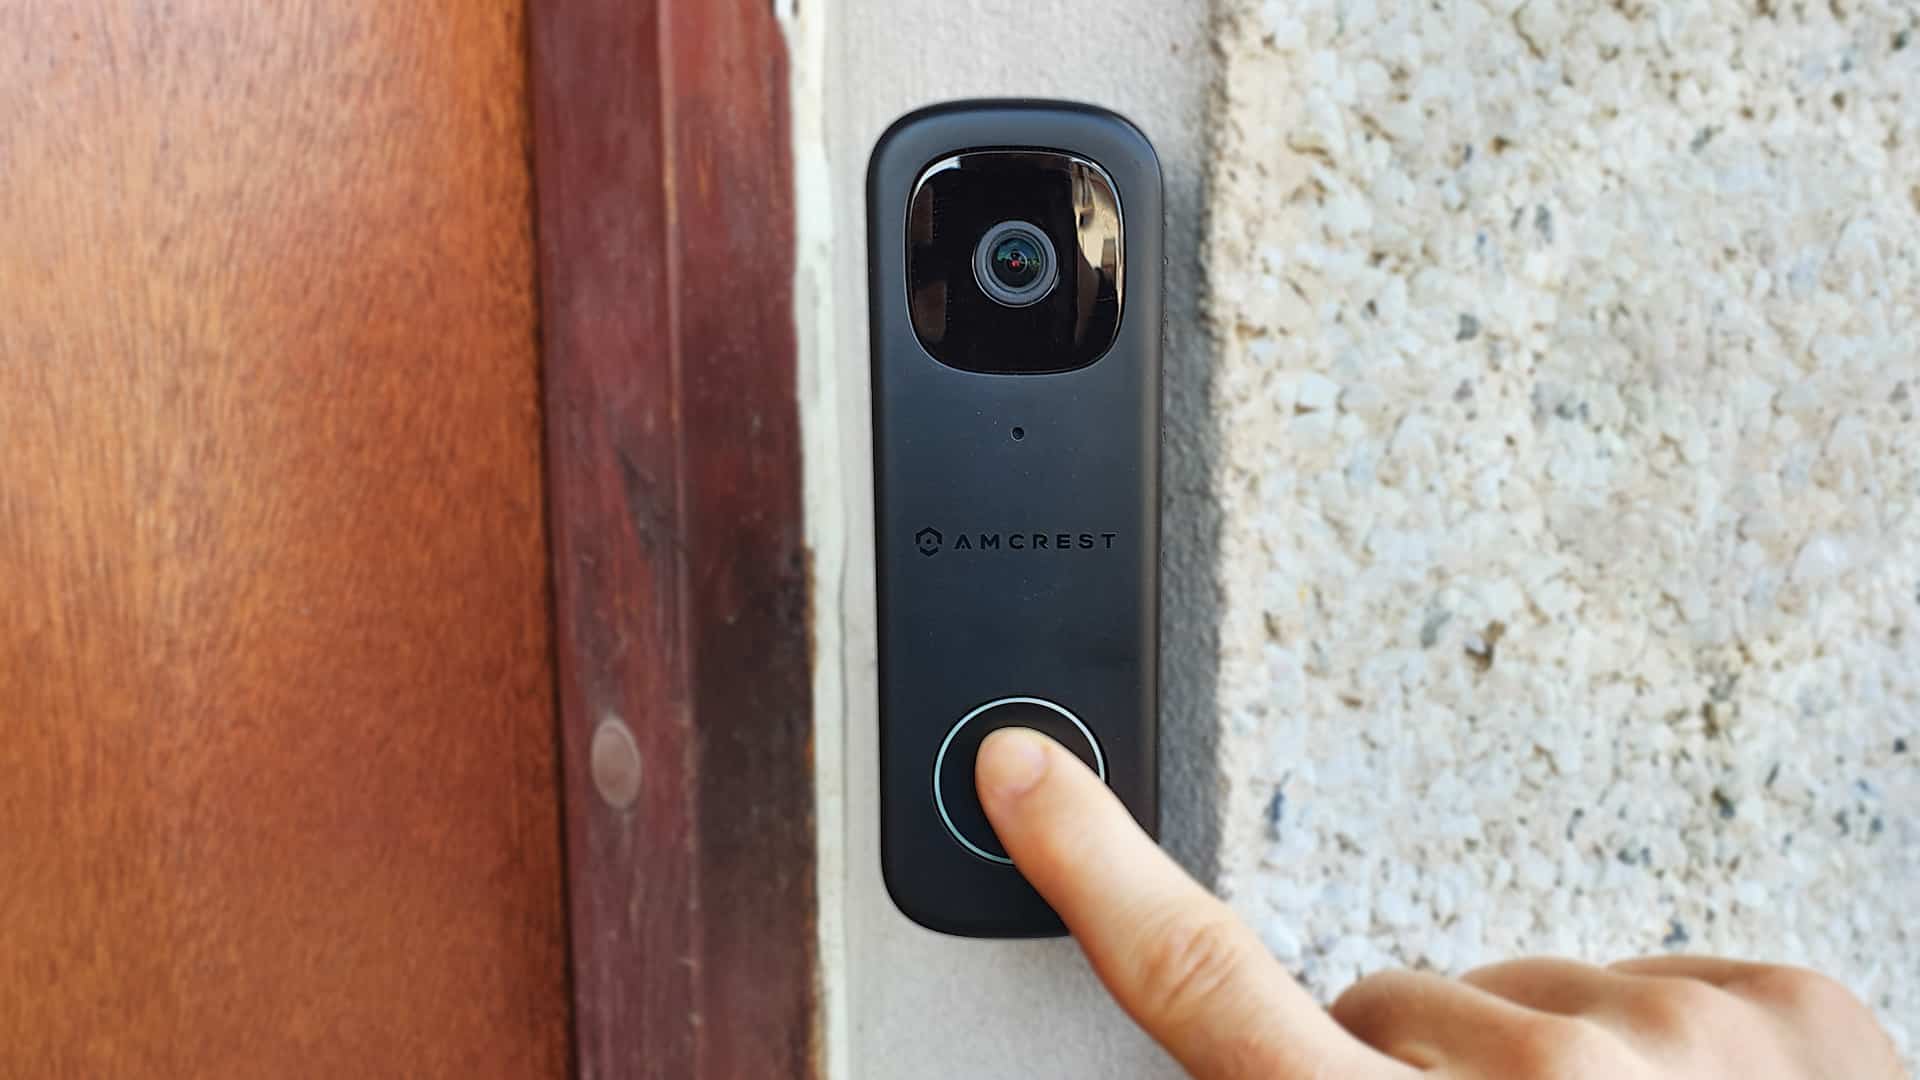
Step 7: Test the new wired doorbell
With the new wired doorbell successfully mounted, it’s important to test its functionality before completing the installation. Follow these steps to test the new doorbell:
- Turn the power supply back on by flipping the corresponding breaker switch in the circuit breaker panel.
- Stand a few feet away from the doorbell and ensure that you can hear the sound it produces. If necessary, adjust the volume settings on the doorbell according to the manufacturer’s instructions.
- Press the doorbell button to simulate a visitor ringing the bell.
- Listen for the doorbell sound and ensure that it is functioning correctly.
- If the doorbell doesn’t ring or the sound is weak, double-check the connections and make sure they are secure. You may need to reexamine the wiring or consult the manufacturer’s troubleshooting guide.
- Test the doorbell from different locations around the house to ensure it can be heard from various areas.
If the doorbell functions correctly and you can hear the sound clearly, congratulations! Your new wired doorbell is successfully installed. If you encounter any issues during the testing process, don’t hesitate to consult the manufacturer’s instructions or seek professional assistance.
Now that you have verified the functionality of the new doorbell, it’s time to move on to the final step: turning the power back on.
Step 8: Turn the power back on
After testing and confirming the functionality of the new wired doorbell, it’s time to turn the power back on. Follow these steps to safely restore the power supply:
- Ensure that all the connections are secure, and there are no loose wires or exposed parts.
- Double-check that the doorbell is mounted securely and level.
- Return to the circuit breaker panel and locate the breaker that controls the power supply to the doorbell.
- Flip the breaker switch to the “On” position, restoring power to the doorbell circuit.
- Take a moment to listen and ensure that the doorbell is receiving power and functioning correctly.
Now that the power has been restored, you can fully enjoy the functionality of your new wired doorbell. It will reliably alert you when someone is at your door, providing convenience and improved security for your home.
Remember to keep the instruction manual and any warranty information in a safe place for future reference. If you have any further questions or encounter issues with your new doorbell, consult the manufacturer’s instructions or contact their customer support for assistance.
Congratulations! You have successfully replaced your wired doorbell and completed this home improvement project. Enjoy the convenience and peace of mind that your new doorbell brings!
This concludes the step-by-step guide for replacing a wired doorbell. We hope this article has been informative and helpful in guiding you through the process. Happy doorbell replacement!
Read more: How To Run Wire For A Doorbell
Conclusion
Replacing a wired doorbell is a straightforward home improvement project that can enhance the functionality and convenience of your home. By following the step-by-step guide provided in this article, you can successfully replace your wired doorbell without the need for professional assistance.
We began by gathering the necessary tools and materials, ensuring that we are well-prepared for the installation process. Next, we turned off the power supply to ensure our safety while working with electrical components. We then proceeded to remove the old wired doorbell, inspecting the wiring for any issues.
After preparing the new wired doorbell, we connected the wires properly, ensuring a secure and reliable connection. We then mounted the new doorbell in the desired location, taking care to align it correctly. With the doorbell mounted, we proceeded to test its functionality, making sure it could be heard from various locations in the house.
Finally, we turned the power supply back on, ensuring everything was in working order before concluding the installation process. By following these steps, you have successfully replaced your wired doorbell and can now enjoy the benefits of a fully functional and reliable doorbell system.
Remember, safety should always be a priority when working with electrical systems. If you are unsure about any aspect of the installation process or encounter any difficulties, it is recommended to consult a licensed electrician for assistance.
We hope this guide has been informative and helpful in your wired doorbell replacement journey. Enjoy the convenience and security that a new wired doorbell brings to your home!
Frequently Asked Questions about How To Replace Wired Doorbell
Was this page helpful?
At Storables.com, we guarantee accurate and reliable information. Our content, validated by Expert Board Contributors, is crafted following stringent Editorial Policies. We're committed to providing you with well-researched, expert-backed insights for all your informational needs.


0 thoughts on “How To Replace Wired Doorbell”