Home>Garden Essentials>When To Plant Bachelor Button Seeds

Garden Essentials
When To Plant Bachelor Button Seeds
Modified: March 16, 2024
Learn the best time to plant bachelor button seeds in your garden for beautiful blooms. Step-by-step guide on when and how to sow these stunning flowers.
(Many of the links in this article redirect to a specific reviewed product. Your purchase of these products through affiliate links helps to generate commission for Storables.com, at no extra cost. Learn more)
Introduction
Gardening is a rewarding and enjoyable hobby that allows you to connect with nature and create beautiful outdoor spaces. Whether you’re an experienced gardener or just starting out, adding flowers to your garden is always a great idea. One such flower that can brighten up your garden is the Bachelor Button (Centaurea cyanus).
Bachelor Buttons, also known as Cornflowers, are annual plants that produce stunning blue, pink, and white flowers. These flowers not only add vibrant colors to your garden, but they also attract beneficial pollinators like bees and butterflies. If you’re interested in growing Bachelor Buttons in your garden, this article will guide you on when to plant Bachelor Button seeds to ensure a successful growing season.
Before we dive into the planting details, it’s essential to understand a few key factors that influence the growth and development of Bachelor Button plants. These include climate and temperature requirements, soil preparation, and selecting the right location for optimal growth.
Key Takeaways:
- Plant Bachelor Button seeds in well-draining soil with 6-8 hours of sunlight. Start indoors 4-6 weeks before the last frost or directly sow after frost. Care for them by watering, fertilizing, and providing support.
- Harvest and save Bachelor Button seeds for future planting. Troubleshoot common issues like poor germination and pests. Enjoy vibrant blooms and attract beneficial pollinators in your garden.
Read more: When To Sow Bachelor Button Seeds
Climate and Temperature Requirements
Bachelor Button plants thrive in temperate climates with moderate temperatures. They are versatile and can adapt to various growing conditions, making them suitable for both cool and mild climates. It’s important to note that extreme heat or cold can impact the growth and flowering of these plants.
Generally, Bachelor Buttons prefer temperatures between 60°F and 75°F (15°C to 24°C) during the day and slightly cooler temperatures at night. If you live in a region with hot summers, providing partial shade during the hottest parts of the day can help prevent the plants from wilting or becoming stressed. In cooler climates, Bachelor Buttons can tolerate light frosts, making them an excellent choice for early spring or fall planting.
When selecting a planting location, consider the microclimate of your garden. Choose an area that receives at least six to eight hours of direct sunlight each day. This will ensure that the plants receive enough light for healthy growth and abundant flowering.
It’s important to mention that Bachelor Buttons can also be grown in containers, making them a versatile choice for gardeners with limited space. Make sure to select pots with good drainage and place them in well-lit areas.
By providing the appropriate climate and temperature conditions, you’ll set the stage for successful Bachelor Button growth and a bountiful display of colorful blooms in your garden.
Soil Preparation
Proper soil preparation is crucial for the healthy growth of Bachelor Button plants. These flowers prefer well-draining soil that is fertile and rich in organic matter. Here are some steps to prepare your soil before planting:
- Clear the area: Start by removing any weeds or grass from the planting area. This will minimize competition for nutrients and resources.
- Loosen the soil: Use a garden fork or tiller to loosen the soil to a depth of about 6 inches (15 cm). Breaking up compacted soil allows for better root penetration and water drainage.
- Add organic matter: Incorporate organic matter such as compost or well-rotted manure into the soil. This will improve soil fertility, moisture retention, and drainage.
- Test the soil: Consider conducting a soil test to assess its pH levels and nutrient content. Bachelor Buttons prefer slightly acidic to neutral soil with a pH range of 6.0 to 7.0. Based on the test results, you may need to adjust the pH by adding lime or sulfur.
Once you’ve prepared the soil, rake the surface to create a smooth and level planting bed. This will make it easier to sow the Bachelor Button seeds and ensure uniform germination.
Remember to avoid overwatering the soil before planting, as excessively moist conditions can hinder seed germination and promote fungal diseases. Wait until after planting to provide appropriate irrigation.
By following these soil preparation steps, you’ll create an optimal growing environment for your Bachelor Button plants, promoting healthy root development and robust growth.
Selecting the Right Location
Choosing the right location for planting your Bachelor Button seeds is essential for their overall health and success. Here are some factors to consider when selecting a spot in your garden:
- Sunlight: Bachelor Buttons thrive in full sun, so select a location that receives at least 6 to 8 hours of direct sunlight each day. This will ensure optimal growth and abundant flowering.
- Space: Take into account the mature size of the Bachelor Button plants when choosing a location. These plants can reach a height of 2 to 3 feet (60 to 90 cm) and spread about 1 to 2 feet (30 to 60 cm) wide, so provide enough space between plants for proper airflow and prevent overcrowding.
- Protection from Wind: While Bachelor Buttons can tolerate light breezes, excessive wind can cause the plants to topple or become damaged. Consider planting them in a location that provides some protection from strong winds, such as near a fence or among other taller plants.
- Visibility: Since Bachelor Buttons produce vibrant, eye-catching flowers, it’s best to plant them in a location where they can be easily seen and appreciated. This could be along walkways, near entrances, or in flower beds that are visible from a patio or seating area.
In addition to these factors, consider any specific needs or preferences of the Bachelor Button variety you’re planting. Some varieties may have specific requirements for soil moisture, temperature, or exposure. Reading the seed packet or plant label will provide valuable information on these requirements.
By selecting the right location for your Bachelor Button plants, you’ll create an environment that maximizes their growth potential and contributes to the aesthetic beauty of your garden.
When to Start Seeds Indoors
Starting Bachelor Button seeds indoors gives you a head start on the growing season and allows for earlier blooms. If you prefer to have established seedlings ready for planting, here are some guidelines on when to start Bachelor Button seeds indoors:
It’s recommended to start Bachelor Button seeds indoors about 4 to 6 weeks before the last frost date in your region. This timing ensures that the seedlings have enough time to grow and develop before being transplanted outdoors.
Find out the average date of the last spring frost in your area by referring to a local gardening resource or contacting your agricultural extension office. Count back 4 to 6 weeks from that date to determine when to start your seeds indoors.
Fill seed trays or individual pots with a quality seed-starting mix. Moisten the soil before sowing the seeds to provide a good growing environment. Sow the seeds at a depth of about ¼ inch (0.6 cm) and lightly cover them with soil.
Place the trays or pots in a warm and well-lit area, such as near a south-facing window or under grow lights. Bachelor Button seeds germinate best at temperatures around 60°F to 70°F (15°C to 21°C).
Keep the soil consistently moist but not waterlogged. Using a spray bottle or gentle watering can help prevent overwatering and dislodging the seeds.
Once the seedlings have developed a couple of sets of true leaves and are sturdy enough to handle, they can be transplanted into larger pots or hardened off and prepared for outdoor planting.
By starting Bachelor Button seeds indoors at the appropriate time, you’ll give your plants a head start and enjoy their beautiful blooms earlier in the growing season.
Bachelor button seeds should be planted in early spring, as soon as the soil can be worked. They prefer full sun and well-drained soil. Sow the seeds directly into the garden, as they do not transplant well. Keep the soil consistently moist until the seeds germinate.
Read more: Where Is The Bachelor Button Plant Native To
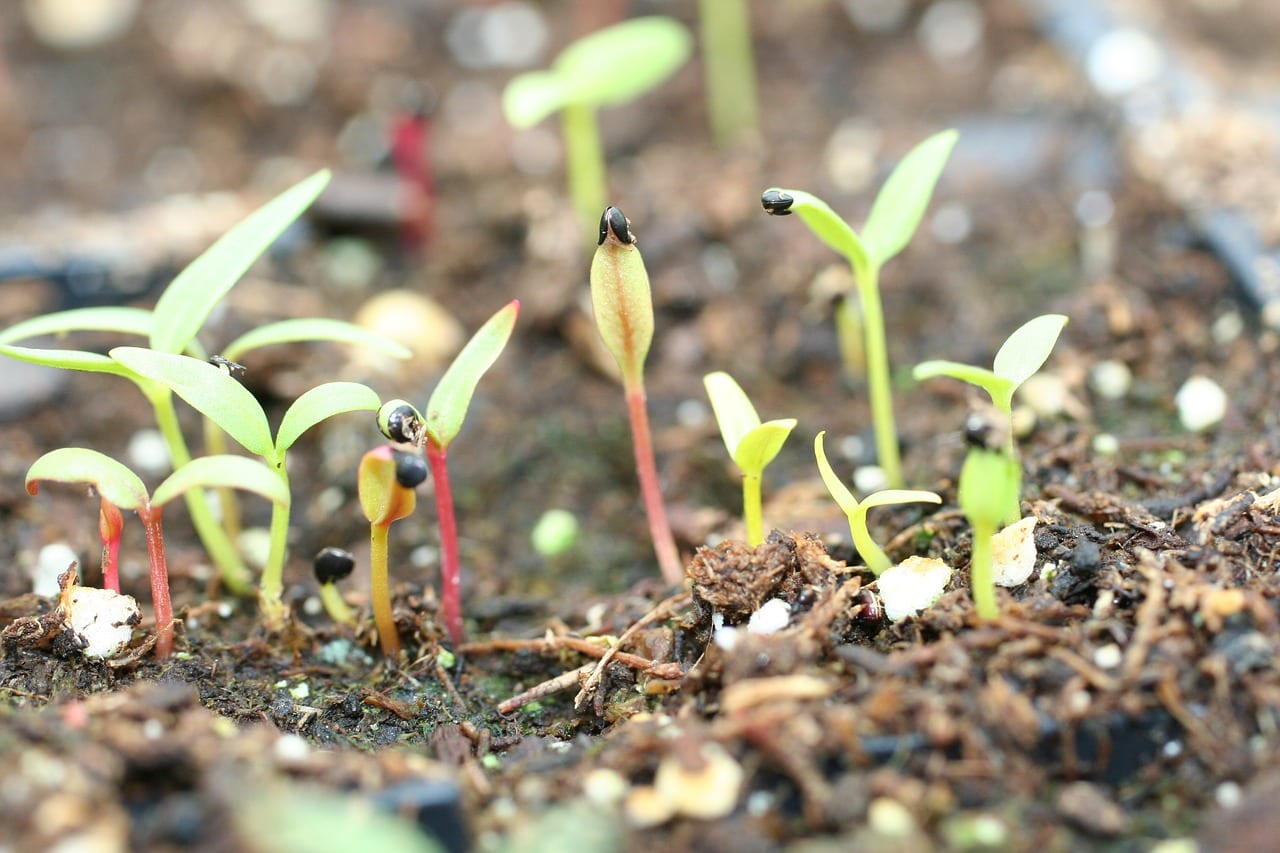
Direct Sowing in the Garden
If you prefer to skip the process of starting Bachelor Button seeds indoors, you can directly sow them in your garden. Direct sowing is a simple and straightforward method that can be done once the danger of frost has passed and the soil has warmed up. Here are the steps to successfully direct sow Bachelor Button seeds:
- Prepare the soil: Ensure that the soil is adequately prepared by removing weeds and loosening it to a depth of about 6 inches (15 cm). Rake the surface to create a smooth and even planting bed.
- Select the right time: Wait until after the last frost date in your area and when the soil temperature is consistently above 50°F (10°C). Ideal timing for direct sowing varies depending on your specific location and climate, so it’s essential to refer to local gardening resources or consult with experts.
- Sow the seeds: Scatter the Bachelor Button seeds over the prepared soil. Aim to space the seeds about 4 to 6 inches (10 to 15 cm) apart to allow room for the plants to grow and spread. Lightly press the seeds into the soil, ensuring good seed-to-soil contact.
- Water the seeds: Gently water the area immediately after sowing to ensure moisture penetrates the soil and reaches the seeds. Keep the soil consistently moist but not waterlogged during the germination and early growth stages.
- Thin the seedlings: Once the seedlings emerge and develop their first few true leaves, thin them out to provide sufficient space for healthy growth. Space the plants about 12 to 18 inches (30 to 45 cm) apart.
It’s important to note that Bachelor Buttons have a taproot, so transplanting them can be challenging. Direct sowing eliminates the need for transplanting and reduces any potential root disturbance.
By following these steps, you can enjoy the simplicity and convenience of directly sowing Bachelor Button seeds in your garden, allowing them to grow and thrive in their intended outdoor environment.
Caring for Bachelor Button Plants
Once your Bachelor Button plants are established, proper care and maintenance are crucial for their continued health and longevity. Here are some essential tips for caring for Bachelor Button plants:
- Watering: Bachelor Button plants prefer moderately moist soil. Water them regularly, especially during dry spells, to keep the soil evenly moist. Avoid overwatering, as this can lead to root rot. Water at the base of the plants to prevent wetting the foliage, which can promote diseases.
- Fertilizing: Bachelor Buttons are not heavy feeders, but a light application of balanced fertilizer once or twice during the growing season can provide a nutrient boost. Follow the instructions on the fertilizer packaging for application rates and timing. Alternatively, you can amend the soil with compost or well-rotted manure before planting to provide a slow-release source of nutrients.
- Supporting the plants: Depending on the variety and size of your Bachelor Button plants, they may benefit from some support. Install stakes or small plant cages around taller varieties to prevent them from bending or toppling as they grow. This will also prevent the stems from breaking under the weight of the blooms.
- Deadheading: Removing wilted or spent flowers, a process known as deadheading, not only keeps the plants looking tidy but also encourages more blooms. Pinch or snip off the faded flowers just above a leaf node to promote continuous flowering throughout the season.
- Pest and disease control: Bachelor Buttons are generally resistant to pests and diseases. However, they can occasionally be susceptible to aphids, slugs, and powdery mildew. Regularly inspect your plants and take appropriate measures, such as using organic insecticidal soap or applying natural slug deterrents, if necessary.
Additionally, it’s best to avoid excessive pruning or cutting back Bachelor Button plants unless necessary. These flowers tend to self-seed, and pruning can disrupt their natural growth habit and reduce their ability to produce more flowers and seeds.
By providing proper care, you can ensure that your Bachelor Button plants remain healthy, vigorous, and adorned with stunning blooms throughout the growing season.
Common Issues and Troubleshooting
While Bachelor Button plants are generally hardy and low-maintenance, they may encounter a few common issues. Here are some potential problems you may encounter when growing Bachelor Buttons and their corresponding troubleshooting tips:
- Poor or No Germination: If your Bachelor Button seeds fail to germinate, it may be due to several factors, such as improper soil temperature, old or poor-quality seeds, or inadequate moisture. Make sure to sow the seeds at the recommended depth, provide the right amount of moisture, and ensure the soil temperature is suitable for germination.
- Stunted Growth or Yellowing Leaves: Stunted growth and yellowing leaves can be signs of nutrient deficiencies. Ensure your Bachelor Button plants are receiving an adequate supply of nutrients by amending the soil with organic matter and applying a balanced fertilizer. Be careful not to over-fertilize, as excessive nutrients can also cause problems.
- Aphid Infestation: Aphids are small, sap-sucking insects that can cluster on the leaves and stems of Bachelor Button plants. To combat an aphid infestation, you can spray a solution of diluted insecticidal soap onto the affected areas or introduce beneficial insects like ladybugs, which feed on aphids.
- Powdery Mildew: Powdery mildew is a fungal disease that manifests as a white, powdery coating on the leaves. To prevent powdery mildew, ensure adequate air circulation around the plants by providing proper spacing. If it appears, you can use fungicidal sprays or make a solution of baking soda and water to spray onto the affected leaves.
- Wilting or Drooping: Wilting or drooping of Bachelor Button plants can occur due to underwatering, overwatering, or excessive heat. Check the moisture level of the soil and adjust your watering practices accordingly. Provide shade during the hottest parts of the day if extreme heat is causing wilting.
Regularly inspect your Bachelor Button plants for any signs of pests, diseases, or nutrient deficiencies. Early detection and timely action can help prevent issues from escalating and ensure the health and vitality of your plants.
If you’re unsure about a particular problem or need further assistance, consult with a local gardening expert or contact your agricultural extension office for personalized guidance and recommendations.
Harvesting and Saving Seeds
As the growing season comes to an end, you can harvest the seeds from your Bachelor Button plants to save them for the next year or share them with fellow gardeners. Here are the steps to harvest and save Bachelor Button seeds:
- Allow the flowers to fully mature: Leave some of the flowers on the plant until they have dried out completely and turned brown. These are the flowers that will produce viable seeds.
- Remove the seeds: Once the flowers have dried, gently rub or shake them to dislodge the seeds. Alternatively, you can cut off the entire seed head and place it in a paper bag or envelope.
- Dry the seeds: Spread the harvested seeds in a single layer on a clean, dry surface such as a tray or paper towel. Allow them to air dry for about one to two weeks in a warm and well-ventilated area. Make sure the seeds are completely dry before storing them to prevent mold or moisture damage.
- Store the seeds: Once dry, transfer the seeds to a labeled and airtight container, such as a glass jar or an envelope. Store them in a cool and dark place, such as a refrigerator or a seed storage box. Properly stored Bachelor Button seeds can remain viable for up to two years.
When saving Bachelor Button seeds, it’s important to note any specific variety or color characteristics to ensure that you’re preserving the desired traits. Labeling the containers or envelopes with the date and variety information will help you keep track of the seeds.
Remember, if you have different varieties of Bachelor Buttons growing in close proximity, there is a chance for cross-pollination, which can result in hybridization. To maintain the purity of the seeds, consider isolating different varieties or collecting seeds from only one variety each year.
By harvesting and saving Bachelor Button seeds, you can continue to enjoy these beautiful flowers in your garden year after year and even share the joy of gardening by sharing the saved seeds with friends and fellow gardeners.
Read more: When To Plant Borage Seeds
Conclusion
Bachelor Buttons, with their stunning blooms and easy-care nature, are an excellent addition to any garden. Whether you choose to start the seeds indoors or directly sow them in your garden, following the proper planting and care techniques will ensure successful growth and abundant flowering.
By understanding the climate and temperature requirements, preparing the soil, selecting the right location, and providing proper care such as watering, fertilizing, and pest control, you can enjoy healthy and vibrant Bachelor Button plants that will beautify your garden throughout the growing season.
In addition to their aesthetic appeal, Bachelor Buttons also serve as valuable attractants for beneficial pollinators, enhancing the biodiversity of your garden.
Furthermore, as the growing season comes to an end, you have the opportunity to harvest and save Bachelor Button seeds, allowing you to enjoy these beautiful flowers year after year and share the joy of gardening with others.
Remember to troubleshoot any common issues that may arise, such as poor germination, nutrient deficiencies, pests, or diseases. By promptly addressing any problems, you can prevent further damage and ensure the long-term health of your Bachelor Button plants.
Now that you have the knowledge and insights on when to plant Bachelor Button seeds, proper care techniques, and seed harvesting, it’s time to get started on creating a vibrant and colorful garden with these delightful blooms.
Happy gardening and may your garden be adorned with the beauty of Bachelor Buttons!
Frequently Asked Questions about When To Plant Bachelor Button Seeds
Was this page helpful?
At Storables.com, we guarantee accurate and reliable information. Our content, validated by Expert Board Contributors, is crafted following stringent Editorial Policies. We're committed to providing you with well-researched, expert-backed insights for all your informational needs.


0 thoughts on “When To Plant Bachelor Button Seeds”