Articles
How To Set Up Charcoal Grill Without Chimney
Modified: January 20, 2024
Learn how to set up your charcoal grill without a chimney with this helpful guide. Our step-by-step articles will show you the easy way to get your grill ready for cooking.
(Many of the links in this article redirect to a specific reviewed product. Your purchase of these products through affiliate links helps to generate commission for Storables.com, at no extra cost. Learn more)
Introduction
Grilling is a popular cooking technique that brings out delicious flavors in food. While gas grills are convenient to use, many grilling enthusiasts prefer the smoky and authentic taste that comes from cooking on a charcoal grill. However, setting up a charcoal grill without a chimney can be a challenge for some. In this article, we will guide you through the steps on how to set up a charcoal grill without a chimney.
Before we dive into the details, let’s briefly discuss why using a chimney starter is the preferred method for igniting charcoal. A chimney starter is a cylindrical metal container that helps you light the charcoal uniformly and efficiently. It creates a natural updraft, allowing the coals to ignite quickly and evenly. However, if you don’t have a chimney starter, don’t worry! You can still achieve excellent results by following these straightforward steps.
But before we get started, let’s gather the materials you’ll need to set up your charcoal grill without a chimney.
Key Takeaways:
- Master the art of charcoal grilling without a chimney by preparing, igniting, and controlling the coals for delicious, smoky flavors. Patience, proper airflow, and precise heat control are key to success.
- Embrace the challenge of setting up a charcoal grill without a chimney and enjoy the rewarding process of creating mouthwatering, authentic grilled dishes. From arranging the coals to adjusting the vents, each step contributes to a flavorful culinary experience.
Materials Needed
Setting up a charcoal grill without a chimney requires a few essential materials. Here’s what you’ll need:
- Charcoal: Choose high-quality charcoal briquettes or lump charcoal.
- Lighter fluid: This will help ignite the charcoal.
- Firestarter cubes: An alternative to lighter fluid, firestarter cubes are odorless and easy to use.
- Tongs: You’ll need tongs to handle the hot charcoal and place it in the grill.
- Matches or a lighter: These will be used to ignite the charcoal.
- Grill gloves: Protect your hands from the heat while handling the charcoal and grill.
- Grill grate: This is the surface on which you’ll place your food to cook.
Once you have gathered these materials, you’re ready to start setting up your charcoal grill without a chimney. Let’s dive into the step-by-step process.
Step 1: Preparing the Charcoal
Before you can start grilling, you need to prepare the charcoal for ignition. Start by removing any leftover ashes or debris from your grill. Clean the grill thoroughly to ensure proper airflow and prevent any unwanted flavors from transferring to your food.
Next, determine the amount of charcoal you’ll need based on the size of your grill and the cooking time. As a general rule of thumb, a full chimney starter typically holds around 100 briquettes, which is enough to cook for a moderate-sized gathering. Adjust the amount accordingly if you’re cooking for a smaller or larger crowd.
If you’re using charcoal briquettes, ensure they are of uniform size and shape. Remove any pieces that are excessively large or damaged, as they may affect airflow and the overall cooking experience.
Once you have selected the appropriate amount of charcoal, it’s time to arrange them in a pyramid shape. This shape promotes better airflow and allows for more even distribution of heat. Place the larger pieces at the bottom and gradually layer the smaller ones on top.
Now that your charcoal is prepared, it’s time to move on to the next step: igniting the charcoal.
Step 2: Creating a Charcoal Pile
Creating a charcoal pile is an essential step in setting up a charcoal grill without a chimney. This pile will serve as the foundation for igniting the charcoal and ensuring an even distribution of heat throughout the cooking process.
Start by carefully placing the arranged pyramid of charcoal in the center of your grill. Make sure to leave a small space in the middle to create an air pocket for better ventilation. This will allow the flames to spread more evenly and promote consistent heating.
If you’re using firestarter cubes, place one or two cubes in the center of the charcoal pile. These cubes are designed to burn slowly and provide a consistent source of heat to ignite the charcoal. If you’re using lighter fluid, evenly distribute a small amount over the charcoal pile, making sure not to drench it excessively.
Now, it’s time to move on to the next step: igniting the charcoal pile and starting the fire.
Step 3: Igniting the Charcoal
Igniting the charcoal is a crucial step in setting up a charcoal grill without a chimney. There are a few methods you can use, depending on the materials you have available and personal preference. Here are two commonly used methods:
- Using matches or a lighter: If you’re using matches or a lighter, carefully ignite the firestarter cubes or lighter fluid-soaked charcoal in the center of the pile. Ensure that you have a safe distance from the flames to avoid any accidents. Once the flames start to spread, let them continue to ignite the charcoal fully.
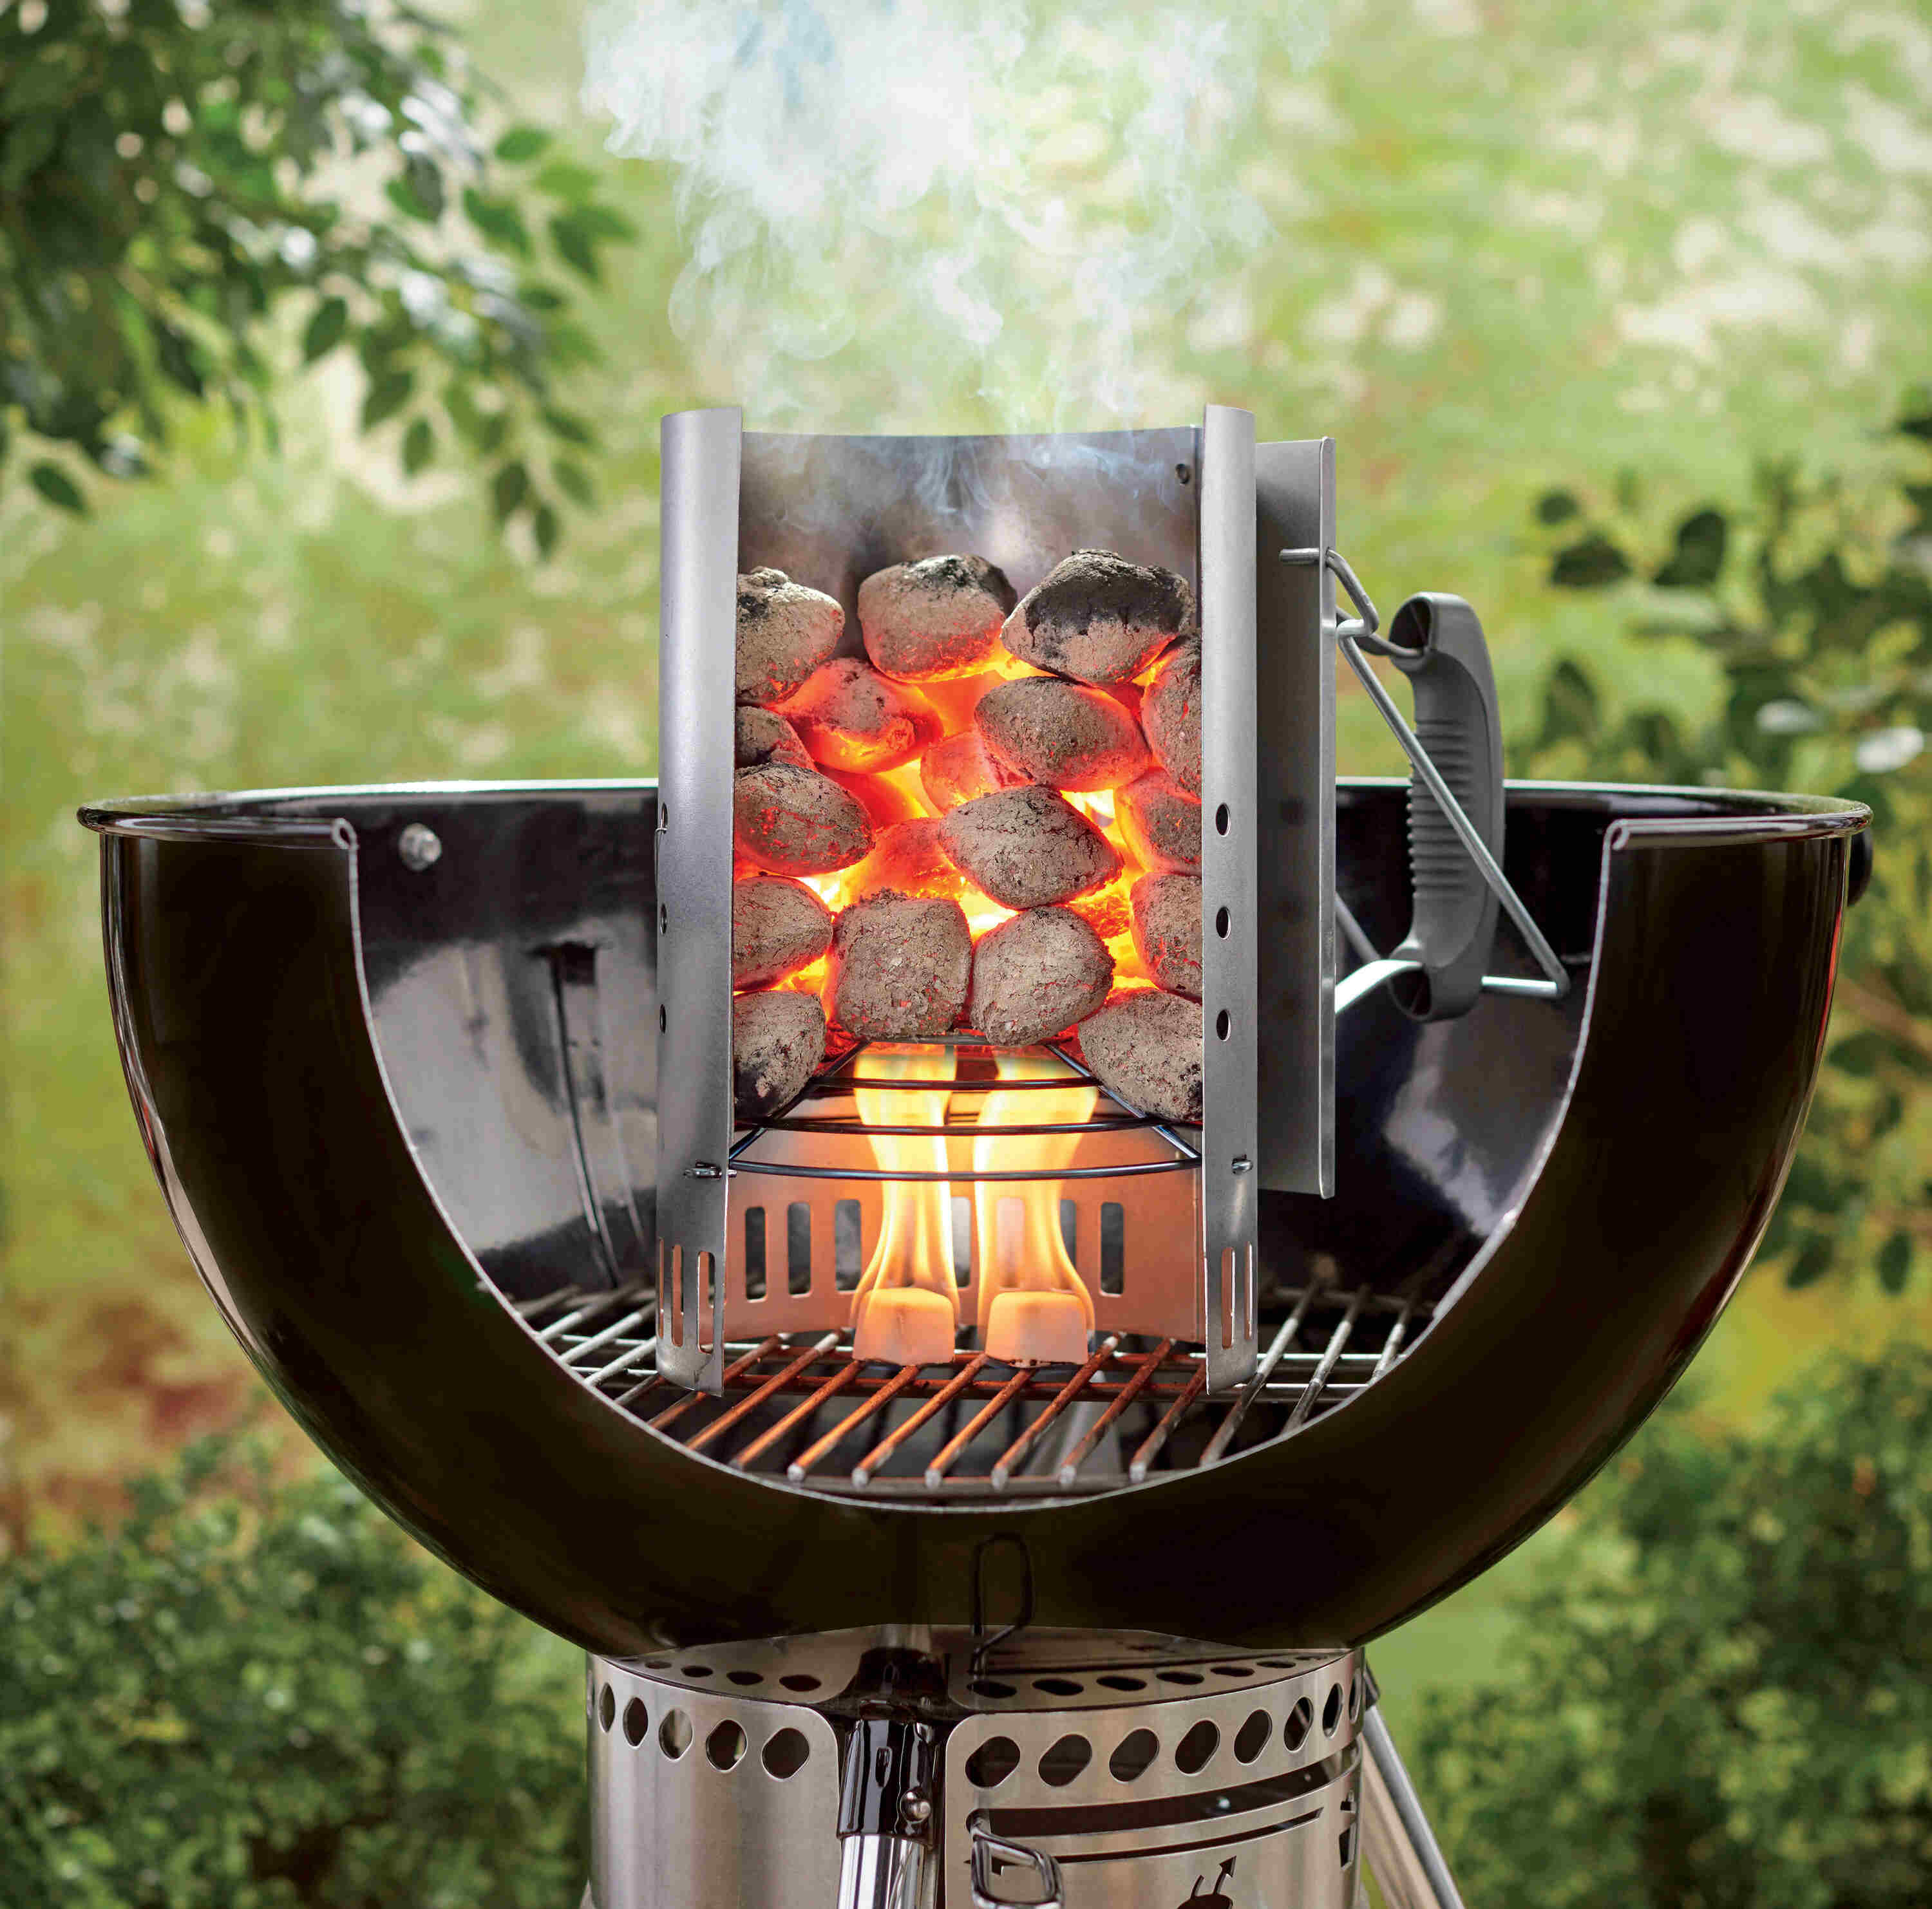
- Using a charcoal chimney: If you have access to a charcoal chimney, you can place the charcoal pile inside the chimney and use newspaper or firestarter cubes at the bottom to ignite the coals. The chimney will generate an upward draft, quickly igniting the charcoal. After the coals become ashed over, carefully pour them onto the grill grate.
Regardless of the method you choose, always prioritize safety. Keep a safe distance from the flames, and never leave a fire unattended. Once the charcoal is ignited, it’s time to move on to the next step: spreading the flames to ensure even heating.
Step 4: Spreading the Flames
After igniting the charcoal, it’s time to spread the flames throughout the charcoal pile to ensure even heating. This step will help the flames reach all the charcoal pieces, promoting a consistent temperature across the grill.
Begin by using your tongs or a long-handled utensil to carefully spread the flames from the center of the charcoal pile to the outer edges. This will help ignite all the charcoal pieces and create a steady source of heat. Take your time and ensure that all parts of the pile are properly lit.
During this process, you may notice some smoke coming from the grill. This is normal and will subside as the charcoal continues to burn and reach its optimal temperature.
Once the flames have spread across the charcoal pile, it’s time to move on to the next step: waiting for the coals to ash over.
To set up a charcoal grill without a chimney, create a pyramid of charcoal in the center of the grill, leaving space for air to flow. Use lighter fluid or a charcoal starter to ignite the coals, and wait until they are covered in ash before spreading them out for cooking.
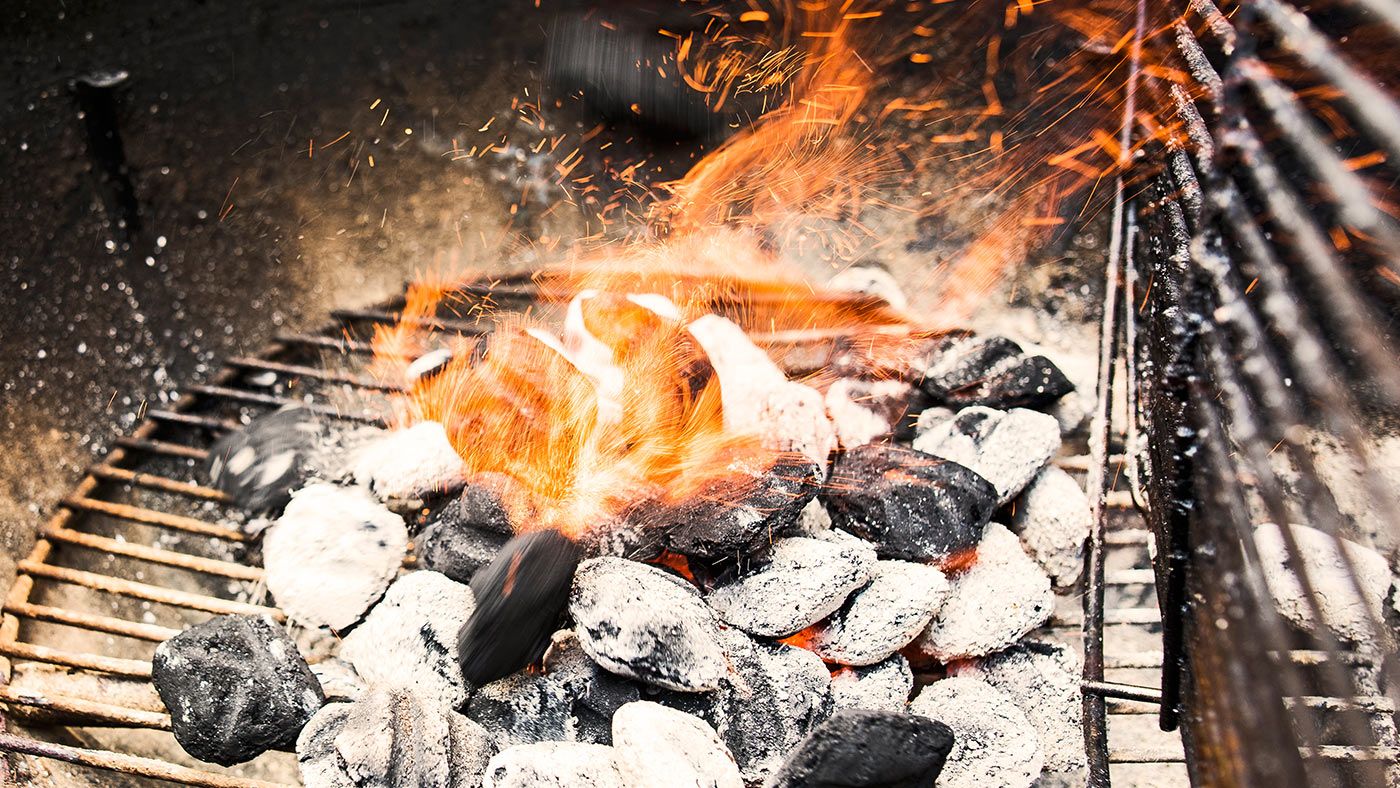
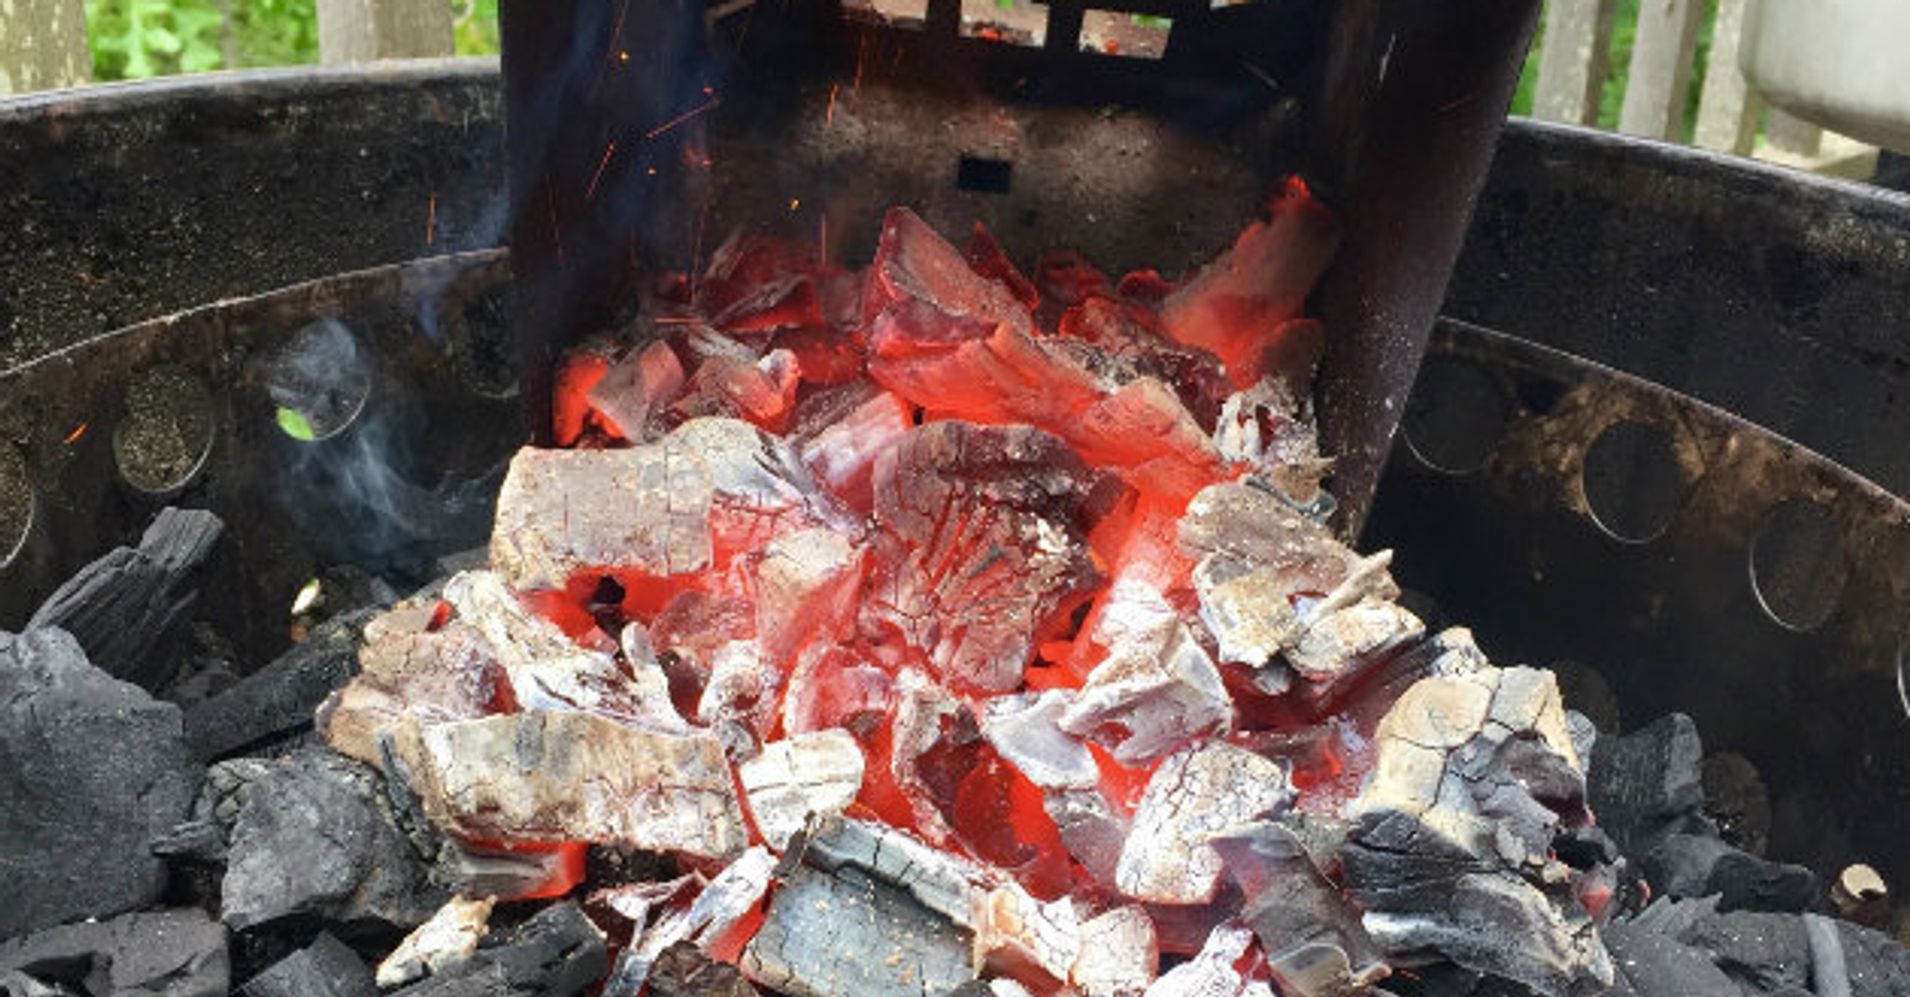
Step 5: Waiting for the Coals to Ash Over
As the flames spread and the charcoal continues to burn, you’ll need to exercise patience and allow the coals to ash over. This means waiting for the charcoal to turn gray and develop a light layer of white ash on the surface.
Ashed-over coals indicate that the charcoal is fully ignited and ready for cooking. The white ash acts as insulation, preventing excessive heat from reaching your food and ensuring a more controlled grilling experience.
The time it takes for the coals to ash over can vary depending on various factors, including the type and quantity of charcoal used, weather conditions, and airflow. On average, it can take anywhere from 20 to 30 minutes.
While waiting for the coals to ash over, resist the temptation to start cooking prematurely. Rushing this step can result in uneven heat distribution and potentially undercooked or overcooked food.
Once the coals have ashed over and reached the desired temperature, it’s time to move on to the next step: spreading the coals for an even cooking surface.
Step 6: Spreading the Coals
Now that the coals have ashed over and reached the desired temperature, it’s time to spread them evenly on the grill. This step ensures that you have an even cooking surface and allows for precise heat control during grilling.
Using your tongs or a long-handled utensil, carefully spread the ashed-over coals across the bottom of the grill. Create a single layer of coals for indirect grilling, where the food is placed away from the direct heat source, or arrange them into two separate zones for direct and indirect cooking.
If you’re planning on using the two-zone method, where one side of the grill has direct heat and the other side indirect heat, arrange the coals to one side of the grill. This setup allows for more versatility in grilling, providing you with the option to sear food over high heat and then move it to the cooler side for slow cooking.
Once you have spread the coals, ensure they are evenly distributed across the grill surface. This will help maintain a consistent temperature throughout the cooking process.
Now that the coals are spread and ready, it’s time to move on to the next step: adjusting the ventilation to control the temperature.
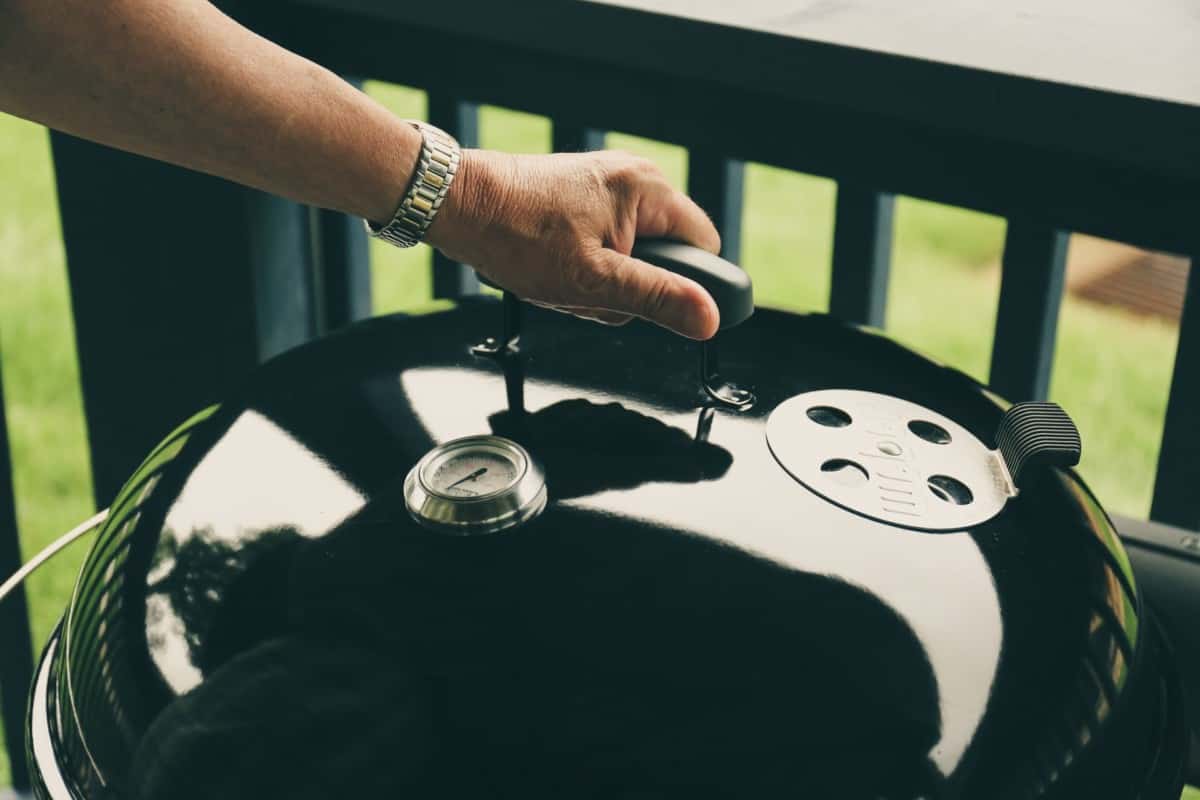
Step 7: Adjusting the Ventilation
Properly controlling the airflow is essential for maintaining the desired cooking temperature on your charcoal grill. Adjusting the ventilation allows you to increase or decrease the intensity of the heat, giving you better control over the cooking process.
Most charcoal grills have vents located on the bottom and top. The bottom vents regulate the airflow coming into the grill, while the top vents allow for the release of smoke and heat. Here’s how to adjust the ventilation:
- Open the bottom vents: Initially, open the bottom vents fully to allow for maximum oxygen flow. This will help the coals reach the desired cooking temperature quickly.
- Adjust the vents for temperature control: To lower the temperature, partially close the bottom vents. This restricts the airflow, reducing the intensity of the fire. To increase the temperature, open the vents wider, allowing more oxygen to reach the coals.
- Adjust the top vents: The top vents control the release of heat and smoke. If you need to reduce the temperature, partially close the top vents to minimize the airflow. Opening the top vents wider will allow heat and smoke to escape more freely, increasing the temperature.
Remember, small adjustments can make a big difference in heat control, so monitor the temperature closely and adjust the vents as needed throughout the grilling process.
Now that you have adjusted the ventilation, it’s time to move on to the next step: placing the grill grate and starting to cook your delicious food!
Read more: How To Light Charcoal With A Chimney
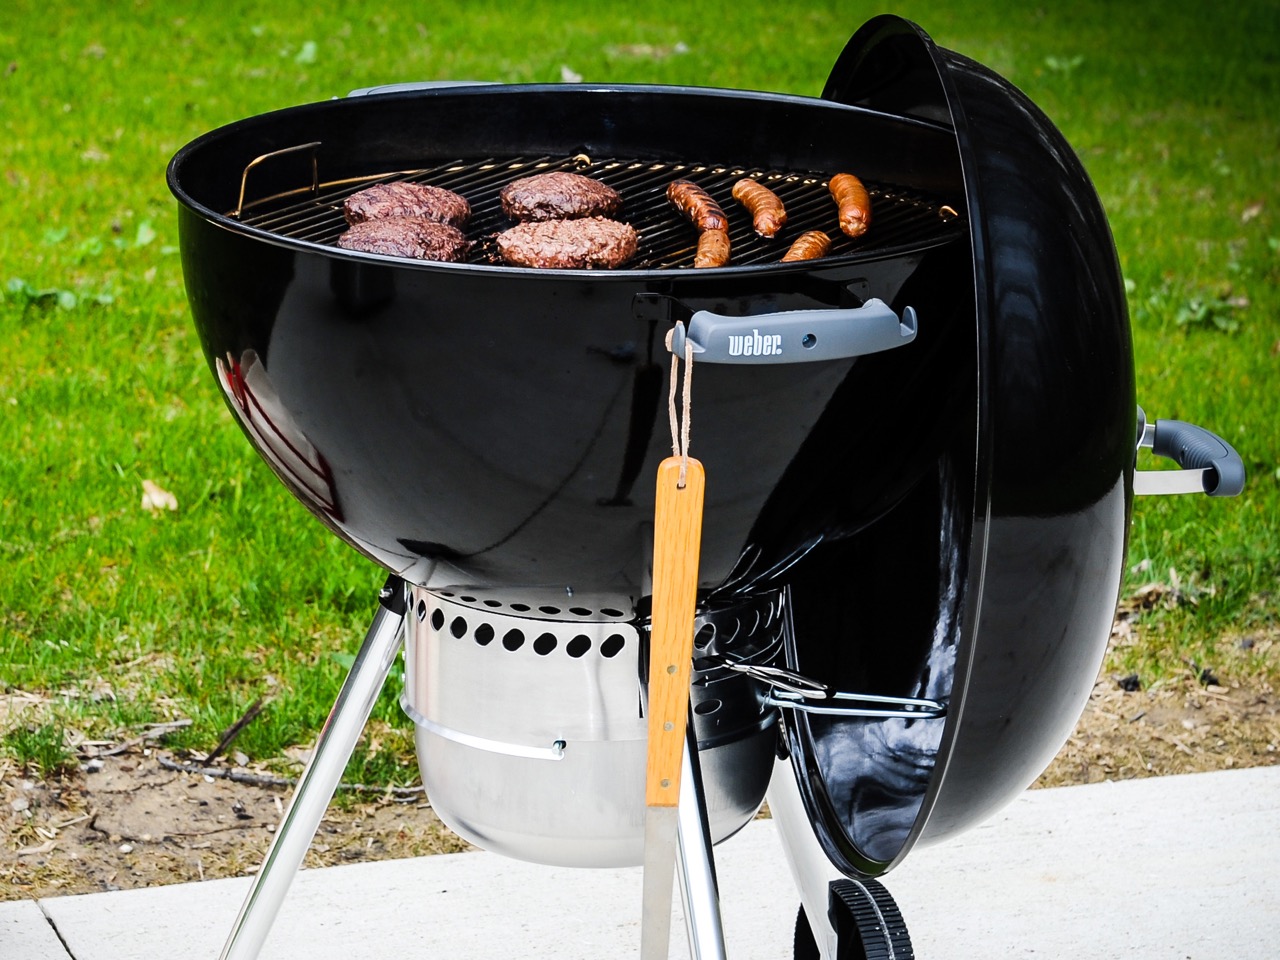
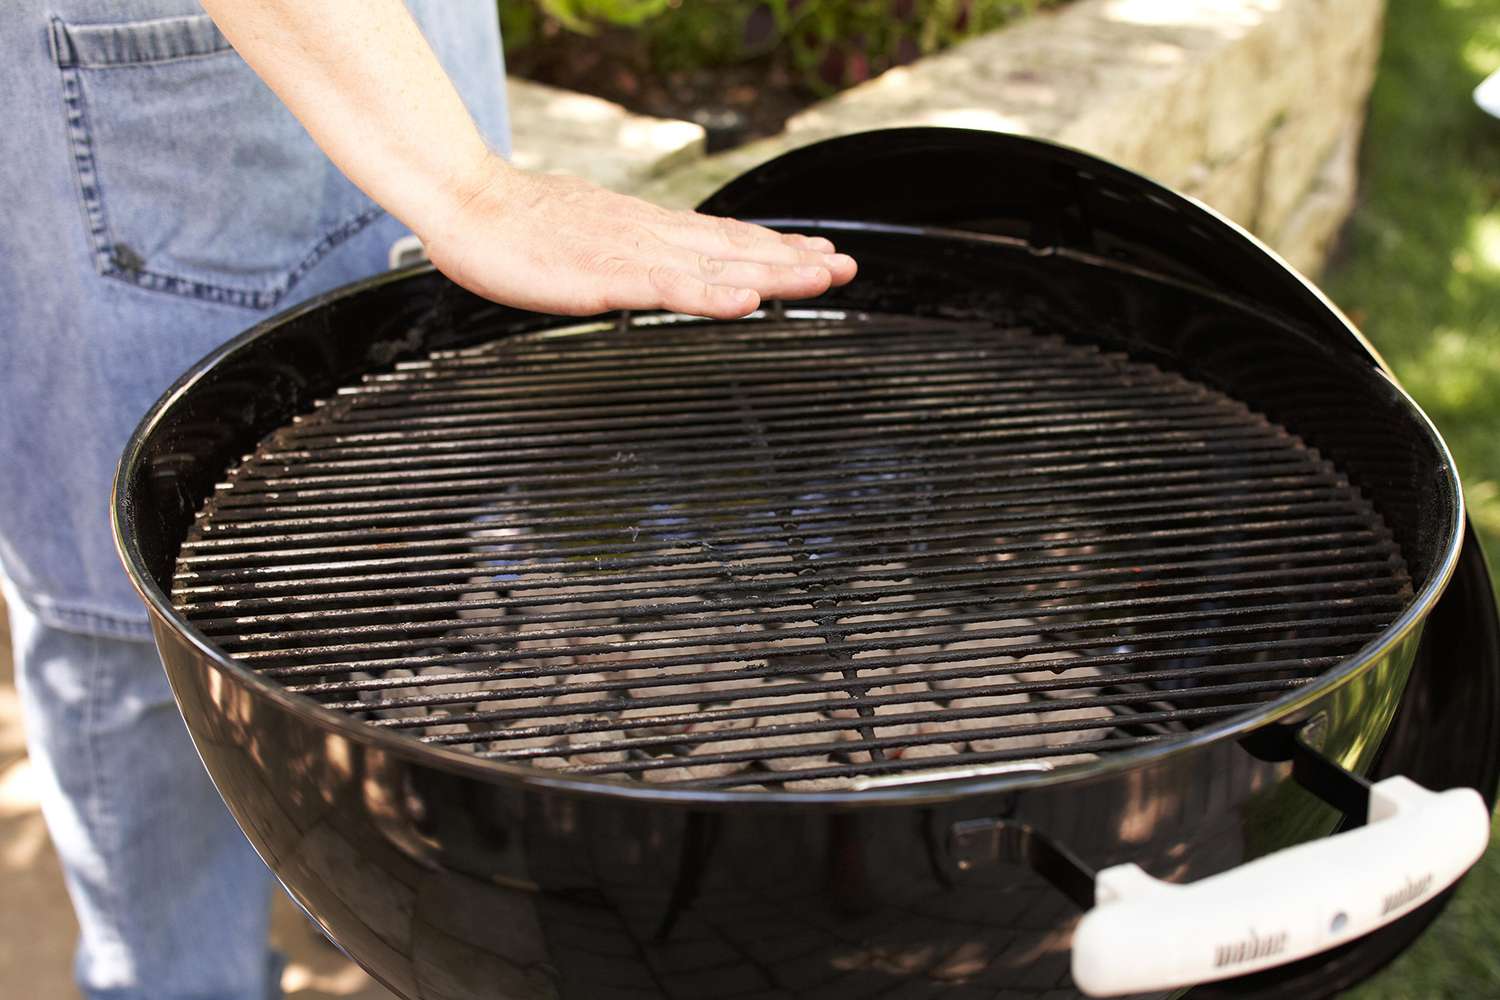
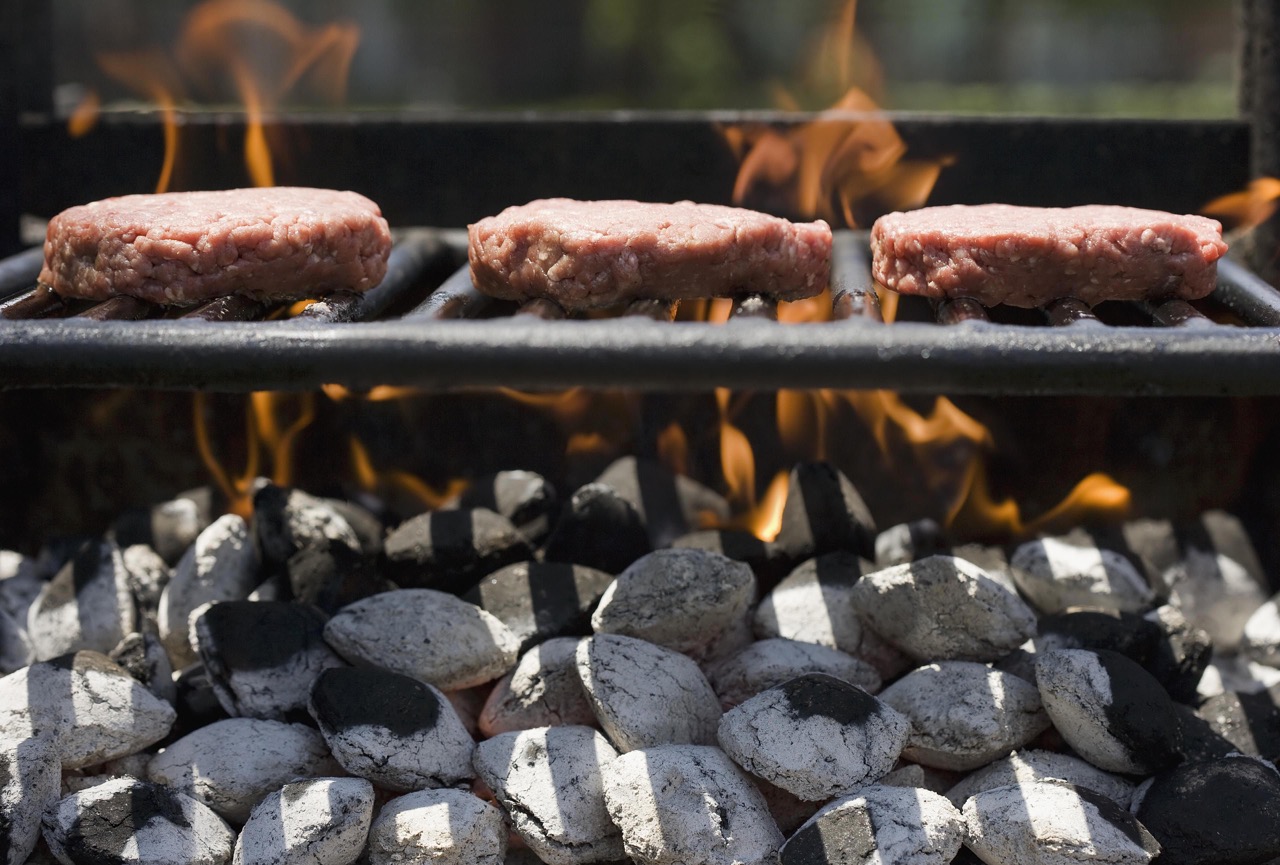
Step 8: Placing the Grate and Starting to Cook
With the coals spread and the ventilation adjusted, it’s time to place the grill grate and get ready to cook your mouthwatering food!
Carefully place the grill grate on top of the charcoal, ensuring it is securely positioned. Allow the grate to heat up for a few minutes before placing any food on it. This will help prevent sticking and ensure even cooking.
Before placing your food on the grill, make sure it is properly seasoned and prepped. Whether it’s marinated meats, seasoned vegetables, or juicy burgers, be sure to have everything ready to go.
When cooking on a charcoal grill, it’s essential to keep a close eye on the food. The cooking time will depend on the type of food, desired doneness, and grill temperature. Use a meat thermometer to check the internal temperature of meats for accurate cooking. And remember, flipping your food only once helps promote even browning and avoids sticking.
Throughout the cooking process, maintain the desired temperature by adjusting the vents as necessary. If the temperature drops, open the vents slightly to allow more oxygen in. Conversely, if it’s too hot, close the vents partially to reduce the airflow and lower the heat.
While the food is sizzling on the grill, resist the temptation to constantly lift the lid. Every time you do, you let heat escape, causing fluctuations in temperature and increasing cooking time.
Once your food reaches the desired level of doneness, carefully remove it from the grill using tongs or a spatula. Allow the food to rest for a few minutes before serving. This resting time allows the juices to redistribute, resulting in a more flavorful and tender bite.
Remember to exercise caution when handling hot grates and coals. Use heat-resistant gloves or tools to protect your hands and always follow proper safety precautions.
Congratulations! You have successfully set up your charcoal grill without a chimney and cooked a delicious meal. The smoky and flavorful results are well worth the extra effort.
Enjoy your grilled masterpiece and the satisfaction of mastering the art of charcoal grilling!
As a final note, be sure to properly clean and store your grill after use to ensure its longevity and continued enjoyment for future grilling adventures.
Happy grilling!
Conclusion
Setting up a charcoal grill without a chimney may seem daunting at first, but with the right techniques and a little practice, you can achieve exceptional grilling results. By following the steps outlined in this guide, you can enjoy the smoky and authentic flavors that cooking with charcoal brings.
Starting with the preparation of the charcoal and creating a well-arranged pile, you can ensure even ignition. Igniting the charcoal using matches, lighters, or firestarter cubes allows for a steady and controlled fire. Spreading the flames across the charcoal pile ensures that all coals are properly ignited.
Waiting for the coals to ash over is an important step that requires patience, as it ensures a stable and consistent cooking temperature. Spreading the coals evenly on the grill surface promotes uniform heat distribution and aids in precise heat control.
Adjusting the ventilation by utilizing the bottom and top vents allows you to fine-tune the temperature, achieving the perfect grilling environment. Placing the grill grate and knowing when to start cooking your food is key to achieving delectable results. Monitoring the food closely and making necessary adjustments to the vents throughout the cooking process helps to maintain the desired temperature and prevent overcooking or undercooking.
With these steps, you are well on your way to becoming a charcoal grilling expert. Remember, practice makes perfect, so don’t be discouraged if your first attempt isn’t flawless. With each grilling session, you will gain more confidence and master the art of charcoal grilling.
So go ahead, gather your materials, set up your charcoal grill without a chimney, and ignite your passion for grilling. Whether it’s juicy steaks, tender chicken, or flavorful vegetables, enjoy the smoky and mouthwatering results that cooking with charcoal provides.
Happy grilling!
Frequently Asked Questions about How To Set Up Charcoal Grill Without Chimney
Was this page helpful?
At Storables.com, we guarantee accurate and reliable information. Our content, validated by Expert Board Contributors, is crafted following stringent Editorial Policies. We're committed to providing you with well-researched, expert-backed insights for all your informational needs.

0 thoughts on “How To Set Up Charcoal Grill Without Chimney”