Articles
How To Set Up Electrician Tool Belt
Modified: August 31, 2024
Learn how to set up and organize your electrician tool belt with these helpful articles. Find tips and tricks for maximizing efficiency and staying prepared on the job.
(Many of the links in this article redirect to a specific reviewed product. Your purchase of these products through affiliate links helps to generate commission for Storables.com, at no extra cost. Learn more)
Introduction
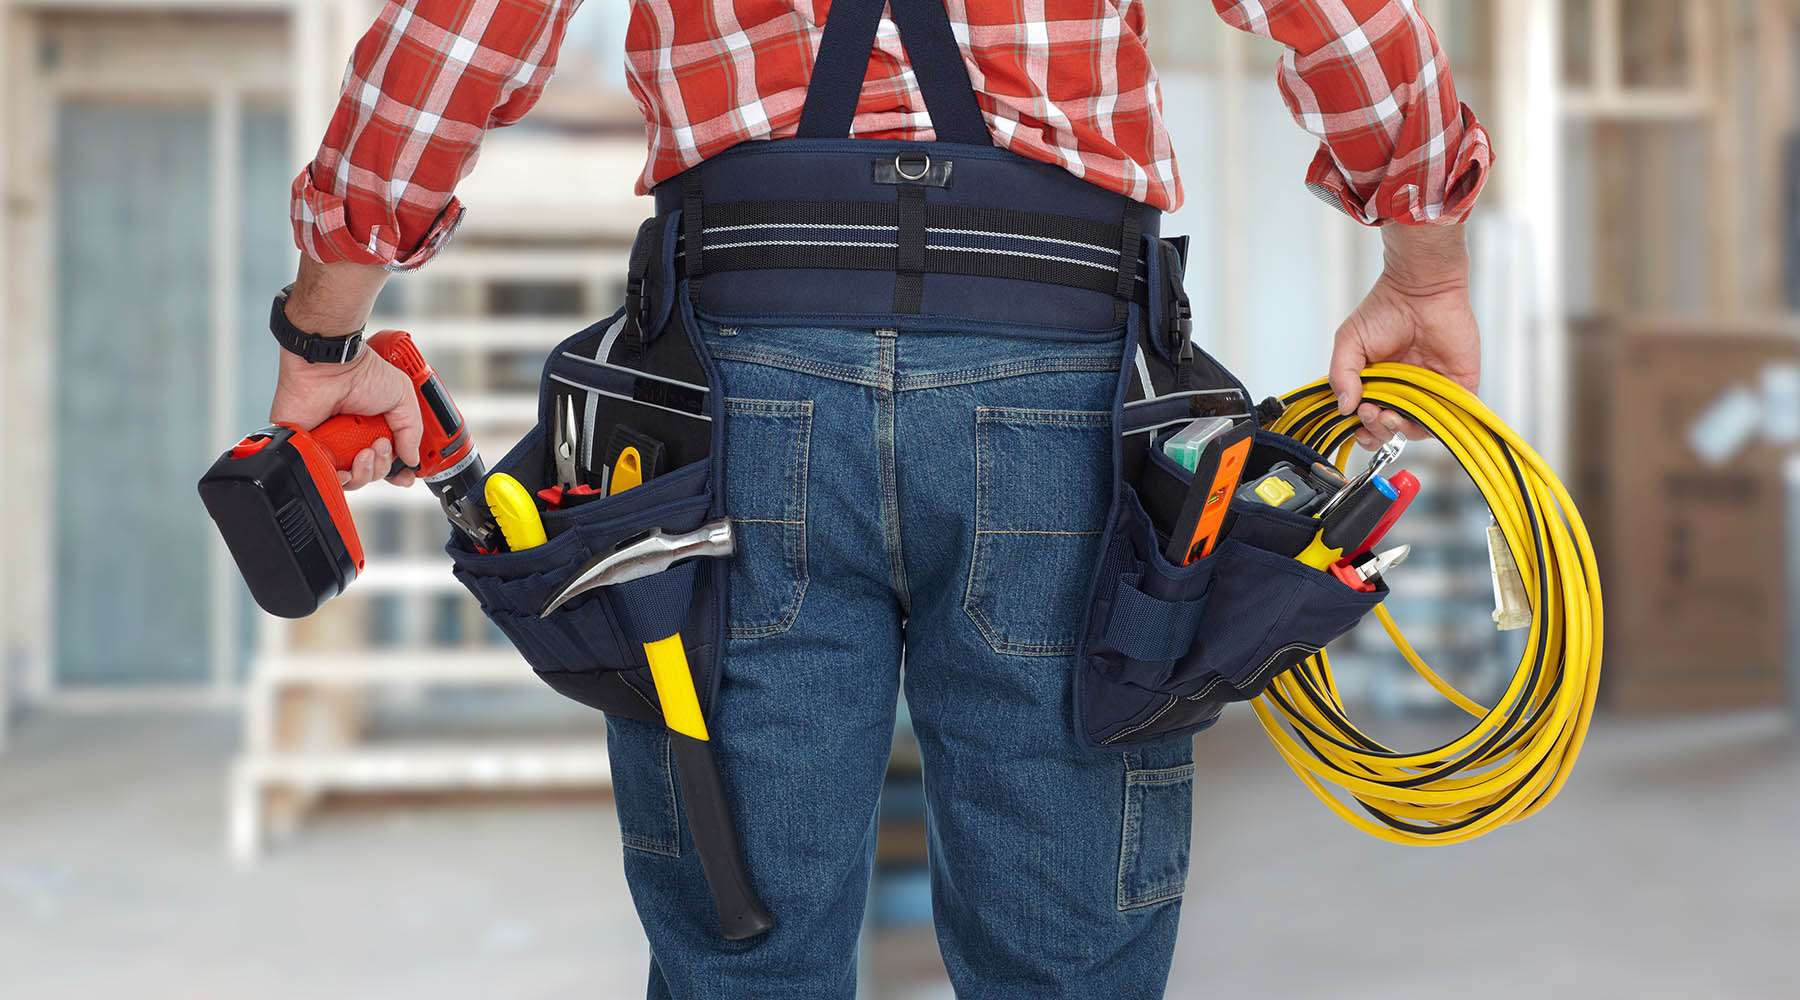
When it comes to being an electrician, having the right tools at your disposal is essential. But just as important as the tools themselves is how you organize and carry them. This is where a tool belt comes in handy. A properly set up electrician tool belt not only keeps your tools easily accessible, but also improves your efficiency on the job.
In this article, we will guide you through the process of setting up an electrician tool belt that is not only functional but also comfortable to wear. We will discuss the different types of tool belts available and help you choose the right one for your needs. We will also provide tips on how to organize your tools, secure and adjust your tool belt, add additional pouches or holders, and maintain and clean your tool belt.
By the end of this article, you will have all the knowledge you need to set up an electrician tool belt that will help you stay organized and work efficiently on your projects.
Key Takeaways:
- Choose a tool belt that suits your work style, material, and comfort features. Organize tools by category and size, utilize pockets, and consider additional pouches for efficient access and workflow.
- Secure and adjust your tool belt for comfort and functionality. Regularly assess and make adjustments as needed. Maintain and clean your tool belt to prolong its lifespan and enhance your productivity as an electrician.
Read also: 10 Amazing Electrician Tool Belt for 2025
Choosing the Right Tool Belt
When it comes to choosing the right tool belt for your needs as an electrician, there are a few key factors to consider.
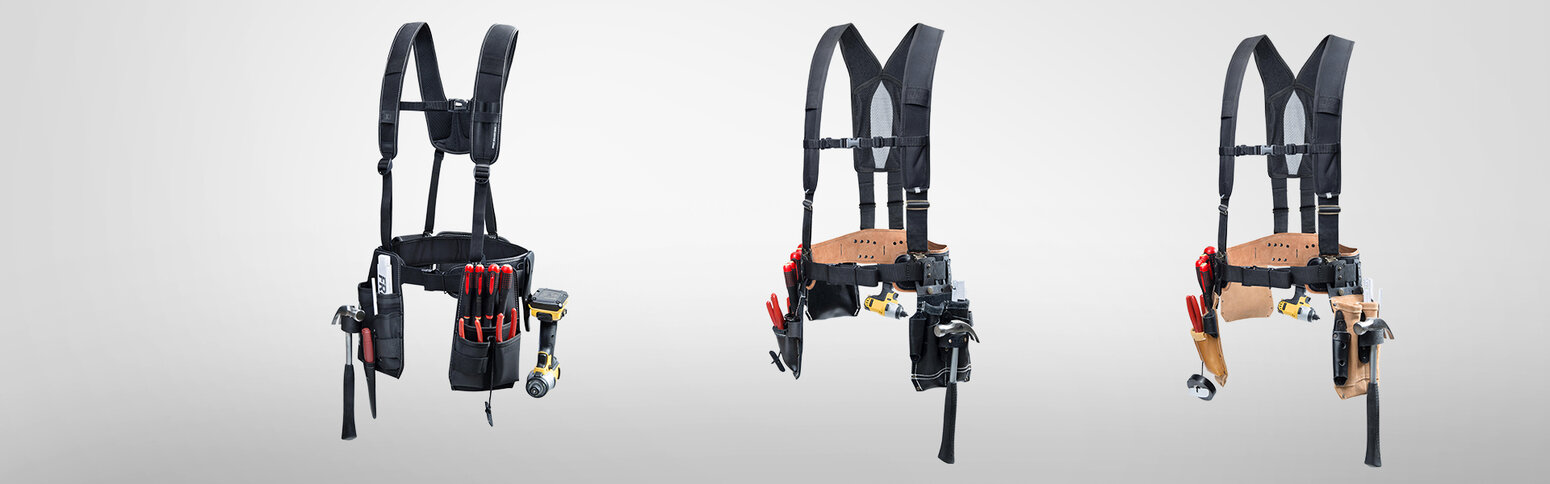
Firstly, you need to determine the type of tool belt that suits your work style. There are three main types of tool belts: waist belts, suspenders, and combination belts. Waist belts are the most common and are worn around the waist, providing easy access to your tools. Suspenders are worn over the shoulders and distribute the weight of the tools more evenly. Combination belts offer both waist belt and suspender options, giving you the flexibility to choose the setup that works best for you.
Next, consider the material of the tool belt. Look for a durable and sturdy material that can withstand the wear and tear of job site conditions. Leather and nylon are commonly used materials for tool belts, with leather providing a more traditional and rugged option, while nylon offers lightweight and water-resistant properties.
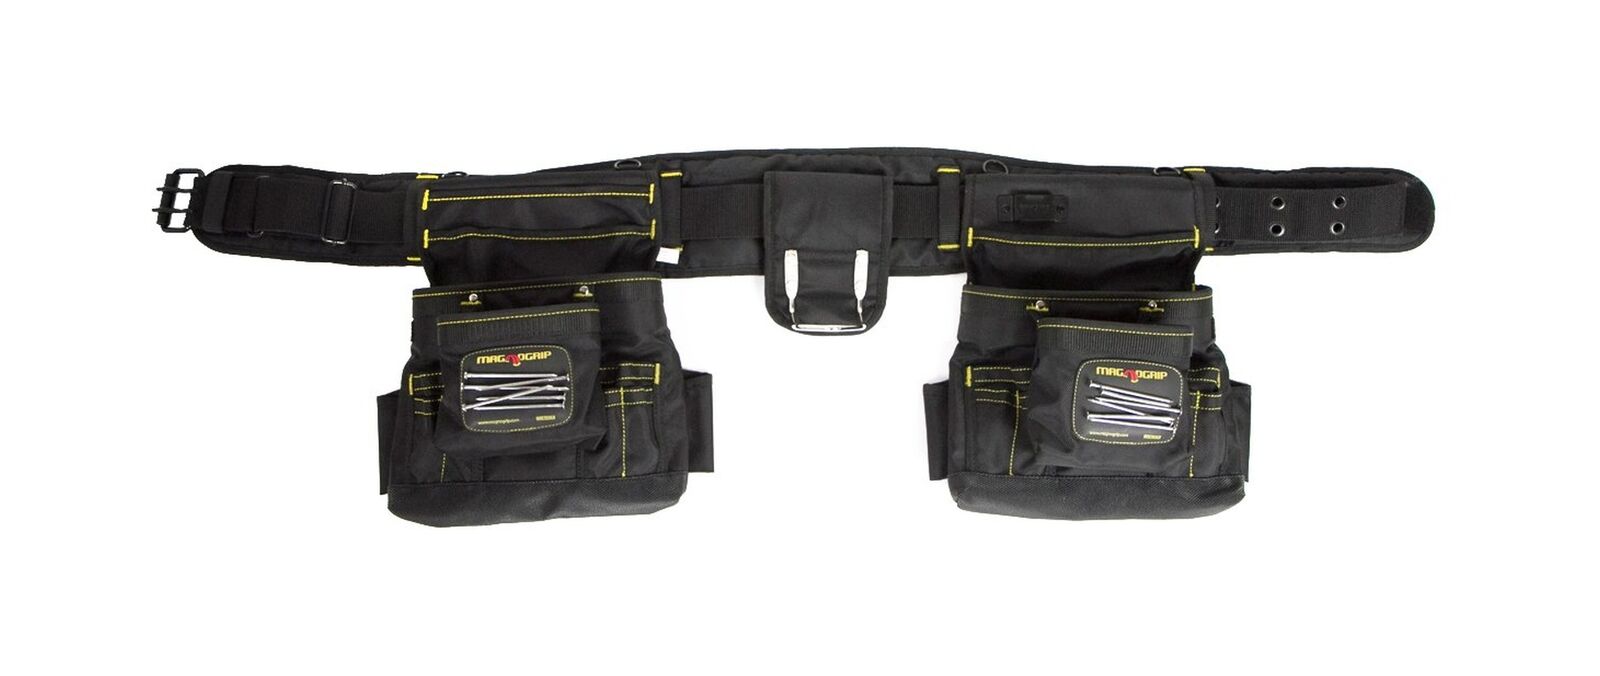
The number and size of pouches or pockets on the tool belt are also important considerations. Assess the types of tools you regularly use and make sure there is enough storage space to accommodate them. Multiple pockets in different sizes allow for efficient organization of small and large tools, ensuring easy access when needed.
Comfort is another crucial factor to keep in mind when choosing a tool belt. Look for one that offers adjustable belt straps and suspenders, as these allow you to customize the fit for maximum comfort. Padded belts and suspenders also provide added support and help alleviate strain on your back and shoulders during long hours of work.
Lastly, consider any additional features or attachments that may be helpful for your specific needs. Some tool belts come with built-in hammer holders, tape measure holders, or loops for carrying wire spools. These features can enhance your efficiency and convenience on the job.
Take your time to research and try on different tool belts before making a purchase. It is important to find one that fits your body comfortably and meets all your functional requirements as an electrician.
Organizing Your Tools
Once you have chosen the right tool belt, the next step is to organize your tools in a way that ensures easy accessibility and efficient workflow. Here are some tips to help you organize your tools:
- Categorize your tools: Start by categorizing your tools based on their function or usage. For example, group together your screwdrivers, pliers, and wire cutters. This will help you locate specific tools quickly when you need them.
- Arrange tools by size: Within each category, arrange your tools by size. This will make it easier to find the right tool for the task at hand, especially if you have multiple tools of the same type.
- Utilize pockets and pouches: Take advantage of the various pockets and pouches on your tool belt to store your tools. Assign specific pockets or pouches for each category of tools, keeping them organized and preventing them from jumbling together.
- Secure small tools: Smaller tools, such as screws or wire nuts, can easily get lost in the depths of your tool belt. Use small containers or pouches with secure closures to keep these items safe and easily accessible.
- Consider tool holders: If your tool belt doesn’t have enough pockets or pouches for all your tools, consider adding tool holders to your belt. These holders can be attached to your belt and provide dedicated storage for specific tools, such as pliers or screwdrivers.
- Label your tools: To further facilitate organization, consider labeling your tools. This can be done by attaching small labels or using colored tape to differentiate between similar-looking tools. This will save you time searching for the right tool and minimize the chances of misplacing them.
Remember, organizing your tools is a personal preference, and what works for one electrician may not work for another. Experiment with different organizational methods until you find one that suits your workflow and helps you work efficiently.
Setting Up Your Tool Belt
Now that you have organized your tools, it’s time to set up your tool belt for optimal functionality and comfort. Here’s a step-by-step guide to help you:
- Put on the tool belt: Adjust the belt straps or suspenders to fit comfortably around your waist or shoulders. Make sure it is secure but not too tight.
- Position the pouches: Determine the most convenient placement for your tool pouches. Many electricians prefer to have their most frequently used tools in front of them, while others may prefer a balanced distribution. Experiment with different configurations to find what works best for you.
- Attach the pouches: Securely attach the pouches to your tool belt. Some tool belts have snap or Velcro closures, while others have belt loops that you can slide the belt through. Make sure the pouches are tightly fastened to prevent them from sliding or falling off during work.
- Consider weight distribution: Distribute the weight of the tools evenly across your tool belt, ensuring that it doesn’t pull too much on one side. This helps maintain balance and prevents strain or discomfort.
- Arrange tools within the pouches: Place your tools within the pouches according to your organizational system. Ensure that each tool is securely held and easily accessible. Keep in mind the weight and size of the tools when placing them in the pouches to maintain balance.
- Test the setup: Move around and simulate common work tasks to test the functionality of your tool belt setup. Make adjustments as needed to ensure your tools are easily reachable without causing any inconvenience or discomfort.
Setting up your tool belt may require some trial and error to find the most comfortable and efficient configuration. Pay attention to your body’s movements and make adjustments accordingly. Remember, your tool belt should enhance your workflow and make your job easier, so take the time to set it up properly.
When setting up your electrician tool belt, make sure to distribute the weight evenly to avoid strain on your back. Place frequently used tools within easy reach for efficiency.
Securing and Adjusting the Tool Belt
Once you have set up your tool belt, it’s important to ensure that it is securely fastened and properly adjusted for maximum comfort and functionality. Here are some tips on how to secure and adjust your tool belt:
- Tighten the belt straps: If you’re wearing a waist belt, adjust the belt straps to ensure a snug and secure fit around your waist. Avoid making it too tight, as it can restrict movement and cause discomfort. The belt should be secure enough to prevent it from slipping or shifting during work.
- Adjust the suspenders: If you’re using a tool belt with suspenders, adjust the length of the suspenders to your preferred height and comfort level. The suspenders help distribute the weight of the tools, reducing strain on your waist and back. Ensure that the suspenders are not too loose or too tight, as they should provide adequate support without digging into your shoulders.
- Check for balance: Once you have secured your tool belt, check for balance. A well-balanced tool belt allows you to move freely and prevents strain on one side of your body. If you notice any imbalance, adjust the placement of the pouches or redistribute the weight of the tools as necessary.
- Test mobility: Move around and simulate common work tasks to test the mobility and comfort of your tool belt. Ensure that you have a full range of motion without any restrictions or discomfort. Make any necessary adjustments to the belt straps or suspenders until you achieve optimal mobility.
- Regularly check for tightness: Throughout your workday, periodically check the tightness of your tool belt. Over time, the belt may loosen, causing it to slide or shift while you work. Regularly readjust the belt straps or suspenders to maintain a secure and comfortable fit.
- Consider adding padding: If you find that your tool belt is causing discomfort or pressure points on your body, consider adding padding. There are various types of padding available, such as gel or foam inserts, that can provide extra cushioning and alleviate pressure.
Remember, everyone has different body types and preferences, so it may take some time to find the ideal fit and adjustment for your tool belt. Regularly assess and adjust as needed to ensure that your tool belt stays comfortable and secure throughout your workday.
Read more: What Power Tools Do Electricians Use
Adding Additional Pouches or Holders
While your tool belt may come with a standard set of pouches and holders, you may find that you need additional storage options for certain tools or accessories. Here are some tips on how to add extra pouches or holders to your tool belt:
- Assess your needs: Take a look at the tools or accessories that you frequently use and determine if there are any items that could benefit from dedicated storage. This may include specialized tools, spare parts, or personal items like your cell phone or wallet.
- Choose the right pouch or holder: Once you identify the items that need additional storage, select the appropriate pouch or holder for each item. There are a variety of options available, such as small zippered pouches, tool-specific holders (e.g., for a tape measure or flashlight), or pouches with multiple compartments.
- Consider attachment methods: Different pouches or holders may have different attachment methods. Some may come with built-in clips or hooks that can be easily attached to your tool belt. Others may require additional straps or loops to secure them in place. Choose the attachment method that works best for your tool belt and ensures a secure hold.
- Strategically position the additional pouches or holders: Determine the best placement for the additional pouches or holders on your tool belt. Take into consideration weight distribution and accessibility. You may want to position them in a way that balances out the weight of your existing pouches or places frequently used items within easy reach.
- Test functionality: Once you have added the extra pouches or holders, test their functionality. Make sure that the items fit securely and are easily accessible when needed. Walk around and simulate common work tasks to ensure that the additional pouches or holders do not interfere with your mobility or comfort.
- Regularly assess and adjust: As your tool set or work requirements change, it’s important to regularly assess your tool belt’s organization and adapt as needed. Reevaluate the need for additional pouches or holders and make adjustments accordingly.
By adding extra pouches or holders to your tool belt, you can customize its functionality to meet your specific needs. This allows for better organization, accessibility, and efficiency while working on your projects.
Maintaining and Cleaning Your Tool Belt
Proper maintenance and regular cleaning of your tool belt are important to ensure its durability and longevity. Here are some tips on how to maintain and clean your tool belt:
- Inspect your tool belt regularly: Take the time to inspect your tool belt on a regular basis. Look for any signs of wear and tear, such as frayed stitching or ripped pockets. Address any damage as soon as possible to prevent further deterioration.
- Repair or replace damaged parts: If you notice any damage to your tool belt, take the necessary steps to repair or replace the affected parts. This may involve restitching, patching, or replacing pockets, straps, or buckles. Prompt repair will help extend the lifespan of your tool belt and ensure its functionality.
- Clean your tool belt properly: Cleaning your tool belt is essential to maintain its appearance and remove any dirt or debris that may accumulate. The cleaning method will depend on the material of your tool belt. For leather belts, use a damp cloth and mild soap to gently clean the surface. For nylon belts, you can use a solution of warm water and mild detergent. Avoid using harsh chemicals or abrasive materials, as they can damage the material.
- Dry your tool belt properly: After cleaning, make sure to dry your tool belt thoroughly. Hang it in a well-ventilated area or lay it flat on a clean surface. Allow it to air dry completely before storing or using it again. Avoid exposing your tool belt to excessive heat or direct sunlight, as this can cause the material to deteriorate.
- Store your tool belt properly: When you’re not using your tool belt, store it in a clean and dry area. Avoid storing it in damp or humid environments, as this can promote mold or mildew growth. If possible, hang your tool belt rather than folding or squishing it to maintain its shape.
- Avoid overloading your tool belt: While it can be tempting to fill your tool belt with all your tools, it’s important to avoid overloading it. Excessive weight can put strain on the belt and reduce its lifespan. Only carry the essential tools and distribute them evenly throughout the pouches to maintain balance.
- Replace worn-out pouches or belts: Over time, the pouches or belt straps may wear out and become less functional. It’s important to periodically assess the condition of your tool belt and replace any worn-out parts. Investing in high-quality replacement pouches or belts will ensure the continued usability of your tool belt.
By following these maintenance and cleaning tips, you can keep your tool belt in good condition and ensure it serves you well for years to come. A well-maintained tool belt not only enhances your efficiency on the job but also reflects your professionalism and attention to detail.
Conclusion
Setting up an electrician tool belt is an essential step in ensuring that you have easy access to your tools and can work efficiently on the job. By choosing the right tool belt, organizing your tools effectively, and securing and adjusting it properly, you can create a setup that improves your workflow and enhances your overall productivity.
When selecting a tool belt, consider factors such as the type of belt, material, number of pouches, and comfort features. Take the time to try on different options and find one that fits your body comfortably and meets your specific needs as an electrician.
Organizing your tools within the tool belt is crucial for quick and easy access. Categorize your tools, arrange them by size, and utilize the pockets and pouches to keep everything organized and secure. Consider additional pouches or holders if needed to accommodate specific tools or accessories.
Once your tool belt is set up, ensure that it is securely fastened and adjusted to distribute weight evenly and allow for maximum mobility. Regularly assess and make adjustments as needed to maintain a comfortable and secure fit.
To prolong the lifespan of your tool belt, maintain and clean it regularly. Inspect for any damage and repair or replace parts as necessary. Clean the belt according to the recommended methods for its material and store it properly when not in use.
A well-maintained and properly set up electrician tool belt allows you to work with ease, efficiency, and professionalism. It enhances your productivity, reduces the chances of lost or misplaced tools, and ultimately contributes to your success as an electrician.
By following the guidelines outlined in this article, you now have the knowledge to set up and maintain an electrician tool belt that perfectly suits your needs. Take the time to invest in a high-quality tool belt and organize it effectively, and you will reap the benefits throughout your electrical projects.
Now that you've got your electrician tool belt set up, why not take it a step further? Enhance your gear with some cutting-edge attachments. Our next article offers a look at the hottest tool belt accessories slated for 2024. These additions promise to boost your efficiency and make every job smoother. So, if you're striving for the ultimate in professional preparation, make sure to check out our insights on the latest gear upgrades that can fit seamlessly into your toolkit.
Frequently Asked Questions about How To Set Up Electrician Tool Belt
Was this page helpful?
At Storables.com, we guarantee accurate and reliable information. Our content, validated by Expert Board Contributors, is crafted following stringent Editorial Policies. We're committed to providing you with well-researched, expert-backed insights for all your informational needs.


0 thoughts on “How To Set Up Electrician Tool Belt”