Articles
How To Store A Car For 3 Months
Modified: October 20, 2024
Learn the best strategies for storing a car for 3 months. Read our articles on proper car storage techniques to maintain its condition during long-term parking.
(Many of the links in this article redirect to a specific reviewed product. Your purchase of these products through affiliate links helps to generate commission for Storables.com, at no extra cost. Learn more)
Introduction
When it comes to storing a car for an extended period of time, whether it’s for a long vacation, a deployment, or simply because you won’t be using it for a few months, there are several important steps you should take to ensure that your vehicle remains in top condition. Properly storing a car can help prevent issues such as flat tires, dead batteries, and damage from the elements.
In this article, we will guide you through a comprehensive checklist of steps to follow when storing your car for three months or more. By following these guidelines, you can minimize the risk of any potential problems and ensure that your car stays in great shape while it’s not being driven.
Key Takeaways:
- Properly storing a car for an extended period involves steps such as washing, changing fluids, and finding a suitable storage location. Regular monitoring and maintenance are crucial to ensure the car remains in top condition.
- Protecting the exterior and interior, maintaining the tires, and covering the car are essential for safeguarding the vehicle during storage. Following these steps helps minimize potential issues and ensures the car’s longevity.
Read more: How To Store A Car For 6 Months
Step 1: Wash and Clean the Car
Before storing your car, it’s essential to thoroughly wash and clean both the exterior and interior. This step might seem unnecessary, especially if your car appears clean already, but it’s crucial for long-term storage.
Start by giving your vehicle a good wash, removing any dirt, dust, or grime that may have accumulated. Pay special attention to the undercarriage, as dirt and debris can cause corrosion if left unchecked. Use a gentle car soap and microfiber cloths or mitts to avoid scratching the paint.
After washing the exterior, it’s recommended to apply a layer of wax or paint sealant to protect the paintwork from oxidation and UV damage. This will help keep your car’s paint looking fresh and vibrant throughout its storage period.
Next, focus on cleaning the interior. Remove any trash, personal items, or perishable foods that might attract pests. Vacuum the seats, floor mats, and carpets to remove any dirt or debris. Wipe down the dashboard, console, and other surfaces with a mild cleaner. Consider using a fabric freshener to keep the interior smelling pleasant.
By starting with a clean car, you eliminate the risk of dirt or stains causing damage over time. Additionally, a clean car helps deter pests that may be looking for a cozy place to nest while your car remains unused.
Step 2: Change the Oil and Fluids
Before storing your car for an extended period, it’s crucial to change the oil and other fluids. Over time, the oil can become contaminated and lose its effectiveness, which can lead to engine problems.
Schedule an oil change shortly before storing your car, ensuring that you use the manufacturer-recommended oil viscosity and type. This will help protect the engine from moisture and corrosion, and it will also ensure that your car is ready for immediate use when you retrieve it from storage.
In addition to changing the oil, check and top up other necessary fluids, such as coolant, brake fluid, power steering fluid, and windshield washer fluid. By ensuring that all fluids are at the appropriate levels, you eliminate the risk of any potential issues that may arise from sitting unused for an extended period of time.
If your car has a manual transmission, consider changing the transmission fluid as well. Over time, transmission fluid can break down or become contaminated, potentially causing damage to the transmission system. Similarly, if your car has a limited-slip differential, it’s recommended to change the fluid to prevent any clutch plates from sticking during storage.
By taking the time to change the oil and fluids, you can help protect the vital components of your car’s engine and ensure that it runs smoothly when you’re ready to drive it again.
Step 3: Fill Up the Fuel Tank
When storing a car for an extended period, it’s important to fill up the fuel tank before parking it. This step may seem counterintuitive, especially if you won’t be using the car for a while, but it’s actually beneficial for several reasons.
Filling up the fuel tank helps prevent moisture from accumulating inside the tank. A partially filled tank can create condensation, which can lead to rust and corrosion in the fuel system. By keeping the tank full, you minimize the amount of air and moisture that can enter and cause potential damage.
In addition, a full tank of fuel helps prevent the seals in the fuel system from drying out. The fuel acts as a lubricant for these seals, ensuring that they remain in good condition. This is particularly important for older vehicles or those that will be stored for an extended period.
Furthermore, having a full tank of fuel helps prevent any potential issues with fuel degradation. Over time, fuel can break down and become less stable, which can lead to starting problems or engine damage. By keeping the tank full, you reduce the chances of fuel degradation and ensure that the fuel remains fresh.
Lastly, having a full tank of fuel provides an added security measure. If you’re storing your car in an area prone to power outages or fuel shortages, having a full tank ensures that you’ll have enough fuel to get to a safer location if needed.
By filling up the fuel tank before storing your car, you can protect the fuel system, prevent moisture buildup, and ensure that your car is ready to hit the road when you’re ready to drive it again.
Step 4: Protect the Exterior
Protecting the exterior of your car is crucial when storing it for an extended period. This step helps shield the paintwork and other exterior components from potential damage caused by the elements, such as UV rays, rain, and debris.
Start by giving your car a thorough wash and dry to remove any dirt or debris that may have accumulated. Once clean, you can apply a layer of paint protection, such as a wax or sealant, to create a barrier between the paint and the environment. This protective layer helps prevent fading, oxidation, and damage from things like bird droppings or tree sap.
Consider covering sensitive areas of the car, such as the front grille and headlights, with a protective film or cover. This can help prevent bugs or debris from causing damage or marks on the surface.
Additionally, if you’re storing your car outdoors or in a garage with windows, it’s advisable to use a car cover to provide an extra layer of protection. Choose a cover that is breathable and offers UV protection. This will help shield your vehicle from the sun’s rays while allowing moisture to evaporate, preventing mold or mildew from forming.
Lastly, if your car has any vulnerable areas, such as convertible tops or vinyl trim, apply specialized protectants or cleaners designed to prevent drying or cracking. This will help prolong the life of these components and keep them looking their best during storage.
By taking the time to protect the exterior of your car, you can minimize the risk of damage and ensure that it retains its beauty and value while being stored.
Read more: How To Store Spinach For Months
Step 5: Protect the Interior
Protecting the interior of your car is just as important as protecting the exterior when storing it for an extended period. This step helps maintain the cleanliness and condition of the interior components and prevents issues like mold, odors, or damage from occurring.
Start by thoroughly cleaning and vacuuming the interior. Remove any loose items, trash, or perishable food that may attract pests or cause unpleasant smells. Wipe down surfaces with a mild cleaner and ensure that they are completely dry before storage.
Consider using a fabric protector on seats, carpets, and upholstery, especially if your car will be stored in a humid environment. This will help repel stains and prevent fabric from absorbing moisture or odors. Apply leather conditioner to any leather surfaces to keep them supple and prevent cracking.
Utilize car sunshades or blinds to protect the interior from UV rays. Direct sunlight can fade and damage the dashboard, seats, and other interior components. Additionally, consider using window tinting to provide an added layer of protection against UV rays.
If possible, crack open the windows slightly to allow for ventilation. This will help prevent the buildup of stale air and reduce the risk of mold or mildew growth inside the car.
Finally, place moisture-absorbing products, such as desiccant packs or moisture absorbers, in the interior of the car. These products will help control humidity levels and prevent moisture-related issues.
By taking the necessary steps to protect the interior of your car, you can ensure that it remains fresh, odor-free, and in excellent condition while being stored.
To store a car for 3 months, fill the gas tank to prevent condensation, change the oil, and disconnect the battery to prevent draining. Cover the car to protect it from dust and debris.
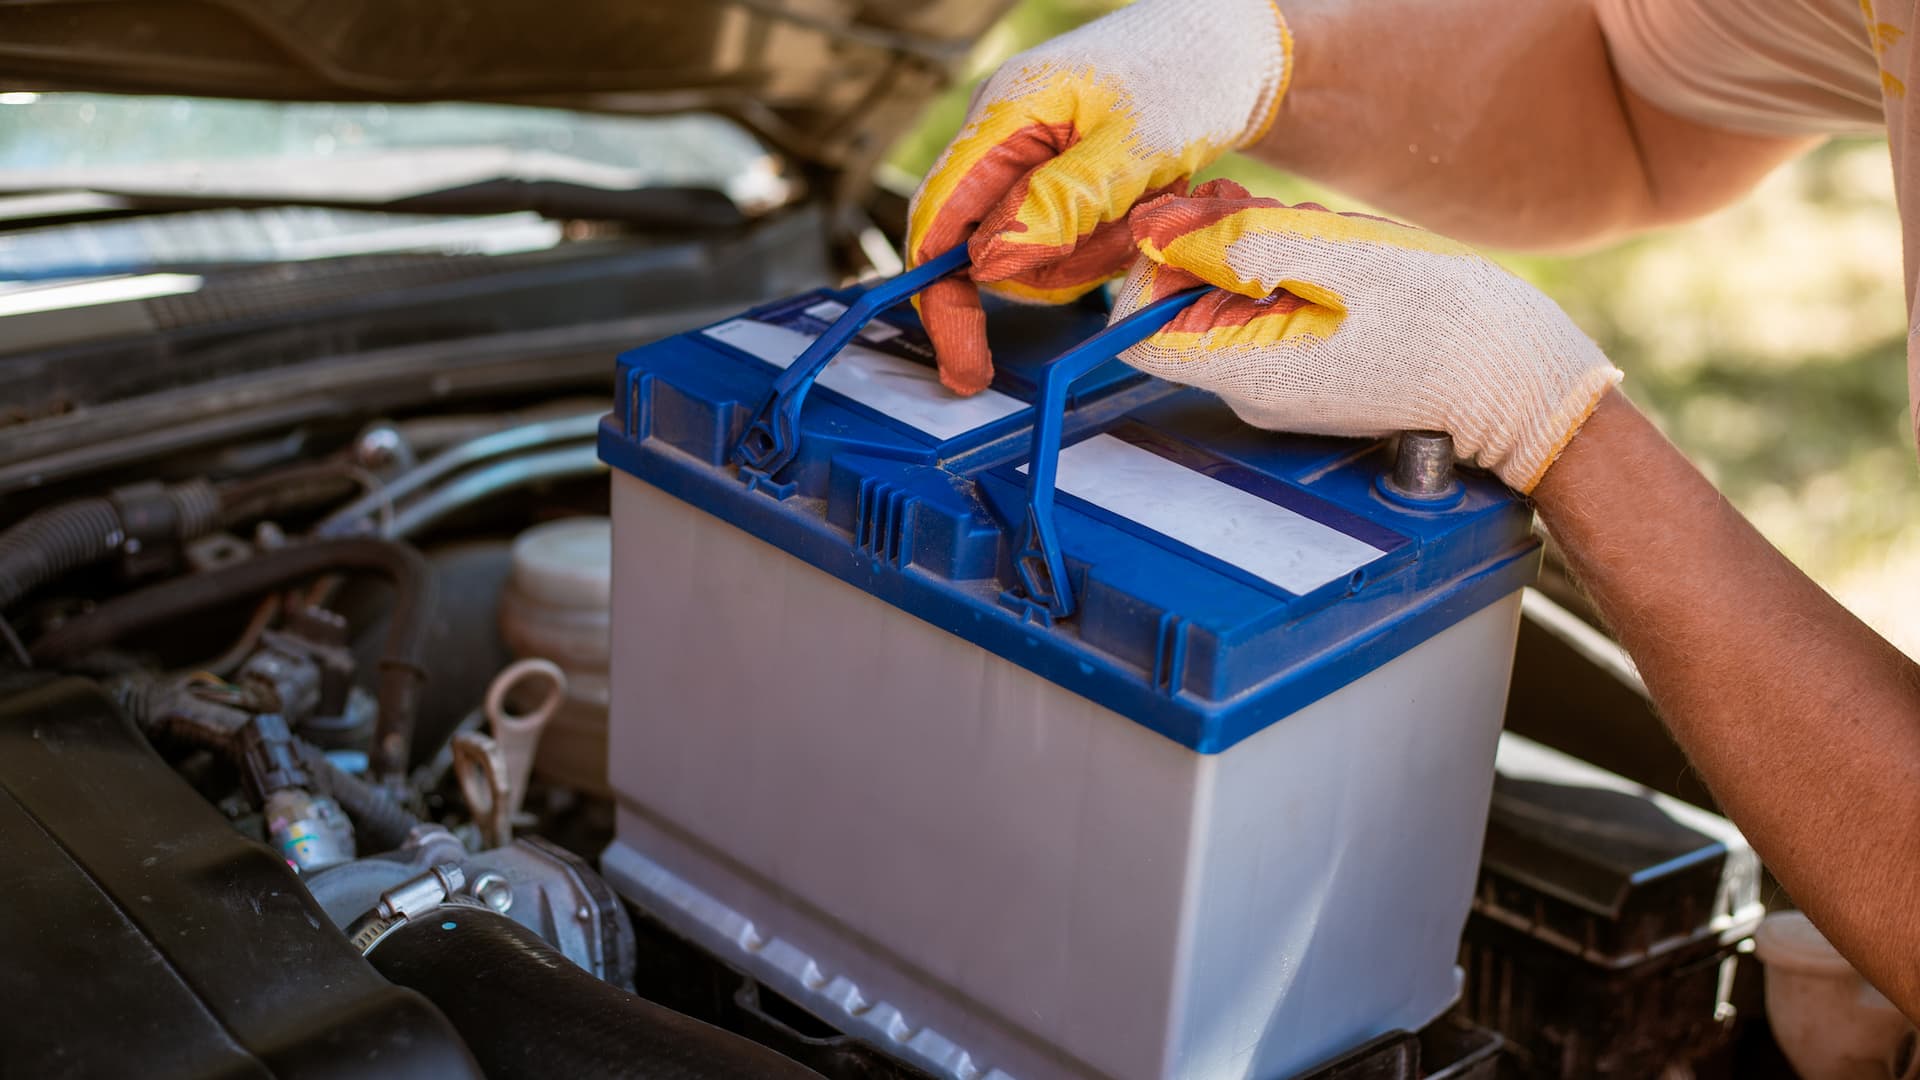
Step 6: Remove the Battery or Disconnect
When storing a car for an extended period, it’s often recommended to remove the battery or disconnect it to prevent any potential issues or drain on the battery life.
If you choose to remove the battery, start by disconnecting the negative (-) terminal first, followed by the positive (+) terminal. Store the battery in a cool and dry place, ideally on a battery maintainer or charger to keep it in good condition.
Alternatively, if removing the battery is not feasible or desirable, you can disconnect it instead. This involves disconnecting the negative terminal to cut off the electrical connection and prevent any power drain. However, keep in mind that disconnecting the battery may reset settings or presets in your car’s electronic systems.
By removing or disconnecting the battery, you eliminate the risk of the battery draining over time or experiencing damage due to prolonged inactivity. It also reduces the chances of any electrical issues occurring while the car is in storage.
When reinstalling or reconnecting the battery, always make sure to connect the positive terminal first, followed by the negative terminal. Double-check that the connections are secure before starting the car.
Remember to consult your car’s owner’s manual for specific instructions or precautions regarding your particular vehicle model.
By taking the necessary steps to remove or disconnect the battery, you can ensure that it remains in good condition and ready for use when you retrieve your car from storage.
Step 7: Maintain the Tires
Proper tire maintenance is essential when storing a car for an extended period. Neglected tires can develop flat spots, lose pressure, or even degrade over time, leading to potential safety hazards or costly repairs.
Start by inflating the tires to the manufacturer-recommended pressure. This will help prevent flat spots from forming and ensure that the tires maintain their shape during storage. Consider using a tire pressure monitoring system to keep an eye on the pressure levels throughout the storage period.
If possible, move the car slightly every few weeks to change the contact points between the tires and the ground. This can help prevent flat spots and distribute the weight more evenly. However, be cautious if moving the vehicle is not feasible or could result in damage or accidents.
Using jack stands can also be an option to take the weight off the tires completely. This can avoid the development of flat spots over a long period.
Additionally, inspect the tires for any signs of damage or uneven wear. If you notice any issues, such as bulges, cracks, or excessive wear, it’s advisable to replace the tires before storing the car. Damaged or worn-out tires can lead to unsafe driving conditions when you’re ready to use the vehicle again.
Finally, protect the tires from long-term exposure to the sun by using tire covers or parking your car in a shaded area. Extended exposure to UV rays can cause the rubber to deteriorate, leading to premature aging and potential tire failure.
By properly maintaining the tires, you can prolong their lifespan, ensure their safety, and minimize the risk of any tire-related issues when you’re ready to hit the road again.
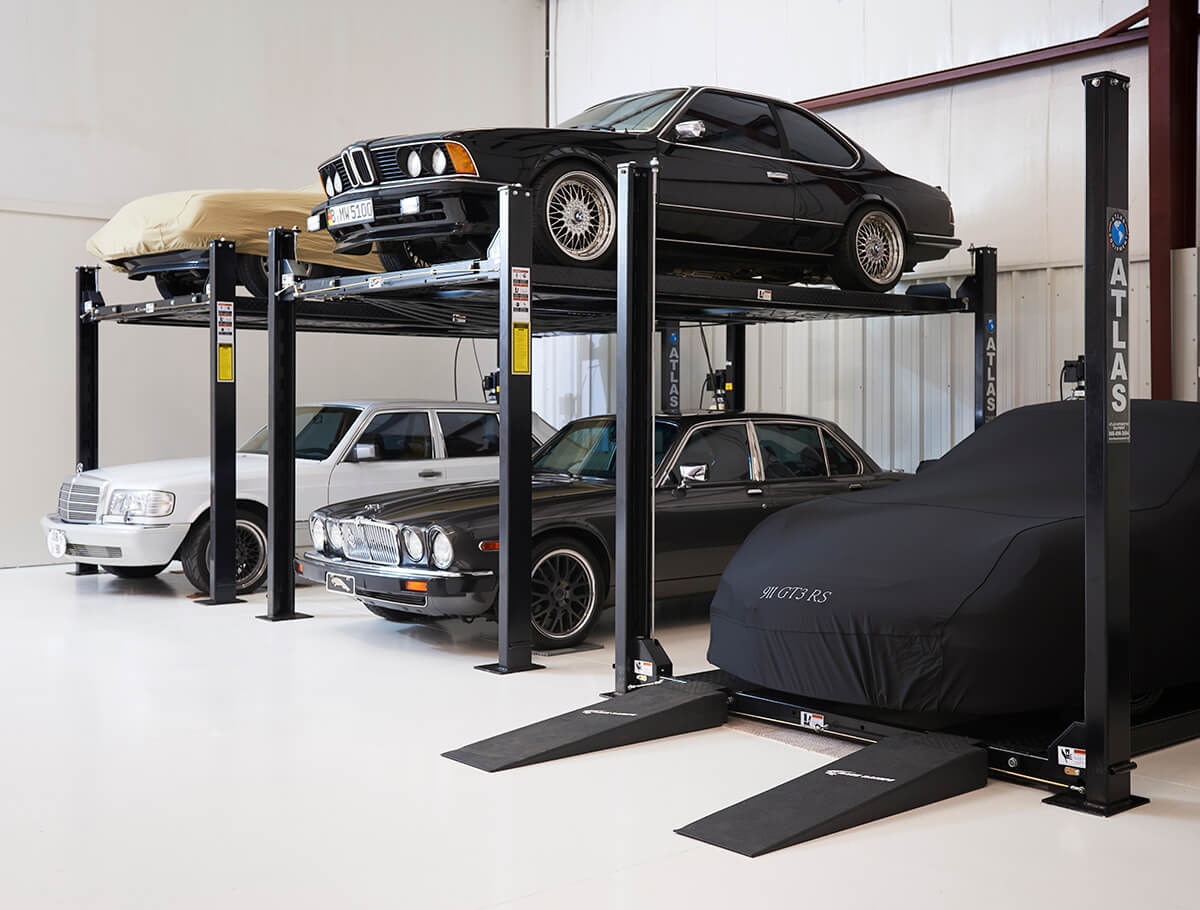
Step 8: Find a Suitable Storage Location
Finding the right storage location for your car is crucial to ensure its safety and protect it from potential damage during the storage period. Here are a few considerations to keep in mind when selecting a suitable storage location:
- Secure and Climate-Controlled: Look for a storage facility that is secure, with proper fencing, surveillance cameras, and controlled access. Additionally, consider a climate-controlled facility that can regulate temperature and humidity levels to prevent damage from extreme weather conditions.
- Indoor Storage: If possible, opt for indoor storage to shield your car from the elements, such as rain, hail, or extreme heat. Indoor storage also provides an added layer of protection against theft or vandalism.
- Clean and Dry: Ensure that the storage area is clean and free from any potential hazards, such as debris or moisture. A clean and dry environment will help prevent any damage to your car’s exterior and interior.
- Avoid Sunlight Exposure: If outdoor storage is the only option, choose a location that provides ample shade or use a car cover that offers UV protection. Prolonged exposure to sunlight can fade the paint and damage the interior components.
- Sufficient Space: The storage location should provide enough space for your car to be parked comfortably without any risk of damage from other vehicles or objects.
Consider researching and visiting multiple storage facilities to compare features, prices, and security measures. Ask for recommendations from trusted sources or fellow car enthusiasts who have utilized storage facilities in the past.
Before leaving your car in storage, take detailed photographs of its condition. This will serve as documentation in case of any disputes or damage claims that may arise during the storage period.
By choosing a suitable storage location, you can have peace of mind knowing that your car is in a safe and protected environment.
Read more: How To Store Green Tomatoes For Months
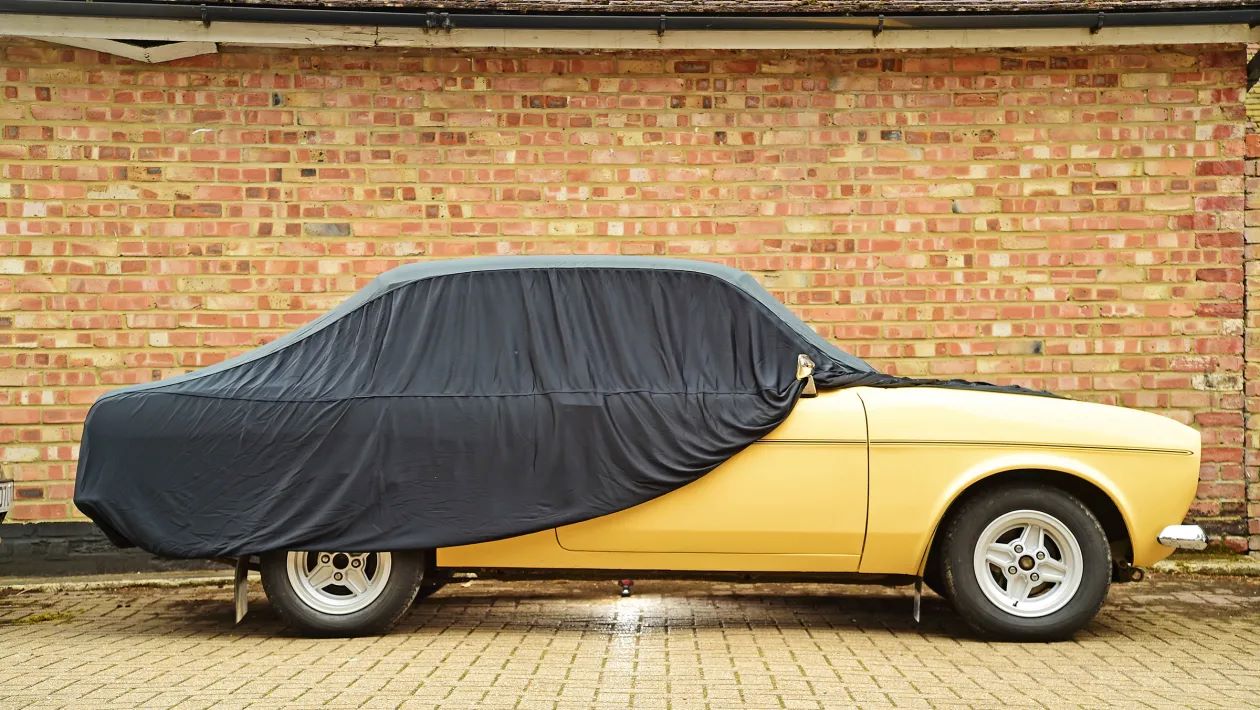
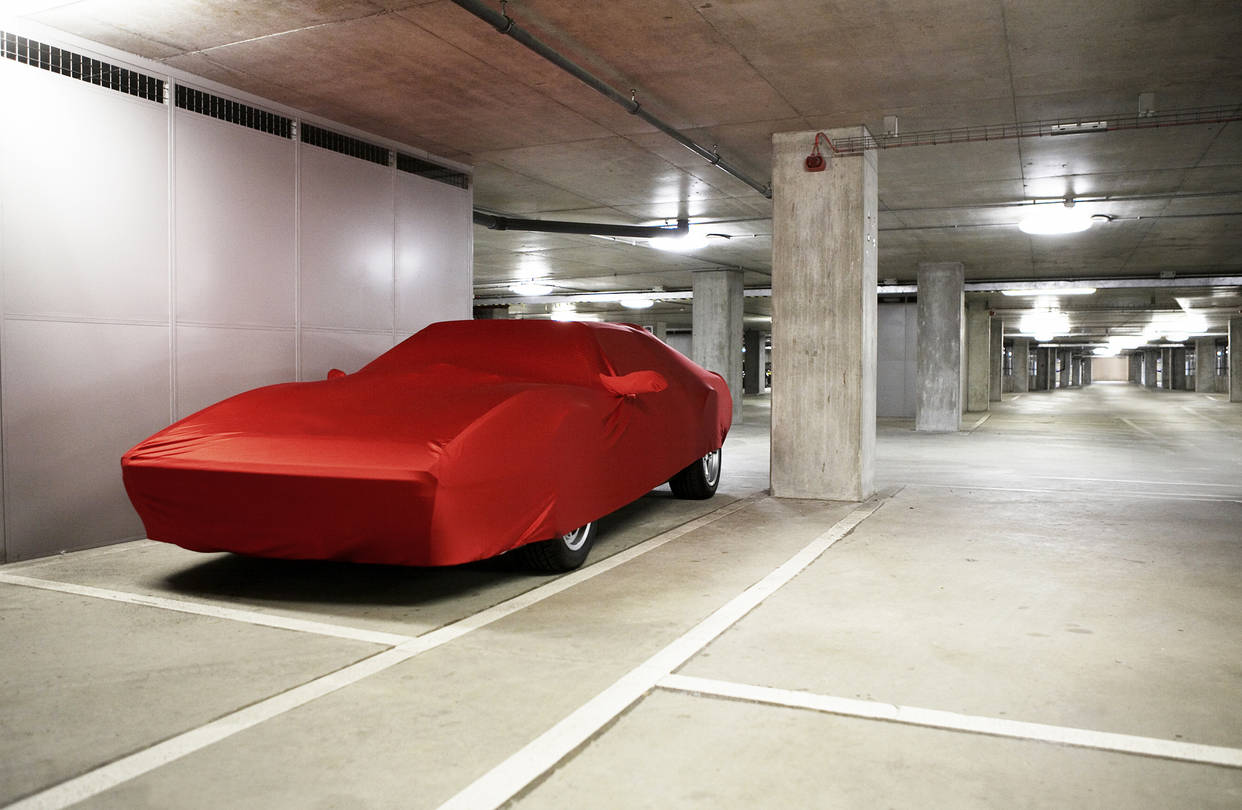
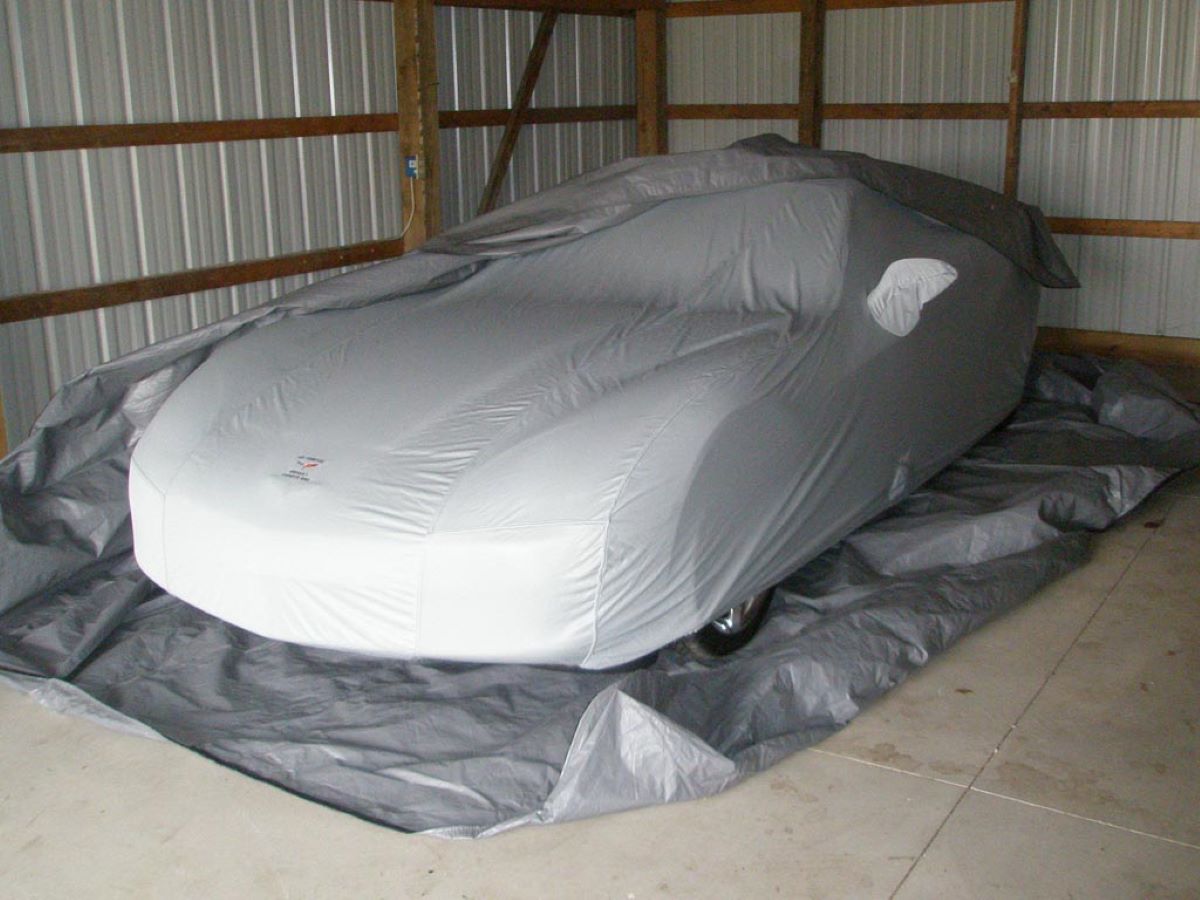
Step 9: Cover the Car
Covering your car is an important step in protecting it from dust, debris, and potential damage during storage. A car cover acts as an additional barrier against the elements and helps keep your vehicle looking its best. Here are some tips for covering your car:
- Choose a Breathable Cover: Select a car cover made from breathable materials, such as cotton or polyester blends. These covers allow air circulation, preventing moisture buildup and reducing the risk of mold or mildew formation.
- Ensure a Proper Fit: The cover should fit snugly over your car, covering all exterior surfaces. A loose or ill-fitting cover can flap in the wind and cause damage to the paintwork.
- Clean the Car Before Covering: Make sure to wash and dry your car thoroughly before covering it. Any dirt or debris left on the surface can potentially scratch the paint when the cover is applied.
- Secure the Cover: Use straps or ties to secure the cover in place, preventing it from blowing off or shifting during high winds. This will ensure that the cover provides maximum protection.
- Inspect Regularly: Check on your car periodically, especially if it’s stored for a long duration. Remove the cover and inspect for any signs of moisture, pests, or damage. Also, make sure the cover remains in good condition and repair or replace it if necessary.
It’s important to note that covering your car should only be done when the car and cover are clean and dry. Covering a dirty or wet car can trap moisture, leading to rust or paint damage.
If you’re storing your car in a garage or indoor space, ensure adequate ventilation to prevent any condensation buildup. A dehumidifier can help control moisture levels in enclosed spaces and reduce the risk of damage.
By covering your car properly, you can further safeguard it from dust, debris, and potential scratches, keeping it in excellent condition while it’s in storage.
Step 10: Regular Monitoring and Maintenance
Even though your car is in storage, it’s important to continue monitoring and maintaining it to ensure its well-being during the storage period. Here are some key steps to follow:
- Check on Your Car: Visit your car periodically to inspect its condition. Look for any signs of moisture buildup, pest infestation, or damage. Address any issues promptly to prevent further damage.
- Start the Engine: If possible and safe to do so, start the engine and let it run for a few minutes. This helps lubricate the engine components and prevents them from seizing or becoming stagnant. However, consult your owner’s manual for specific instructions, as certain cars may have different recommendations.
- Drive the Car: If feasible, take your car for a short drive once in a while. This helps maintain the mechanical components and prevents them from deteriorating due to prolonged inactivity. Driving the car also charges the battery and keeps the tires from developing flat spots.
- Maintain Battery Charge: If the battery is still connected, use a battery maintainer or charger to keep it charged. This helps prevent the battery from draining completely and ensures that it will start when you’re ready to use the car again.
- Clean and Detail: Periodically clean your car, including the exterior and interior, to maintain its appearance. Removing any dust or dirt buildup helps prevent potential damage and keeps the car looking fresh.
- Address Repairs and Maintenance: If you notice any issues or required maintenance tasks during your inspections, address them promptly. This includes repairing any leaks, replacing worn-out parts, or getting scheduled maintenance done. Taking care of these tasks during the storage period helps ensure that your car is in great shape when you’re ready to drive it again.
It’s important to follow the manufacturer’s guidelines and recommendations for both inspections and maintenance during the storage period. Additionally, consider consulting a professional mechanic for any specific concerns or questions you may have.
By regularly monitoring and maintaining your car during storage, you can prevent potential problems, ensure its proper functioning, and minimize the need for expensive repairs in the future.
Conclusion
Storing a car for an extended period requires careful preparation and attention to detail to ensure that it remains in top condition. By following the ten steps outlined in this article, you can minimize the risk of any potential issues and maintain the integrity of your vehicle.
From washing and cleaning the car to changing the oil and fluids, each step plays a crucial role in protecting the car’s exterior, interior, engine, and tires. Finding a suitable storage location, covering the car, and conducting regular monitoring and maintenance are equally important to ensure its safety and longevity during the storage period.
Remember to consult your car’s owner’s manual for any specific instructions or recommendations. Additionally, consider seeking professional advice or assistance if needed.
When the time comes to retrieve your car from storage, it’s a good idea to give it a thorough inspection and perform any necessary maintenance to ensure it’s in optimal condition before hitting the road again.
By following these steps and dedicating some time and effort to properly store your car, you can have peace of mind knowing that it will be ready for you whenever you’re ready to drive it again.
Frequently Asked Questions about How To Store A Car For 3 Months
Was this page helpful?
At Storables.com, we guarantee accurate and reliable information. Our content, validated by Expert Board Contributors, is crafted following stringent Editorial Policies. We're committed to providing you with well-researched, expert-backed insights for all your informational needs.


0 thoughts on “How To Store A Car For 3 Months”