Articles
How To Store A Menstrual Cup
Modified: January 20, 2024
Learn how to store a menstrual cup properly with these helpful articles. Find tips and advice on keeping your cup clean and hygienic.
(Many of the links in this article redirect to a specific reviewed product. Your purchase of these products through affiliate links helps to generate commission for Storables.com, at no extra cost. Learn more)
Introduction
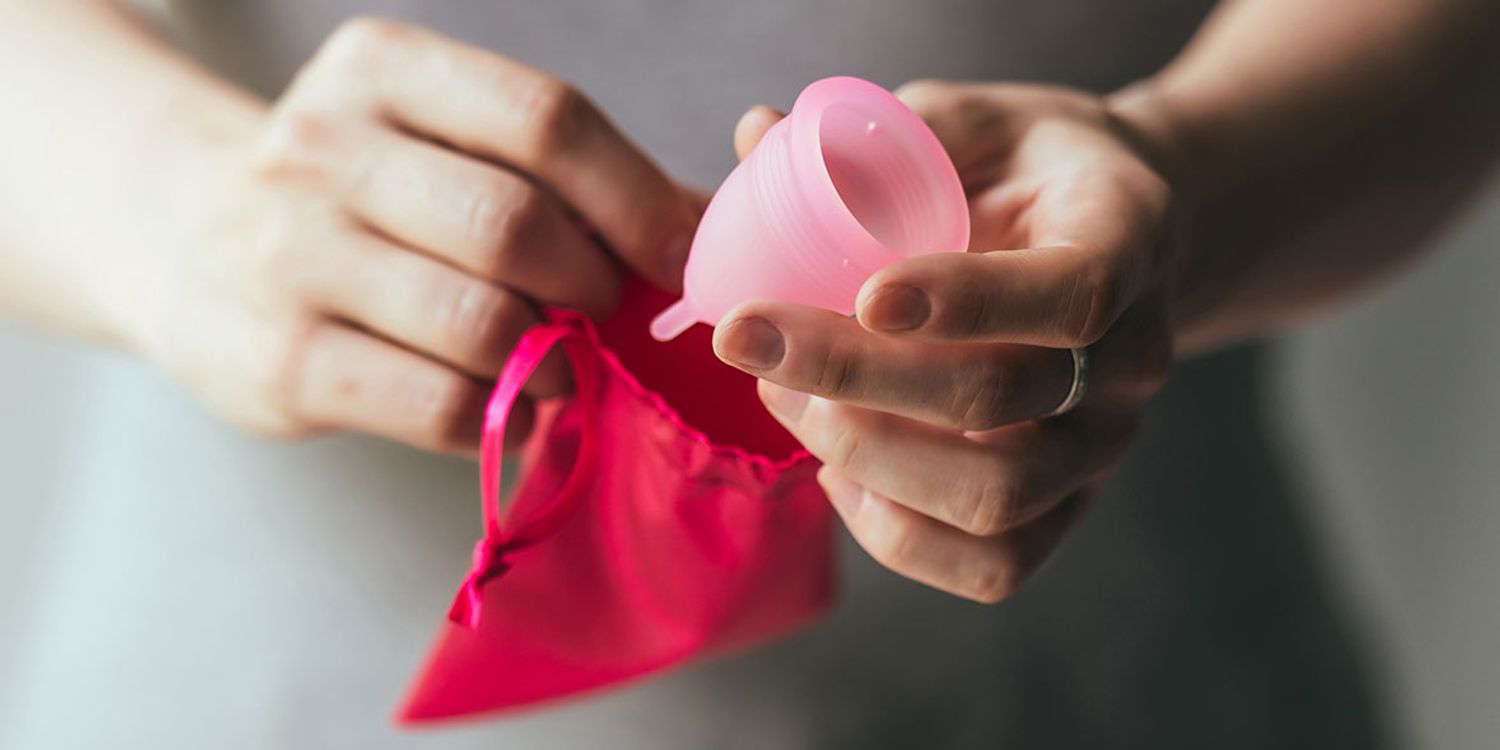
Menstrual cups have gained popularity in recent years as a sustainable and eco-friendly alternative to traditional disposable sanitary products. These silicone cups can be reused for several years, making them not only cost-effective but also highly convenient for women looking for a more sustainable menstrual care option.
However, proper storage of the menstrual cup is crucial to maintain its hygiene and longevity. In this article, we will guide you through the steps to store your menstrual cup effectively, ensuring that it remains clean and ready for use month after month.
Whether you are a seasoned menstrual cup user or are just starting out, it’s important to understand the proper cleaning and storage techniques to ensure the cup stays in good condition and remains sanitary. This will not only protect your health but also extend the lifespan of the cup.
Let’s dive into the step-by-step process of storing a menstrual cup.
Key Takeaways:
- Properly cleaning and drying your menstrual cup before storage is crucial to prevent bacterial growth and maintain hygiene, ensuring a comfortable and sustainable menstrual experience.
- Choosing the right storage option and following proper storage guidelines will help protect your menstrual cup from damage, extend its lifespan, and keep it ready for reuse month after month.
Read more: How To Clean Menstrual Cup Steamer
Step 1: Cleaning the Menstrual Cup
The first step to properly store your menstrual cup is to ensure it is thoroughly cleaned. Proper cleaning helps remove any residue or bacteria that may be present on the cup, minimizing the risk of infections or unpleasant odors.
To clean your menstrual cup, follow these simple steps:
- Wash your hands: Before handling your menstrual cup, make sure to wash your hands with mild soap and warm water. This helps prevent the transfer of bacteria to the cup.
- Empty the cup: Remove the menstrual cup from your body and empty its contents into the toilet or sink.
- Rinse with water: Rinse the cup with cold or lukewarm water to remove any remaining blood or discharge. Avoid using hot water, as it can damage the silicone material.
- Clean with mild soap: Once rinsed, wash the cup using a gentle, fragrance-free soap. Be sure to wash both the inside and outside of the cup, using your fingers or a soft brush to remove any buildup.
- Rinse again: After cleaning with soap, rinse the cup thoroughly with water to ensure all soap residues are removed. Soap residues can cause irritation or infections if left on the cup.
- Sterilize (optional): If desired, you can further sterilize your menstrual cup by boiling it in a pot of water for 5-10 minutes. This is particularly recommended before and after each menstrual cycle to ensure maximum cleanliness.
Once the cup is cleaned and sanitized, it is ready to be stored safely until its next use. Remember to always wait until the cup is completely dry before moving on to the next step.
Now that your menstrual cup is squeaky clean, let’s move on to the next step: drying the cup.
Step 2: Drying the Menstrual Cup
Properly drying the menstrual cup is essential to prevent the growth of bacteria or mold while it is in storage. Here’s what you need to do to ensure your cup dries thoroughly:
- Use a clean towel: After cleaning the cup, gently pat it dry using a clean, lint-free towel. Avoid using tissues or paper towels, as they may leave behind fibers on the cup.
- Air-dry: For optimal drying, allow the cup to air-dry completely. Place it in a clean, well-ventilated area away from direct sunlight or heat sources. This helps prevent any lingering moisture that may promote the growth of bacteria or mold.
- Avoid drying with cloth or tissues: As mentioned earlier, using cloth or tissues to dry the cup may introduce additional fibers or particles onto the cup’s surface. It is best to let it air-dry naturally.
- Optional: Use a menstrual cup dryer: If you prefer a quicker drying option or want to ensure thorough drying, you can use a menstrual cup dryer. These devices use gentle heat or air circulation to expedite the drying process. However, it’s important to follow the manufacturer’s instructions and ensure the dryer is specifically designed for menstrual cups.
By allowing your menstrual cup to air-dry completely, you minimize the risk of bacterial growth, ensuring the cup remains clean and ready for use when you need it. Now that the cup is dry, let’s move on to the next step: choosing a storage option.
Step 3: Choosing a Storage Option
Choosing the right storage option for your menstrual cup is crucial to maintain its cleanliness and protect it from damage. Here are some popular storage options to consider:
- Menstrual cup pouch: Many menstrual cup brands provide a storage pouch or case with the purchase of the cup. These small fabric pouches are designed specifically to hold and protect your cup between uses. Look for a pouch made of breathable fabric to allow air circulation and prevent moisture buildup.
- Silicone case: If you prefer a more durable and protective option, consider investing in a silicone storage case. These cases are often made of food-grade silicone and feature a secure lid or snap closure to keep your cup safe and hygienic. Silicone cases offer excellent protection from dust, dirt, and damage while allowing the cup to air out properly.
- DIY storage container: If you don’t have a specific menstrual cup storage option, you can repurpose a small container or jar with a lid. Make sure it is thoroughly cleaned and dry before using it to store your cup. Avoid using containers made of materials that may react with the cup, such as plastic or metal.
- Disinfection container: Some menstrual cup brands provide a disinfection container that doubles as a storage option. These containers are usually made of antibacterial materials and feature a lid with small holes to allow airflow. They are convenient for both sterilizing the cup and storing it between uses.
When selecting a storage option, consider the cup’s size and shape to ensure it fits properly and doesn’t get squished or deformed. Additionally, prioritize options that allow the cup to breathe and prevent unwanted odors or moisture buildup.
Now that you have chosen the ideal storage option, it’s time to move on to the next step: storing the menstrual cup properly.
After cleaning your menstrual cup, store it in a breathable cotton pouch or container to keep it clean and dry between uses. Avoid storing it in an airtight container to prevent bacteria growth.
Step 4: Storing the Menstrual Cup Properly
Proper storage of your menstrual cup is essential to maintain its cleanliness and extend its lifespan. Follow these guidelines to store your cup effectively:
- Ensure cleanliness: Before storing your cup, make sure it is clean and completely dry. Any moisture or residue left on the cup can lead to bacterial growth or unpleasant odors.
- Place in storage container: Depending on the storage option you chose, carefully place the menstrual cup inside the storage container. If using a fabric pouch or silicone case, gently fold the cup and tuck it inside to protect it from dust and debris.
- Avoid airtight containers: It is important to choose a storage option that allows air circulation, as airtight containers can trap moisture and lead to the growth of bacteria or mold. Look for options that have breathable properties or small holes to ensure proper ventilation.
- Keep away from direct sunlight: Store your menstrual cup in a cool, dry place away from direct sunlight. Prolonged exposure to sunlight or heat can damage the cup’s silicone material and degrade its quality over time.
- Keep in a clean environment: Store your cup in a clean environment to prevent contamination. Avoid placing it on dirty or dusty surfaces. It is also recommended to clean the storage container regularly to ensure it remains hygienic.
- Label the container (optional): If you have multiple menstrual cups or other personal items stored in the same area, consider labeling the storage container or pouch to easily identify the cup when needed.
By following these storage guidelines, you can ensure that your menstrual cup stays clean, dry, and protected until its next use. With the cup safely stored, let’s move on to the final step: preparing the cup for reuse.
Read more: How To Store K-Cups
Step 5: Preparing the Cup for Reuse
Once you are ready to use your menstrual cup again, it’s important to properly prepare it for reuse. Follow these steps to ensure your cup is clean, hygienic, and ready to provide you with comfortable and reliable menstrual protection:
- Wash your hands: Begin by washing your hands thoroughly with mild soap and warm water to maintain proper hygiene.
- Retrieve the cup: Take your menstrual cup out of its storage container or pouch, ensuring a clean and dust-free environment.
- Rinse with water: Rinse the cup with cold or lukewarm water to remove any dust or debris that may have settled on it during storage. Avoid using hot water, as excessive heat can damage the cup.
- Clean with mild soap: Apply a small amount of gentle, fragrance-free soap to the cup and lather it up. Clean both the inside and outside surfaces of the cup, gently scrubbing with your fingers or a soft brush to remove any residue or buildup.
- Rinse thoroughly: After cleaning with soap, rinse the cup thoroughly with water to ensure all traces of soap are removed. Soap residue left on the cup can cause irritation or discomfort when inserted.
- Sterilize (optional): If desired, you can choose to sterilize the menstrual cup by boiling it in a pot of water for 5-10 minutes. This step is particularly important before and after each menstrual cycle to ensure optimal cleanliness.
- Dry the cup: Once the cup is clean and rinsed, pat it dry using a clean, lint-free towel or allow it to air-dry completely. Make sure there is no moisture remaining on the cup before inserting it.
By following these steps, you can ensure that your menstrual cup is clean, fresh, and ready for use. Properly preparing the cup for reuse not only ensures its hygiene but also contributes to your overall comfort and confidence during your period.
Remember to empty and clean the menstrual cup regularly throughout your menstrual cycle to maintain its hygiene and effectiveness. Following the manufacturer’s instructions is also essential for proper use and care of your specific menstrual cup.
With these steps completed, you are now equipped with the knowledge to properly store and prepare your menstrual cup for a sustainable and comfortable menstrual experience.
Happy cupping!
Conclusion
Storing a menstrual cup properly is crucial for maintaining its cleanliness, hygiene, and longevity. Following the steps outlined in this article will ensure that your cup remains clean, dry, and ready for use when needed.
Remember to start by cleaning your cup thoroughly, using mild soap and water, and sterilizing it if desired. Ensure that the cup is completely dry before proceeding to the next step.
Choosing the right storage option is equally important. Whether it’s a fabric pouch, silicone case, or repurposed container, make sure it allows for proper air circulation and keeps the cup protected from dust and damage.
When storing the cup, keep it in a clean environment away from direct sunlight or heat sources. Labeling the storage container can also help you identify the cup easily, especially if you have multiple menstrual cups or other personal items stored together.
When it’s time to reuse the cup, take the necessary steps to prepare it properly. Wash your hands, rinse the cup, clean it with mild soap, and rinse it again to ensure it’s free from any residues or irritants. You can choose to sterilize the cup before use for maximum cleanliness.
By following these steps and giving proper attention to cleaning, drying, and storing your menstrual cup, you’ll not only maintain its hygiene but also extend its lifespan, making it an economical and eco-friendly choice in the long run.
So, embrace the convenience and sustainability of menstrual cups and enjoy a comfortable period experience each month. Remember, the more care you put into storing your cup, the more it will take care of you.
Frequently Asked Questions about How To Store A Menstrual Cup
Was this page helpful?
At Storables.com, we guarantee accurate and reliable information. Our content, validated by Expert Board Contributors, is crafted following stringent Editorial Policies. We're committed to providing you with well-researched, expert-backed insights for all your informational needs.


0 thoughts on “How To Store A Menstrual Cup”