
Articles
How To Store Menstrual Cup
Modified: January 20, 2024
Learn how to store your menstrual cup properly with these helpful articles. Find tips and techniques to keep your cup clean and hygienic.
(Many of the links in this article redirect to a specific reviewed product. Your purchase of these products through affiliate links helps to generate commission for Storables.com, at no extra cost. Learn more)
Introduction:
Welcome to the comprehensive guide on how to store a menstrual cup!
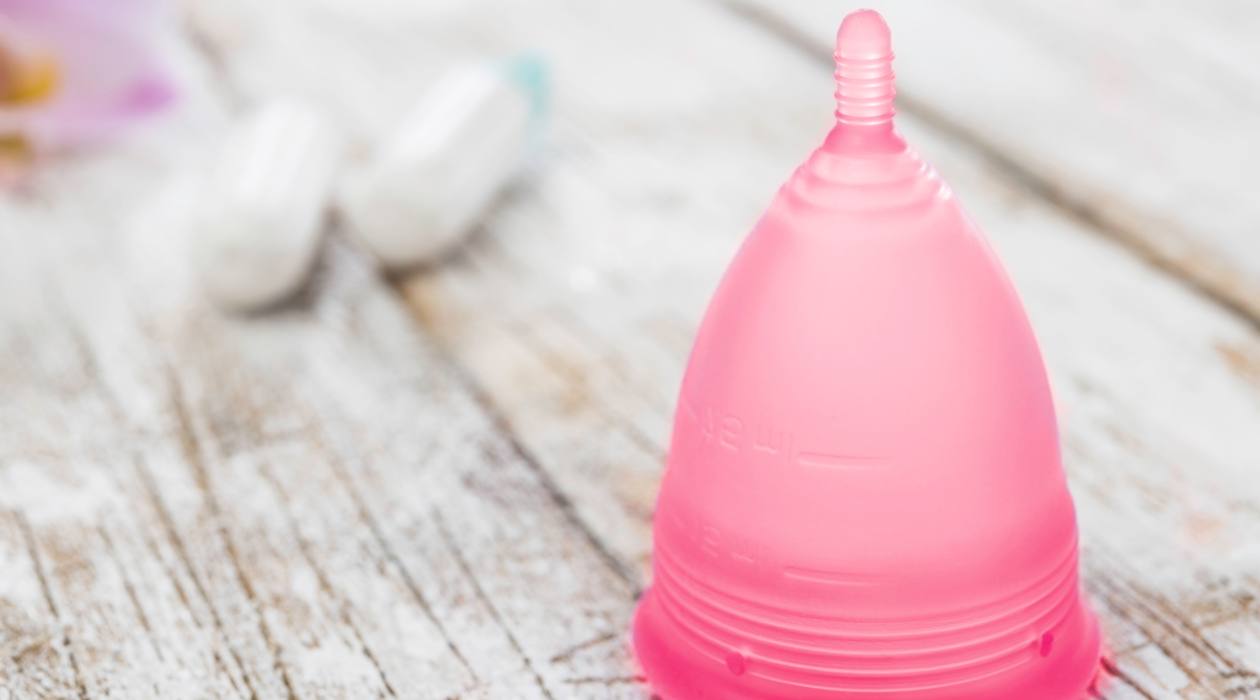
Menstrual cups have become increasingly popular as an eco-friendly and cost-effective alternative to traditional sanitary products. These reusable silicone cups are not only convenient but also promote sustainability by reducing waste. However, to ensure their longevity and hygiene, proper storage is essential.
In this article, we will walk you through the step-by-step process of storing your menstrual cup correctly. From sterilization to choosing the right storage container and maintaining a clean environment, we’ve got you covered. So, let’s dive in!
Key Takeaways:
- Properly storing your menstrual cup is crucial for maintaining hygiene and longevity. Follow the steps to sterilize, dry, and store it in a clean, dry environment to ensure its effectiveness and your well-being.
- Regularly inspect and replace your menstrual cup when needed to prioritize your health and safety. Proper storage and care contribute to a sustainable and eco-friendly period routine, ensuring a reliable and hygienic menstrual product for years to come.
Read more: How To Store A Menstrual Cup
Step 1: Sterilizing the Menstrual Cup
Before storing your menstrual cup, it is crucial to ensure that it is properly sterilized. This step is essential to maintain proper hygiene and prevent the growth of bacteria or other harmful microorganisms.
To sterilize your menstrual cup, follow these simple steps:
- Wash your hands thoroughly with soap and water before handling the cup. This will help prevent any potential contamination.
- Fill a clean pot with water and bring it to a boil.
- After the water has reached a boiling point, carefully place the menstrual cup in the pot. Make sure that the cup is fully submerged in the water.
- Let the cup boil for approximately 5-10 minutes. This will effectively kill any bacteria or germs present on the cup.
- Once the sterilization process is complete, carefully remove the cup from the pot using clean tongs or a utensil.
It is important to note that certain menstrual cup brands may have specific sterilization guidelines. Always refer to the manufacturer’s instructions for the recommended sterilization method.
After the cup has been sterilized, move on to the next step: drying the menstrual cup.
Step 2: Drying the Menstrual Cup
Once you have sterilized your menstrual cup, the next step is to ensure that it is thoroughly dried before storage. Proper drying will help prevent the growth of mold or mildew and maintain the cup’s cleanliness.
Follow these steps to dry your menstrual cup:
- After removing the cup from the boiling water, gently shake off any excess water. Be cautious as the cup may still be hot.
- Place the cup on a clean towel or paper towel to air dry. Avoid using cloth towels as they may leave behind lint or fibers.
- Ensure that the cup is completely dry before proceeding to the next step. This may take anywhere from a few minutes to a couple of hours, depending on the surrounding humidity.
- Once the cup is dry, visually inspect it to ensure there are no traces of moisture. Moisture can lead to the growth of bacteria or mold, compromising the cup’s hygiene.
Remember, proper drying is crucial for maintaining the integrity of the cup and prolonging its lifespan. Take the time to ensure that the cup is dried thoroughly before moving on to the next step: choosing the storage container.
Step 3: Choosing the Storage Container
When it comes to storing your menstrual cup, selecting the right storage container is key. The container should provide adequate protection from dust, dirt, and other external contaminants while keeping the cup safe and secure.
Consider the following factors when choosing a storage container:
- Material: Opt for a container made of a non-porous material such as silicone or glass. These materials are easy to clean and do not trap moisture, preventing the growth of bacteria.
- Size and Shape: Choose a container that can comfortably accommodate your menstrual cup. Avoid containers that are too small or tight, as they can deform the cup’s shape and compromise its effectiveness.
- Cover or Lid: Look for a container with a securely fitting cover or lid. This will ensure that the cup remains protected from dust, dirt, and potential damage.
- Privacy: If you prefer to maintain privacy, consider a container that is discreet and opaque, preventing others from inadvertently seeing the cup.
- Travel-Friendly: If you plan to carry your menstrual cup while traveling, choose a container that is compact and easy to pack.
- Separate Compartments: Some containers come with separate compartments, allowing you to store additional items such as wipes or sterilization tablets.
It’s worth noting that some menstrual cup brands provide storage containers as part of their product packaging. These containers are specifically designed to fit the cup perfectly and are a convenient option.
Once you have chosen the ideal storage container, move on to the next step: keeping the menstrual cup in a clean environment.
Step 4: Keeping the Menstrual Cup in a Clean Environment
Properly storing your menstrual cup in a clean environment is essential to maintain its hygiene and prevent contamination. Here are some tips to help you keep your cup in a clean and sanitary condition:
- Wash your hands: Always wash your hands thoroughly with soap and water before handling your menstrual cup. This will help prevent the transfer of any bacteria or dirt onto the cup.
- Clean storage container: Ensure that the storage container is clean before placing the cup inside. Wash the container with mild soap and water, rinse thoroughly, and allow it to dry before use.
- Avoid exposure to moisture: Store the menstrual cup in a dry environment. Moisture can promote the growth of bacteria or mold, which can compromise the cup’s hygiene. Avoid storing the cup in bathrooms or areas prone to high humidity.
- No contact with other items: Do not store your menstrual cup directly with other items, especially those that may contain chemicals or strong odors. This can lead to the cup absorbing unwanted substances or odors.
- Keep away from pets and children: Store your menstrual cup out of reach of pets and children to prevent any potential contamination or accidents.
- Frequent cleaning: Regularly clean the storage container with mild soap and water to maintain its cleanliness. If using a fabric storage pouch, wash it periodically as well.
- Avoid contact with harsh chemicals: Avoid storing the cup near substances such as perfumes, oils, or cleaning products that may contain harsh chemicals. These can potentially damage the cup or affect its integrity.
By following these guidelines, you can ensure that your menstrual cup remains in a clean and sanitary environment, ready for use when needed. In the next step, we will discuss the importance of storing the cup in a dry place.
After cleaning, store your menstrual cup in a breathable pouch or container to prevent moisture buildup and allow for air circulation. Avoid storing it in an airtight container to prevent mold growth.
Read more: How To Clean Menstrual Cup Steamer
Step 5: Storing the Menstrual Cup in a Dry Place
Properly storing your menstrual cup in a dry place is crucial for maintaining its cleanliness and longevity. Moisture can promote the growth of bacteria or mold, compromising the cup’s hygiene and effectiveness. Follow these guidelines to store your menstrual cup in a dry environment:
- Choose a dry location: Find a cool and dry spot to store your menstrual cup. Avoid areas with high humidity, such as bathrooms, as they can introduce moisture to the cup.
- Avoid direct sunlight: Direct sunlight can cause discoloration or damage to the cup over time. Store the cup in a place away from direct sunlight or strong sources of heat.
- Allow for proper airflow: Ensure that the storage container or pouch allows for adequate airflow. This helps in preventing moisture buildup and allows the cup to stay dry.
- Keep away from liquids: It is important to keep your menstrual cup away from liquids such as water or cleaning solutions. Even if the cup is dry, exposure to liquids can increase the risk of contamination and compromise hygiene.
- Consider a breathable pouch: If you are using a fabric pouch or bag to store your cup, opt for a breathable material such as cotton. This allows for better air circulation and helps in keeping the cup dry.
- Regular inspections: Check the storage area periodically to ensure that it remains dry and free from any moisture. If you notice any signs of dampness, consider moving the cup to a different location.
By following these guidelines, you can ensure that your menstrual cup remains in a dry environment, free from moisture-related issues. Next, we will discuss the importance of handling the menstrual cup with care when storing it.
Step 6: Handling the Menstrual Cup with Care
Handling your menstrual cup with care is essential to maintain its shape, durability, and effectiveness. Mishandling or improper storage can lead to damage or deformities, compromising its functionality. Follow these tips to handle your menstrual cup with care when storing it:
- Avoid excessive squeezing or squeezing: When handling the cup, avoid squeezing it too tightly or roughly. Excessive force can lead to deformation or damage to the cup’s shape. Gently handle the cup with clean hands.
- Do not use sharp or abrasive objects: Avoid using sharp objects such as pins or scissors to handle or remove the cup from its storage container. These can cause punctures or tears in the cup. Instead, use clean fingers or specialized removal tools if provided by the cup manufacturer.
- Keep away from pets: Ensure that your menstrual cup is stored in an area where pets cannot access it. Pets may mistake the cup for a toy or chew on it, leading to damage or contamination.
- Avoid exposure to extreme temperatures: Extreme temperatures can impact the integrity of the cup. Avoid storing the cup in locations with extreme heat or cold, as this can cause the cup to become too soft or brittle.
- Check for any deformities: Before storing the cup, inspect it for any deformities, cracks, or damage. If you notice any issues, contact the cup manufacturer for guidance on whether it is safe to continue using the cup or if a replacement is needed.
By treating your menstrual cup with care and being mindful of how you handle it, you can ensure its longevity and effectiveness. Next, we will discuss the importance of regularly inspecting the menstrual cup during storage.
Step 7: Regularly Inspecting the Menstrual Cup
Regularly inspecting your menstrual cup while it is in storage is an important step to ensure its hygiene and functionality. By checking the cup periodically, you can identify any signs of wear, damage, or discoloration, allowing you to take appropriate action. Follow these guidelines for inspecting your menstrual cup:
- Visual inspection: Visually examine the cup for any discoloration, stains, or changes in texture. These can be signs of deterioration or contamination.
- Feel for irregularities: Run your fingers over the cup’s surface, feeling for any irregularities such as cracks, tears, or abnormalities. If you notice anything unusual, it may indicate that the cup needs to be replaced.
- Check the suction holes: Make sure the suction holes on the cup are clear and free from blockage. Use a soft brush or toothpick to gently clean any debris that may have accumulated in the holes.
- Inspect the stem or grip rings: If your menstrual cup has a stem or grip rings, check them for any signs of wear or damage. These parts can wear out over time and may need to be replaced to maintain the cup’s functionality.
- Smell test: Give the cup a sniff to ensure there are no unusual or foul smells. Any persistent odors may indicate improper cleaning or contamination.
If you notice any issues or concerns during the inspection, it is advisable to contact the manufacturer for guidance. They can provide assistance in determining whether the cup is still safe to use or if a replacement is necessary.
Regular inspections ensure that your menstrual cup remains in good condition and safe for use. Finally, let’s discuss the importance of replacing your menstrual cup when needed.
Step 8: Replacing the Menstrual Cup if Needed
Replacing your menstrual cup when needed is vital for your health and safety. While menstrual cups are designed to be durable and long-lasting, they do have a lifespan. Over time, the cup may experience wear and tear, compromising its effectiveness and hygiene. Here are some indications that it may be time to replace your menstrual cup:
- Visible signs of deterioration: If your cup shows visible signs of wear, such as cracks, tears, or significant discoloration, it is a clear indication that it needs to be replaced. These issues can impact the cup’s functionality and increase the risk of leakage or contamination.
- Changes in shape or size: Menstrual cups are designed to maintain their shape and size. If you notice any significant changes, such as distortion or deformation, it is best to replace the cup. Altered shape or size can affect the cup’s comfort and effectiveness.
- Persistent odor or stains: If you notice that your cup has a persistent odor or stains that cannot be removed with regular cleaning, it may be a sign of contamination or degradation. In such cases, it is advisable to replace the cup to maintain proper hygiene.
- Exceeded manufacturer’s recommended lifespan: Each menstrual cup brand has its recommended lifespan, usually stated by the manufacturer. If you have been using your cup beyond the recommended timeframe, it is a good idea to replace it. Continued use beyond the recommended lifespan can compromise the cup’s integrity.
- Hygiene concerns: If your cup has been exposed to unsanitary conditions or mishandling that cannot be rectified through cleaning, it is essential to err on the side of caution and replace the cup to maintain proper hygiene.
Remember, using a deteriorated or compromised menstrual cup can increase the risk of leaks, discomfort, and potential infections. It is always better to prioritize your health and replace the cup when necessary.
Congratulations! You have now learned how to properly store your menstrual cup. By following these steps, you can ensure the cleanliness and longevity of your cup. Happy menstruating!
Read more: How To Store Cups
Conclusion:
Storing your menstrual cup properly is essential for maintaining its cleanliness, hygiene, and effectiveness. By following the steps outlined in this comprehensive guide, you can ensure that your cup remains in optimal condition and ready for use whenever you need it. Here is a recap of the steps:
- Sterilize the menstrual cup by boiling it in water for 5-10 minutes.
- Thoroughly dry the cup before storage to prevent mold or mildew growth.
- Choose a suitable storage container made of non-porous material.
- Maintain a clean environment for the cup by washing hands before handling and keeping it away from potential contaminants.
- Store the cup in a dry place, avoiding exposure to moisture and direct sunlight.
- Handle the cup with care, avoiding excessive squeezing or contact with sharp objects.
- Regularly inspect the cup for any signs of wear, damage, or odor, and clean it as necessary.
- Replace the cup if you notice any deterioration, changes in shape, persistent odor, or it has exceeded the recommended lifespan.
By following these guidelines, you can ensure the longevity and functionality of your menstrual cup, while also maintaining your personal hygiene and well-being.
Remember, proper storage and care not only prolong the life of your menstrual cup but also contribute to a more sustainable and eco-friendly period routine. Investing a little time and effort into storing your cup correctly will pay off in the long run, ensuring that you have a reliable and hygienic menstrual product for years to come.
So, go ahead and store your menstrual cup with confidence, knowing you are taking the necessary steps to maintain its cleanliness and performance. Enjoy the convenience, comfort, and sustainability that a menstrual cup can provide!
Frequently Asked Questions about How To Store Menstrual Cup
Was this page helpful?
At Storables.com, we guarantee accurate and reliable information. Our content, validated by Expert Board Contributors, is crafted following stringent Editorial Policies. We're committed to providing you with well-researched, expert-backed insights for all your informational needs.



0 thoughts on “How To Store Menstrual Cup”