Home>Articles>How To Store All Files In One Folder Using Zoom H6
Articles
How To Store All Files In One Folder Using Zoom H6
Modified: December 7, 2023
Learn how to store all your articles in one convenient folder with the Zoom H6. Say goodbye to scattered files and enjoy easy organization.
(Many of the links in this article redirect to a specific reviewed product. Your purchase of these products through affiliate links helps to generate commission for Storables.com, at no extra cost. Learn more)
Introduction
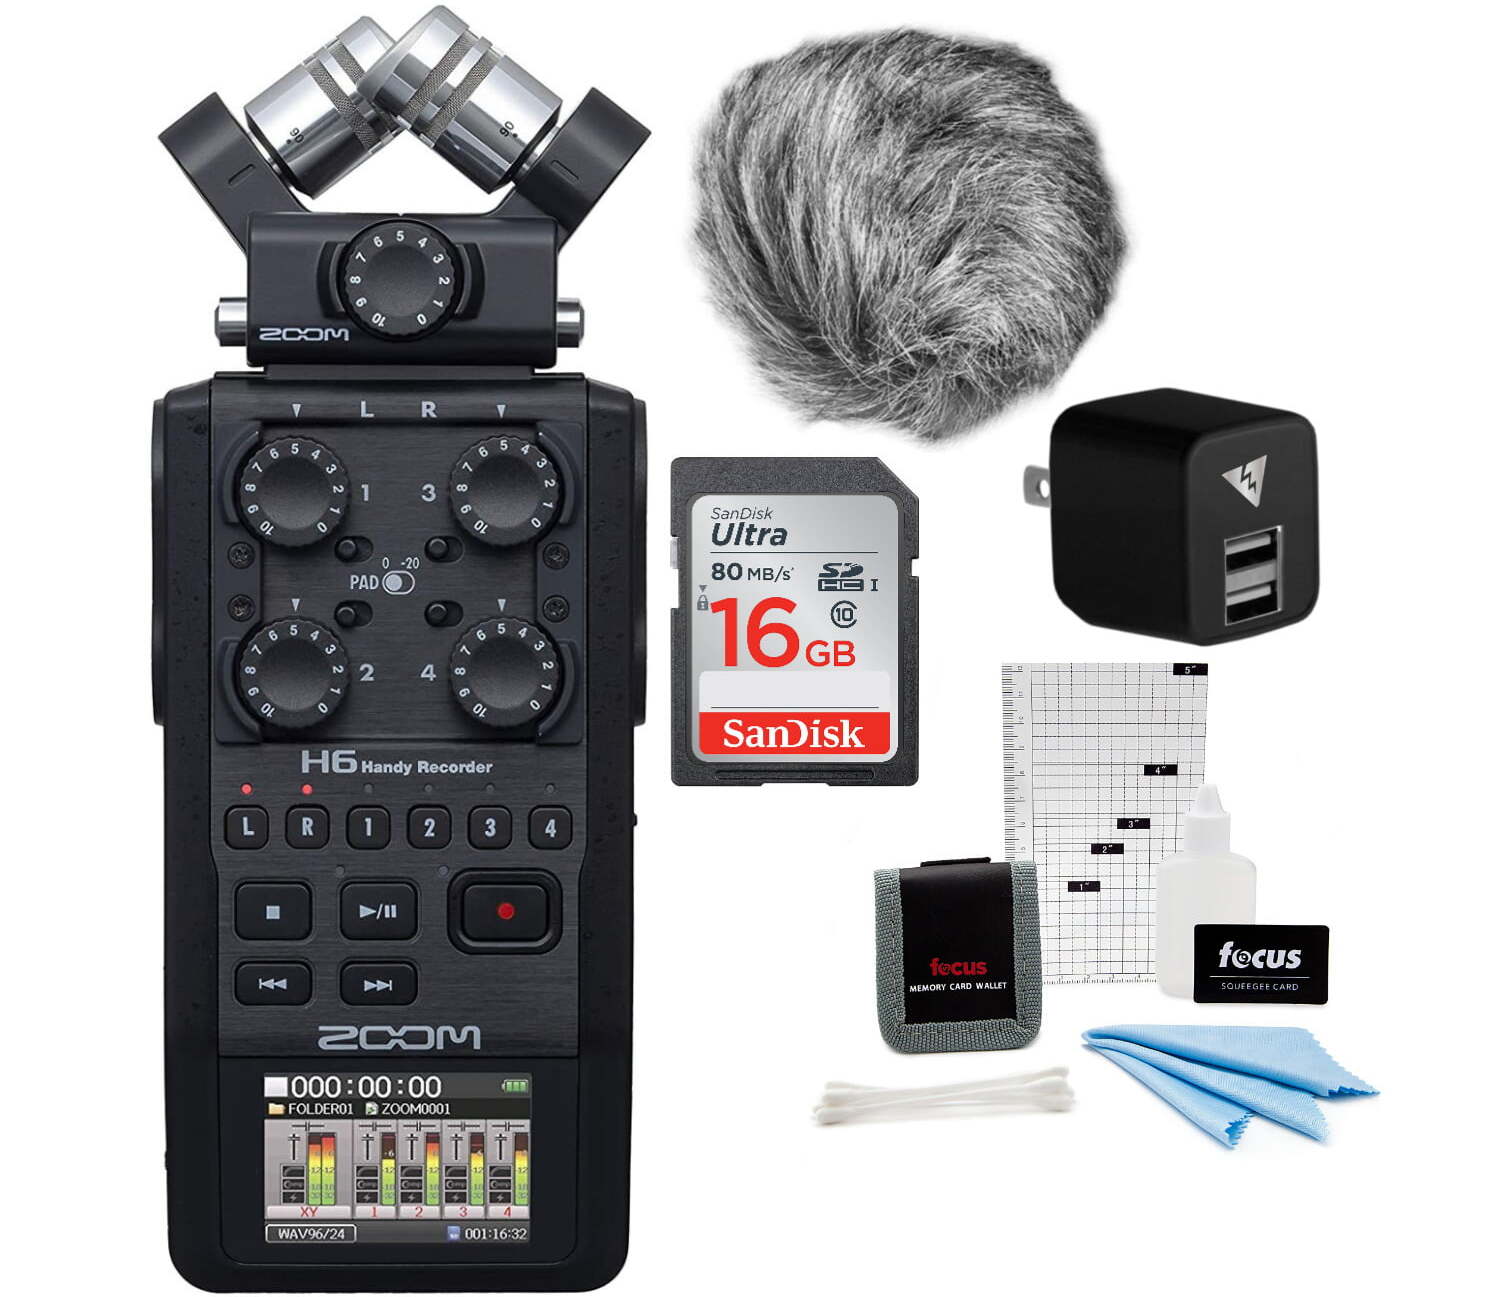
Welcome to the world of the Zoom H6, a revolutionary portable audio recorder that offers professional-grade sound quality and incredible versatility. Whether you are a musician, podcaster, journalist, or filmmaker, the Zoom H6 is your go-to tool for capturing pristine audio in any situation. One of the many features that sets the Zoom H6 apart from other recorders is its ability to store all files in one folder, making it easy to organize and manage your recordings.
In this article, we will walk you through the step-by-step process of storing all your files in one folder on the Zoom H6. By following these instructions, you will be able to keep your recordings organized and easily accessible, saving you time and eliminating the hassle of searching through multiple folders.
So, if you’re ready to optimize your Zoom H6 experience and streamline your workflow, let’s dive in and learn how to store all your files in one folder!
Key Takeaways:
- Streamline your Zoom H6 experience by storing all files in one folder, saving time and hassle when managing recordings. Follow the step-by-step guide to optimize organization and accessibility.
- Take advantage of the Zoom H6’s ability to store all recordings in a single, easily accessible folder. Simplify your workflow and focus on your creative pursuits with this efficient organizational feature.
Step 1: Access the Zoom H6 Menu
The first step in storing all your files in one folder on the Zoom H6 is to access the device’s menu. To do this, power on the Zoom H6 and navigate to the home screen by pressing the MENU button located on the front panel of the recorder.
Once you are in the menu, you will see various options displayed on the screen. Use the scroll wheel or the arrow buttons to navigate through the menu and locate the “Recording” option. Press the REC button to enter the Recording menu.
Within the Recording menu, there will be several sub-menus available. Look for the “File Type” or “Recording Format” option, as this is where you will be able to select the format in which your files will be saved.
With the “File Type” or “Recording Format” option highlighted, press the REC button again to access the format settings. This will allow you to choose between different audio recording formats, such as WAV or MP3. Select the format that best suits your needs by using the scroll wheel or the arrow buttons, and press the REC button to confirm your selection.
Now that you have accessed the Zoom H6 menu and chosen your desired recording format, you are ready to move on to the next step in storing all your files in one folder.
Step 2: Select the Recording Format
After accessing the Zoom H6 menu, the next step in storing all your files in one folder is to select the recording format. The recording format determines the file type and quality of your audio recordings.
In the Recording menu, navigate to the “File Type” or “Recording Format” option. Press the REC button to enter the format settings.
Zoom H6 offers various recording formats, such as WAV, MP3, and others. Each format has its own advantages and considerations:
- WAV: WAV is a lossless audio format that provides high-quality sound reproduction. It is the preferred format for professional use where audio fidelity is crucial. Keep in mind that WAV files are large in size and can consume more storage space.
- MP3: MP3 is a compressed audio format that offers smaller file sizes while maintaining reasonable audio quality. MP3 files are suitable for storing recordings where file size is a concern, such as podcasts or voice memos.
Select the recording format that best matches your requirements by using the scroll wheel or arrow buttons. Once you have made your selection, press the REC button to confirm.
It’s important to choose the recording format that suits your needs and the intended purpose of your recordings. If audio quality is critical, go for a lossless format like WAV. However, if file size is a concern, opt for a compressed format like MP3.
With the recording format selected, you can now proceed to the next step in storing all your files in one folder on the Zoom H6.
Step 3: Choose the Storage Location
Once you have selected the recording format, the next step in storing all your files in one folder on the Zoom H6 is to choose the storage location. The storage location determines where your recordings will be saved on the device.
In the Recording menu, navigate to the “Storage Location” option. Press the REC button to access the storage settings.
Zoom H6 offers two storage locations:
- Internal Memory: The internal memory is the built-in storage of the Zoom H6. It provides a certain amount of space where your recordings can be stored. The available amount of internal memory varies depending on the model of the Zoom H6.
- SD Card: The Zoom H6 has a slot for an SD card, allowing you to expand the storage capacity. By inserting an SD card into the device, you can save your recordings directly to the card.
Choose the storage location that suits your needs by using the scroll wheel or arrow buttons. If you want to store all your files in one folder, it’s recommended to use the internal memory. This way, you can keep all your recordings organized and easily accessible.
However, if you anticipate a large volume of recordings or require additional storage, using an SD card is an excellent option. Just make sure to keep track of the files you save on the card to maintain organization.
Once you have made your selection, press the REC button to confirm your choice.
With the storage location chosen, you are now ready to proceed to the next step in storing all your files in one folder on the Zoom H6.
Step 4: Create a New Folder
Now that you have chosen the storage location, it’s time to create a new folder where all your files will be stored. Creating a dedicated folder will help you keep your recordings organized and easily accessible.
Navigate to the “New Folder” option in the Recording menu of the Zoom H6. Press the REC button to enter the folder creation settings.
Once you are in the folder creation settings, you will be prompted to enter a name for the new folder. Use the scroll wheel or arrow buttons to select letters and characters, and press the REC button to confirm each selection. Continue this process until you have entered the desired name for your folder.
When choosing a name for your folder, it’s a good idea to use descriptive and meaningful terms. For example, if you are recording interviews, you could name the folder “Interviews.” This will make it easier to locate and manage your recordings in the future.
After entering the folder name, press the REC button to create the new folder. The Zoom H6 will confirm the creation and return you to the Recording menu.
Congratulations! You have successfully created a new folder to store all your files on the Zoom H6. Now it’s time to set this new folder as the default location.
Proceed to the next step to learn how to set the new folder as the default storage location on your Zoom H6.
When using the Zoom H6, it’s best to store all files in one folder to keep them organized and easily accessible. This will help you locate and manage your recordings more efficiently.
Step 5: Set the New Folder as Default
Setting the new folder as the default storage location on your Zoom H6 ensures that all your recordings will be automatically saved to this folder. This step is crucial to keeping your files organized and easily accessible.
In the Recording menu, navigate to the “Default Folder” or “Storage Folder” option. Press the REC button to access the default folder settings.
Within the default folder settings, you will see a list of available folders. Scroll through the list using the scroll wheel or arrow buttons until you locate the folder you created in the previous step.
Select the folder by pressing the REC button. A checkmark or indicator will appear next to the chosen folder, indicating that it has been set as the default storage location.
By setting the new folder as the default, any new recordings you make on the Zoom H6 will automatically be saved in this folder. This eliminates the need to manually navigate to the folder each time you make a recording, saving you time and effort.
Once you have selected the folder and set it as the default storage location, press the REC button to confirm your choice.
Great job! You have successfully set the new folder as the default storage location on your Zoom H6. Now all your recordings will be saved directly to this folder without any additional steps required.
Proceed to the next step to learn how to save all your files in the new folder on the Zoom H6.
Step 6: Save All Files in the New Folder
Now that you have set the new folder as the default storage location on your Zoom H6, it’s time to save all your files directly into this folder. This step ensures that all your recordings are organized and easily accessible in one place.
When you start recording on the Zoom H6, the device will automatically save the files into the default folder that you have previously set.
Once you have completed your recording, navigate back to the home screen by pressing the MENU button.
In the home screen, you will see the recorded files listed. Use the scroll wheel or arrow buttons to navigate through the files.
Locate the file or files that you want to save in the new folder.
Highlight the file by selecting it with the scroll wheel or arrow buttons. Press the REC button to enter the options menu for the selected file.
Within the options menu, you will see different actions you can perform with the file, such as renaming, deleting, or moving it.
Select the “Move” or “Copy” option from the menu. This will allow you to move or copy the file into the new folder.
In the subsequent menu, navigate to the new folder you created earlier by using the scroll wheel or arrow buttons. Once you have reached the new folder, press the REC button to confirm the move or copy action.
The Zoom H6 will then move or copy the selected file into the new folder, saving it alongside any other recordings you have previously made.
Repeat this process for any additional files you wish to save in the new folder.
Congratulations! You have successfully saved all your files directly into the new folder on the Zoom H6. Now all your recordings will be organized and easily accessible in one place.
Proceed to the next step to review and confirm your settings on the Zoom H6.
Step 7: Review and Confirm
After completing all the previous steps to store all your files in one folder on the Zoom H6, it’s important to review and confirm your settings to ensure everything is correctly set up.
Start by navigating back to the home screen of the Zoom H6 by pressing the MENU button.
Take a moment to verify the following:
- Confirm that you have selected your desired recording format. Check that it aligns with your needs and the intended purpose of your recordings.
- Verify that you have chosen the correct storage location. Make sure you have selected either the internal memory or the inserted SD card.
- Ensure that the new folder you created has been set as the default storage location. Check that it is correctly listed and highlighted as the default folder.
- Double-check that you have successfully moved or copied all your files into the new folder. Confirm that they are saved in the designated location.
If everything appears to be in order, congratulations! You have successfully stored all your files in one folder on the Zoom H6.
If you notice any discrepancies or need to make changes, navigate to the respective settings in the Zoom H6 menu and adjust as necessary. It’s always a good idea to review and confirm your settings to ensure that your recordings are being saved properly.
By following these steps, you have optimized your Zoom H6 experience and have created an organized system to manage your recordings efficiently. This will save you time and make it easier to locate and access your files in the future.
Enjoy your recording journey with the Zoom H6 and make the most out of its exceptional capabilities!
With this, we conclude the step-by-step process of storing all your files in one folder on the Zoom H6. Happy recording!
Conclusion
Storing all your files in one folder on the Zoom H6 is a simple yet effective way to keep your recordings organized and easily accessible. By following the steps outlined in this article, you have learned how to set up the Zoom H6 to save all your files in one dedicated folder.
Remember, the process begins by accessing the Zoom H6 menu and selecting the desired recording format. Then, you choose the storage location, whether it is the internal memory or an inserted SD card. Next, you create a new folder with a descriptive name to store all your recordings.
After creating the new folder, you set it as the default storage location to ensure that all future recordings are saved directly into it. Finally, you review and confirm your settings to verify that everything is correctly set up.
By organizing your recordings in one folder, you can easily locate and manage your files. This saves valuable time and eliminates the need to search through multiple folders or locations when accessing your recordings.
Whether you are a musician, podcaster, journalist, or filmmaker, the Zoom H6 provides a powerful and versatile recording solution. Its ability to store all files in one folder adds an extra level of convenience and efficiency to your workflow.
So, start implementing these steps and make the most out of your Zoom H6. Enjoy the seamless organization and accessibility of your recordings, allowing you to focus on your creative endeavors.
Thank you for joining us on this journey to store all files in one folder on the Zoom H6. Happy recording!
Frequently Asked Questions about How To Store All Files In One Folder Using Zoom H6
Was this page helpful?
At Storables.com, we guarantee accurate and reliable information. Our content, validated by Expert Board Contributors, is crafted following stringent Editorial Policies. We're committed to providing you with well-researched, expert-backed insights for all your informational needs.


0 thoughts on “How To Store All Files In One Folder Using Zoom H6”