Articles
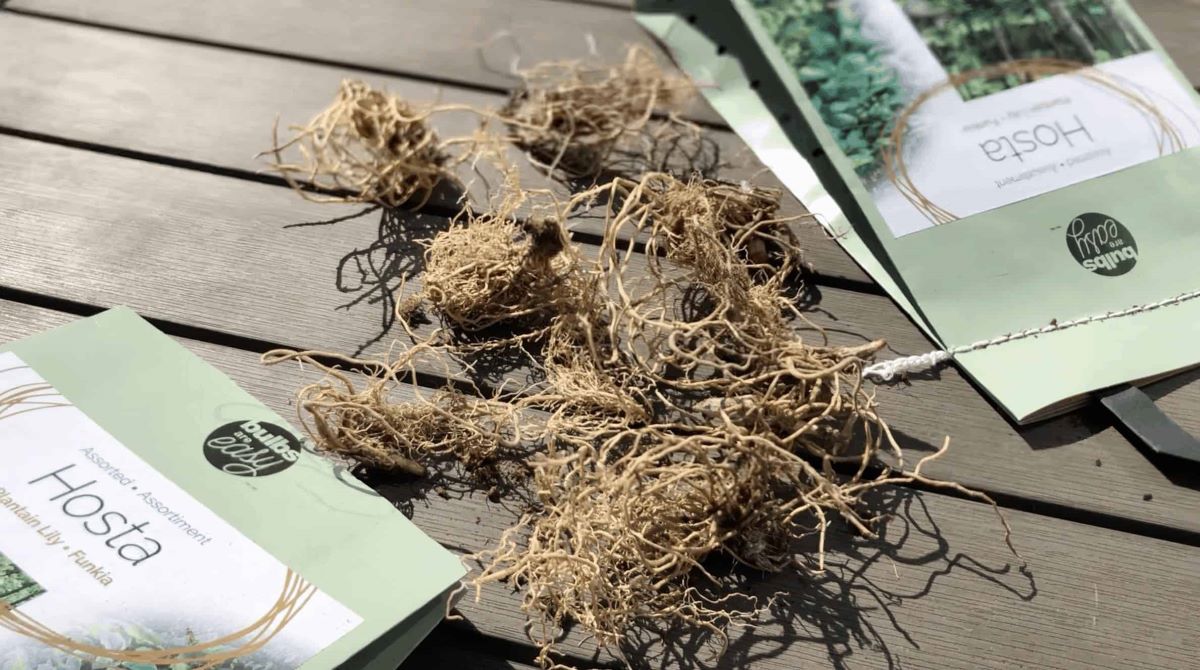
How To Store Bare Root Hostas
Modified: May 6, 2024
Learn how to properly store bare root hostas with these informative articles.
(Many of the links in this article redirect to a specific reviewed product. Your purchase of these products through affiliate links helps to generate commission for Storables.com, at no extra cost. Learn more)
Introduction
Hostas are a popular choice for gardens due to their beautiful foliage and low maintenance requirements. However, there may be times when you need to store your hostas temporarily, such as during the winter months or when you’re moving to a new location. In such situations, storing bare root hostas can be a practical solution to keep your plants healthy and ready for replanting.
In this article, we will explore the importance of storing bare root hostas, when and how to store them, and essential tips for ensuring successful storage and replanting. So, if you want to preserve your hostas and have them thriving in your garden year after year, keep reading to discover the best practices for storing bare root hostas.
Key Takeaways:
- Protect your hostas from harsh weather and facilitate easy transplantation by storing bare root hostas in a cool, dry, and well-ventilated environment. Proper preparation and monitoring ensure successful replanting and continued growth.
- Timing is crucial when storing hostas, and proper preparation, packaging, and storage conditions are essential for maintaining the health and vitality of your bare root hostas. Regular monitoring and attention to detail lead to successful replanting and flourishing plants in your garden.
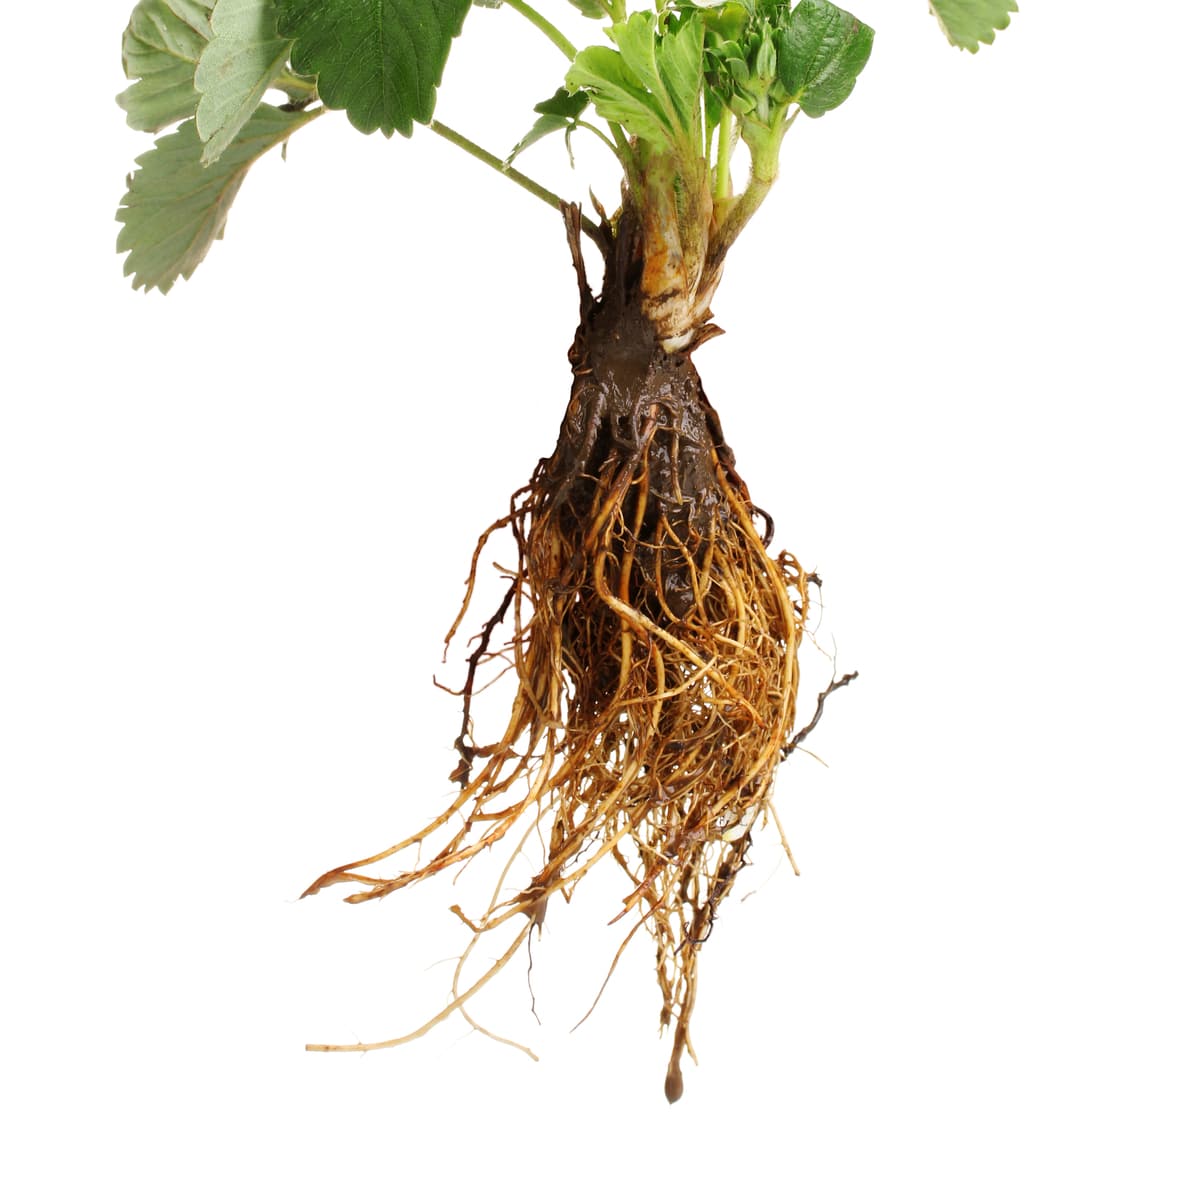
Read more: How To Store Bare Root Strawberries
Why Store Bare Root Hostas?
Storing bare root hostas offers several benefits. Firstly, it provides a way to protect your plants during harsh weather conditions, such as freezing temperatures, heavy snowfall, or drought. By removing the hostas from the ground and storing them in a controlled environment, you can prevent them from sustaining damage or becoming stressed.
Secondly, storing bare root hostas allows you to transplant them easily whenever you’re ready to relocate or redesign your garden. By keeping the hostas in a dormant state, you can safely transport them and replant them without disrupting their growth cycle.
Additionally, storing bare root hostas can be necessary if you need to move your plants temporarily due to construction work or landscaping projects. Instead of risking damage or accidentally uprooting the hostas, you can carefully store them until the project is complete, ensuring their survival and uninterrupted growth.
Furthermore, storing bare root hostas can be beneficial for those who enjoy collecting different hosta varieties. If you have limited space in your garden or want to experiment with various planting combinations, storing and rotating hostas allows you to have a wider selection of plants without overcrowding your garden beds.
Overall, storing bare root hostas is a proactive approach to preserve and protect your plants, ensuring their longevity and maintaining their health even under challenging circumstances. Whether it’s for temporary relocation, weather protection, or expanding your hosta collection, proper storage techniques are crucial for successful replanting and optimal growth.
When to Store Bare Root Hostas
The timing for storing bare root hostas depends on various factors, such as the climate in your region, the specific hosta variety, and your gardening goals. However, there are a few general guidelines to follow when determining the ideal time to store your hostas.
In colder regions with freezing temperatures, it’s recommended to store bare root hostas during the late autumn or early winter before the first frost. This allows the plants to enter a dormant state, protecting them from potential damage caused by extreme cold.
For milder climates, where winter temperatures do not drop below freezing, you have more flexibility in choosing when to store bare root hostas. You can opt to store them in late autumn or early winter, as mentioned before, or you can choose to dig up and store the hostas anytime during their dormancy period.
It’s important to note that storing hostas too early in the fall can interrupt their natural growth process. If the plants are still actively growing and producing new leaves, it’s best to wait until they have entered their dormant stage before storing them.
On the other hand, if you plan to store bare root hostas for short-term relocation or replanting purposes, you can dig them up and store them at any time while they are actively growing. Just ensure that you transplant them to their new location as soon as possible to minimize any stress or transplant shock.
Ultimately, it’s crucial to understand the specific needs of your hostas and consider the climate conditions in your area when deciding when to store them. By timing the storage properly, you can ensure that your hostas remain healthy and have the best chance for successful replanting and continued growth in the future.
Preparing Hostas for Storage
Before you can store your bare root hostas, it’s essential to properly prepare them to ensure their health and vitality during the storage period. Here are the steps to follow when preparing hostas for storage:
- Water the hostas: A few days before digging up the hostas, make sure to water them thoroughly. This will help hydrate the plants and make it easier to remove them from the ground without damaging their roots.
- Trim the foliage: Once the hostas are well-watered, trim the foliage back to a few inches above the ground. This will reduce transpiration and help the plant conserve energy during storage.
- Digging up the hostas: Carefully dig around the perimeter of the hostas, staying several inches away from the crown. Gently lift the clumps out of the ground, being cautious not to break or damage the roots.
- Cleaning the roots: Shake off any excess soil clinging to the roots. You can also rinse them lightly with water to remove any stubborn dirt or debris.
- Inspect for pests or diseases: Before storing the hostas, examine the foliage, stems, and roots for any signs of pests or diseases. If you notice any issues, treat them accordingly before proceeding with storage.
- Allow the roots to dry: After cleaning, let the hostas’ roots air dry for a few hours. This helps prevent excess moisture during storage, which can lead to rot or fungal issues.
By following these steps, you can ensure that your hostas are in the best condition for storage. Properly preparing them will minimize stress and increase their chances of survival and successful replanting in the future.
Choosing the Right Storage Location
Choosing the right storage location for your bare root hostas is crucial in maintaining their health and vitality during the storage period. Here are some factors to consider when selecting the ideal storage spot:
- Temperature: Hostas require a cool and consistent temperature during storage. Aim for a location with temperatures between 32°F (0°C) and 50°F (10°C). Extreme temperature fluctuations can damage the plants, so avoid areas prone to rapid temperature changes.
- Light: Hostas should be stored in a dark or dimly lit area. Exposure to direct sunlight during storage can trigger premature growth, which is not desirable when the plants are in a dormant state.
- Air Circulation: Adequate air circulation is essential to prevent the build-up of excess moisture, which can lead to fungal issues or rot. Ensure that the storage location has good ventilation and avoid areas with high humidity.
- Humidity: While hostas prefer a slightly humid environment, excessive humidity can be detrimental. Aim for a humidity level of around 50-60%. You can monitor the humidity using a hygrometer or by selecting a storage location with naturally balanced humidity.
- Pest Control: Choose a storage location that is free from pests and insects. Pests can cause damage to the stored hostas and even spread diseases. Keep the area clean and consider using pest control measures if necessary.
- Accessibility: Select a storage location that is easily accessible so you can check on the hostas periodically. This will allow you to monitor the plants for any signs of moisture, pests, or diseases and take the necessary actions if required.
Some suitable storage locations for hostas include unheated basements, garages, or root cellars. These areas usually provide the ideal temperature and protection from extreme weather conditions. If you’re using a basement or garage, ensure that the storage area is insulated to maintain a consistent temperature.
Remember that the storage location should mimic the natural environment that hostas experience during their dormant period. By providing the right conditions, you can ensure the hostas remain healthy and ready for replanting when the time comes.
Read more: How To Store Bare Root Trees
Choosing the Right Containers for Storage
When it comes to storing bare root hostas, choosing the right containers is essential to ensure the plants remain healthy and protected. Here are some key considerations when selecting containers for hosta storage:
- Size: Opt for containers that provide enough space for the hosta clumps without crowding or bending the roots. The containers should accommodate both the length and width of the root system, allowing the plants to retain their natural shape.
- Drainage: Proper drainage is crucial to prevent waterlogging and root rot. Ensure that the containers have drainage holes at the bottom to allow excess water to escape. If the containers don’t have drainage holes, you can create them using a drill or by placing a layer of gravel at the bottom to facilitate drainage.
- Material: Select containers made of breathable materials such as plastic or wooden crates. These materials allow air circulation around the roots, minimizing the risk of fungal diseases. Avoid using non-breathable materials like glass or metal, as they can trap moisture and harm the plants.
- Depth: Choose containers with sufficient depth to accommodate the length of the hosta roots. The roots should be able to spread out comfortably without being cramped. A general rule of thumb is to select containers that are at least 12-15 inches deep.
- Sturdiness: Ensure that the containers are sturdy enough to withstand transportation and handling. Fragile containers may break or damage the hosta roots during storage or when moving the plants to their new location.
When it comes to the number of hostas per container, it’s best to store each clump separately. This prevents competition for resources and minimizes the risk of tangling or damaging the roots. However, if you’re short on space, you can store multiple smaller hosta clumps in a single container, ensuring that they have enough room to grow.
Labeling the containers is also a good practice, especially if you’re storing different hosta varieties. This helps avoid confusion when it’s time to replant the hostas by providing clear identification of each plant.
By selecting the right containers and ensuring proper drainage and ventilation, you can create an optimal storage environment for your bare root hostas. This will help maintain their health and readiness for replanting, ensuring a successful transition back into the garden.
Properly Packing Bare Root Hostas
When storing bare root hostas, it’s crucial to pack them properly to ensure their roots are protected and the plants remain in a dormant state. Here are some steps to follow when packing bare root hostas:
- Moisture retention: Before packing, moisten the roots of the hostas slightly. This helps prevent excessive dehydration during storage. However, be careful not to soak the roots as excess moisture can lead to rot.
- Use damp material: Wrap the moistened roots in a damp material such as damp sphagnum moss, damp newspaper, or damp peat moss. The damp material helps retain moisture and provides a protective layer around the roots.
- Secure the roots: Gently wrap the damp material around the roots, ensuring they are fully covered. Take care not to wrap too tight, as this can damage delicate roots. The goal is to create a snug but not overly restrictive wrapping.
- Secure the packaging: Tie or secure the wrapping around the roots using twine or a rubber band. This keeps the packing material in place and prevents it from coming loose during storage or transportation.
- Label the packaging: If you’re storing multiple hosta varieties, label each packaging with the correct variety name. This will help avoid confusion when it’s time to replant the hostas.
- Place the packed hostas in containers: Once the hostas are appropriately packed, place them in the selected containers. Ensure that the containers have sufficient space to fit the wrapped hostas without compressing the packing material or damaging the roots.
- Cover the containers: If desired, cover the containers with a lid or use plastic wrap to provide additional protection against moisture loss and to keep dust and pests out.
Properly packing bare root hostas with damp material helps maintain a suitable level of moisture around the roots, preventing dehydration and ensuring the plants remain in their dormant state. It also provides insulation and protection for the roots during storage.
Remember to handle the packed hostas with care to avoid damaging the roots or dislodging the packing material. When it’s time to replant the hostas, gently remove the packing material and inspect the roots for any signs of damage or rot before planting them in their new location.
By following these packing steps, you can ensure that your bare root hostas are protected and ready for successful storage and replanting.
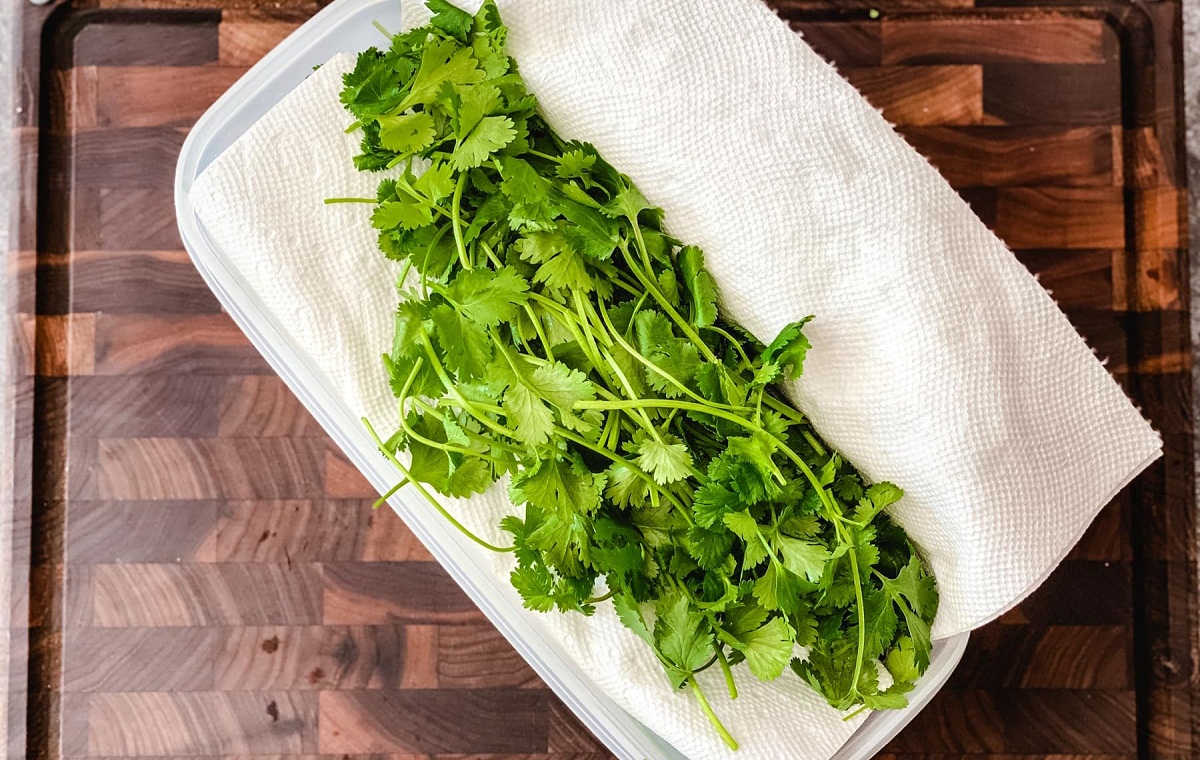
When storing bare root hostas, keep them in a cool, dark place to prevent them from drying out. You can also wrap the roots in damp paper towels or store them in peat moss to keep them moist.
Storing Hostas in a Cool and Dry Place
Creating the right storage conditions is crucial for the health and preservation of your bare root hostas. One of the key factors to consider is maintaining a cool and dry environment. Here’s why it’s important and how to achieve it:
Temperature plays a significant role in keeping hostas in their dormant state during storage. Aim for a storage temperature between 32°F (0°C) and 50°F (10°C). This range helps prevent premature growth while still allowing the plant to remain dormant. Extreme temperatures can cause stress to the plants, so it’s important to find a cool but above-freezing storage space.
A dry environment is equally important to prevent issues like mold, rot, or decay. Excess moisture can lead to fungal diseases and damage the roots of your hostas. To maintain a dry environment, avoid storing your hostas in areas prone to high humidity, such as basements with water leakage or areas with poor ventilation.
Here are some tips to achieve a cool and dry storage place for your hostas:
- Select the right storage location: Choose a storage area that is naturally cool and dry, such as an unheated basement, garage, or root cellar. These places generally provide a suitable environment for storing hostas.
- Avoid areas with temperature fluctuations: Extreme temperature changes can be harmful to stored hostas. Try to avoid areas that experience frequent temperature fluctuations, such as near heating vents, direct sunlight, or drafts.
- Provide proper ventilation: Good air circulation helps maintain a dry environment. Ensure that the storage area has adequate ventilation to prevent the build-up of moisture. You can use fans or leave a small gap for airflow.
- Monitor humidity levels: Use a hygrometer to monitor the humidity levels in the storage area. Aim for a humidity level between 50-60% to prevent excess moisture without causing the hostas to become too dry.
- Avoid storing near water sources: It’s important to keep your hostas away from water sources or areas prone to water leakage. This includes avoiding storing them near leaking pipes, washing machines, or areas that tend to accumulate water.
- Regularly check for moisture: Regularly inspect your stored hostas for any signs of excess moisture. If you notice condensation, dampness, or signs of mold, take action immediately to address the issue and adjust the storage conditions if needed.
By storing your bare root hostas in a cool and dry place, you create an environment that promotes dormancy and helps preserve the health of the plants. This sets the stage for successful replanting when the time comes to bring your hostas back to the garden.
Checking Hostas for Signs of Moisture or Pests
Regularly checking your stored hostas for signs of moisture or pests is crucial to ensure their health and well-being during the storage period. Here’s what you should look out for and how to address these issues:
Moisture: Excess moisture can lead to root rot, fungal diseases, and other issues. When checking your hostas, keep an eye out for any signs of excessive moisture, such as condensation on container lids or dampness in the packing material. If you notice these signs, it’s important to address the issue promptly.
To mitigate excess moisture, you can take the following steps:
- Inspect the containers: Check for any cracks or damage that might be allowing moisture to seep in. If you find any issues, transfer the hostas to a new, dry container.
- Adjust the packing material: If you notice the packing material becoming too damp, replace it with fresh, dry material. Be sure to wring out any excess moisture from the existing material before disposing of it.
- Improve ventilation: Ensure that the storage area has proper ventilation to allow for air circulation. You can consider using fans or leaving the container lids slightly ajar to facilitate the drying of the packing material and hosta roots.
Pests: Pests can be detrimental to your stored hostas, as they can cause damage or spread diseases. While the hostas are in storage, periodically inspect them for any signs of pests such as insects, snails, or slugs. Keep an eye out for chewed leaves, holes in foliage, or signs of insect activity.
If you notice any pests, take immediate action to address the issue. Here are some steps you can take:
- Remove visible pests: If you spot any pests on your hostas, carefully remove them by hand and dispose of them properly.
- Use organic pest control methods: Consider using organic pest control methods such as neem oil or insecticidal soaps to control common pests. Be sure to follow the instructions on the product label for safe and effective application.
- Monitor regularly: Keep monitoring your hostas regularly to ensure that the pest problem is under control. If necessary, repeat the pest control measures to prevent further damage.
By regularly checking your stored hostas for signs of moisture or pests, you can catch and address any issues before they escalate. This proactive approach helps protect your hostas and increases the likelihood of successful replanting and continued growth once they are taken out of storage.
Maintaining Proper Humidity Levels During Storage
Maintaining proper humidity levels is essential when storing bare root hostas to ensure their health and prevent issues like dehydration or excess moisture. Here’s how you can maintain the right humidity levels during the storage period:
Monitor Humidity: Use a hygrometer to regularly monitor the humidity levels in the storage area. Aim for a humidity level between 50% and 60%, which provides enough moisture for the hostas without creating an environment prone to excessive dampness or fungal growth.
Adjust Ventilation: Proper ventilation helps regulate humidity levels by allowing air movement and preventing the build-up of excessive moisture. If the humidity is too high, increase ventilation by opening container lids slightly or using fans to circulate the air. If the humidity is too low, reduce ventilation to limit the amount of moisture escaping the containers.
Mist the Air: If the humidity levels are consistently low, you can increase the humidity by lightly misting the air using a spray bottle filled with water. Be cautious not to directly spray the hostas, as excessive moisture on the foliage can lead to disease and rot.
Use Humidity Trays: Placing trays or shallow dishes filled with water near the containers can help increase humidity levels in the immediate vicinity. The water evaporates slowly, raising the humidity around the stored hostas. Ensure that the containers themselves are not in direct contact with the water to avoid water damage or excess moisture.
Seal the Containers: If you’re struggling to maintain the desired humidity levels, you can partially seal the containers to trap moisture. Cover the containers with plastic wrap or place a plastic bag over them, ensuring that there’s still some ventilation to prevent the build-up of excessive moisture.
Regular Monitoring: Check the hostas and the environment regularly for any signs of excessive moisture or humidity-related issues, such as wilting, mold growth, or condensation. Adjust your humidity control measures accordingly based on the observations.
By maintaining proper humidity levels, you create an environment that promotes healthy plant growth and reduces the risk of pests, diseases, and dehydration. Consistent monitoring and adjustments will help ensure that your stored hostas remain in optimal condition for successful replanting.
Tips for Long-Term Storage
Long-term storage of bare root hostas requires additional attention and care to ensure the plants remain healthy and ready for successful replanting. Here are some tips to keep in mind when storing hostas for an extended period:
- Regularly check on the hostas: Visit the storage area periodically to monitor the condition of the hostas. Look for any signs of moisture, pests, or diseases. This allows you to address any issues promptly and ensure the plants remain in optimal condition.
- Inspect for dehydration: Check the hostas for signs of dehydration, such as shriveled and dry roots. If you notice dehydration, lightly mist the packaging material or add a small amount of water to the container to increase moisture. Take care not to overwater, as excess moisture can lead to rot.
- Rotate the containers: To prevent uneven growth, rotate the containers periodically. This ensures that all sides of the hostas receive equal exposure to light, reducing the risk of lopsided growth or bending towards the light source.
- Avoid stacked containers: If you need to stack containers to save space, ensure that there’s sufficient airflow between them. Stacked containers can create a humid environment, increasing the risk of mold or mildew formation.
- Protect from extreme temperatures: If the storage location is susceptible to extreme temperatures, such as during heatwaves or cold snaps, take precautions to protect the hostas. Move the containers to a more temperature-controlled area or take additional measures to insulate them, such as using cardboard or bubble wrap.
- Do not store near ethylene-producing fruits: Ethylene gas produced by ripening fruits can stimulate premature growth in hostas. Avoid storing the containers near fruits like apples, bananas, or tomatoes to prevent unwanted growth and stress on the plants.
- Label containers and keep records: Label each container with the hosta variety and date of storage. This helps you keep track of the stored hostas and ensures you replant them correctly in the future. Keeping records of the storage conditions and any observations can also be helpful for future reference.
- Maintain patience: Storing hostas for an extended period requires patience. Avoid the temptation to check or disturb them too frequently. Let the hostas remain in their dormant state and trust the storage process until it’s time for replanting.
By following these tips, you can ensure the long-term storage of your bare root hostas is successful. With proper care and attention, the hostas will remain healthy and ready for replanting, allowing you to enjoy their beauty and elegance in your garden for years to come.
When and How to Replant Stored Hostas
Knowing when and how to replant your stored hostas is crucial for their successful transition back into the garden. Here’s a guide on when and how to replant your stored hostas:
Timing: The ideal time to replant your hostas from storage will depend on your climate and the specific plant’s growth cycle. As a general rule, aim to replant them in early spring, just before or as new growth begins. This allows the hostas to establish themselves before the hot summer months.
Preparing the Garden Bed:
- Choose the right location: Select a suitable spot in your garden with the proper light conditions for the specific hosta variety. Hostas generally thrive in partial to full shade, although some varieties can tolerate more sun.
- Amend the soil: Hostas prefer well-draining soil that is rich in organic matter. Prior to replanting, amend the soil with compost or well-rotted organic matter to improve its fertility and drainage.
- Clear the area: Remove any weeds, rocks, or debris from the garden bed. This provides a clean and healthy environment for the hostas to grow.
Replanting Process:
- Prepare the clumps: Carefully remove the hostas from the storage containers. Gently untangle the roots and remove any remaining packing material, being cautious not to damage the delicate roots.
- Dig the planting holes: Dig holes in the prepared garden bed that are slightly larger and wider than the hosta clumps to accommodate the roots comfortably.
- Planting depth: Place each hosta clump in its planting hole with the crown (where the leaves emerge) just at or slightly above the soil level. Avoid planting too deep, as this can lead to rotting.
- Backfill and firm soil: Fill the planting holes with soil, ensuring that the roots are covered entirely. Gently firm the soil around the roots to eliminate air pockets.
- Water thoroughly: After planting, water the hostas thoroughly to settle the soil and provide essential moisture. Continue to monitor the soil moisture levels and water as needed during the establishment period.
- Maintain proper care: After replanting, provide regular care to your hostas, including adequate watering, mulching, and occasional fertilization. This helps promote healthy growth and maximizes their potential in the garden.
It’s important to note that hostas may take some time to fully establish and start regaining their vigor after being stored. Be patient and allow them the time they need to acclimate to their new environment.
By following these guidelines for replanting, you can ensure a smooth transition for your stored hostas, enabling them to thrive and enhance the beauty of your garden once again.
Conclusion
Storing bare root hostas is a practical solution to protect these beautiful plants during periods of harsh weather, temporary relocation, or when you need to make space in your garden. By following the proper storage techniques, you can ensure the health and vitality of your hostas, setting the stage for successful replanting and continued growth.
Throughout this article, we’ve explored the importance of storing bare root hostas and provided valuable tips to make the storage process a success. We discussed the benefits of storing hostas, including protecting them from extreme weather conditions, facilitating easy transplantation, and expanding your collection.
Timing is crucial when storing hostas, and it’s important to consider your specific climate and the growth cycle of the plants. Preparing hostas for storage involves trimming foliage, gently digging up the clumps, cleaning the roots, and checking for pests or diseases.
Choosing the right storage location and containers is essential to maintain a cool, dry, and well-ventilated environment for your hostas. Properly packing the bare root hostas ensures that the roots are protected and the plants remain in a dormant state. Maintaining proper humidity levels during storage helps prevent dehydration and excess moisture-related issues.
Long-term storage requires regular monitoring to check for signs of moisture, pests, or diseases. When it’s time to replant the stored hostas, choose a suitable location in your garden, prepare the soil, and carefully plant the clumps. With proper care and attention, your stored hostas will flourish and bring beauty to your garden once again.
By following these guidelines, you can successfully store and replant your bare root hostas, ensuring their health, longevity, and continued enjoyment in your garden. So, make the most of storing bare root hostas, and prepare for the vibrant and resilient plants that will grace your garden for years to come.
After mastering the art of storing bare root hostas, why not spruce up your garden's appeal? Dive into our guide on creative fencing solutions, perfect for any gardening enthusiast looking to enhance their outdoor space. You'll find innovative ideas that not only protect your plants but also add a unique charm to your garden. Ready to transform your garden into a more beautiful and secure haven?
Frequently Asked Questions about How To Store Bare Root Hostas
Was this page helpful?
At Storables.com, we guarantee accurate and reliable information. Our content, validated by Expert Board Contributors, is crafted following stringent Editorial Policies. We're committed to providing you with well-researched, expert-backed insights for all your informational needs.


0 thoughts on “How To Store Bare Root Hostas”