Articles
How To Store Breadsticks
Modified: January 6, 2024
Learn the best techniques for storing breadsticks in this informative article. Keep your breadsticks fresh and delicious for longer with these helpful tips and tricks.
(Many of the links in this article redirect to a specific reviewed product. Your purchase of these products through affiliate links helps to generate commission for Storables.com, at no extra cost. Learn more)
Introduction
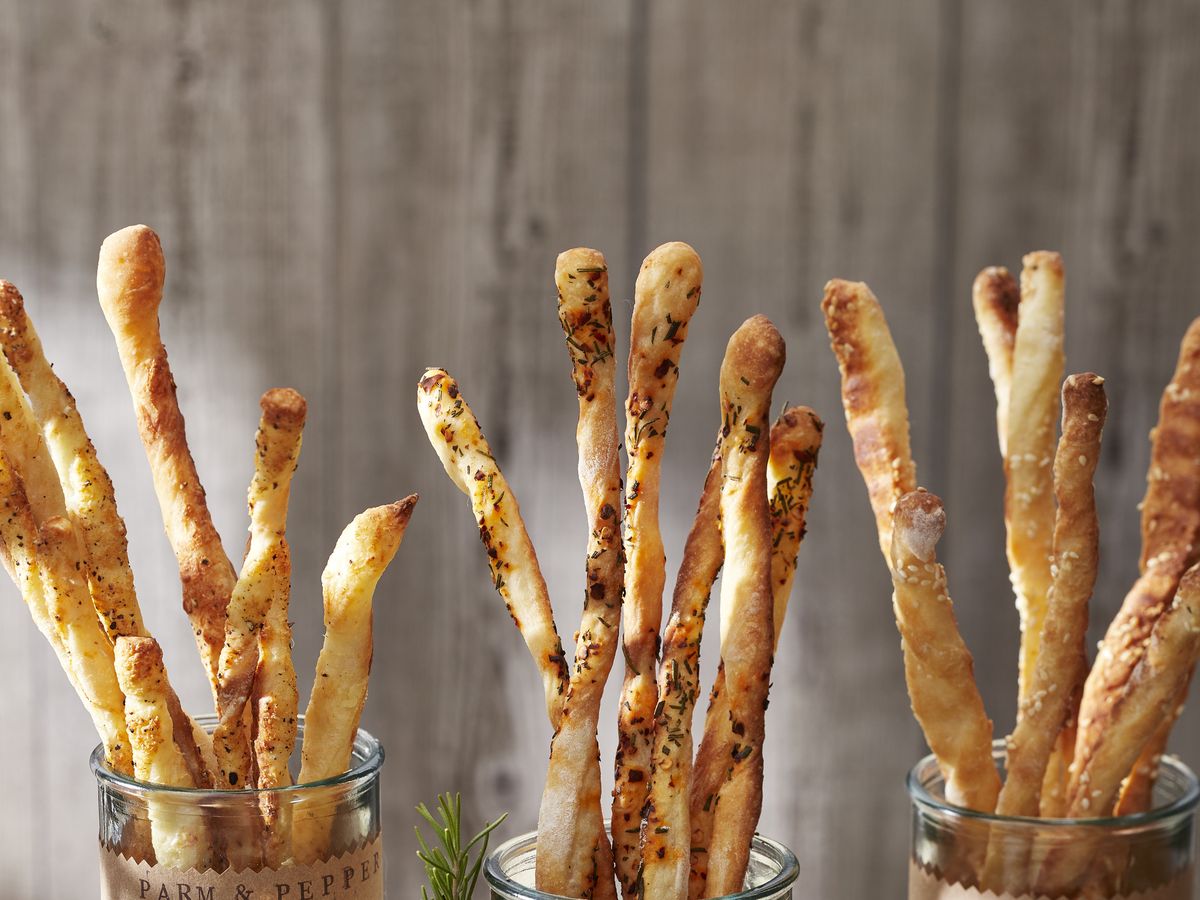
Breadsticks are a delicious and versatile snack that can be enjoyed on their own or alongside a variety of meals. Whether you bake your own breadsticks or purchase them from a bakery, proper storage is vital to maintain their freshness and flavor.
In this article, we will explore the importance of properly storing breadsticks and provide you with some valuable tips on how to extend their shelf life. From choosing the right storage container to freezing and thawing techniques, we’ve got you covered.
So, let’s dive in and discover the secrets to keeping your breadsticks crisp, flavorful, and ready to enjoy whenever you desire.
Key Takeaways:
- Properly storing breadsticks is crucial to maintain their freshness, crispness, and flavor. Choosing the right container, considering temperature and humidity, and wrapping them properly are key steps to preserving their quality.
- Freezing breadsticks for long-term storage is a convenient option, allowing you to enjoy them months after preparation. Thaw and reheat them properly to regain their crispness and warmth, ensuring a delightful taste and texture.
Read more: How To Store Olive Garden Breadsticks
Importance of Properly Storing Breadsticks
Properly storing breadsticks is essential to preserve their quality and taste. When exposed to air and humidity, breadsticks can quickly become stale, losing their crispness and becoming chewy or tough. Additionally, improper storage can also lead to mold growth, which is not only unappetizing but also detrimental to your health.
By ensuring that you store your breadsticks correctly, you can extend their shelf life and maintain their freshness. This not only saves you from wasting food but also allows you to enjoy your breadsticks at their best, whether you’re serving them as a appetizer, a side dish, or even as a snack on its own.
Another benefit of proper storage is the ability to plan ahead and make larger batches of breadsticks. By storing them properly, you can have a ready supply of breadsticks that are just as delicious as the day they were made, saving you time and effort in the kitchen.
Now that we understand the importance of properly storing breadsticks, let’s explore how to do it correctly.
Choosing the Right Storage Container
When it comes to storing breadsticks, the choice of the right container is crucial in maintaining their freshness. Look for a container that is airtight and has a secure lid to prevent air and moisture from seeping in. This will help preserve the crispness and texture of the breadsticks.
Consider using a plastic or glass container with a tight seal. Both options are effective in keeping the breadsticks fresh. However, glass containers may be a better choice if you prefer to see the breadsticks without opening the container, as it allows for easy visibility.
If you don’t have an airtight container, you can use resealable plastic bags or wrap the breadsticks tightly in aluminum foil. Just make sure to squeeze out any excess air from the bag or wrap to minimize the exposure to air, which can lead to staleness.
It’s important to note that the container should be clean and dry before storing the breadsticks. Any moisture or contaminants can affect the quality of the breadsticks.
To keep your breadsticks organized and easily accessible, you may consider using a bread box specifically designed for storing bread products. These boxes not only provide airtight storage but also help in maintaining the proper temperature and humidity levels.
Remember, choosing the right storage container is the first step to ensure the freshness of your breadsticks. Now, let’s move on to the next important consideration: temperature and humidity.
Temperature and Humidity Considerations
Temperature and humidity play a significant role in ensuring the longevity of your breadsticks. The ideal conditions for storing breadsticks are cool and dry environments.
It’s crucial to keep your breadsticks away from heat sources such as sunlight, stoves, or ovens, as the heat can accelerate the staleness process. Additionally, high temperatures can lead to moisture accumulation, which can cause mold growth and spoilage.
Avoid storing breadsticks in the refrigerator, as the cold temperature can cause them to dry out quickly and lose their desirable texture. Instead, find a cool and dry spot in your kitchen pantry or cupboard, away from direct sunlight and heat sources.
Humidity is another important factor to consider when storing breadsticks. Excessive humidity can cause the breadsticks to become soggy or limp. To prevent this, choose a storage location with low humidity levels.
If you live in a humid climate or during humid seasons, you can further protect your breadsticks by using desiccants, such as silica gel packets or rice grains, in the storage container. These will help absorb any moisture present and keep the breadsticks dry.
By considering temperature and humidity when storing your breadsticks, you can ensure that they stay fresh, crisp, and delightful to eat. Now, let’s move on to the next step: wrapping the breadsticks for freshness.
Wrapping Breadsticks for Freshness
Properly wrapping your breadsticks is essential for maintaining their freshness and preventing them from becoming stale or dry. By following a few simple steps, you can ensure that your breadsticks stay delicious and enjoyable for longer periods of time.
Firstly, if you have store-bought breadsticks, they may already come individually wrapped. In this case, you can simply keep them in their original packaging until you’re ready to consume them. However, if the original packaging is not airtight, it’s recommended to transfer them to a suitable container or resealable plastic bags to maintain freshness.
If you have baked your own breadsticks, it’s important to cool them completely before wrapping. This allows any residual heat to escape and prevents condensation from forming, which could lead to sogginess.
When wrapping breadsticks, start by placing them in a single layer on a sheet of plastic wrap or parchment paper. Space them apart slightly to ensure even airflow and prevent them from sticking together.
Begin by folding the plastic wrap or parchment paper over the breadsticks, tucking the edges in tightly to create a sealed package. Ensure that the wrap is not loose, as this may allow air to enter, compromising the freshness of the breadsticks.
If you’re using parchment paper, you can secure it with a piece of tape or tie it with a string to keep it in place.
Once the breadsticks are securely wrapped, place them into an airtight container or resealable plastic bag for added protection. Remember to remove any excess air from the bag before sealing it to minimize the contact with oxygen.
By properly wrapping your breadsticks, you create a barrier that helps preserve their moisture and prevents air from accelerating the staling process. This method keeps your breadsticks fresh and ready to enjoy whenever you desire.
Next, let’s explore the option of freezing breadsticks for long-term storage.
Store breadsticks in an airtight container or resealable plastic bag at room temperature. To keep them fresh for longer, you can also freeze them in a freezer-safe bag or container.
Read more: How To Reheat Olive Garden Breadsticks
Freezing Breadsticks for Long-Term Storage
Freezing breadsticks is an excellent option for long-term storage, allowing you to enjoy them at a later time while maintaining their freshness and flavor. To freeze your breadsticks, follow these simple steps:
- Ensure your breadsticks are completely cooled before freezing. This helps prevent condensation and ice crystals from forming during the freezing process.
- Individually wrap each breadstick with plastic wrap or aluminum foil. The goal is to create a tight seal that prevents air and moisture from reaching the breadsticks.
- Place the wrapped breadsticks into a freezer-safe bag or airtight container. Squeeze out as much air as possible before sealing the container to minimize freezer burn.
- Label the container with the date of freezing to keep track of their freshness.
When properly frozen, breadsticks can last for up to three months. However, for the best quality, it’s recommended to consume them within one to two months.
To thaw frozen breadsticks, remove them from the freezer and let them sit at room temperature for about 1-2 hours. Once thawed, you can heat them in a preheated oven at 350°F (175°C) for 5-10 minutes to regain their crispness and warmth.
Alternatively, you can reheat frozen breadsticks directly in the oven without thawing. Place them on a baking sheet and bake at 350°F (175°C) for 10-12 minutes, or until they are hot and crispy.
It’s essential to note that once breadsticks have been frozen and thawed, they should not be refrozen. This can affect their texture and quality.
Freezing breadsticks is a convenient way to ensure that you always have a supply of ready-to-eat breadsticks on hand. It’s particularly useful if you enjoy batch baking or want to stock up during busy periods. By following these steps, you can enjoy delicious breadsticks at your convenience.
Now that you know how to freeze and thaw breadsticks, let’s move on to some additional tips for extending their shelf life.
Thawing and Reheating Frozen Breadsticks
When it comes to thawing and reheating frozen breadsticks, there are a few methods you can follow to ensure they regain their delicious taste and texture:
Thawing at Room Temperature:
One of the easiest ways to thaw frozen breadsticks is to remove them from the freezer and let them sit at room temperature. Place them on a plate or a wire rack and allow them to thaw for approximately 1-2 hours. This method is ideal if you have a little more time and prefer a gentler thawing process.
Oven Thawing and Reheating:
If you’re short on time and want to enjoy your breadsticks quickly, you can thaw and reheat them in the oven. Preheat your oven to 350°F (175°C) and place the frozen breadsticks on a baking sheet. Bake them for about 10-12 minutes, or until they are thawed and heated through. This method helps restore their crispness and warmth.
Microwave Thawing:
If you’re in a hurry and need to thaw breadsticks quickly, you can use a microwave. Place the frozen breadsticks on a microwave-safe plate and microwave them on a low power setting, such as 30% power, in short intervals of 30 seconds. Check the breadsticks after each interval and continue microwaving until they are thawed. However, keep in mind that using the microwave may result in slightly softer breadsticks compared to other methods.
Regardless of the thawing method you choose, it’s essential to ensure that the breadsticks are fully thawed before reheating them. Partially thawed breadsticks may become unevenly heated, leading to a less enjoyable eating experience.
For reheating, the oven is generally the best method, as it helps restore the breadsticks’ crispness and warmth. However, if you’re short on time, you can use a toaster oven or even a microwave, though the results may vary in terms of texture.
Once reheated, it’s recommended to enjoy the breadsticks immediately for the best taste and texture. Avoid reheating the breadsticks more than once, as this can cause them to become dry or lose their desirable crispness.
By following these thawing and reheating techniques, you can enjoy your frozen breadsticks as if they were freshly baked.
Now, let’s explore some additional tips for extending the shelf life of your breadsticks.
Tips for Extending the Shelf Life of Breadsticks
To maximize the freshness and shelf life of your breadsticks, consider implementing the following tips:
- Proper storage: As mentioned earlier, store your breadsticks in an airtight container or resealable plastic bag to prevent exposure to air and moisture. This will help maintain their crispness and prevent them from becoming stale.
- Keep them dry: Moisture is the enemy of breadsticks. Avoid placing them near areas with high humidity, such as above the stove or near the sink. Additionally, make sure the breadsticks are completely cooled before storing to prevent moisture accumulation.
- Avoid direct sunlight: Sunlight can cause the breadsticks to become dry and stale quickly. Store them in a cool and dark spot, such as a pantry or cupboard, away from direct sunlight.
- Refrigerate homemade breadsticks: If you have made your own breadsticks and want to extend their shelf life, consider refrigerating them. Wrap them tightly in plastic wrap or store them in an airtight container. However, note that refrigeration can cause breadsticks to become slightly drier, so it’s best to consume them within a few days.
- Portion control: If you have a large batch of breadsticks, consider freezing them in portioned sizes. This way, you can thaw and enjoy only what you need, reducing the chances of leftovers going to waste.
- Use desiccants: To absorb any excess moisture and prolong the freshness of your breadsticks, you can place a desiccant, such as a silica gel packet or rice grains, in the storage container or bag.
- Avoid slicing in advance: If you plan to serve breadsticks for a gathering or event, it’s best to wait until just before serving to slice them. Sliced breadsticks tend to dry out more quickly than whole ones.
- Inspect before consuming: Before eating stored breadsticks, always check for signs of spoilage such as mold, unusual odors, or a significant change in texture. If you notice any of these signs, it’s best to discard them to ensure your safety.
By following these tips, you can extend the shelf life of your breadsticks and enjoy them at their best for as long as possible.
Now, let’s wrap up and summarize what we have covered in this article.
Conclusion
Properly storing breadsticks is essential for maintaining their freshness, crispness, and flavor. By following the tips outlined in this article, you can extend the shelf life of your breadsticks and ensure they are always delicious and enjoyable to eat.
Choosing the right storage container, considering temperature and humidity, and wrapping the breadsticks properly are the key steps to preserving their quality. Whether you opt for airtight containers, resealable bags, or specialized bread boxes, make sure to keep the breadsticks in a cool and dry environment away from heat and humidity.
Furthermore, freezing breadsticks can be a convenient option for long-term storage. By individually wrapping them and using freezer-safe containers, you can enjoy breadsticks whenever you want, months after their preparation. Just make sure to thaw and reheat them properly to regain their crispness and warmth.
To further extend the shelf life of your breadsticks, consider portion control, refrigeration for homemade breadsticks, and the use of desiccants to absorb excess moisture. Additionally, avoid slicing the breadsticks in advance and inspect them before consumption to ensure they are free from any signs of spoilage.
By taking these measures, you can enhance the longevity of your breadsticks and reduce food waste, saving you time and money in the process.
So, whether you’re enjoying breadsticks as a tasty snack, an accompaniment to a meal, or as a party appetizer, remember to store them properly to keep them fresh and delicious for as long as possible. With these storage and preservation techniques, you can savor the delightful taste of breadsticks whenever the craving strikes.
Frequently Asked Questions about How To Store Breadsticks
Was this page helpful?
At Storables.com, we guarantee accurate and reliable information. Our content, validated by Expert Board Contributors, is crafted following stringent Editorial Policies. We're committed to providing you with well-researched, expert-backed insights for all your informational needs.


0 thoughts on “How To Store Breadsticks”