Articles
How To Store Olive Garden Breadsticks
Modified: December 7, 2023
Learn how to store Olive Garden breadsticks with these helpful articles. Keep your leftovers fresh and delicious for later enjoyment.
(Many of the links in this article redirect to a specific reviewed product. Your purchase of these products through affiliate links helps to generate commission for Storables.com, at no extra cost. Learn more)
Introduction
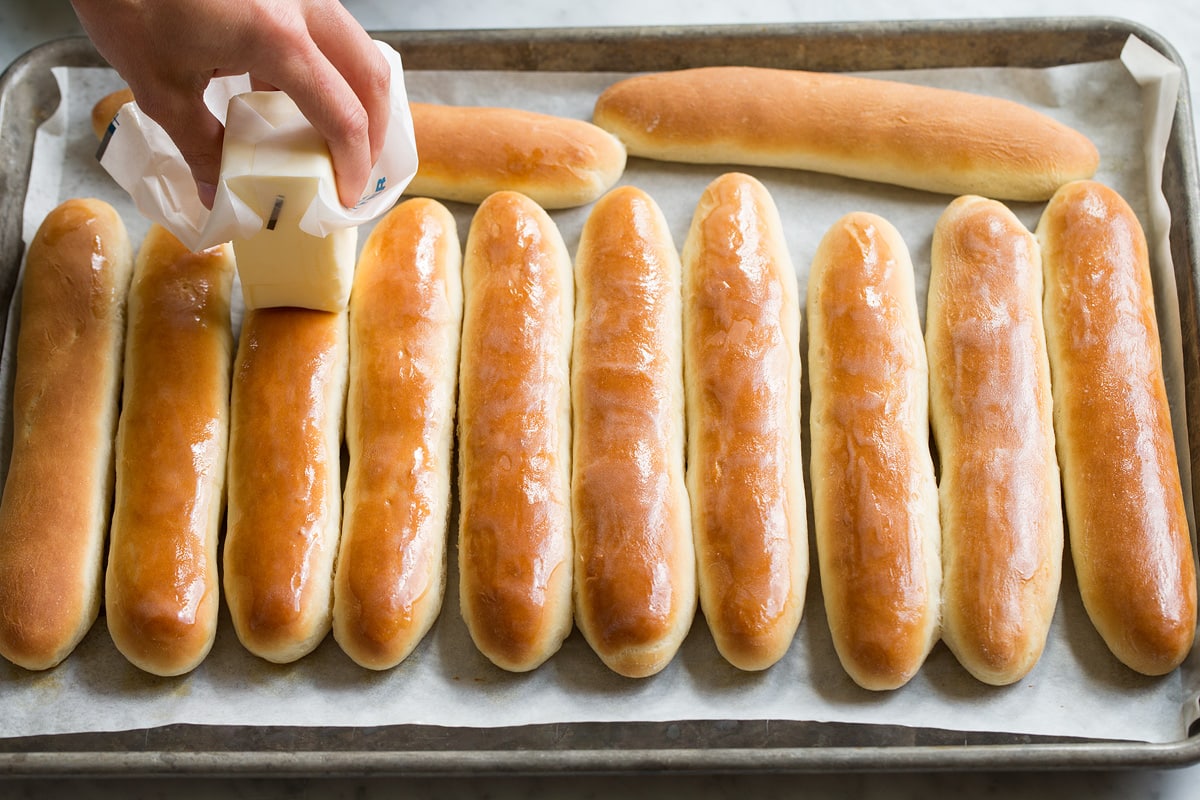
Welcome to the world of Olive Garden – a place where breadsticks are in high demand, and for good reason. These delectable, warm, and chewy breadsticks have become synonymous with the Olive Garden dining experience, and it’s no wonder that people want to know how to store them for later enjoyment.
Whether you’ve brought home a few extras from your visit to an Olive Garden or found yourself with a surplus of breadsticks from a catering order, storing them correctly is essential to maintain their freshness and flavor.
In this article, we will guide you through the process of storing Olive Garden breadsticks to help you keep them as fresh as possible. From packaging to storage options and even freezing, we’ll provide you with all the information you need to enjoy those mouthwatering breadsticks at a later time.
So, let’s dive in and discover how to properly store Olive Garden breadsticks to ensure they remain just as delicious as the moment they were served at your table.
Key Takeaways:
- Properly storing Olive Garden breadsticks in airtight containers or wrapping them tightly in plastic wrap or foil can help maintain their freshness and flavor, allowing you to enjoy them at your convenience for up to 2 days at room temperature or 5-7 days in the refrigerator.
- Freezing Olive Garden breadsticks in airtight containers or freezer bags can extend their shelf life for up to 2-3 months, providing a convenient option to stock up on this beloved treat and enjoy it whenever the craving strikes. Thaw and reheat them properly to savor their deliciousness as if they were freshly baked.
Read more: How To Reheat Olive Garden Breadsticks
The Importance of Storing Olive Garden Breadsticks
Why is it so important to learn how to properly store Olive Garden breadsticks? Well, for starters, these breadsticks are a sought-after treat that many people crave even after leaving the restaurant. By storing them correctly, you can extend their shelf life and enjoy them at your convenience.
One of the key reasons to store Olive Garden breadsticks properly is to maintain their freshness. When properly stored, the breadsticks will retain their soft and chewy texture, making each bite as satisfying as the first. Without proper storage, they may become stale, dry, or even moldy, ruining the taste and experience.
Another important aspect is food safety. Bread products are prone to bacterial growth if not stored correctly. By following the right storage methods, you can minimize the risk of foodborne illnesses and ensure that the breadsticks are safe to consume.
Additionally, knowing how to store Olive Garden breadsticks can save you money. If you have leftovers from a meal or a catering order, you can preserve them for future enjoyment rather than letting them go to waste. This is especially helpful for those who love Olive Garden breadsticks but may not have frequent access to the restaurant.
Storing your breadsticks properly can also save you time. With the right storage techniques, you can have a delicious snack or accompaniment ready to go whenever you’re in the mood, without the need to visit the restaurant or go through the trouble of making them from scratch.
Finally, by learning how to store Olive Garden breadsticks, you can indulge in the experience of enjoying these beloved breadsticks in the comfort of your own home. Whether it’s as a side dish for a homemade Italian meal or as a standalone snack, having a stash of breadsticks ready to go can elevate your dining experience.
Now that you understand the importance of storing Olive Garden breadsticks properly, let’s dive into the step-by-step process to help you preserve the freshness and flavor of these iconic treats.
Step 1: Gather the Necessary Supplies
Before you start storing your Olive Garden breadsticks, it’s essential to gather the necessary supplies to ensure proper storage. Here’s what you will need:
- Airtight Containers: Invest in good quality airtight containers that can effectively seal in the freshness of the breadsticks. Choose containers that are large enough to accommodate the breadsticks without causing them to bend or break.
- Plastic Wrap or Foil: If you don’t have airtight containers, you can alternatively use plastic wrap or foil to wrap the breadsticks tightly. This will help maintain their moisture and prevent them from drying out.
- Freezer Bags (if freezing): If you’re planning to freeze the breadsticks for longer storage, make sure to have freezer bags on hand. Freezer bags are designed to prevent freezer burn and help retain the quality of the breadsticks.
- Labels and Marker: To stay organized, it’s helpful to label the containers or bags with the date of storage. This will make it easier to keep track of how long the breadsticks have been stored and ensure you consume them within a reasonable time frame.
- Cooling Rack or Baking Sheet: If you’re storing freshly baked breadsticks, it’s recommended to cool them completely on a wire cooling rack or a baking sheet before packaging them. This will prevent moisture buildup and maintain their texture.
Once you have gathered all these supplies, you’re ready to move on to the next step: properly packaging the breadsticks for storage. Remember, using the right containers and materials will help preserve the taste, texture, and freshness of the Olive Garden breadsticks.
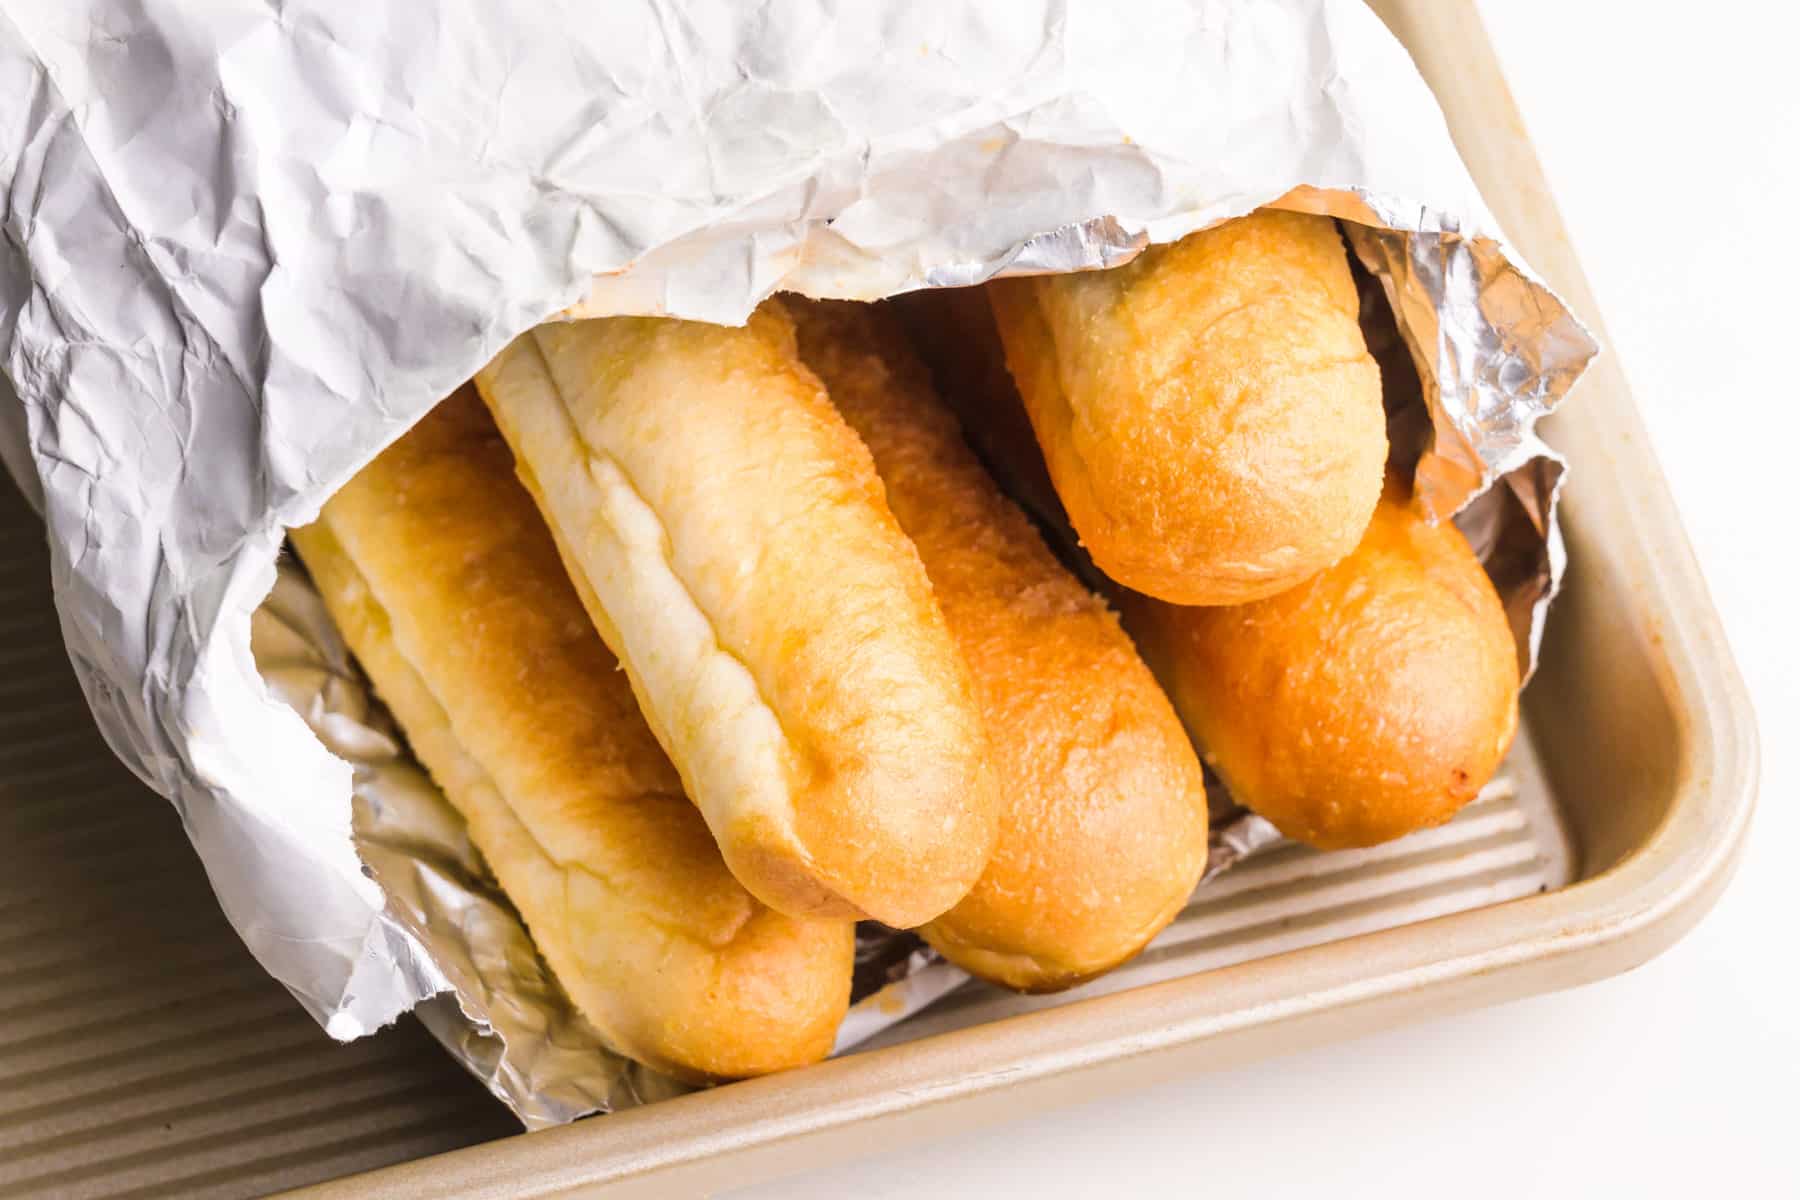
Step 2: Properly Packaging the Breadsticks
Now that you have the necessary supplies, it’s time to package the Olive Garden breadsticks for optimal storage. Proper packaging will help protect the breadsticks from moisture, air exposure, and contaminants. Here are the recommended methods for packaging:
Option 1: Airtight Containers
If you have airtight containers, this is the ideal method for storing the breadsticks. Follow these steps:
- Ensure that the breadsticks are completely cooled.
- Place the breadsticks inside the airtight container in a single layer or stack them vertically, if needed.
- Seal the container tightly to prevent air from getting in.
Note: If the breadsticks don’t fit in a single layer, you can use parchment or wax paper to separate the layers and prevent them from sticking together.
Option 2: Plastic Wrap or Foil
If you don’t have airtight containers, you can use plastic wrap or foil to tightly wrap the breadsticks. Here’s how:
- Cool the breadsticks completely.
- Place the breadsticks in a stack on a clean and flat surface.
- Wrap the entire stack tightly with plastic wrap or foil, making sure to cover all sides of the breadsticks.
- Twist the ends of the wrap or foil to secure them in place.
This method helps maintain the moisture within the breadsticks and protects them from drying out.
Regardless of the packaging method you choose, make sure to press out any excess air before sealing to minimize the risk of the breadsticks becoming stale. Properly packaging the breadsticks sets the foundation for successful storage and preservation.
Now that your Olive Garden breadsticks are securely packaged, it’s time to explore the different storage options available. In the next steps, we will discuss how to store the breadsticks at room temperature, in the refrigerator, and how to freeze them for long-term storage.
Step 3: Storing at Room Temperature
If you plan to consume your Olive Garden breadsticks within a day or two, storing them at room temperature is a convenient option. Here’s how:
- Ensure that the breadsticks are completely cooled and properly packaged in airtight containers or wrapped tightly in plastic wrap or foil.
- Select a cool and dry area in your kitchen or pantry where the temperature remains consistent.
- Place the packaged breadsticks in the selected area, away from direct sunlight, heat sources, or excessive humidity. These factors can cause the breadsticks to spoil or lose their freshness.
- If you have multiple containers or wrapped breadsticks, stack them carefully, making sure not to crush or deform them.
- Make sure the storage location is easily accessible so you can grab a breadstick whenever you desire.
When stored properly at room temperature, Olive Garden breadsticks can maintain their flavor and texture for up to 2 days. However, it’s essential to perform a visual and smell check before consuming them to ensure they haven’t gone bad or developed any signs of spoilage.
Note: Storing breadsticks at room temperature is suitable for short-term storage only. If you have leftover breadsticks that won’t be consumed within a couple of days, it’s best to consider refrigeration or freezing methods to extend their shelf life.
With this knowledge, you can confidently store your breadsticks at room temperature and enjoy them whenever you’re in the mood for a tasty treat. In the next step, we will explore the option of storing Olive Garden breadsticks in the refrigerator for increased preservation.
To store Olive Garden breadsticks, place them in an airtight container or resealable plastic bag to maintain freshness. Keep them at room temperature and consume within 2-3 days for the best taste and texture.
Step 4: Storing in the Refrigerator
If you want to extend the shelf life of your Olive Garden breadsticks beyond a couple of days, storing them in the refrigerator is the way to go. The cooler temperature helps slow down the staling process and keeps the breadsticks fresh for a longer period. Follow these steps to store your breadsticks in the refrigerator:
- Ensure that the breadsticks are completely cooled and properly packaged in airtight containers or wrapped tightly in plastic wrap or foil.
- Place the packaged breadsticks in the refrigerator, preferably in the main compartment rather than the door. This helps maintain a consistent temperature.
- Avoid storing the breadsticks near strong-smelling foods such as onions or garlic, as they can absorb those flavors.
- Keep the breadsticks away from areas where they can get crushed or squished by other items in the refrigerator.
- Make sure to label the containers or packages with the date of storage to keep track of their freshness.
When stored in the refrigerator, Olive Garden breadsticks can stay fresh for up to 5-7 days. However, keep in mind that refrigeration may cause the breadsticks to lose some of their original texture and become slightly firmer. To restore the softness, you can briefly warm them in the oven or microwave before serving.
Remember to always check the breadsticks for any signs of spoilage before consuming them. If you notice any mold, odd smells, or changes in color and texture, it’s best to discard them to avoid any risk of foodborne illnesses.
Storing your Olive Garden breadsticks in the refrigerator allows you to enjoy them for a longer period while maintaining their quality. However, if you have an abundance of breadsticks that won’t be consumed within a week, freezing them becomes a viable option. We’ll cover freezing in the next step.
Step 5: Freezing Olive Garden Breadsticks
Freezing Olive Garden breadsticks is an excellent option if you want to store them for an extended period of time. Freezing helps preserve their freshness and flavor, allowing you to enjoy them at a later date. Follow these steps to freeze your breadsticks:
- Ensure that the breadsticks are completely cooled and properly packaged in airtight containers or wrapped tightly in plastic wrap or foil.
- If using airtight containers, make sure they are freezer-safe and leave some headspace to allow for expansion during freezing.
- If using plastic wrap or foil, wrap the breadsticks tightly to prevent freezer burn and freezer odors from seeping in.
- Place the packaged breadsticks in a freezer bag, squeezing out as much air as possible before sealing.
- Label the freezer bag with the date of storage for easy tracking.
- Place the freezer bag in the coldest part of the freezer, away from other food that might crush or deform them.
Frozen Olive Garden breadsticks can maintain their quality for up to 2-3 months. However, for the best flavor and texture, it’s recommended to consume them within a month. Remember to thaw only the amount you plan to eat to minimize waste.
When you’re ready to enjoy the frozen breadsticks, follow the next step to learn how to thaw and reheat them properly.
Freezing Olive Garden breadsticks allows you to stock up on this delicious treat and enjoy them whenever the craving strikes. It’s a convenient option for those who want to always have a supply of breadsticks on hand without worrying about spoilage.
Step 6: Thawing and Reheating Frozen Breadsticks
When it’s time to enjoy your frozen Olive Garden breadsticks, it’s essential to thaw and reheat them properly to maintain their taste and texture. Here’s how you can do it:
- Thawing:
- Refrigerator: Place the frozen breadsticks in the refrigerator and allow them to thaw slowly overnight or for a few hours. This method ensures a gradual thaw and helps retain the moisture within the breadsticks.
- Room Temperature: If you’re short on time, you can let the frozen breadsticks thaw at room temperature for approximately 1-2 hours. Make sure to keep them in their packaging to prevent any potential contamination.
- Microwave: If you’re in a hurry, you can use the defrost setting on your microwave to thaw the breadsticks. Follow the microwave’s instructions for defrosting and check them frequently to prevent overheating.
- Reheating:
- Oven: Preheat your oven to 350°F (175°C). Place the thawed breadsticks on a baking sheet and bake for 5-10 minutes, or until heated through. This method will help crisp up the exterior while keeping the interior soft and chewy.
- Microwave: If you prefer a quicker method, you can reheat the breadsticks in the microwave. Wrap them in a damp paper towel and microwave them in short bursts of 10-15 seconds until heated through. Be cautious not to overcook them, as they can become tough or rubbery.
There are a few methods you can use to thaw your frozen breadsticks:
Once the breadsticks are thawed, it’s time to reheat them to restore their warm and inviting texture:
Make sure to check the breadsticks for desired warmth before serving. Once reheated, enjoy your Olive Garden breadsticks as if they were freshly baked!
Now that you know how to thaw and reheat your frozen breadsticks, you can indulge in their deliciousness anytime you like. But don’t forget to follow the next step for additional tips on maintaining their freshness and flavor.
Step 7: Tips for Maintaining Freshness
To ensure the longest possible shelf life and maintain the freshness of your Olive Garden breadsticks, here are some additional tips to keep in mind:
- Proper Packaging: Always use airtight containers, plastic wrap, or foil to seal the breadsticks tightly. This prevents air, moisture, and contaminants from entering, helping to preserve their flavor and texture.
- Storage Location: Choose a cool, dry place to store the breadsticks, away from direct sunlight, heat sources, and excessive humidity. Exposure to these elements can accelerate staling and spoilage.
- Use Fresh Breadsticks: The fresher the breadsticks when you first store them, the longer they will last. If possible, try to store them as soon as they cool down after baking or after your visit to the restaurant.
- Consume Within the Recommended Timeframe: While proper storage can extend the shelf life of the breadsticks, it’s important to consume them within the recommended timeframe. This ensures they are at their best in terms of flavor and texture.
- Avoid Excessive Handling: Each time you handle the breadsticks, you introduce the risk of contamination or moisture transfer. Only touch them when necessary, and avoid excessive handling to maintain their freshness.
- Regularly Check for Spoilage: Periodically check the breadsticks for any signs of spoilage, such as mold, unusual odors, or changes in color or texture. If any of these are present, it’s best to discard them to avoid any potential health risks.
By following these tips, you can maximize the freshness and longevity of your Olive Garden breadsticks, ensuring that every bite is as delicious as the first.
Now that you have learned the step-by-step process for storing, thawing, and reheating Olive Garden breadsticks, as well as some bonus tips, you are ready to enjoy these delectable treats whenever you desire. Whether it’s a quick snack, a side dish, or a party appetizer, having perfectly stored and preserved breadsticks at your fingertips adds a touch of Italian goodness to any occasion.
Go ahead, satisfy your cravings and savor the taste of Olive Garden breadsticks at any time. Buon appetito!
Read more: How To Reheat Olive Garden Alfredo
Conclusion
Congratulations! You are now equipped with the knowledge and techniques to properly store and preserve Olive Garden breadsticks. By following the step-by-step process outlined in this guide, you can ensure that these beloved breadsticks maintain their freshness, flavor, and texture for an extended period of time.
Remember, the key to successfully storing Olive Garden breadsticks lies in proper packaging, selecting suitable storage methods, and following recommended thawing and reheating techniques. Whether you choose to store them at room temperature, in the refrigerator, or in the freezer, each method has its advantages and helps to meet your specific needs.
By gathering the necessary supplies, packaging the breadsticks correctly, and selecting the appropriate storage option, you can enjoy the convenience of having Olive Garden breadsticks available whenever you want them. Whether it’s a spontaneous craving or a planned special meal, these breadsticks will be at your fingertips, ready to be warmed and enjoyed.
With the ability to extend the shelf life of Olive Garden breadsticks, you can minimize waste and save money. It’s a win-win situation, as you get to indulge in these delicious treats while reducing environmental impact.
So go ahead, stock up on these irresistible breadsticks, and savor the taste of Olive Garden in the comfort of your own home. Whether it’s a family gathering, a casual dinner, or a solo treat, you can now enjoy the iconic flavors of Olive Garden anytime you desire.
Remember to follow the tips for maintaining freshness and regularly check for spoilage to ensure the best quality. With proper storage and care, you can enjoy the delightful experience of Olive Garden breadsticks whenever the craving strikes.
So, what are you waiting for? Get ready to embark on a culinary journey and bring the taste of Olive Garden into your own kitchen with perfectly stored and preserved breadsticks. Buon appetito!
Frequently Asked Questions about How To Store Olive Garden Breadsticks
Was this page helpful?
At Storables.com, we guarantee accurate and reliable information. Our content, validated by Expert Board Contributors, is crafted following stringent Editorial Policies. We're committed to providing you with well-researched, expert-backed insights for all your informational needs.


0 thoughts on “How To Store Olive Garden Breadsticks”