Articles
How To Reheat Olive Garden Breadsticks
Modified: August 26, 2024
Discover the perfect way to reheat Olive Garden breadsticks with our easy-to-follow guide. Whether you're a gardening expert or a beginner, enjoy warm and delicious breadsticks in no time.
(Many of the links in this article redirect to a specific reviewed product. Your purchase of these products through affiliate links helps to generate commission for Storables.com, at no extra cost. Learn more)
Introduction
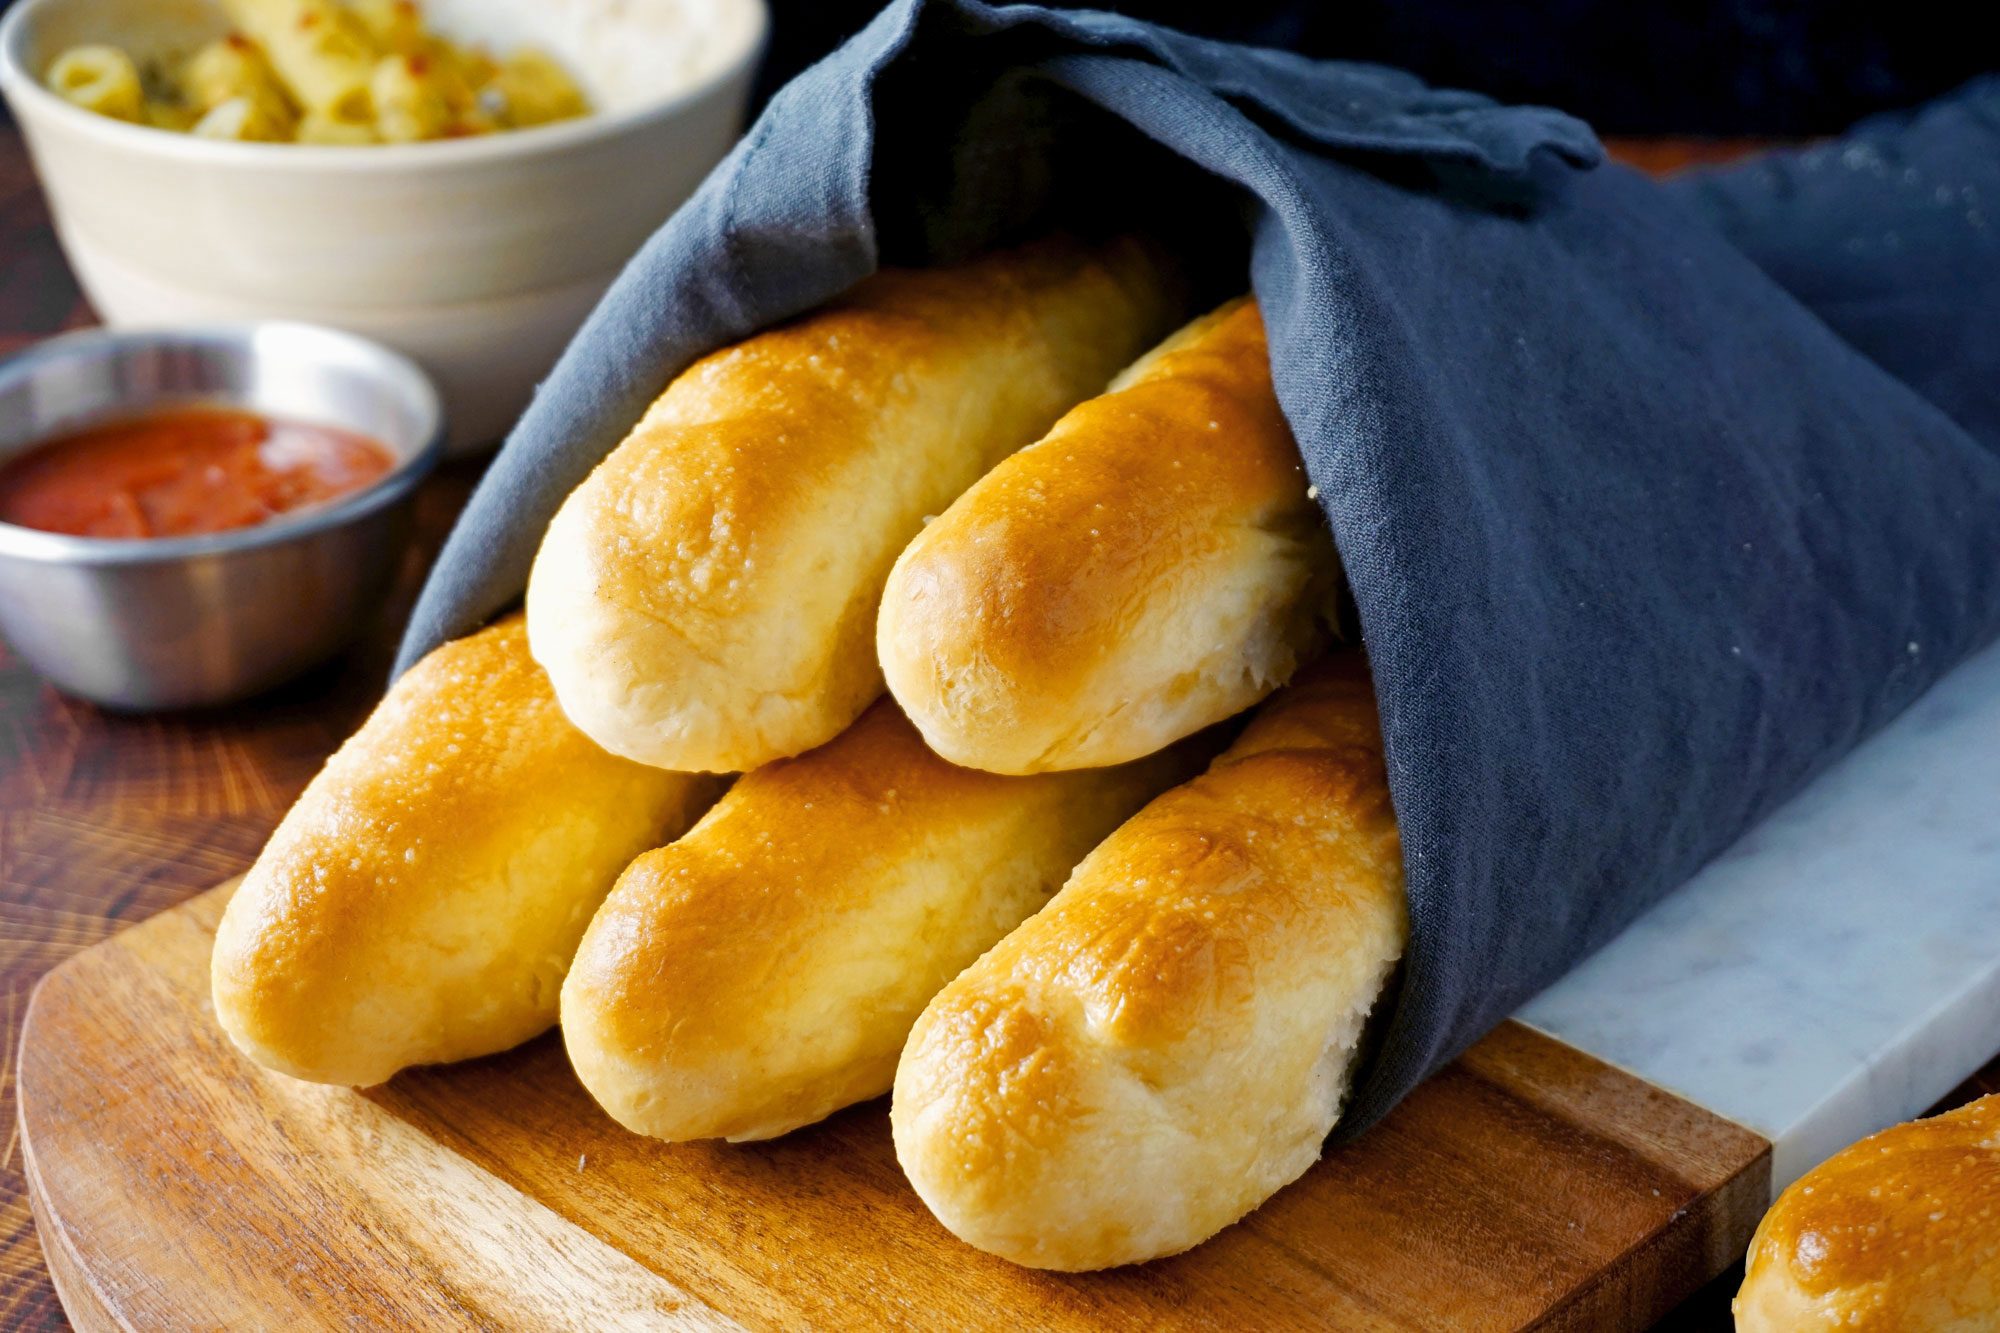
Welcome to the world of Olive Garden’s delectable breadsticks! These warm and lightly seasoned breadsticks have become synonymous with the restaurant chain, delighting diners with their irresistible aroma and delicious flavor. However, if you have some leftover breadsticks or simply want to enjoy them at a later time, you may wonder how to reheat them while preserving their original taste and texture.
In this article, we will guide you through a simple and foolproof method to reheat Olive Garden breadsticks to perfection. So, whether you had a great meal at the restaurant or ordered takeout, you can always enjoy the warm and freshly baked goodness of these breadsticks right in your own kitchen.
Before we dive into the reheating process, let’s take a moment to appreciate what makes Olive Garden breadsticks so special. These iconic breadsticks are known for their soft and fluffy texture, perfectly seasoned with a combination of garlic and salt. Each bite is like a heavenly experience, and it’s no wonder that many people can’t get enough of them.
Now that we’ve whetted your appetite, it’s time to turn our attention to reheating these marvelous breadsticks. With just a few simple steps, you can enjoy the same warm and savory experience that you had at the Olive Garden.
So, let’s get started!
Key Takeaways:
- Enjoy the warm and savory experience of Olive Garden breadsticks at home by following a simple reheating method using the oven. Preserve their soft and fluffy texture for a delightful treat anytime.
- Elevate your dining experience by pairing reheated Olive Garden breadsticks with your favorite dipping sauces or condiments. Indulge in the iconic taste and aroma of these delectable treats.
Read more: How To Store Olive Garden Breadsticks
Step 1: Preheat the oven
The first step in reheating Olive Garden breadsticks is to preheat your oven. Preheating ensures that the breadsticks heat evenly and maintain their soft texture. Set your oven to 350 degrees Fahrenheit (175 degrees Celsius) and allow it to reach the desired temperature.
While waiting for the oven to preheat, take this time to gather the breadsticks and any accompanying sauces or seasonings you’d like to serve with them. By having everything ready in advance, you can ensure a smooth and efficient reheating process.
It’s important to note that reheating the breadsticks in the oven, rather than using a microwave, is the preferred method. Microwaving may result in a loss of the breadsticks’ texture and make them chewy or rubbery. By using the oven, you can recreate the original taste and texture of the breadsticks.
Once your oven has reached the desired temperature, it’s time to move on to the next step of preparing the breadsticks for reheating.
Step 2: Prepare the breadsticks
Before placing the breadsticks in the oven, it’s important to prepare them properly. Start by taking the desired number of breadsticks out of their packaging or container. If they were refrigerated, allow them to come to room temperature for about 10-15 minutes. This will help them heat up evenly and maintain their softness.
Next, lightly brush each breadstick with a small amount of olive oil or melted butter. This step helps to enhance the flavor and create a slightly crispy exterior when reheated. If you prefer a garlic-infused taste, you can mix minced garlic with the olive oil or butter before brushing it onto the breadsticks.
Additionally, if you’d like to add a bit more seasoning to your breadsticks, you can sprinkle a pinch of garlic powder or Italian seasoning over the top. This will elevate the flavor profile and give them an extra kick of deliciousness.
Once the breadsticks are brushed with oil or butter and seasoned to your liking, they are ready to be placed on a baking sheet.
For easy cleanup, consider lining the baking sheet with parchment paper or aluminum foil. This will prevent any sticking and make it a breeze to clean up afterward. Make sure to leave a bit of space between each breadstick to allow for even heat distribution during the reheating process.
Now that the breadsticks are prepared, it’s time to move on to the next step: placing them in the oven for reheating.
Step 3: Place the breadsticks on a baking sheet
With the breadsticks prepared and the oven preheated, it’s time to move on to the next step of reheating them. Carefully transfer the prepared breadsticks to a baking sheet, ensuring that they are spaced evenly apart.
By placing the breadsticks on a baking sheet, you allow for even heat distribution and ensure that they reheat properly. This helps to maintain their delicious texture, keeping them soft and fluffy on the inside while achieving a slightly crispy exterior.
If you have different varieties of breadsticks, such as regular and stuffed, you can arrange them on separate sections of the baking sheet to ensure they heat evenly and don’t alter each other’s flavor profiles.
Once you have the breadsticks arranged on the baking sheet, it’s time to transfer them to the preheated oven for reheating. Be careful not to overcrowd the baking sheet to ensure that each breadstick has enough space to heat evenly.
Close the oven door and get ready to witness the magic as the reheating process unfolds. The gentle heat of the oven will transform these cold breadsticks into warm and irresistible delights.
Now that the breadsticks are in the oven, it’s time to move on to the next step: reheating them to perfection.
To reheat Olive Garden breadsticks, preheat your oven to 350°F, wrap the breadsticks in aluminum foil, and heat for 10-15 minutes until warm. Enjoy!
Step 4: Reheat the breadsticks in the oven
Now comes the exciting part – reheating the breadsticks in the oven! Set a timer for about 5-7 minutes and let the breadsticks warm up in the preheated oven.
Reheating times may vary depending on the size and thickness of the breadsticks, so keep a close eye on them. You want to ensure they are heated through without becoming overly dry or toasted.
During the reheating process, the gentle heat of the oven will warm up the breadsticks, making them soft and tender. The oil or butter you brushed onto them earlier will help create a slightly crispy exterior, adding that perfect balance of textures.
While the breadsticks are reheating, take a moment to enjoy the wonderful aroma that fills your kitchen. The scent of warm bread and garlic will have your taste buds eagerly anticipating the final result.
As the timer approaches the 5-7 minute mark, start checking the breadsticks for doneness. Gently press the center of a breadstick to ensure it feels warm to the touch. If they need a little more time, you can continue reheating them for an additional minute or two.
Remember, you want the breadsticks to be heated through but still maintain their soft and fluffy texture. Overheating them can result in dry and tough breadsticks, so it’s important to monitor them closely.
Once the breadsticks are warmed through and have reached the desired doneness, it’s time to remove them from the oven and get ready to enjoy your beautifully reheated Olive Garden breadsticks.
Now that the breadsticks are perfectly reheated, it’s time to move on to the next step: removing them from the oven.
Read more: How To Reheat Olive Garden Alfredo
Step 5: Remove the breadsticks from the oven
The aroma of freshly baked breadsticks fills the air as you approach the oven. It’s time to remove the breadsticks and bask in the satisfaction of a successful reheating process.
Carefully open the oven door and using oven mitts or heat-resistant gloves, carefully remove the baking sheet with the reheated breadsticks. Place it on a heat-resistant surface to cool slightly before serving.
Take a moment to admire the golden brown exterior of the breadsticks. The gentle crisping on the outside is the perfect complement to the soft and fluffy interior waiting to be enjoyed.
Allow the breadsticks to cool for a few minutes before handling them. This will prevent any accidental burns and give them a chance to firm up slightly. However, be sure to serve them while they are still warm for the best taste experience.
Now that the breadsticks have been safely removed from the oven, it’s time to move on to the final step: serving and enjoying the deliciously reheated Olive Garden breadsticks.
But before we savor the warm, garlicky goodness, let’s quickly recap the steps we’ve taken so far:
- Preheated the oven to 350 degrees Fahrenheit (175 degrees Celsius)
- Prepared the breadsticks by brushing them with olive oil or melted butter and adding seasoning if desired
- Placed the breadsticks on a baking sheet, allowing for even heat distribution
- Reheated the breadsticks in the oven for 5-7 minutes, or until warm and golden brown
With the breadsticks freshly reheated and ready to be enjoyed, let’s move on to the final step: serving and indulging in these savory treats.
Step 6: Serve and enjoy the reheated Olive Garden breadsticks
The moment has arrived to savor the fruits of your reheating efforts – the glorious taste of Olive Garden breadsticks. With their warm and enticing aroma, they are ready to be served and enjoyed.
Transfer the reheated breadsticks from the baking sheet to a serving platter or basket, inviting everyone to partake in this delightful treat. Arrange them neatly, ensuring a visually appealing presentation that matches their irresistible taste.
Pair the breadsticks with your favorite dipping sauces or condiments. Popular options include marinara sauce, Alfredo sauce, or even an herb-infused olive oil for a simple and elegant touch. The choice is yours, so get creative and experiment with different flavors to elevate the experience.
As you take your first bite, notice the satisfying crunch on the outside followed by the soft and pillowy interior. The garlic and salt-infused flavor will dance on your taste buds, transporting you back to the warm and inviting atmosphere of the Olive Garden.
Remember to enjoy the breadsticks while they are still warm to fully experience their luscious texture and flavors. They make a perfect accompaniment to any meal or can be enjoyed on their own as a delicious snack.
Whether you’re enjoying the breadsticks as a side dish, using them to mop up a saucy pasta dish, or savoring them as a standalone treat, these reheated Olive Garden breadsticks are sure to bring smiles and satisfaction to everyone at the table.
Congratulations on successfully reheating the Olive Garden breadsticks to perfection! Your dedication and patience have paid off, and now you can enjoy the taste of the restaurant’s iconic breadsticks from the comfort of your own home.
Now that you know how to reheat Olive Garden breadsticks, you can keep the enjoyment going even after your visit to the restaurant or takeout order. With these simple steps, you can relish in the warm and flavorful experience of Olive Garden breadsticks anytime you desire.
So, gather your loved ones, serve up these deliciously reheated breadsticks, and revel in the joy of sharing a slice of Olive Garden’s renowned culinary delight.
Enjoy!
Conclusion
As we conclude our journey through reheating Olive Garden breadsticks, we hope that you now feel confident and excited to recreate the warm and flavorful experience at home. By following these simple steps, you can enjoy the iconic taste of these delectable breadsticks anytime you desire.
With the right preparation and a few minutes in the oven, you can bring the breadsticks back to life, preserving their soft and fluffy texture while achieving a delightful crispness on the outside. Whether you have leftovers from a visit to the restaurant or simply want to enjoy these mouthwatering breadsticks from the comfort of your own home, reheating them to perfection is now within your grasp.
Remember to preheat the oven, prepare the breadsticks by brushing them with oil or butter and adding a sprinkle of seasoning, and arrange them on a baking sheet for even heat distribution. Reheat them in the oven until warm and golden brown, being careful not to overcook them. Then, remove them from the oven, allow them to cool slightly, and serve them with your favorite sauces or condiments.
With each bite, savor the combination of flavors and the nostalgic feeling that comes with enjoying these breadsticks. The Garlic-infused aroma and the soft, warm texture will transport you back to the Olive Garden, even if you’re miles away.
So, the next time you find yourself with leftover Olive Garden breadsticks or a craving for their deliciousness, don’t hesitate to use this reheating method. With a little effort, you can enjoy these delectable treats in the comfort of your own home.
We hope this guide has been helpful in empowering you to savor the irresistible taste of Olive Garden breadsticks whenever the craving strikes. By following the steps outlined in this article, you can bring the essence of the restaurant into your own kitchen and share the joy of these warm and flavorful breadsticks with your loved ones.
Now it’s time to gather your ingredients, preheat the oven, and embark on your culinary adventure. Enjoy the process, relish the aroma, and delight in every bite as you experience the deliciousness of reheated Olive Garden breadsticks. Bon appétit!
Frequently Asked Questions about How To Reheat Olive Garden Breadsticks
Was this page helpful?
At Storables.com, we guarantee accurate and reliable information. Our content, validated by Expert Board Contributors, is crafted following stringent Editorial Policies. We're committed to providing you with well-researched, expert-backed insights for all your informational needs.


0 thoughts on “How To Reheat Olive Garden Breadsticks”