Articles
How To Store Clay So It Doesn’T Dry
Modified: December 7, 2023
Learn effective ways to store clay and prevent it from drying out. Read our informative articles and keep your clay fresh and pliable for longer.
(Many of the links in this article redirect to a specific reviewed product. Your purchase of these products through affiliate links helps to generate commission for Storables.com, at no extra cost. Learn more)
Introduction
Storing clay properly is essential for any pottery enthusiast or artist. Clay is a versatile material used in various crafts and sculpting projects, but it can quickly become unusable if not stored correctly. Clay has a high water content, so it is prone to drying out and becoming hard and brittle. To prevent this, it is crucial to follow proper storage techniques to keep your clay in its optimal condition.
In this article, we will explore the importance of storing clay properly and provide you with practical tips to ensure your clay stays soft and ready to use. We will discuss choosing the right container, preparing the clay before storage, wrapping techniques, moisture-retaining methods, ideal storage conditions, checking for moisture levels, and even reviving dry clay. By following these guidelines, you can extend the lifespan of your clay and maximize its usability.
Whether you are a beginner or an experienced potter, understanding the best practices for storing clay will not only save you money but also enhance your creativity. Let’s dive into the details and discover how to preserve the quality of your clay so it doesn’t dry out.
Key Takeaways:
- Properly storing clay preserves its moisture, saves money, maintains consistent quality, reduces contamination, and ensures convenient accessibility for creative projects.
- Choose the right container, prepare the clay, wrap it tightly, use moisture-retaining techniques, store in a cool, dark place, check moisture levels, and revive dry clay when needed for optimal clay preservation.
Read more: How To Store Air Dry Clay
Why it’s important to store clay properly
Properly storing clay is crucial to maintain its workability and prevent it from drying out. Here are a few reasons why it’s important to store clay properly:
1. Preserves clay’s moisture: Clay contains a high percentage of water, which gives it its malleable and pliable nature. When clay is exposed to air for an extended period, evaporation occurs, leading to the loss of moisture. This causes the clay to become hard, making it difficult to shape or work with. Storing clay properly can help retain its moisture content and keep it in a workable state.
2. Saves money: Clay can be an expensive material, especially if you use high-quality or specialized clays. When clay dries out and becomes unusable, it becomes a waste of money. By storing clay properly, you can extend its lifespan and avoid unnecessary waste.
3. Ensures consistent quality: Clay that has dried out and been rehydrated multiple times can lose its original qualities. The repeated drying and rehydration process can affect the clay’s texture, plasticity, and overall quality. Proper storage techniques help maintain the clay’s original consistency, ensuring that each time you use it, you’re working with clay of consistent quality.
4. Reduces clay contamination: Clay is susceptible to picking up foreign particles and contaminants from the air. Unprotected or improperly stored clay can accumulate dirt, dust, and debris, making it less suitable for use. Storing clay in a sealed container or wrapping it properly helps minimize these contaminants, ensuring a clean and pure clay material for your projects.
5. Convenient accessibility: Storing clay in an organized manner makes it easier to access when you’re ready to work on your projects. Instead of spending time searching for clay or dealing with dry lumps that need rehydration, properly stored clay will be readily available for use, allowing you to dive into your creative process without any delays or interruptions.
By understanding the importance of storing clay properly, you can take the necessary steps to ensure its longevity and usability. From preserving moisture to maintaining quality and reducing contamination, proper storage techniques play a vital role in maximizing the potential of your clay. Now let’s explore the different ways you can store clay to maintain its optimal condition.
Choosing the right container for clay storage
When it comes to storing clay, selecting the right container is key to keeping it fresh and workable. Here are some considerations to keep in mind when choosing a container for clay storage:
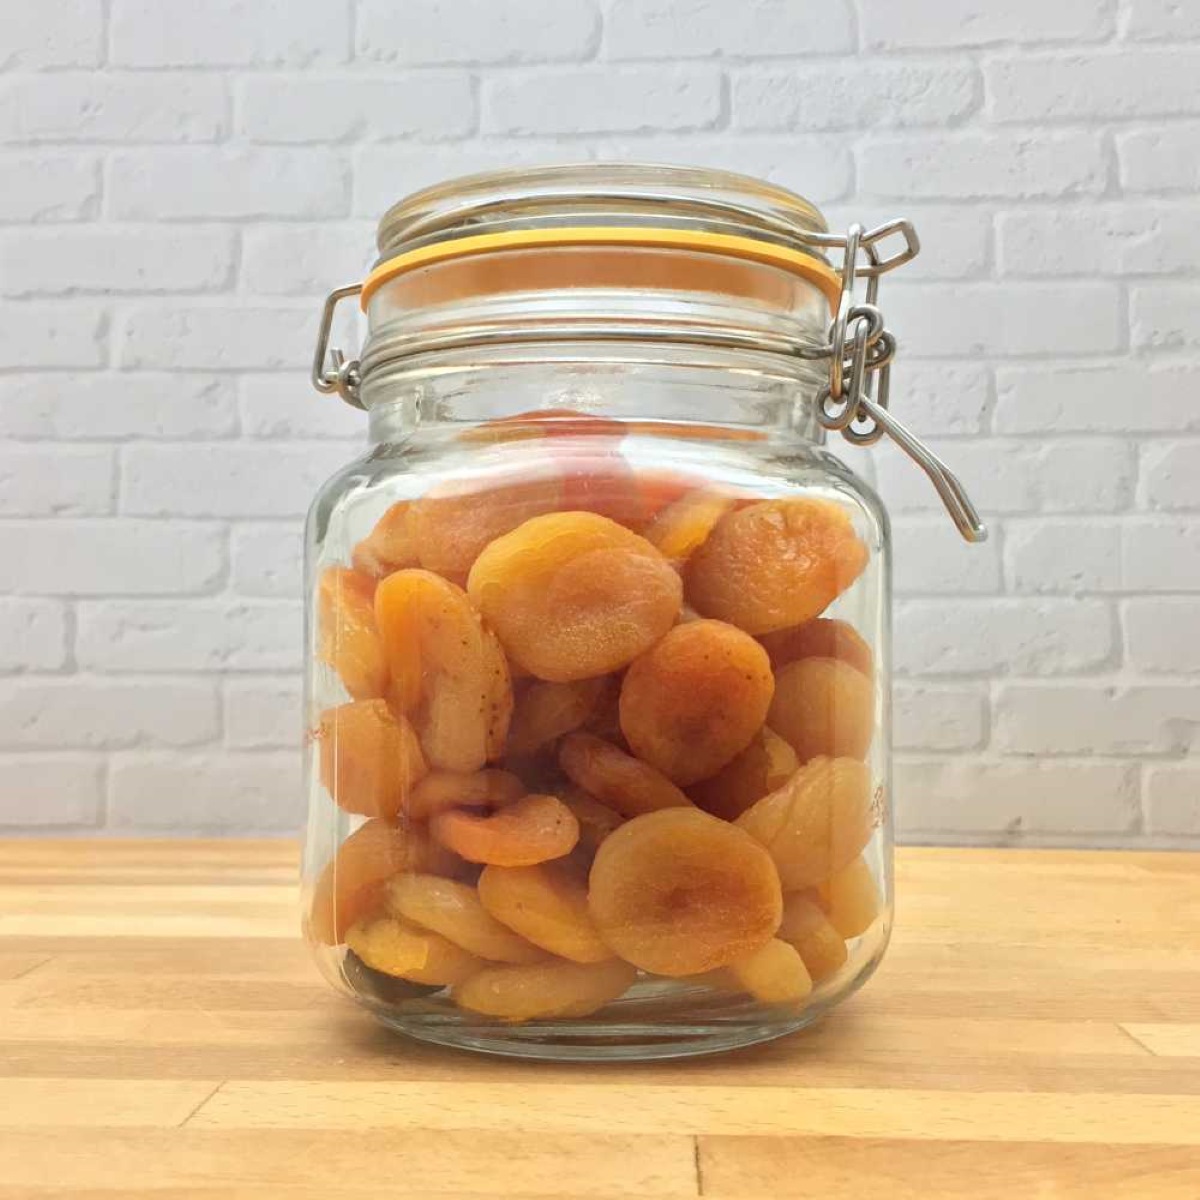
1. Airtight and moisture-proof: Clay is highly sensitive to air and moisture, so it’s crucial to choose a container that provides an airtight and moisture-proof seal. This will prevent the clay from drying out and keep it in its optimal condition. Look for containers with rubber gaskets or tight-fitting lids to ensure a secure seal.
2. Non-reactive material: Clay can react with certain materials, such as metal or certain plastics, which can potentially alter its composition or contaminate it. It is best to opt for containers made of non-reactive materials like food-grade plastics or glass. These materials will not interact with the clay and will maintain its purity.
3. Easy to clean: Over time, clay containers can accumulate residue and build-up, leading to potential contamination of the clay. Choose containers that are easy to clean, preferably with smooth surfaces and no hidden crevices where clay can stick. This will ensure that your clay container remains clean and free from any contaminants.
4. Size and shape: Consider the volume of clay you typically work with when selecting a storage container. It’s recommended to choose a container that accommodates your clay supply without leaving too much empty space. This minimizes the air exposure inside the container, reducing the chances of clay drying out. Additionally, consider the shape of the container – square or rectangular containers can be more space-efficient and stackable than round ones.
5. Portability: If you often bring your clay to different locations or workshops, consider a container that is easy to transport. Look for containers with handles or those designed specifically for clay storage and transportation. This will help protect your clay during transit and make it convenient to carry.
Remember, it’s important to dedicate a container exclusively for clay storage. Avoid using containers that have previously held food or other substances, as residual particles may contaminate the clay.
By selecting the right container for clay storage, you can ensure the longevity of your clay and maintain its ideal moisture levels. Now let’s move on to the next step – preparing the clay before storage.
Preparing the clay before storage
Before you store your clay, it’s important to prep the clay properly to ensure its longevity and usability. Here are some steps to follow when preparing clay for storage:
1. Remove any debris: Start by removing any debris or foreign materials from the clay. This includes rocks, twigs, or any other unwanted elements that may have mixed into the clay during the harvesting or processing stages.
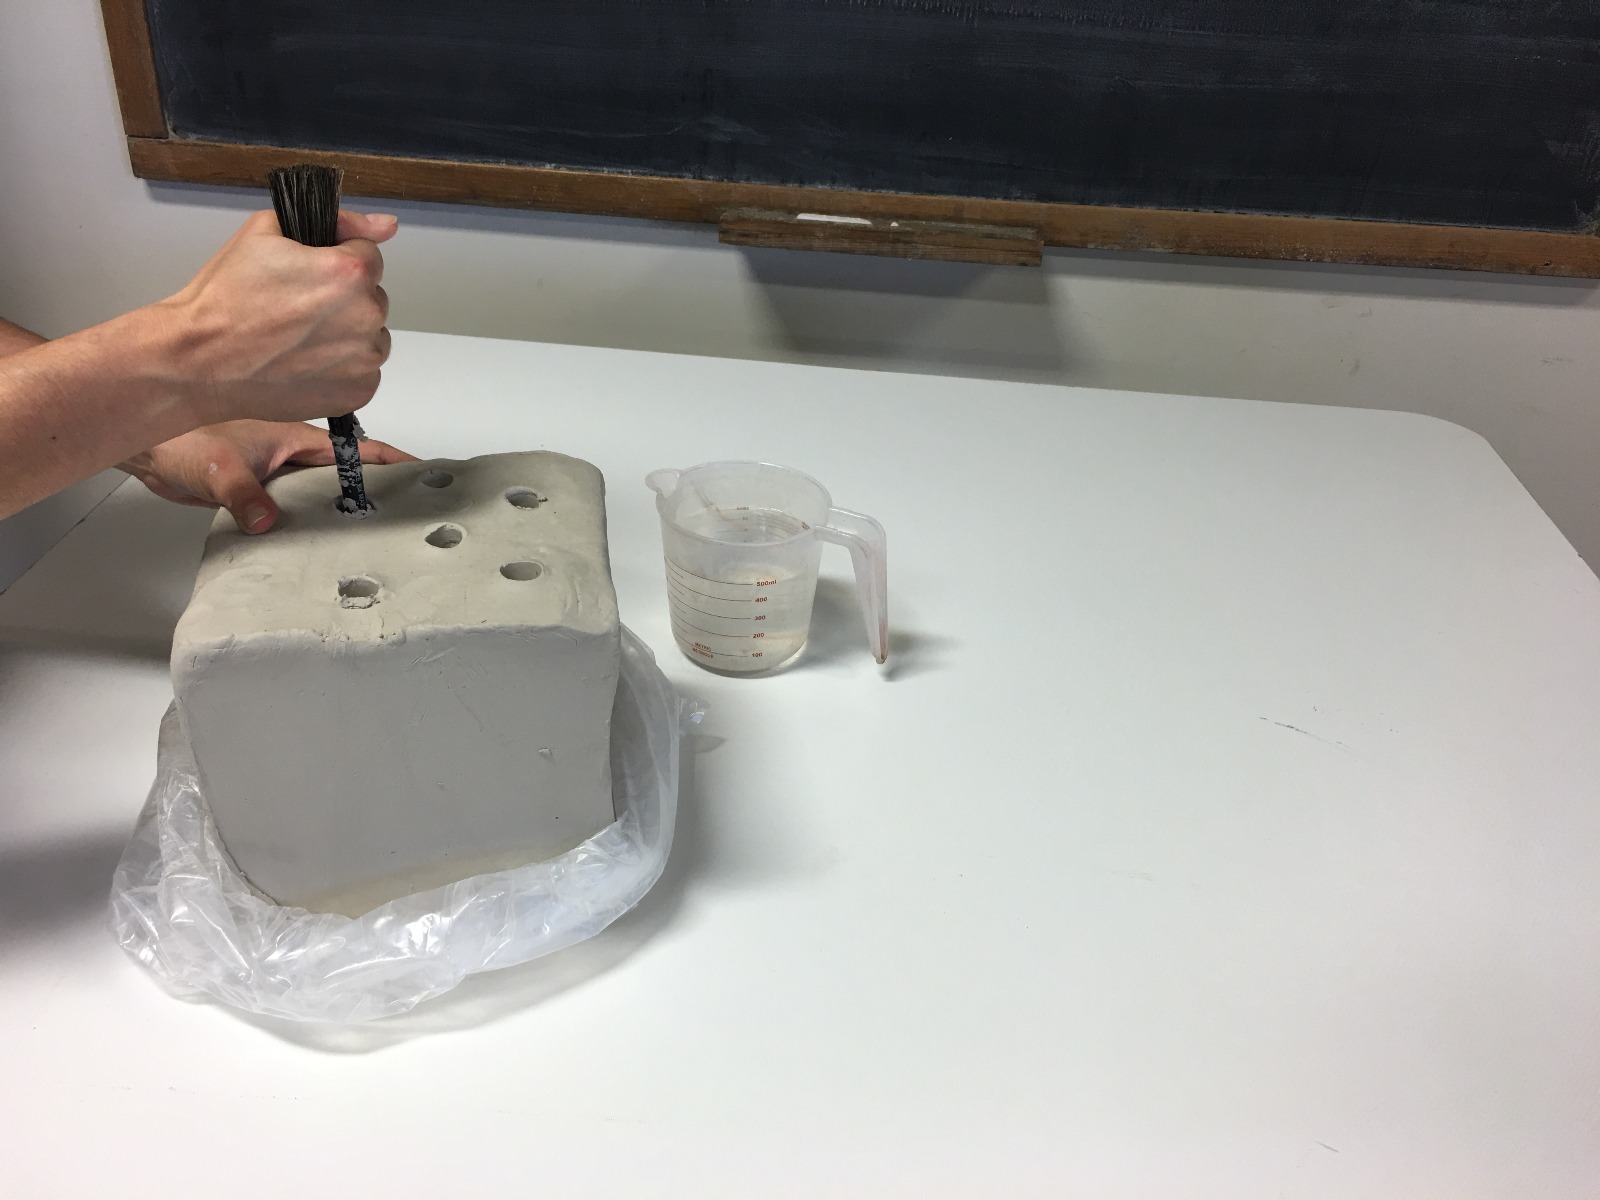
2. Wedge the clay: Wedging is a process that helps improve the clay’s consistency and homogeneity. It also helps eliminate air bubbles and redistribute moisture throughout the clay. By wedging the clay before storage, you’ll ensure that the moisture content is evenly distributed, reducing the chances of drying out or uneven moisture loss during storage. To wedge the clay, simply knead and press it repeatedly with your hands until it becomes smooth and pliable.
3. Divide into manageable portions: If you have a large quantity of clay, it’s advisable to divide it into smaller portions or chunks. This allows for easier handling and prevents unnecessarily exposing the entire batch of clay to air when you only need a small amount. Dividing the clay also helps maintain the moisture levels of the unused clay while you work with smaller portions.
4. Shape into blocks or balls: Once your clay is divided into smaller portions, shape them into blocks or balls. The size and shape can depend on your preference or the projects you typically work on. Shaping the clay into compact forms helps minimize the surface area exposed to air, reducing the potential for drying out.
5. Smooth the surfaces: Smooth the surfaces of the clay blocks or balls by gently rubbing or patting them with your hands. This will help seal the clay and create a smoother surface that resists moisture loss. Pay attention to any cracks or rough edges and smooth them out to further protect the clay from drying.
By following these steps, you’ll ensure that your clay is prepared and ready for storage. The next step involves wrapping the clay to prevent drying and maintain its moisture content.
Wrapping the clay to prevent drying
Properly wrapping your clay is essential for preventing drying and maintaining its moisture content. Here are some effective methods for wrapping clay to keep it fresh and ready for use:
1. Plastic wrap: One of the most common and convenient ways to wrap clay is by using plastic wrap or cling film. Start by placing the clay block or ball in the center of a sheet of plastic wrap. Wrap the plastic wrap tightly around the clay, ensuring there are no gaps or openings where air can enter. Press and smooth the plastic wrap against the clay’s surface to create a tight, secure seal. This method helps keep the clay moist and prevents it from drying out.
2. Ziplock bags: Another effective option for wrapping clay is to use airtight ziplock bags. Place the clay block or ball inside a ziplock bag, ensuring it is completely sealed. Squeeze out any excess air before closing the bag to create a tight seal. The ziplock bag provides an extra layer of protection and keeps the clay moist for an extended period.
3. Wet cloth or damp paper towel: For smaller clay pieces, you can wrap them in a wet cloth or a damp paper towel. Moisten the cloth or towel with water (avoid soaking them) and wrap it tightly around the clay to create a barrier against air exposure. The moisture from the cloth or towel will keep the clay hydrated and prevent it from drying.
4. Wax or parchment paper: If you prefer an alternative to plastic wrap, you can wrap clay with wax or parchment paper. Place the clay on a sheet of wax or parchment paper and fold it tightly around the clay, ensuring there are no openings. The paper will help maintain the clay’s moisture while allowing it to breathe slightly.
Regardless of the wrapping method you choose, make sure that the clay is tightly sealed and protected from air exposure. Additionally, label each wrapped clay piece with the date of storage to keep track of its freshness.
Remember, it’s essential to store your wrapped clay in suitable conditions to maintain its moisture and quality. In the next sections, we will discuss moisture-retaining techniques and ideal storage conditions for clay.
Store clay in an airtight container or plastic bag to prevent it from drying out. You can also add a damp cloth or sponge to keep it moist.
Read more: How To Store Clay
Using moisture-retaining techniques
In addition to wrapping your clay properly, there are several techniques you can employ to further retain its moisture and prevent drying. These techniques are particularly useful for longer-term storage or if you live in a dry climate. Here are some effective moisture-retaining techniques for storing clay:
1. Humidity trays: Placing your wrapped clay on humidity trays can help create a controlled environment that maintains moisture. A humidity tray is a shallow tray filled with water. The clay is placed on top of a rack or stand within the tray, ensuring it is not in direct contact with the water. As the water evaporates, it creates a humid microclimate around the clay, preventing it from drying out. Be sure to monitor the water level in the tray and refill it as needed.
2. Clay moisteners: Clay moisteners, such as clay saver discs or damp clay bags, can be placed inside the container alongside the wrapped clay. These clay moisteners are designed to slowly release moisture and keep the surrounding environment humid. They are especially helpful during dry seasons or in locations with low humidity levels. Follow the manufacturer’s instructions for usage and placement within the storage container.
3. Mist sprays: Periodically misting the outside of the wrapped clay with water can help maintain its moisture content. Use a spray bottle filled with water to lightly mist the surfaces of the wrapped clay. Avoid spraying directly onto the clay as excessive moisture can lead to mold or bacterial growth. Misting is particularly beneficial if you live in a hot or dry climate or if you notice the clay starting to feel drier.
4. Sealing containers: If you have multiple clay-containing containers, ensure that they are tightly sealed. Check the lids or closures regularly to make sure they are secure and airtight. This prevents air circulation within the containers, minimizing moisture loss. Consider using sealing wax or tape as an extra precaution to maintain the integrity of the seal.
Remember, it’s important to strike a balance with moisture-retaining techniques. Excessive moisture can lead to mold growth or make the clay too soft and difficult to work with. Regularly check the moisture levels of your clay and adjust the techniques accordingly to ensure optimal conditions.
By utilizing these moisture-retaining techniques, you can prolong the lifespan of your clay and ensure that it remains in a usable state for an extended period. In the next section, we will discuss the ideal storage conditions for clay.
Storing clay in a cool and dark place
The storage conditions of clay play a crucial role in maintaining its moisture and quality. One of the key factors to consider is the environment where you store your clay. Storing clay in a cool and dark place is highly recommended for optimal preservation. Here’s why:
1. Temperature control: Clay is sensitive to temperature fluctuations. High temperatures can accelerate the drying process and cause the clay to harden prematurely. On the other hand, extreme cold can affect the clay’s plasticity and make it more difficult to work with. Storing clay in a cool environment helps regulate its temperature and slows down the moisture evaporation process, preserving its workability.
2. Protection from sunlight: Exposure to direct sunlight can not only cause the clay to dry out rapidly but also affect its color and texture. UV rays can alter the properties of the clay and lead to discoloration or hardening. Storing clay in a dark place or in opaque containers shields it from sunlight, maintaining its moisture and preserving its original characteristics.
3. Consistent humidity levels: A cool and dark environment often offers more stable humidity levels. Consistency in humidity is essential for long-term clay storage. Fluctuations in humidity can cause the clay to absorb or release moisture, leading to inconsistent texture and quality. By storing clay in a cool and dark place, you create an environment with more controlled and stable humidity levels, ensuring the clay remains in optimal condition.
4. Slow aging process: Exposure to light and unfavorable environmental conditions can contribute to the aging process of clay. Storing clay in a cool and dark place slows down this aging process, helping to maintain the clay’s integrity and extend its usability. It also reduces the likelihood of developing dry spots or a hardened outer layer, making it easier to work with when you’re ready to use it.
When selecting a storage area, consider spaces like basements, closets, or cabinets that provide a consistently cool and dark environment. Avoid areas near heat sources, windows, or areas prone to temperature fluctuations, such as attics or garages. Additionally, make sure the storage area is dry and free from excessive humidity, as high humidity can promote mold growth or make the clay overly soft.
By storing your clay in a cool and dark place, you create optimal conditions for preserving its moisture, texture, and workability. In the next section, we will discuss the importance of checking clay regularly for moisture levels.
Checking clay regularly for moisture levels
Regularly monitoring the moisture levels of your stored clay is essential to ensure it remains in a workable and usable state. By checking the moisture levels, you can identify if the clay is too dry or too wet and take appropriate steps to maintain its optimal condition. Here’s why checking clay regularly is important and how you can do it:
1. Prevents excessive drying: Clay that is allowed to dry out excessively becomes hard and difficult to work with. Regularly checking the moisture levels allows you to catch any signs of drying early on. This way, you can take immediate action to rehydrate the clay before it hardens too much, ensuring its continued usability.
2. Avoids excessive moisture: Excessive moisture in clay can lead to a variety of issues, such as mold growth, clay slumping or sagging, or difficulty in shaping. By checking the moisture levels, you can identify if the clay is overly wet or damp. This allows you to take appropriate steps to remove excess moisture, such as allowing the clay to air dry or using absorbent materials.
3. Determines clay’s consistency: Different projects or techniques may require varying degrees of clay moisture. Regularly checking the moisture levels allows you to adjust the clay’s consistency based on your specific needs. For example, if you’re working on fine details or intricate designs, you may prefer a slightly drier clay that holds its shape better. Conversely, if you’re working on larger forms or need more malleability, a slightly wetter clay may be ideal. By monitoring the moisture levels, you can achieve the desired consistency for your projects.
To check the moisture levels of your clay, you can try the following methods:
1. Pinch test: Take a small amount of clay from the wrapped block or ball and pinch it between your fingers. Assess the clay’s texture and how it holds together. If the clay feels dry, crumbly, or falls apart easily, it may need rehydration. If it feels overly moist or sticks excessively to your hands, it may require some air drying or additional wedging.
2. Weight test: Get familiar with the weight of your clay when it’s properly moisturized. Over time, you will recognize any notable differences in weight that could indicate drying or excessive moisture. If the clay feels significantly lighter than usual, it may be too dry. On the other hand, if it feels excessively heavy, it may be too wet.
3. Visual inspection: Observe the appearance of the clay. Dry clay often has a lighter or duller color, while wet clay appears darker or more vibrant. If you notice a significant change in color or texture, it could indicate a shift in moisture levels.
By regularly checking the moisture levels of your clay, you can ensure it remains in an optimal state for your creative endeavors. In the next section, we will discuss how to revive dry clay in case it becomes too hard.
Reviving dry clay
If your clay has dried out and become too hard, don’t worry! There are several methods you can try to revive dry clay and restore its workability. Here are some techniques to help bring your dry clay back to life:
1. Rehydration: The simplest and most common method to revive dry clay is through rehydration. Start by breaking the dried clay into small pieces and placing them in a container. Add water gradually, allowing the clay to absorb the moisture. Use your hands or a tool to knead and mix the clay thoroughly, ensuring all dry pieces are evenly moistened. Continue adding water and kneading until the clay reaches the desired consistency. Be careful not to add too much water at once, as it can make the clay overly wet and difficult to work with.
2. Wedging: If the rehydrated clay still feels a bit lumpy or uneven, wedging can help improve its consistency. Take the rehydrated clay and press and knead it repeatedly, folding it over itself to eliminate any air bubbles or inconsistencies. Wedging helps distribute moisture evenly and improves the clay’s plasticity and workability.
3. Slip or water spray: If you don’t have time for extensive rehydration or wedging, you can try using slip or water spray to soften the clay. Slip is a mixture of water and clay particles that forms a liquid clay-like consistency. Apply slip onto the dried clay’s surface, allowing it to soak in and soften the clay. Alternatively, you can spray water onto the dry clay and let it absorb the moisture for some time. Afterward, knead or wedge the clay to ensure proper distribution of moisture.
4. Plastic bag method: For extremely dry clay, you can try an extended rehydration method using a sealed plastic bag. Place the dry clay in a sealed plastic bag with a damp cloth or paper towel. Allow the clay to sit inside the sealed bag for several days, giving it ample time to absorb the moisture from the damp cloth. Check the clay periodically and knead it to ensure the moisture is evenly distributed. This method may take longer but can be effective for severely dried clay.
Remember, it’s essential to monitor and control the moisture levels while reviving dry clay. Add water gradually and knead or wedge the clay to achieve the desired consistency. Be patient, as the revival process can take time depending on the severity of the dryness.
By utilizing these methods, you can bring your dried-out clay back to life and continue using it for your creative projects. However, it’s best to prevent clay from drying out by following proper storage and maintenance techniques. Let’s recap the key points we covered in this article and conclude our discussion.
Read more: How To Store Pottery Clay
Conclusion
Properly storing clay is essential for preserving its moisture, texture, and workability. By following the guidelines outlined in this article, you can ensure that your clay remains in optimal condition and ready for use. Here’s a recap of the key points discussed:
– Storing clay properly prevents it from drying out and becoming hard and brittle.
– Choosing the right container, such as airtight and non-reactive options, is crucial for clay storage.
– Preparing the clay by removing debris, wedging, and dividing it into manageable portions enhances its storage life.
– Wrapping the clay tightly with plastic wrap, using ziplock bags, or wet cloths/paper towels helps prevent drying.
– Employing moisture-retaining techniques like humidity trays, clay moisteners, mist sprays, and sealing containers maintains the clay’s moisture content.
– Storing clay in a cool and dark place regulates temperature, protects it from sunlight, and provides consistent humidity levels.
– Regularly checking clay for moisture levels helps prevent excessive drying or moisture accumulation.
– Reviving dry clay is possible through rehydration, wedging, slip/water spray, or the plastic bag method.
By implementing these practices, you can extend the lifespan of your clay and maximize its usability. Remember to adapt these techniques to suit your specific needs and environment.
Proper clay storage not only saves you money by avoiding waste but also ensures that your clay remains in a consistent and usable state. Whether you’re a pottery enthusiast, sculptor, or artist, taking care of your clay will enhance your creative process and allow your artistic vision to flourish.
So, don’t forget to choose the right container, wrap your clay meticulously, utilize moisture-retaining techniques, store clay in a cool and dark place, check moisture levels regularly, and revive dry clay when needed. With these practices in place, you can enjoy the benefits of well-preserved clay, ready to shape, mold, and create to your heart’s content.
Happy clay storing and creating!
Frequently Asked Questions about How To Store Clay So It Doesn'T Dry
Was this page helpful?
At Storables.com, we guarantee accurate and reliable information. Our content, validated by Expert Board Contributors, is crafted following stringent Editorial Policies. We're committed to providing you with well-researched, expert-backed insights for all your informational needs.


0 thoughts on “How To Store Clay So It Doesn’T Dry”