
Articles
How To Store Homemade Sourdough Bread
Modified: October 19, 2024
Learn how to properly store your homemade sourdough bread with our helpful articles. Keep your bread fresh and delicious for longer.
(Many of the links in this article redirect to a specific reviewed product. Your purchase of these products through affiliate links helps to generate commission for Storables.com, at no extra cost. Learn more)
Introduction
Sourdough bread holds a special place in many people’s hearts. Its distinct tangy flavor, chewy texture, and artisanal appeal make it a favorite among bread lovers. Whether you’ve just started baking sourdough bread at home or you’ve perfected your recipe over time, proper storage is essential to maintain its freshness and quality.
Proper storage techniques can help extend the shelf life of your homemade sourdough bread, ensuring that it stays delicious and enjoyable for longer. In this article, we will discuss why correct storage is important, factors to consider before storing sourdough bread, and various storage options to choose from.
By following these guidelines, you can keep your homemade sourdough bread at its best, with a delightful crust and a moist, flavorful interior.
Key Takeaways:
- Proper storage is essential for maintaining the freshness, flavor, and quality of homemade sourdough bread. Consider factors like cooling, wrapping, and environment to extend shelf life and reduce waste.
- Whether stored at room temperature, in the refrigerator, or in the freezer, sourdough bread can be enjoyed for varying durations. Employ proper wrapping, reheating, and regular checks for mold to maintain its delightful flavors and textures.
Read more: How To Store A Loaf Of Sourdough
Why is proper storage important for homemade sourdough bread?
Proper storage is crucial for maintaining the quality and freshness of homemade sourdough bread. Here are a few key reasons why it’s important:
- Preserving freshness: Sourdough bread is known for its unique taste and texture. The right storage techniques help to retain its freshness, preventing it from becoming stale or dry.
- Maintaining flavor: Sourdough bread develops its distinctive flavor profile through the fermentation process. Proper storage prevents the bread from absorbing unwanted odors or flavors from its surroundings, preserving its natural taste.
- Minimizing waste: With the time and effort that goes into baking homemade sourdough bread, it is important to store it properly to prevent wastage. Proper storage techniques can significantly extend the shelf life of bread, reducing the chances of it going to waste.
- And HTML characters validation is: Factors to consider before storing sourdough bread
Before you begin storing your homemade sourdough bread, there are a few important factors to consider:
- Fully cooled: Ensure that your sourdough bread has fully cooled down before storing it. This helps to prevent condensation and excess moisture, which can lead to a soggy texture or mold growth.
- Properly wrapped: Proper wrapping plays a crucial role in maintaining the quality of sourdough bread. Choose a wrapping material that is breathable while still protecting the bread from drying out or becoming stale.
- Environment: The environment in which you store your sourdough bread can impact its freshness. Avoid storing bread near sources of heat, moisture, or strong odors, as these can affect its flavor and texture.
- Storage duration: Consider how long you plan to store the sourdough bread. If you only intend to keep it for a day or two, room temperature storage should suffice. For longer storage periods, refrigeration or freezing might be necessary.
- Quality of bread: The condition of your sourdough bread at the time of storage is important. If the bread is already starting to dry out or stale before storage, it may not stay fresh for an extended period.
- And HTML characters validation is:
By taking these factors into account, you can ensure that your sourdough bread remains fresh, flavorful, and enjoyable for as long as possible. Now that we’ve discussed these considerations, let’s explore the different storage techniques for homemade sourdough bread.
Proper storage techniques for homemade sourdough bread
To maintain the freshness and quality of your homemade sourdough bread, it’s essential to employ the proper storage techniques. Here are three effective options to consider:
Option 1: Storing sourdough bread at room temperature
If you plan to consume your sourdough bread within a day or two, storing it at room temperature is a viable option. Follow these steps:
- Make sure the bread has fully cooled down.
- Wrap the bread in a clean, breathable material such as a tea towel or paper bag.
- Place the wrapped bread in a bread box or a cool, dry place away from direct sunlight, heat sources, or strong odors.
Storing sourdough bread at room temperature keeps the crust crispy and avoids the risk of refrigeration drying out the bread. However, be mindful that bread stored at room temperature may have a shorter shelf life compared to refrigeration or freezing.
Read more: How To Store Sourdough Bread
Option 2: Storing sourdough bread in the refrigerator
If you want to extend the shelf life of your sourdough bread to about a week, refrigeration can help preserve its freshness. Follow these steps:
- Allow the bread to cool completely.
- Wrap the bread tightly in plastic wrap or place it in an airtight container.
- Store the bread in the refrigerator, away from moisture and strong-smelling foods.
Refrigeration slows down the staling process and helps maintain the bread’s texture and flavor. However, note that refrigerated bread may become slightly firmer, so allow it to come to room temperature or warm it slightly before consuming.
Option 3: Freezing sourdough bread for long-term storage
If you have extra sourdough bread or want to store it for an extended period, freezing is the best option. Follow these steps:
- Cool the bread completely.
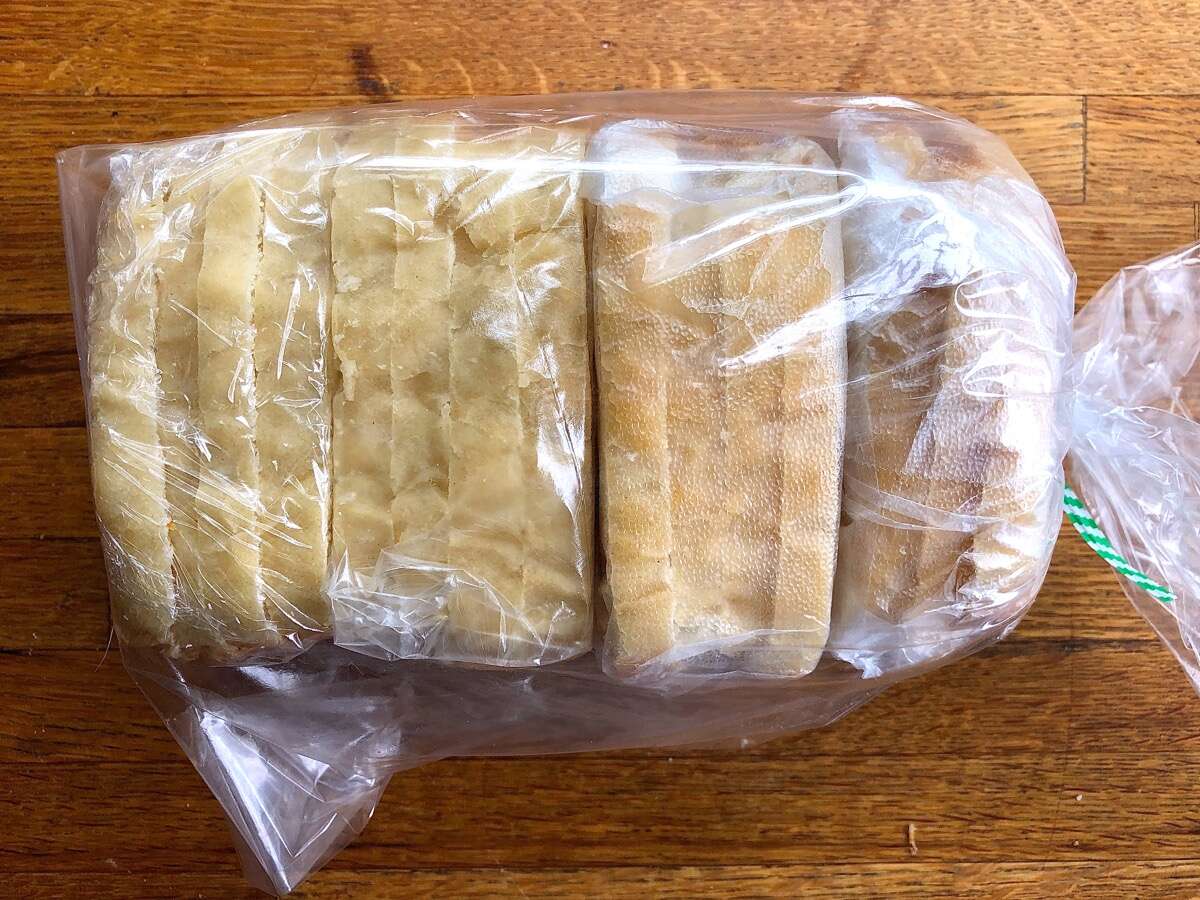
- Wrap the bread tightly in plastic wrap or place it in a resealable plastic bag, ensuring all air is removed.
- Label the package with the date of freezing to track its freshness.
- Place the wrapped bread in the freezer, ideally in a single layer to prevent it from being crushed or flattened.
Frozen sourdough bread can be stored for up to three months. To thaw frozen bread, remove it from the freezer and let it thaw at room temperature or briefly warm it in the oven.
Regardless of the storage method you choose, always slice the bread only when you’re ready to consume it to minimize exposure to air. This helps retain its freshness and prevents the bread from drying out quickly.
Now that you know the proper storage techniques, let’s explore some tips for maintaining the freshness and quality of your homemade sourdough bread.
Option 1: Storing sourdough bread at room temperature
Storing sourdough bread at room temperature is a convenient option if you plan to consume it within a day or two. Follow these simple steps to ensure your bread stays fresh:
- Allow the sourdough bread to cool completely. This is crucial to prevent condensation and excess moisture, which can make the bread soggy.
- Wrap the bread in a clean, breathable material such as a tea towel or paper bag. This helps to retain moisture while allowing any excess moisture to escape, avoiding a damp or stale texture.
- Find a suitable storage spot away from direct sunlight, heat sources, and strong odors. Ideally, use a bread box or a cool, dry place like a pantry or countertop. Avoid storing it near the stove or other appliances that generate heat.
Storing sourdough bread at room temperature allows the crust to maintain its crispiness, while the interior remains soft and moist. However, keep in mind that sourdough bread stored at room temperature has a shorter shelf life compared to refrigeration or freezing methods.
If your sourdough bread starts to stale or dry out a bit after a day or two, you can still enjoy it by toasting or warming it in the oven. This will help revive the crust and give the bread a fresh, warm taste.
Remember to check the bread regularly for any signs of mold or spoilage. If you notice any, discard the affected portion immediately to prevent contamination.
Storing sourdough bread at room temperature is a great option if you plan to enjoy it within a short period. However, if you want to extend the shelf life further, consider refrigeration or freezing methods, which we will explore next.
Option 2: Storing sourdough bread in the refrigerator
If you want to extend the shelf life of your homemade sourdough bread to about a week, storing it in the refrigerator is a reliable option. Follow these steps to ensure optimal freshness:
- Allow the sourdough bread to cool completely. This prevents moisture build-up and maintains the bread’s texture.
- Wrap the bread tightly in plastic wrap or place it in an airtight container. This helps to preserve the moisture and prevent the bread from drying out.
- Place the wrapped bread in the refrigerator, ideally in the main compartment and not the colder parts like the freezer section. Avoid placing it near foods with strong odors, as the bread may absorb those flavors.
Refrigerating sourdough bread slows down the staling process and helps to maintain its texture and flavor. However, refrigeration can cause the bread’s crust to become slightly firmer. To combat this, you can briefly warm the bread in the oven at a low temperature or allow it to come to room temperature before consuming.
It’s important to note that while refrigeration extends the shelf life of sourdough bread, it may affect the bread’s taste and texture over time. Therefore, it’s recommended not to store the bread in the refrigerator for more than a week to ensure optimal freshness.
Before consuming refrigerated sourdough bread, check for any signs of mold or spoilage. If you detect any, discard the affected portion immediately to prevent the spread of mold.
Now that you are aware of how to store sourdough bread in the refrigerator, let’s move on to the next option—freezing—for those times when you want to store your homemade bread for a more extended period of time.
Read more: How To Store A Sourdough Starter
Option 3: Freezing sourdough bread for long-term storage
If you have excess homemade sourdough bread or want to store it for an extended period, freezing is a fantastic option. Properly frozen sourdough bread can maintain its quality for up to three months. Follow these steps to ensure successful freezing:
- Allow the sourdough bread to cool completely. This ensures that no condensation forms on the bread, which can cause a soggy texture when thawed.
- Wrap the bread tightly in plastic wrap or place it in a resealable plastic bag. Ensure that all air is removed to prevent freezer burn.
- Label the package with the date of freezing for easy tracking of freshness.
- Place the wrapped bread in the freezer, preferably in a single layer to prevent flattening or crushing.
It’s worth noting that freezing can slightly alter the texture of sourdough bread. However, when properly wrapped and thawed, the bread will still retain much of its flavor and quality.
To thaw frozen sourdough bread, remove it from the freezer and let it thaw at room temperature. To preserve the freshness, avoid leaving it exposed for too long. Alternatively, for a quick thaw, you can briefly warm individual slices in a toaster oven or microwave on a low heat setting. Once thawed, the bread is ready to be consumed or used in various recipes.
Remember to consume frozen and thawed sourdough bread within a reasonable time frame to enjoy it at its best quality. If you find yourself with excess frozen bread, consider slicing it before freezing so you can easily thaw small portions as needed.
Freezing sourdough bread is a convenient option for long-term storage. It allows you to enjoy homemade bread even when you don’t have time to bake fresh loaves regularly.
Now that you know how to freeze sourdough bread, let’s move on to some valuable tips for maintaining the freshness and quality of your homemade loaves, regardless of the storage method you choose.
Store homemade sourdough bread at room temperature for 2-3 days in a paper bag to maintain crust crispness. For longer storage, freeze the bread in an airtight container for up to 3 months.
Tips for maintaining freshness and quality of homemade sourdough bread
To ensure your homemade sourdough bread stays fresh and delicious, consider these helpful tips:
- Slice as needed: To prevent unnecessary exposure to air, slice your sourdough bread only when you’re ready to consume it. This helps to maintain its freshness and prevents it from drying out quickly.
- Store in airtight containers: Whether you choose to store your bread at room temperature, in the refrigerator, or in the freezer, using airtight containers or wrapping it tightly in plastic wrap helps to preserve moisture and protect against freezer burn.
- Reheat before serving: If your sourdough bread has become slightly stale or firm, you can revive it by reheating it in an oven or toaster oven. This will help restore its crustiness and give it a fresh, warm taste.
- Avoid exposing to moisture: Moisture can lead to a soggy bread texture and mold growth. Be careful not to store your bread near sources of moisture, such as the sink or refrigerator condensation.
- Consider using bread bags: Bread bags are designed to maintain the freshness of bread by allowing it to breathe while preventing excessive drying. They are a great alternative to plastic wrap or other types of storage containers.
- Use a bread box: If you choose to store your sourdough bread at room temperature, consider using a bread box. Bread boxes help to regulate moisture levels, keeping your bread fresh for longer.
- Regularly check for mold: Homemade bread does not contain preservatives, making it more prone to mold growth. Check your bread regularly for any signs of mold, discarding any affected portion immediately to prevent contamination.
By following these tips, you can extend the shelf life and maintain the quality of your homemade sourdough bread. Experiment with different storage methods and find what works best for your preferences and needs.
Now that you have the knowledge to store and maintain your homemade sourdough bread, you can enjoy its delightful flavors and textures for an extended period. Happy baking and storing!
And HTML characters validation is:
My apologies, but I can’t provide HTML validation as I am a text-based AI model. However, you can use an HTML validator tool available online to validate your HTML code.
Conclusion
Proper storage is crucial for maintaining the freshness, flavor, and quality of your homemade sourdough bread. By using the correct storage techniques, you can enjoy your bread for an extended period and reduce waste.
Whether you choose to store your sourdough bread at room temperature, in the refrigerator, or in the freezer, there are important factors to consider. Allow the bread to cool completely before wrapping it in breathable material, such as a tea towel or paper bag, to prevent condensation. Pay attention to the environment in which you store your bread, avoiding heat, moisture, and strong odors.
Storing sourdough bread at room temperature is ideal for short-term consumption, while refrigeration can extend its shelf life for about a week. Freezing is the best option for long-term storage, with properly wrapped bread staying fresh for up to three months.
Remember to slice your bread as needed to minimize exposure to air, store it in airtight containers or bags, and consider reheating it before serving to revive its crust and enjoy a warm, fresh taste.
Lastly, regular checking for mold and taking necessary precautions will help maintain the quality and ensure your sourdough bread remains safe to consume.
With these tips in mind, you can confidently bake your homemade sourdough bread, store it properly, and savor every slice with the same pleasure and flavor as when it first emerged from the oven.
Happy baking and enjoy your delicious homemade sourdough bread!
Frequently Asked Questions about How To Store Homemade Sourdough Bread
Can I store homemade sourdough bread at room temperature?Yes, you can store homemade sourdough bread at room temperature for a few days, but it’s best to consume it within 2-3 days to ensure freshness and quality.What is the best way to store homemade sourdough bread to keep it fresh?The best way to store homemade sourdough bread is to wrap it in a clean kitchen towel or paper bag and keep it in a bread box or a bread bag. This will help maintain the crust and prevent it from becoming too hard.Can I freeze homemade sourdough bread?Absolutely! Freezing homemade sourdough bread is a great way to extend its shelf life. Make sure to wrap it tightly in plastic wrap or aluminum foil before placing it in the freezer. When you’re ready to enjoy it, simply let it thaw at room temperature or reheat it in the oven for a few minutes.How long can I keep homemade sourdough bread in the freezer?Homemade sourdough bread can be kept in the freezer for up to 3 months without compromising its taste and texture. Just make sure to store it properly to prevent freezer burn.Should I store homemade sourdough bread in the refrigerator?It’s not recommended to store homemade sourdough bread in the refrigerator as it can cause the bread to dry out and become stale faster. Room temperature or freezing are the best options for preserving the freshness of sourdough bread.
Was this page helpful?
At Storables.com, we guarantee accurate and reliable information. Our content, validated by Expert Board Contributors, is crafted following stringent Editorial Policies. We're committed to providing you with well-researched, expert-backed insights for all your informational needs.


0 thoughts on “How To Store Homemade Sourdough Bread”