
Articles
How To Store Iced Sugar Cookies
Modified: December 7, 2023
Learn helpful tips and tricks for storing delicious sugar cookies! Read our articles on proper storage techniques and keep your iced sugar cookies fresh for longer.
(Many of the links in this article redirect to a specific reviewed product. Your purchase of these products through affiliate links helps to generate commission for Storables.com, at no extra cost. Learn more)
Introduction
Nothing beats biting into a delicious, soft and sweet iced sugar cookie. Whether you are a baking enthusiast or simply enjoy indulging in these delightful treats, it’s important to know how to store them properly to maintain their freshness and flavor.
Storing iced sugar cookies requires a few specific steps to ensure they stay intact, retain their shape, and remain tasty for as long as possible. In this article, we will guide you through each step of the process, from cooling the cookies to properly packaging them for gifting or transporting.
So, if you’ve recently baked a batch of iced sugar cookies or received them as a gift, read on to discover the best way to store them and enjoy their delectable flavor for days to come!
Key Takeaways:
- Preserve the Freshness: Follow the 10 steps to store iced sugar cookies effectively, maintaining their delicate decorations and delicious taste for an extended period.
- Proper Packaging: Ensure the cookies arrive in perfect condition by individually wrapping, cushioning, and securing them for gifting or transport.
Read more: How To Store Sugar Cookies With Royal Icing
Step 1: Cooling the Cookies
Before storing your iced sugar cookies, it’s essential to allow them to cool completely. This step is crucial as it helps the icing to set and prevents any potential damage to the cookies during storage.
To cool the cookies, place them on a wire rack or a clean, flat surface for about 1 to 2 hours. This allows the excess heat to dissipate and ensures that the icing doesn’t melt or become sticky when stored.
It’s important to note that you should avoid placing the cookies in the refrigerator or freezer to cool them down quickly. The sudden change in temperature can cause the cookies to become soft or lose their shape.
While you wait for the cookies to cool, resist the temptation to handle them or touch the icing. This will prevent any smudging or damage to the decorations.
Once the cookies are completely cool to the touch, you can move on to the next step, which involves layering the cookies to protect their delicate icing.
Step 2: Layering the Cookies
Layering the iced sugar cookies is an important step in storing them, as it helps to protect the delicate icing from smudging or breaking. By carefully separating the cookies with layers, you can ensure that they remain intact and retain their beautiful decorations.
To begin, you will need a clean, airtight container that is large enough to accommodate your cookies without overcrowding. Line the bottom of the container with a sheet of parchment paper or wax paper to create a protective barrier between the cookies and the container itself.
Next, place a single layer of iced sugar cookies on top of the paper. Ensure that there is enough space between each cookie, so they are not touching each other. Ideally, you should leave about half an inch of space between each cookie.
If you have multiple layers of cookies to store, place an additional sheet of parchment or wax paper on top of the first layer, and carefully arrange another layer of cookies on top. Repeat this process for each layer of cookies, ensuring there is enough space between each one.
By layering the cookies, you are creating a protective buffer between them, minimizing the risk of the icing getting smudged or damaged when you store or transport them.
On the next step, we will discuss the importance of separating the layers to further safeguard the cookies and their delicate decorations.
Step 3: Separating the Layers
After layering the iced sugar cookies, it’s crucial to separate each layer to provide additional protection for the delicate icing. Separating the layers prevents the cookies from sticking together and helps maintain their shape and design.
To prevent the cookies from touching and potentially damaging the icing, you can use a couple of methods to create separation between the layers:
- Parchment or Wax Paper: Place a sheet of parchment or wax paper between each layer of cookies. This will create a barrier that prevents them from sticking together and preserves their individual decorations. Ensure that the paper covers the entire surface area of each cookie.
- Cardboard Dividers: Cut pieces of clean, food-safe cardboard to the size of your container. Slide these dividers between the layers of cookies to create a physical barrier. This method is especially useful if you have a large number of cookies to store.
By adequately separating the layers, you minimize the risk of the cookies’ icing getting smudged or losing its intricate details. This step is particularly crucial when storing cookies with intricate designs or delicate royal icing decorations.
Now that you have properly layered and separated the cookies, it’s time to choose the most suitable container for storing them. This will be discussed in Step 4.
Step 4: Choosing the Right Container
Choosing the appropriate container for storing your iced sugar cookies is essential to maintain their freshness and protect their delicate decorations. The ideal container should be airtight, sturdy, and spacious enough to accommodate the layered cookies without crushing or damaging them.
Here are a few container options to consider:
- Plastic Storage Containers: Look for airtight plastic containers with secure lids. These containers offer protection against moisture and air, ensuring that your cookies stay fresh for an extended period. Opt for containers with adjustable dividers to separate different flavors or types of cookies.
- Tin or Metal Cookie Tins: These classic cookie tins provide a nostalgic charm and effective storage solution. Look for tins with tight-fitting lids to keep the cookies fresh. Make sure the tin is clean and free of any residue to prevent any unwanted flavors from transferring to your cookies.
- Glass Containers: Glass containers with tight-fitting lids are another excellent option for storing iced sugar cookies. They not only keep the cookies fresh but also allow you to see the beautiful decorations without opening the container.
Whichever container you choose, make sure it is thoroughly cleaned and dried before use. Any leftover residue or moisture could affect the quality and shelf life of your cookies.
Once you have selected the perfect container, you are now ready to move on to the next step – adding moisture control.
Read more: How To Store Sugar Cookie Dough
Step 5: Adding Moisture Control
Properly controlling moisture is vital to keeping your iced sugar cookies fresh and preserving their texture. Excessive moisture can cause the cookies to become soft or develop sogginess, while too little moisture can make them dry and stale.
To maintain the ideal moisture level, you can add moisture control measures to the container:
- Silica Gel Packets: Place a few silica gel packets inside the container with your cookies. These small packets absorb excess moisture and help prevent the cookies from becoming soft or mushy. Ensure the packets are labeled as food-safe and avoid placing them directly in contact with the cookies.
- Uncooked Rice: Another effective method is to add a small dish of uncooked rice to the container. The rice acts as a moisture absorber and helps maintain the cookies’ texture. Make sure the rice dish is placed away from the cookies to avoid any direct contact.
- Oatmeal: Alternatively, you can place a small container or pouch filled with uncooked oatmeal inside the cookie container. The oatmeal absorbs moisture and helps to extend the freshness of the cookies.
Remember to check the moisture control measures periodically and replace them if they become saturated. This will ensure that your cookies remain in the best possible condition.
Now that you have added the appropriate moisture control to your container, it’s time to discuss the importance of storing the cookies at the right temperature in Step 6.
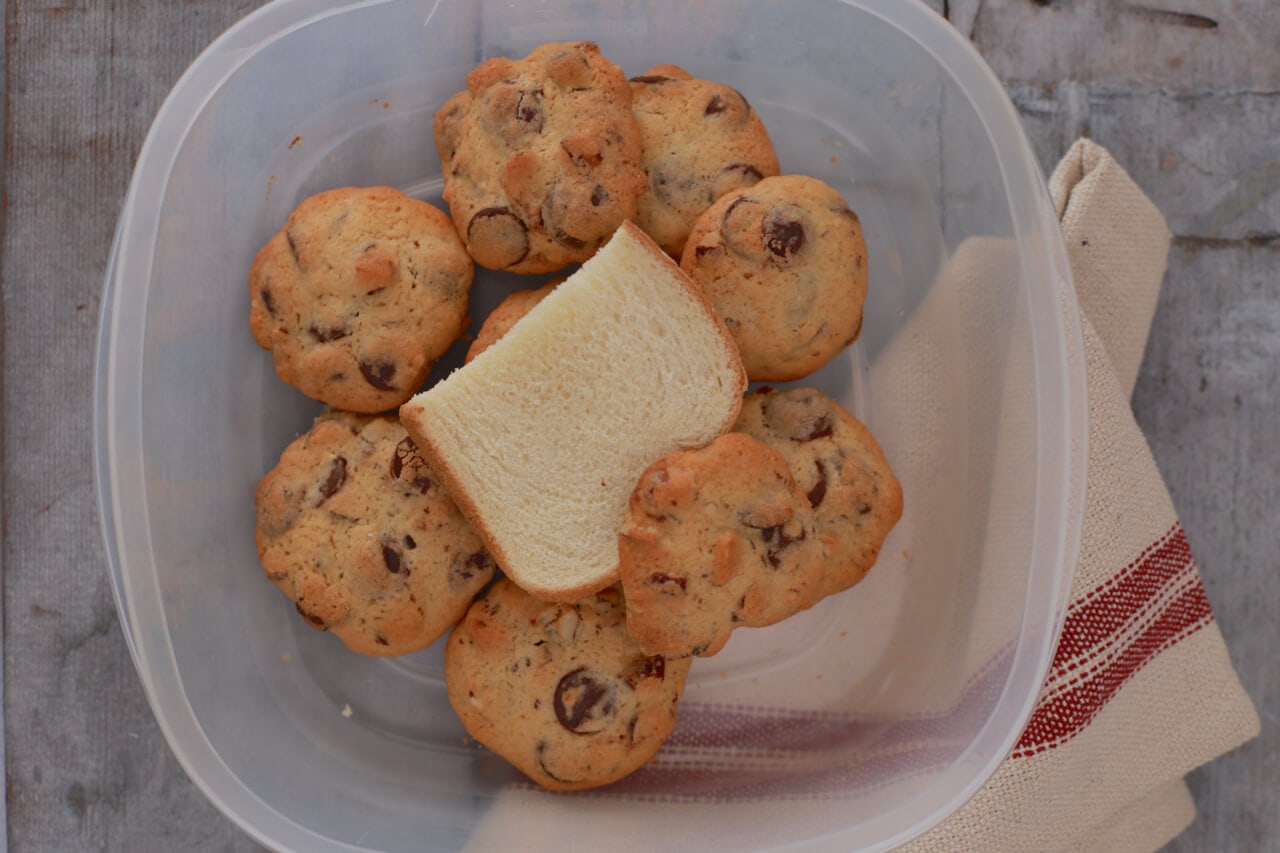
Store iced sugar cookies in an airtight container at room temperature for up to 1 week. Layer cookies with parchment paper to prevent sticking and place a piece of bread in the container to help keep them soft.
Step 6: Storing at the Right Temperature
Storing your iced sugar cookies at the correct temperature is essential to maintain their freshness and prevent them from spoiling. Extreme temperatures can affect the texture, taste, and overall quality of the cookies.
It is recommended to store your cookies in a cool, dry place away from direct sunlight and sources of heat. Ideally, the temperature should be between 60°F (15°C) and 70°F (21°C). This range helps to preserve the cookies’ texture and prevents the icing from melting or becoming too soft.
Avoid storing the cookies in areas of high humidity, such as near the stove, dishwasher, or refrigerator, as the excess moisture can cause the cookies to become soggy.
If the room temperature in your location exceeds the recommended range, you may need to consider refrigerating the cookies. However, take note that refrigeration can alter the texture and taste of the cookies. To refrigerate, place the container of cookies in the refrigerator but ensure that it is tightly sealed to prevent any flavors from contaminating the cookies.
It’s important to allow the cookies to come to room temperature before consuming them, as this will help restore their original texture and flavor.
By storing your iced sugar cookies at the appropriate temperature, you can ensure that they stay fresh and delicious for an extended period.
With the temperature adequately controlled, it’s time to address the importance of avoiding direct sunlight in the next step – Step 7.
Step 7: Avoiding Direct Sunlight
Protecting your iced sugar cookies from direct sunlight is crucial to maintain their appearance and prevent any color fading or melting of the icing. Sunlight can cause the cookies to become soft, lose their shape, and negatively impact the overall quality.
When storing your cookies, make sure to place them in an area away from direct sunlight. This includes avoiding placing them near windows or any other sources of direct sunlight in your home.
Exposure to sunlight can cause the icing to melt or become sticky, resulting in a loss of the intricate designs and decorations. It can also cause the colors on the cookies to fade, dulling their vibrant appearance.
Find a cool, dark place to store your cookies, such as a pantry or a cupboard. Make sure the area is dry and well-ventilated to prevent any moisture build-up that could compromise the texture and taste of the cookies.
By keeping your iced sugar cookies away from direct sunlight, you can preserve their visual appeal and ensure that they maintain their original form and flavor.
Now that you know how to protect your cookies from sunlight, let’s move on to Step 8, where we’ll discuss how to check the cookies periodically to ensure their freshness and quality.
Step 8: Checking the Cookies
Periodically checking your stored iced sugar cookies is important to ensure their freshness and quality over time. By conducting regular inspections, you can identify any signs of spoilage or deterioration and take necessary actions to maintain the cookies’ optimal condition.
Here are a few things to look out for during your checks:
- Appearance: Examine the cookies to see if there are any visible changes in color or texture. Look for any signs of mold, sogginess, or drying out. If you notice any significant changes, it may be an indication that the cookies are no longer fresh or suitable for consumption.
- Scent: Take a whiff of the cookies to check for any off-putting or stale odors. Freshly baked cookies should have a pleasant aroma. If you detect any unpleasant smells, it may be a sign that the cookies have begun to spoil.
- Taste: Occasionally sample a cookie to assess its taste. Pay attention to any unusual flavors, including a bitter or rancid taste. If the cookies taste off or have a strange aftertaste, it’s best to discard them.
By conducting these checks every few days, you can catch any potential issues early on and take appropriate steps to prevent further spoilage. Should you discover any signs of spoilage, it’s best to discard the affected cookies to avoid any risk to your health.
Now that you know how to check the cookies, let’s move on to Step 9, which addresses re-icing the cookies if necessary.
Read more: How To Store Decorated Sugar Cookies
Step 9: Re-icing if Necessary
If you notice that the icing on your stored iced sugar cookies has started to fade, crack, or lose its vibrancy, you may consider re-icing them to restore their visual appeal and freshness. Re-icing the cookies can help revitalize their appearance and make them look as good as new.
Before re-icing, make sure that the cookies are completely at room temperature and free from any moisture or condensation. If the cookies have absorbed any moisture, they may become soft and make it difficult for the new icing to adhere properly.
To re-ice your cookies, you’ll need fresh royal icing or icing of your choice. Prepare a small batch following your preferred recipe or use pre-made icing from a reliable source. Use food coloring to achieve the desired colors for your decorations.
Using a piping bag or squeeze bottle, carefully apply the fresh icing onto the cookies, recreating the designs or patterns that were on the original icing. Take your time and be gentle to avoid any damage to the cookies or the existing icing.
Allow the fresh icing to dry and set completely before storing the cookies again. This will ensure that the re-icing remains intact and doesn’t smudge or stick to the layers when storing them.
Re-icing can be a fun and creative process, allowing you to give your stored cookies a fresh and appealing look. However, keep in mind that multiple layers of icing can alter the texture and taste of the cookies, so it’s best to exercise moderation and avoid excessive re-icing.
Now that you know how to re-ice the cookies, let’s move on to the final step – properly packaging the cookies for gifting or transporting.
Step 10: Properly Packaging for Gifting or Transporting
Properly packaging your iced sugar cookies is crucial when gifting them or transporting them to ensure they arrive in pristine condition. By taking some extra steps to protect the cookies during transit, you can ensure that their beautiful designs and flavors are maintained.
Here are some tips for packaging your cookies:
- Wrap Individually: If you’re gifting or transporting multiple cookies, consider wrapping each one individually in clear plastic wrap or wax paper. This provides an added layer of protection, preventing the cookies from sticking to each other and getting damaged during handling.
- Use Cushioning Material: Place the individually wrapped cookies inside a sturdy box or container lined with cushioning material, such as tissue paper or bubble wrap. The cushioning will prevent the cookies from shifting and help absorb any impact during transport.
- Secure the Container: Close the container securely to ensure it doesn’t accidentally open during transit. Use tape or fasteners to secure the lid and prevent any unwanted exposure to air or moisture.
- Consider Insulation: If you’re transporting the cookies in hot or cold weather, consider using insulating material, such as an insulated bag or a cool pack, to maintain the desired temperature and prevent them from melting or becoming too soft.
Additionally, if you’re gifting the cookies, you may want to add a personal touch by including a note or decoration inside the packaging. This shows care and thoughtfulness, making the gift even more special.
By properly packaging your iced sugar cookies, you can ensure that they arrive at their destination in perfect condition and are ready to be enjoyed by the lucky recipients.
With these ten steps, you now have a comprehensive guide on how to store iced sugar cookies effectively. By following these strategies, you can prolong the shelf life of your delicious creations, preserve their visual appeal, and maintain their delectable taste.
So next time you bake or receive a batch of iced sugar cookies, remember to cool them, layer and separate them, choose the right container, add moisture control, store at the right temperature, avoid direct sunlight, periodically check the cookies, re-ice if necessary, and properly package them for gifting or transport.
Enjoy the sweet delight of fresh and beautifully stored iced sugar cookies!
The end of the article
Conclusion
Properly storing iced sugar cookies is essential to maintain their freshness, preserve their delicate decorations, and ensure their delicious taste. By following the ten steps outlined in this article, you can keep your cookies in the best possible condition for an extended period.
From cooling the cookies to re-icing if necessary, each step plays a crucial role in maintaining the quality and visual appeal of your treats. Layering and separating the cookies, choosing the right container, and adding moisture control help protect the cookies from damage and keep them fresh.
Storing the cookies at the appropriate temperature, away from direct sunlight, is vital to prevent melting or discoloration of the icing. Regularly checking the cookies ensures their freshness, and re-icing can revive their appearance if needed.
Proper packaging is vital, especially when gifting or transporting the cookies. Individual wrapping, cushioning, and secure containers prevent damage during transit and maintain the cookies’ integrity.
By following these steps, you can enjoy delicious iced sugar cookies that look as good as they taste. Whether you’re baking them for yourself or giving them as a thoughtful gift, the proper storage techniques ensure that these delightful treats bring joy to every bite.
So, the next time you find yourself enjoying iced sugar cookies, remember the importance of proper storage and follow these steps to keep them fresh, beautiful, and utterly delicious for as long as possible.
Happy baking and happy storing!
The end of the article
Frequently Asked Questions about How To Store Iced Sugar Cookies
Was this page helpful?
At Storables.com, we guarantee accurate and reliable information. Our content, validated by Expert Board Contributors, is crafted following stringent Editorial Policies. We're committed to providing you with well-researched, expert-backed insights for all your informational needs.


0 thoughts on “How To Store Iced Sugar Cookies”