Articles
How To Store Live Worms
Modified: February 23, 2024
Learn the best methods for storing live worms in this informative collection of articles. From temperature control to proper bedding, we've got you covered!
(Many of the links in this article redirect to a specific reviewed product. Your purchase of these products through affiliate links helps to generate commission for Storables.com, at no extra cost. Learn more)
Introduction
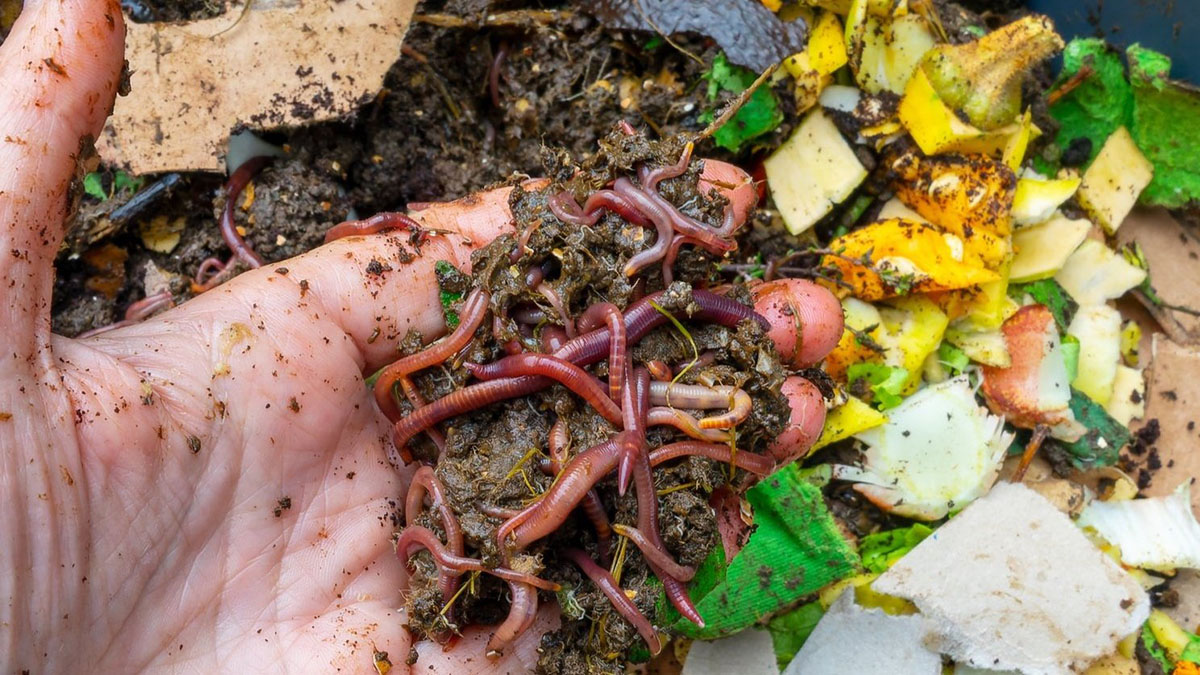
When it comes to worm storage, proper care and attention are crucial for maintaining the health and vitality of these amazing creatures. Whether you are raising worms for personal use or for commercial purposes, ensuring that they are stored correctly is essential for their well-being. Proper worm storage not only extends their lifespan but also maximizes their productivity and effectiveness for various purposes.
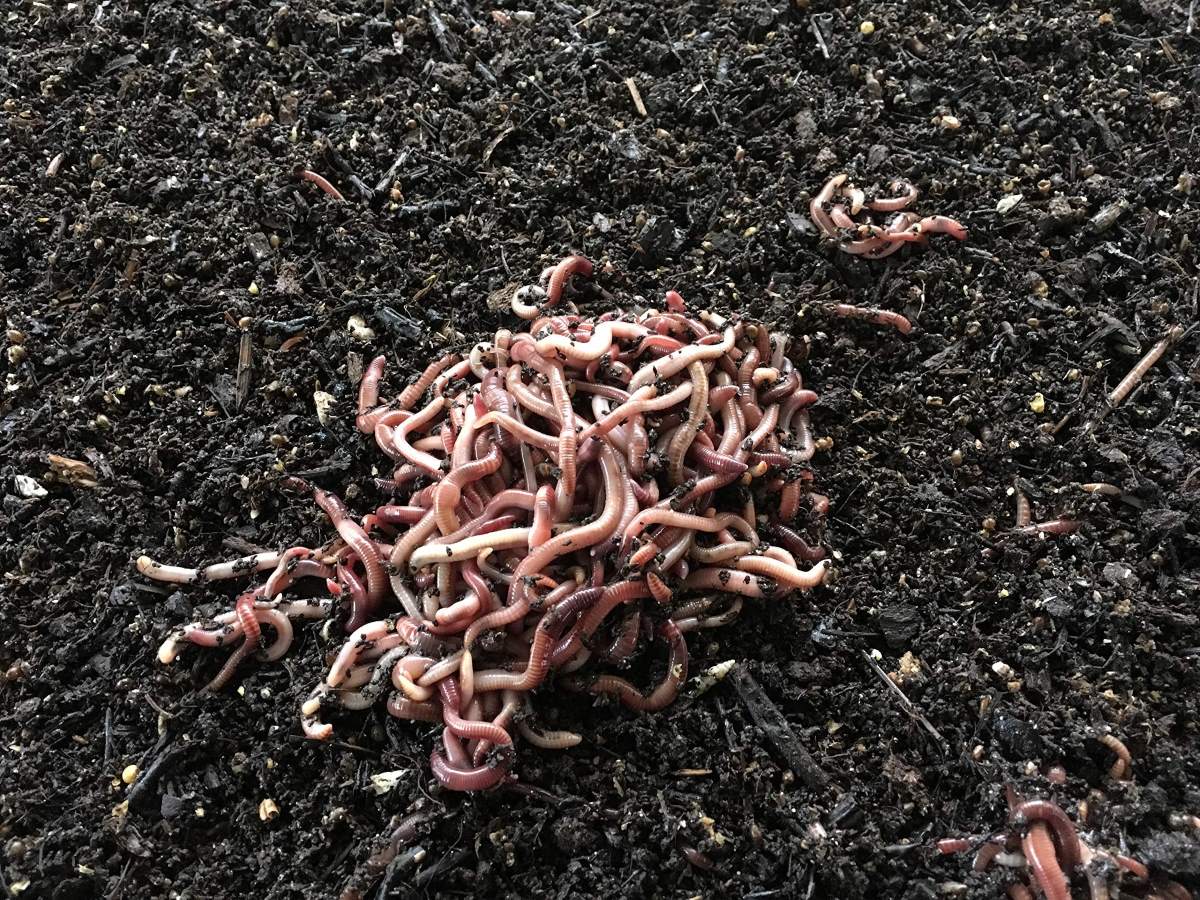
Worms, such as red wigglers or Eisenia fetida, are commonly used in vermicomposting, fishing bait, and even as a food source for certain animals. Regardless of your specific goal, the success of your worm storage practices will greatly impact the overall outcome.
In this article, we will delve into the importance of proper worm storage and provide you with practical tips on how to store live worms effectively. From choosing the right container to creating the ideal environment, feeding and maintaining the worms, and monitoring temperature and moisture levels, we will cover all the necessary steps to ensure the well-being of your worms.
So, let’s dive in and explore the world of worm storage, so you can keep your worms healthy, happy, and thriving!
Key Takeaways:
- Proper worm storage is crucial for maintaining the health, longevity, productivity, and effectiveness of live worms, whether for vermicomposting, fishing bait, or animal feed.
- Choosing the right container, creating the ideal environment, and providing proper care and nutrition are essential for successful and effective worm storage.
Read more: How To Store Fishing Worms
Importance of Proper Worm Storage
Proper worm storage is crucial for several reasons. Firstly, it helps maintain the health and vitality of the worms. Worms are living organisms and require specific conditions to survive and thrive. By providing them with the right storage environment, you can ensure their overall well-being.
Secondly, proper storage extends the lifespan of the worms. Worms kept in optimal conditions are more likely to live longer, allowing you to continue using them for composting, bait, or other purposes for an extended period of time.
Additionally, storing worms correctly maximizes their productivity. Healthy worms are active and reproduce at a faster rate, resulting in a larger population. This can be beneficial for composting projects as more worms means faster decomposition of organic waste.
Furthermore, proper worm storage helps preserve their effectiveness for various applications. If you are using worms as fishing bait, for example, storing them correctly ensures that they remain lively and attractive to fish. Similarly, if you are feeding worms to animals, maintaining their health and vitality ensures that they provide the necessary nutrients.
Lastly, proper storage reduces the risk of disease and pest infestations. By providing the right conditions for the worms, you create an inhospitable environment for harmful bacteria, parasites, and predators. This ensures the safety and well-being of the worms, while also reducing the risk of contamination and spread of diseases.
Overall, proper worm storage is vital for maintaining the health, longevity, productivity, and effectiveness of these incredible creatures. By implementing the right storage practices, you can ensure that your worms thrive and continue to serve their purpose effectively.
Choosing the Right Container
When it comes to storing live worms, selecting the right container is crucial for maintaining their well-being. The container you choose should provide a suitable environment that meets the specific needs of the worms.
Here are some factors to consider when choosing a container for worm storage:
- Size: The container should be spacious enough to accommodate the number of worms you have. As a general rule of thumb, allocate around 2 square feet of space for every pound of worms. This allows for proper airflow and prevents overcrowding.
- Material: The container can be made of various materials, including plastic, wood, or even a dedicated worm bin made of breathable fabric. Ensure that the material is non-toxic and does not release any harmful substances that could harm the worms.
- Design: Consider the design of the container, especially in terms of accessibility. Look for containers with lids or covers that can be easily opened and closed for feeding, monitoring, and maintenance.
- Drainage: Proper drainage is essential to prevent excess moisture buildup. Look for containers with small holes or mesh at the bottom to allow for drainage and avoid waterlogging.
- Lightproof: Worms prefer darkness, so choose a container that is lightproof or has minimal light exposure. This can be achieved by using a dark-colored container or covering the container with a dark cloth or material.
There are various container options available, including plastic bins, wooden crates, or even repurposed containers. Whichever container you choose, ensure that it meets the specific needs of the worms and provides a suitable environment for their storage.
Remember, the container should serve as a comfortable home for the worms, allowing them to thrive and maintain their natural behaviors. By choosing the right container, you set the foundation for successful worm storage.
Preparing the Container
Once you have chosen the right container for storing live worms, it is essential to properly prepare it before introducing the worms. This preparation process ensures that the container provides a suitable environment for the worms to thrive.
Follow these steps to effectively prepare the container for worm storage:
- Clean the container: Thoroughly clean the container using mild soap and water. Rinse it well to remove any residues that could be harmful to the worms. Avoid using any harsh chemicals or cleaners that may leave toxic residues.
- Add drainage: If the container does not have built-in drainage, create small holes or place a layer of fine mesh at the bottom. This allows excess moisture to drain out, preventing waterlogging and maintaining optimal moisture levels.
- Line the container: Line the bottom of the container with a breathable material such as newspaper or cardboard. This layer acts as a barrier between the worms and the container, preventing direct contact and allowing for better moisture regulation.
- Moisten the bedding: Before adding the bedding material, moisten it with water. The bedding should be damp but not soaking wet. Aim for a moisture level similar to that of a squeezed-out sponge.
- Spread the bedding: Evenly spread the bedding material, such as shredded newspaper or coconut coir, over the bottom of the container. The bedding provides a comfortable habitat for the worms and aids in moisture retention.
- Aerate the bedding: Gently fluff or mix the bedding material to improve airflow and facilitate the worms’ movement within the container.
By following these steps, you ensure that the container is clean, prepared, and ready to provide a suitable habitat for the live worms. A well-prepared container sets the stage for a healthy and productive worm storage environment.
Creating the Ideal Environment
Creating the ideal environment is crucial for ensuring the well-being of the live worms in your storage container. Worms have specific temperature, moisture, and pH level requirements that need to be met for them to thrive.
Here are the key factors to consider when creating the ideal environment for your worms:
- Temperature: Worms are most active and productive within a temperature range of 55°F to 77°F (13°C to 25°C). Avoid extreme temperature fluctuations as it can stress the worms. If necessary, insulate the container to maintain a stable temperature.
- Moisture: Worms require a moist environment to breathe and move comfortably. The bedding material should be consistently damp but not saturated. It should feel similar to a wrung-out sponge. Mist the bedding occasionally to maintain moisture levels.
- pH Level: Worms prefer a slightly acidic environment with a pH level between 6.0 and 7.0. Test the pH level of the bedding and adjust if necessary using materials like lime or crushed eggshells to increase pH or peat moss to decrease pH.
- Airflow: Worms need oxygen to survive. Ensure proper airflow within the container by creating small ventilation holes or using a container with a breathable design. Adequate airflow helps prevent the buildup of harmful gases and ensures a healthy environment.
- Protection from extreme weather: If storing worms outdoors, protect the container from extreme weather conditions, such as direct sunlight, heavy rain, or freezing temperatures. Place the container in a shaded area or use insulation to regulate temperature and protect against moisture fluctuations.
- Location: Choose an appropriate location for the container. Indoors, a basement or garage can be suitable as they tend to have more stable temperatures. Outdoors, a shaded area away from direct sunlight and strong winds is preferable.
By monitoring and adjusting these environmental factors as needed, you can create an ideal habitat within the storage container for your worms, ensuring their comfort, health, and overall productivity.
Read more: How To Store Worm Castings
Adding Bedding Material
Bedding material plays a vital role in the overall health and comfort of the live worms in your storage container. It provides a habitat for the worms, promotes moisture retention, and aids in the decomposition of organic matter.
Here are some key points to consider when adding bedding material to your worm storage container:
- Types of bedding material: There are various options for bedding material, including shredded newspaper, cardboard, coconut coir, peat moss, or a combination of these materials. Choose a bedding material that is non-toxic, absorbent, and provides good structure.
- Preparation: If using newspaper or cardboard, shred it into small pieces, removing any glossy or colored sections. Moisten the bedding material with water before adding it to the container. Aim for a moisture level similar to that of a squeezed-out sponge.
- Amount of bedding: Add enough bedding material to cover the bottom of the container with a layer that is approximately 3 to 4 inches (7 to 10 cm) thick. The bedding should provide a comfortable environment for the worms to burrow and move around.
- Fluffing and mixing: Gently fluff or mix the bedding material to ensure even distribution and improve airflow within the container. This allows the worms to move freely and helps maintain proper moisture levels.
- Supplementary materials: You can add additional materials to enhance the bedding. Examples include crushed eggshells for calcium, coffee grounds for organic matter, or small amounts of garden soil to introduce beneficial microbes.
The bedding material serves as a source of organic matter for the worms to feed on, as well as a comfortable substrate for them to live in. It also helps regulate moisture levels, preventing the container from becoming too dry or waterlogged.
Remember to monitor the moisture level regularly and adjust as needed by misting the bedding with water to maintain the ideal moisture balance for the worms. With proper bedding, you provide a nurturing environment that encourages the worms’ well-being and productivity.
Store live worms in a breathable container with damp bedding like peat moss or shredded newspaper. Keep them in a cool, dark place like a refrigerator to prolong their lifespan. Avoid storing them in direct sunlight or extreme temperatures.
Introducing the Live Worms
Once you have prepared the container and added the bedding material, it’s time to introduce the live worms. Careful and gentle handling is crucial to ensure the health and safety of the worms during this process.
Here are the steps to effectively introduce the live worms to their new environment:
- Acclimatization: Before transferring the worms to the container, allow them to acclimate to the temperature of their new environment. This can be done by placing the container with the worms in a shaded area near the storage location for a few hours.
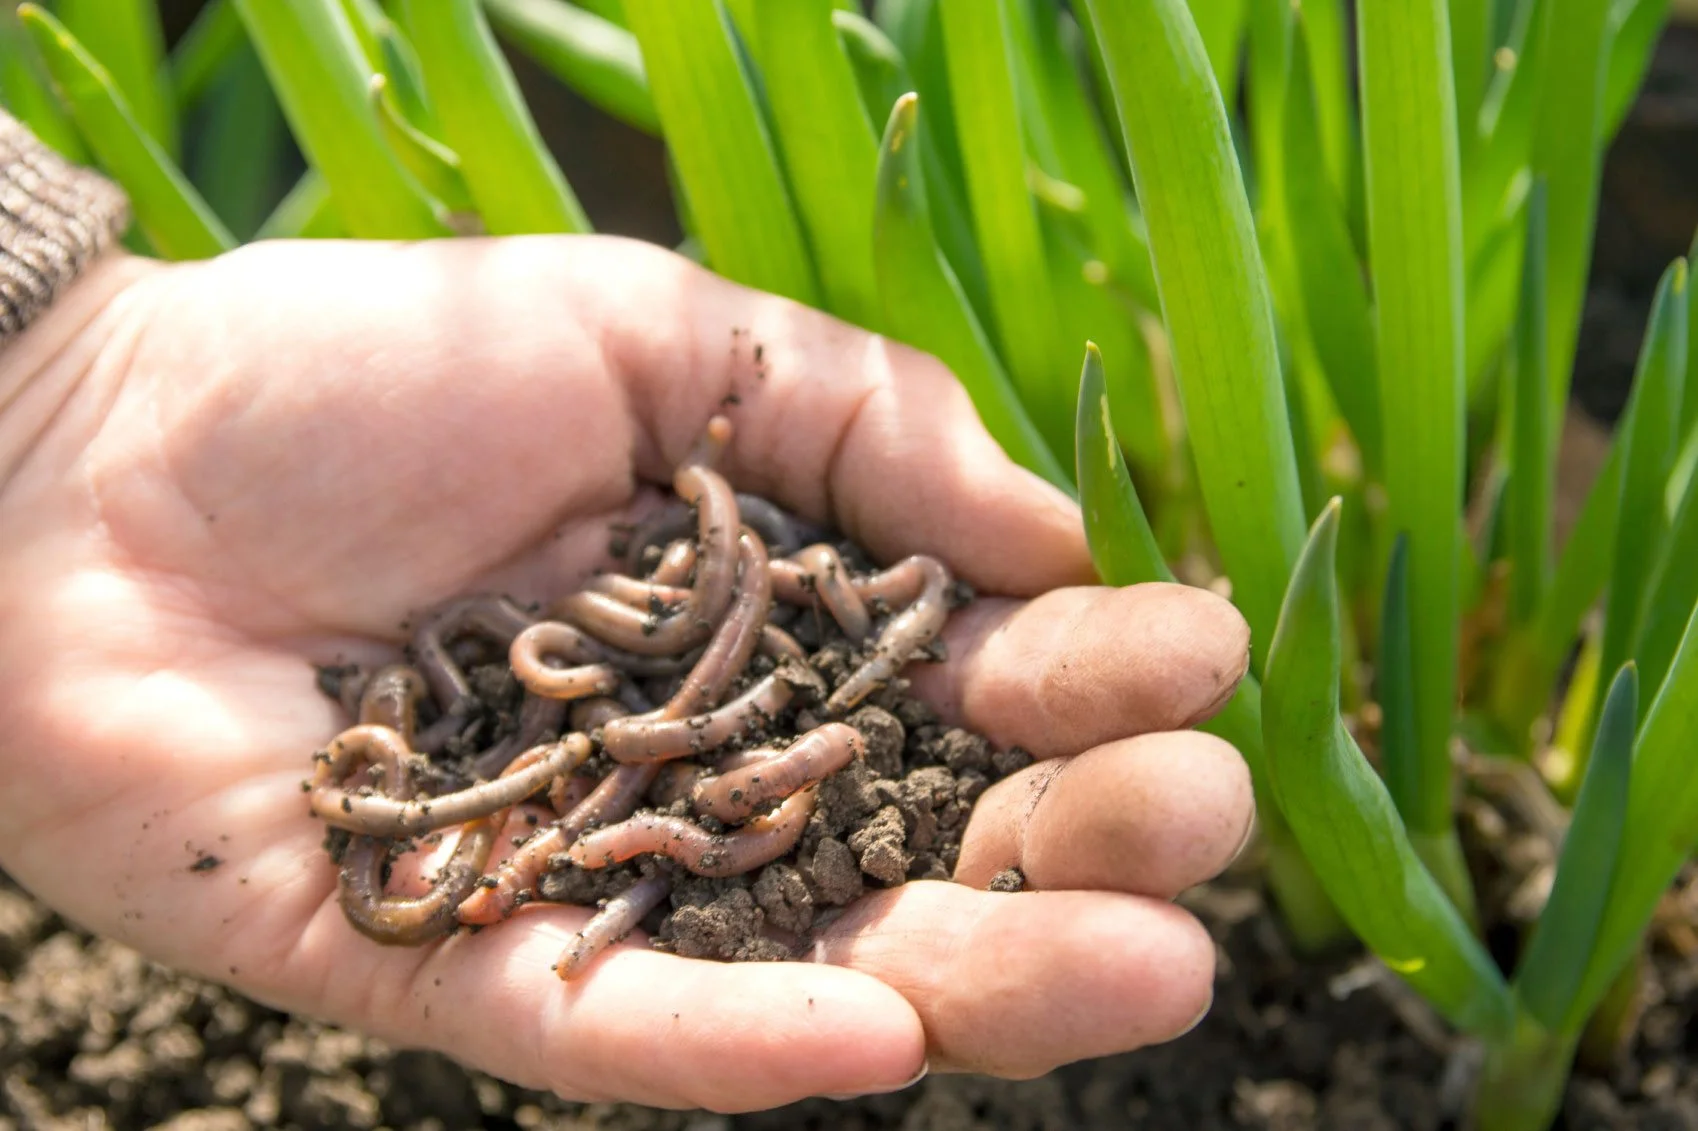
- Preparation: Wet your hands with clean, non-chlorinated water before handling the worms. This helps prevent their delicate skin from drying out and becoming damaged.
- Transfer: Gently scoop up a handful of worms from their current habitat and carefully place them on the bedding material in the storage container. Be mindful not to harm or squash the worms while transferring them.
- Spread them evenly: Spread the worms evenly over the bedding material to ensure they are distributed throughout the container. Avoid clumping them together as this can lead to competition for food and space.
- Avoid overcrowding: Do not overload the container with more worms than it can comfortably accommodate. Overcrowding can create stress and hinder the worms’ ability to thrive and reproduce.
Once the worms are introduced to their new habitat, they will naturally start burrowing into the bedding material. Allow them a few days to settle in and adapt to their surroundings before disturbing the container or attempting any feeding.
Remember to handle the worms with care, being mindful of their delicate nature. By following these steps, you ensure a smooth and safe transition for the live worms into their new storage environment.
Feeding and Maintaining the Worms
Feeding and maintaining the worms in your storage container is crucial for their overall health and productivity. Providing them with proper nutrition and care ensures their well-being and maximizes their effectiveness for various purposes, such as vermicomposting or as fishing bait.
Here are some important points to consider when feeding and maintaining your live worms:
- Feeding frequency: Feed the worms regularly, about once or twice a week, depending on their appetite and the amount of organic waste in the container. Overfeeding can lead to excess moisture buildup and odor, while underfeeding can result in malnourishment.
- Food selection: Offer a variety of organic materials as food for the worms. Suitable options include fruit and vegetable scraps, coffee grounds, tea leaves, shredded paper, and crushed eggshells. Avoid adding citrus fruits, meat, dairy products, oily and spicy foods, as well as any toxic or non-biodegradable materials.
- Food preparation: Chop or blend the food scraps into small, manageable pieces for easier digestion by the worms. This also helps accelerate the decomposition process.
- Feeding technique: Make small holes or trenches in the bedding material and bury the food scraps within these pockets. Cover the food scraps with a thin layer of bedding to prevent fruit flies or odors. This mimics the worms’ natural feeding behavior and prevents any surface disturbances.
- Monitor moisture levels: Check the moisture content of the bedding regularly. If it feels too dry, lightly mist the bedding with water to increase moisture. If it feels too wet, add dry bedding material to absorb the excess moisture. Maintaining the right moisture balance is crucial for the worms’ well-being.
- Harvesting worm castings: Over time, the worms will convert the organic waste into nutrient-rich worm castings, also known as vermicompost. Harvest the castings periodically by gently scooping them out from the surface of the bedding. This allows you to utilize the valuable vermicompost for your gardening or other projects.
By following these feeding and maintenance practices, you ensure that the worms receive the proper nutrition and care they need to thrive. Remember to observe the worms regularly, making sure they are active, healthy, and reproducing. Adjust the feeding frequency and quantities as needed based on their appetite and the condition of the bedding.
With proper feeding and maintenance, your worms will continue to be productive and provide you with valuable vermicompost or fishing bait for your needs.
Monitoring Temperature and Moisture Levels
Monitoring the temperature and moisture levels in your worm storage container is essential for creating an optimal environment for the worms. It ensures their health, activity, and overall well-being.
Here are some key factors to consider when monitoring temperature and moisture levels:
- Temperature: Use a thermometer to regularly check the temperature inside the container. The ideal temperature range for most worm species is between 55°F and 77°F (13°C and 25°C). Fluctuations can stress the worms, so aim for a stable and consistent temperature within this range.
- Moisture: Maintaining adequate moisture levels is crucial for the worms’ survival. Regularly check the moisture content of the bedding material by squeezing a handful. It should feel damp but not dripping wet. If it feels dry, lightly mist the bedding with water. If it feels too wet, add dry bedding material to absorb excess moisture.
- Condensation: Keep an eye out for condensation inside the container. Excessive condensation can indicate high moisture levels and poor airflow. If you notice increased condensation, adjust the ventilation or reduce the moisture content in the bedding.
- Insulation: If the temperature in the storage area tends to fluctuate or if you live in an extreme climate, insulate the container to provide a more stable temperature. This can be done by wrapping the container with insulation material or placing it in a temperature-regulated space.
- Shading: If storing the container outdoors, place it in a shaded area to protect it from direct sunlight. Sunlight can raise the temperature inside the container and create hot spots that can harm the worms.
- Regular observation: Regularly observe the worms for signs of distress or discomfort. Healthy worms are actively moving, have a reddish color, and exhibit a slimy but not sticky texture. If you notice any changes in behavior, such as reduced activity or discoloration, it could indicate an issue with temperature or moisture levels.
By consistently monitoring the temperature and moisture levels within the container, you can make necessary adjustments to maintain a stable and suitable environment for the worms. This ensures their well-being, longevity, and productivity.
Remember, each worm species may have slightly different temperature and moisture preferences, so it’s important to research and understand the specific needs of the worms you are storing.
Read more: How To Store Meal Worms
Avoiding Common Mistakes
When it comes to storing live worms, there are some common mistakes that can adversely affect their health and well-being. By being aware of these mistakes, you can avoid them and ensure the success of your worm storage practices:
- Overfeeding: One of the most common mistakes is overfeeding the worms. Overfeeding leads to excess organic waste, which can cause odor, attract pests, and create an unbalanced environment. Feed the worms only the amount they can consume within a reasonable time frame.
- Underfeeding: Conversely, underfeeding the worms can lead to malnourishment and slower productivity. Be mindful of providing enough food to meet their nutritional needs and stimulate their growth and reproduction.
- Adding inappropriate foods: Avoid adding foods that are harmful to worms, such as citrus fruits, onions, garlic, meats, dairy products, oily and spicy foods, and any non-biodegradable or toxic materials. Stick to suitable food options that are easily digestible and beneficial for their health.
- Inadequate ventilation: Insufficient airflow within the container can lead to stagnant and foul-smelling conditions. Ensure proper ventilation by creating small holes or using a container with breathable material to allow for adequate airflow.
- Excessive moisture: Too much moisture in the bedding can cause waterlogging, which can drown the worms and create an anaerobic environment. Monitor and adjust the moisture levels regularly to maintain a damp but not saturated bedding material.
- Insufficient moisture: On the other hand, allowing the bedding material to dry out can dehydrate the worms and hinder their activity. It’s important to provide enough moisture to keep the bedding in a suitable condition.
- Using toxic containers or materials: Be cautious of using containers or bedding materials that may release toxic substances harmful to the worms. Always choose non-toxic materials and avoid using containers that previously held chemicals or harmful substances.
By avoiding these common mistakes, you can provide the best possible environment for the worms in your storage container. This ensures their overall health, vitality, and productivity, leading to successful worm storage practices.
Troubleshooting Tips
While proper worm storage practices can greatly enhance the health and well-being of your worms, sometimes issues may arise. Here are some troubleshooting tips to help address common problems and ensure the success of your worm storage:
- Foul odor: If you notice a strong and unpleasant odor emanating from the container, it may indicate an imbalance in the bedding or excess moisture. Consider adjusting the bedding material, increasing ventilation, and ensuring proper moisture levels.
- Fruit flies: Fruit flies can be attracted to decaying organic matter in the container. To combat them, bury the food scraps deeper into the bedding material, cover them with a thin layer of bedding, and reduce the amount of food you add. You can also use natural fruit fly traps to control their population.
- Mold or fungus: If you observe mold or fungus growing on the bedding material, it may indicate excess moisture or poor airflow. Adjust the moisture levels, increase ventilation, and mix the bedding to improve airflow and reduce moisture content.
- Slow decomposition: If the organic matter in the container is not decomposing as expected, it may indicate a lack of microbial activity or insufficient worm population. Consider adding more worms, ensuring proper food quantity and quality, and introducing beneficial microbes through garden soil or compost.
- Temperature fluctuations: Fluctuating temperatures can stress the worms and affect their activity and reproduction. Insulate the container to provide a more stable temperature and avoid placing it in areas with extreme temperature variations.
- Pests: If you notice unwanted pests, such as ants or mites, in the container, it may be due to excess moisture or the presence of food scraps attracting them. Address the underlying issues of moisture and food management to reduce pest infestations.
Regular monitoring and proactive troubleshooting can help identify and address problems early on, ensuring a healthy and thriving worm storage environment. Remember that each situation may require different interventions, so be observant and adapt your approach accordingly.
By implementing these troubleshooting tips, you can overcome common challenges and create a successful worm storage system that promotes the well-being and productivity of your worms.
Conclusion
Proper worm storage is essential for maintaining the health, vitality, and productivity of live worms. By following the guidelines outlined in this article, you can create an optimal environment for your worms to thrive.
From choosing the right container to preparing it with suitable bedding material, creating the ideal environment, and maintaining proper temperature and moisture levels, every step plays a crucial role in ensuring the well-being of your worms.
By avoiding common mistakes and addressing any issues through troubleshooting, you can overcome challenges and provide the best possible conditions for your worms to flourish. This not only extends their lifespan but also maximizes their effectiveness for various purposes such as vermicomposting, fishing bait, or feeding other animals.
Remember, monitoring the temperature and moisture levels, as well as providing appropriate food and care, are essential for the ongoing success of your worm storage practices. Regular observation and adjustments will ensure that your worms remain healthy, productive, and ready to serve their purpose.
By implementing the techniques and tips covered in this article, you can experience the joy and satisfaction of successful worm storage and enjoy the benefits that come with it, such as nutrient-rich vermicompost or a fresh supply of fishing bait.
So, follow these guidelines, be attentive to your worms’ needs, and enjoy the wonders of storing live worms effectively!
Frequently Asked Questions about How To Store Live Worms
Was this page helpful?
At Storables.com, we guarantee accurate and reliable information. Our content, validated by Expert Board Contributors, is crafted following stringent Editorial Policies. We're committed to providing you with well-researched, expert-backed insights for all your informational needs.


0 thoughts on “How To Store Live Worms”