Articles
How To Store Oreo Truffles
Modified: August 17, 2024
Learn the best way to store Oreo truffles in this informative article. Find out how to keep them fresh and delicious for longer.
(Many of the links in this article redirect to a specific reviewed product. Your purchase of these products through affiliate links helps to generate commission for Storables.com, at no extra cost. Learn more)
Introduction
Welcome to the world of Oreo truffles! If you’re a fan of the classic Oreo cookie and decadent chocolate, then you’re in for a treat. Oreo truffles are a simple yet indulgent dessert that can be enjoyed on their own or used as a delightful addition to any dessert spread. With just a few ingredients and a little bit of time, you can whip up a batch of these delicious treats that will have everyone coming back for more.
Oreo truffles are the perfect combination of creamy, crunchy, and rich flavors. The base of these truffles is made by crushing up Oreo cookies, mixing them with cream cheese, and forming them into bite-sized balls. These balls are then coated in melted chocolate, giving them a beautiful and glossy shell. The end result is a rich and velvety truffle with a delightful Oreo flavor that will satisfy any sweet tooth.
Whether you’re a beginner in the kitchen or an experienced baker, making Oreo truffles is a fun and rewarding process. This article will guide you through each step of the process, from crushing the Oreos to storing the finished truffles. So grab your apron, gather your ingredients, and let’s get started on this mouthwatering adventure!
Key Takeaways:
- Indulge in the delightful world of Oreo truffles, where creamy, crunchy, and rich flavors come together to create a crowd-pleasing treat. With simple ingredients and a little creativity, you can enjoy these irresistible delights at any occasion.
- Master the art of making, serving, and storing Oreo truffles to ensure a delightful and indulgent experience. From crushing Oreos to coating in luscious chocolate, these versatile treats are perfect for sharing joy and satisfaction with loved ones.
Read more: How To Store Oreo Balls
Ingredients
Before you embark on your Oreo truffle-making journey, let’s gather all the necessary ingredients. Don’t worry, you won’t need to make a trip to a specialized grocery store for these. Most of these items are likely to be already in your pantry or easy to find at your local supermarket. Here are the ingredients you’ll need:
- 1 package of Oreo cookies (or any chocolate sandwich cookies) – 36 cookies
- 8 ounces (226 grams) of cream cheese, softened
- 12 ounces (340 grams) of chocolate (dark, semisweet, or white), for coating
- Optional garnishes: crushed Oreo cookies, sprinkles, chopped nuts, etc.
The key ingredient here is, of course, the Oreo cookies. You can either use the classic Oreo or get creative with different flavors like Double Stuf, Mint, or Golden Oreo. The choice is yours! Just make sure to have a total of about 36 cookies.
As for the cream cheese, it’s important to use the full-fat variety for the best texture and flavor. Make sure to let it soften at room temperature before using it in the recipe. This will ensure that it blends seamlessly with the crushed cookies.
The chocolate you choose for coating the truffles will depend on your preference. Dark chocolate will add a rich and slightly bitter flavor, while semisweet chocolate will provide a balance of sweetness and cocoa. If you prefer a sweeter option, you can use white chocolate for coating.
Lastly, the optional garnishes are a fantastic way to add a personal touch to your Oreo truffles. Sprinkle some crushed Oreo cookies on top for an extra Oreo kick, or get creative with colorful sprinkles or chopped nuts.
Now that you have all the ingredients ready, it’s time to move on to the next step: gathering the equipment you’ll need. Don’t worry; you won’t need any fancy gadgets for this recipe – just some basic kitchen tools.
Equipment
Luckily, making Oreo truffles doesn’t require a lot of specialized equipment. Chances are, you already have most of the necessary items in your kitchen. Here’s what you’ll need:
- Food processor or blender
- Mixing bowl
- Electric mixer or hand whisk
- Baking sheet or tray
- Parchment or wax paper
- Fork or dipping tool
- Double boiler or microwave-safe bowl
- Spatula or spoon
The first tool you’ll need is a food processor or blender. This will make quick work of crushing the Oreo cookies into fine crumbs. If you don’t have a food processor or blender, you can also place the cookies in a zip-top bag and crush them with a rolling pin or the bottom of a heavy pan.
A mixing bowl is essential for combining the crushed cookies with the softened cream cheese. You’ll want a large bowl to ensure there’s enough space to thoroughly mix the ingredients. If you prefer, you can also use an electric mixer or a hand whisk to make the mixing process even easier.
A baking sheet or tray lined with parchment or wax paper will come in handy for placing the formed truffles. This will prevent them from sticking to the surface and make it easier to transfer them to the refrigerator for chilling.
You’ll also need a fork or a dipping tool to coat the truffles in melted chocolate. A fork works well for rolling the truffles in the chocolate, allowing any excess chocolate to drip off. If you prefer, you can use a dipping tool designed specifically for candy-making, which will provide more control and precision.
For melting the chocolate, you have two options: a double boiler or a microwave-safe bowl. A double boiler is a kitchen tool that consists of a bottom pot filled with simmering water and a top pot or bowl where you place the chocolate. The steam from the simmering water gently heats the chocolate, preventing it from burning. If you don’t have a double boiler, you can use the microwave to melt the chocolate. Just make sure to heat it in short intervals, stirring in between, to avoid overheating or scorching the chocolate.
Lastly, you’ll need a spatula or spoon for mixing the melted chocolate and for drizzling any optional garnishes over the truffles.
With all the equipment gathered, you’re ready to dive into the step-by-step process of making the Oreo truffles!
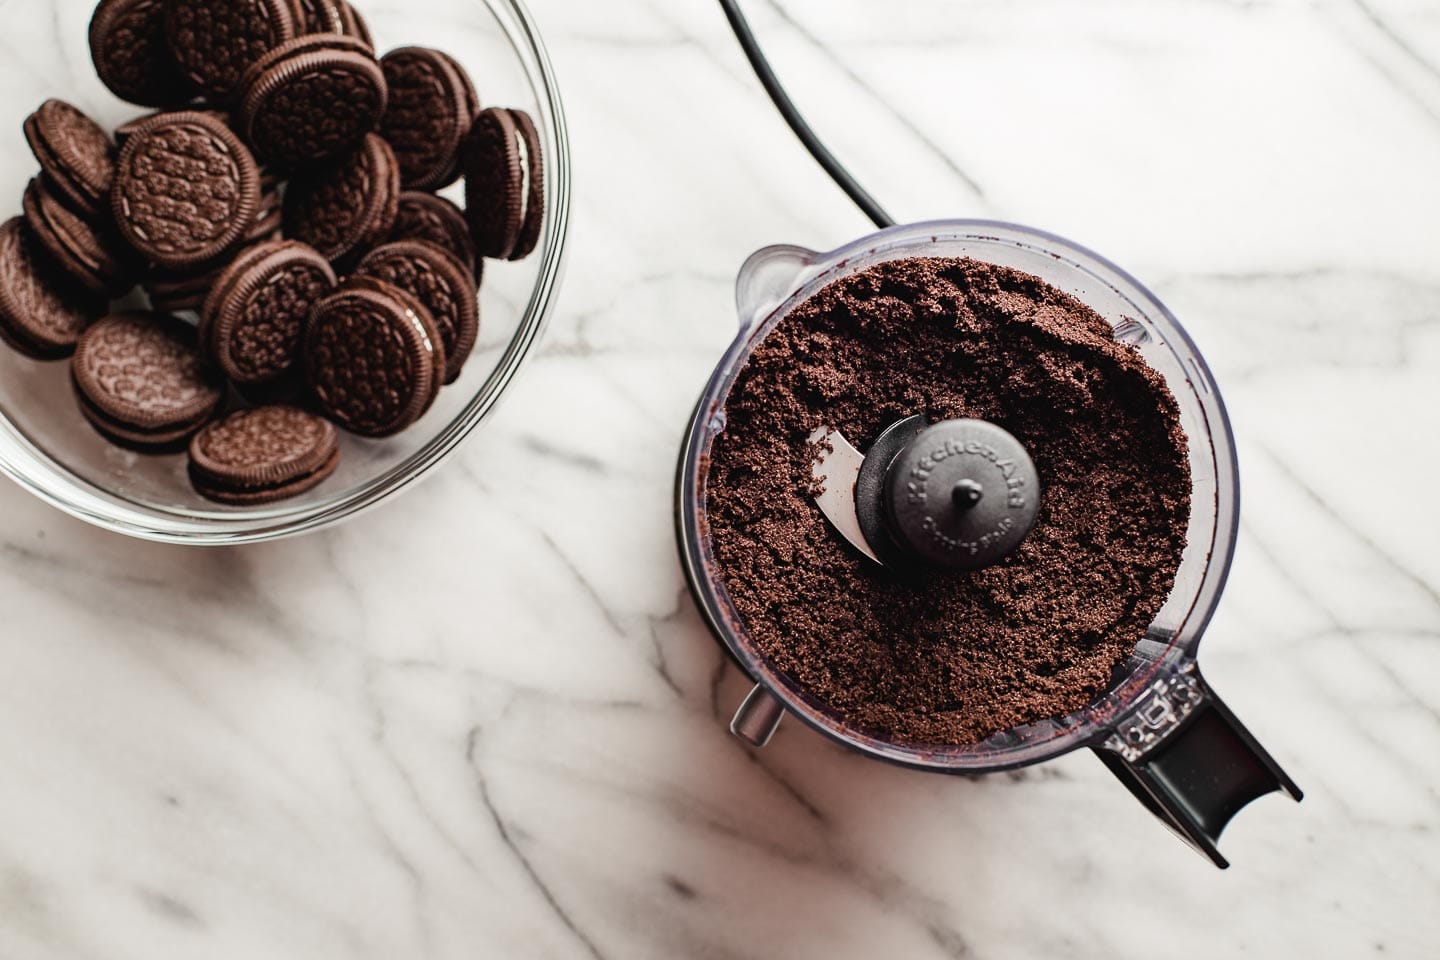
Step 1: Crushing Oreos
The first step in making Oreo truffles is crushing the Oreo cookies into fine crumbs. This will create the base for the truffle mixture that will be mixed with cream cheese.
Here’s how to crush the Oreos:
- Begin by removing the cream filling from the Oreo cookies. You can gently twist the cookies apart, carefully scraping off the filling with a knife or spoon. Set the filling aside for later use or enjoy it as a snack!
- Place the separated cookie halves into a food processor or blender. If you don’t have a food processor or blender, you can place the cookies in a zip-top bag and crush them with a rolling pin or the bottom of a heavy pan. Make sure to seal the bag tightly to prevent any crumbs from escaping.
- If using a food processor or blender, pulse the cookies until they are finely ground. If using a zip-top bag, gently crush the cookies by rolling the rolling pin or pan over them until they resemble fine crumbs. Be careful not to apply too much pressure, as this can cause the bag to burst.
- Once the Oreos have been crushed into fine crumbs, transfer them to a mixing bowl. This will be the base for your truffle mixture.
Crushing the Oreos is an essential step in creating the perfect texture for your Oreo truffles. The fine crumbs will mix seamlessly with the cream cheese, resulting in a smooth and creamy consistency. Make sure to remove the cream filling from the cookies beforehand, as it can interfere with the texture of the truffle mixture.
With your Oreos properly crushed, you’re ready to move on to the next step: mixing the cream cheese with the crumbs to create the truffle base.
Step 2: Mixing Cream Cheese
Once you have crushed the Oreo cookies into fine crumbs, it’s time to mix them with cream cheese to create the base of your Oreo truffles. The cream cheese will not only bind the crumbs together but also add a creamy and velvety texture to the truffles.
Here’s how to mix the cream cheese:
- In a mixing bowl, add the softened cream cheese.
- Using an electric mixer or a hand whisk, beat the cream cheese until it is smooth and creamy. Make sure there are no lumps remaining.
- Add the crushed Oreo crumbs to the bowl with the cream cheese.
- Using a spatula or spoon, mix the cream cheese and Oreo crumbs together until well combined. Ensure that the cream cheese is evenly distributed throughout the mixture.
Mixing the cream cheese with the crushed Oreos is an important step as it helps to bring all the flavors together. The cream cheese not only adds a delicious tangy taste but also helps to bind the truffle mixture, allowing you to shape it into balls later on.
Make sure that your cream cheese is softened to room temperature before mixing. This will ensure it blends easily with the Oreo crumbs and creates a smooth and creamy texture. If your cream cheese is too cold, you may end up with lumps in the mixture.
Once you have mixed the cream cheese and Oreo crumbs to a smooth consistency, you’re ready to move on to the next step: forming the truffle balls.
Read more: How To Store White Truffles
Step 3: Forming Truffle Balls
With the cream cheese and Oreo mixture well combined, it’s time to shape them into delightful bite-sized truffle balls. This step allows you to create uniform truffles that are perfectly sized for easy serving and enjoyment.
Here’s how to form the truffle balls:
- Scoop about a tablespoonful of the Oreo mixture using a spoon or a small cookie scoop.
- Roll the mixture between your palms to form a smooth ball. Apply gentle pressure to ensure that the truffle is compact and holds its shape.
- Place the formed truffle ball onto a baking sheet or tray lined with parchment or wax paper. Leave space between each truffle to prevent them from sticking together.
- Repeat the process with the remaining Oreo mixture until you have formed all the truffle balls.
Forming the truffle balls can be a fun and creative process. You can adjust the size of the truffles based on your preference. If you like smaller truffles, use a teaspoonful of the mixture. If you prefer larger truffles, use a slightly heaping tablespoonful.
Keep in mind that the truffles should be bite-sized, so they are easy to enjoy in one or two bites. Rolling the mixture between your palms will help create a smooth and uniform shape, ensuring that each truffle looks enticing. If the mixture becomes too soft to handle, you can place it in the refrigerator for a few minutes to firm up before continuing.
Once you have formed all the truffle balls, it’s time for the next step: coating them in luscious melted chocolate to create a decadent shell.
Store Oreo truffles in an airtight container in the refrigerator for up to 2 weeks. Place parchment paper between layers to prevent sticking.
Step 4: Melting Chocolate
Now that you have your Oreo truffle balls formed and ready, it’s time to give them a delectable chocolate coating. Melting the chocolate to a smooth and glossy consistency will create a luscious shell that enhances the overall taste and presentation of the truffles.
Here’s how to melt the chocolate:
- Break the chocolate into small, uniform pieces and place them in a microwave-safe bowl or in the top part of a double boiler.
- If using a microwave, heat the chocolate in short 20-30 seconds bursts, stirring well after each interval. Be careful not to overheat the chocolate as it can become scorched or seize. Stirring between each interval will help distribute the heat evenly.
- If using a double boiler, fill the bottom part with water and bring it to a simmer. Place the bowl with the chocolate on top, ensuring that the bowl doesn’t touch the water. Stir the chocolate constantly as it melts, until it reaches a smooth and liquid consistency.
- Continue melting the chocolate until there are no lumps and it is completely smooth. Be patient and take your time to ensure that the chocolate is melted properly.
Choosing the right type of chocolate for coating is a matter of personal preference. Dark chocolate will provide a rich and slightly bitter flavor, while semisweet chocolate strikes a balance between sweetness and cocoa. If you prefer a sweeter option, you can use white chocolate.
Remember, it’s important to handle the melted chocolate with care. Be cautious not to get any liquid or steam inside the chocolate, as it can cause it to seize and become grainy. Use a clean utensil for stirring and avoid any moisture coming into contact with the chocolate.
With your chocolate melted to perfection, it’s time to move on to the next step: coating the truffles with this heavenly chocolate.
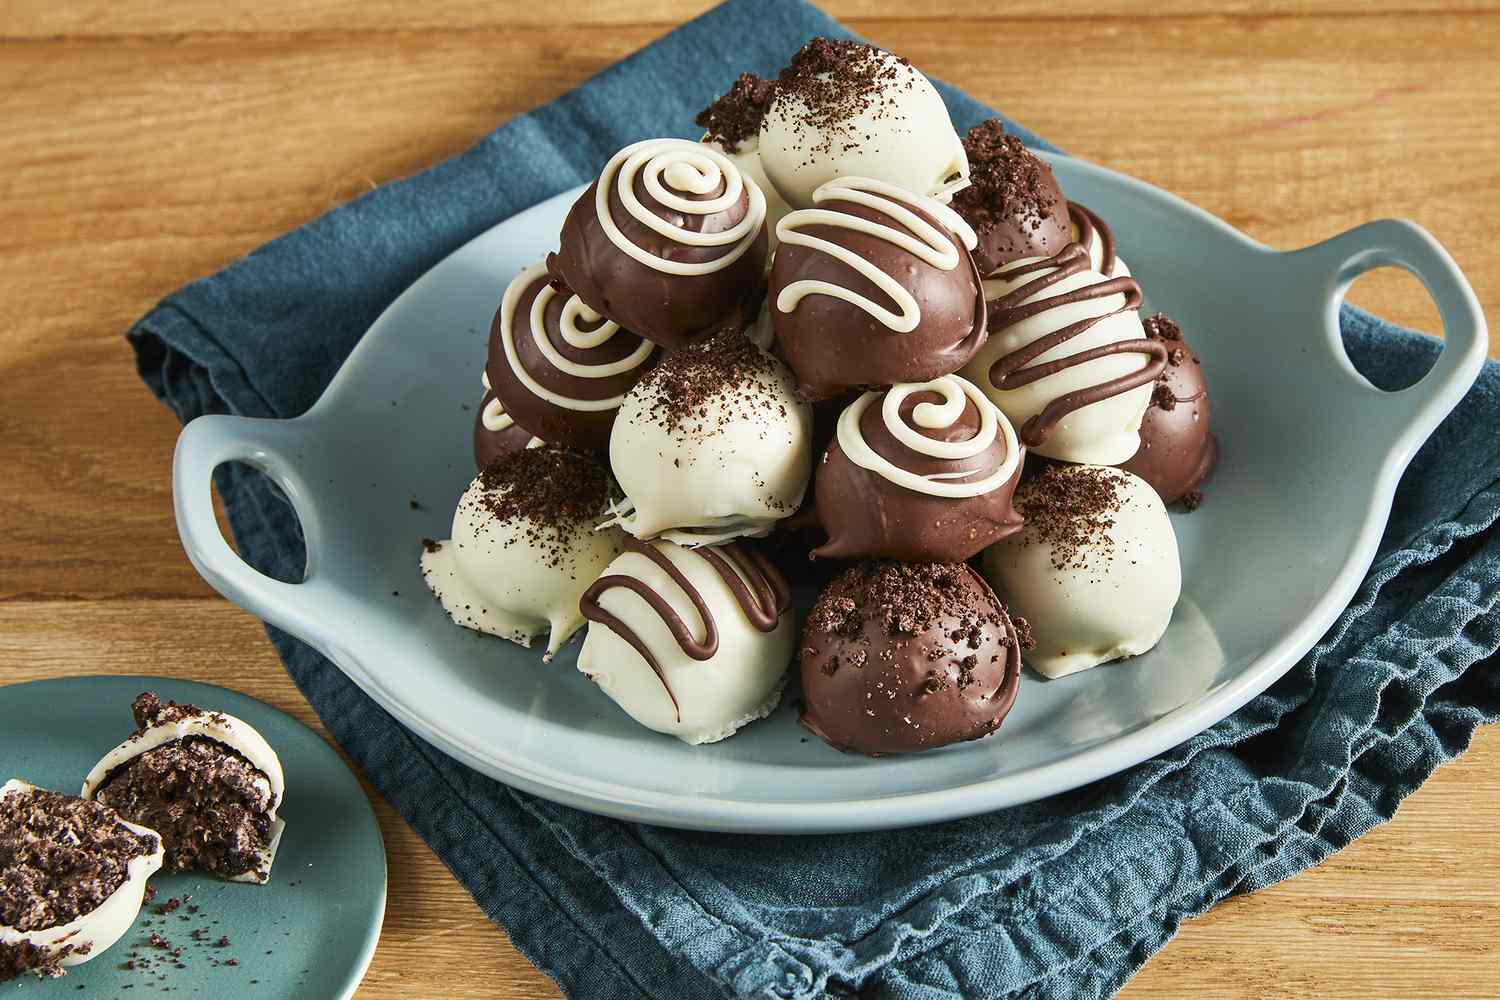
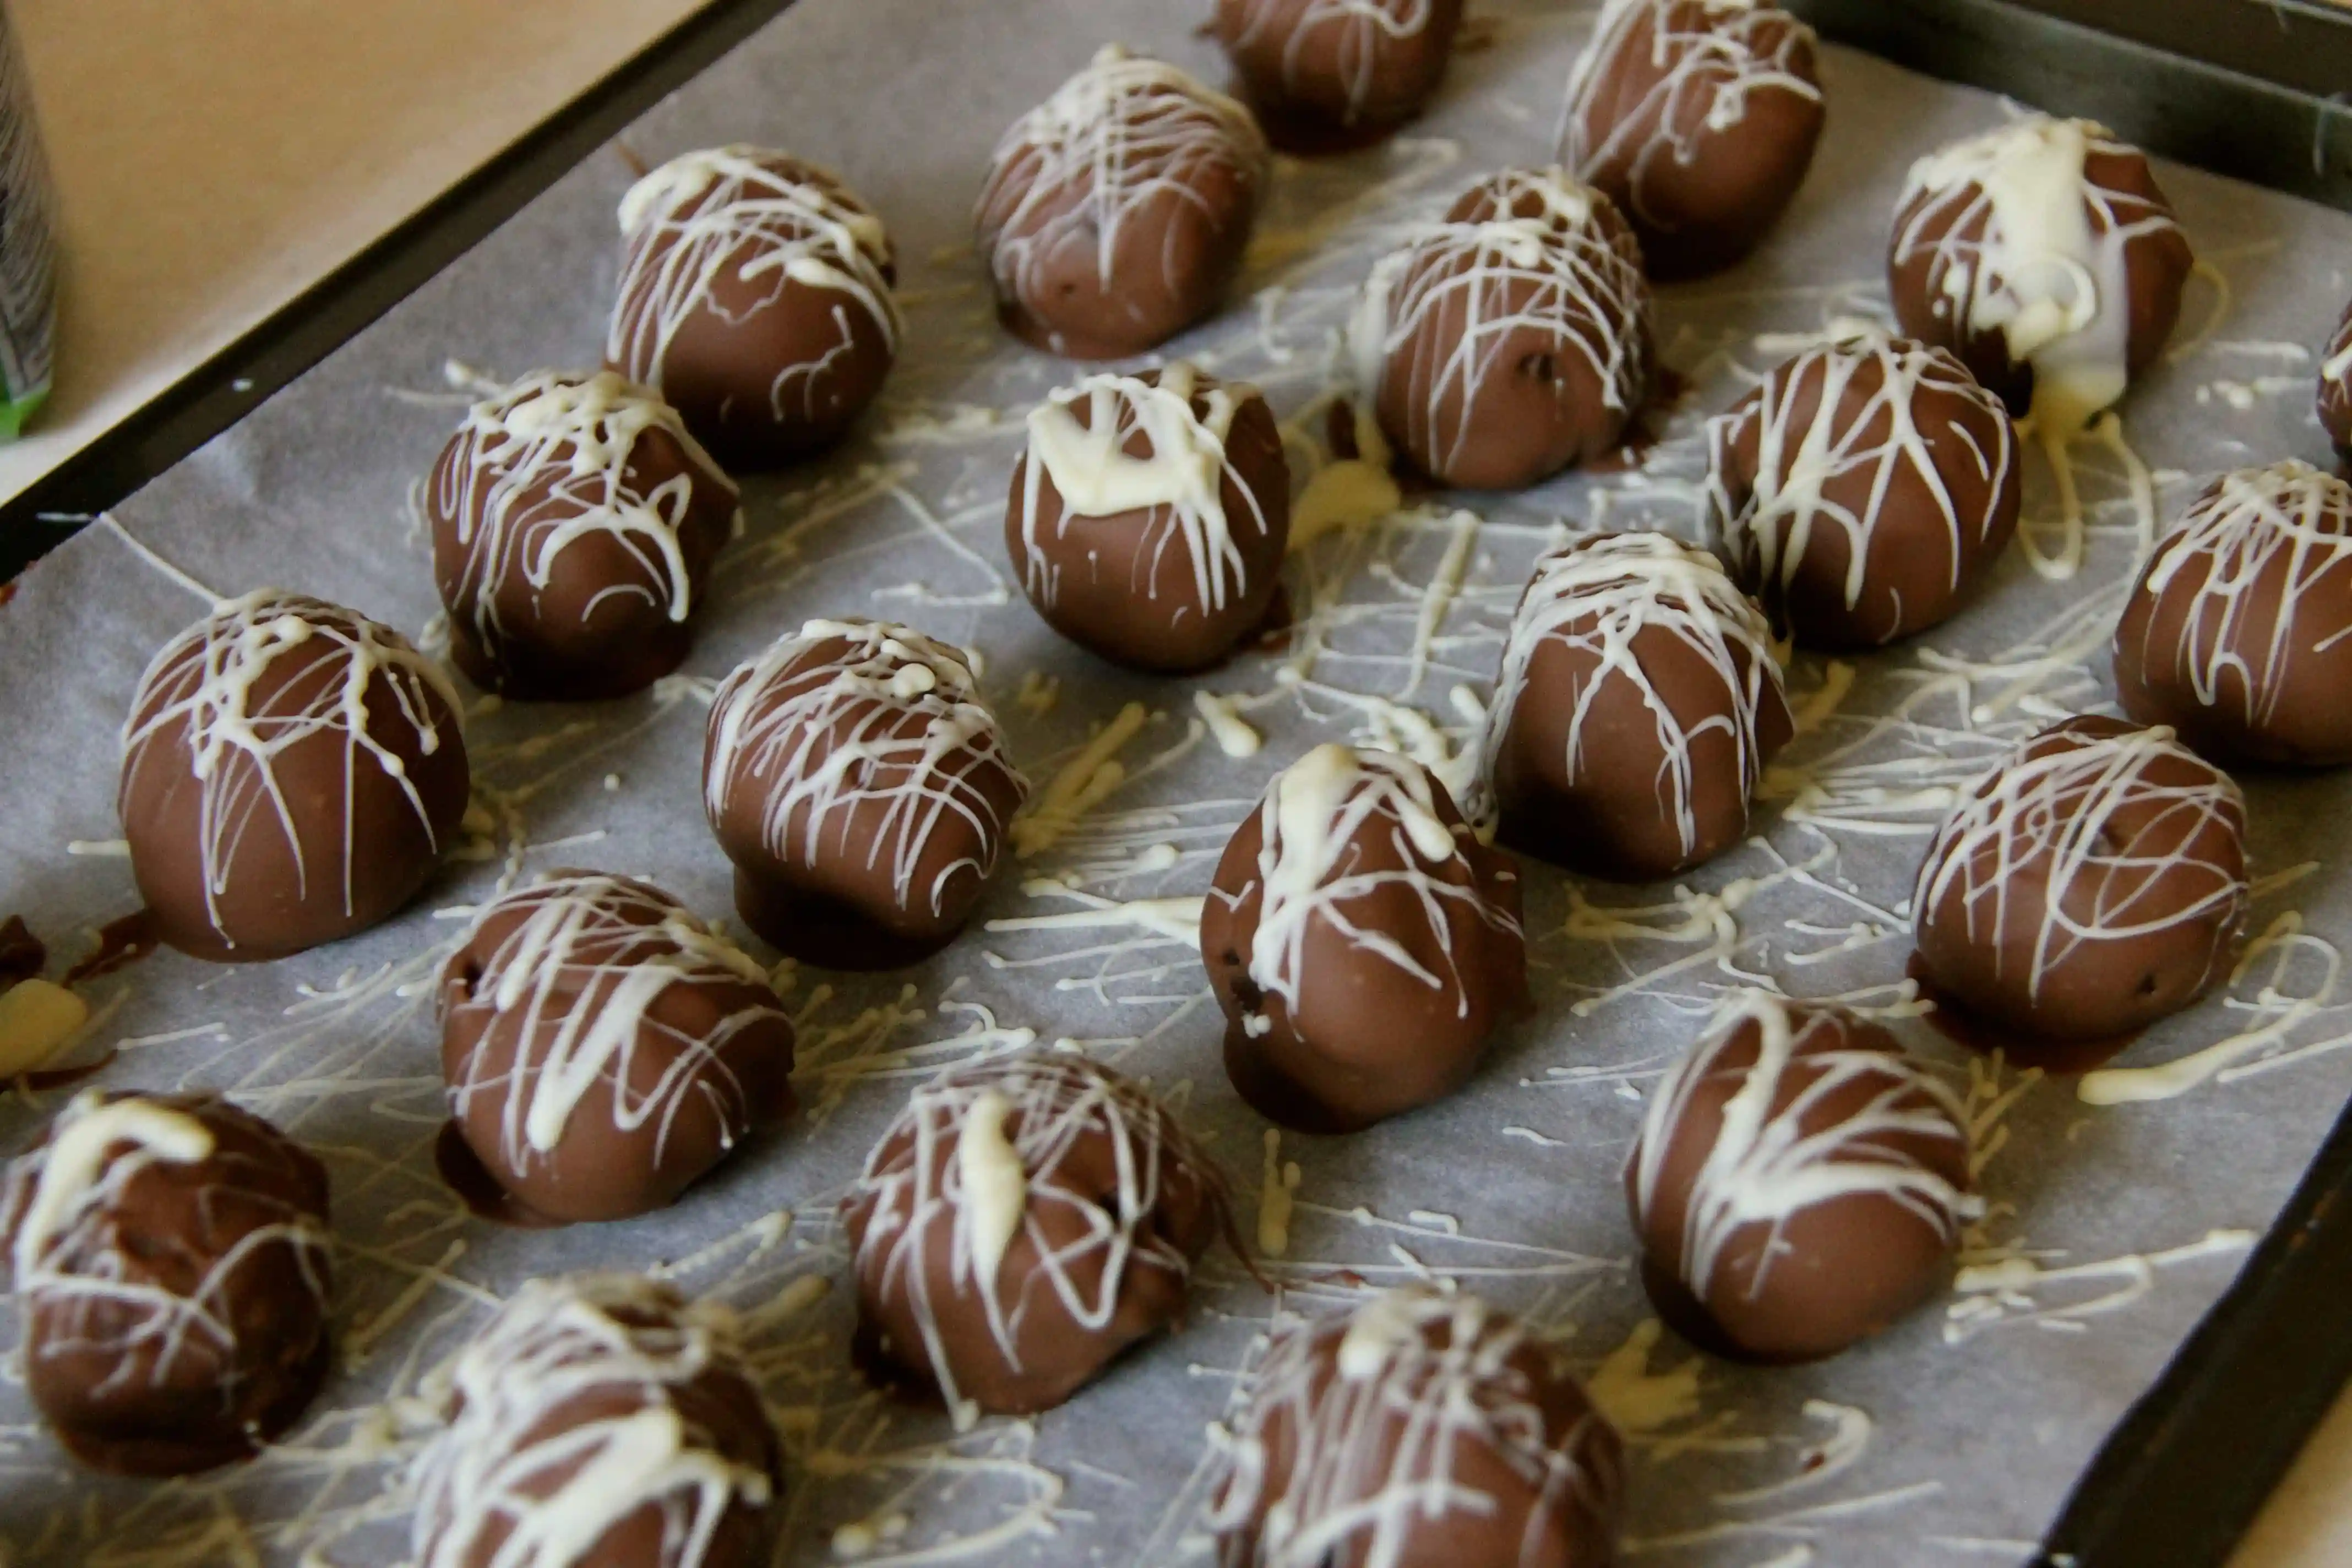
Step 5: Coating Truffles
Now that you have your smooth and melted chocolate ready, it’s time to give your Oreo truffles a gorgeous and delicious coating. This step will add an extra layer of decadence and make your truffles even more irresistible.
Here’s how to coat the truffles:
- Using a fork or a dipping tool, gently lower one truffle into the melted chocolate. Make sure it is fully submerged.
- Using the fork or tool, lift the truffle out of the chocolate and allow any excess chocolate to drip back into the bowl.
- Place the coated truffle back onto the lined baking sheet or tray.
- Repeat the process with the remaining truffles, coating each one in melted chocolate.
Coating the truffles requires some finesse, but with a little practice and patience, you’ll master the technique. Here are a few tips to keep in mind:
- Use a gentle touch when dipping the truffles into the chocolate. You want to ensure that they are fully coated but avoid overly thick layers.
- Allowing the excess chocolate to drip off will help create a smooth and even coating. You can gently tap the fork against the side of the bowl to encourage the excess chocolate to fall off.
- Place the coated truffles back onto the lined baking sheet or tray carefully to avoid smudging or smearing the chocolate.
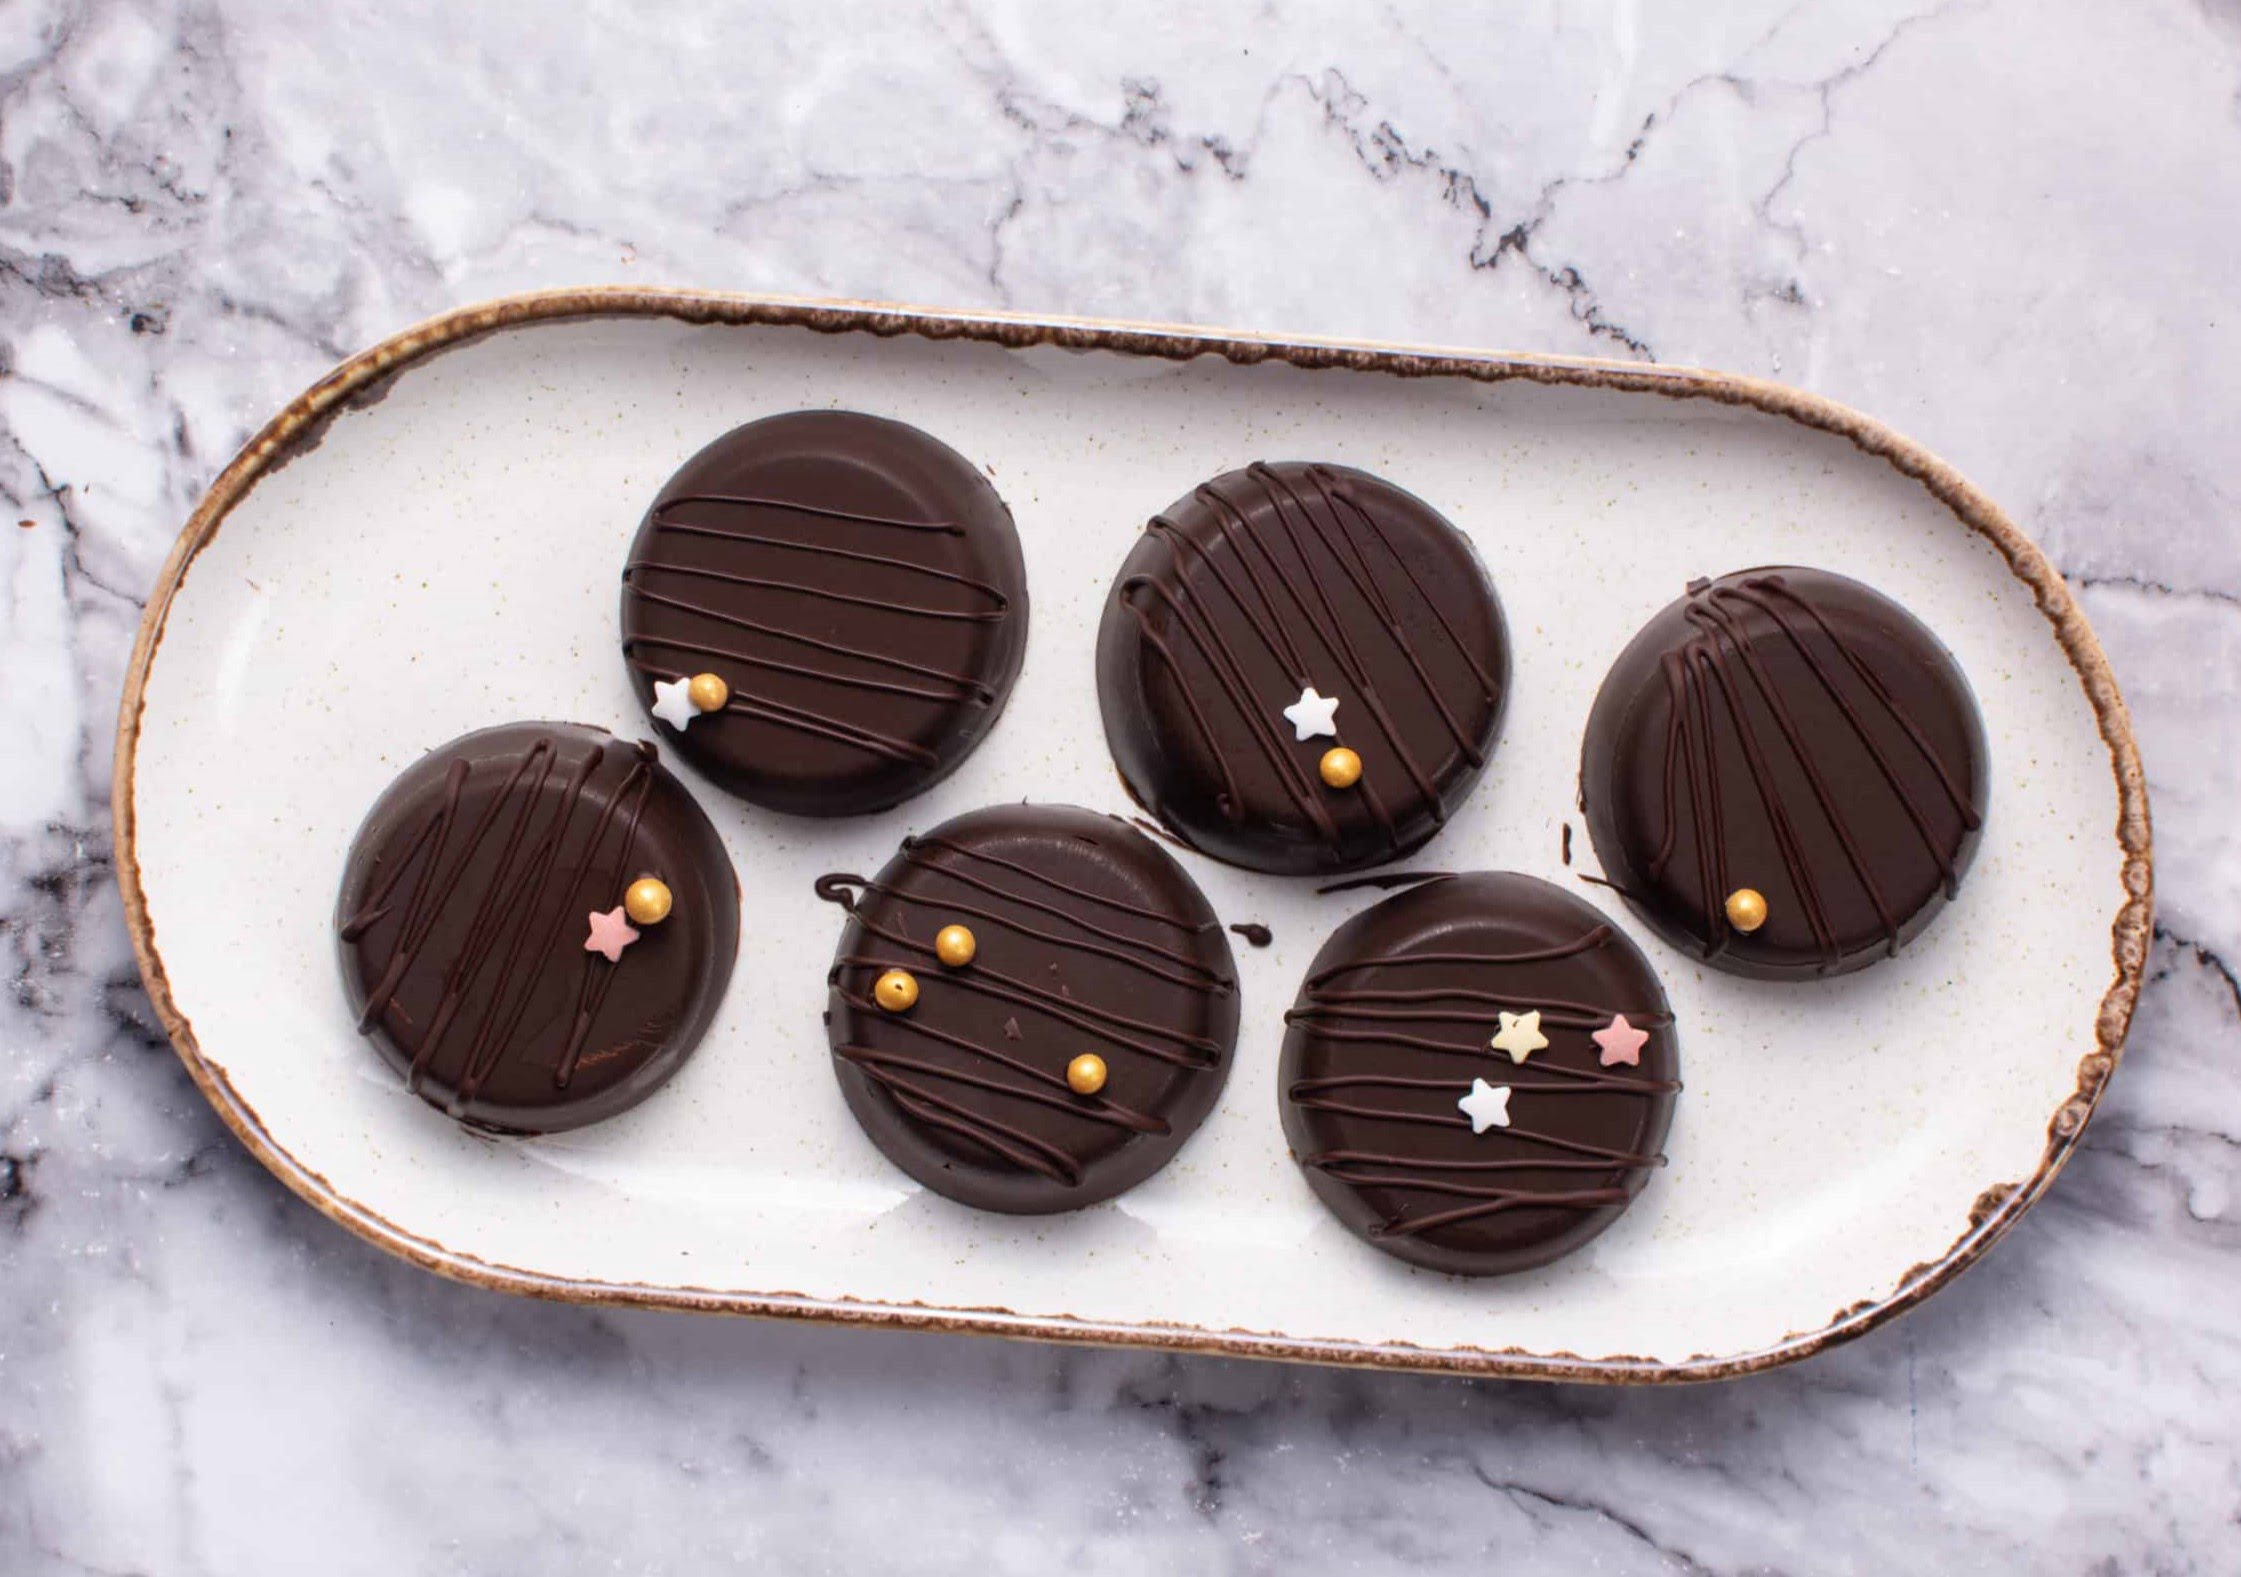
If you’d like to get creative, you can sprinkle some crushed Oreo crumbs, colorful sprinkles, or chopped nuts on top of the freshly coated truffles. Do this while the chocolate is still wet so that the garnishes stick well.
Once all the truffles have been coated and decorated to your liking, it’s time for the next step: chilling them to set the chocolate coating.
Step 6: Refrigerating Truffles
After coating the truffles in delicious melted chocolate, it’s important to refrigerate them to set the coating and allow the flavors to meld together. This step ensures that the truffles maintain their shape, texture, and taste.
Here’s how to refrigerate the truffles:
- Carefully transfer the baking sheet or tray with the coated truffles to the refrigerator.
- Allow the truffles to chill for at least 30 minutes to 1 hour, or until the chocolate coating is firm and set.
Refrigerating the truffles serves two purposes: first, it helps the chocolate coating harden, creating that smooth and crisp shell. Second, it allows the flavors of the Oreo cookie and cream cheese mixture to meld together, enhancing their taste and texture.
If you’re short on time, you can place the truffles in the freezer for a shorter duration, around 15-20 minutes, to speed up the setting process. However, note that leaving them in the freezer for too long may cause the truffles to become too hard and difficult to bite into.
Once the truffles have chilled and the chocolate coating is firm, they are ready to be served and enjoyed. However, if you’re not planning to serve them right away, it’s important to store them properly to maintain their freshness.
Read more: How To Store Truffle Oil
Step 7: Serving and Storage
After patiently waiting for the truffles to chill and the chocolate coating to set, it’s time to indulge in these delectable Oreo treats. Here’s how to serve and store them:
Serving the Truffles:
- Remove the chilled truffles from the refrigerator.
- Arrange them on a serving platter or in small paper cups for a beautiful presentation.
- You can dust them with a sprinkle of powdered sugar, drizzle some additional melted chocolate on top, or leave them as-is for a classic appearance.
- Enjoy the Oreo truffles as a standalone treat or alongside your favorite desserts. They pair well with a cup of coffee, tea, or a glass of milk.
Storing the Truffles:
- Once you have savored a few truffles, store the remaining ones to maintain their freshness.
- Place the truffles in an airtight container or a covered dish to prevent them from absorbing odors or drying out.
- Store the truffles in the refrigerator to keep them firm and maintain their shape. They can be stored in the refrigerator for up to 1 week.
- If you need to store them for longer, you can keep them in the freezer. Place the truffles in a freezer-safe container or a zip-top bag, separating each layer with parchment paper to prevent sticking. They can be stored in the freezer for up to 2-3 months.
- When ready to enjoy the frozen truffles, allow them to thaw in the refrigerator for a few hours before serving. This will ensure that they reach the desired creamy texture.
Whether you’re serving the Oreo truffles at a special occasion, gifting them to loved ones, or simply treating yourself, be prepared for their irresistibly delicious taste and luxurious texture. With proper storage, you can savor these delightful treats long after you’ve made them.
Congratulations! You have successfully completed the process of making, serving, and storing Oreo truffles. Now, it’s time to relish each bite and share the joy of these indulgent treats with others.
Enjoy!
Conclusion
Congratulations on learning how to create delicious and irresistible Oreo truffles! Through each step of the process, you’ve crushed Oreos, mixed them with cream cheese, formed them into truffle balls, coated them in melted chocolate, refrigerated them to set, and now you can enjoy the fruits of your labor.
Oreo truffles are a versatile and crowd-pleasing treat that can be enjoyed on their own or as a delightful addition to any dessert spread. Their rich and creamy texture, combined with the classic Oreo flavor, makes them a favorite among both kids and adults alike.
Remember, you can get creative with your truffles by using different variations of Oreo cookies or adding your own personal twist with toppings and garnishes. Whether you prefer them as a simple indulgence or a show-stopping dessert centerpiece, Oreo truffles are sure to impress.
When serving the truffles, don’t forget to pair them with your favorite hot or cold beverages for a complete sensory experience. They make a fantastic treat for social gatherings, special occasions, or whenever you’re in need of a sweet pick-me-up.
With proper storage, you can enjoy your Oreo truffles for days or even months to come. Store them in the refrigerator or freezer, ensuring they are properly sealed to maintain their freshness and taste whenever you’re ready to indulge.
Now that you have mastered the art of creating Oreo truffles, feel free to experiment with different flavors, coatings, and decorations to truly make them your own. Share this delightful recipe with friends and family, and let the joy of these delectable treats spread.
So, go ahead and treat yourself to the heavenly combination of Oreo cookies, cream cheese, and chocolate. Whether you’re enjoying them alone or sharing them with loved ones, Oreo truffles are bound to bring smiles and satisfaction.
Thank you for joining us on this mouthwatering adventure, and happy truffle making!
Frequently Asked Questions about How To Store Oreo Truffles
Was this page helpful?
At Storables.com, we guarantee accurate and reliable information. Our content, validated by Expert Board Contributors, is crafted following stringent Editorial Policies. We're committed to providing you with well-researched, expert-backed insights for all your informational needs.


0 thoughts on “How To Store Oreo Truffles”