
Articles
How To Store Paint Supplies
Modified: November 1, 2024
Discover the best ways to store your paint supplies and keep your articles organized and easily accessible.
(Many of the links in this article redirect to a specific reviewed product. Your purchase of these products through affiliate links helps to generate commission for Storables.com, at no extra cost. Learn more)
Introduction
Welcome to our guide on how to store paint supplies! Whether you’re a professional painter or an enthusiastic DIYer, properly storing your paint supplies is essential for maintaining their quality and prolonging their lifespan. From paint brushes and cans to rollers and trays, organizing and protecting your supplies will not only help you find what you need when you need it but also save you time, money, and frustration.
In this article, we will provide you with a step-by-step process to ensure your paint supplies are stored safely and efficiently. We’ll discuss choosing a suitable storage space, organizing different types of supplies, considering temperature and humidity, and more. By following these guidelines, you’ll be able to keep your paint supplies in excellent condition, ready for your next project.
Key Takeaways:
- Properly storing paint supplies is crucial for maintaining quality and usability. Choose a suitable storage space, organize supplies, and consider temperature and humidity to prolong their lifespan and enhance your painting experience.
- Labeling and categorizing your paint supplies, as well as considering temperature and humidity, are essential steps in maintaining an organized and efficient storage system. These practices will save time, prevent unnecessary purchases, and result in a more streamlined painting experience.
Read more: How To Store A Painting
Step 1: Choose a suitable storage space
The first step in storing your paint supplies is to find an appropriate storage space. Ideally, this space should be cool, dry, and well-ventilated to prevent moisture buildup and paint deterioration. Here are some factors to consider when selecting a storage area:
- Temperature: Extreme temperatures can affect the quality of your paint. Avoid storing your supplies in areas that are prone to extreme heat or cold, such as attics, basements, or garages without temperature control.
- Humidity: High humidity can lead to paint cans rusting or paint brushes becoming moldy. Look for a storage area with low humidity levels. If necessary, consider using a dehumidifier or silica gel packets to absorb excess moisture.
- Light exposure: Excessive exposure to light can cause the pigments in your paint to fade or change over time. Choose a storage space that is dark or has minimal direct sunlight. If you’re unable to find a completely dark area, consider using opaque containers or wrapping your supplies in a light-blocking material.
- Accessibility: Ensure that the storage space is easily accessible to you whenever you need to retrieve or store your paint supplies. Avoid overcrowding the area and maintain a clear pathway to minimize the risk of accidents.
- Security: If you have children or pets, it’s important to choose a storage space that can be securely locked to prevent any mishaps. Additionally, make sure the area is free from any potential hazards that could damage your supplies.
In summary, the ideal storage space for your paint supplies should have a stable temperature, low humidity, minimal light exposure, easy accessibility, and appropriate security measures. Taking the time to find the right storage area will help preserve the quality and usability of your paint supplies for future projects.
Step 2: Organize your paint brushes
Properly organizing your paint brushes is crucial for their longevity and ease of use. By following these tips, you can ensure that your brushes are stored safely and remain in good condition:
- Clean and dry: Before storing your paint brushes, make sure to thoroughly clean them with the appropriate cleaner or solvent, depending on the type of paint used. Rinse them with water or the recommended cleaning solution and remove any excess paint. After cleaning, allow the brushes to dry completely to prevent any moisture-related damage.
- Sort by size and type: To keep your paint brushes organized, sort them by size and type. You can use separate containers, such as jars or brush holders, to keep them upright and prevent the bristles from bending or fraying. Label each container or section to easily identify the brush you need for a specific task.
- Protect the bristles: To protect the bristles of your paint brushes, consider using brush guards or covers. These protective covers help maintain the shape and integrity of the bristles, preventing them from becoming misshapen or damaged during storage. Alternatively, you can wrap the bristles with a clean cloth or paper towel before storing them.
- Hanging storage: If you prefer a space-saving option for organizing your paint brushes, consider hanging them. Install hooks or a pegboard on the wall near your work area and hang the brushes by their handles. This method not only keeps the bristles in top shape but also allows for easy access while working.
- Regular maintenance: Once you have organized your paint brushes, remember to periodically inspect and clean them to ensure their optimal performance. Remove any dried paint or debris that may accumulate over time, and replace brushes that are worn out or no longer usable.
By taking the time to organize and care for your paint brushes, you can extend their lifespan and maintain their quality. A well-organized collection of brushes will also help you work efficiently and find the perfect brush for any project with ease.
Step 3: Store paint cans properly
Storing paint cans in the correct way is essential for preserving the paint and preventing any leakage or damage. Follow these guidelines to ensure your paint cans are stored safely:
- Tightly seal the cans: Before storing, make sure the lids of your paint cans are tightly sealed to prevent air and moisture from entering. Use a rubber mallet or a block of wood to gently tap the lid into place, ensuring a secure seal. If the original lids are damaged, replace them with new ones or transfer the paint into airtight containers.
- Store upright: To minimize the risk of leakage, always store paint cans in an upright position. This helps maintain a proper seal and prevents the paint from settling or separating inside the can. Place the cans on a sturdy shelf or in a storage rack to keep them stable.
- Avoid extreme temperatures: Extreme temperatures can affect the quality of the paint. Avoid storing paint cans in areas that experience high heat or freezing conditions, such as garages or sheds without temperature control. Instead, opt for an indoor storage area with stable temperatures.
- Proper labeling: It’s important to label your paint cans with the color, brand, and the date of purchase. This will make it easier to locate specific paints when needed and keep track of their age. Use a permanent marker or custom labels to ensure the information remains visible and withstands any potential wear over time.
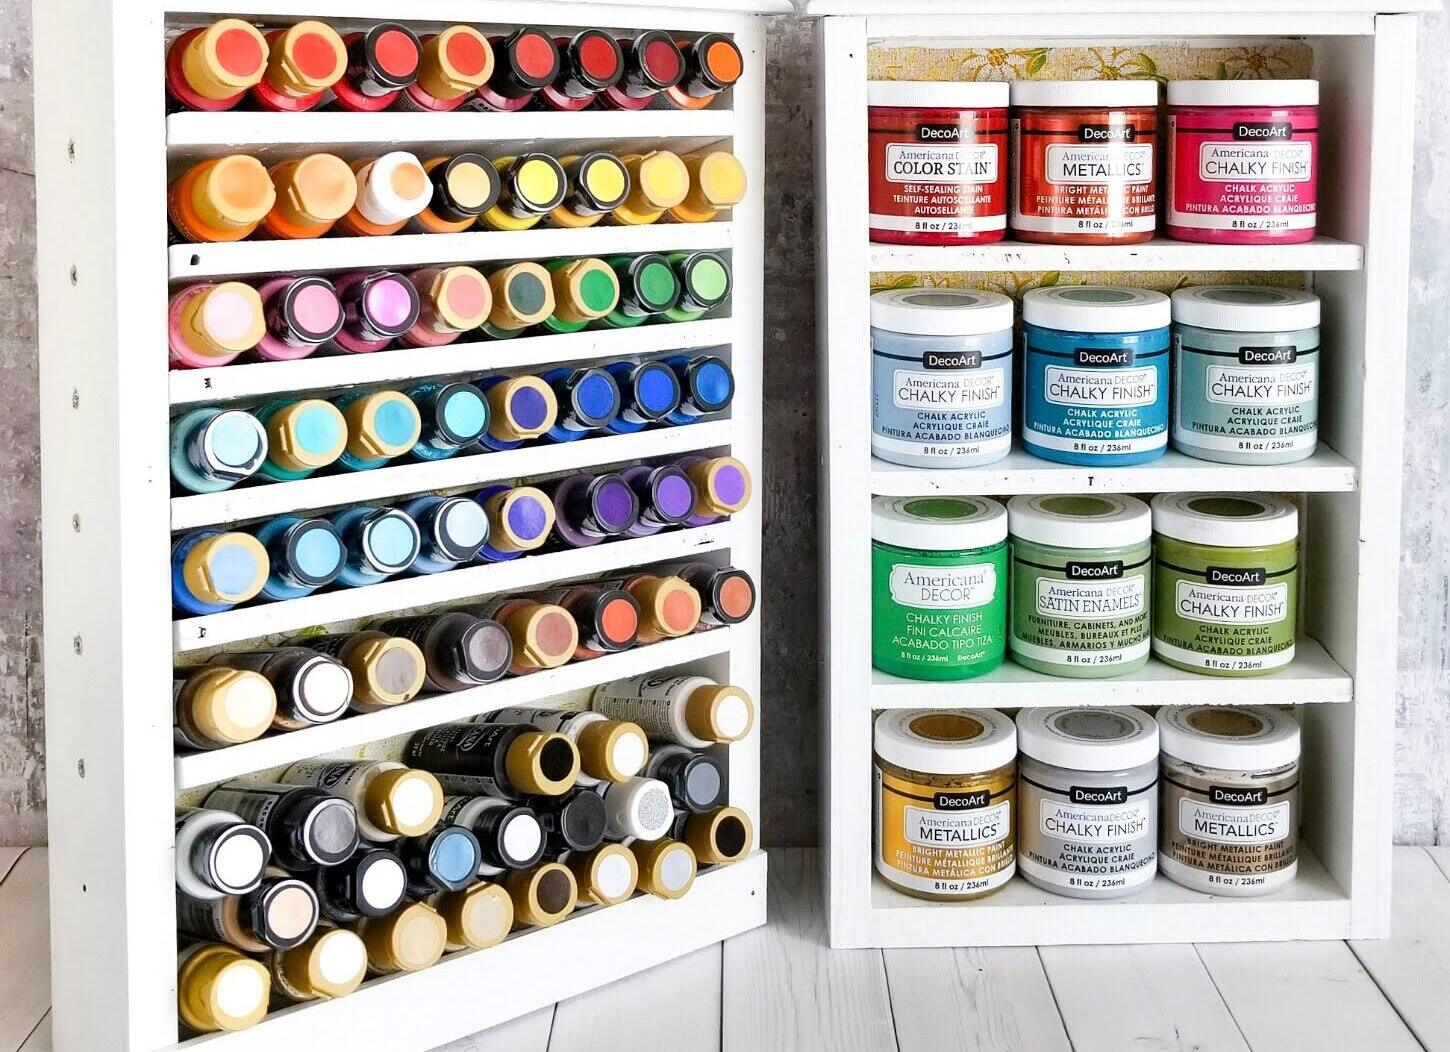
- Organize by type: To maximize efficiency, consider organizing your paint cans by type or project. This will make it easier to find the paint you need without searching through multiple cans. You can use shelves or storage bins and categorize them based on interior, exterior, finish, or specific project needs.
By following these tips, you can ensure that your paint cans remain in good condition and are ready for use whenever you need them. Properly stored paint cans will not only save you time but will also help you avoid unnecessary waste or the need to purchase new paint due to deterioration or spillage.
Step 4: Secure your paint rollers
Paint rollers are a convenient tool for large painting projects, and proper storage is key to maintaining their effectiveness and prolonging their lifespan. Here are some tips to help you secure your paint rollers:
- Clean thoroughly: After using a paint roller, it’s essential to clean it thoroughly to remove any leftover paint. Rinse the roller cover with water or the recommended cleaning solution until the water runs clear. Use your hand or a roller cleaner to remove any paint trapped in the fibers. Allow the roller cover to dry completely before moving on to the next step.
- Remove roller cover: To properly store your paint roller, remove the roller cover from the frame. This will prevent the fibers from becoming compressed or deformed during storage. Gently slide the cover off by pulling it away from the frame, taking care not to bend or damage the cover in the process.
- Store in plastic bags: To protect the roller cover from dust and debris, place it in a plastic bag. This will help keep it clean and prevent any foreign particles from getting trapped in the fibers. Seal the bag tightly to create an airtight environment and minimize exposure to air and moisture.
- Label the bag: To easily identify the roller cover and its purpose, label the plastic bag with the type of paint used and the project it was used for. This will save you time when you need to reuse the roller cover and ensure that you use the right one for each task. Additionally, note the date of use to keep track of the roller’s age.
- Secure the frame: To store the roller frame, clean and remove any excess paint from the metal or plastic components. If the frame is adjustable, retract it to its smallest size to save space. Find a designated storage spot for the frame, such as a rack or hook, to keep it organized and prevent any accidental damage.
By following these steps, you can ensure that your paint rollers are secured and ready to use for future painting projects. Proper storage and maintenance will help preserve the quality of the roller covers and frames, allowing you to achieve smooth and consistent results every time you paint.
Store paint supplies in a cool, dry place away from direct sunlight and extreme temperatures. Keep cans tightly sealed and brushes wrapped in plastic to prevent drying out.
Read more: How To Store Paintings In Storage
Step 5: Take care of your paint trays
Paint trays are essential for holding and distributing paint during your painting projects. Proper care and storage of your paint trays will not only extend their lifespan but also save you time and money. Here are some tips on how to take care of your paint trays:
- Clean immediately: After each use, it’s important to clean your paint tray before the paint dries. Use a putty knife or scraper to remove any excess paint and then rinse the tray with water or the recommended cleaning solution. Scrub the tray with a brush to remove any stubborn paint residue. Repeat the process if necessary until the tray is clean.
- Dry thoroughly: After cleaning, allow the paint tray to dry completely. You can use a clean cloth or paper towel to soak up any remaining moisture. Make sure that the tray is completely dry before storing it to prevent the growth of mold or mildew.
- Protect the tray: To prevent the paint tray from getting damaged or dirty during storage, consider using a plastic bag or cling wrap as a protective cover. Wrap the tray tightly, ensuring that all edges and corners are covered. This will help keep the tray clean and ready for use in your next painting project.
- Stack or hang: Depending on the available storage space, you can either stack or hang your paint trays. If stacking, make sure to place a clean cloth or piece of cardboard between each tray to prevent any paint transfer or damage. If hanging, you can use hooks or a pegboard to keep the trays organized and easily accessible.
- Label and categorize: To keep track of your paint trays and easily find the specific tray you need, consider labeling and categorizing them. Use labels or markers to indicate the tray size or the type of paint that is commonly used with that particular tray. This will save you time and effort when selecting the appropriate tray for your next project.
By following these steps, you can ensure that your paint trays are well-maintained and ready for use whenever you need them. Taking care of your paint trays will not only prolong their lifespan but also contribute to a smoother and more efficient painting process.
Step 6: Store paint thinner and solvents safely
Paint thinner and solvents are commonly used for cleaning paint brushes and equipment, but they can be hazardous if not stored properly. To ensure their safety and prevent accidents, follow these guidelines for storing paint thinner and solvents:
- Seal tightly: Make sure the lids of paint thinner and solvent containers are tightly sealed to prevent any evaporation or leakage. Check the lids regularly for any damage or wear and replace them if necessary. It’s important to maintain a tight seal to prevent exposure to air and reduce the risk of spills or fumes.
- Store in a well-ventilated area: Paint thinner and solvents should be stored in a well-ventilated area to allow any fumes to dissipate. Avoid storing them in confined spaces or near open flames or heat sources. Keep the storage area well-ventilated by opening windows or using fans if necessary.
- Keep away from children and pets: Paint thinner and solvents are toxic substances and should be stored in a secure location that is out of reach of children and pets. Lock them in cabinets or use childproof latches to prevent accidental ingestion or exposure to these potentially harmful chemicals.
- Separate from flammable materials: Store paint thinner and solvents away from flammable materials such as rags, paper, or other chemicals. Even a small spark can cause a fire when in contact with these volatile substances. Follow all safety instructions provided by the manufacturer to prevent accidents.
- Label containers: Properly label containers of paint thinner and solvents with their contents and any safety warnings. This will help ensure that you use the correct product for your intended purpose and provide necessary information to anyone who may need to handle these substances.
By following these precautions, you can safely store and handle paint thinner and solvents. It’s important to be aware of the hazards associated with these substances and take the necessary steps to protect yourself, your family, and the environment. Always refer to the manufacturer’s instructions and consult a professional if you have any concerns or questions.
Step 7: Label and categorize your supplies
Labeling and categorizing your paint supplies is a crucial step in maintaining an organized and efficient storage system. By properly labeling and categorizing your supplies, you can easily locate and access what you need for your painting projects. Here’s how you can do it:
- Use clear, legible labels: Labels should be clear and easy to read. Use waterproof or durable labels to ensure they remain intact over time. Consider using labels with adhesive backs for easy application to various surfaces, such as paint cans, jars, or storage containers.
- Include important information: When labeling your paint supplies, be sure to include important information such as the color, brand, type of paint, and date of purchase. This will help you quickly identify the specific supplies you need for a project, ensuring accurate color matching and quality control.
- Categorize by type: Group your supplies by type to create a logical and systematic organization system. For example, you can categorize paint brushes, rollers, trays, and other tools separately. This will make it easier to find the specific type of supply you need and maintain a tidy storage area.
- Separate by project: If you frequently work on different projects, consider separating your supplies by project. Use labeled bins or containers to hold the supplies needed for each project. This way, you can easily grab everything you need when starting a new project without scouring through all your supplies.
- Keep an inventory: Maintain an inventory list of your paint supplies, especially if you have a large collection. Update the list regularly to ensure accuracy and note when supplies are running low. This will help you stay organized and ensure you have everything you need before starting a new project.
By labeling and categorizing your paint supplies, you’ll save time and effort when searching for specific items. You’ll also have better control over your inventory, reducing wasted time and preventing unnecessary purchases. Implementing these practices will result in a more streamlined and efficient painting experience.
Step 8: Consider temperature and humidity
Temperature and humidity play a crucial role in the storage and preservation of your paint supplies. Excessive heat, cold, or humidity can negatively impact the quality and effectiveness of your paints, brushes, and other supplies. Here’s how to consider temperature and humidity when storing your paint supplies:
- Avoid extreme temperatures: Extreme temperatures can cause paints to freeze or become too thick. Avoid storing your paint supplies in areas that experience extreme heat or cold, such as attics, garages without temperature control, or basements with poor insulation. Opt for a storage space with a stable temperature, ideally between 50°F (10°C) and 80°F (26°C).
- Control humidity levels: High humidity can lead to the growth of mold and mildew, as well as cause paints to deteriorate. Aim for a humidity level between 40% and 60%. If your storage area is naturally humid, consider using a dehumidifier or moisture-absorbing products like silica gel packets to reduce moisture in the air.
- Avoid direct sunlight: Direct sunlight can cause paints to fade and change color. Find a storage area that is away from direct sunlight or cover your paint cans and supplies with a light-blocking material to protect them from UV rays. This is particularly important for organic pigments that are more susceptible to light sensitivity.
- Use climate-controlled storage: If you have valuable or sensitive paint supplies, consider investing in a climate-controlled storage unit or cabinet. These units allow you to control the temperature and humidity levels, providing optimal conditions for your paints, brushes, and other supplies.
- Monitor the environment: Regularly check the temperature and humidity levels in your storage area using a hygrometer. This will help you identify any changes or fluctuations that may affect your paint supplies. Make any necessary adjustments or relocate your supplies to a more suitable space if needed.
By considering the temperature and humidity levels in your storage area, you can ensure that your paint supplies remain in optimal condition. Taking these precautions will prevent paint spoilage, maintain the effectiveness of your brushes, and prolong the shelf life of your supplies, resulting in better painting outcomes.
Read more: How To Store Gouache Paint
Conclusion
Properly storing your paint supplies is essential for maintaining their quality, longevity, and usability. By following the steps outlined in this guide, you can ensure that your paint brushes, cans, rollers, trays, solvents, and other supplies remain organized, protected, and ready for your next painting project.
Choosing a suitable storage space that is cool, dry, well-ventilated, and easily accessible is the first step. Organizing your paint brushes by cleaning them thoroughly, sorting them by size and type, and protecting the bristles will help keep them in optimal condition.
Storing paint cans properly involves sealing them tightly, keeping them upright, and labeling them for easy identification. Securing paint rollers by cleaning them, removing the cover, and storing them in plastic bags or by hanging them will ensure their effectiveness over time. Similarly, taking care of paint trays involves cleaning them, protecting them, and organizing them for quick and efficient use.
Remember to store paint thinner and solvents safely, keeping them sealed, ventilated, and away from flammable materials. Labeling and categorizing your supplies by using clear, legible labels and separating them by type or project will help you locate and retrieve the right supplies when needed.
Lastly, considering temperature and humidity is essential for preserving the quality of your paint supplies. Avoid extreme temperatures, control humidity levels, and protect your supplies from direct sunlight. Monitoring the environment and making any necessary adjustments will ensure the longevity and integrity of your supplies.
By following these guidelines and incorporating them into your storage routine, you can maximize the lifespan of your paint supplies and enhance your overall painting experience. Enjoy the convenience of well-organized and well-maintained supplies, and let your creativity shine in all your painting endeavors!
Frequently Asked Questions about How To Store Paint Supplies
Was this page helpful?
At Storables.com, we guarantee accurate and reliable information. Our content, validated by Expert Board Contributors, is crafted following stringent Editorial Policies. We're committed to providing you with well-researched, expert-backed insights for all your informational needs.








0 thoughts on “How To Store Paint Supplies”