Articles
How To Store Pumpkin Muffins
Modified: December 7, 2023
Learn the best way to store your delicious pumpkin muffins for lasting freshness. Read our articles for helpful tips and tricks.
(Many of the links in this article redirect to a specific reviewed product. Your purchase of these products through affiliate links helps to generate commission for Storables.com, at no extra cost. Learn more)
Introduction
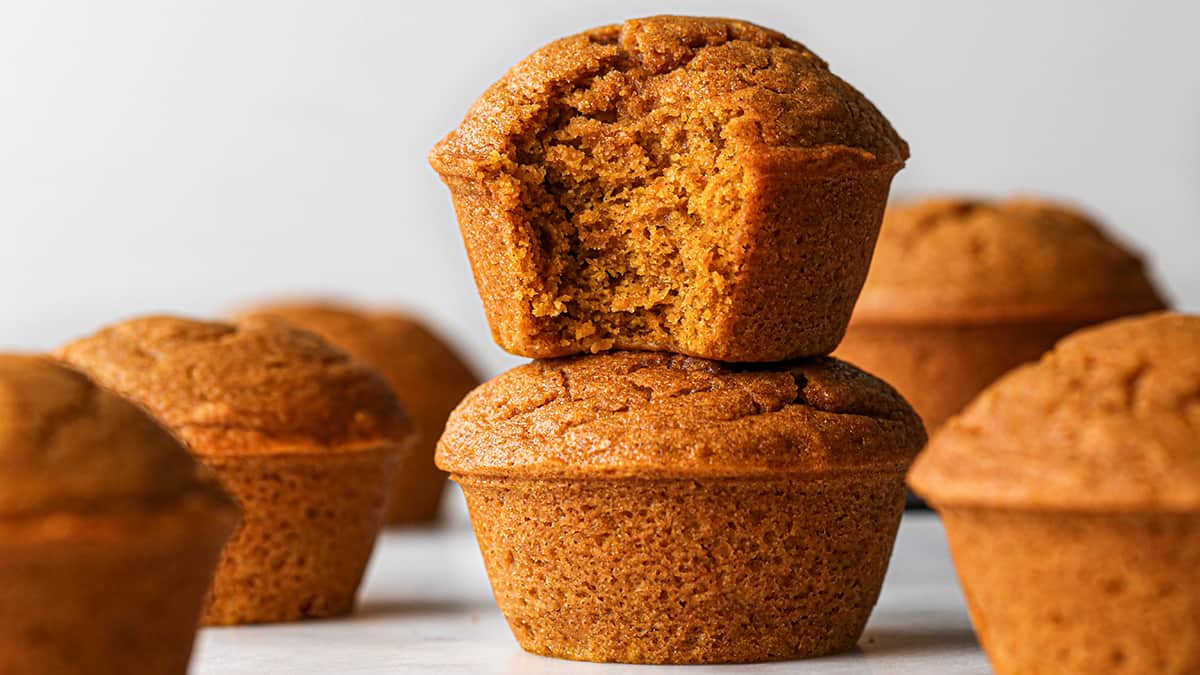
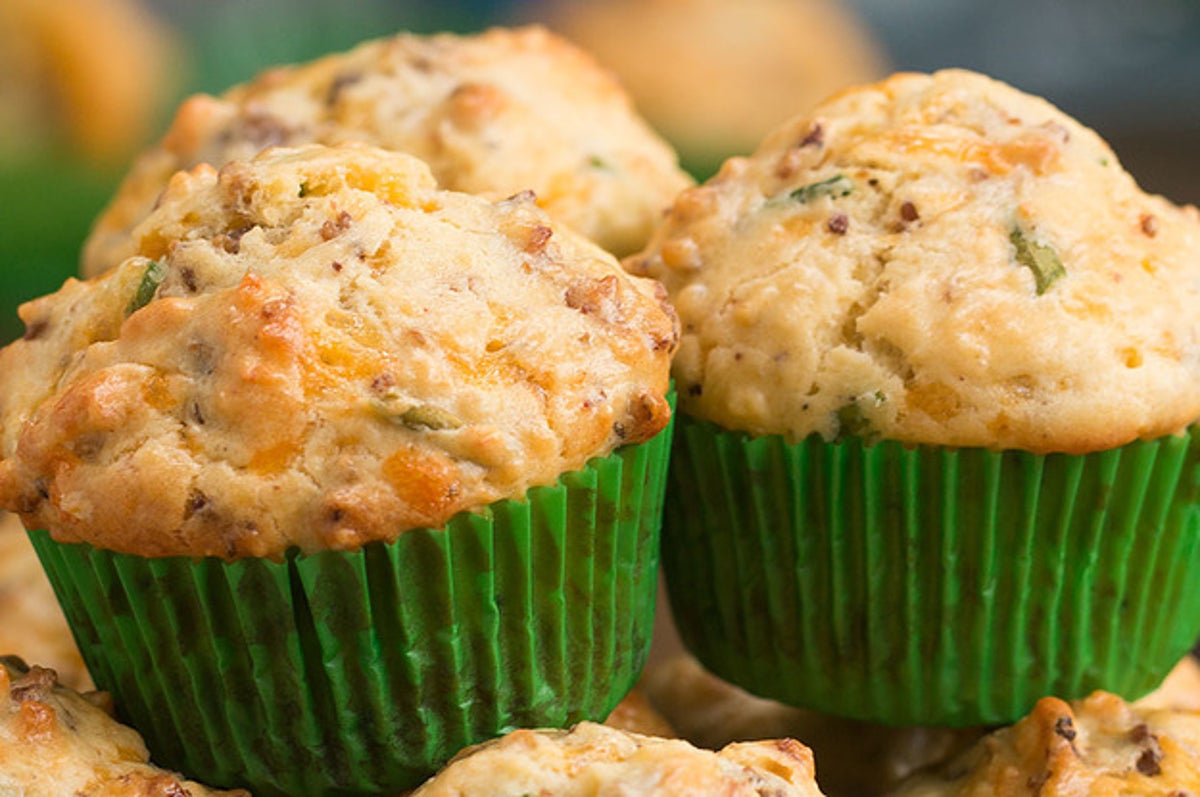
Welcome to the world of pumpkin muffins – a delicious treat that is perfect for fall, but can be enjoyed year-round. These moist and flavorful muffins are filled with the warm spices of cinnamon, nutmeg, and cloves, and are sure to satisfy your taste buds. Whether you have just made a batch of pumpkin muffins or have leftovers from a bake sale or brunch, knowing how to store them properly is essential to maintain their freshness and taste.
In this article, we will guide you through the process of storing pumpkin muffins to ensure that they stay delicious for as long as possible. We will cover everything from cooling the muffins properly, to wrapping and storing techniques, and even freezing options for long-term storage. By following these tips, you can enjoy the delightful flavors of homemade pumpkin muffins, whenever the craving strikes.
So, let’s dive in and discover the best practices for storing your tasty pumpkin muffins!
Key Takeaways:
- Preserve the Freshness: Properly store pumpkin muffins by cooling, wrapping, and freezing them to maintain their moist and flavorful qualities for long-lasting enjoyment.
- Thaw and Reheat with Care: When ready to enjoy stored pumpkin muffins, thaw at room temperature or use oven/microwave methods for reheating, ensuring a delightful treat every time.
Read more: How To Store Blueberry Muffins
Ingredients
Before we delve into the storage methods for pumpkin muffins, let’s take a look at the basic ingredients you’ll need to make these delectable treats:
- 2 cups all-purpose flour
- 1 1/2 teaspoons baking powder
- 1/2 teaspoon baking soda
- 1/2 teaspoon salt
- 1 teaspoon ground cinnamon
- 1/2 teaspoon ground nutmeg
- 1/4 teaspoon ground cloves
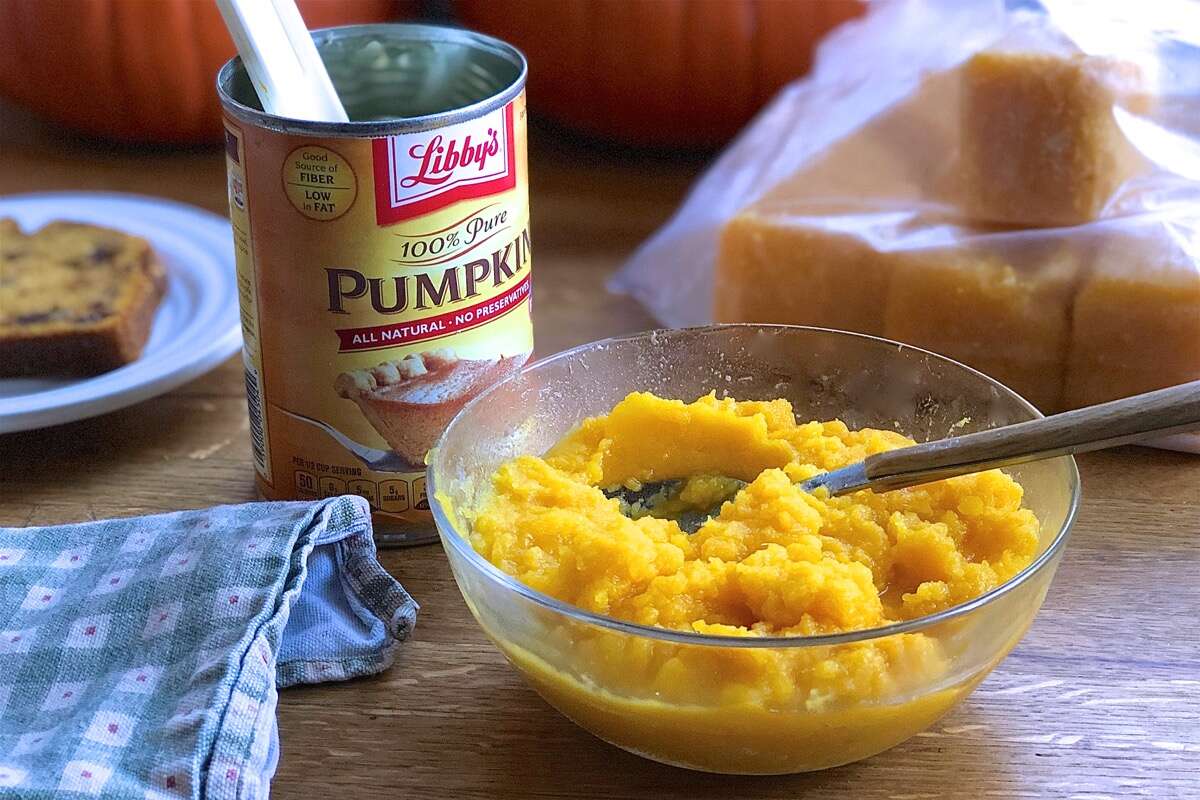
- 1 cup canned pumpkin puree
- 1/2 cup granulated sugar
- 1/2 cup packed brown sugar
- 1/2 cup vegetable oil
- 2 large eggs
- 1 teaspoon vanilla extract
- 1/2 cup milk
- 1/2 cup chopped nuts or chocolate chips (optional)
These ingredients combine to create moist and flavorful pumpkin muffins. Feel free to customize your muffins by adding in extras such as nuts or chocolate chips for an added crunch or burst of sweetness. Once you have your muffins baked to perfection, it’s time to focus on storing them properly to maintain their freshness. Let’s move on to the equipment needed and the step-by-step instructions for storing pumpkin muffins.
Equipment Needed
Before you embark on the journey of storing your pumpkin muffins, make sure you have the following equipment ready:
- A cooling rack
- Plastic wrap or aluminum foil
- Airtight containers or resealable plastic bags
- Freezer bags or containers (if freezing)
- Permanent marker
Having these essential tools on hand will help you effectively store your muffins and keep them fresh for longer periods of time. Now, let’s move on to the step-by-step instructions for properly storing your pumpkin muffins.
Instructions
Now that you have your equipment ready, let’s go through the step-by-step instructions for storing your pumpkin muffins:
1. Cooling the Muffins
Once your pumpkin muffins are freshly baked, it’s important to let them cool completely before storing. Place the muffins on a cooling rack and allow them to cool for at least 30 minutes to an hour. This step ensures that the muffins retain their moisture and prevents them from becoming soggy when stored.
Read more: How To Store Muffins In Freezer
2. Wrapping and Storing
After the muffins have cooled, individually wrap each muffin with plastic wrap or aluminum foil. This will keep them protected from air and help maintain their moisture. If you’re planning to consume the muffins within a day or two, you can place the individually wrapped muffins in an airtight container or resealable plastic bag. Make sure to seal the containers tightly to prevent air from getting in.
3. Freezing Options
If you have a surplus of pumpkin muffins or want to save them for later, freezing is a great option. Wrap each muffin tightly with plastic wrap and place them in a freezer-safe bag or container. If you want to freeze multiple muffins, you can separate the layers with parchment paper to avoid sticking. Remember to label the container or bag with the date using a permanent marker for easy reference.
4. Thawing and Reheating
When you’re ready to enjoy your stored pumpkin muffins, there are a few methods for thawing and reheating:
- Thawing at Room Temperature: Take the frozen muffins out of the freezer and let them thaw at room temperature for a couple of hours. Once thawed, you can enjoy them as is or warm them up in the oven or microwave.
- Oven Method: Preheat the oven to 350°F (175°C). Place the frozen muffins on a baking sheet and bake for 10-15 minutes until heated through.
- Microwave Method: If you’re short on time, you can microwave a muffin for about 20-30 seconds until warm.
Remember to always test the temperature of the muffin before consuming, as microwaves and ovens may heat unevenly.
Following these instructions will ensure that your pumpkin muffins retain their texture, taste, and overall quality during storage. However, there are a few additional tips that can help extend the shelf life of your muffins. Let’s explore some of these tips in the next section.
Cooling the Muffins
The first step in properly storing your pumpkin muffins is to ensure they are fully cooled before packaging them for storage. This crucial step helps prevent condensation from forming inside the packaging, which can lead to a soggy texture.
After removing the muffins from the oven, allow them to cool in the muffin tin for about 5 minutes. Then, carefully transfer the muffins to a cooling rack. This allows air to circulate around the muffins, helping them cool evenly. Allow the muffins to cool completely, which typically takes around 30 minutes to an hour.
During the cooling process, it’s important to resist the temptation to handle or wrap the muffins while they are still warm. Prematurely sealing the muffins in packaging while warm can trap steam and moisture, resulting in a loss of quality and freshness.
Once the muffins have reached room temperature, they are ready to be properly packaged for storage. Now, let’s move on to the next step: wrapping and storing the muffins.
Read more: How To Store English Muffins
Wrapping and Storing
Once your pumpkin muffins have completely cooled, it’s time to wrap and store them properly. Proper wrapping helps to maintain the freshness and moisture of the muffins, ensuring they stay delicious for a longer period of time.
Individually wrap each muffin with plastic wrap or aluminum foil. This wrapping acts as a barrier, preventing air from reaching the muffins and causing them to dry out. Make sure the entire muffin is covered, ensuring a tight seal.
If you’re planning to consume the muffins within a day or two, you can place the individually wrapped muffins in an airtight container or resealable plastic bag. This added layer of protection helps to maintain the moisture and prevent any potential odors from seeping into the muffins.
For longer storage, you can freeze the wrapped muffins. Place the individually wrapped muffins in a freezer-safe bag or container, making sure to eliminate as much air as possible. Label the container or bag with the date using a permanent marker for easy reference.
Remember, proper packaging and sealing are imperative to prevent freezer burn and maintain the quality of the muffins. Ensuring the muffins are fully wrapped and the packaging is airtight will protect them from freezer odors while preserving their taste and texture.
Now that your pumpkin muffins are wrapped and stored, you’re one step closer to enjoying them whenever the craving strikes. In the next step, we’ll explore the options for freezing your muffins for long-term storage. Read on to learn more!
Freezing Options
If you have a surplus of pumpkin muffins or want to save them for later, freezing is a great option. Freezing your muffins allows you to extend their shelf life, preserving their freshness and flavor for several months.
Here are a few freezing options to consider:
Option 1: Individual Wrapping
Wrap each pumpkin muffin tightly with plastic wrap, ensuring it is fully covered. Then, place the individually wrapped muffins in a freezer-safe bag or container. This method allows you to easily take out and thaw only the muffins you need, without having to defrost the entire batch.
Option 2: Tray Freezing
If you prefer a more organized approach, you can try tray freezing. Place the cooled and wrapped muffins on a tray in a single layer. Ensure that they are not touching each other to prevent sticking. Place the tray in the freezer and allow the muffins to freeze completely. Once frozen, transfer them to a freezer-safe bag or container.
Read more: How To Store Banana Muffins
Option 3: Muffin Tin Freezing
If freezer space is limited, you can also freeze the muffins directly in the muffin tin. Simply wrap each muffin individually and place them back in the muffin tin. Place the entire tin in the freezer and allow the muffins to freeze solid. Once frozen, remove the muffins from the tin and transfer them to a freezer-safe bag or container.
Regardless of the method you choose, be sure to label the freezer bag or container with the date using a permanent marker. This way, you can easily keep track of how long the muffins have been stored.
Freezing your pumpkin muffins allows you to enjoy their deliciousness even months after they were baked. Properly stored and wrapped, they can maintain their quality for up to three months in the freezer.
Now, in the next step, let’s explore the methods for thawing and reheating your stored pumpkin muffins to enjoy them as if they were freshly baked.
Thawing and Reheating
When you’re ready to enjoy your stored pumpkin muffins, you’ll need to properly thaw and reheat them to bring back their fresh-baked goodness. Here are a few methods to consider:
Thawing at Room Temperature
One of the simplest ways to thaw your pumpkin muffins is to let them sit at room temperature. Remove the desired number of muffins from the freezer and place them on a plate or baking sheet. Allow them to thaw for a couple of hours until they reach room temperature. This method ensures a gradual thawing process, which helps maintain the moisture of the muffins.
Once thawed, you can enjoy the muffins as is or warm them up for a delightful treat. If you prefer warm muffins, you have a couple of options for reheating.
Oven Method
To reheat your muffins in the oven, preheat it to 350°F (175°C). Place the thawed muffins on a baking sheet and bake for approximately 10-15 minutes until they are heated through. Keep an eye on them to prevent them from becoming overly dry.
Read more: How To Store Costco Muffins
Microwave Method
If you’re short on time, you can use the microwave to quickly warm up your muffins. Place one muffin on a microwave-safe plate and heat it for about 20-30 seconds. Adjust the time as needed, depending on the wattage of your microwave. Be cautious not to overheat the muffins, as they can become rubbery or dry.
Before consuming the reheated muffins, it’s always a good idea to check their temperature to avoid any surprise burns. Simply insert a toothpick or a clean knife into the center of the muffin and remove it. If it comes out warm, but not scorching hot, your muffin is ready to be enjoyed.
Now that you know how to properly thaw and reheat your pumpkin muffins, you can relish in their scrumptiousness anytime you want. But before we wrap up, let’s go over a few additional tips for long-term storage.
Tips for Long-Term Storage
To ensure your pumpkin muffins stay fresh and tasty for an extended period, here are some additional tips for long-term storage:
1. Label and Date
When storing your muffins in the freezer, always label the container or bag with the date of freezing. This helps you keep track of how long they have been stored and ensures you use the oldest muffins first.
2. Use Freezer-Safe Containers
When freezing your muffins, make sure to use containers and bags specifically designed for freezer storage. This helps prevent freezer burn and maintains the quality of the muffins for a longer period.
Read more: How To Store Pumpkins
3. Avoid Exposure to Air
Air is the enemy when it comes to storing muffins. Whether in the refrigerator or freezer, always wrap the muffins tightly to minimize air exposure. This helps prevent moisture loss and maintains the muffins’ texture.
4. Re-wrap Unused Portions
If you only plan to consume a few muffins at a time, it’s best to re-wrap the unused portion separately and store them again. This way, you won’t have to thaw and refreeze the entire batch each time, ensuring optimal freshness.
5. Consume within Recommended Time
To enjoy the best quality and taste, it’s recommended to consume your stored pumpkin muffins within three months. While they may still be safe to eat beyond this timeframe, the texture and flavor can deteriorate over time.
6. Avoid Excessive Moisture
When thawing your muffins, ensure they are fully thawed before removing the wrapping. This prevents any condensation from forming on the surface, which can make the muffins soggy.
By following these tips, you can maximize the shelf life and maintain the deliciousness of your pumpkin muffins for as long as possible. Now, let’s wrap up our guide on storing pumpkin muffins.
Read more: How To Store Pumpkin Bread
Conclusion
Congratulations! You’re now equipped with the knowledge and techniques to successfully store your pumpkin muffins for long-lasting freshness. By following the proper steps of cooling, wrapping, and storing, you can ensure that your muffins retain their moist and flavorful qualities.
Remember to cool your muffins completely before wrapping them individually. By using plastic wrap or aluminum foil, you can protect them from air and maintain their moisture. For short-term storage, place the wrapped muffins in airtight containers or resealable bags. If you want to enjoy your pumpkin muffins at a later date, freezing is a great option. Make sure to wrap each muffin tightly and use freezer-safe bags or containers to prevent freezer burn.
When it’s time to enjoy your stored muffins, thaw them at room temperature or use the oven or microwave methods to reheat them. Regardless of the method, always check the muffins’ temperature before consuming to avoid burns and ensure they are heated through.
Finally, if you have any leftovers or simply want to enjoy your pumpkin muffins over an extended period, just follow the tips for long-term storage. Label and date your containers, use freezer-safe materials, minimize air exposure, and consume the muffins within the recommended timeframe for the best quality and flavor.
Now, armed with this comprehensive guide, you can confidently bake a batch of pumpkin muffins and store them like a pro. You’ll always have a delicious treat on hand, whether for breakfast, snack time, or whenever the craving strikes. So go ahead, indulge in the warm and comforting flavors of pumpkin muffins, knowing that you can store them with ease and enjoy them whenever you desire!
Frequently Asked Questions about How To Store Pumpkin Muffins
Was this page helpful?
At Storables.com, we guarantee accurate and reliable information. Our content, validated by Expert Board Contributors, is crafted following stringent Editorial Policies. We're committed to providing you with well-researched, expert-backed insights for all your informational needs.
0 thoughts on “How To Store Pumpkin Muffins”