Articles
How To Store Squash From The Garden
Modified: August 27, 2024
Learn effective ways to store squash from your garden with these helpful articles. Keep your squash fresh and delicious for months!
(Many of the links in this article redirect to a specific reviewed product. Your purchase of these products through affiliate links helps to generate commission for Storables.com, at no extra cost. Learn more)
Introduction
Storing squash from the garden is a great way to preserve the flavor and nutritional value of this versatile vegetable. Whether you have a surplus harvest or simply want to enjoy your homegrown squash all year round, proper storage is key to maintaining its freshness and quality. In this article, we will explore the steps to store squash effectively, ensuring that it stays delicious and ready to use whenever you need it.
When it comes to storing squash, several factors play a crucial role in maintaining its quality. Choosing the right squash, harvesting it at the right time, cleaning and preparing it correctly, and using proper storage containers are all essential steps in ensuring the longevity of your squash.
In the following sections, we will delve into each step in detail, providing you with practical tips and guidelines to help you store squash from your garden successfully. By following these steps, you can enjoy the rich flavors and nutritional benefits of squash throughout the year, even after the harvest season has come to an end.
Key Takeaways:
- Choose winter squash varieties like butternut, acorn, and spaghetti squash for long-term storage. Harvest at the right time and store in a cool, dry place to enjoy homegrown squash year-round.
- Properly clean, prepare, and monitor squash during storage to maintain freshness. Consider reusing squash seeds for sustainable homegrown produce.
Choosing the Right Squash
The first step in successfully storing squash is to select the right variety for storage. Not all types of squash have the same storability, so it’s essential to choose squash varieties known for their durability and long shelf life.
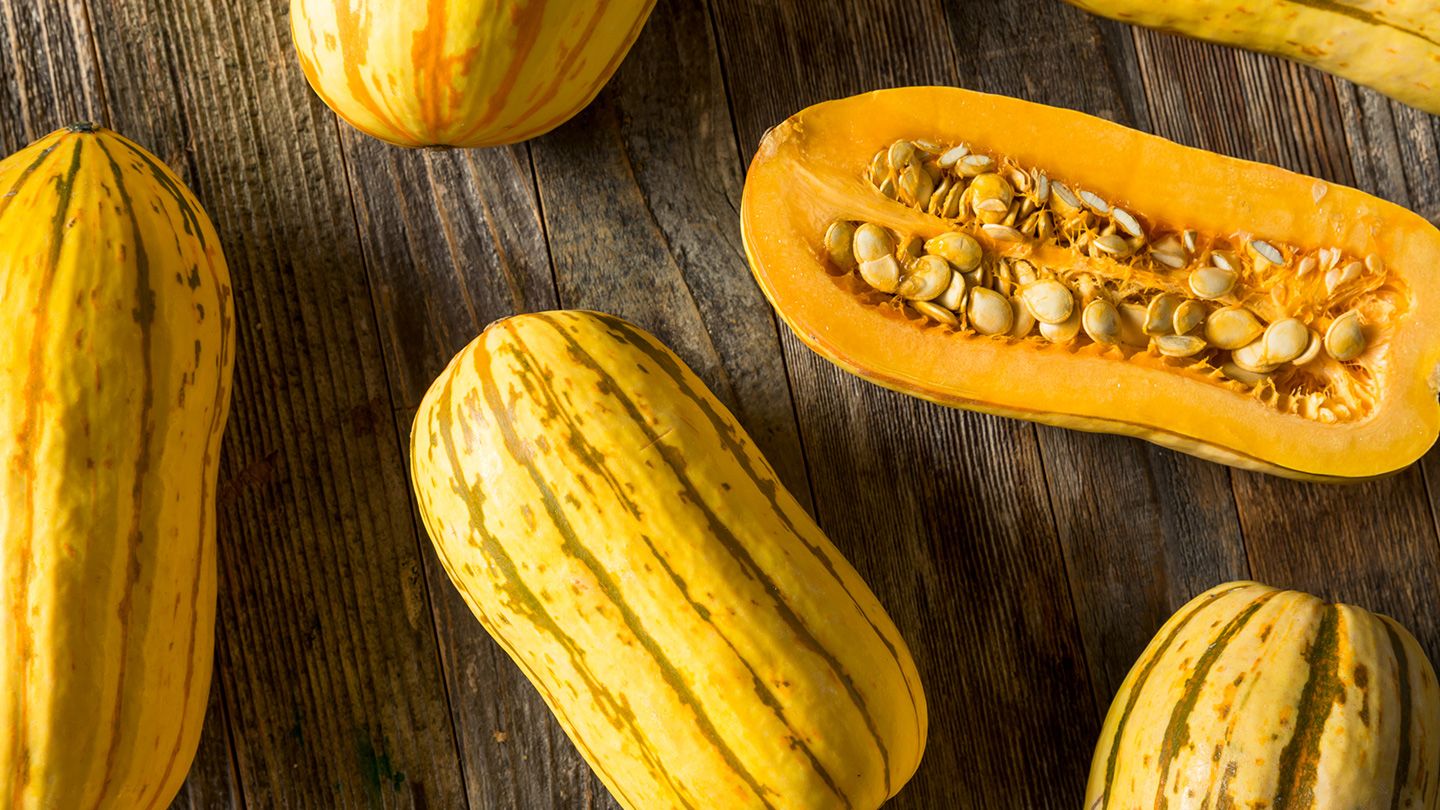
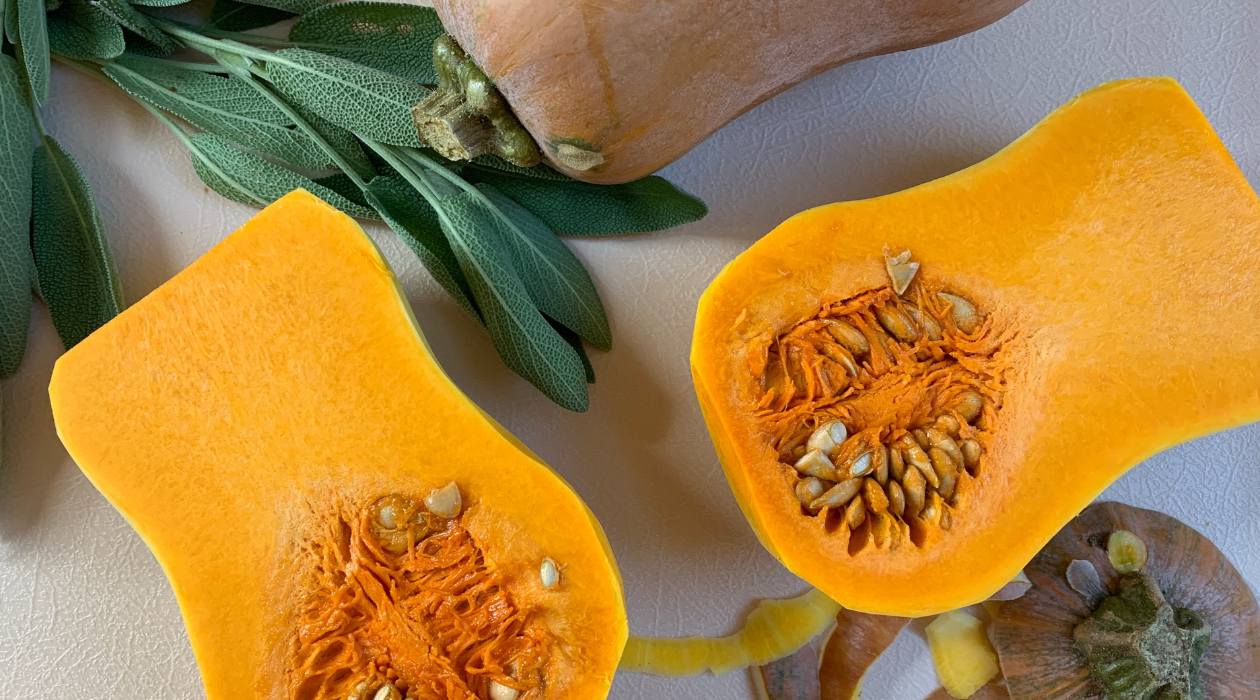
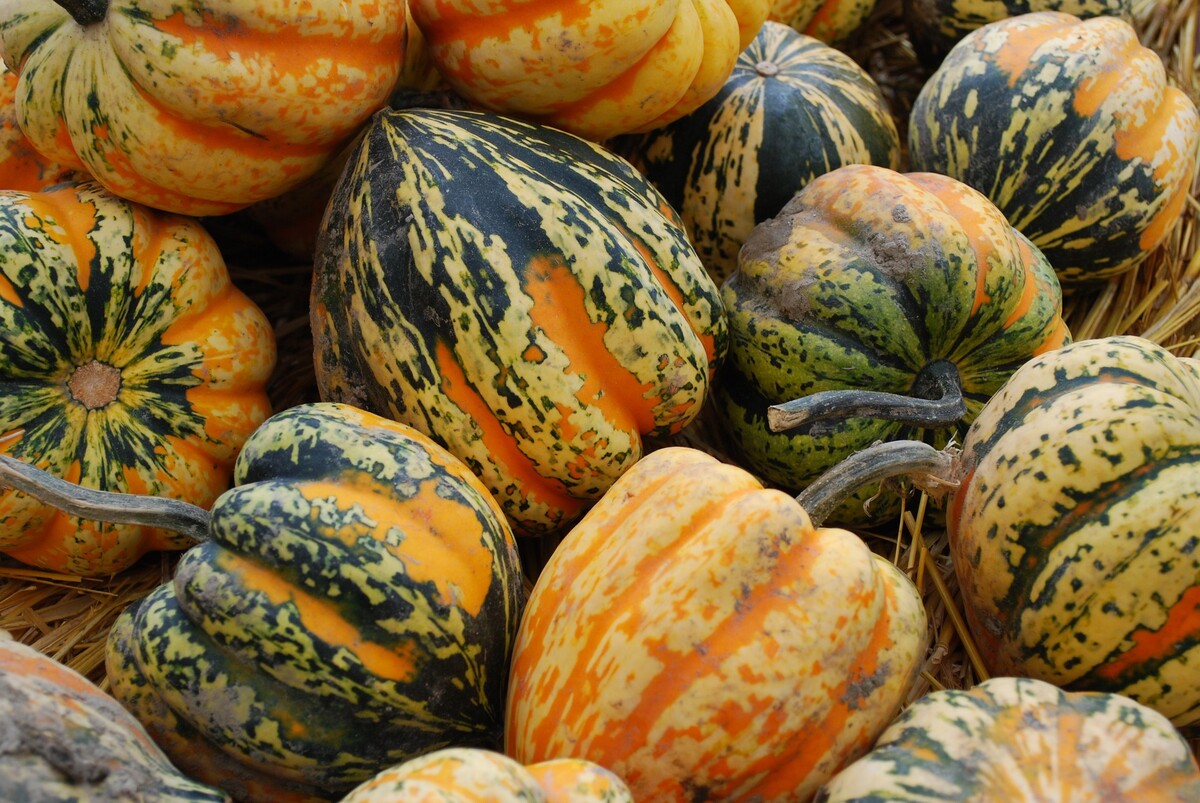
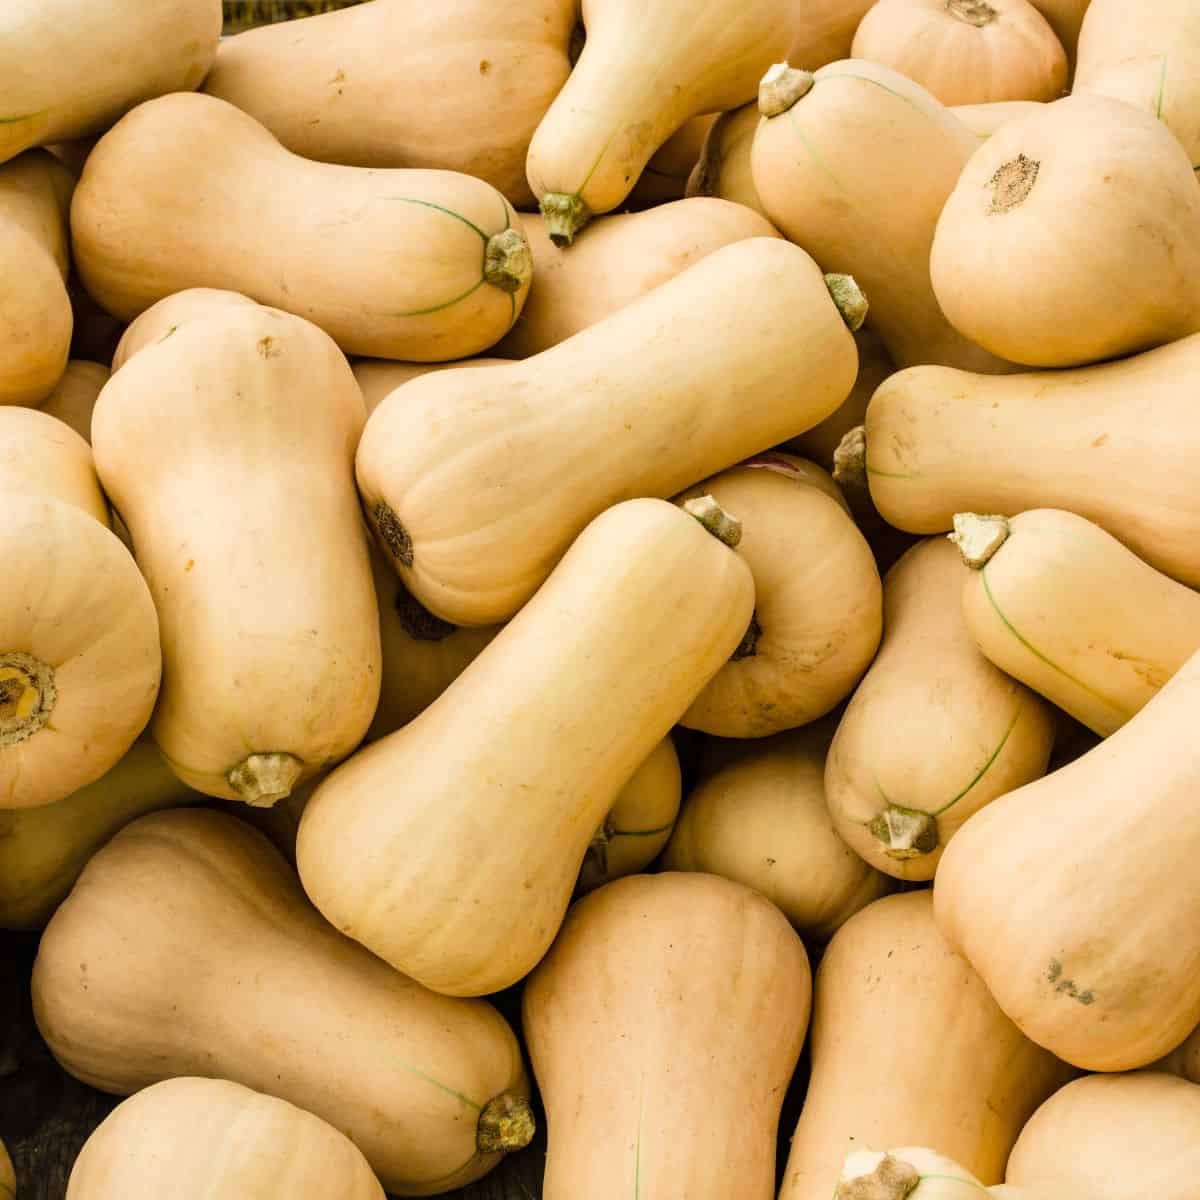
Winter squash varieties such as butternut squash, acorn squash, and spaghetti squash are excellent choices for long-term storage. These varieties have thick outer skins and dense flesh, making them less susceptible to spoilage and dehydration. They can be stored for several months without losing their flavor and texture.
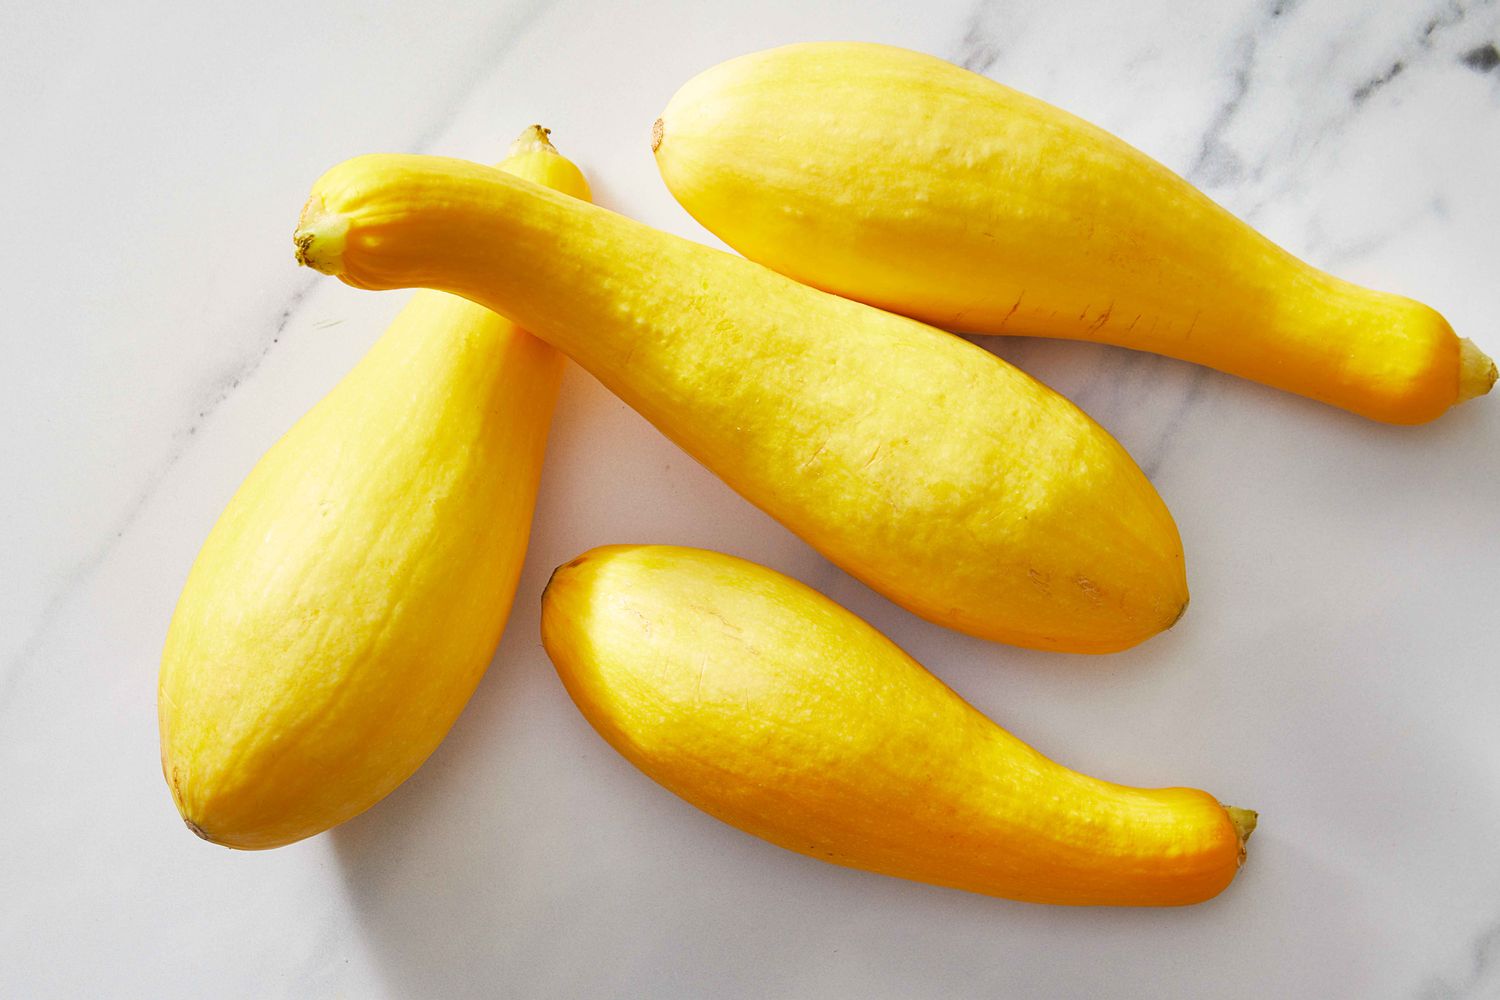
On the other hand, summer squash, including zucchini and yellow squash, have a high water content and delicate skin, making them more perishable. While they can be stored for a short time, they are best enjoyed fresh or used in recipes promptly.
When selecting squash for storage, choose firm, unblemished squash with a rich color. Avoid squash with soft spots, bruising, or damaged skin, as these are signs of decay that can quickly spread to other healthy squash during storage.
Now that we have discussed the importance of choosing the right squash for storage, let’s move on to the next step: harvesting squash at the right time.
(… continue writing the content for the other sections of the article…)
Key Takeaways:
- Choose winter squash varieties like butternut, acorn, and spaghetti squash for long-term storage. Harvest at the right time and store in a cool, dry place to enjoy homegrown squash year-round.
- Properly clean, prepare, and monitor squash during storage to maintain freshness. Consider reusing squash seeds for sustainable homegrown produce.
Choosing the Right Squash
When it comes to storing squash, selecting the right variety is key to maximizing its shelf life and flavor. Not all types of squash have the same storability, so it’s important to choose varieties that are known for their ability to withstand extended periods of storage.
Winter squash, including butternut, acorn, and spaghetti squash, are excellent choices for long-term storage. These varieties have thick, hard skins and dense flesh, which helps them stay fresh for longer periods. Additionally, their vibrant colors and rich flavors make them popular choices for both cooking and storing.
When selecting winter squash for storage, choose those that feel heavy for their size and have a hard, intact skin. Avoid squash with soft spots or signs of rotting, as these can quickly spread and spoil other squash during storage.
On the other hand, summer squash, such as zucchini and yellow squash, have a higher moisture content and thinner skins, making them more perishable and less suitable for long-term storage. While these varieties can be stored for a short period, they are best enjoyed fresh or used in recipes promptly after harvest.
Another important consideration when choosing squash for storage is the size. Smaller to medium-sized squash tend to store better than larger ones. The larger the squash, the more susceptible it is to developing soft spots, rot, and other storage-related issues. Therefore, opt for squash that are within a manageable size range for easier storage and to minimize waste.
Lastly, consider your personal preferences and cooking habits when selecting squash for storage. If you have specific recipes in mind or prefer certain squash varieties for their taste and texture, prioritize those when making your selection.
By choosing the right squash varieties for storage, you can ensure that you have a bountiful supply of delicious and nutritious squash throughout the year. Continue reading to learn the next steps in properly storing your squash harvest.
Harvesting Squash
Harvesting squash at the right time is crucial to ensure optimal flavor and quality during storage. While different squash varieties have slightly different harvesting requirements, there are some general guidelines you can follow.
Most winter squash varieties are ready for harvest when their skins are hard and difficult to pierce with a fingernail. The skin color of mature squash also tends to become duller or more vibrant, depending on the variety. Harvesting too early can result in underdeveloped flavors and a shorter storage life.
When harvesting winter squash, use a sharp knife or pruning shears to cut the stem a few inches above the fruit. Be careful not to damage or bruise the squash during the harvesting process. Leaving a portion of the stem intact can help prolong the squash’s shelf life.
Summer squash, on the other hand, should be harvested when the fruits are still young and tender. They are at their best when they are small to medium in size, before they become overly mature and develop tough skins. Check your summer squash plants frequently, as they can grow rapidly and reach their peak harvest stage within a short time frame.
When harvesting summer squash, gently twist or cut the fruit from the stem, being careful not to damage the vine or other fruits. Harvesting regularly encourages continuous production and helps prevent the squash from becoming overripe or oversized.
After harvesting, it’s important to handle the squash with care to avoid any damage or bruising that could lead to rotting during storage. Place the harvested squash in a clean, dry container or basket, being mindful not to stack or pack them too tightly.
Now that you know how to choose the right squash varieties and when to harvest them, let’s move on to the next crucial step: cleaning and preparing squash for storage.
Cleaning and Preparing Squash for Storage
Properly cleaning and preparing squash before storage is essential to ensure its longevity and prevent the growth of mold or bacteria. Follow these steps to clean and prepare your squash for storage:
1. Gently wipe off any dirt or debris from the surface of the squash using a clean, dry cloth or paper towel. Avoid using water unless absolutely necessary, as excess moisture can promote rotting.
2. Inspect the squash for any signs of damage, such as cuts, bruises, or soft spots. Remove any damaged areas using a sharp knife, ensuring that only healthy and intact portions remain.
3. For winter squash with longer stems, leave a few inches of the stem intact. This can help slow down the process of moisture loss and extend the shelf life of the squash.
4. Do not wash the squash before storing, as moisture can accelerate the decay process. Instead, focus on removing any visible dirt or debris and ensuring that the surface of the squash is clean and dry.
5. Once you have inspected, cleaned, and prepared the squash, it is ready for storage. Place the squash in a cool, dry, and well-ventilated location, away from direct sunlight and extreme temperature fluctuations.
Following these steps will help maintain the freshness and quality of your squash during storage. Now, let’s explore the next important aspect of proper squash storage: storing squash in a cool and dry place.
Read more: How To Store Squash Seeds
Storing Squash in a Cool and Dry Place
Creating the right storage conditions is crucial for prolonging the shelf life of squash. The key is to provide a cool and dry environment that mimics the conditions of a traditional root cellar. Follow these steps to store squash in a cool and dry place:
1. Find a suitable storage location: Look for a cool and dry area in your home, such as a basement, garage, or pantry. The ideal temperature for storing squash is between 50 to 55 degrees Fahrenheit (10 to 13 degrees Celsius). Avoid storing squash in areas prone to extreme temperature fluctuations or high humidity, as this can accelerate spoilage.
2. Prepare the storage area: Clean and organize the storage area to ensure it is free from dust, mold, and other contaminants that can affect the quality of the squash. Remove any perishable items or strong-smelling foods from the vicinity, as they can impact the flavor of the squash.
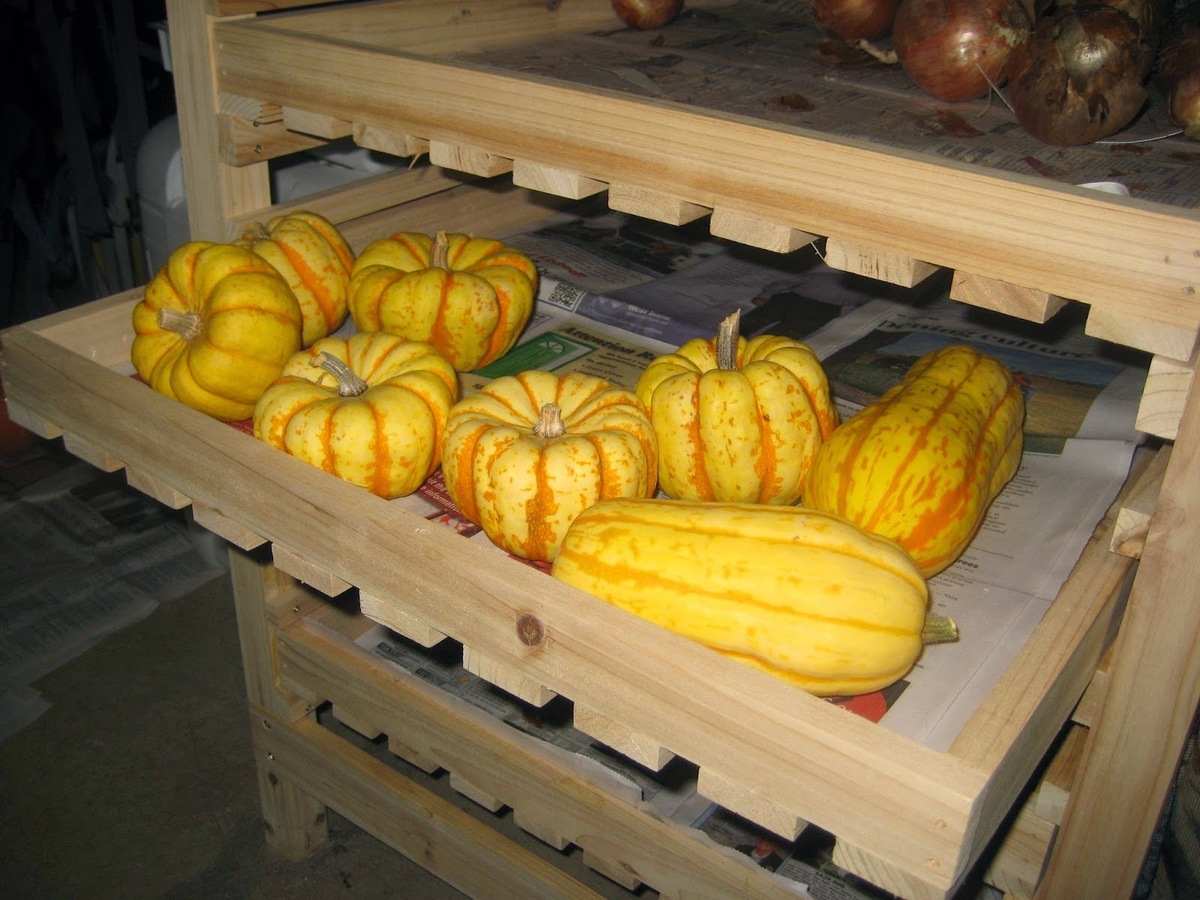
3. Arrange the squash properly: Place the squash in a single layer, ensuring that they are not touching or overcrowded. This allows for proper air circulation and reduces the risk of mold or rot spreading between the squash. Consider using shelves, crates, or baskets to organize the squash, keeping similar varieties together for easy access.
4. Regularly check for spoilage: Periodically inspect the stored squash for any signs of decay, such as mold, soft spots, or a foul smell. Remove any spoiled squash immediately to prevent it from affecting the rest of the stored produce. By regularly checking the squash, you can catch any issues early on and ensure the overall quality of your stored harvest.
By storing squash in a cool and dry place, you are creating the optimal conditions for long-term storage. Now, let’s explore the importance of using proper containers for squash storage.
Store squash in a cool, dry place with good air circulation, such as a pantry or basement. Avoid storing them in the refrigerator, as this can cause them to spoil quickly. Check them regularly for any signs of decay.
Using Proper Containers for Squash Storage
The choice of containers for storing squash can significantly impact its shelf life and quality. Proper containers help protect the squash from moisture, pests, and damage. Follow these guidelines when selecting and using containers for squash storage:
1. Opt for breathable containers: Choose containers that allow for proper airflow to prevent the buildup of excess moisture. Avoid using airtight containers or plastic bags, as they can trap moisture and promote mold growth. Instead, consider using wooden crates, mesh bags, or cardboard boxes with ventilation holes.
2. Ensure cleanliness: Before using any containers, make sure they are clean and free from any dirt, debris, or residue. This helps prevent the introduction of harmful bacteria or pathogens that can spoil the squash. If reusing containers, wash and sanitize them thoroughly before storage.
3. Size matters: Select containers that are appropriate for the size of the squash. Avoid overcrowding the squash, as this can lead to bruising and faster spoilage. A good rule of thumb is to leave some space between each squash for air circulation and to prevent them from touching one another.
4. Consider labeling: Use labels or markers to identify the variety and harvest date of the squash. This can be helpful for tracking the storage time and ensuring that older squash is used first. It also allows you to quickly identify any varieties that have a shorter shelf life.
5. Keep pests at bay: Pests such as mice, rats, and insects can quickly damage or consume stored squash. Take preventive measures by placing traps or deterrents near the storage area and sealing any cracks or openings that may allow pests to enter. Additionally, periodically check the containers for any signs of infestation and promptly address the issue if detected.
By using appropriate containers for squash storage, you can maintain the freshness and quality of the harvest while minimizing the risk of spoilage. Now, let’s move on to discussing the importance of monitoring and checking the squash during storage.
Monitoring and Checking Squash During Storage
Proper monitoring and regular checks are essential to ensure that your stored squash remains in good condition. By keeping an eye on the squash, you can catch any signs of spoilage or damage early on and take appropriate action. Here are some important considerations for monitoring and checking squash during storage:
1. Regular inspections: Plan on checking the squash at least once a week. Look for any visual changes, such as mold growth, soft spots, or discoloration. Pay attention to any unusual odors as well, as these can indicate spoilage. If you notice any issues, remove the affected squash immediately to prevent further contamination.
2. Handle with care: When checking the squash, handle them gently to avoid causing bruising or other damage. Rough handling can lead to accelerated decay and reduce the shelf life of the squash. Take your time and be mindful of how you handle and move the squash.
3. Rotation: If you have multiple containers or shelves where you store squash, practice rotation. Move the squash around so that those stored in the back or bottom are brought forward. This helps ensure that all squash get equal exposure to air and reduces the likelihood of some being overlooked and spoiling.
4. Maintain proper storage conditions: Monitor the temperature and humidity levels in the storage area regularly. Aim to keep the temperature between 50 to 55 degrees Fahrenheit (10 to 13 degrees Celsius) with relative humidity around 50-70%. Fluctuations in temperature and excessive moisture or dryness can impact the quality and shelf life of the squash.
5. Use squash in order of ripeness: When using squash from storage, prioritize those that are closest to reaching maturity. Squash that was harvested later may have a shorter storage life, so it is best to use them early on. This way, you can enjoy the freshest and highest-quality squash first.
By diligently monitoring and checking your stored squash, you can catch any issues promptly and ensure that the majority of your harvest remains in good condition. With proper storage and care, you can enjoy the flavors of homegrown squash throughout the year.
Now, let’s discuss the best practices for storing cut squash.
How to Store Cut Squash
Storing cut squash requires different considerations to ensure its freshness and prevent spoilage. Follow these steps to properly store cut squash:
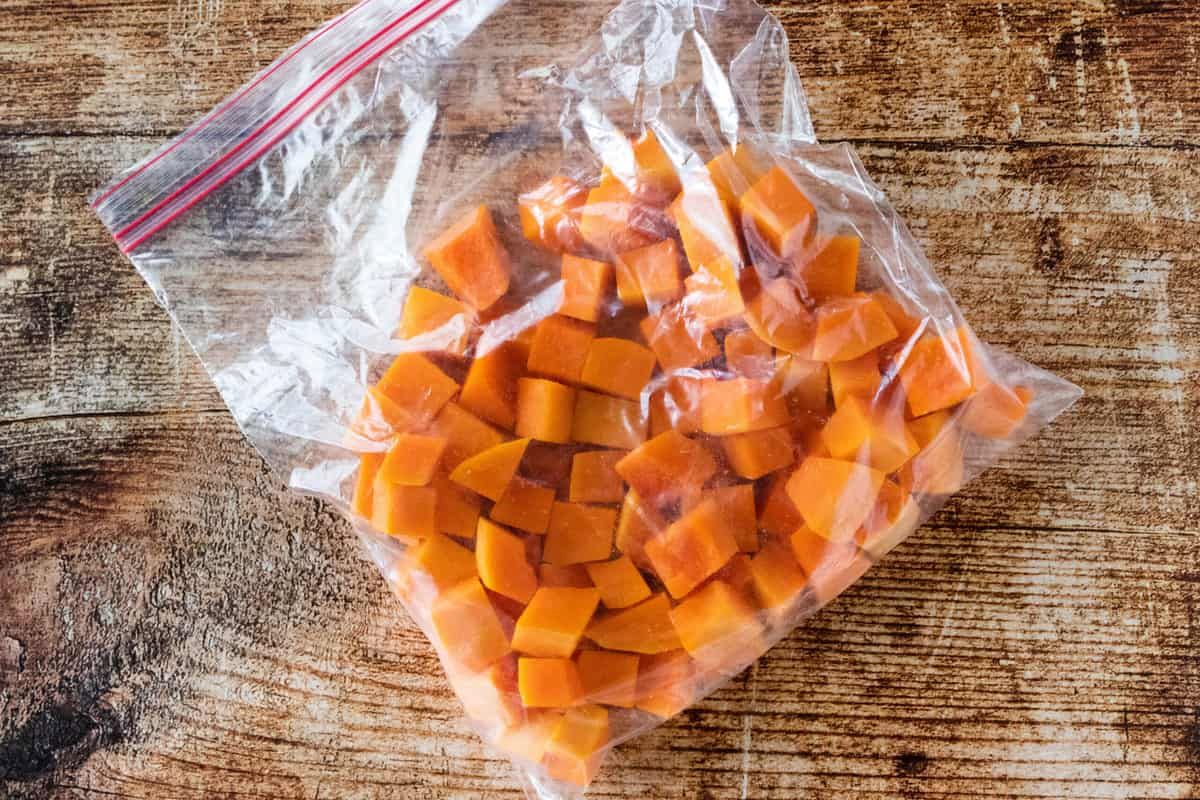
1. Wrap it tightly: After cutting the squash, wrap the exposed cut surface tightly with plastic wrap or place it in an airtight container. This helps prevent moisture loss and keeps the squash from drying out. Make sure the wrap or container is securely sealed to maintain freshness.
2. Refrigerate promptly: Once the cut squash is wrapped, store it in the refrigerator immediately. The cold temperature slows down bacterial growth and helps to extend the shelf life of the squash. Aim to use cut squash within 3-4 days to maintain its flavor and texture.
3. Check for spoilage: Regularly inspect the stored cut squash for any signs of spoilage, such as mold growth, a slimy texture, or an unpleasant odor. If you notice any of these signs, discard the squash immediately to prevent cross-contamination with other food items.
4. Use proper storage containers: Choose a clean, moisture-resistant container for storing cut squash in the refrigerator. Glass or plastic containers with tight-fitting lids work well. Avoid storing cut squash in open containers or unwrapped, as this can lead to faster deterioration.
5. Keep different types of cut squash separate: If you have multiple varieties of cut squash, store them separately to prevent their flavors from intermingling. This is particularly important if you plan to use the squash in recipes where maintaining distinct flavors is important.
6. Prioritize usage: When storing cut squash, it is best to use it as soon as possible to maintain its freshness and taste. The longer cut squash sits in the refrigerator, the greater the likelihood of flavor and texture degradation.
By following these guidelines, you can store cut squash effectively while maintaining its quality and flavor. Keep in mind that the storage time may vary depending on the specific type of squash and its freshness at the time of cutting.
Now that you know how to store cut squash, let’s explore another useful tip: reusing squash seeds.
Read more: How To Store Squash Blossoms
Reusing Squash Seeds
Squash seeds are not only delicious and nutritious, but they can also be reused for future growing seasons. Instead of discarding them, consider saving and replanting squash seeds to enjoy a continuous supply of homegrown squash. Here’s how you can reuse squash seeds:
1. Harvesting seeds: Choose a mature, fully ripened squash for seed harvesting. Cut the squash open and scoop out the seeds using a spoon. Place the seeds in a bowl or colander, and separate them from the pulp or flesh. Rinse the seeds thoroughly under cold water to remove any remaining pulp.
2. Drying the seeds: After rinsing, spread the seeds in a single layer on a clean, dry surface such as a paper towel or a mesh screen. Allow them to dry completely in a well-ventilated area. This process can take several days to a couple of weeks, depending on the humidity levels in your environment. Stir or turn the seeds occasionally to ensure even drying.
3. Storage: Once the squash seeds are fully dry, transfer them to an airtight container, such as a glass jar or a labeled envelope. Store the seeds in a cool, dark, and dry place to maintain their viability. A temperature range of 32 to 41 degrees Fahrenheit (0-5 degrees Celsius) is ideal for seed storage. Properly stored squash seeds can remain viable for up to five years.
4. Germination testing: To ensure the seeds’ viability before planting, perform a germination test. Place a few seeds on a damp paper towel, fold it, and keep it in a warm spot. After a few days, check to see if the seeds have sprouted. If a significant number of seeds have sprouted, it indicates that they are still viable and can be planted. If very few or none have sprouted, it may be time to consider acquiring fresh seeds for planting.
5. Seed-saving tips: To maintain pure seed varieties, separate different squash varieties while harvesting and drying seeds. During the growing season, avoid cross-pollination between various squash varieties by keeping different varieties adequately spaced to prevent the mixing of pollen. Hand-pollination techniques can also be used to control cross-pollination. Additionally, it’s important to note that hybrid squash varieties may not produce true-to-type seeds.
By reusing squash seeds, you can save money, maintain heirloom varieties, and have a sustainable source of homegrown squash year after year. Just remember to follow proper seed-saving techniques and maintain optimal storage conditions.
As we conclude this article, we hope you found these tips useful in storing and reusing squash from your garden. With the right practices and care, you can enjoy the flavors and benefits of homegrown squash long after the harvest season has passed.
Conclusion
Storing squash from the garden is an excellent way to preserve the freshness and flavors of this versatile vegetable. By following the proper steps, you can ensure that your homegrown squash remains delicious and ready to use throughout the year.
Choosing the right squash varieties for storage is crucial. Opt for winter squash varieties such as butternut, acorn, and spaghetti squash, known for their thick skins and long shelf life. Harvest the squash at the right time when they are fully mature but still firm.
Cleaning and preparing the squash properly before storage is essential. Remove any dirt or debris from the surface, inspect for damage, and leave a portion of the stem intact for better storage. Avoid washing the squash, as excess moisture can promote spoilage.
Store the squash in a cool, dry place with temperatures between 50 to 55 degrees Fahrenheit (10 to 13 degrees Celsius). Use breathable containers that allow for proper airflow, and regularly check for signs of spoilage or pest infestation.
If you have cut squash, wrap it tightly, promptly refrigerate it, and use it within a few days. Consider saving and reusing squash seeds for future planting, following proper drying and storage techniques.
Remember to regularly monitor and check the squash during storage, ensuring that it stays fresh and free from spoilage. Handle the squash gently and prioritize usage based on ripeness.
By implementing these tips and best practices, you can enjoy the delicious flavors of your homegrown squash long after the harvest season has ended. So, whether you have an abundant harvest or want to savor the taste of summer squash all year round, proper storage is the key to keeping your squash fresh, tasty, and ready for your favorite recipes.
Frequently Asked Questions about How To Store Squash From The Garden
Was this page helpful?
At Storables.com, we guarantee accurate and reliable information. Our content, validated by Expert Board Contributors, is crafted following stringent Editorial Policies. We're committed to providing you with well-researched, expert-backed insights for all your informational needs.


0 thoughts on “How To Store Squash From The Garden”