Articles
How To Store Large Toy Trucks
Modified: October 20, 2024
Discover helpful articles on how to efficiently store large toy trucks and keep them organized. Learn useful tips and tricks for maximizing space and preserving the condition of your child's favorite toys.
(Many of the links in this article redirect to a specific reviewed product. Your purchase of these products through affiliate links helps to generate commission for Storables.com, at no extra cost. Learn more)
Introduction
If you have children who love playing with large toy trucks, you know how easily these toys can clutter up your home. As a parent, finding effective storage solutions for these bulky playthings can be a challenge. However, with a little planning and organization, you can keep your child’s toy trucks neatly stored away while maximizing space in your home.
In this article, we will discuss various strategies for storing large toy trucks. From choosing the right storage option to implementing safety measures, we will explore practical tips that will help you keep your child’s toy collection tidy and accessible.
So, let’s dive in and discover the best ways to store large toy trucks!
Key Takeaways:
- Keep large toy trucks organized and accessible by choosing the right storage option, clearing space, and implementing safety measures. Utilize container storage, wall solutions, and maximize vertical space for an efficient and enjoyable storage system.
- Maintain the longevity of large toy trucks by sorting and organizing, properly cleaning and maintaining, and implementing safety measures. Utilize container storage, wall solutions, and maximize vertical space for an organized and functional storage system.
Read more: How To Organize Large Toys
Choosing the Right Storage Option
When it comes to storing large toy trucks, it’s essential to select the right storage option that suits your space and organizational needs. Here are a few options to consider:
- Toy Chest or Box: A toy chest or box is a classic storage solution that provides a convenient and accessible place to store your child’s toy trucks. Look for a chest with a sturdy construction and ample space to accommodate the size of the trucks. Additionally, consider a chest with a safety hinge to prevent accidental injuries when opening or closing.
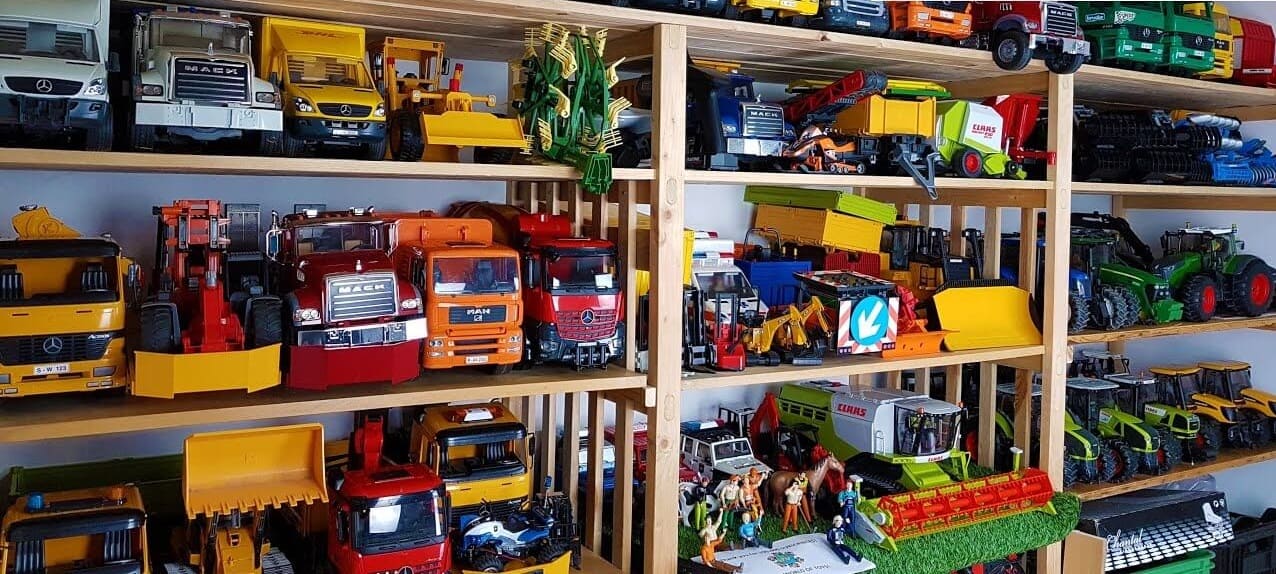
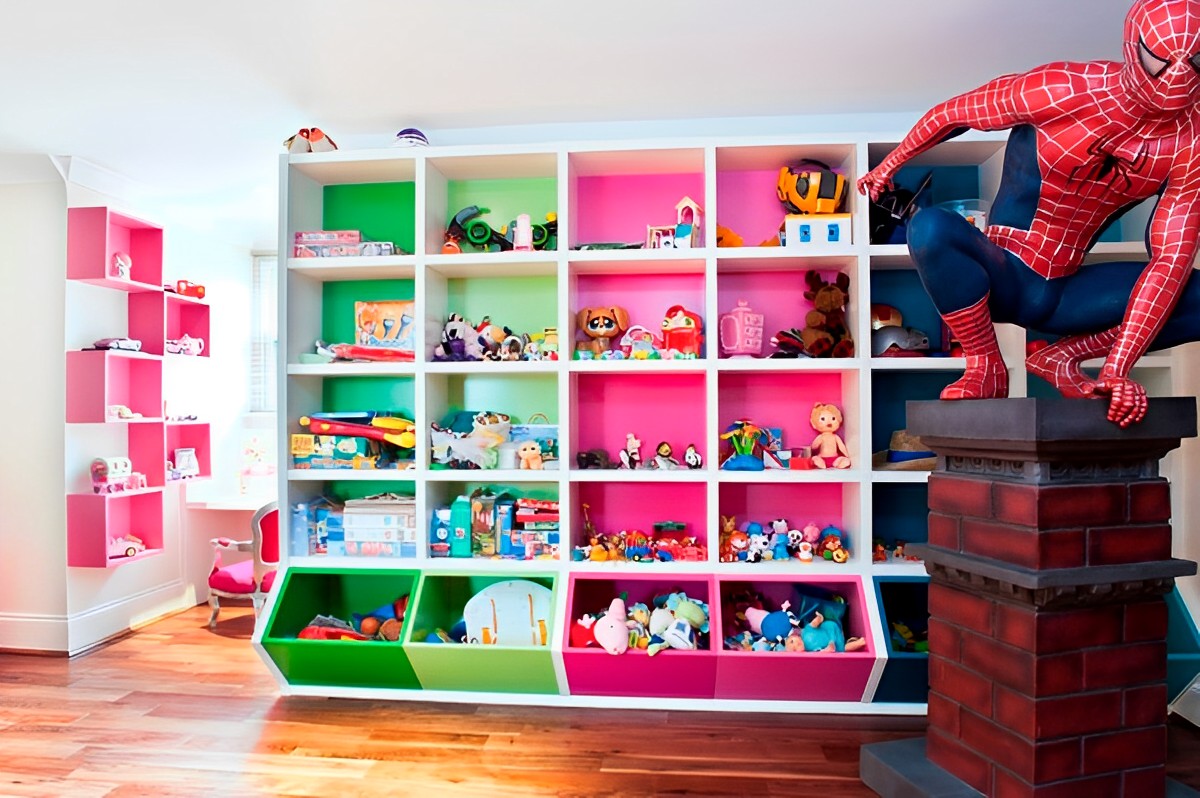
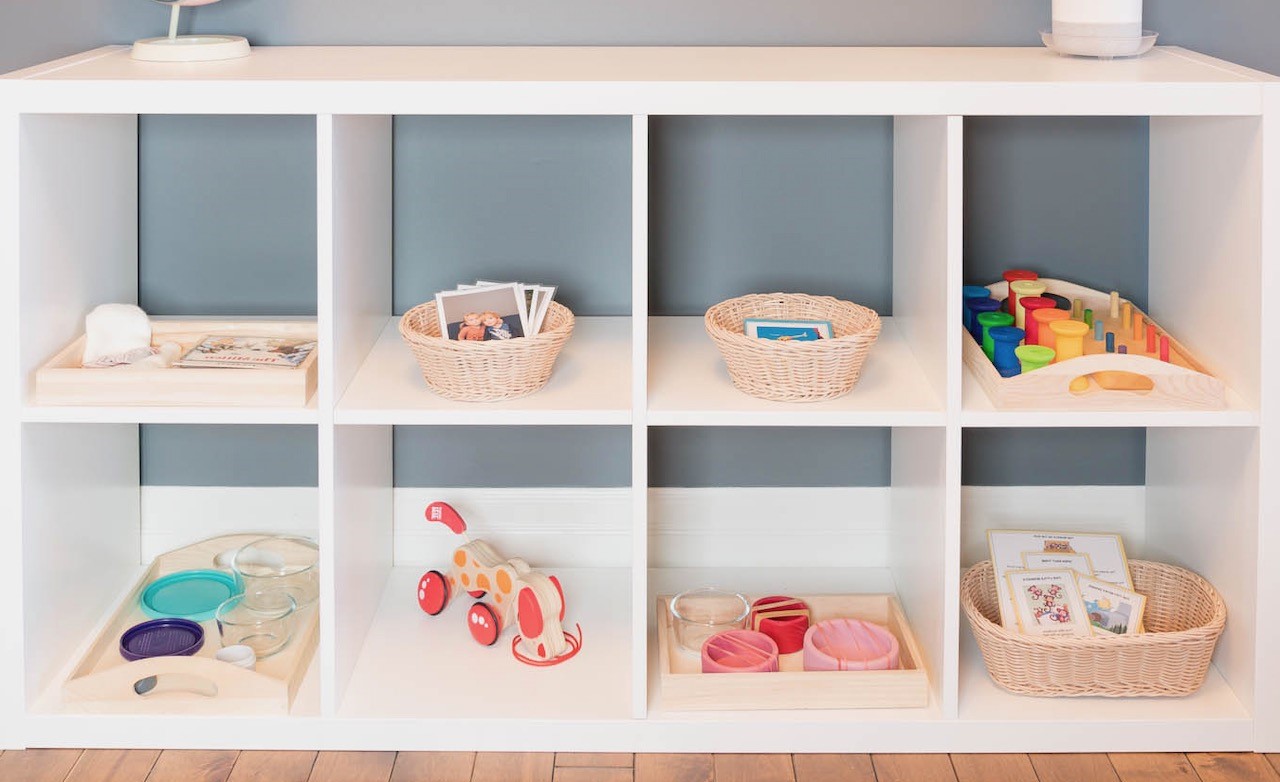
- Shelving Units: Shelving units are perfect for organizing and displaying toy trucks. Look for shelves with adjustable heights to accommodate trucks of different sizes. You can also consider using clear plastic bins or baskets on the shelves to keep the trucks grouped together and easily accessible.
- Under Bed Storage: Utilizing the space under your child’s bed is a smart storage solution for large toy trucks. Invest in low-profile storage containers that can slide easily under the bed. Make sure to choose containers that are durable and have a secure lid to keep the toys protected from dust and damage.
- Custom-Built Wall Shelves: If you are handy with tools, consider building custom wall shelves specifically designed to hold toy trucks. This option not only maximizes vertical space but also provides an attractive display for your child’s collection. Ensure that the shelves are securely attached to the wall to prevent accidents.
- Carrying Cases: Carrying cases designed for toy trucks are a practical storage option, especially if your child likes to take their trucks on the go. Look for cases with dividers or compartments to keep the trucks organized and protected during transportation.
Remember, when choosing a storage option, consider the available space in your home, the number of toy trucks you need to store, and the accessibility you require for your child to play with and put away their trucks.
Now that you have some storage options in mind, let’s move on to the next step: clearing space for storage!
Clearing Space for Storage
Before you can start organizing your child’s toy trucks, it’s essential to clear a designated space for storage. Here are a few steps to help you create an organized area for storing the trucks:
- Declutter: Begin by decluttering the area where you plan to store the toy trucks. Remove any unnecessary items or furniture that are taking up space. This will provide you with a clean slate to work with and ensure that the storage area is dedicated solely to storing the trucks.
- Maximize Vertical Space: Look for opportunities to utilize vertical space. Install wall-mounted shelves or hanging organizers to make use of the available wall space. This will help free up floor space and keep the toy trucks off the ground.
- Create Zones: Divide the storage area into zones based on different categories or types of toy trucks. For example, one zone can be dedicated to monster trucks, while another can be for construction vehicles. This will help keep the collection organized and make it easier for your child to find the specific trucks they want to play with.
- Consider Multi-Purpose Furniture: Look for furniture pieces that can serve dual purposes, such as ottomans or benches with hidden storage compartments. These can be used to store toy trucks while also providing additional seating or surface space in the room.
- Maintain Accessibility: Ensure that the storage area is easily accessible to your child. Use low shelves or storage containers that your child can reach without assistance. This will encourage them to play with their trucks independently and be responsible for putting them back after playtime.
By clearing a dedicated space for storage and following these steps, you will create an organized and functional area where your child’s toy trucks can be safely stored.
Next, let’s discuss how to sort and organize the toy trucks to maintain a tidy collection.
Sorting and Organizing Toy Trucks
Sorting and organizing your child’s toy trucks is essential to maintain a tidy collection and make it easier for your child to find and retrieve their favorite trucks. Here are some tips to help you sort and organize the toy trucks:
- Group by Type: Start by grouping the toy trucks by type or category. For example, group all the construction vehicles together, the race cars together, and the fire trucks together. This will make it easier to locate specific types of trucks when your child wants to play.
- Consider Size: If you have toy trucks of different sizes, consider organizing them by size. You can have a section for larger trucks and a section for smaller trucks. This will help maximize space and prevent smaller trucks from getting lost among larger ones.
- Labeling: Use labels or tags to identify each group of toy trucks. This can be done using adhesive labels or small tags attached to the storage containers or shelves. Clear labels or pictures can help your child identify where each type of truck belongs.
- Separate Parts and Accessories: If your child’s toy trucks come with detachable parts or accessories, keep them separated. Use small boxes or bags to store these parts and label them accordingly. This will prevent parts from getting lost and make it easier to assemble the trucks when needed.
- Rotate the Collection: If your child has a large collection of toy trucks, consider rotating them. Keep some trucks out for immediate play and store the rest in a separate container. Every few months, swap out the trucks to keep your child’s interest and prevent the collection from becoming overwhelming.
Remember, the goal is to create an organized system that makes it easy for your child to find and put away their toy trucks. By sorting and organizing the trucks, you will not only maintain a tidy collection but also encourage your child’s independence and responsibility in taking care of their toys.
In the next section, we will discuss the importance of properly cleaning and maintaining the toy trucks.
Properly Cleaning and Maintaining Toy Trucks
To ensure the longevity and functionality of your child’s toy trucks, it’s important to properly clean and maintain them. Here are some tips on how to keep the toy trucks in excellent condition:
- Regular Cleaning: Establish a routine of regularly cleaning the toy trucks. Dust and dirt can accumulate on the trucks, affecting their appearance and functionality. Use a soft cloth or sponge, mild soap, and water to wipe down the surfaces and remove any dirt or grime. Avoid using harsh chemicals or abrasive materials, as they can damage the trucks.
- Deep Cleaning: For toy trucks that are heavily soiled or have intricate details, a deeper cleaning may be necessary. In such cases, consider using a mild detergent and warm water. Gently scrub the trucks with a soft brush or cloth to remove any stubborn dirt or stains. Rinse thoroughly and allow the trucks to dry completely before returning them to storage.
- Battery Maintenance: If your child’s toy trucks are battery-powered, it’s important to maintain the batteries. Regularly check the battery compartment for any signs of corrosion. If you notice corrosion, carefully remove the batteries and clean the compartment with a cotton swab dipped in vinegar or lemon juice. This will help prevent damage to the trucks and ensure they function properly.
- Inspect for Damage: Regularly inspect the toy trucks for any damage or loose parts. Check for missing wheels, cracked or broken pieces, or any other signs of wear and tear. If you notice any damage, repair or replace the affected parts to keep the trucks in working order.
- Storage Considerations: When it comes to storing the toy trucks, consider the environment. Avoid storing them in extreme temperatures or direct sunlight, as these conditions can cause fading or damage to the trucks. Additionally, make sure the storage area is dry and free from any moisture, which can lead to mold or rust.
By following these cleaning and maintenance tips, you can prolong the lifespan of your child’s toy trucks and keep them looking and functioning their best. It’s worth the effort to maintain these toys, as they will continue to bring joy and entertainment to your child for years to come.
In the next section, we will discuss the importance of implementing safety measures when storing the toy trucks.
Store large toy trucks by using clear plastic bins with lids to keep them organized and protected from dust. Label the bins for easy identification.
Read more: How To Store Large Stuffed Animals
Implementing Safety Measures
When it comes to storing large toy trucks, safety should always be a top priority. Here are some important safety measures to consider:
- Age-Appropriate Storage: Ensure that the storage solution you choose is age-appropriate and safe for your child. Avoid storing heavy or oversized toy trucks in higher areas where they could potentially fall and cause injury. Opt for lower shelves or containers that are easily accessible and won’t pose any risks.
- Secure Heavy Trucks: If you have larger and heavier toy trucks in your collection, make sure they are securely stored to prevent them from toppling over. Use sturdy shelving or wall brackets to secure them in place. Additionally, avoid stacking heavy trucks on top of each other, as this can lead to instability.
- Childproofing: If you have younger children or siblings who may have access to the toy truck storage area, consider childproofing measures. Use cabinet locks or childproof latches to prevent curious hands from opening storage containers or accessing the trucks unsupervised.
- Sharp Edges and Small Parts: Inspect the toy trucks for any sharp edges or small parts that could pose a choking hazard to young children. If necessary, remove or replace these parts to make the trucks safer for play and storage.
- Keep Hazardous Materials Separate: If your child’s toy trucks require the use of batteries or other potentially hazardous materials, ensure that they are stored separately in a secure, childproof container. Keep them out of reach and clearly labeled to prevent accidental ingestion or misuse.
Implementing these safety measures will provide peace of mind and help ensure that storing large toy trucks remains a safe and enjoyable experience for your child and other members of your household.
In the next section, we will explore different storage options for toy trucks, including utilizing containers and wall storage solutions.
Storing Toy Trucks in Containers
One of the most practical ways to store large toy trucks is by utilizing storage containers. Containers provide a versatile solution for keeping the trucks organized and protected. Here are some tips for effective container storage:
- Choose the Right Container: Select storage containers that are suitable for the size and number of toy trucks you have. Clear plastic containers are ideal as they allow you to easily see the contents without having to open them.
- Group Similar Trucks: Sort the toy trucks into groups based on type, size, or any other criteria that make sense to you and your child. Store each group in separate containers to keep the collection organized.
- Consider Dividers or Compartments: Within each container, use dividers or compartments to further organize the trucks. This will help prevent them from shifting and sliding around, reducing the risk of damage during storage.
- Label the Containers: Label each container with the type or category of trucks it contains. This will make it easier for your child to find specific trucks they want to play with and help maintain an organized storage system overall.
- Stackable or Nesting Design: Opt for stackable containers or ones with nesting lids to save space. This will allow you to stack the containers neatly, maximizing vertical storage potential.
- Store in a Dry and Safe Location: Place the containers in a dry and safe location, away from direct sunlight or extreme temperatures. Avoid storing them in areas prone to moisture or humidity, as they can damage the trucks over time.
Storing toy trucks in containers not only keeps them organized but also protects them from dust, dirt, and potential damage. It allows for easy access and ensures that your child’s collection remains in top condition for years to come.
In addition to container storage, let’s explore other storage options such as utilizing wall storage solutions for toy trucks.
Utilizing Wall Storage Solutions
When it comes to storing large toy trucks, utilizing wall storage solutions is a smart and efficient way to maximize space while keeping the trucks easily accessible. Here are some wall storage ideas to consider:
- Pegboard: Install a pegboard on the wall and use hooks or pegs to hang the toy trucks. This not only keeps the trucks organized but also allows your child to display their collection proudly. Arrange the trucks by type or size for a visually appealing and functional display.
- Wall-mounted Shelves: Install wall-mounted shelves specifically designed to hold toy trucks. These shelves can be customized in size and shape to accommodate different types of trucks. Consider adding side rails to prevent the trucks from falling off the shelves.
- Toy Truck Tracks: Some toy truck tracks come with wall-mounting options, allowing you to attach them to the wall. This not only provides storage for the trucks but also adds a fun and interactive element to the room.
- Magnetic Strips: Use magnetic strips or adhesive magnetic tape to create a magnetic wall for storing metal toy trucks. This option is especially suitable for smaller metal trucks that can be easily attached and removed from the magnetic surface.
- Shadow Boxes: Display your child’s favorite toy trucks in shadow boxes mounted on the wall. This option allows you to showcase individual trucks while keeping them protected from dust. Select shadow boxes with a clear front to fully enjoy the beauty of the trucks.
- Hanging Organizers: Hang fabric or mesh organizers on the wall to store smaller toy trucks or accessories. These pockets can help keep all the trucks easily visible and within reach for little ones.
Utilizing wall storage solutions not only keeps the toy trucks off the floor but also adds a decorative element to the room. It creates an eye-catching display that showcases your child’s collection and makes it easy for them to choose and place their trucks back after playtime.
Now that we have explored container storage and wall storage solutions, let’s discuss maximizing vertical space as another strategy for storing large toy trucks.
Maximizing Vertical Space
When it comes to storing large toy trucks, maximizing vertical space is a smart approach to make the most of limited room and keep the trucks organized. Here are some tips to maximize vertical storage:
- Wall-mounted Shelving: Install wall-mounted shelves or floating shelves to make use of vertical wall space. These shelves can be adjusted in height to accommodate different sizes of toy trucks. Arrange the trucks neatly on the shelves, grouping them by type or size.
- Stackable Storage Bins: Use stackable storage bins or crates to create vertical storage towers. These bins can be easily stacked on top of each other, allowing you to utilize vertical space efficiently. Label each bin to identify the types of trucks stored inside.
- Overhead Storage: Utilize overhead storage options, such as suspended shelves or ceiling-mounted racks. These can be used to store larger or less frequently used toy trucks. Make sure to secure the storage units properly to the ceiling for safety.
- Hanging Hooks: Install hooks on the walls or ceiling to hang toy trucks. This is a simple and effective way to keep the trucks off the floor and utilize vertical space. Make sure the hooks are sturdy enough to hold the weight of the trucks.
- Wall-mounted Pegboards: Mount a pegboard on the wall and attach pegs or hooks to hang the toy trucks. Pegboards offer flexibility in terms of arranging and rearranging the trucks according to your preferences.
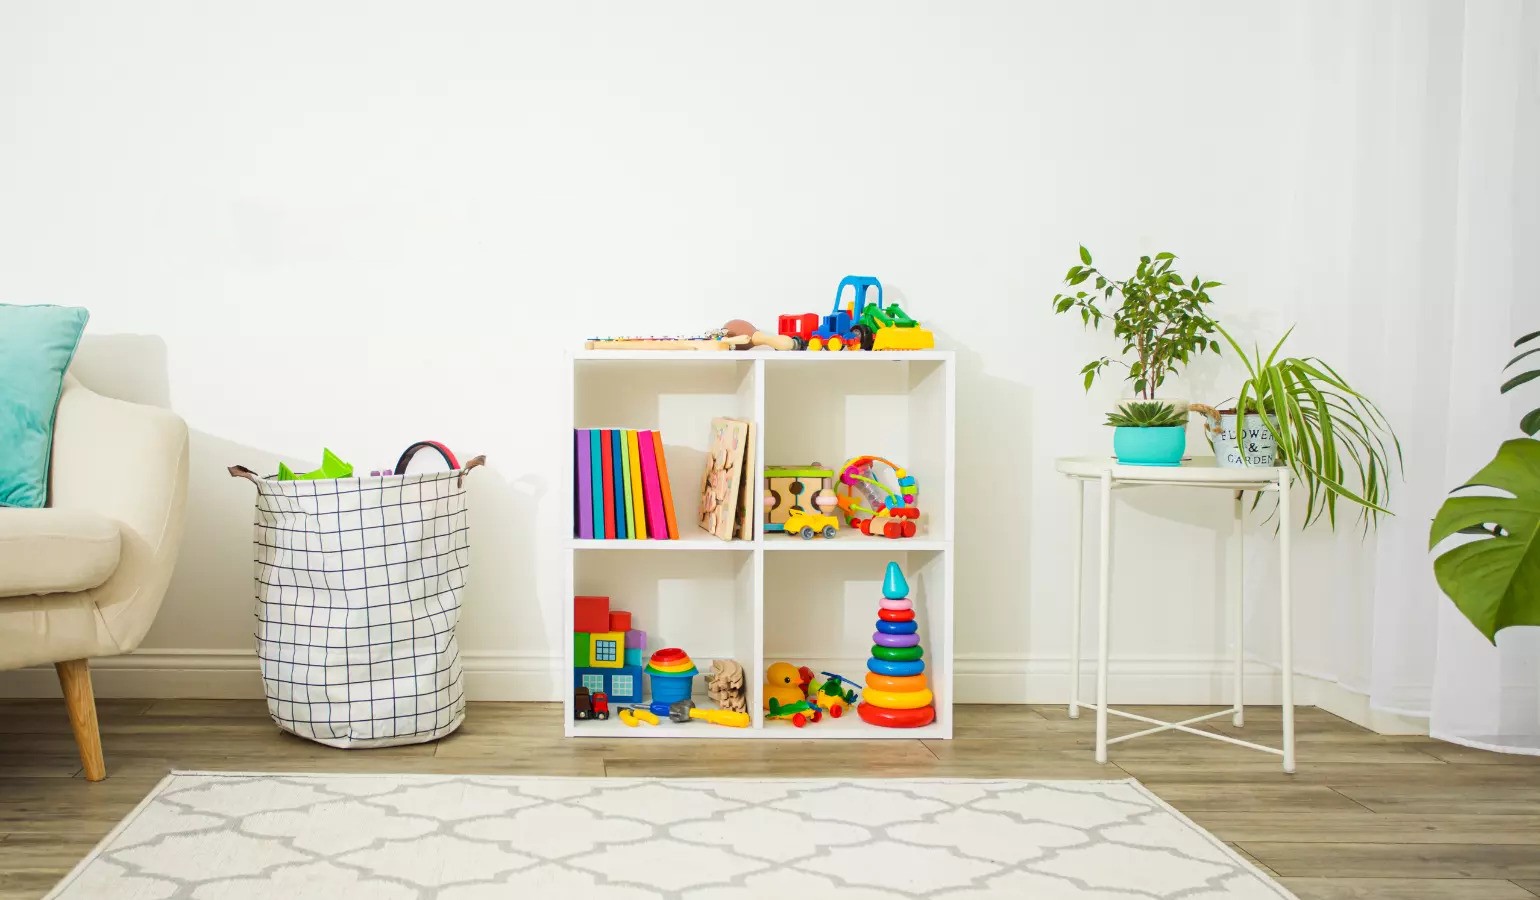
- Vertical Cabinets or Cupboards: Opt for tall vertical cabinets or cupboards with multiple shelves to maximize storage space. You can designate specific shelves for different types of toy trucks or create separate sections within the cabinet.
Maximizing vertical space allows for efficient storage of large toy trucks while freeing up floor space in the room. It provides a visually appealing display and makes it easy to find and access the desired trucks during playtime.
Now that we have explored various strategies for storing large toy trucks, let’s conclude our discussion.
Read more: How To Store Pool Toys
Conclusion
Storing large toy trucks can sometimes be a challenge, but with the right storage options and organization strategies, you can keep your child’s collection neat, accessible, and well-maintained. By choosing the right storage option, clearing space, sorting and organizing the trucks, cleaning and maintaining them, implementing safety measures, and utilizing container storage, wall storage solutions, and vertical space, you can create an organized and functional storage system that maximizes the enjoyment and longevity of your child’s toy trucks.
When choosing a storage option, consider the available space in your home and the number of trucks you need to store. Whether you opt for toy chests, shelving units, under bed storage, or custom-built wall shelves, make sure they are age-appropriate and provide easy access for your child. Sorting and organizing the trucks by type, size, or category helps maintain a tidy collection and makes it easier for your child to find specific trucks for playtime.
Properly cleaning and maintaining the toy trucks is crucial for their longevity. Regular cleaning, deep cleaning when necessary, battery maintenance, and inspecting for damage contribute to keeping the trucks in excellent condition. While storing the trucks, it is important to implement safety measures to ensure a safe environment and prevent accidents. Childproofing, securing heavy trucks, and keeping hazardous materials separate are key considerations.
Container storage is a practical and versatile solution for keeping the trucks organized and protected. Clear plastic containers with dividers and labels help group and identify the trucks easily. Utilizing wall storage solutions, such as pegboards, wall-mounted shelves, or magnetic strips, not only saves space but also adds an attractive display element to the room. Maximizing vertical space through wall-mounted shelving, stackable storage bins, overhead storage, hanging hooks, pegboards, or vertical cabinets allows for efficient use of space and easy access to the trucks.
In conclusion, with a combination of careful planning, organization, and utilizing the right storage solutions, you can keep your child’s large toy trucks stored effectively, creating an organized and enjoyable play area while maintaining the longevity of the collection. By implementing these strategies, you will not only reduce clutter in your home but also provide your child with a clean and accessible space to enjoy their favorite toy trucks.
Frequently Asked Questions about How To Store Large Toy Trucks
Was this page helpful?
At Storables.com, we guarantee accurate and reliable information. Our content, validated by Expert Board Contributors, is crafted following stringent Editorial Policies. We're committed to providing you with well-researched, expert-backed insights for all your informational needs.


0 thoughts on “How To Store Large Toy Trucks”