Articles
How To Store Xmas Lights
Modified: December 7, 2023
Learn the best way to store your Christmas lights to keep them tangle-free and ready for next year's festivities. Browse our collection of articles and tips!
(Many of the links in this article redirect to a specific reviewed product. Your purchase of these products through affiliate links helps to generate commission for Storables.com, at no extra cost. Learn more)
Introduction
When the holiday season comes to an end, it’s time to pack away those beautiful Christmas lights until next year. Properly storing your Xmas lights not only keeps them in good condition but also saves you time and frustration when it’s time to decorate your home again. In this article, we will guide you through the process of storing your Xmas lights to ensure they stay untangled, protected, and ready for use.
Whether you have a small string of lights or an elaborate display, following these steps will help you keep your Xmas lights organized and easily accessible. So let’s dive in and discover how to store Xmas lights like a pro!
Key Takeaways:
- Keep your Xmas lights organized and tangle-free by gathering, inspecting, untangling, and wrapping them around cardboard or spools before storing them in suitable containers.
- Label your storage containers, choose the right storage location, and protect your lights from extreme temperatures and moisture to ensure they remain in excellent condition for the next holiday season.
Read more: How To Store Light Bulbs
Step 1: Gather all Xmas Lights
The first step in storing your Xmas lights is to gather them from around your home. Check every nook and cranny where you may have used lights, including the tree, windows, doorways, and outdoor displays. Collect all the lights in one designated area to make it easier to untangle and store them properly.
As you gather the lights, inspect each strand for any signs of damage or wear. Replace any broken bulbs or frayed wires before storing them to ensure safety and prevent any potential electrical hazards when you use them next year.
Once you have gathered all your Xmas lights, it’s time to move on to the next step of the storage process.
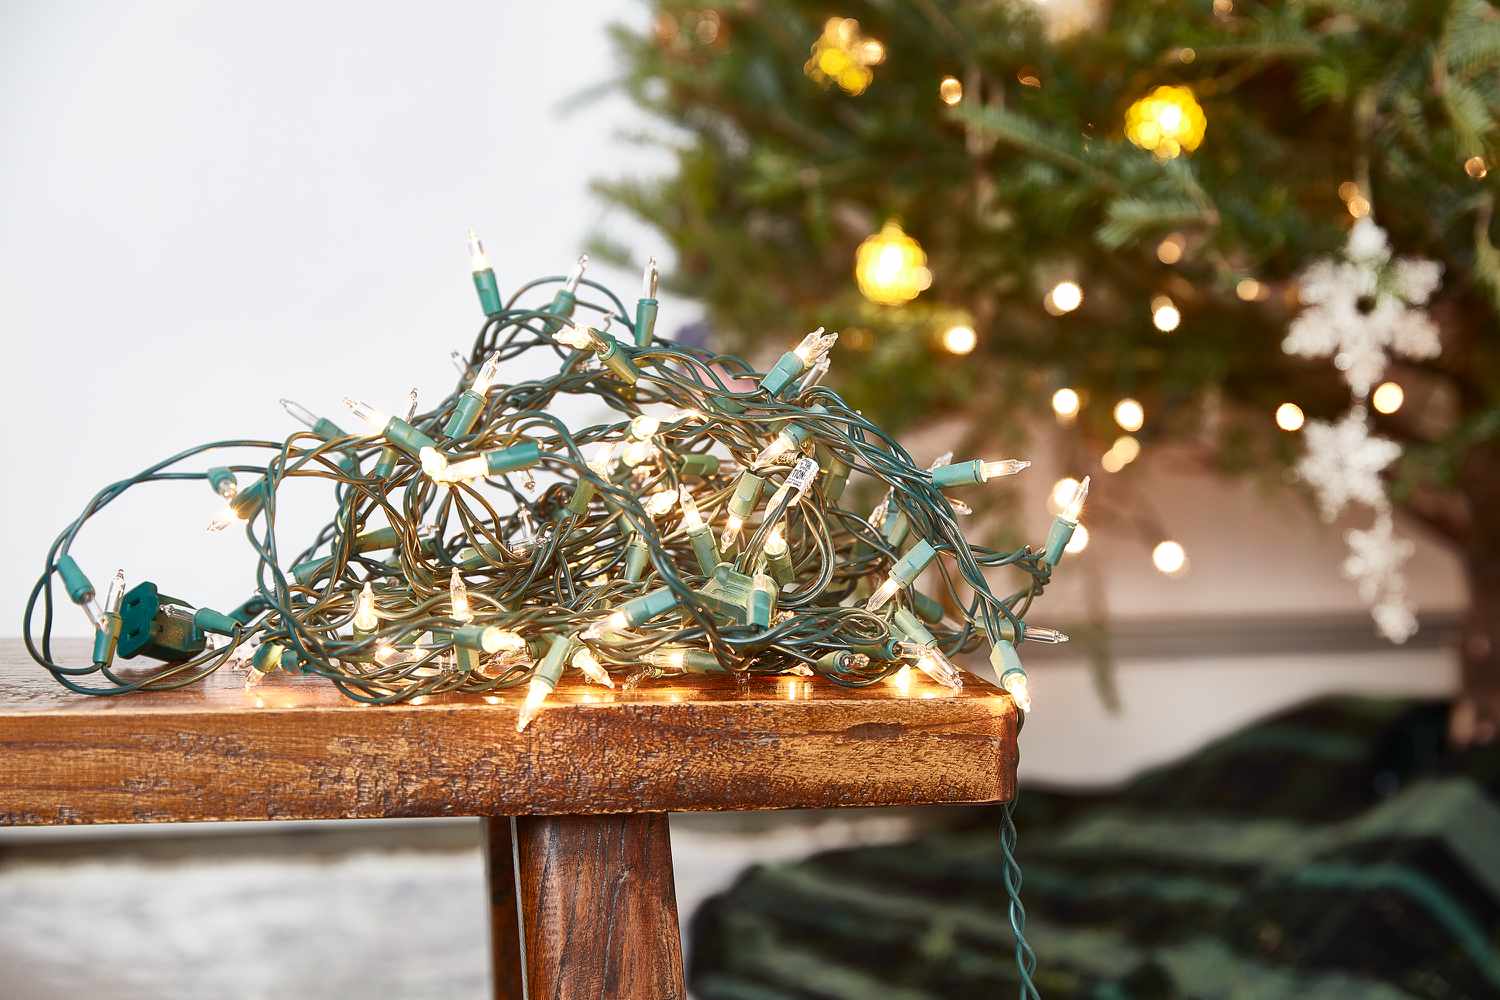
Step 2: Untangle the Lights
Now that you have gathered all your Xmas lights, it’s time to tackle the dreaded task of untangling them. Untangling a mess of lights can be frustrating, but with a few simple techniques, you can make the process a little easier.
Start by laying the lights flat on a clean surface, such as a table or the floor. Begin at one end and slowly work your way through the strand, gently pulling and separating any tangled sections. Use your fingers to carefully untangle the lights, being mindful not to pull too hard and potentially damage the wires or bulbs.
If you encounter particularly stubborn tangles, try the “zipper” method. Hold the two ends of the tangled section between your thumb and forefinger and use a gentle back-and-forth motion. This technique can help loosen the knots and make it easier to untangle the lights.
Remember to take your time and be patient while untangling the lights. Rushing through this step can lead to more tangles and frustration in the long run.
Once you have successfully untangled the lights, move on to the next step of the storage process.
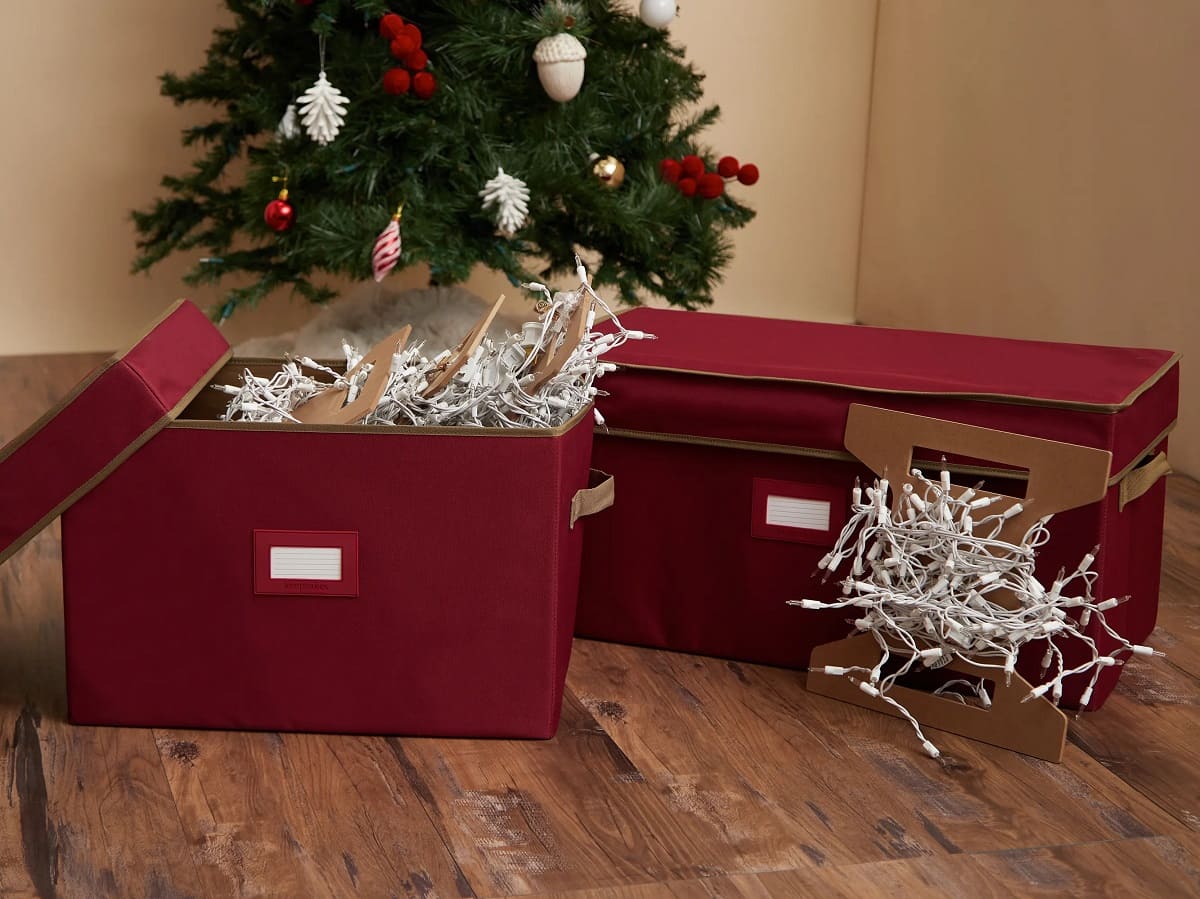
Step 3: Choose Storage Containers
After untangling your Xmas lights, it’s essential to choose the right storage containers to keep them organized and protected. The ideal storage containers for Xmas lights are durable, stackable, and provide enough space to accommodate your strands without bending or squeezing them.
There are various options available for storing your Xmas lights. Here are a few popular choices:
- Plastic Bins: Plastic bins are a popular choice for storing Xmas lights. They come in different sizes and can provide excellent protection against dust, dirt, and moisture. Look for bins with secure lids to ensure that the lights stay safely stored throughout the year.
- Cardboard Boxes: If you prefer a more budget-friendly option, you can use cardboard boxes. Reinforce the boxes with packing tape to ensure they can withstand the weight of the lights. However, be cautious with cardboard boxes as they may not provide as much protection against moisture or pests.
- Light Reels or Spools: Light reels or spools are designed specifically for storing Xmas lights. These reels allow you to wrap the lights around them, keeping them organized and tangle-free. Some reels even come with built-in storage compartments for bulbs and accessories.
Consider the size and quantity of your Xmas lights when choosing storage containers. It’s always better to have a few extra containers rather than cramming all the lights into a small space, which could lead to damage.
Once you have selected the suitable storage containers, you’re ready for the next step in the storage process.
Step 4: Label the Containers
Labeling the storage containers for your Xmas lights is a crucial step to ensure easy identification and retrieval in the future. Proper labeling saves you time and effort when you are ready to decorate your home for the next holiday season.
Here are some tips for effective labeling:
- Label Each Container: Use adhesive labels or permanent markers to clearly label each storage container. Write a brief description of the contents, such as “Outdoor Lights” or “Tree Lights,” on the label.
- Include Additional Details: If you have different color lights or specific themes, you can add that information to the label as well. For instance, if you have red and green outdoor lights, you can write “Outdoor Red & Green Lights” on the container.
- Number the Containers: If you have multiple containers, consider numbering them. This will help you keep track of the order in which the lights are stored and make it easier to locate a specific container when needed.
- Create an Inventory List: For extra organization, you can create a separate inventory list that details the contents of each container. This way, you can quickly reference the list instead of having to open all the containers when you need a specific set of lights.
By labeling your storage containers, you ensure that the lights are easily identifiable and ready for use when the next holiday season arrives. With this step completed, you are ready for the next phase of storing your Xmas lights.
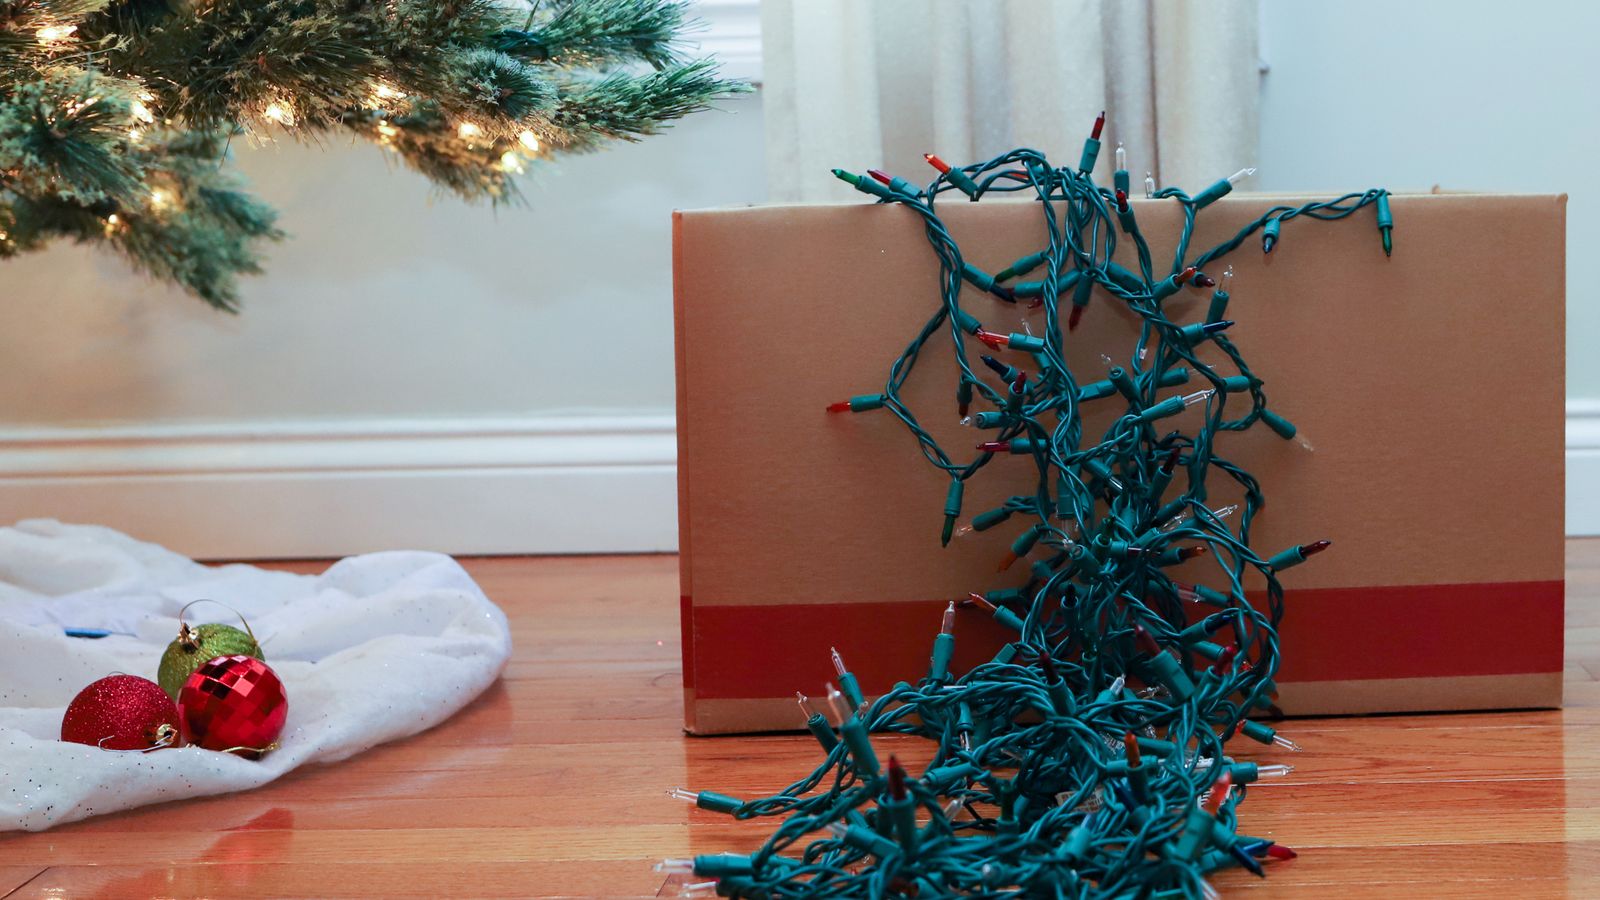
To store Xmas lights, wrap them around a piece of cardboard to prevent tangling. Store in a plastic container to protect from moisture and damage.
Read more: How To Store Net Lights
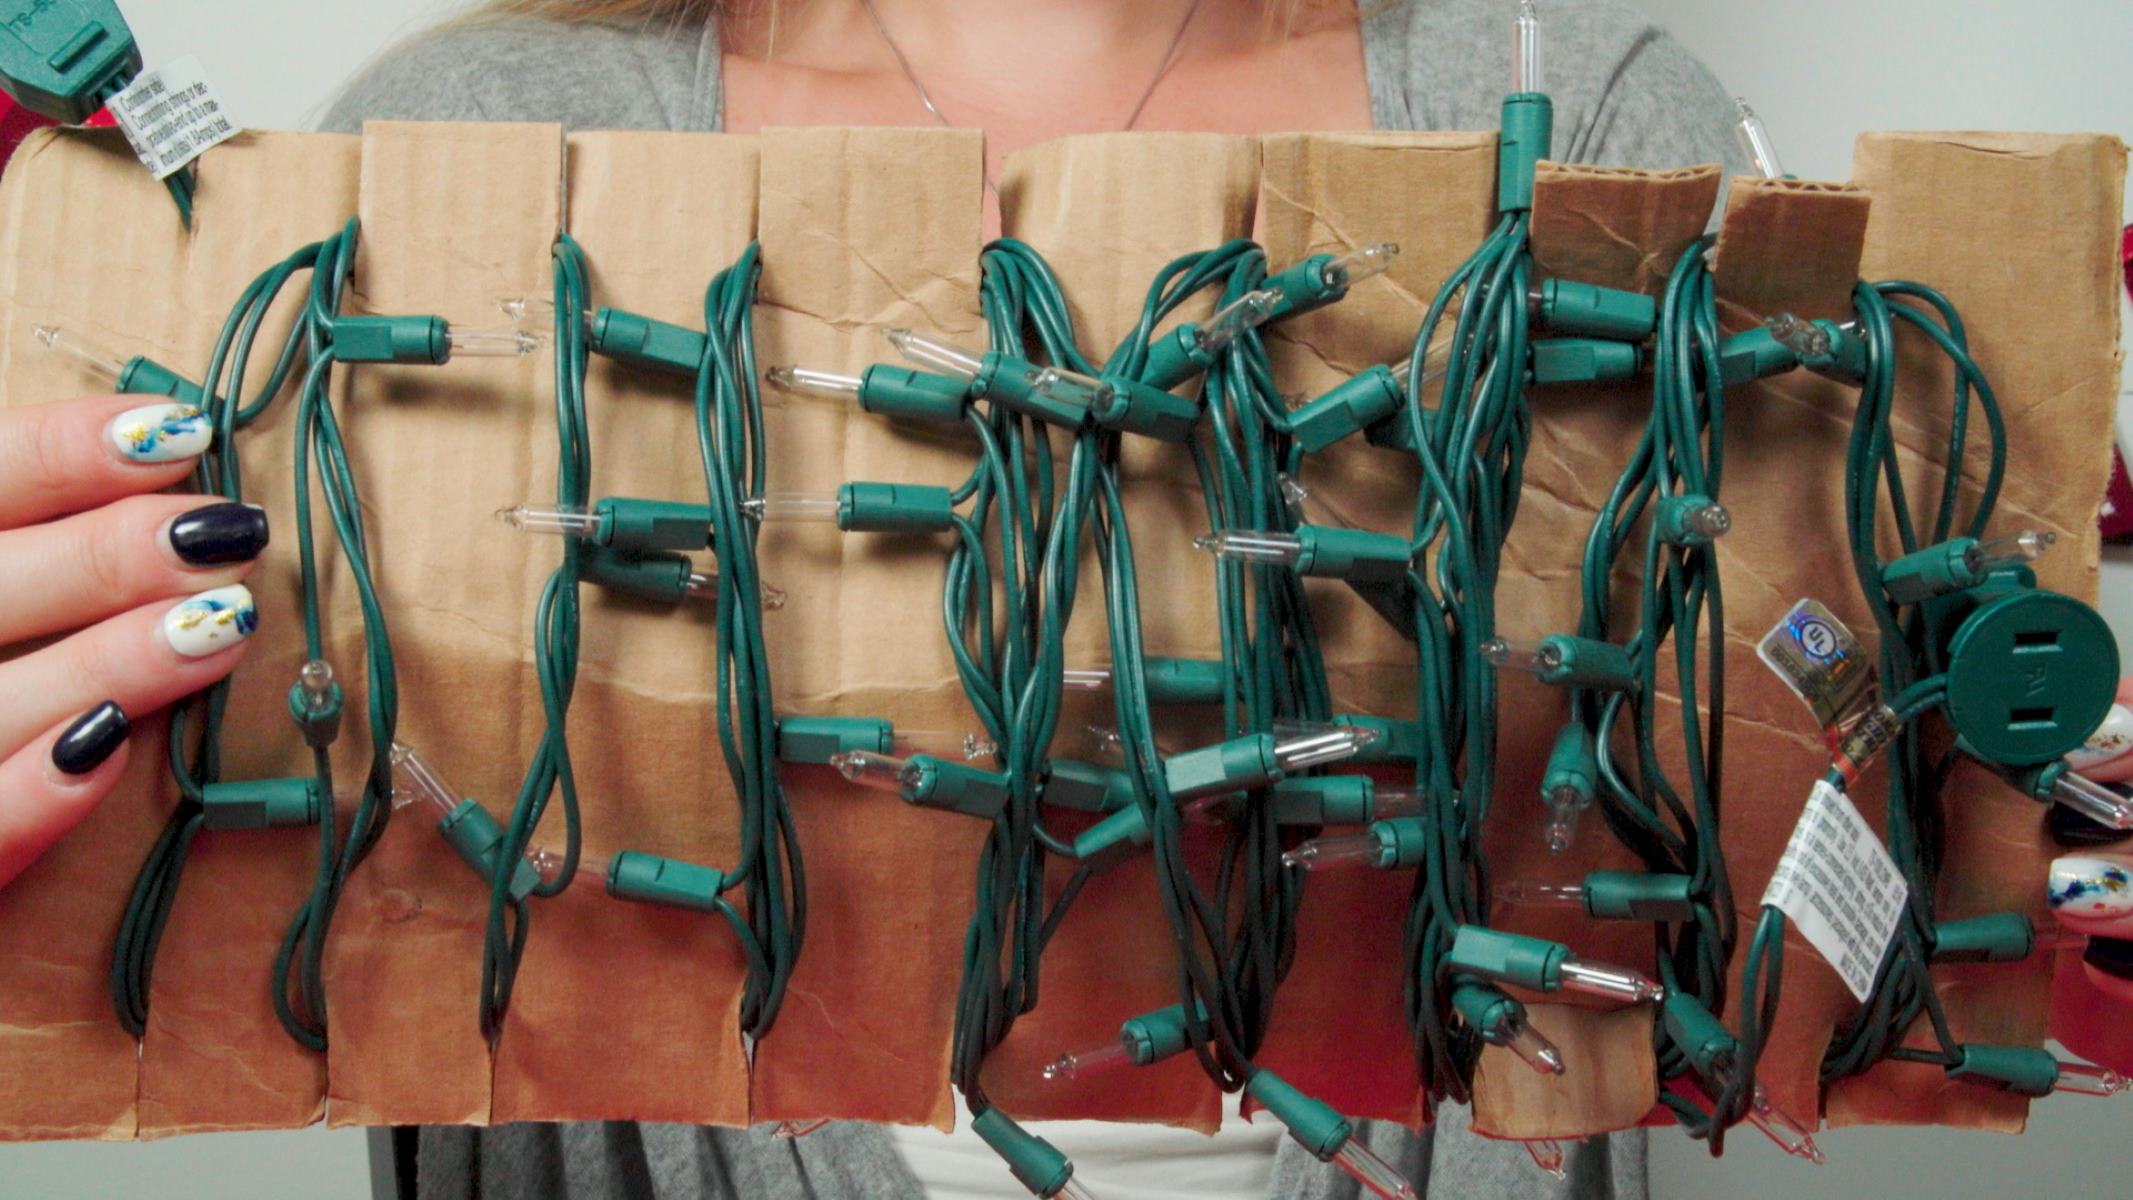
Step 5: Wrap Lights Around Cardboard or Spools
Now that you have your storage containers ready, it’s time to properly wrap your Xmas lights for safekeeping. Wrapping the lights around cardboard or spools not only helps prevent tangling but also keeps them organized and easy to unwind when you’re ready to use them again.
Here’s how to wrap your lights around cardboard or spools:
- Cut Cardboard or Use Spools: If you choose to wrap your lights around cardboard, cut a piece of cardboard to a length that fits inside your storage container. Alternatively, you can use light reels or spools designed specifically for storing Xmas lights.
- Anchor the Start of the Strand: Begin by securing the starting end of the lights to the cardboard or spool. You can use tape or twist ties to keep it in place.
- Wrap the Lights: Start wrapping the lights around the cardboard or spool in a neat and organized manner. Make sure each loop of the lights is aligned and not overlapping to prevent tangles.
- Secure the End: Once you have wrapped the entire strand, secure the end of the lights to the cardboard or spool. Again, you can use tape or twist ties to keep it in place.
- Repeat for Each Strand: Repeat the wrapping process for each strand of lights, using separate pieces of cardboard or spools for each one.
Wrapping your lights in this way helps maintain their shape and prevents tangles during storage. It also makes it easier to access and unwind the lights when you need them again.
With your lights neatly wrapped around cardboard or spools, you’re ready for the next step in the storage process.
Step 6: Store Lights in Containers
Now that you have wrapped your Xmas lights around cardboard or spools, it’s time to store them in the designated containers. Properly storing your lights will ensure they remain protected and untangled until the next holiday season.
Here’s how to store your lights in containers:
- Place the Wrapped Lights: Carefully place the wrapped lights inside the storage containers. Make sure they fit comfortably without being squeezed or bent.
- Separate Strands: If you have multiple strands of lights, consider separating them with tissue paper or bubble wrap to prevent them from rubbing against each other during storage.
- Fill Empty Spaces: If there are any empty spaces in the container, fill them with additional tissue paper or bubble wrap to cushion the lights and prevent them from shifting.
- Close the Lids: Once all the lights are in the containers, securely close the lids to provide protection against dust, dirt, and potential damage.
- Stack Containers: If you have multiple storage containers, stack them neatly in a safe and stable area, taking care not to place heavy items on top.
Remember to handle the containers with care to avoid any accidental dropping or mishandling that could potentially damage the lights inside.
By storing your wrapped lights in containers, you ensure that they remain organized, protected, and ready for use when the holiday season rolls around again.
Now that your lights are securely stored, let’s move on to the final step of the storage process.
Step 7: Store Containers in a Cool and Dry Place
The final step in properly storing your Xmas lights is to find an ideal location to store the containers. It’s important to choose a cool and dry place to ensure the longevity of your lights and prevent any damage from moisture or extreme temperatures.
Follow these guidelines for storing your containers:
- Avoid Extreme Temperatures: Find a storage area that is not subject to extreme hot or cold temperatures. Temperature fluctuations can cause damage to the lights, such as warping or cracking of the bulbs.
- Keep Away from Moisture: Moisture can lead to corrosion of the wires and bulbs, so it’s crucial to store your containers in a dry environment. Avoid storing them in basements, garages, or areas prone to water leaks or high humidity.
- Prevent Sun Exposure: Direct sunlight can fade and discolor your lights over time. Choose a storage area that is shielded from direct sunlight, such as a closet or a storage room.
- Consider Climate-Controlled Storage: If you live in an area with extreme temperatures or high humidity, it may be beneficial to invest in a climate-controlled storage unit. This type of storage offers controlled temperature and humidity levels, providing an optimal environment for keeping your lights in top condition.
By storing your containers in a cool and dry place, you ensure that your Xmas lights remain in excellent condition, ready to be enjoyed next holiday season.
With all the steps completed, you have successfully learned how to store your Xmas lights like a pro. Following these guidelines will help you preserve the quality and lifespan of your lights, making your holiday decorating experience smoother and more enjoyable.
Start organizing and storing your Xmas lights today, and be prepared for a stress-free and dazzling display next year!
Conclusion
Properly storing your Xmas lights is essential for keeping them in good condition and ensuring a stress-free holiday decorating experience. By following the steps outlined in this article, you can effectively store your lights and keep them ready for use year after year.
From gathering all your Xmas lights to untangling them and selecting the right storage containers, each step plays a crucial role in maintaining the quality of your lights. Remember to label the containers for easy identification, wrap the lights around cardboard or spools to prevent tangling, and finally store them in a cool and dry place to avoid damage from temperature fluctuations and moisture.
Taking the time and effort to properly store your lights not only saves you from the frustration of tangled messes but also helps extend the lifespan of your lights, ensuring they can be enjoyed for many holiday seasons to come.
So, don’t let the end of the holiday season be a time of chaos and frustration. Instead, follow these steps to store your Xmas lights like a pro. When the time comes to decorate your home again, you’ll be grateful for the organized and untangled lights waiting for you.
Get started on storing your Xmas lights today and make your holiday preparations a breeze next year!
Frequently Asked Questions about How To Store Xmas Lights
Was this page helpful?
At Storables.com, we guarantee accurate and reliable information. Our content, validated by Expert Board Contributors, is crafted following stringent Editorial Policies. We're committed to providing you with well-researched, expert-backed insights for all your informational needs.


0 thoughts on “How To Store Xmas Lights”